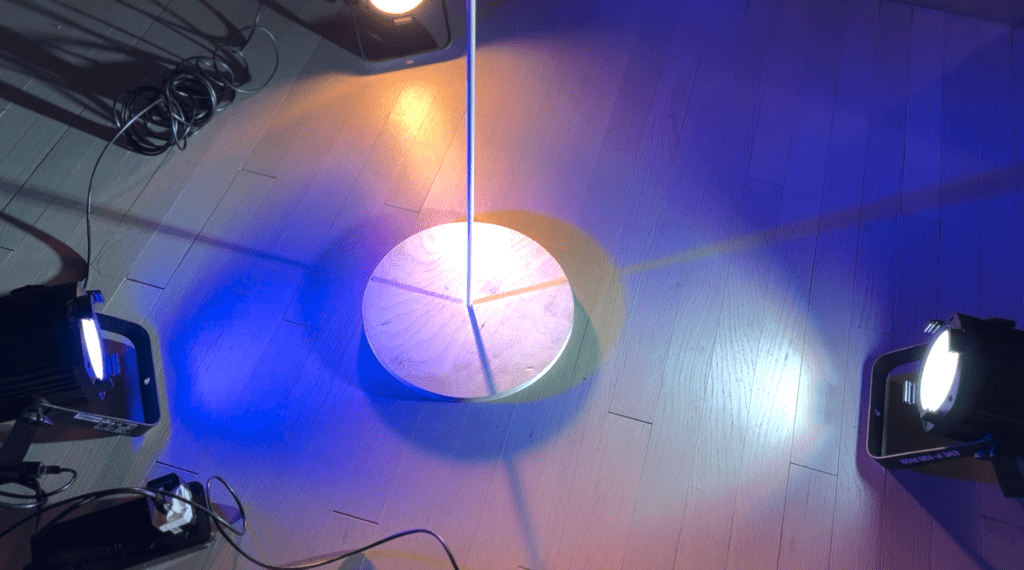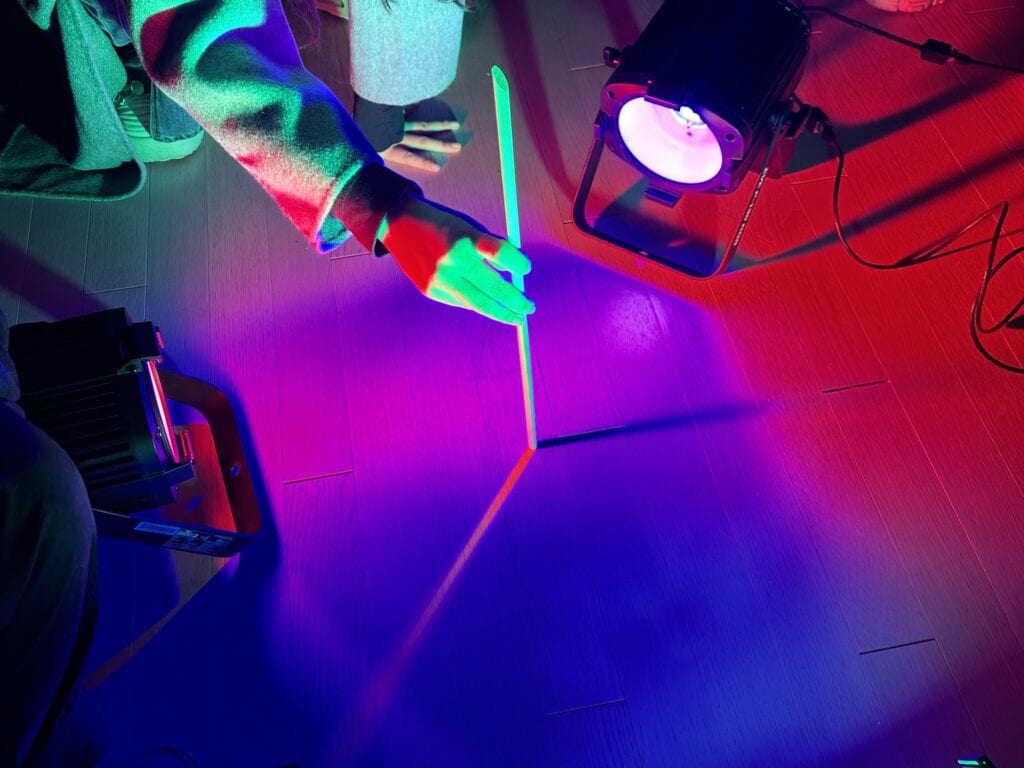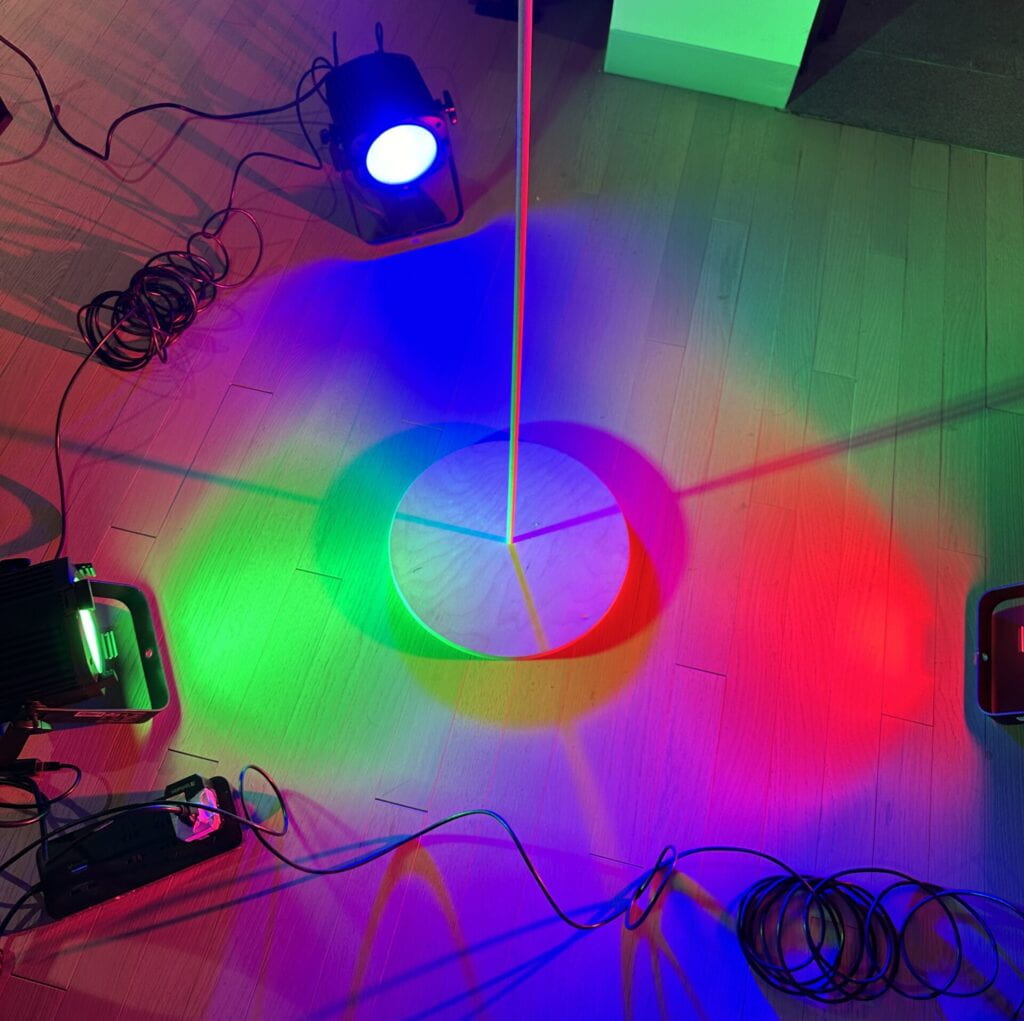
This assignment provided me with a precious opportunity to work on the DMX PAR lights which I previously thought that I could only see on the stage. During the working process, we brainstormed about the idea that we would like to address, learned how to install the lights, and gained practical knowledge of coding the lights. It was fun and meaningful to work in a group of six, and I learned how to cooperate with others throughout our communication and collaboration.
We started on Sunday afternoon when all of us gathered together at school to brainstorm ideas of the project. One of our group members suggested that we could use a wood stick to symbolize the sundial, whose history can be traced back to thousands of years ago. Her starting point was that as the lights could not move automatically in either direction or position, we needed to figure out a method to show the change in position of a certain object. However, as it was too troublesome to carry an object in person and move around the room, we could utilize the variation of the shadow in both colors and positions to make our project more intriguing. Therefore, we reached a consensus at this point that we were going to fix a wood stick on the ground and code the lights so that their colors and the rhythm of the whole composition could affect the shadow of the stick and hence make the light show more interesting.
Our interpretation of this project was that as the speed of color change goes from slow to fast, it could represent our school life which is relaxing at first but becomes more and more tense as time flows. At the end of the semester everyone is busy multitasking and we have little time left for ourselves. Meanwhile, the colors can also represent our hobbies and the happy moments in our daily life. As the position of the shadow shifts, our lives proceed at our own speeds as well.


After we had made our plan about the assignment, we started to work separately. I participated in the whole process as an assistant in our group. Firstly, another group member and I met together on Tuesday afternoon to complete the physical fabrication part. We first cut the bottom part of our installation under the help of the Fabrication Lab Manager. In this process, both of us were exposed to a new electric saw that we had never seen or used before. Then, we utilized both abrasive paper and the drill to levigate the bottom part of the stick so that it could fit into the hole we dug previously on the pedestal.
After we had finished the physical fabrication, we started to work on the code, which was the most crucial part of this assignment. One member in our group finished the draft code earlier that day and we were revising that code in the evening. We utilized the example code, what we had learned in class and our existing knowledge to write the code. The biggest problem we encountered, to our surprise, was that the term “dimmer” in the code actually meant “brightness” rather than “to dim”. We recognized this when we were setting the value of the dimmer. We first set it to be 0, because in our expectation the light would become more and more dim as the number grows. However, after uploading the code, the light just wouldn’t turn on. After trying multiple times, we finally recognized that if we want the lights to light up we should set the value of the dimmer to 255. This is definitely a precious lesson that we learned from this experiment, and all of us cheered after seeing that the lights finally worked according to our initial plan.

Below is the video of the final version. I am very grateful for this precious opportunity for group work and access to DMX PAR lights!
Below is the final code:
/*
 * 3 DMX controlled LED Par Light example
 *
 * In this example we're using 3 par lights model Chauvet DJ Eve P-130 RGB
 * Each light can have up to 9 DMX channels to control different
 * functionality of the light. For an overview of the channels
 * look at https://open-fixture-library.org/chauvet-dj/eve-p-130-rgb
 *
 * For this example the lights should be set to 9 channel DMX mode
 * on the light itself. And, light1 should start at DMX channel 1,
 * light2 at DMX channel 11, and light3 at DMX channel 21.
 *
 * Each channel can be a value between 0 - 255, which is exactly what
 * the 'byte' datatype can hold. Below, a variable of the byte datatype
 * is declared for each channel of each of the three lights.
 *
 * Not all of the channels will be usefull in every use case, so don't
 * worry about the ones that you're not going to use.
 *
 */

// 9 variables for the DMX channels of light 1
byte light1Dimmer = 0;
byte light1Red = 0;
byte light1Green = 0;
byte light1Blue = 0;
byte light1ColorMacros = 0;
byte light1Strobe = 0;
byte light1AutoPrograms = 0;
byte light1ProgSpeedSoundSens = 0;
byte light1DimmerSpeedMode = 0;

// 9 variables for the DMX channels of light 2
byte light2Dimmer = 0;
byte light2Red = 0;
byte light2Green = 0;
byte light2Blue = 0;
byte light2ColorMacros = 0;
byte light2Strobe = 0;
byte light2AutoPrograms = 0;
byte light2ProgSpeedSoundSens = 0;
byte light2DimmerSpeedMode = 0;

// 9 variables for the DMX channels of light 3
byte light3Dimmer = 0;
byte light3Red = 0;
byte light3Green = 0;
byte light3Blue = 0;
byte light3ColorMacros = 0;
byte light3Strobe = 0;
byte light3AutoPrograms = 0;
byte light3ProgSpeedSoundSens = 0;
byte light3DimmerSpeedMode = 0;

bool stage3shown = false;


// include the DMX library
#include

// set the maximum amount of channels we'll need
// each light will run 9 DMX channels so 27 is enough
#define DMX_MASTER_CHANNELS 27

// pin number to change read or write mode on the shield
#define RXEN_PIN 2

// configure a DMX master controller, the master controller
// will use the RXEN_PIN to control its write operation on the bus
DMX_Master dmx_master(DMX_MASTER_CHANNELS, RXEN_PIN);


void setup() {

  // Enable DMX master interface and start transmitting
  dmx_master.enable();

  // To be extra safe,
  // let's set channel 1 - 30 to off (0) to start with
  dmx_master.setChannelRange(1, 30, 0);
}

void loop() {
  // In loop we can modify the values of the variables
  // to make the lights do what we want

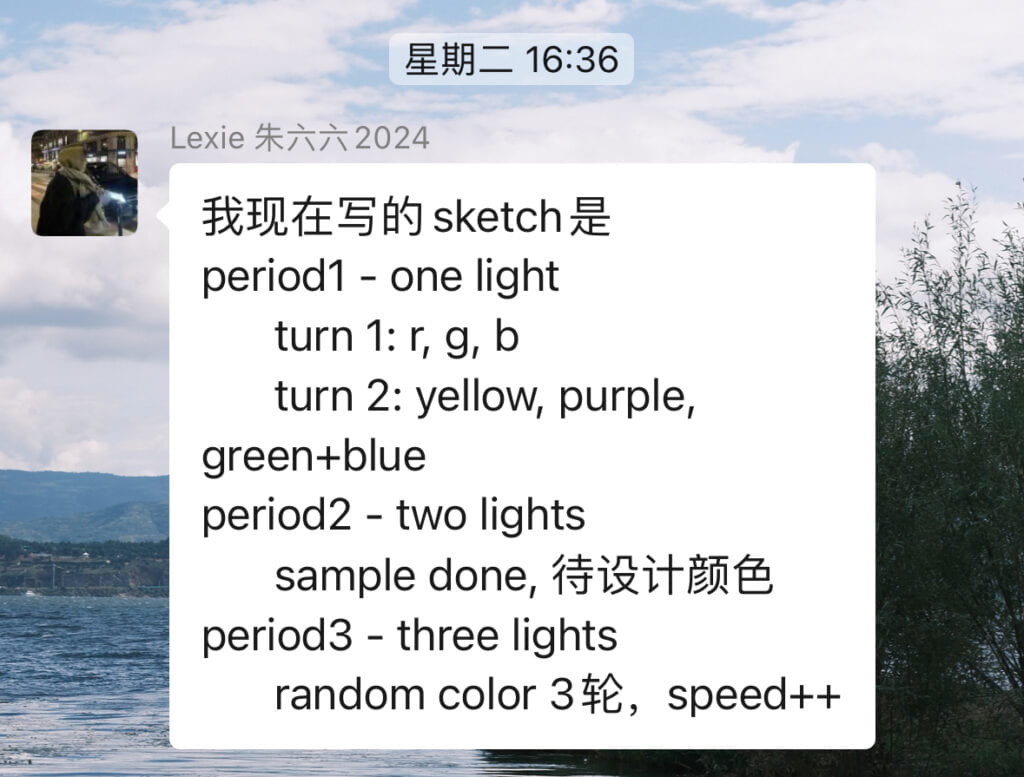
  //1st period: only one light would be turn on
  //first turn: red, blue, green
  // light1 - red

  //  if(!lightCleared){
  //  clearLight();
  //  }


  if (!stage3shown) {
    delay(2000);
    stage1Red();
    writeDMXdata();
    delay(5000);

    stage1Green();
    writeDMXdata();
    delay(2500);

    stage1Blue();
    writeDMXdata();
    delay(2500);

    stage1Yellow();
    writeDMXdata();
    delay(2500);

    stage1Purple();
    writeDMXdata();
    delay(2500);


    stage1GreenBlue();
    writeDMXdata();
    delay(2500);


    light1Red = 255;
    light1Green = 153;
    light1Blue = 18;

    light2Red = 173;
    light2Green = 255;
    light2Blue = 47;

    light1Dimmer = 255;
    light2Dimmer = 255;
    light3Dimmer = 0;
    writeDMXdata();
    delay(5000);

    light2Red = 216;
    light2Green = 191;
    light2Blue = 216;

    light3Red = 176;
    light3Green = 224;
    light3Blue = 230;

    light1Dimmer = 0;
    light2Dimmer = 255;
    light3Dimmer = 255;
    writeDMXdata();
    delay(5000);

    light3Red = 255;
    light3Green = 182;
    light3Blue = 193;
    light1Red = 0;
    light1Green = 245;
    light1Blue = 255;
    light3Dimmer = 255;
    light1Dimmer = 255;

    light1Dimmer = 255;
    light2Dimmer = 0;
    light3Dimmer = 255;
    writeDMXdata();
    delay(5000);
    stage3shown = true;
  } else {
    stage3();
  }
}

void stage3() {

  light1Red = random(0, 255);
  light1Green = random(0, 255);
  light1Blue = random(0, 255);

  light2Red = random(0, 255);
  light2Green = random(0, 255);
  light2Blue = random(0, 255);

  light3Red = random(0, 255);
  light3Green = random(0, 255);
  light3Blue = random(0, 255);

  light1Dimmer = 255;
  light2Dimmer = 255;
  light3Dimmer = 255;

  writeDMXdata();
  delay(400);
}


//2nd period: 2 lights are turned on together
//还没设颜色
//1+2

/*


  delay(500);

//.....这里copy and paste and change 上面一段就行,设计一下颜色?
//arrange 灯的位置,两个一起亮的时候是时间点,也可以讲讲concept和故事?颜色-故事-> any connections?


//3rd period: 3 lights are turned on together, random color, speed++


  light1Red = random(0,255);
  light1Green = random(0,255);
  light1Blue = random(0,255);

  light2Red = random(0,255);
  light2Green = random(0,255);
  light2Blue = random(0,255);

  light3Red = random(0,255);
  light3Green = random(0,255);
  light3Blue = random(0,255);

  light1Dimmer += 2;
  light2Dimmer += 2;
  light3Dimmer += 2;


  light1Red = random(0,255);
  light1Green = random(0,255);
  light1Blue = random(0,255);

  light2Red = random(0,255);
  light2Green = random(0,255);
  light2Blue = random(0,255);

  light3Red = random(0,255);
  light3Green = random(0,255);
  light3Blue = random(0,255);

  light1Dimmer += 3;
  light2Dimmer += 3;
  light3Dimmer += 3;


  // write the DMX data to the lights
  // see the function declaration below
  writeDMXdata();

  delay(50);
  */
//}


void stage1Red() {
  light1Red = 255;
  light1Green = 0;
  light1Blue = 0;
  light2Red = 0;
  light2Green = 0;
  light2Blue = 0;
  light3Red = 0;
  light3Green = 0;
  light3Blue = 0;
  light1Dimmer = 255;
}

void stage1Green() {
  light1Red = 0;
  light1Green = 0;
  light1Blue = 0;
  light2Red = 0;
  light2Green = 255;
  light2Blue = 0;
  light3Red = 0;
  light3Green = 0;
  light3Blue = 0;
  light2Dimmer = 255;
}

void stage1Blue() {
  light1Red = 0;
  light1Green = 0;
  light1Blue = 0;

  light2Red = 0;
  light2Green = 0;
  light2Blue = 0;
  light3Red = 0;
  light3Green = 0;
  light3Blue = 255;

  light3Dimmer = 255;
}

void stage1Yellow() {
  light1Red = 255;
  light1Green = 255;
  light1Blue = 0;

  light2Red = 0;
  light2Green = 0;
  light2Blue = 0;
  light3Red = 0;
  light3Green = 0;
  light3Blue = 0;

  light1Dimmer = 255;
}

void stage1Purple() {
  light1Red = 0;
  light1Green = 0;
  light1Blue = 0;

  light2Red = 255;
  light2Green = 0;
  light2Blue = 255;
  light3Red = 0;
  light3Green = 0;
  light3Blue = 0;

  light2Dimmer = 255;
}


void stage1GreenBlue() {
  light1Red = 0;
  light1Green = 0;
  light1Blue = 0;

  light2Red = 0;
  light2Green = 0;
  light2Blue = 0;
  light3Red = 0;
  light3Green = 255;
  light3Blue = 255;

  light3Dimmer = 255;
}


/*
 * This function writes all the values of the variables to
 * the DMX shield which then passes them on to the
 * the apporpriate channels on the lights.
 *
 * All the lights should be set to 9-channel DMX mode
 * Light1 has to start on DMX channel 1
 * Light2 has to start on DMX channel 11
 * Light3 has to start on DMX channel 21
 */
void writeDMXdata() {
  // write to channel 1-9 for light1
  dmx_master.setChannelValue(1, light1Dimmer);  // 亮度
  dmx_master.setChannelValue(2, light1Red);
  dmx_master.setChannelValue(3, light1Green);
  dmx_master.setChannelValue(4, light1Blue);
  dmx_master.setChannelValue(5, light1ColorMacros);  // 光宏
  dmx_master.setChannelValue(6, light1Strobe);       //频闪
  dmx_master.setChannelValue(7, light1AutoPrograms);
  dmx_master.setChannelValue(8, light1ProgSpeedSoundSens);
  dmx_master.setChannelValue(9, light1DimmerSpeedMode);

  // write to channel 11-19 for light2
  dmx_master.setChannelValue(11, light2Dimmer);
  dmx_master.setChannelValue(12, light2Red);
  dmx_master.setChannelValue(13, light2Green);
  dmx_master.setChannelValue(14, light2Blue);
  dmx_master.setChannelValue(15, light2ColorMacros);
  dmx_master.setChannelValue(16, light2Strobe);
  dmx_master.setChannelValue(17, light2AutoPrograms);
  dmx_master.setChannelValue(18, light2ProgSpeedSoundSens);
  dmx_master.setChannelValue(19, light2DimmerSpeedMode);

  // write to channel 21-29 for light3
  dmx_master.setChannelValue(21, light3Dimmer);
  dmx_master.setChannelValue(22, light3Red);
  dmx_master.setChannelValue(23, light3Green);
  dmx_master.setChannelValue(24, light3Blue);
  dmx_master.setChannelValue(25, light3ColorMacros);
  dmx_master.setChannelValue(26, light3Strobe);
  dmx_master.setChannelValue(27, light3AutoPrograms);
  dmx_master.setChannelValue(28, light3ProgSpeedSoundSens);
  dmx_master.setChannelValue(29, light3DimmerSpeedMode);
}

Leave a Reply