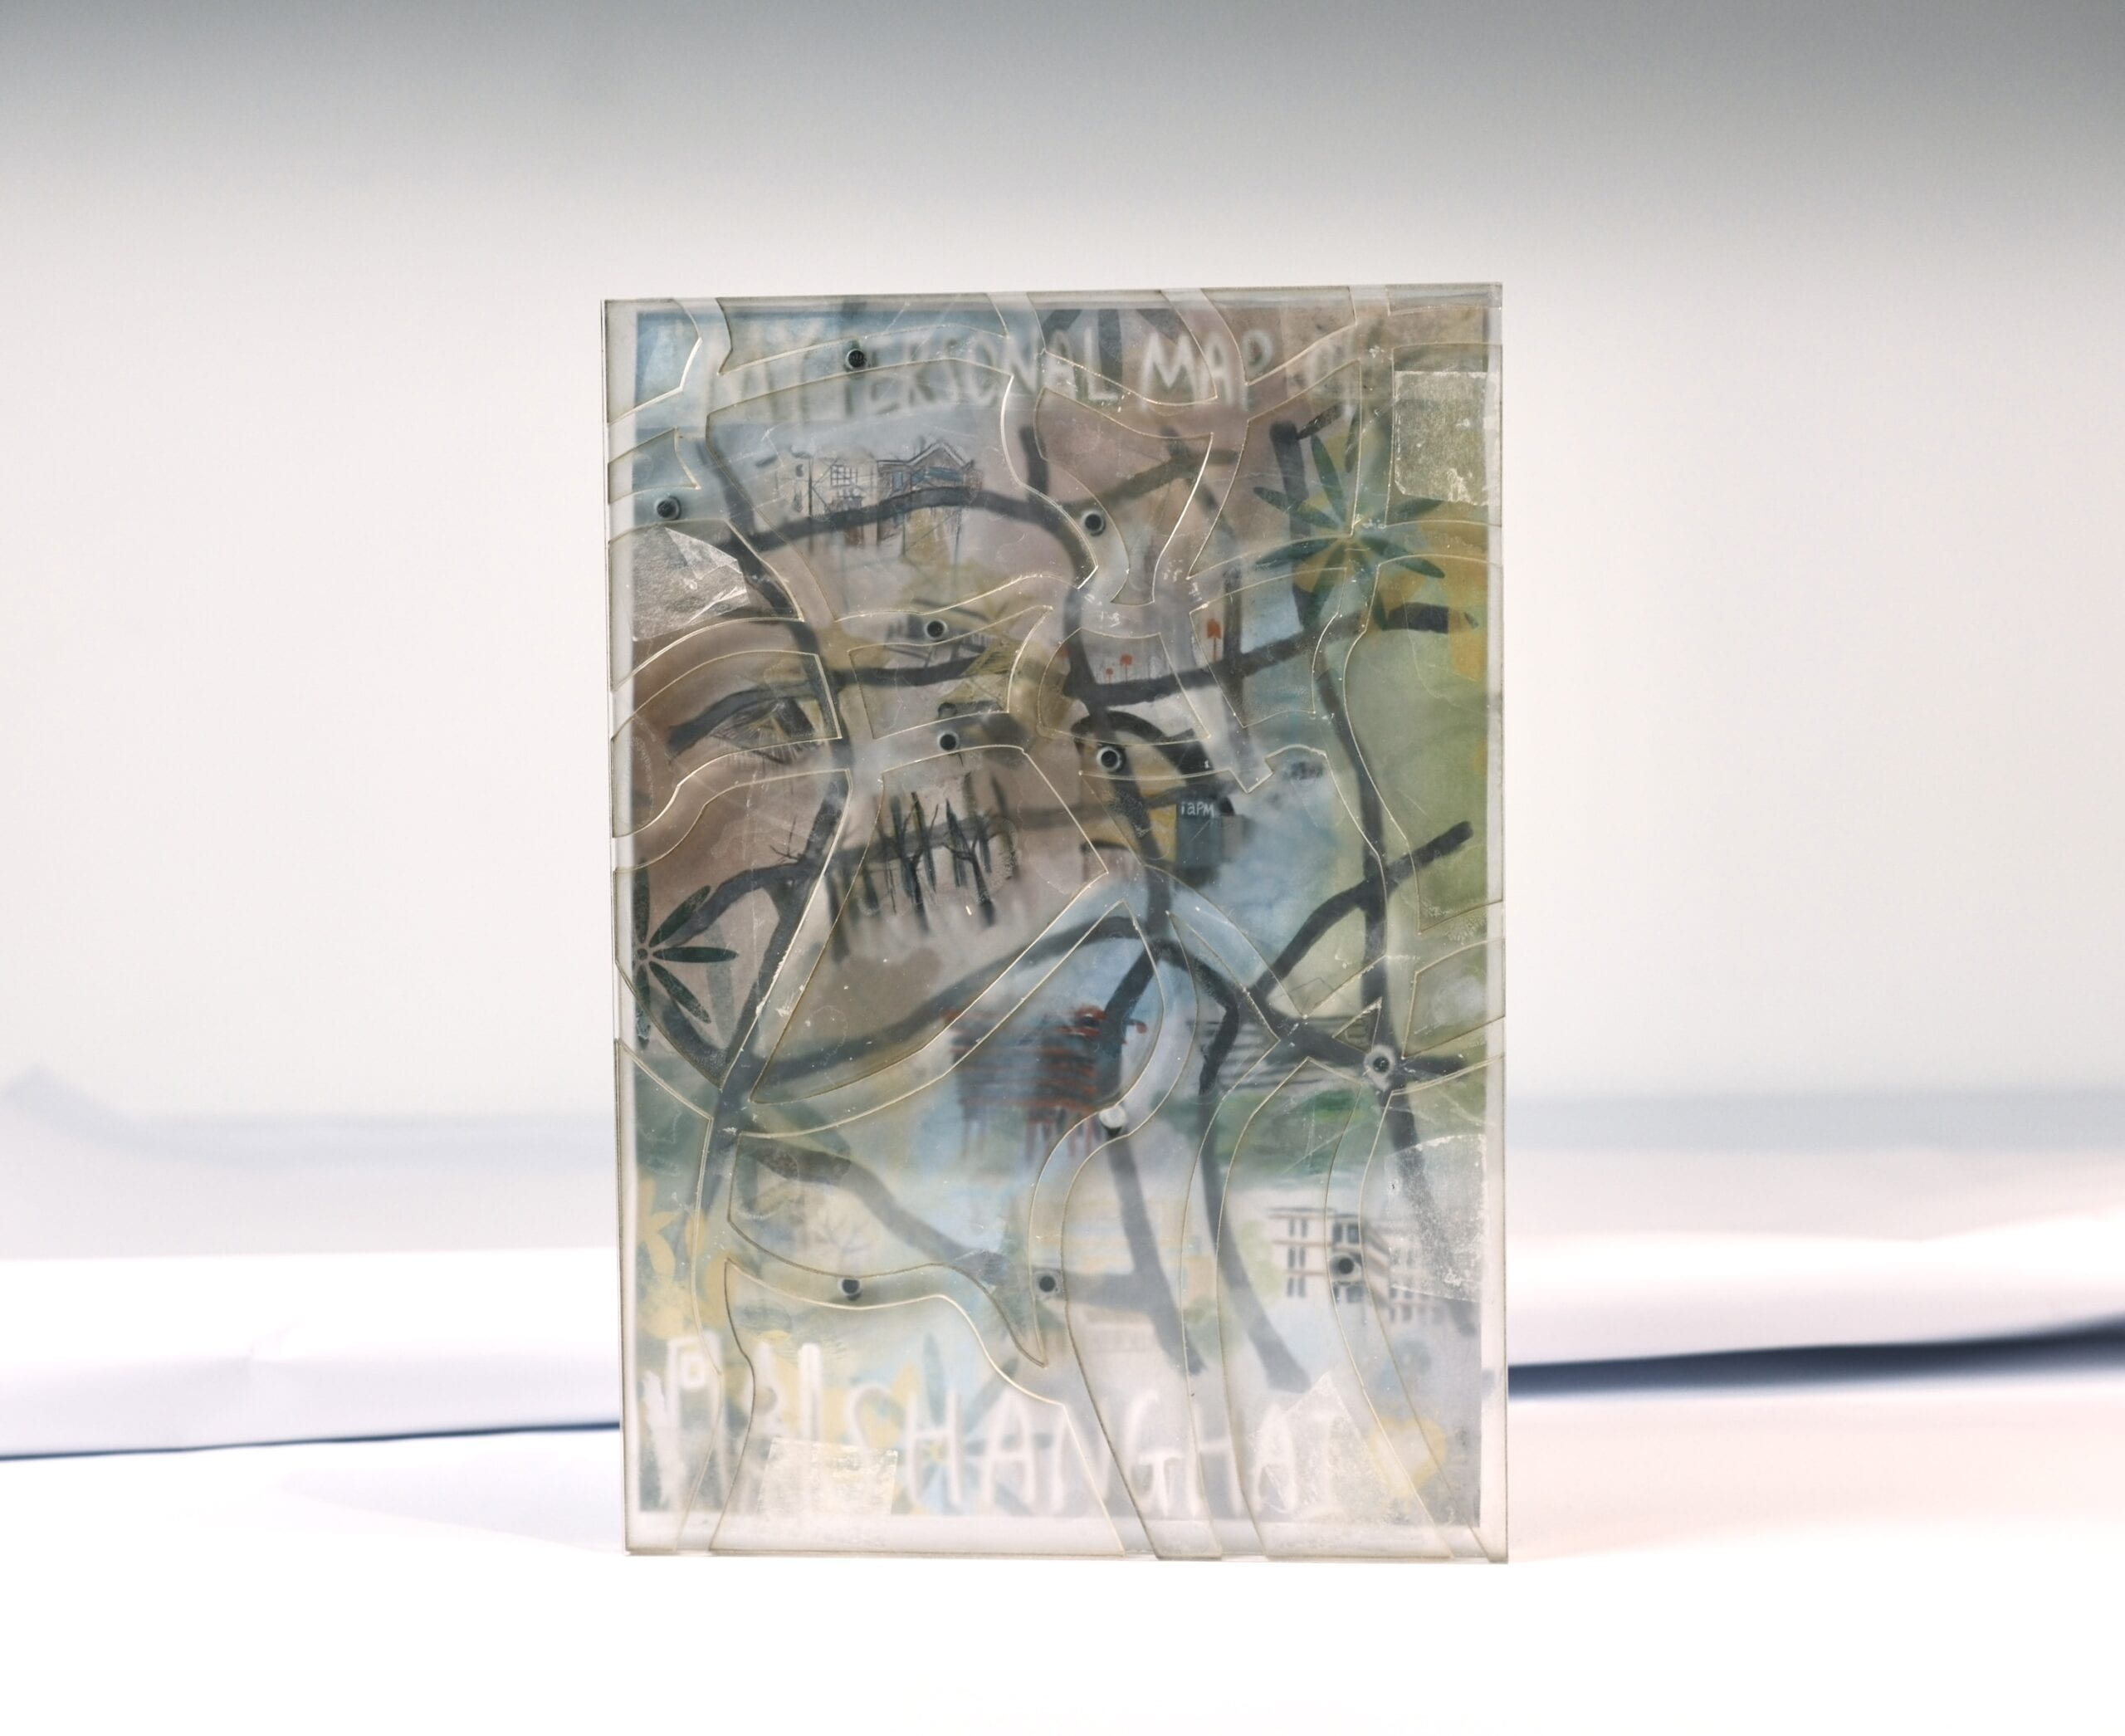
My Personal Map of Shanghai – Jingchen Gao – Gottfried Haider
I. Conception and Design
My first idea of my final project was to create a ball run game which happens in a 3D maze created by 3D printing. But after talking to my professor, he suggested that I could instead try creating a 2D one with several layers in it, and use laser cutting instead of 3D printing to make the physical part. He also suggested that I could try using the reed switches (magnet sensors) instead of the distance sensors for a better interactive experience. As for the theme, he suggested that I could try creating my personal map of Shanghai, with the interactive spots being the videos of the places where I had some personal memories. This idea was very attractive to me, because as I love photographing and using a camera to document my life moments, this idea actually provided me with a chance to combine the physical process of making a handheld map with my digital videos that correspond with my past childhood memories. Meanwhile, as far as I am concerned, the form of “vlog” has been popular in recent years and many young people choose it as a way to record their lives. The idea I used in my final project also includes the part of recording videos of my own, so by creating a personal map of Shanghai, I am also creating a digital album for myself which I can always look back to and cherish my childhood spent in this beautiful city.
Suggested by my professor, in my understanding, the users can hold the map with both of their hands and turn it to let the ball move inside. Also, the traditional map which is made by paper is usually thin and flat. Thus, I wanted to make an Acrylic “map” which was thin enough to be held easily by hand, and meanwhile transparent enough to let the users see the patterns and picture inside. As the map should be visually attractive enough to interest the users and make them engaged during the experiencing process, I would like to draw a map of Shanghai by myself according to the real layout of the city, and make it colorful so that the project could be beautiful and attractive. Also, in case not all the users are from Shanghai and maybe some of them are not familiar enough with the places I chose, I decided to record my voice and prepare introduction audios to help them get more familiar with the spots I chose. Though my plan did not succeed due to technical reasons, this idea of mine did origin from here.
During the user testing day, I had already finished my first version, which I will introduce more later in the fabrication part of my documentation. During the user testing, I realized that my project was way too big and heavy for the users to lift, and some of the components I attached to the project were not firm enough and were easy to fall off. I talked to my professor, and he said that I should try to build a smaller one with curved roads instead of straight roads. After talking to him I got a much clearer idea of the most ideal version and used Adobe Illustrator to build a totally different version of my project. The adaptations turned out to be very effective, and I was finally able to make a complete version of my project. The detailed building process will be described later in the fabrication and production part.
Below are my drawings of my project proposal:


II. Fabrication and Production
To make it clear, I will document this part by describing the physical (making the body of the map) and digital (wiring and coding) part respectively, and also divide the timeline by the crucial points of user testing day and final presentation day.
Before user testing day:
- Physical Fabrication
As soon as I had decided what to do with my idea, I immediately started working. My first idea was to build an Acrylic “maze” consisted of transparent blocks, and it should be big enough to “impress the users” and let the balls move inside. I asked the professor about the thickness of the Acrylic board we had and he told me that it was 3mm. He also informed me of the size of the biggest board available. Before I started working, I ordered some iron balls online, and they had a diameter of 2 cm. Combining the information together, I started to calculate the length and width of every part of the maze, and drew a draft on a cardboard of the similar size.
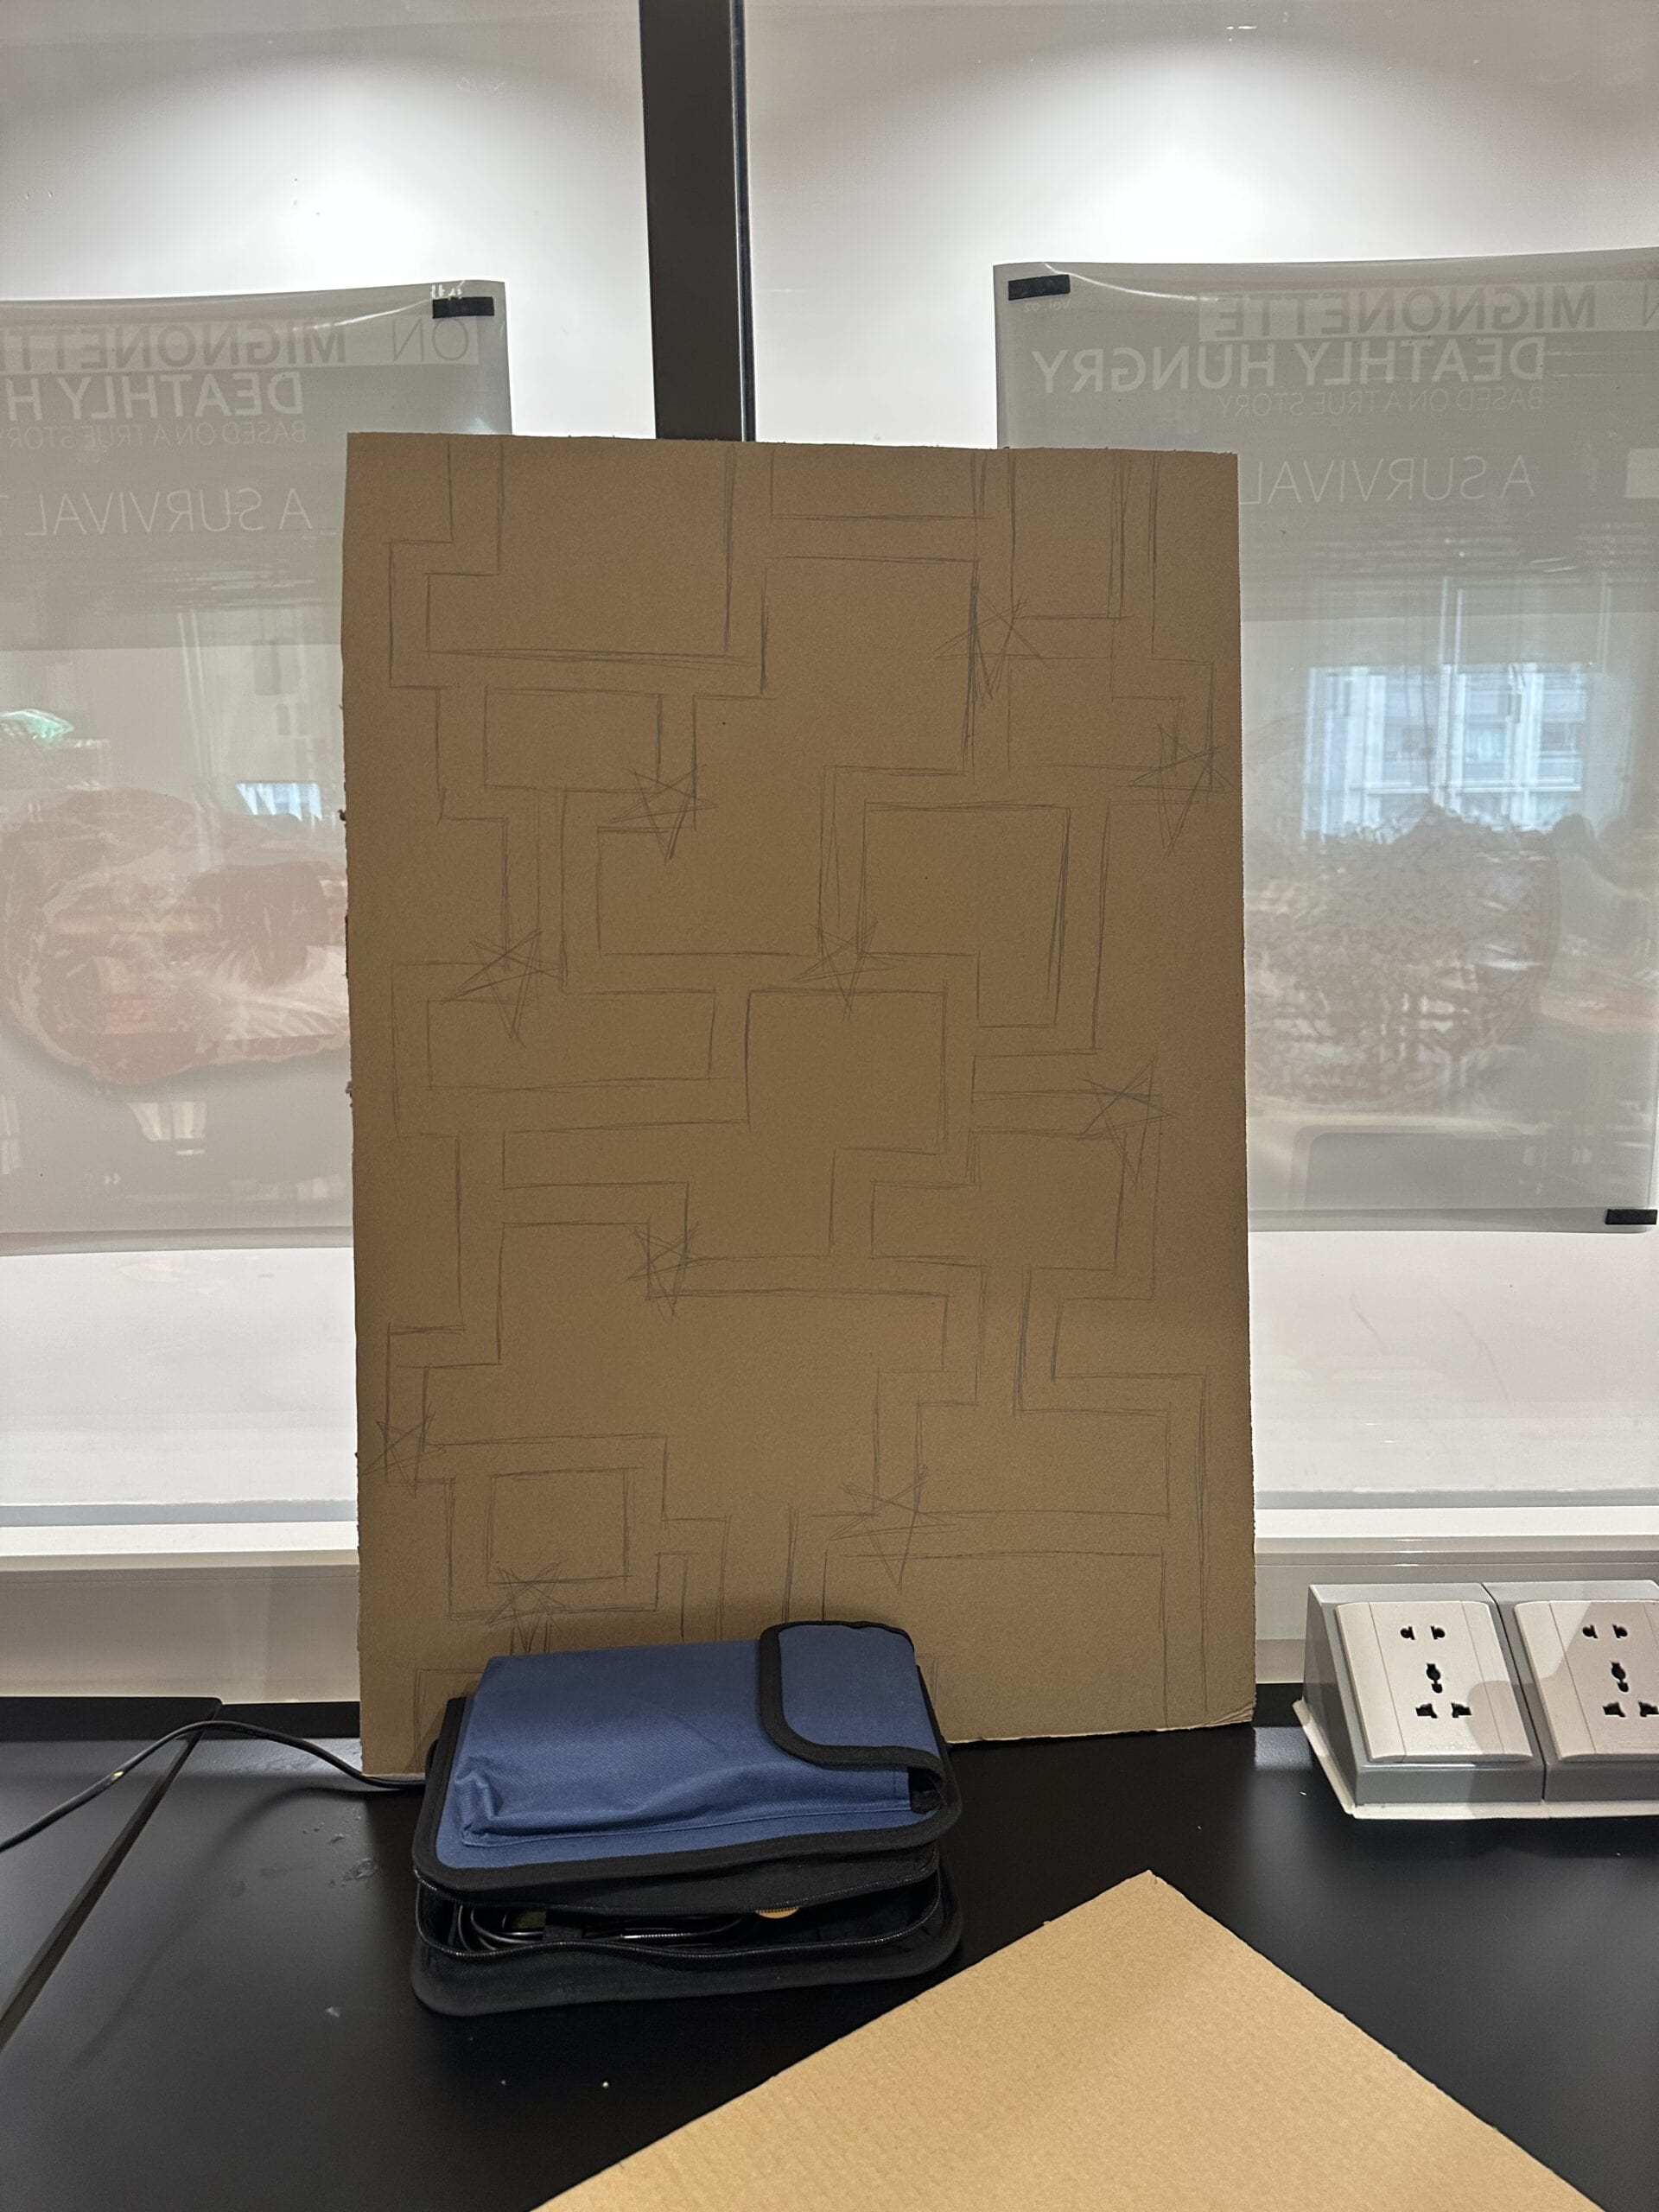

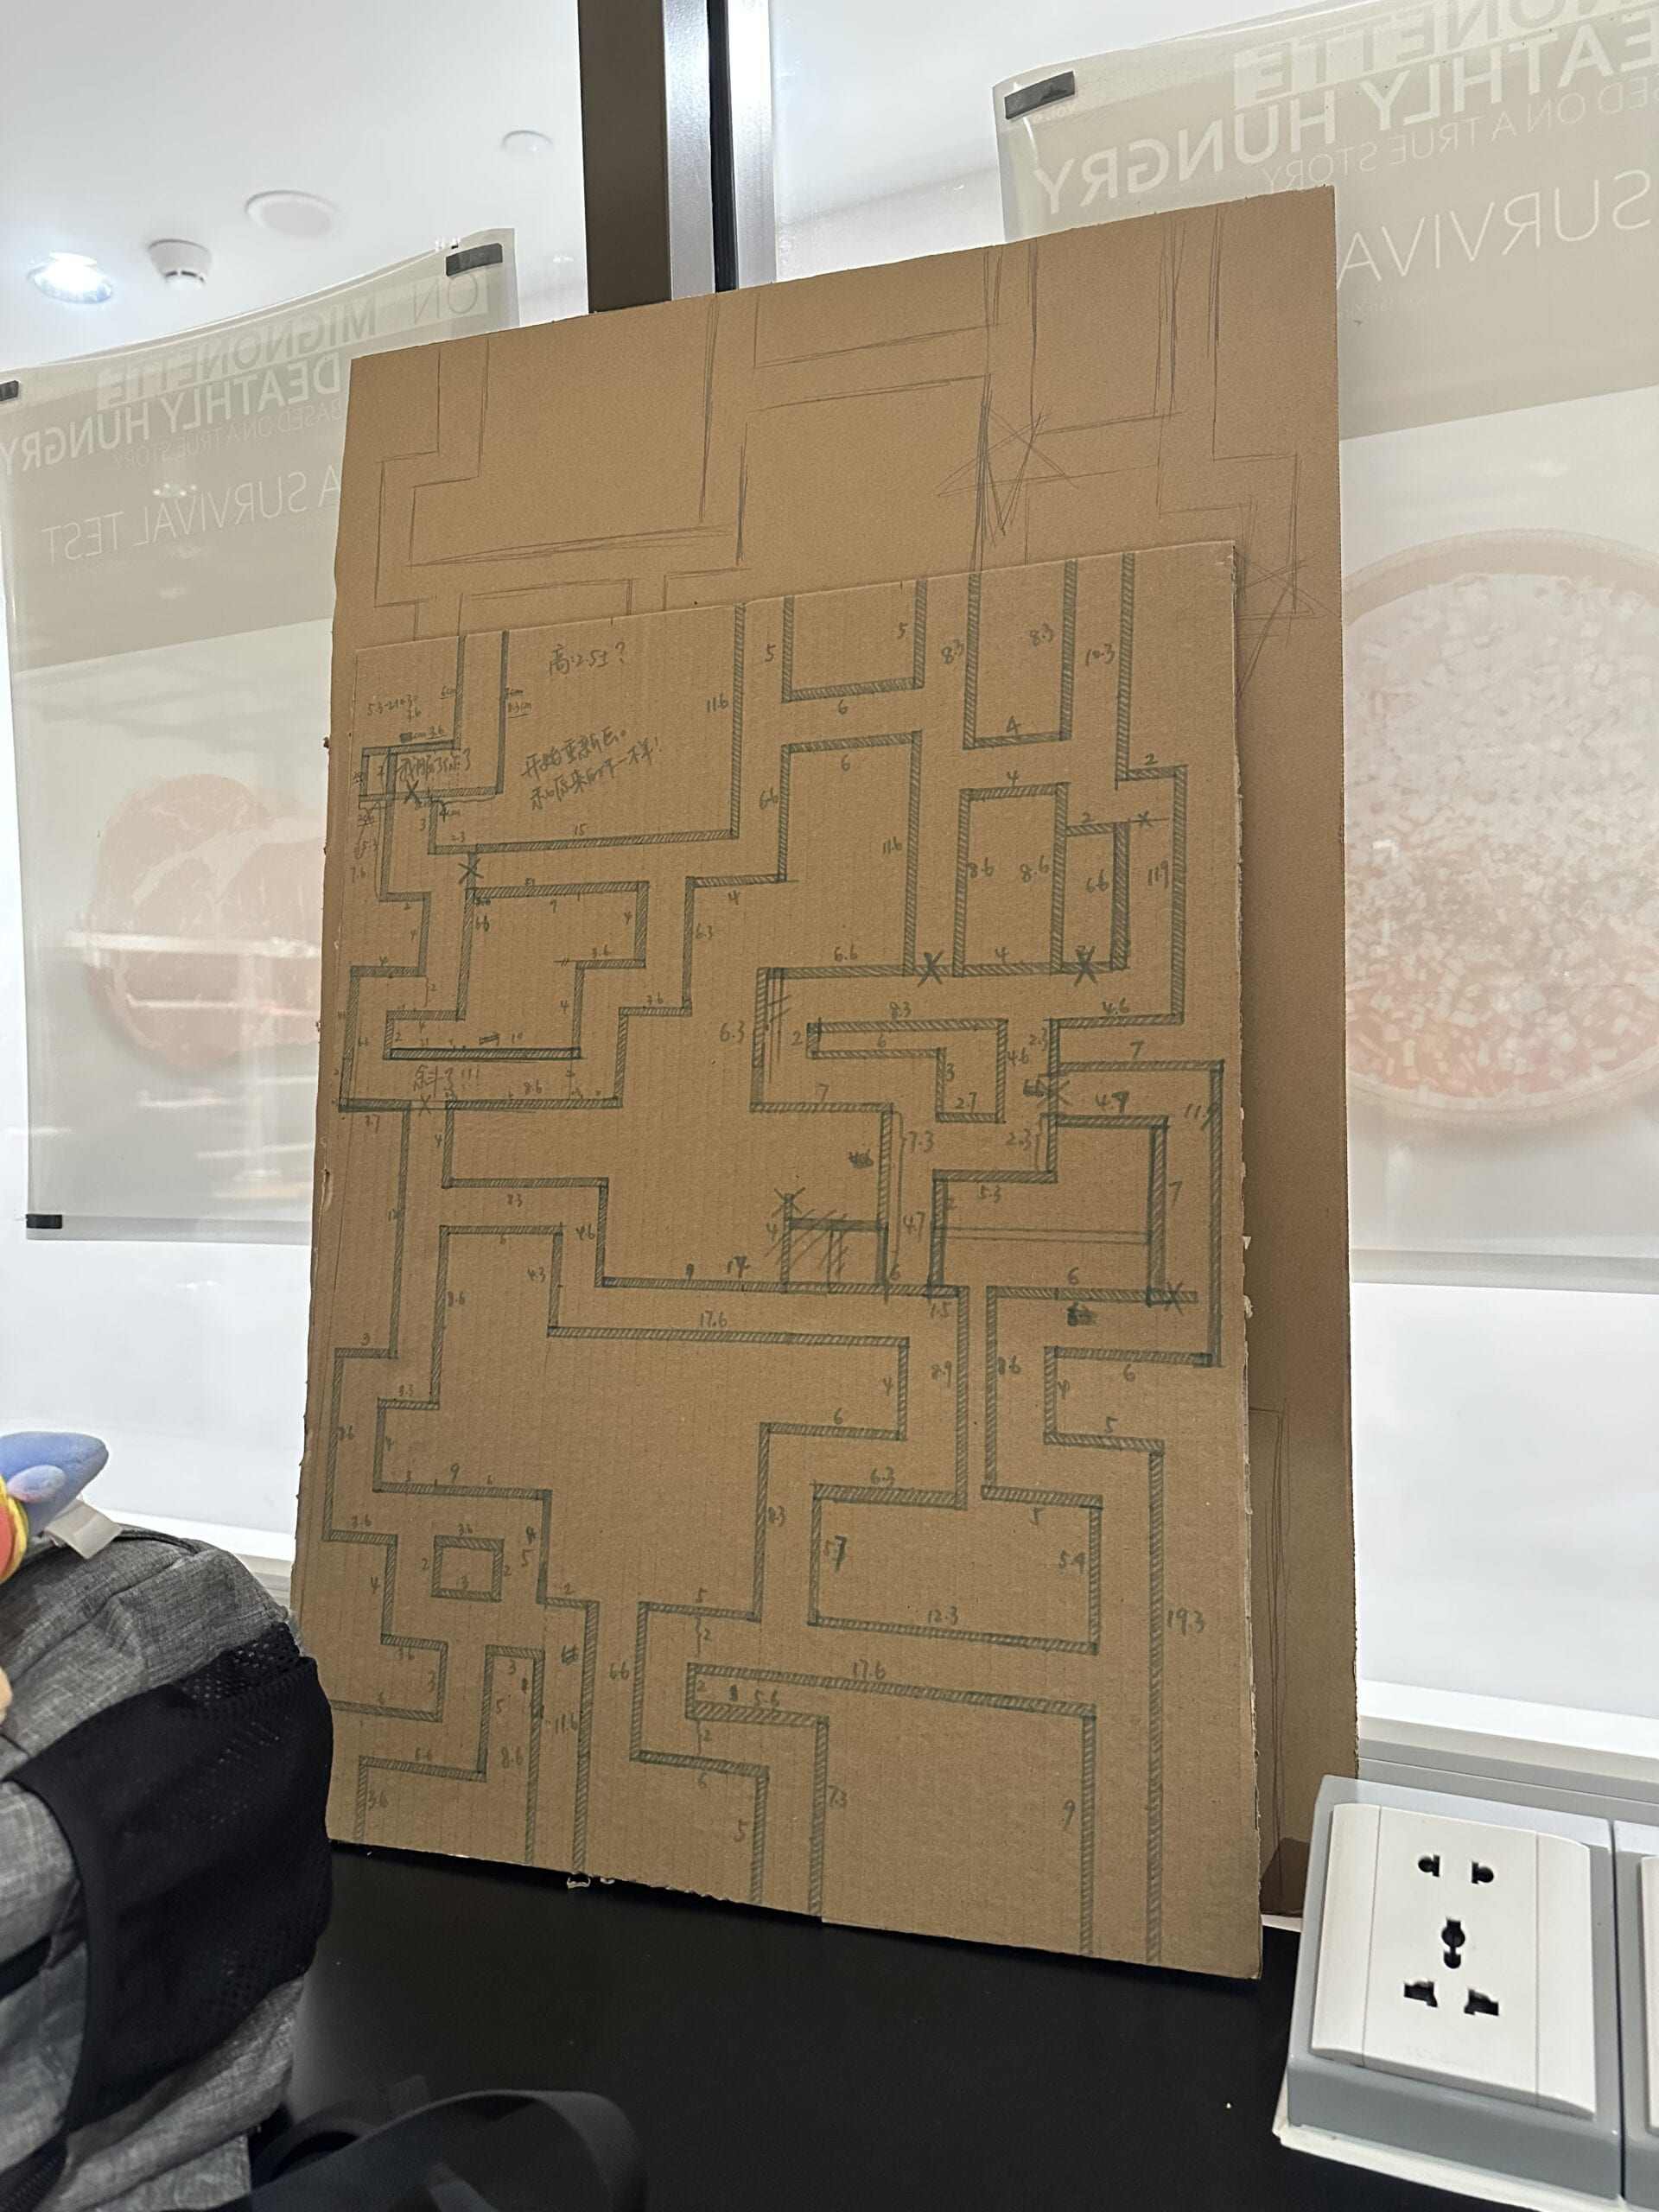
Then, I began to think of the way to make it by laser cutting. The traditional way that I learned in class was to draw the patterns by myself on cuttle.com, but that would take too much time and effort, because as my map was consisted of too many “roads”, there would be too many components. Therefore, I talked to my professor. To my surprise, he said that there was a website (https://adashrod.github.io/LaserCutMazes/welcome) which could create a maze for me, and the maze created by it could be directly used for laser cutting. Though it meant that the effort I spent on the drawing was wasted because the drawing was useless when it came to the maze generator website, I was still very grateful, for this process would save me a lot of extra time.
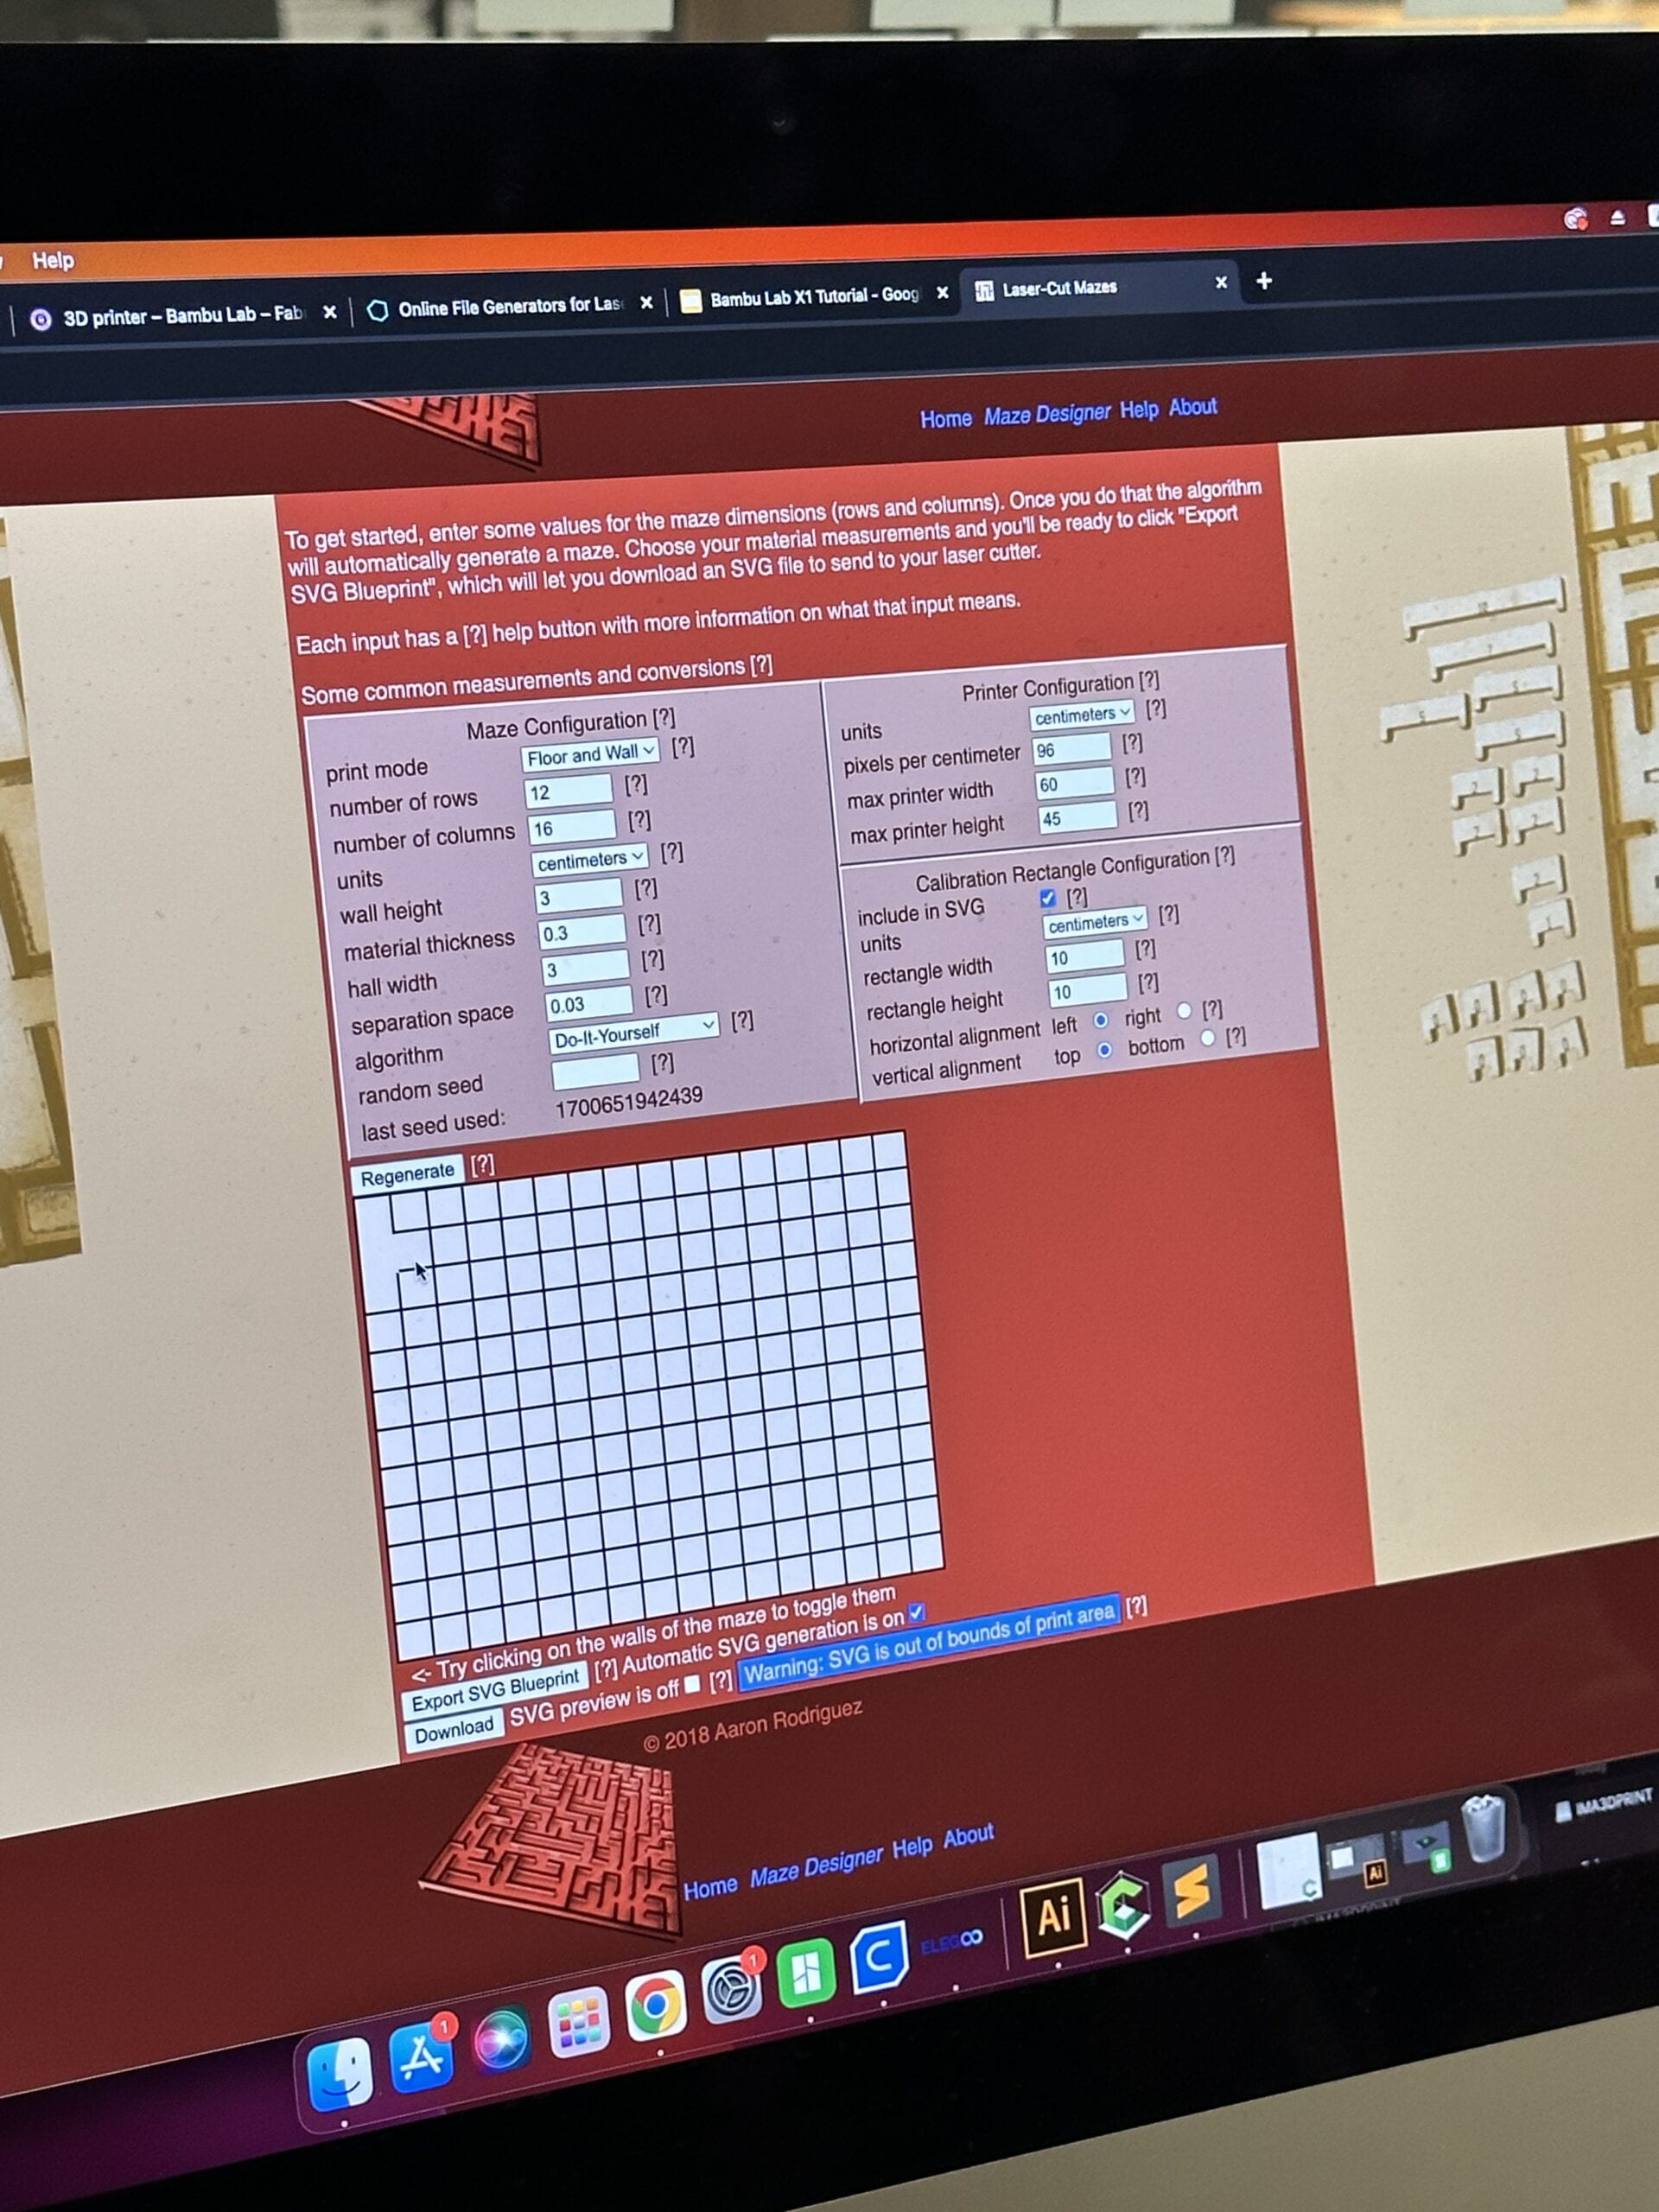

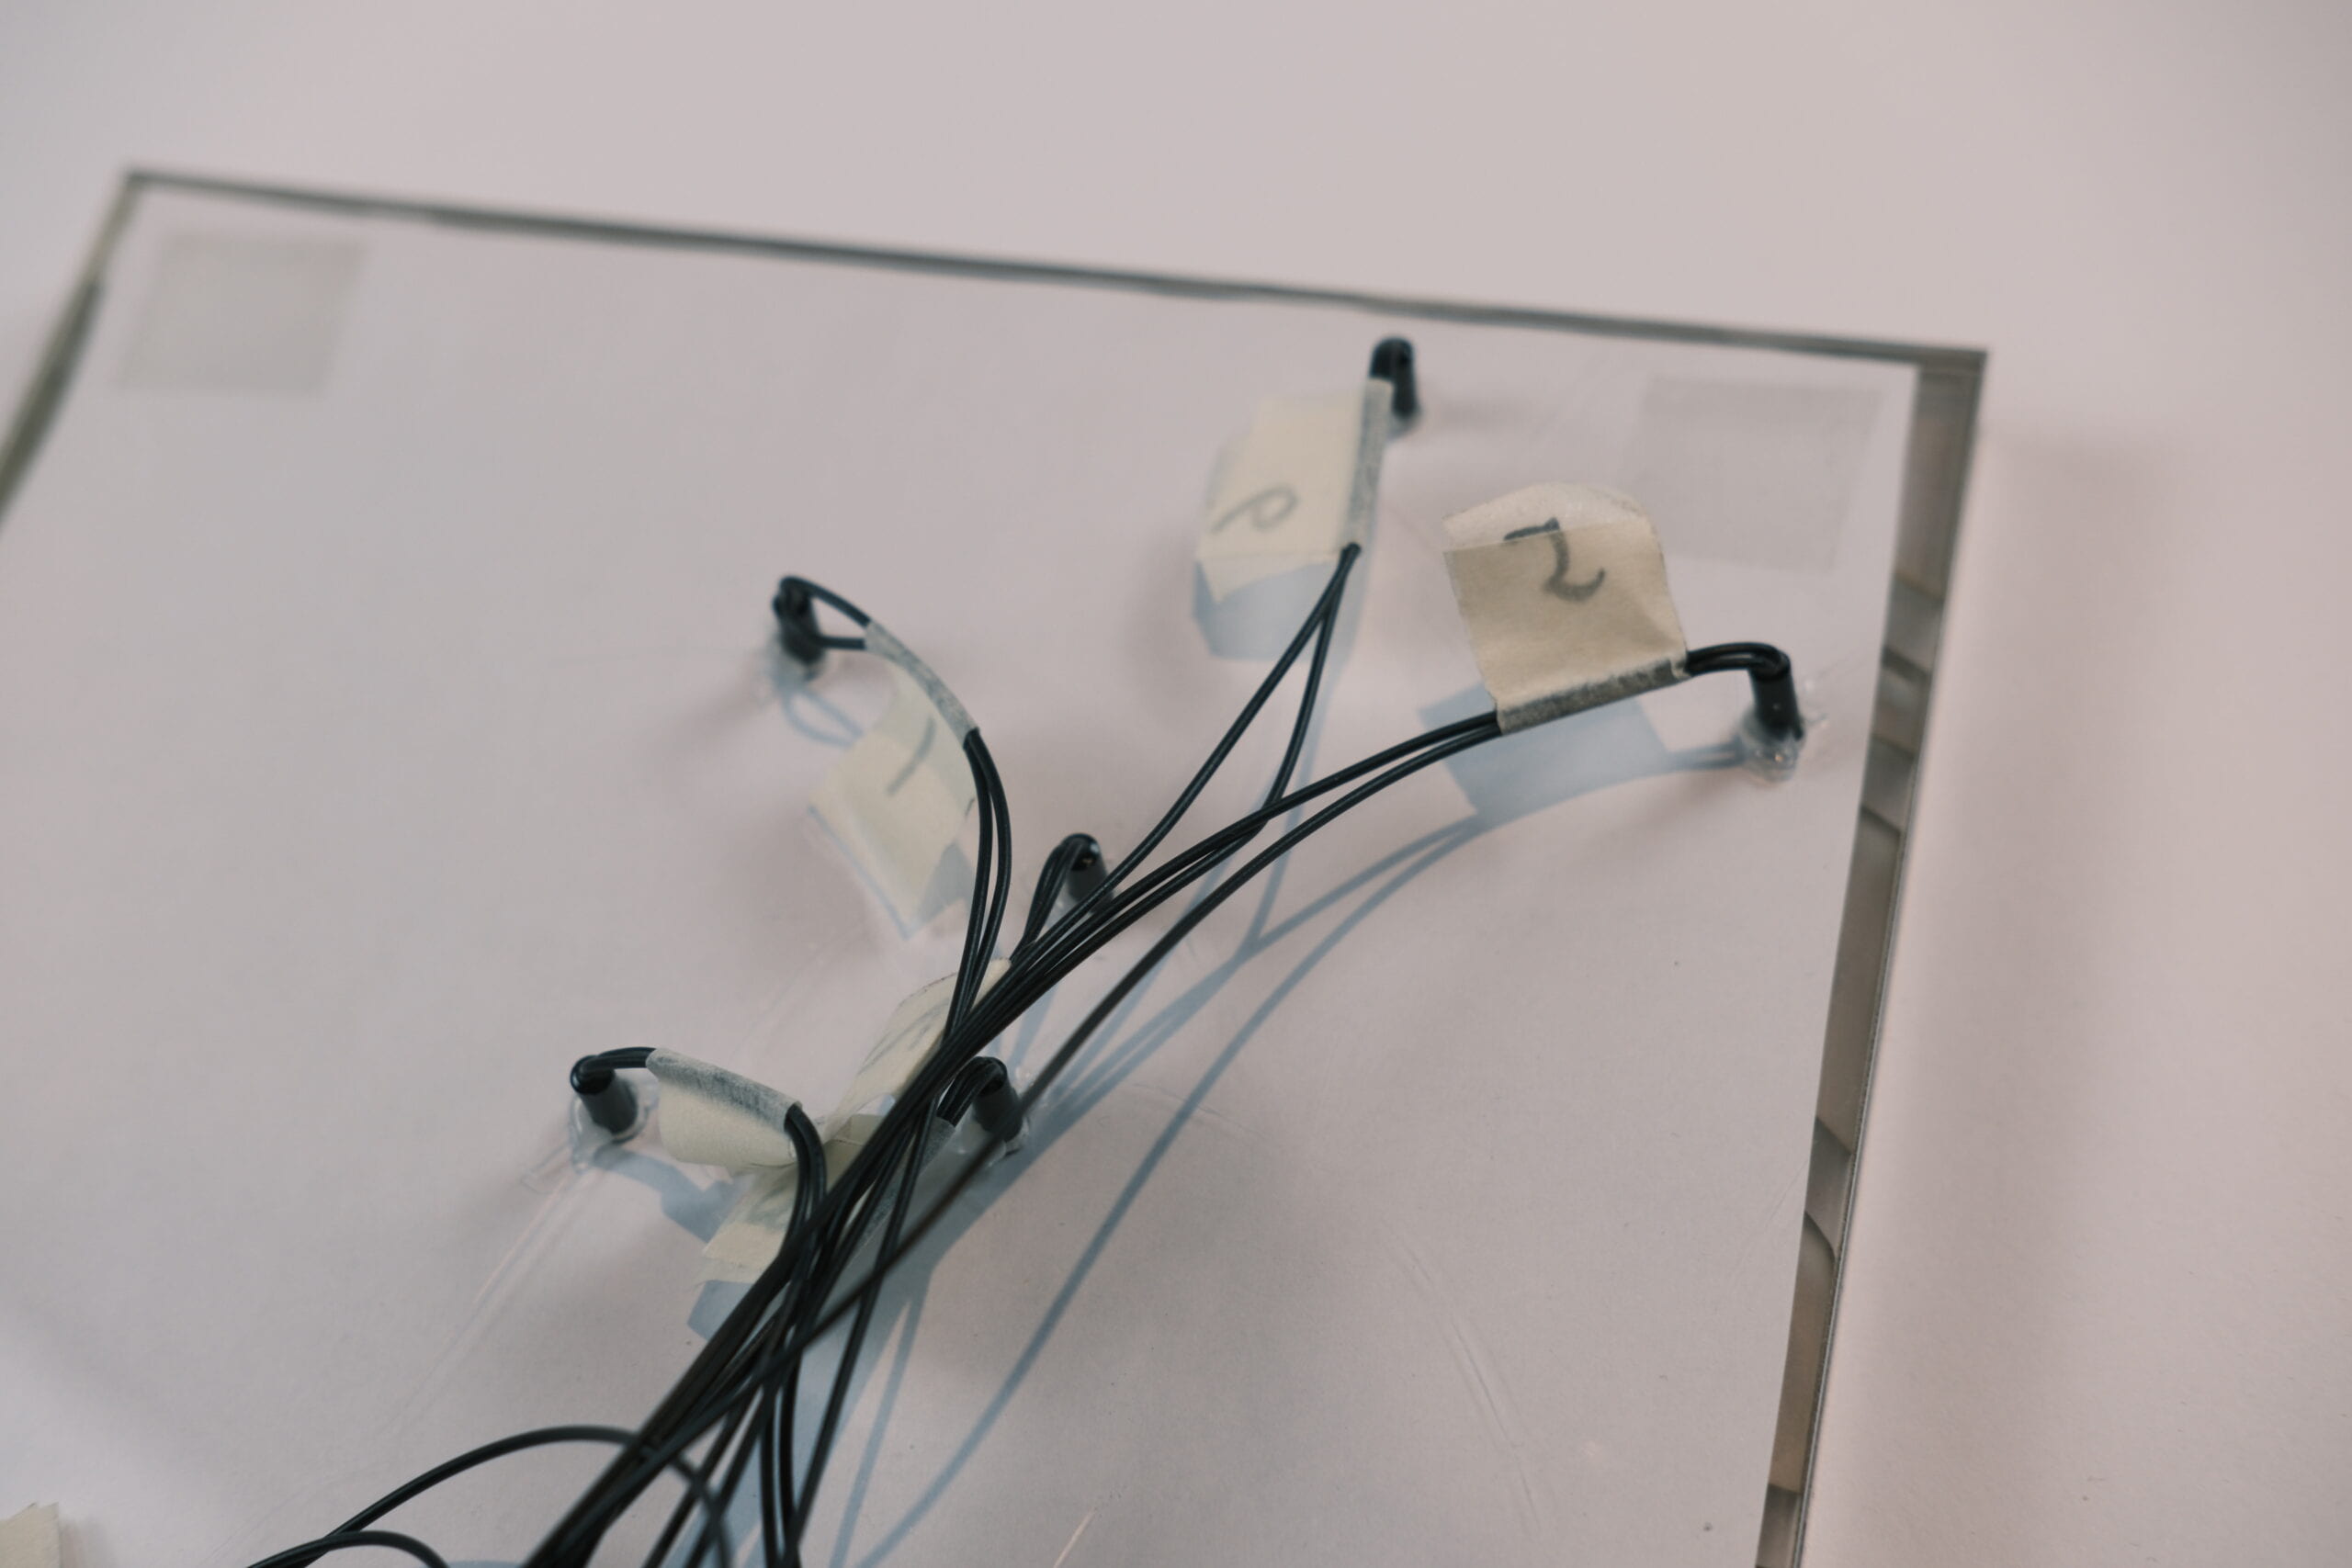
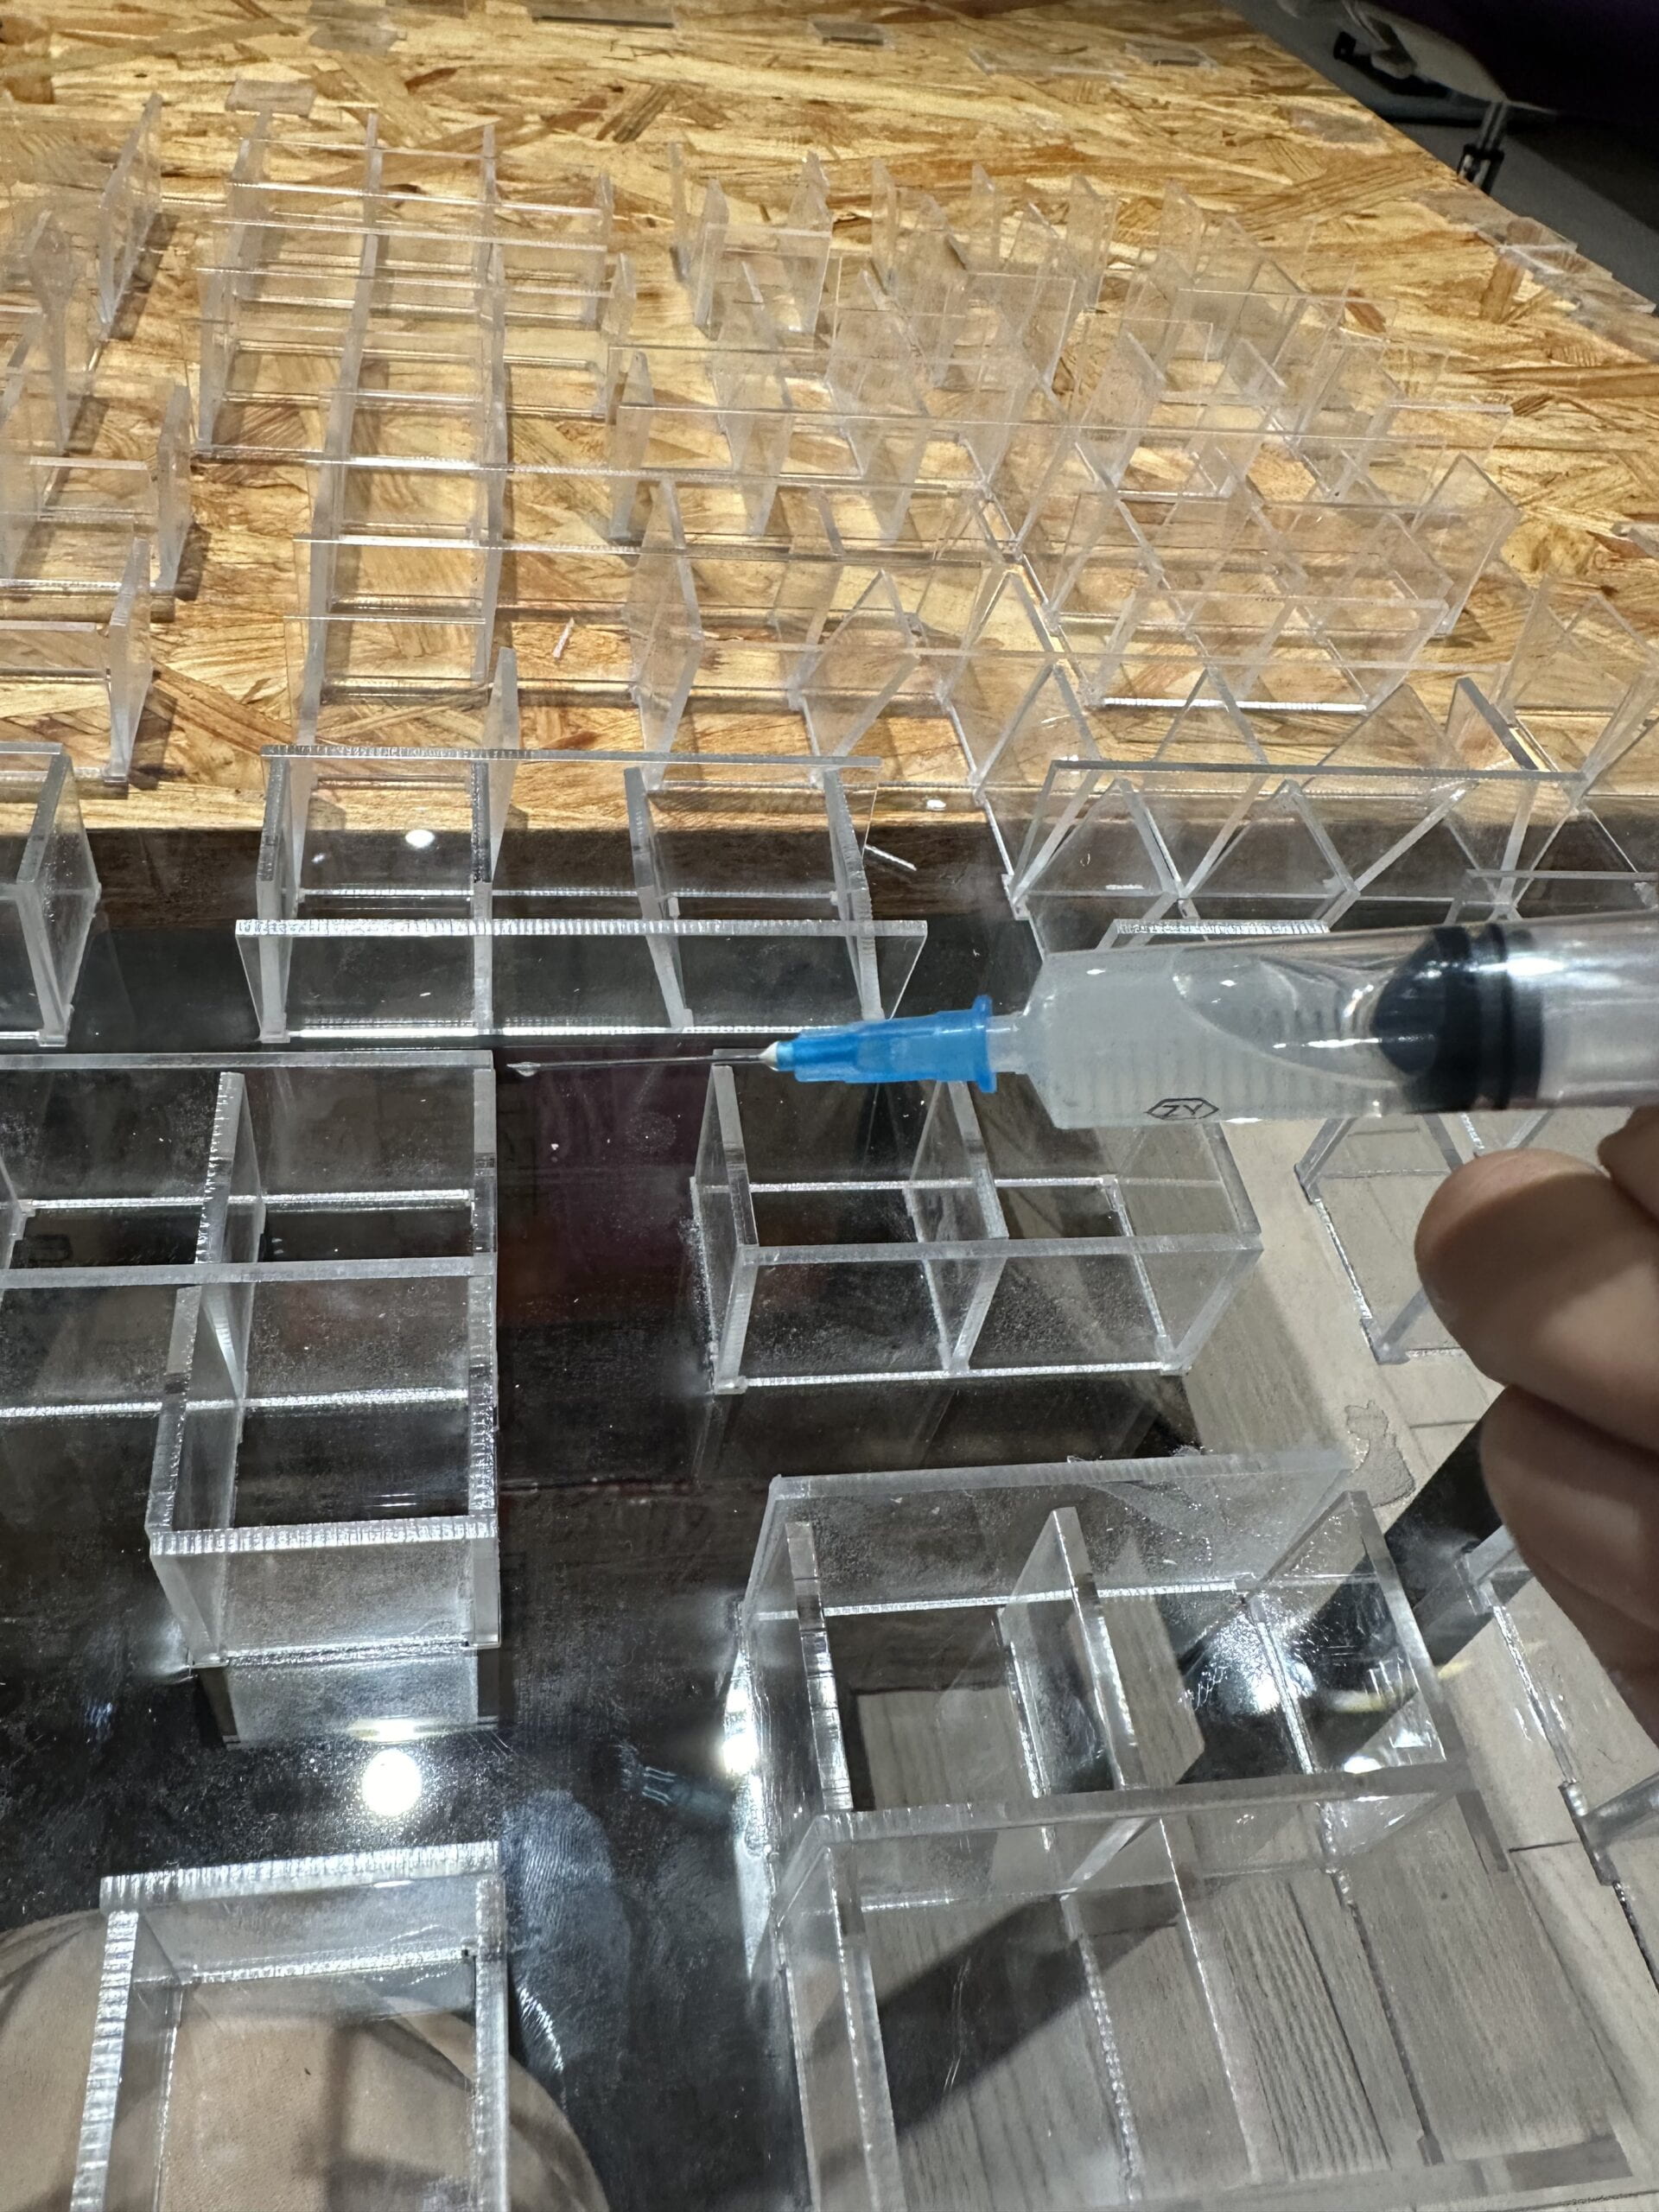
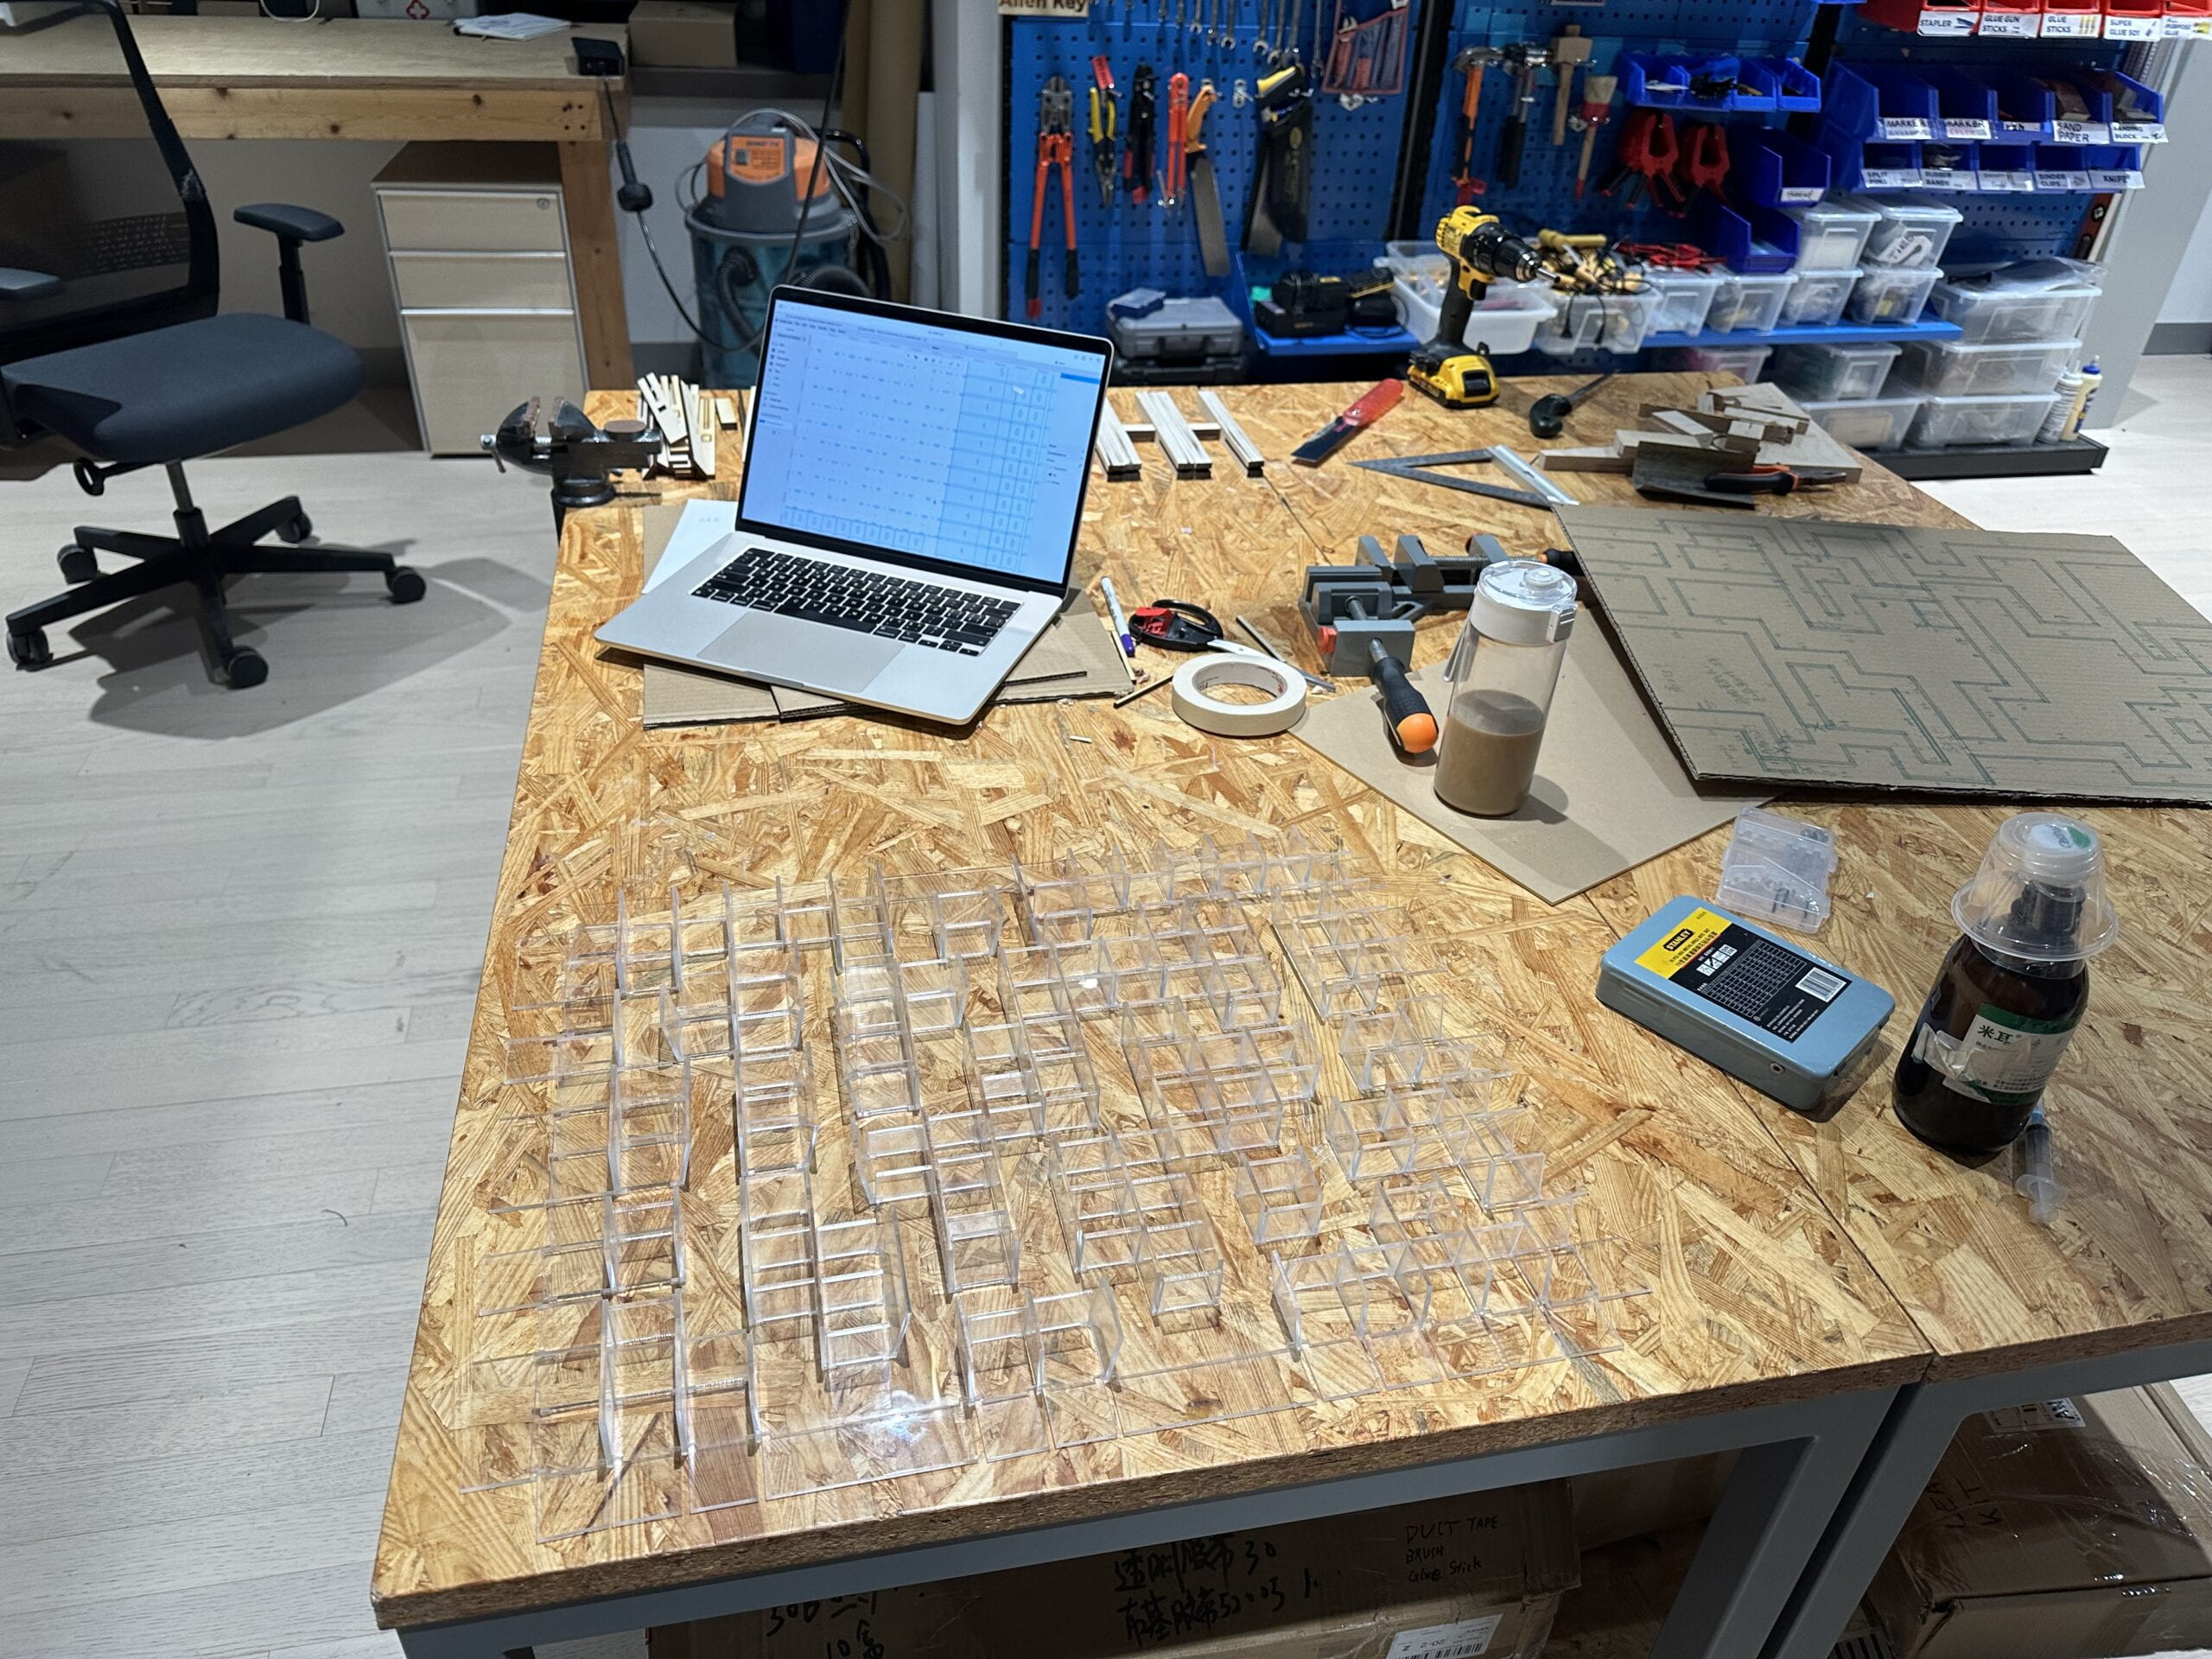
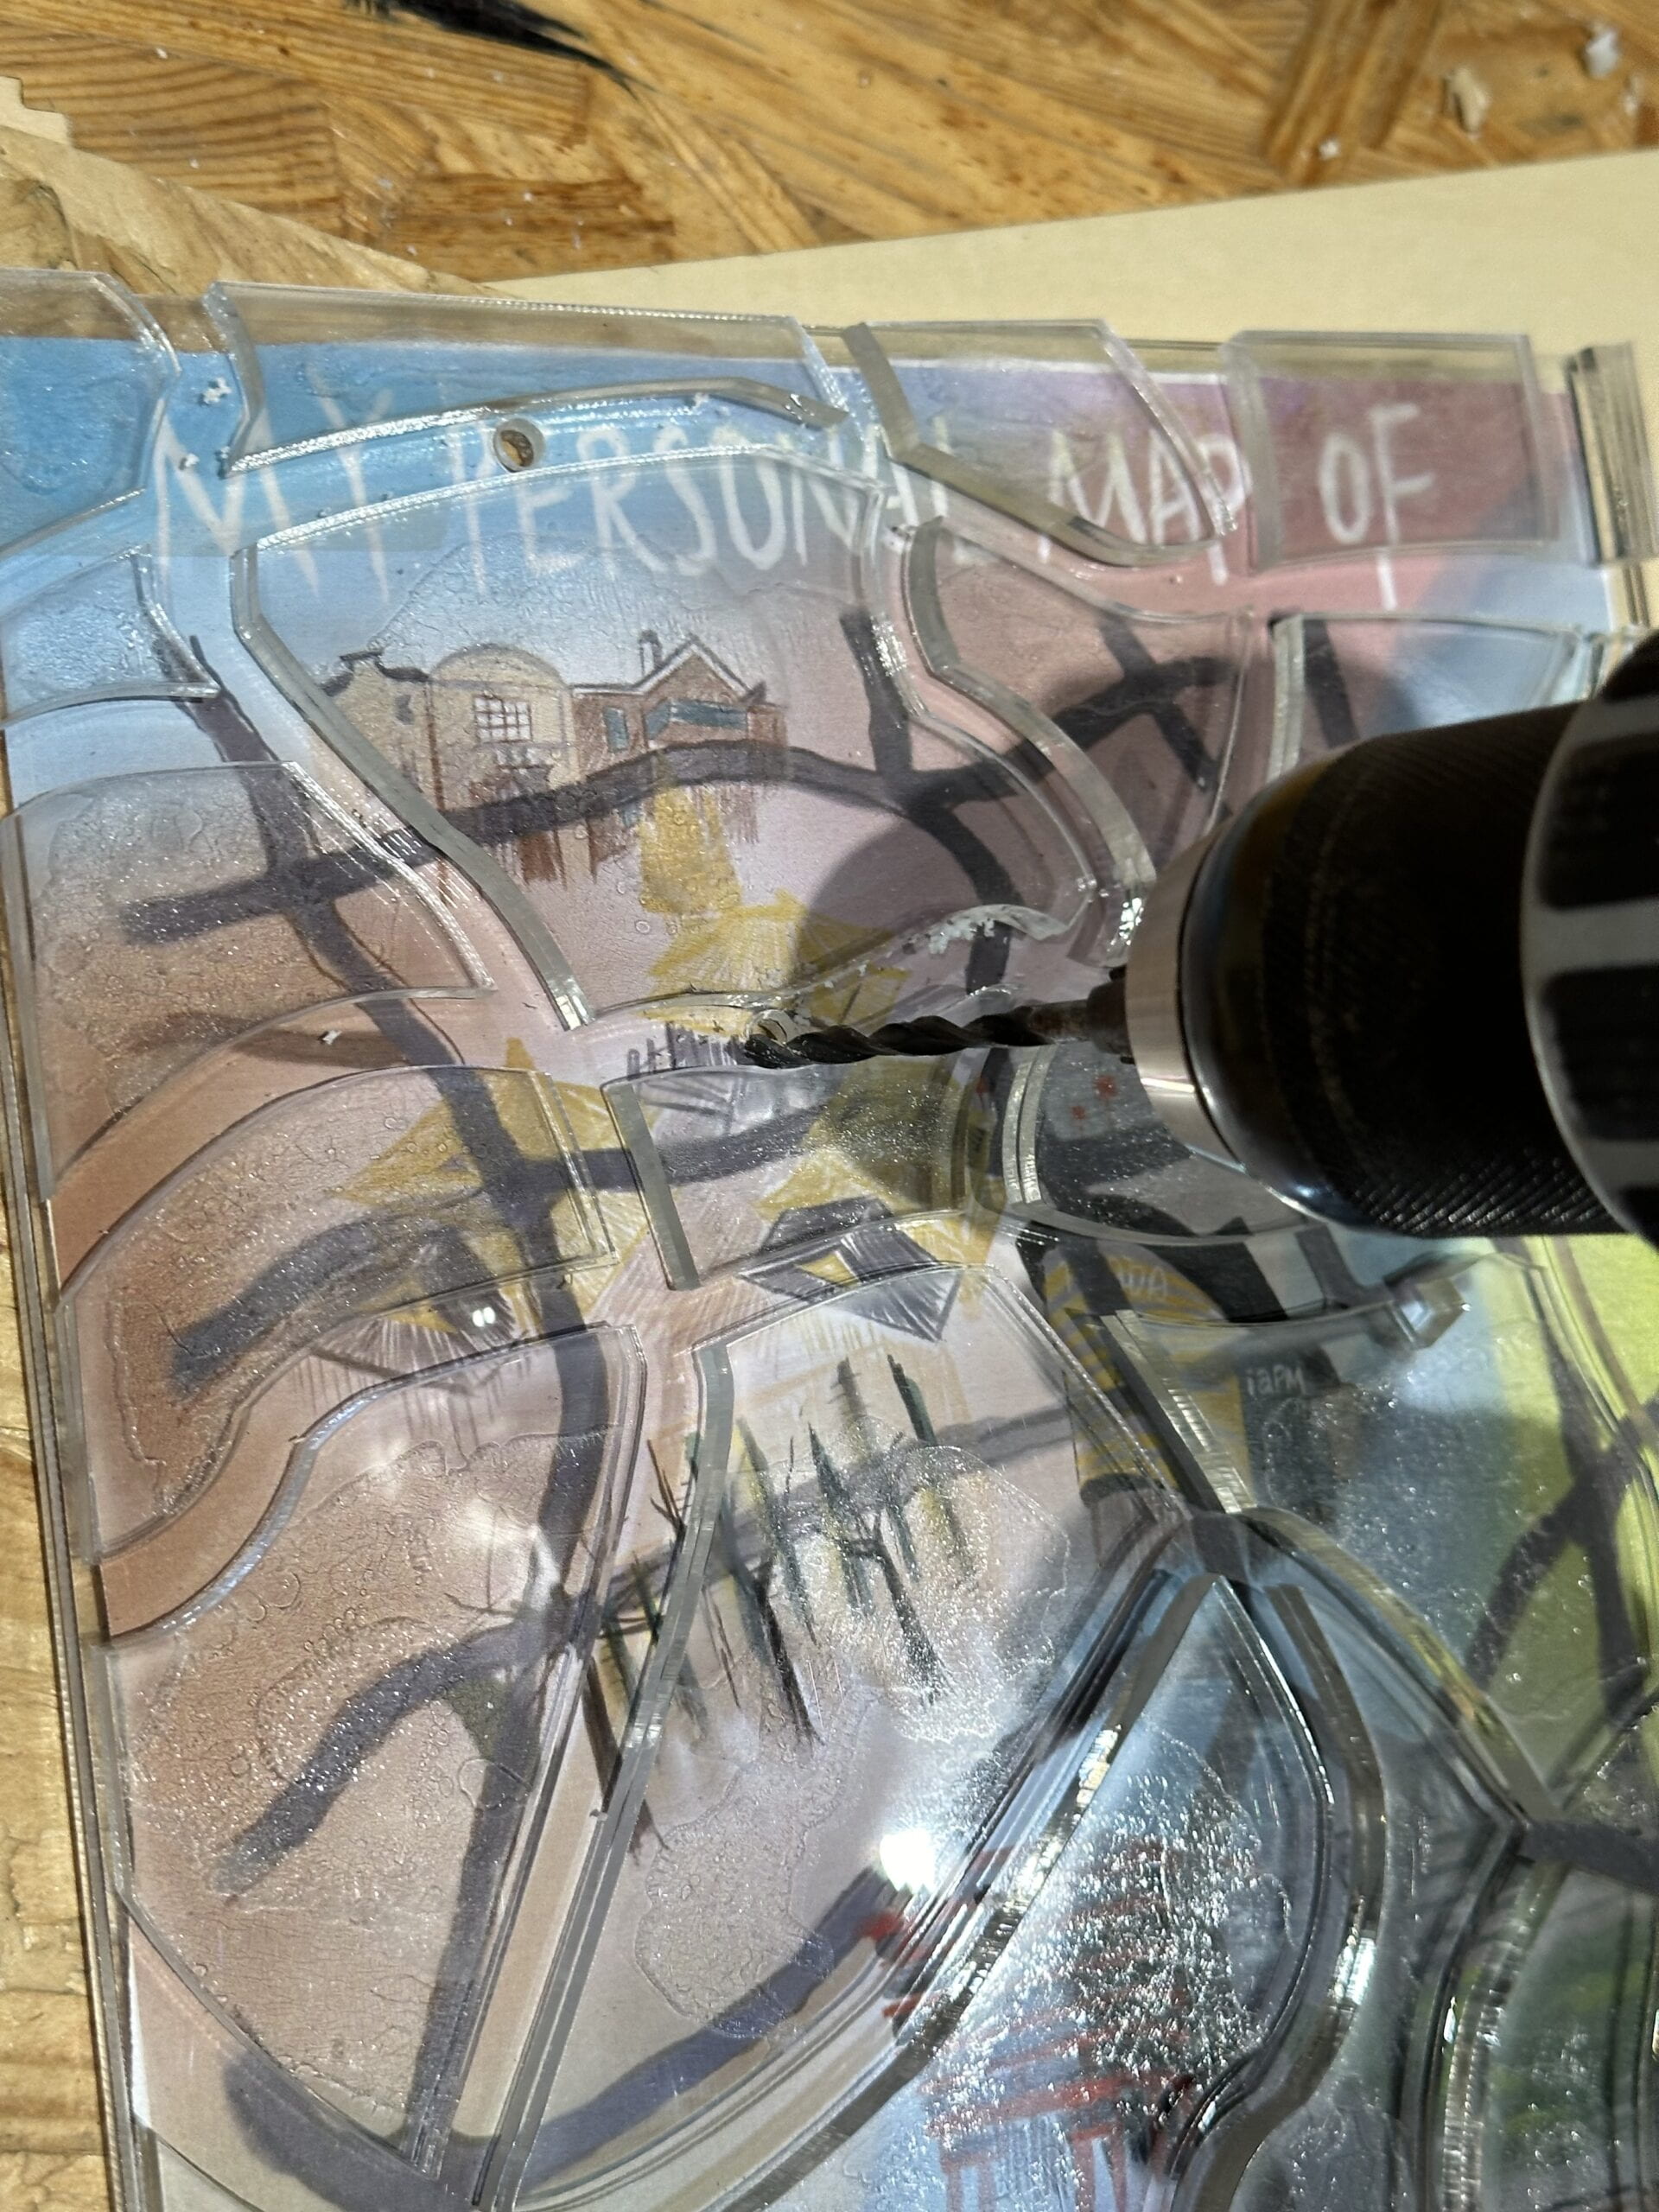
After I had finished designing, my professor helped me to transfer the file into the form which was suitable for laser cutting. Then I waited for all the parts to be cut and started glueing them together using a special kind of glue designed specifically for Acrylics. After finishing this process, I used a drill to dig holes on the “map” so that there would be enough space for the reed switches to be inserted. The process took me a long time, but I think it was worthwhile, for in this process I not only got more familiar with my project but also gained a lot of practical knowledge of making things by hand.
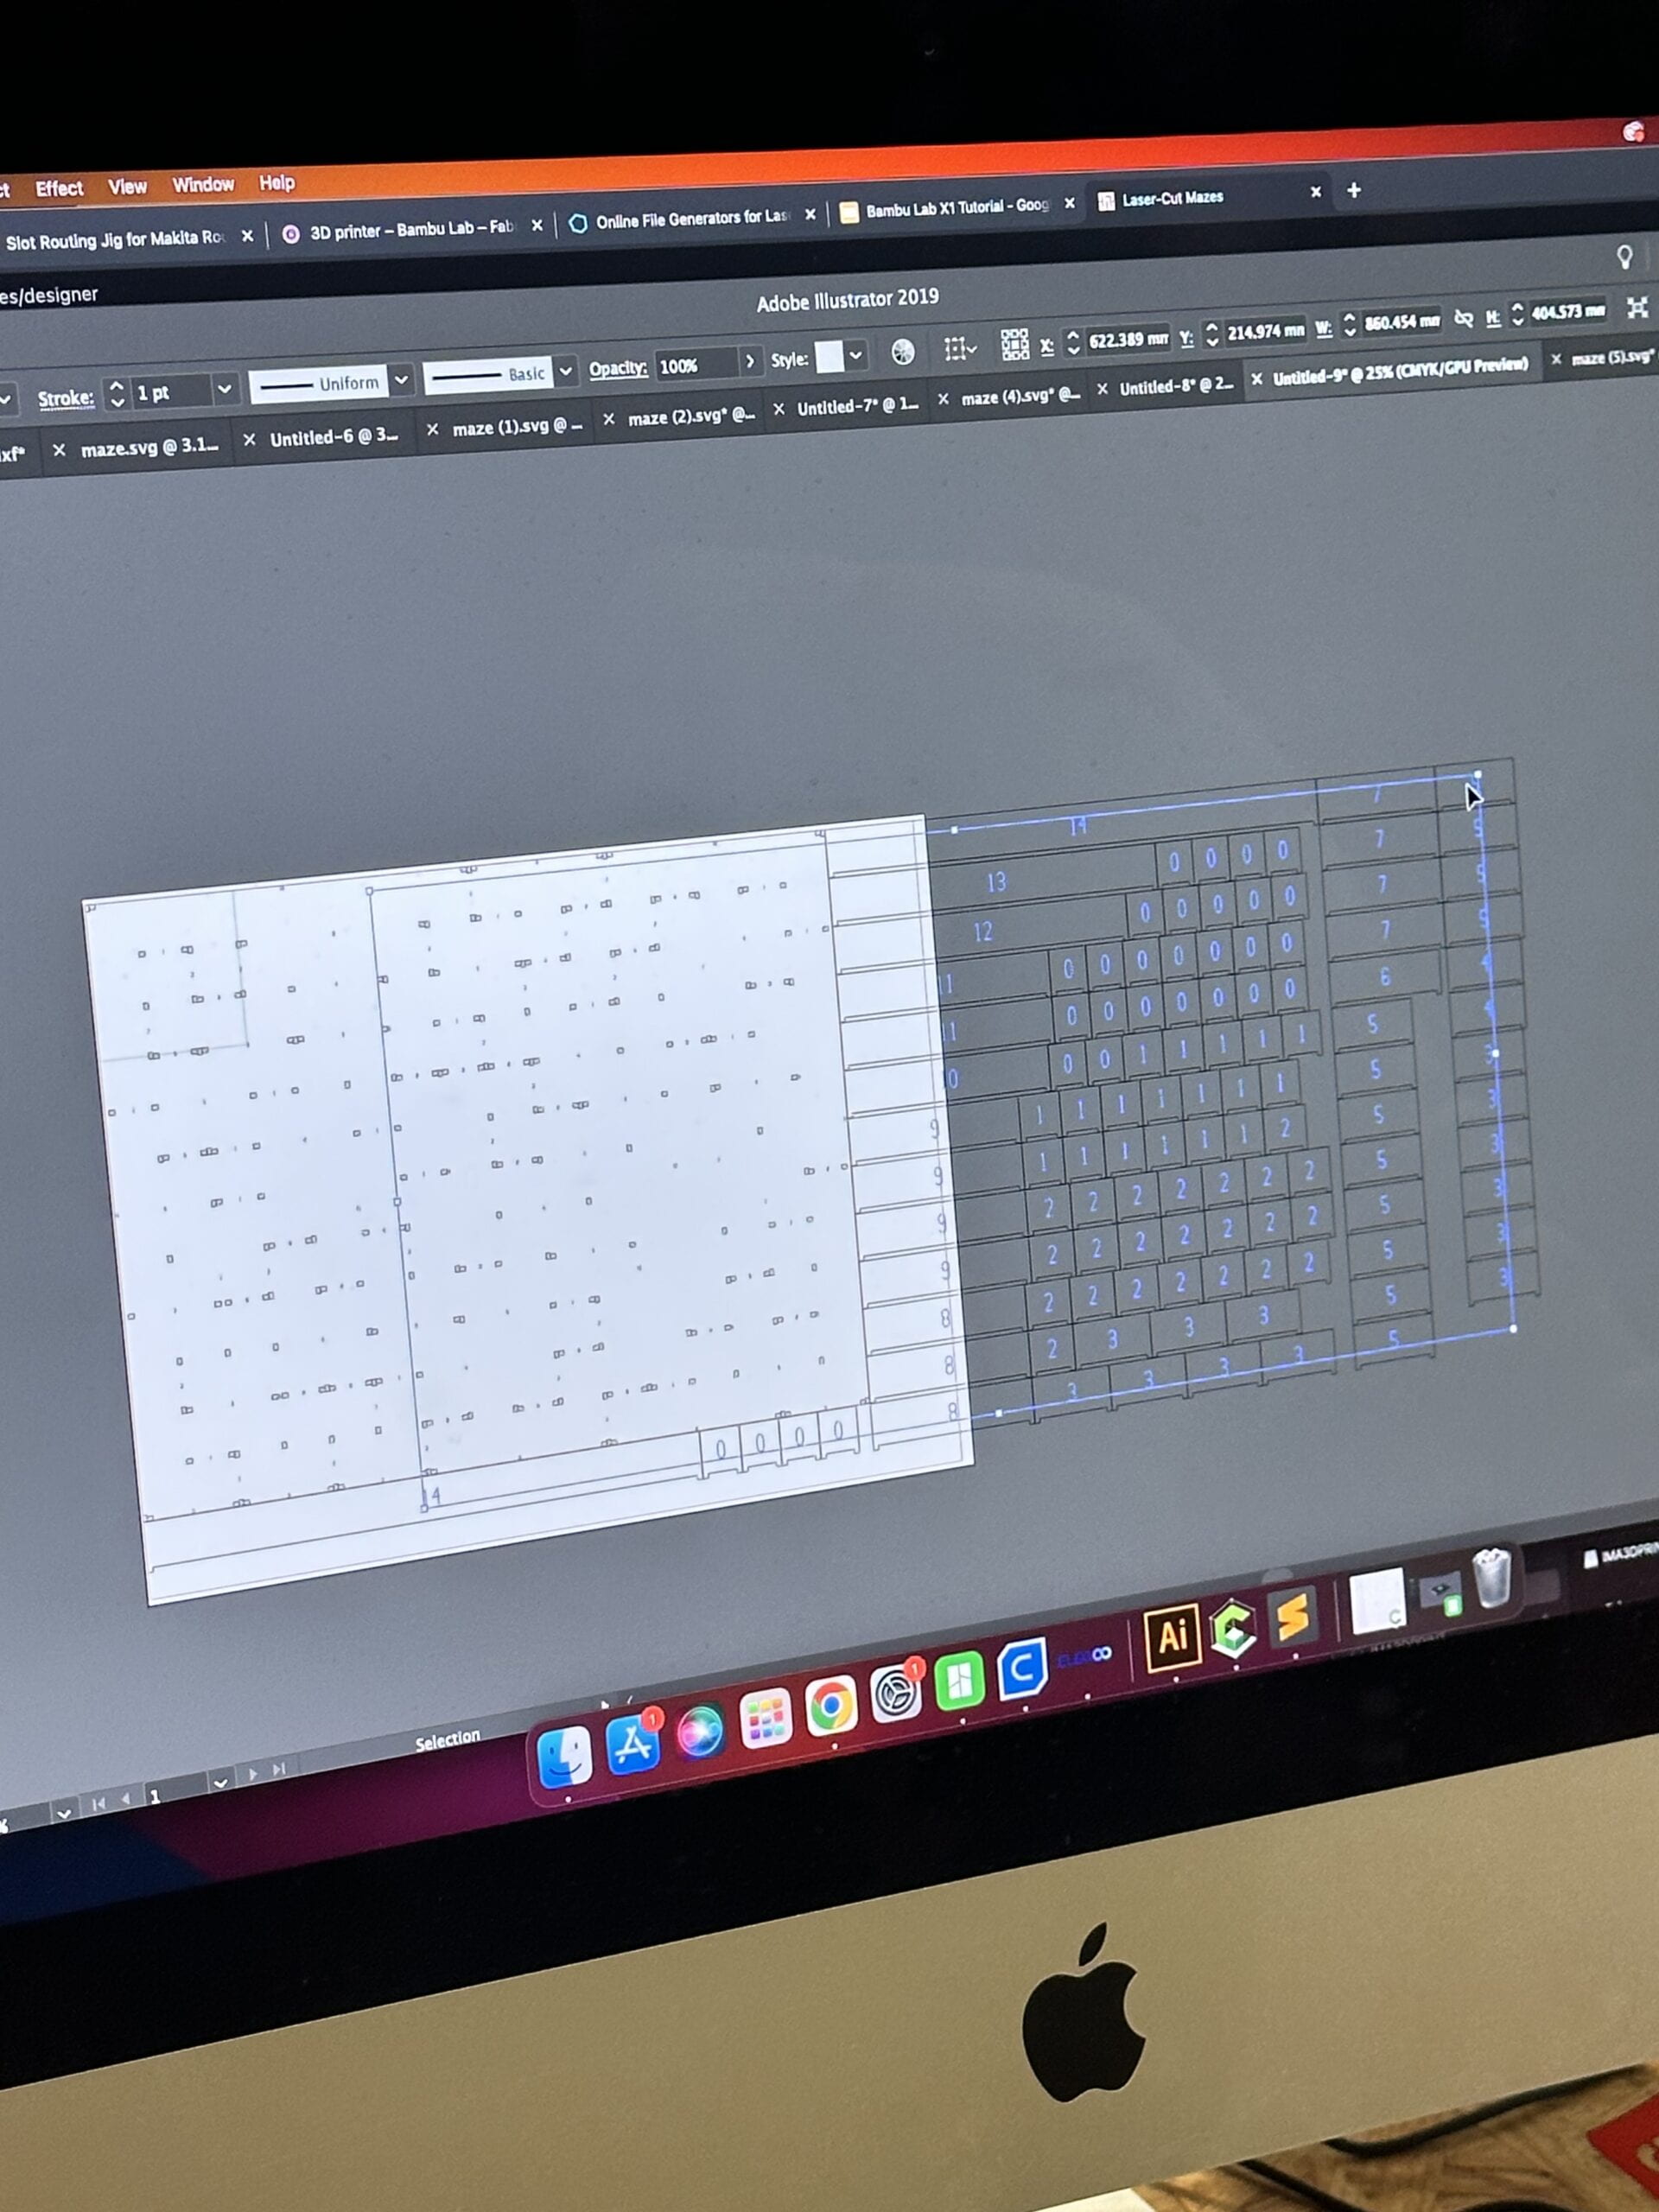
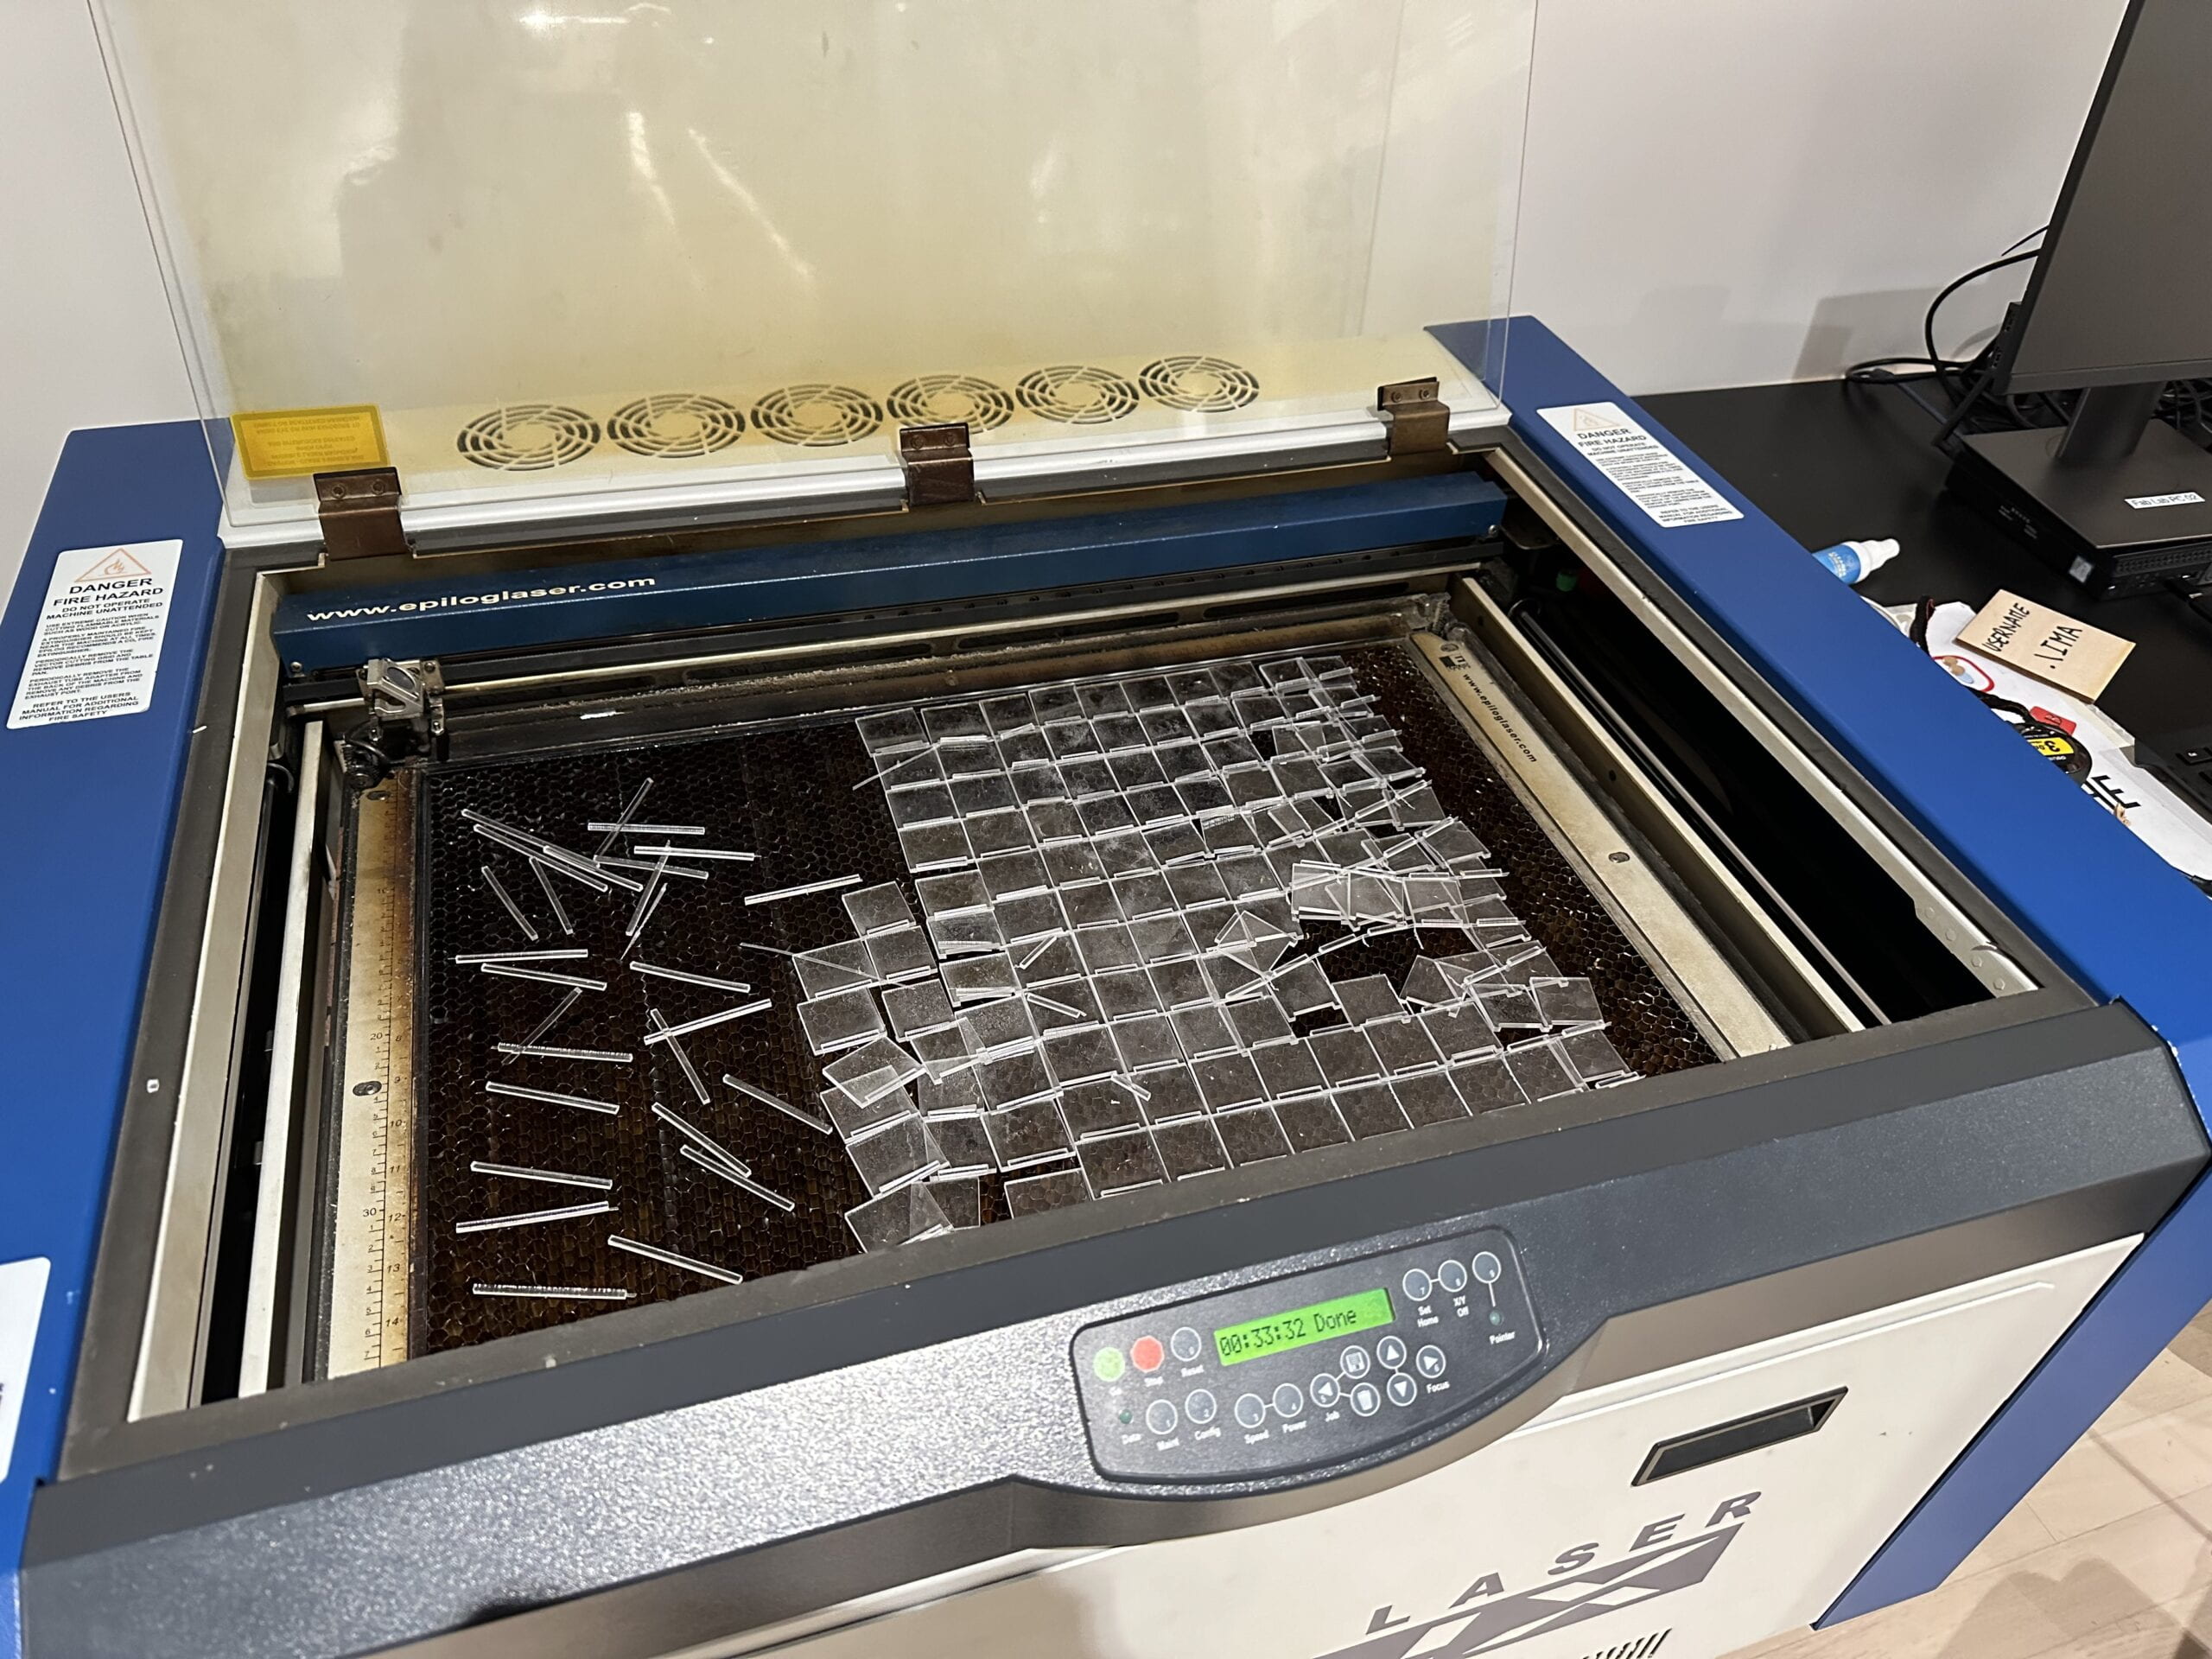
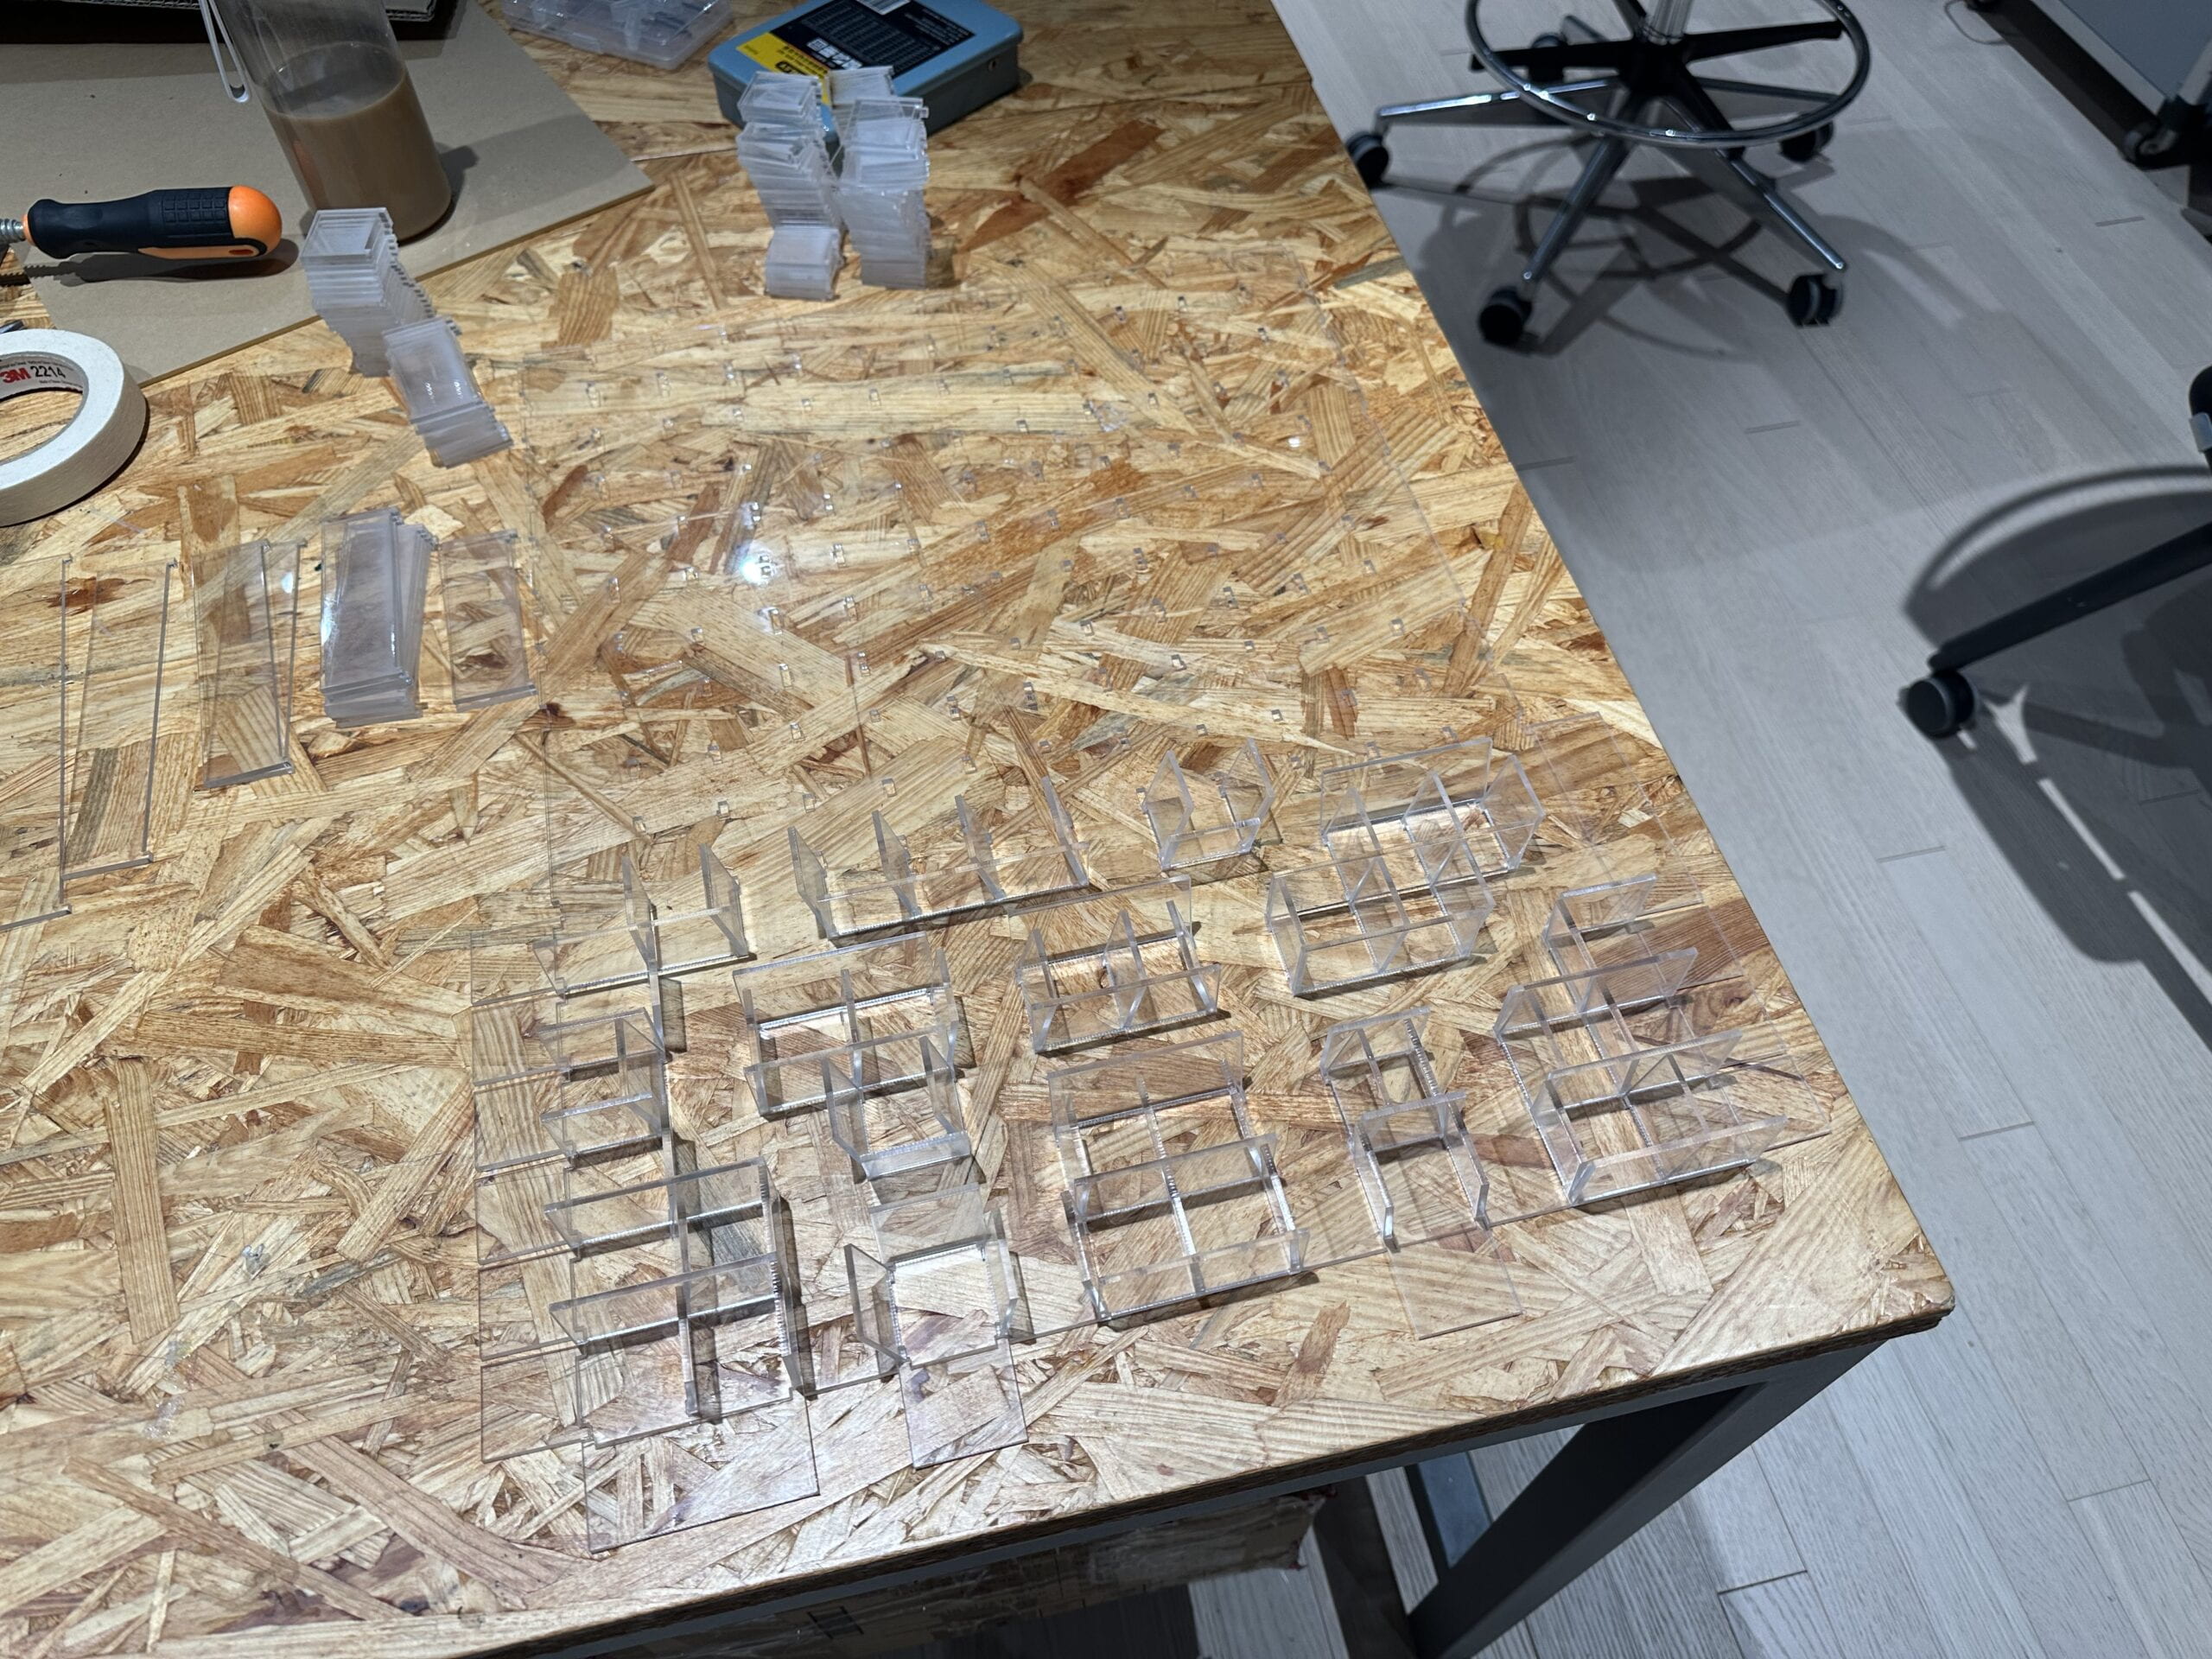
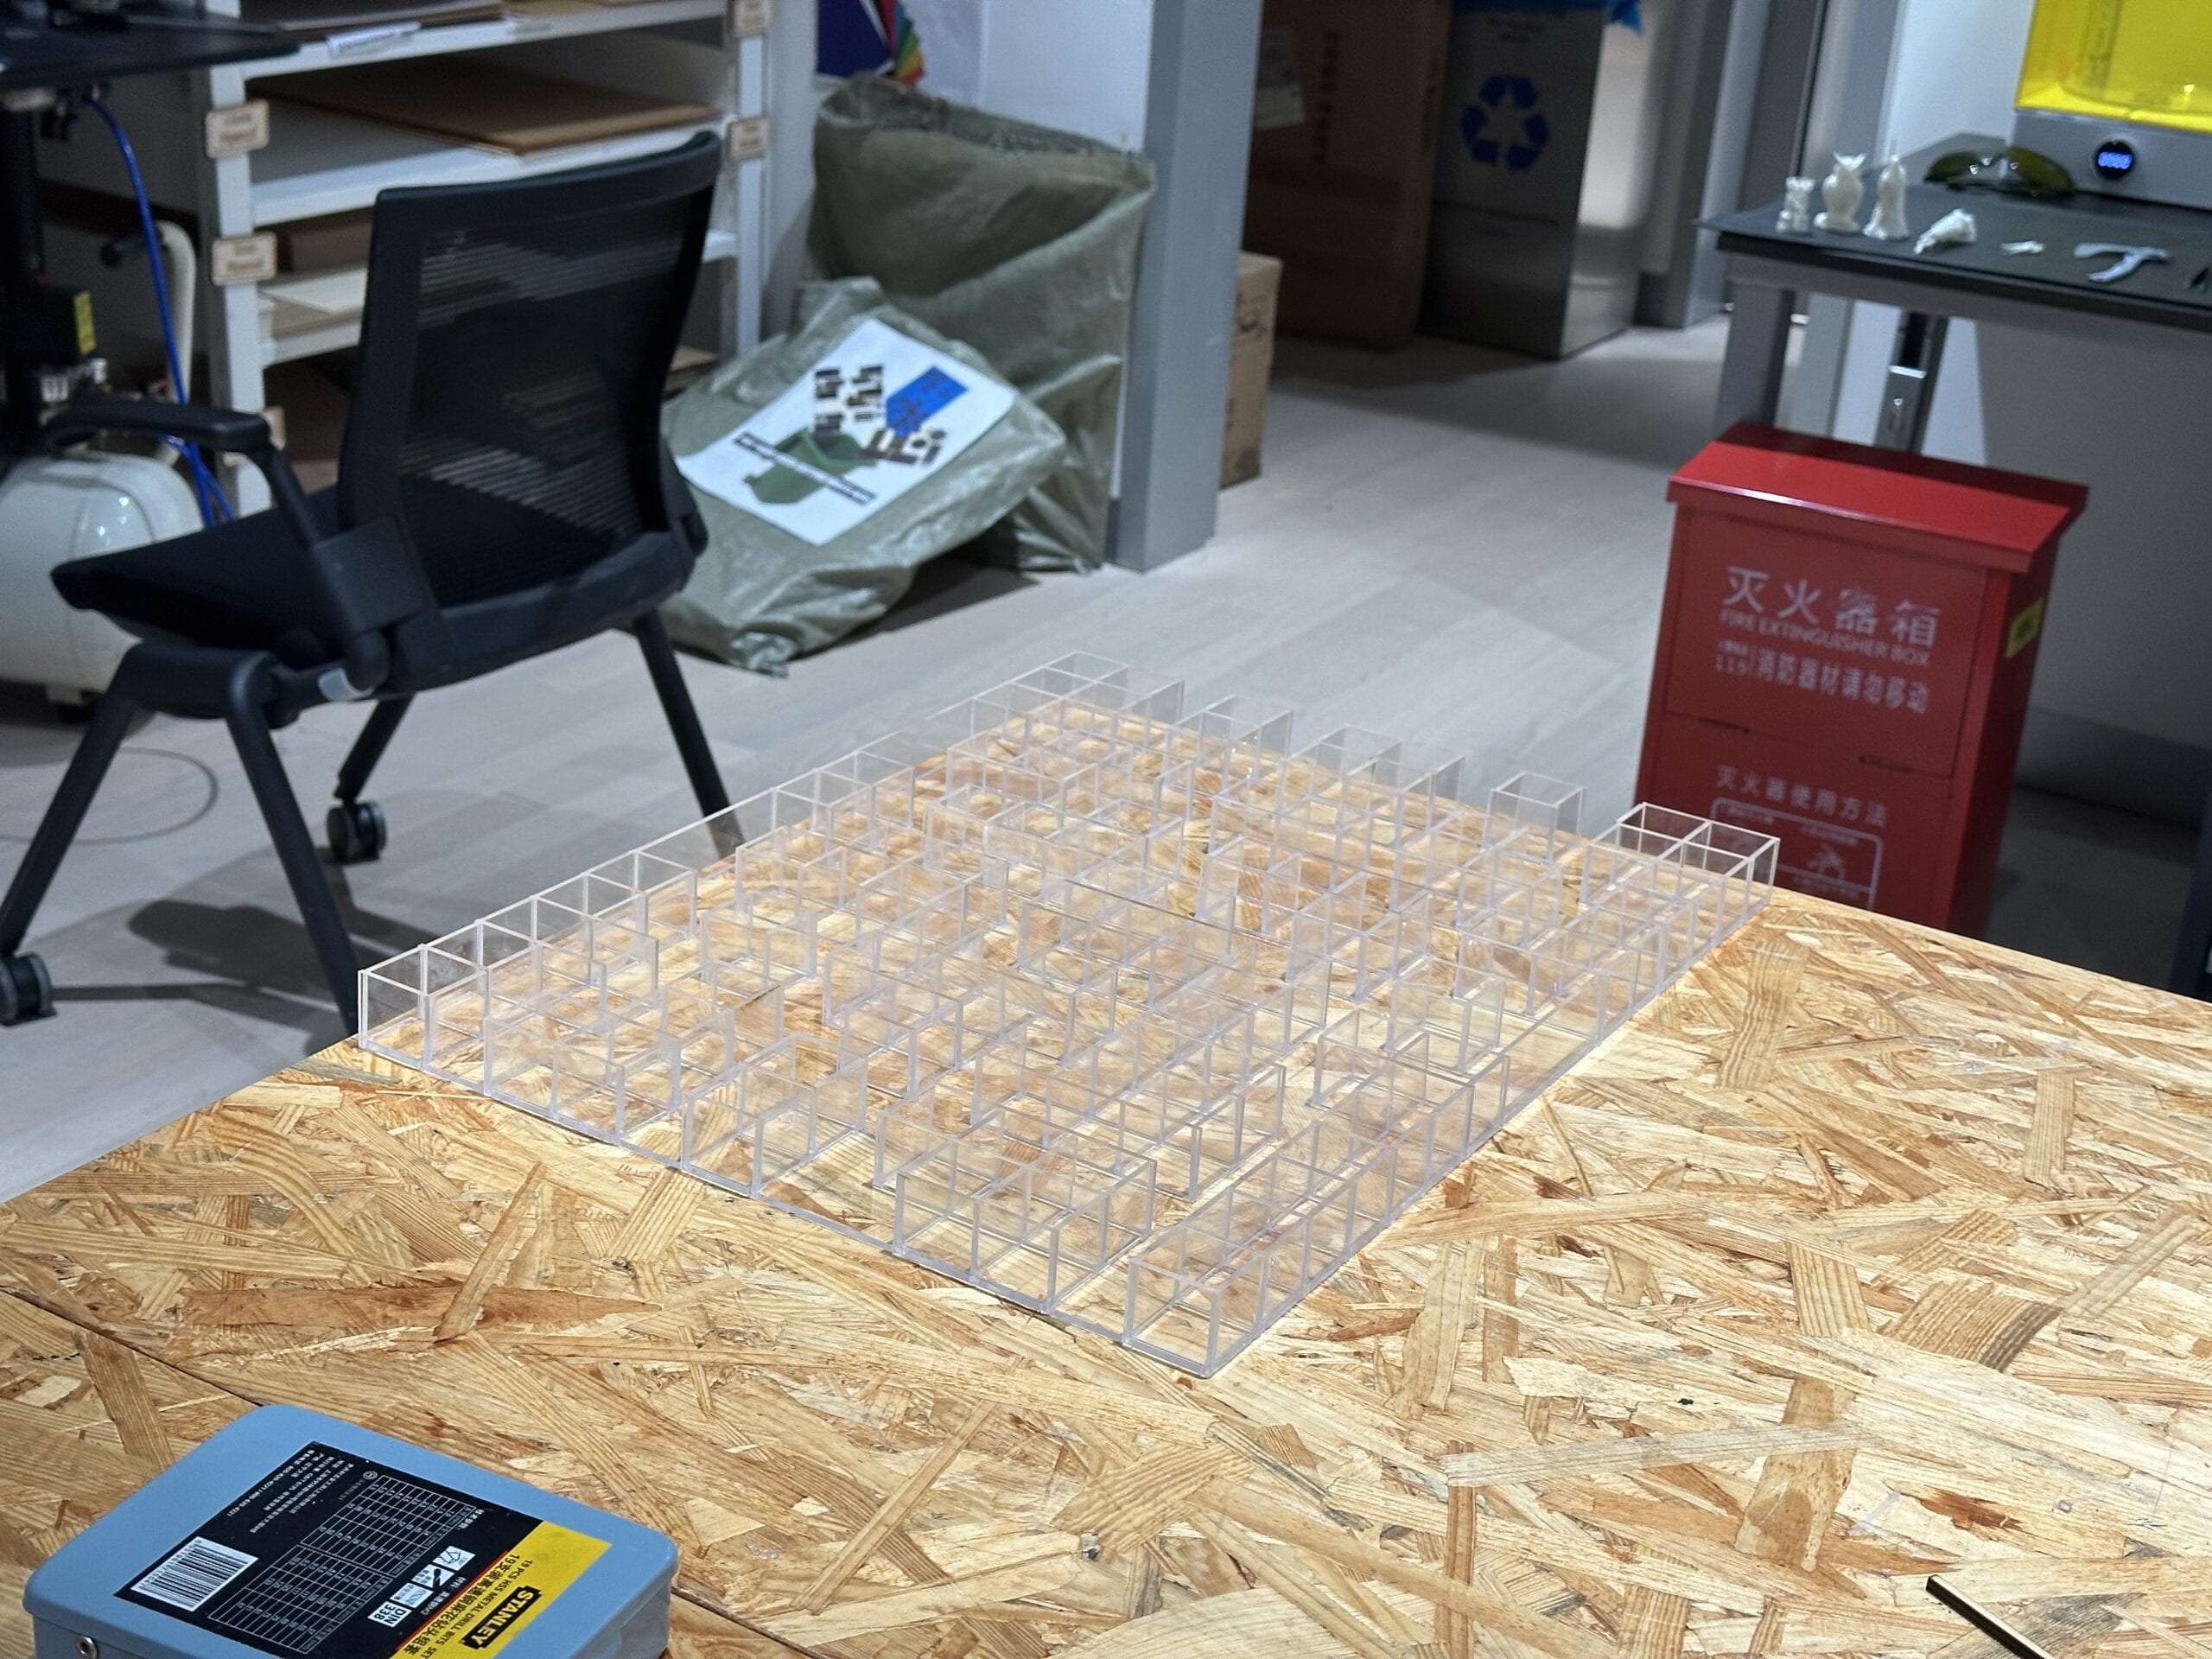
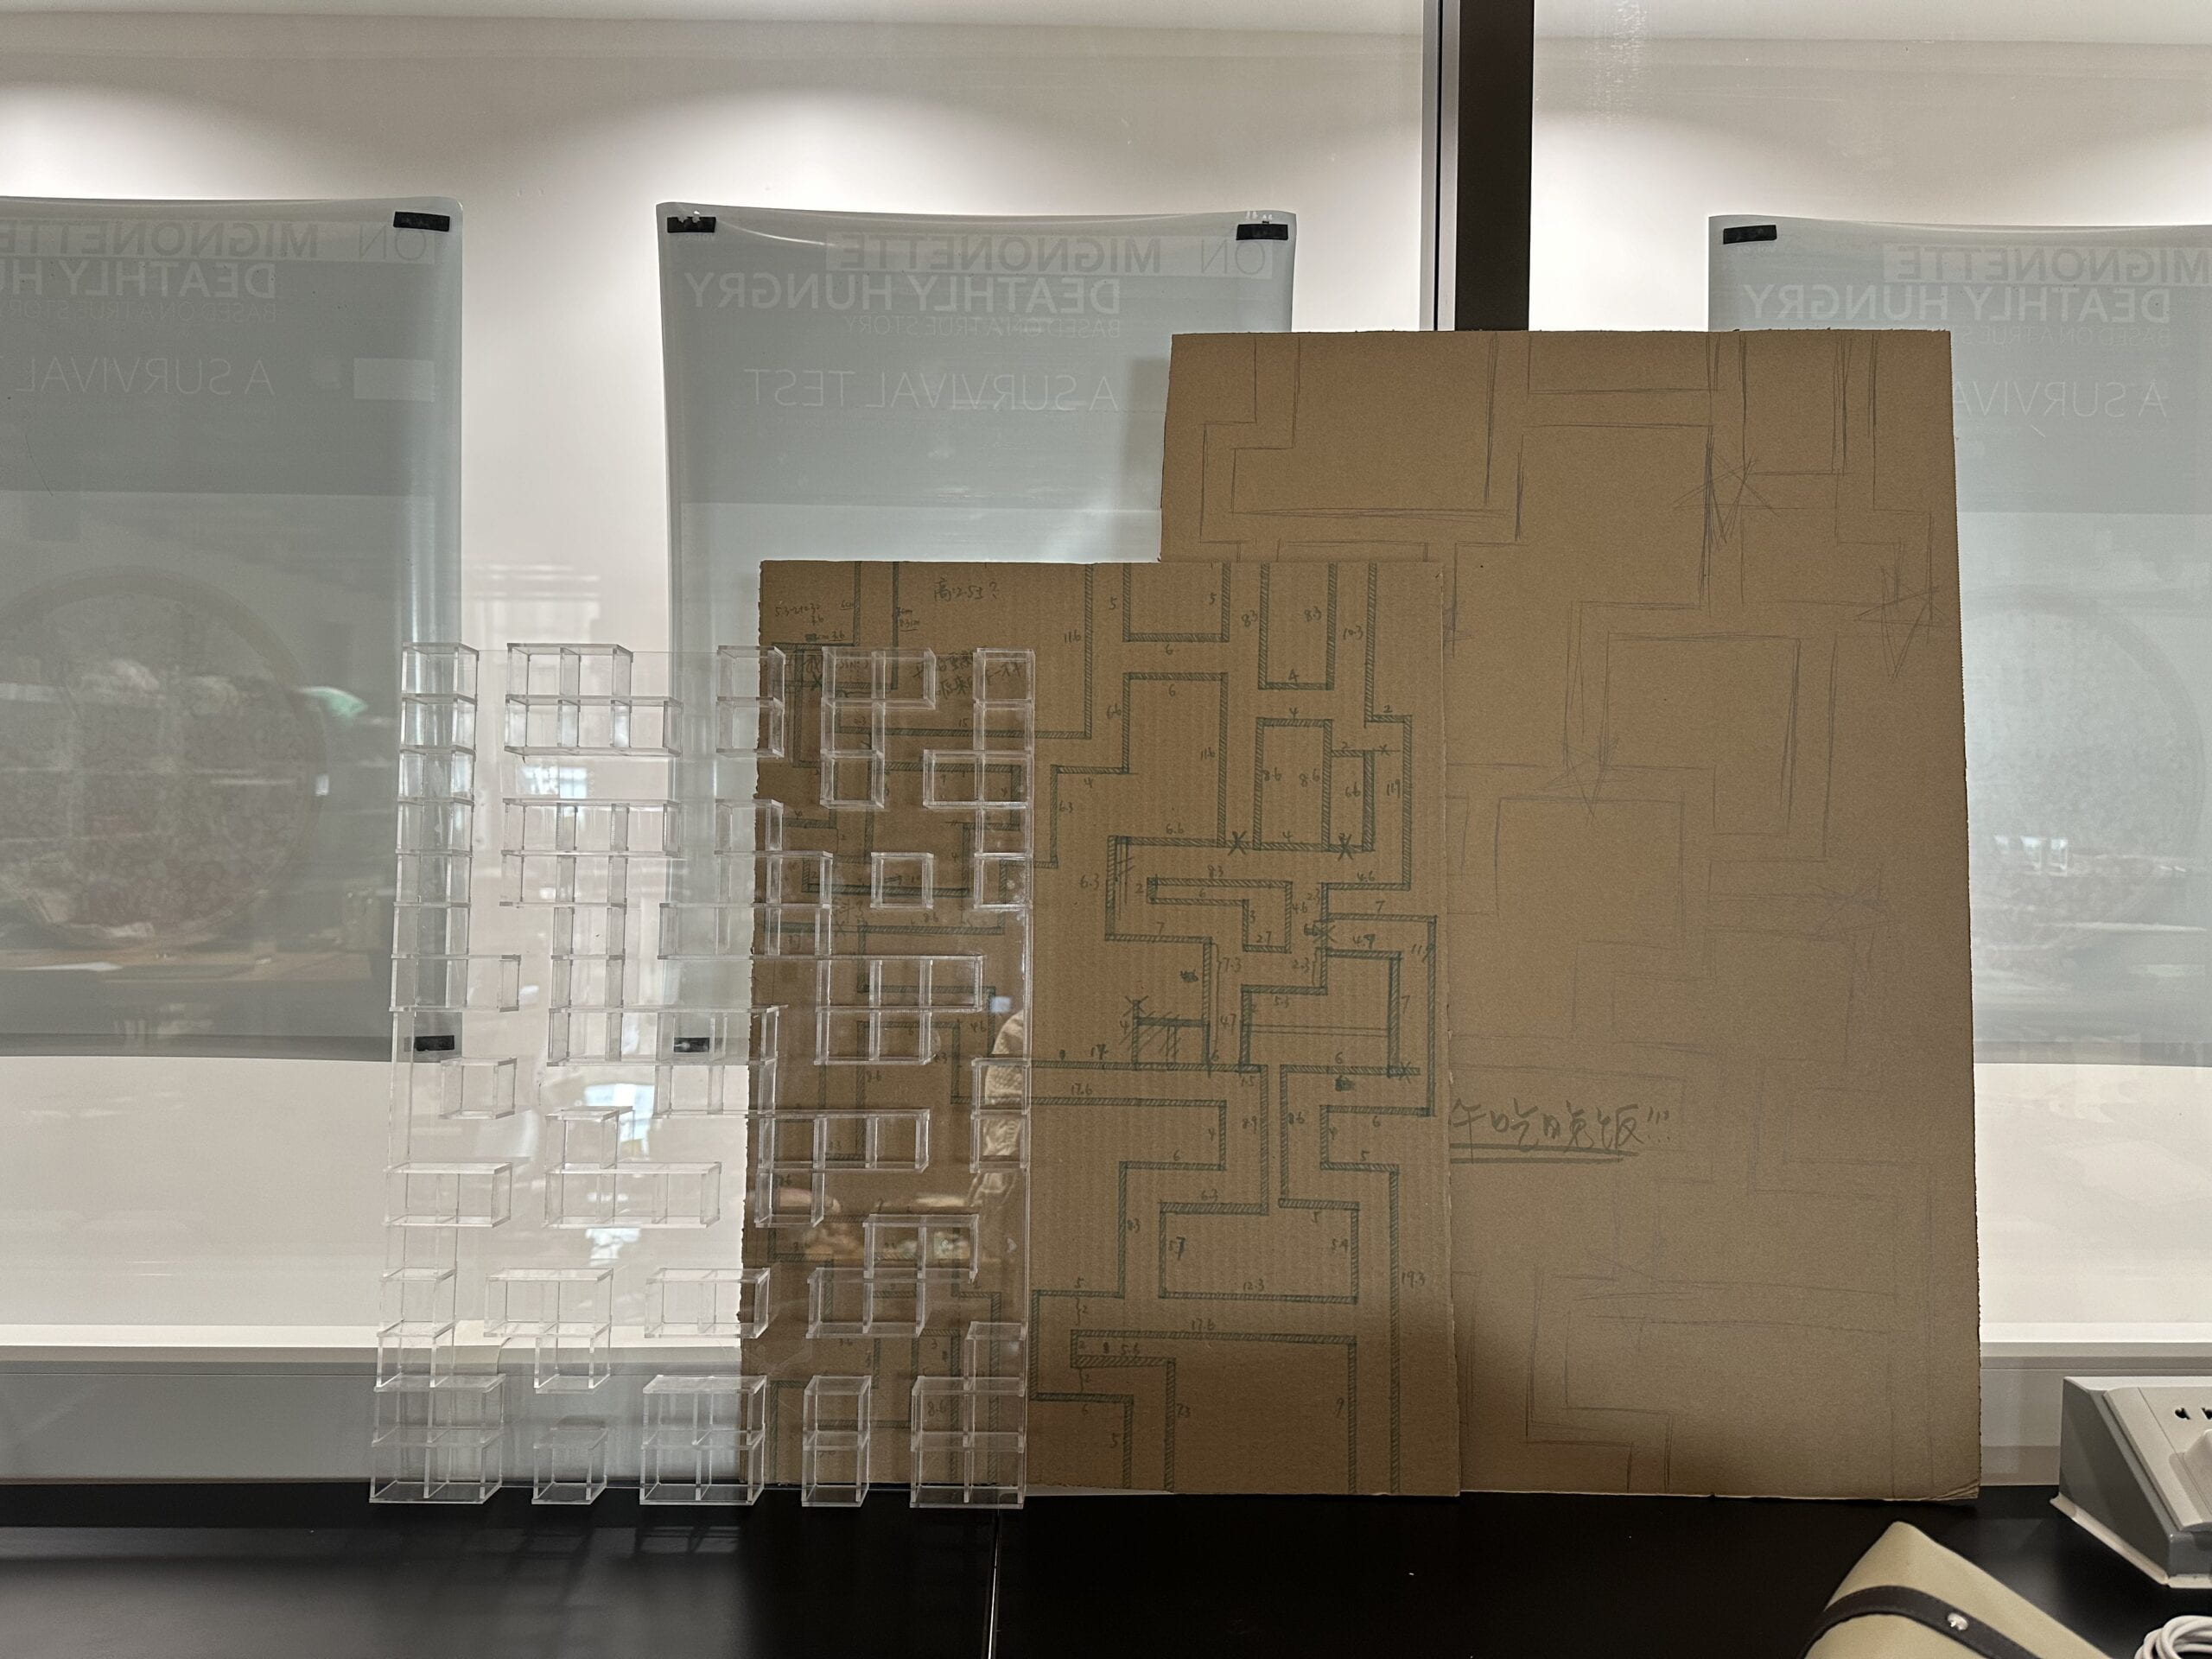
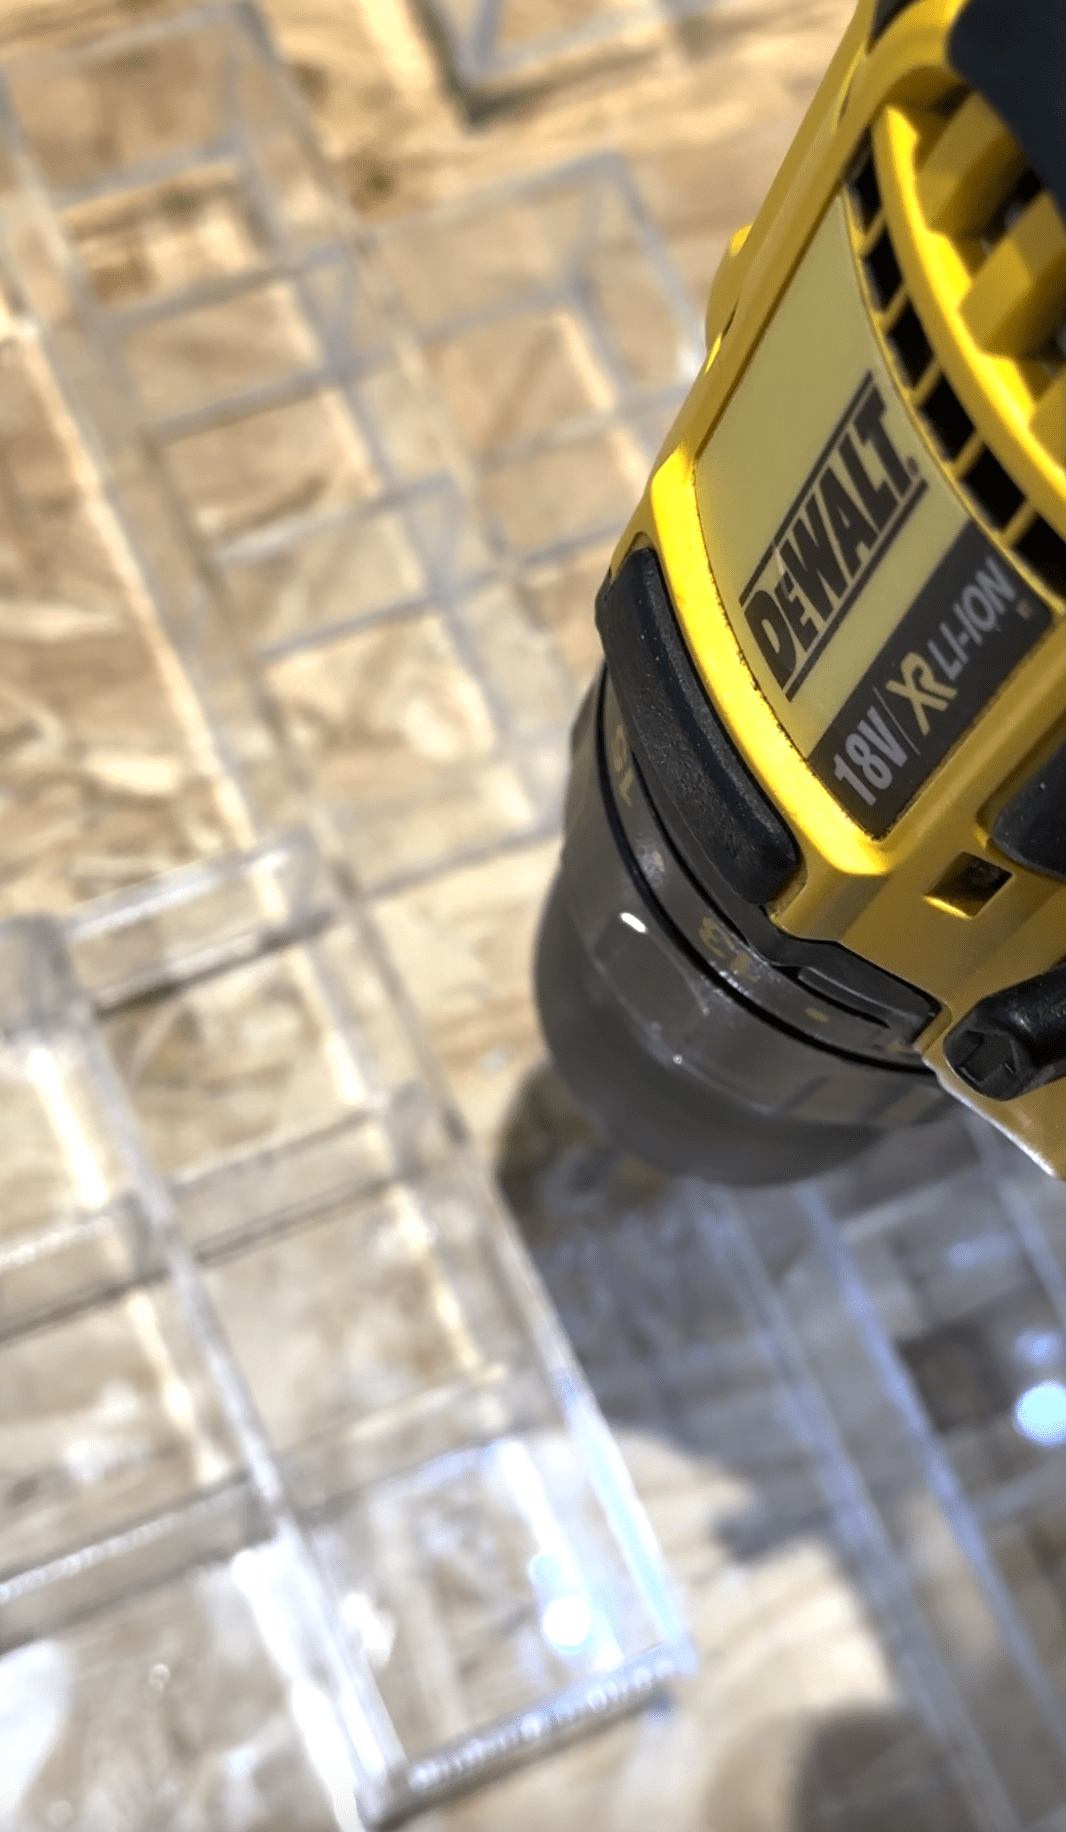
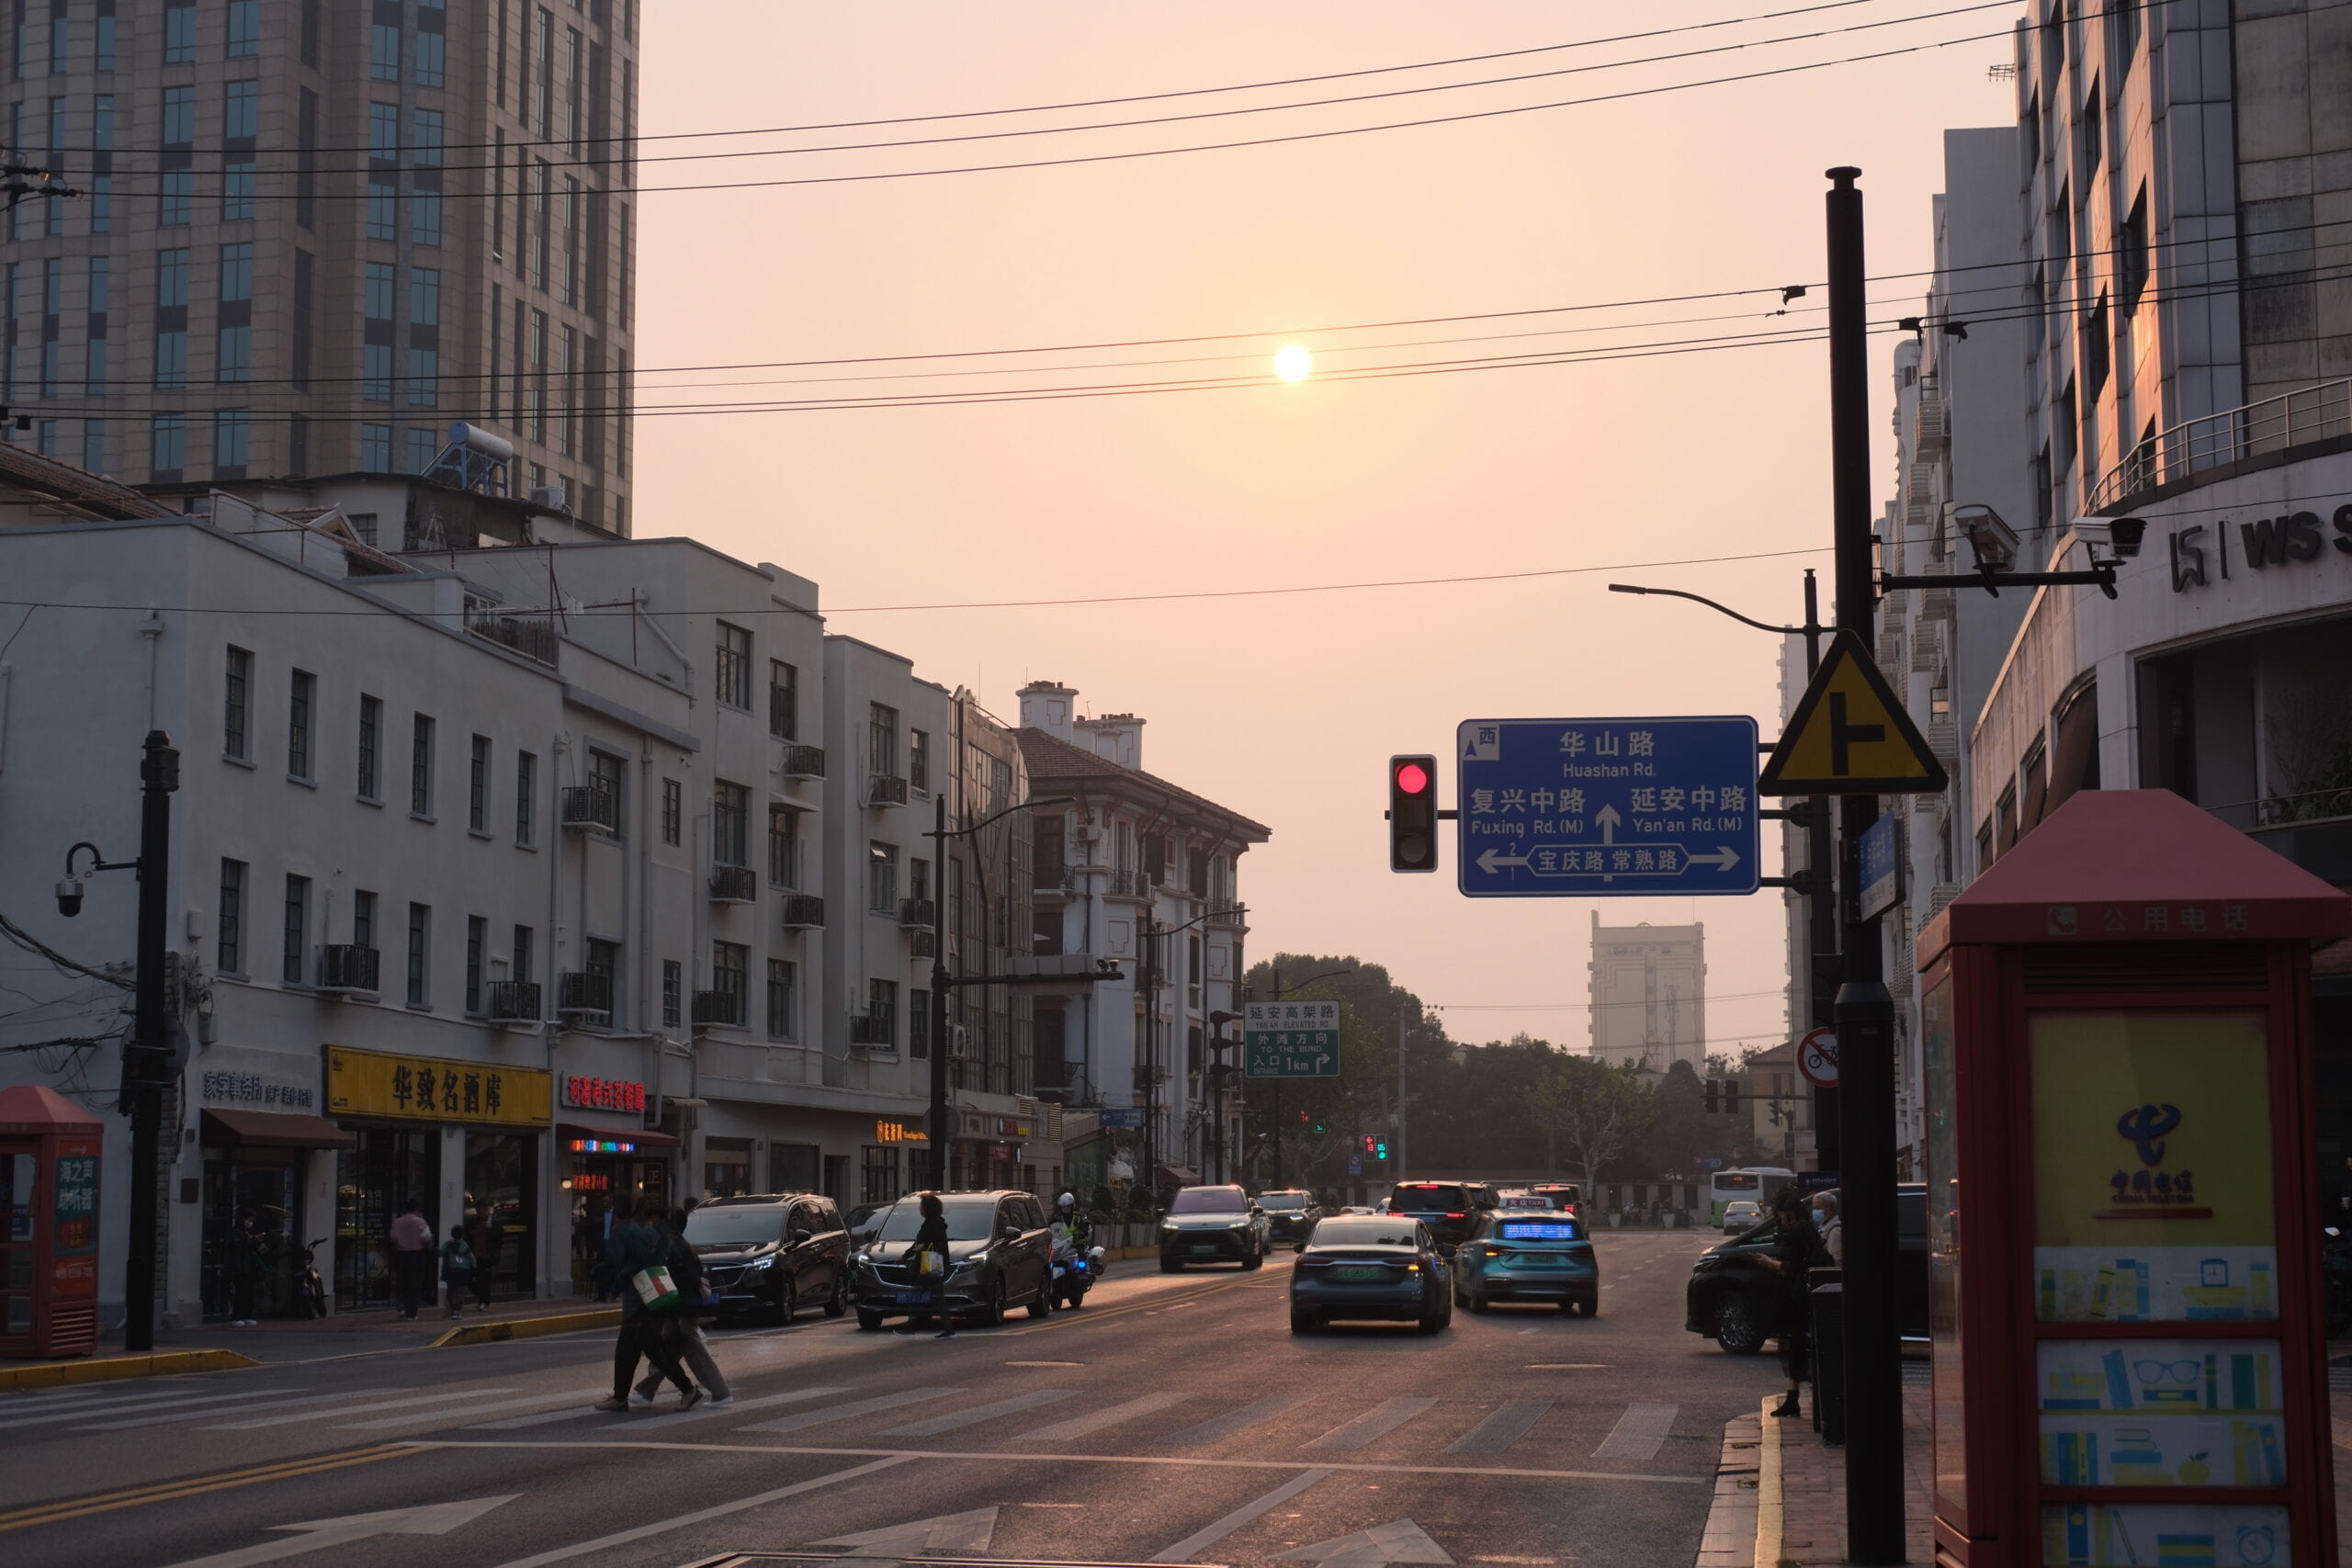
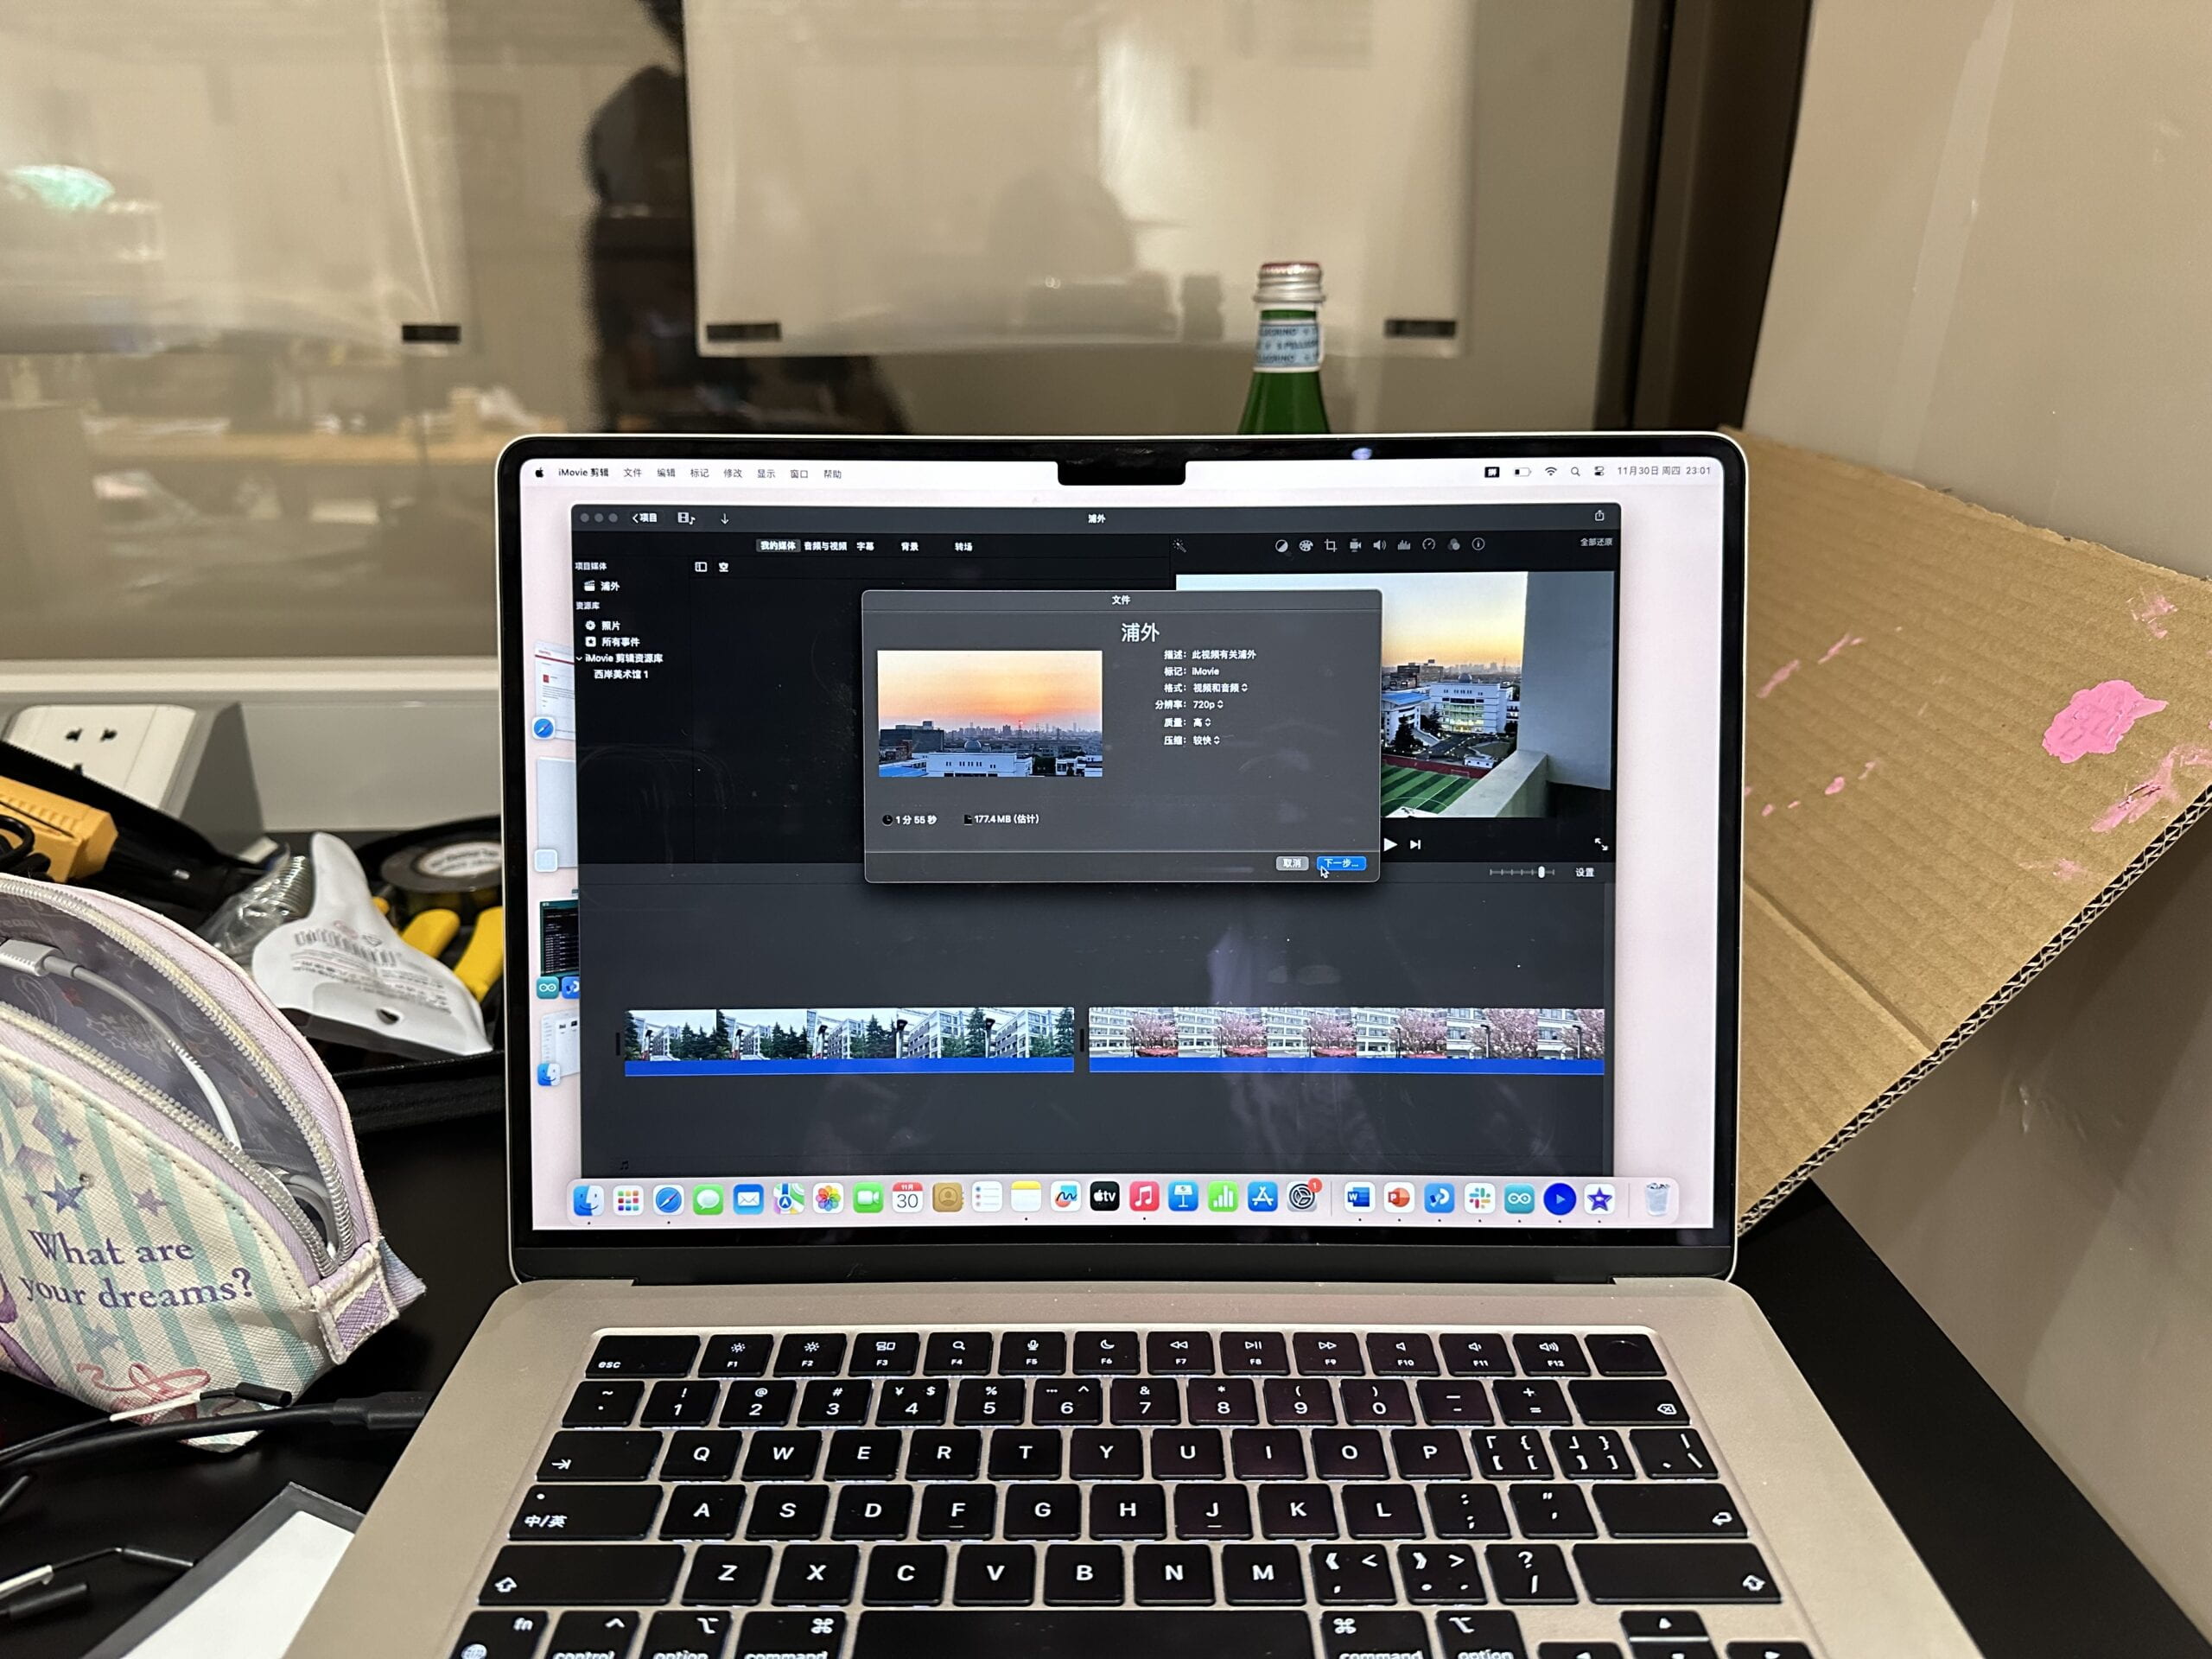
Up till now, I had finished the physical fabrication part of my first version. As my project was a “personal” map of Shanghai and I had decided to make it like a digital album of my own, I should also record the videos on my own, which meant that I had to tour around the city, choose the specific places that meant a lot to me, learn video editing, and finally make my own videos of these places. This was a very challenging task to me because I had never learned video editing before. However, I finally mastered the skill and managed to finish this crucial part of my project!
Below are two of the photographs I took on that day.

2. Digital Part
I had decided to use the reed switches very early, so when I was making the physical part of the project, I already dug the hole for the reed switches, and left the wiring and coding part until I had finished the fabrication part.
I searched online for the proper usage of reed switches, and also asked my professor. He told me that the reed switches worked very similar to the buttons and also needed a pull-down resistor. Thus, I tried by myself and made the circuit for all six sensors. (My goal was to use ten sensors but I ran out of time before the user testing day, so I only used six at this time.)
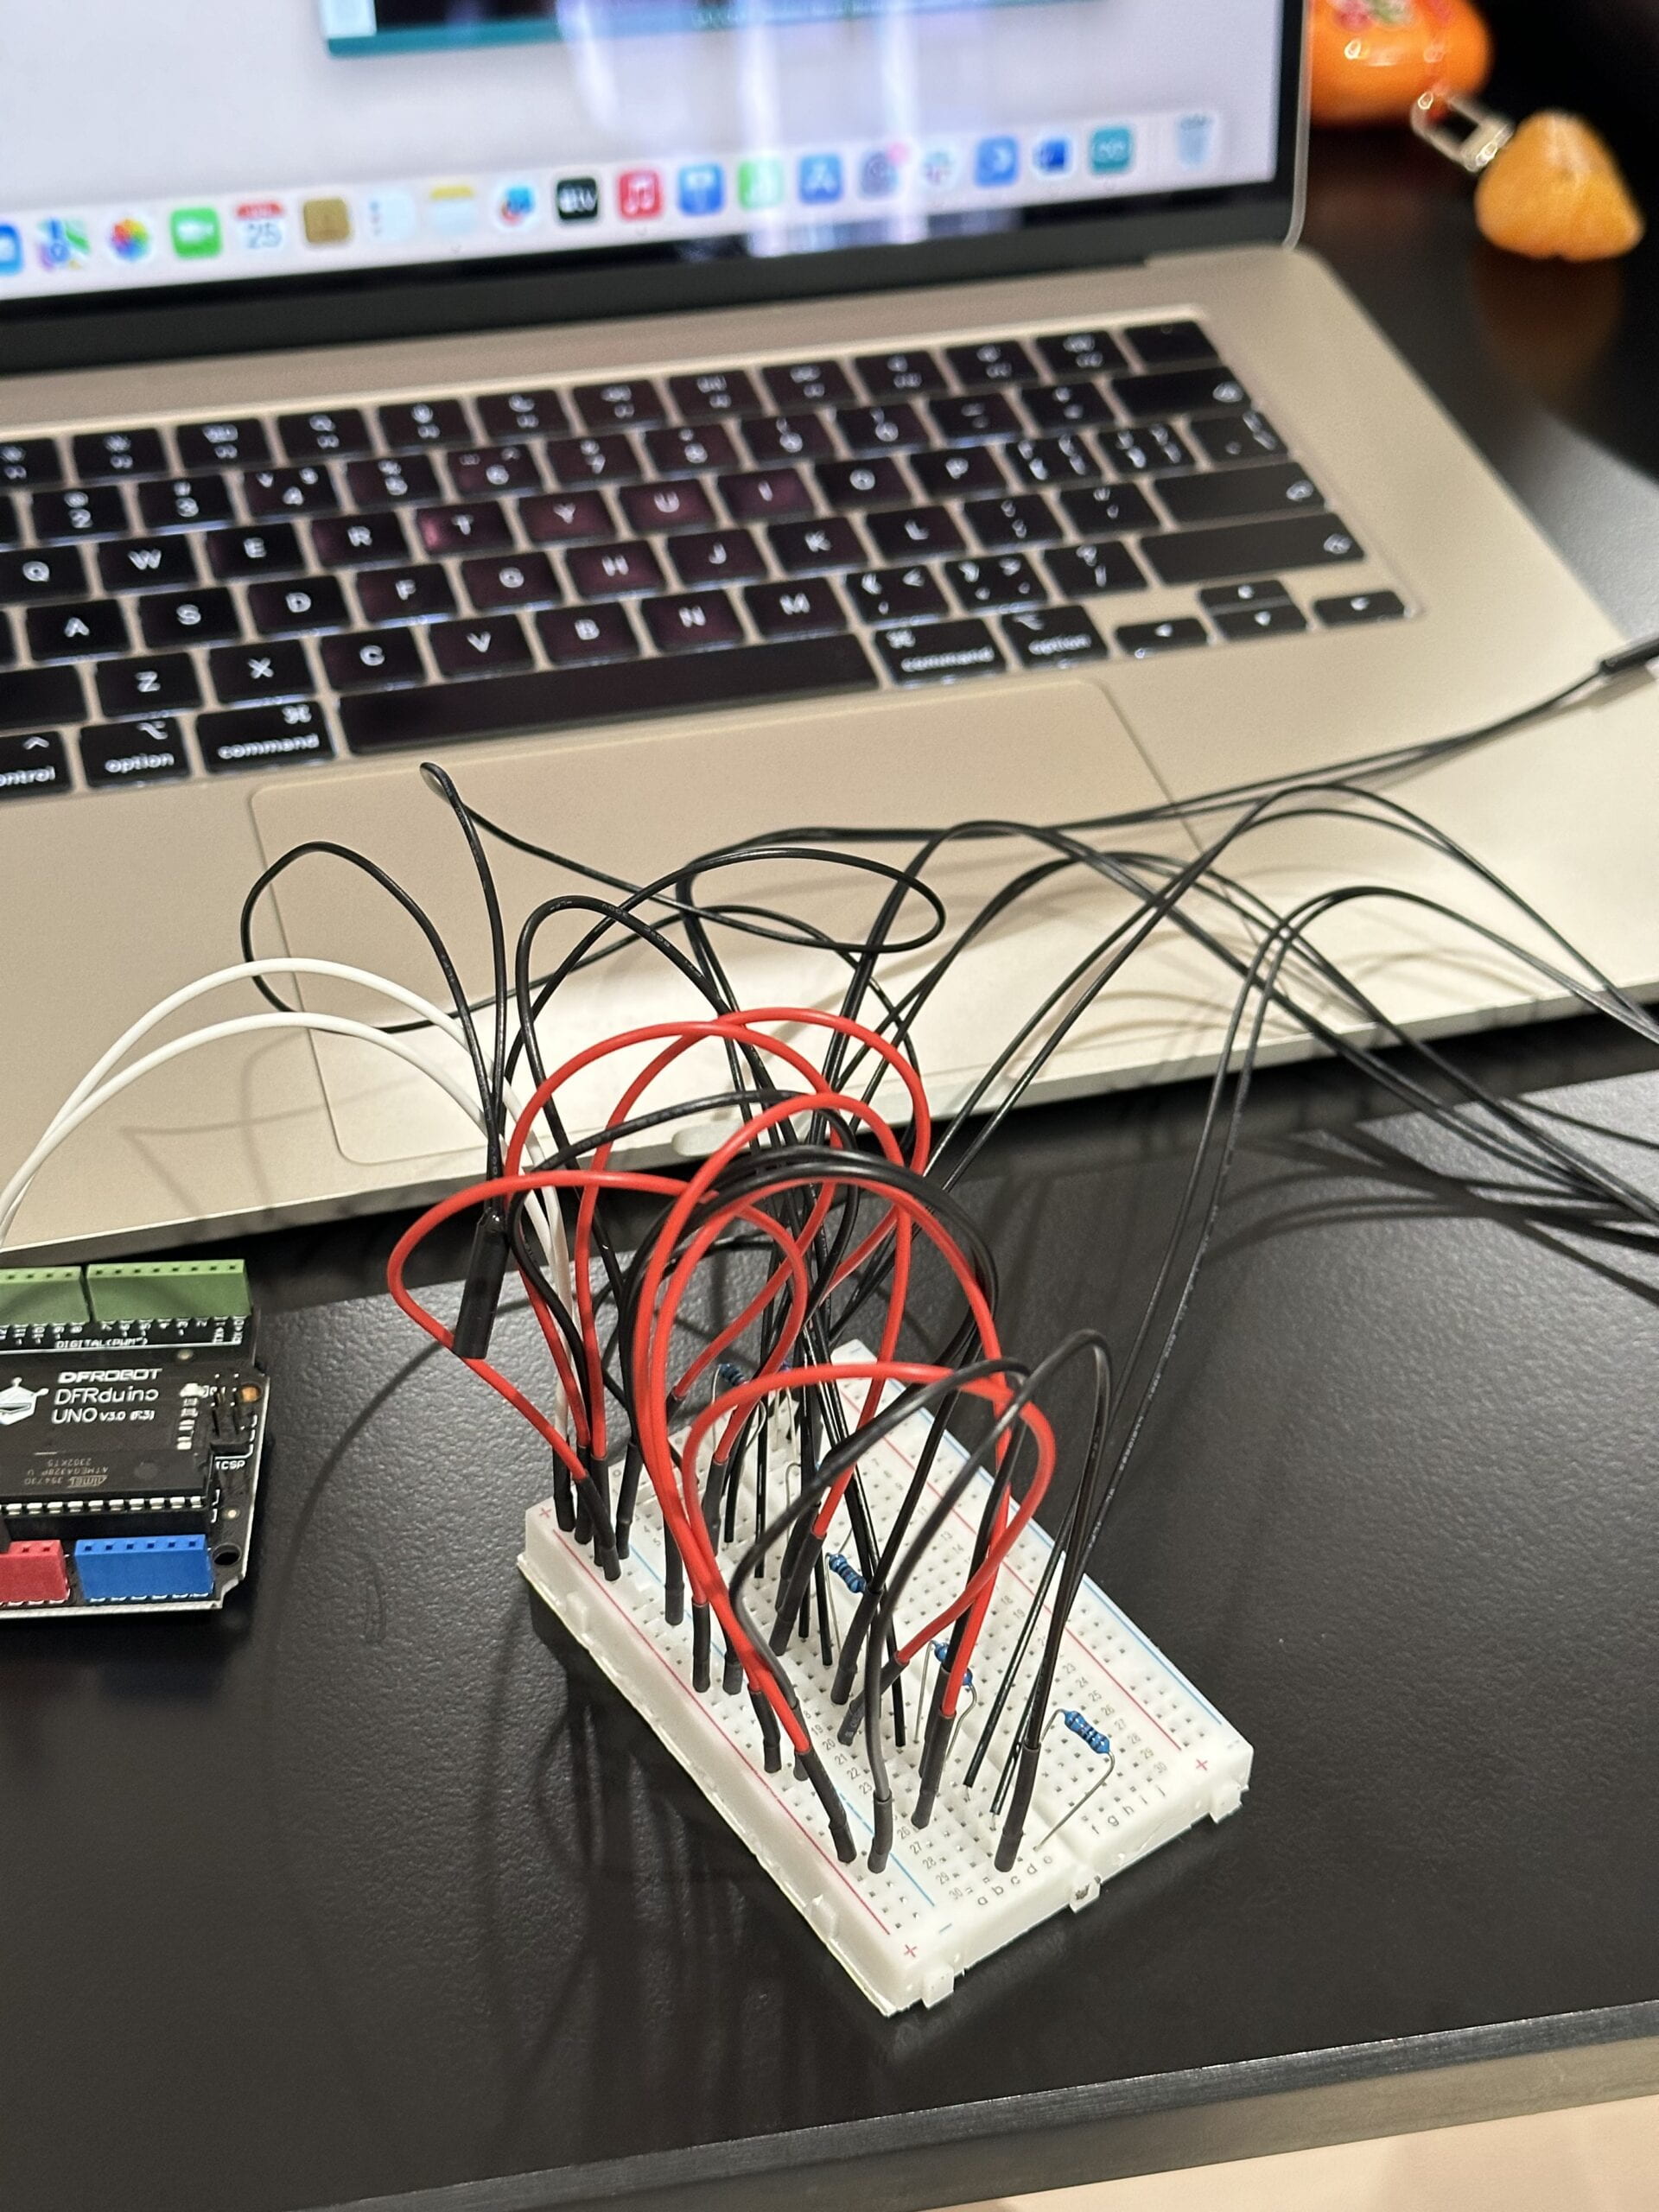
Then it came to the coding part which I fear the most. I had never used reed switches before and didn’t practice it in class, so I had no experience about how to use it. For the Arduino part it was relatively easy for me, because I referred to our past class slides for reference, and basically I only need to write “Serial.begin(9600)” in the void setup() and “int sensor x = digitalRead(x)” in the void loop().
The Processing part was challenging for me, and I asked two fellows for help. According to them, I should first use the import function to introduce the serial and the video and then use int to introduce the number of the variables. In the void setup(), I should not only define the size and background of my videos, but also use the printArray function to play the videos. In the void draw() section, after writing an important line called “getSerialData()”, I should use the if() statement to create conditions for the videos to be played. Before uploading, I should upload the videos I made into the data folder in the processing file.
One problem I encountered in this phase was that after uploading the code, the videos were being played in a very chaotic way. We checked the code and began to try modifying it in various ways to figure out what was wrong. We finally found out that it was because we at first wrote “delay(20)” in the Arduino code, and this would cause a short pause before each video was played, thus resulting in the problem we encountered. I gained a lot from this experience, and next time if I want to play a video in Processing, I should be more cautious with the delay() !
Below is the code of Arduino and Processing that I used in the user testing day.
void setup() {
  Serial.begin(9600);
}

void loop() {
  // to send values to Processing assign the values you want to send
  // this is an example:
  int sensor1 = digitalRead(3);
  int sensor2 = digitalRead(5);
  int sensor3 = digitalRead(6);
  int sensor4 = digitalRead(9);
  int sensor5 = digitalRead(10);
  int sensor6 = digitalRead(11);


  // send the values keeping this format
  Serial.print(sensor1);
  Serial.print(",");  // put comma between sensor values
  Serial.print(sensor2);
  Serial.println();  // add linefeed after sending the last sensor value
  Serial.print(sensor3);
  Serial.print(",");
  Serial.print(sensor4);
  Serial.print(",");
  Serial.print(sensor5);
  Serial.print(",");
  Serial.print(sensor6);
  Serial.print(",");


  // too fast communication might cause some latency in Processing
  // this delay resolves the issue
  //delay(20);

  // end of example sending values
}
import processing.serial.*;
import processing.video.*;
Movie myMovie1;
Movie myMovie2;
Movie myMovie3;
Movie myMovie4;
Movie myMovie5;
Movie myMovie6;

Serial serialPort;

int NUM_OF_VALUES_FROM_ARDUINO = 6;  /* CHANGE THIS ACCORDING TO YOUR PROJECT */

/* This array stores values from Arduino */
int arduino_values[] = new int[NUM_OF_VALUES_FROM_ARDUINO];


void setup() {
  size(1800, 1200);
  background(0);

  printArray(Serial.list());
  myMovie1 = new Movie(this, "1.mp4");
  myMovie1.loop();
  myMovie2 = new Movie(this, "2.mp4");
  myMovie2.loop();
  myMovie3 = new Movie(this, "3.mp4");
  myMovie3.loop();
  myMovie4 = new Movie(this, "4.mp4");
  myMovie4.loop();
  myMovie5 = new Movie(this, "5.mp4");
  myMovie5.loop();
  myMovie6 = new Movie(this, "6.mp4");
  myMovie6.loop();
  serialPort = new Serial(this, "/dev/cu.usbmodem101", 9600);
}
void draw() {
  getSerialData();
  //if (myMovie1.available()) {
  //   myMovie1.read();
  // }
  //image(myMovie1, 0, 0);
  if (arduino_values[0] == 1) {
    myMovie1.read();
    image(myMovie1, 0, 0);
    //stateManager = 1;
  } else if (arduino_values[1] == 1) {
    myMovie2.read();
    image(myMovie2, 0, 0);
  } else if (arduino_values[2] == 1) {
    myMovie3.read();
    image(myMovie3, 0, 0);
  } else if (arduino_values[3] == 1) {
    myMovie4.read();
    image(myMovie4, 0, 0);
  } else if (arduino_values[4] == 1) {
    myMovie5.read();
    image(myMovie5, 0, 0);
  } else if (arduino_values[5] == 1) {
    myMovie6.read();
    image(myMovie6, 0, 0);
  }
  //if stateManager == 1 {movie1.read()
                        //image(myMovie1);}
}


// the helper function below receives the values from Arduino
// in the "arduino_values" array from a connected Arduino
// running the "serial_AtoP_arduino" sketch
// (You won't need to change this code.)

void getSerialData() {
  while (serialPort.available() > 0) {
    String in = serialPort.readStringUntil( 10 );  // 10 = '\n'  Linefeed in ASCII
    if (in != null) {
      print("From Arduino: " + in);
      String[] serialInArray = split(trim(in), ",");
      if (serialInArray.length == NUM_OF_VALUES_FROM_ARDUINO) {
        for (int i=0; i<serialInArray.length; i++) {
          arduino_values[i] = int(serialInArray[i]);
        }
      }
    }
  }
}
After user testing day:
During the user testing, I received a lot of valuable feedback from my professors and my classmates. In all, they suggested that I should build a wooden box to hide the wires and maybe add my voice in the videos. They also said that the map was too heavy for them to hold, and they feared that it would fall apart.
After the user testing, I talked to my professor individually. He said that instead of using this form, I could try to build a map with curved roads and make it smaller and easier for the users to hold. He sent me a picture for reference:
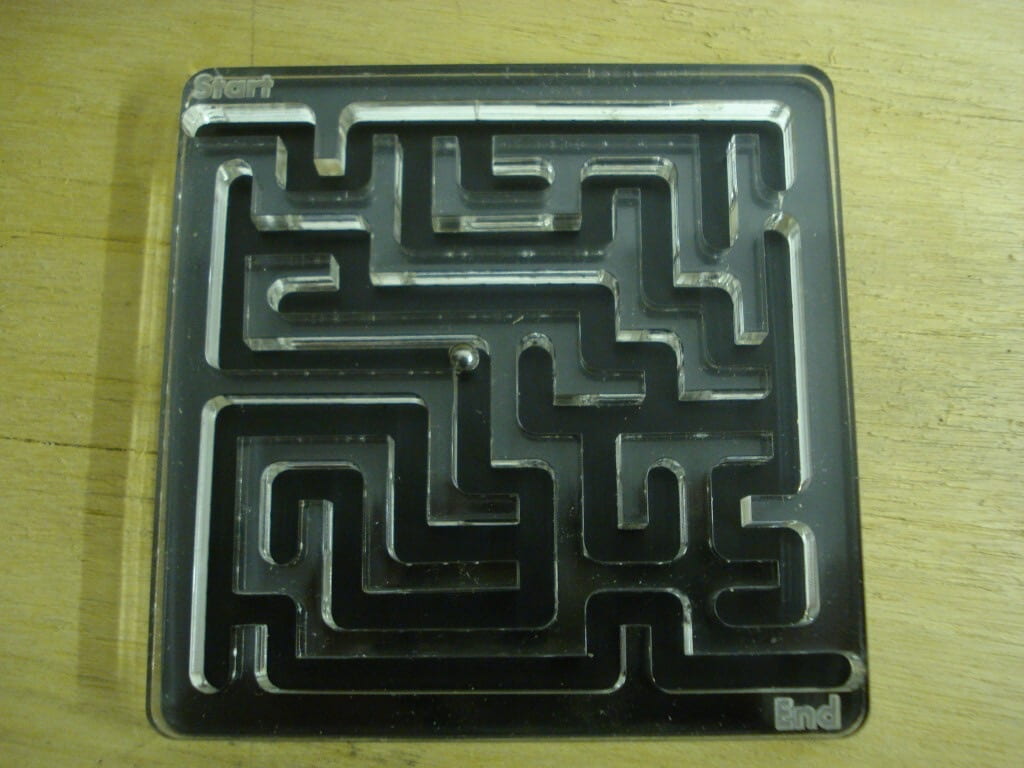
After looking at the picture, I finally understood his idea. Therefore, I began to make my second version of this project.
- Physical fabrication
According to my professor’s advice, I should try to use Adobe Illustrator to create the curved roads that were demanded by my map. 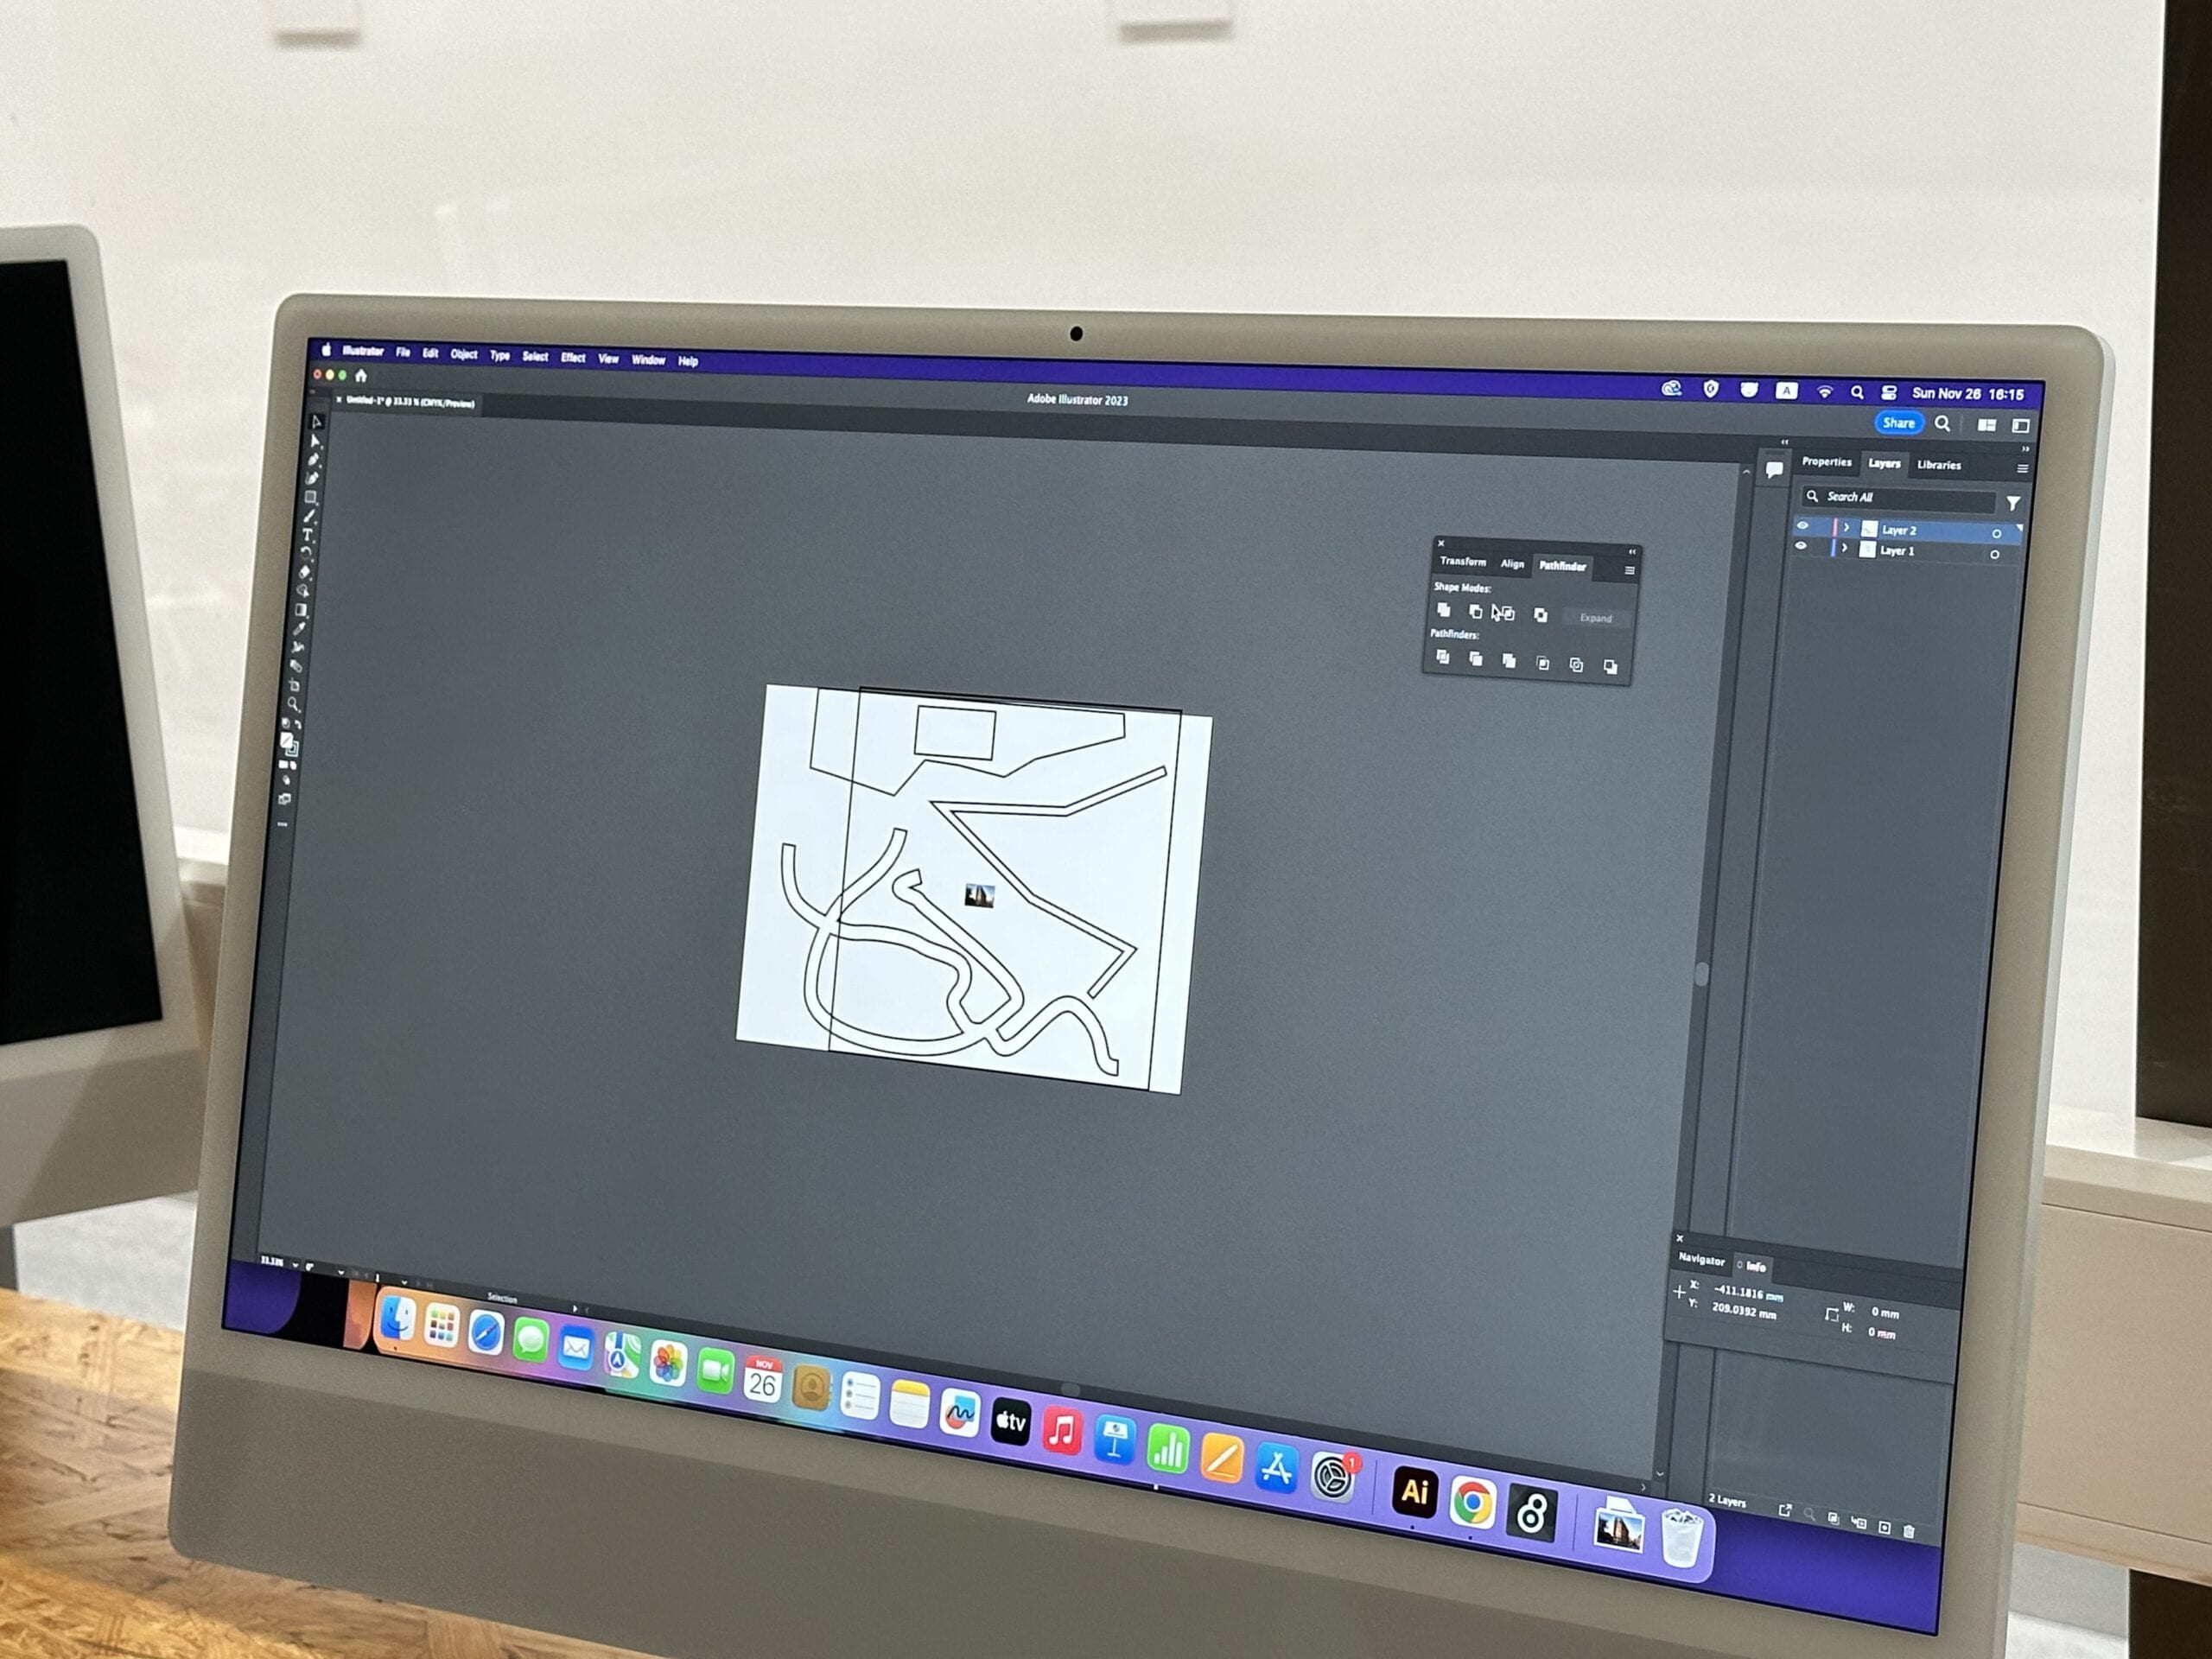
After he had taught me how to use it, I tried by myself, and under the help of another professor, I was finally able to transfer the drawing I created in Adobe Illustrator to an Acrylic board that had been cut by the laser-cutting machine.
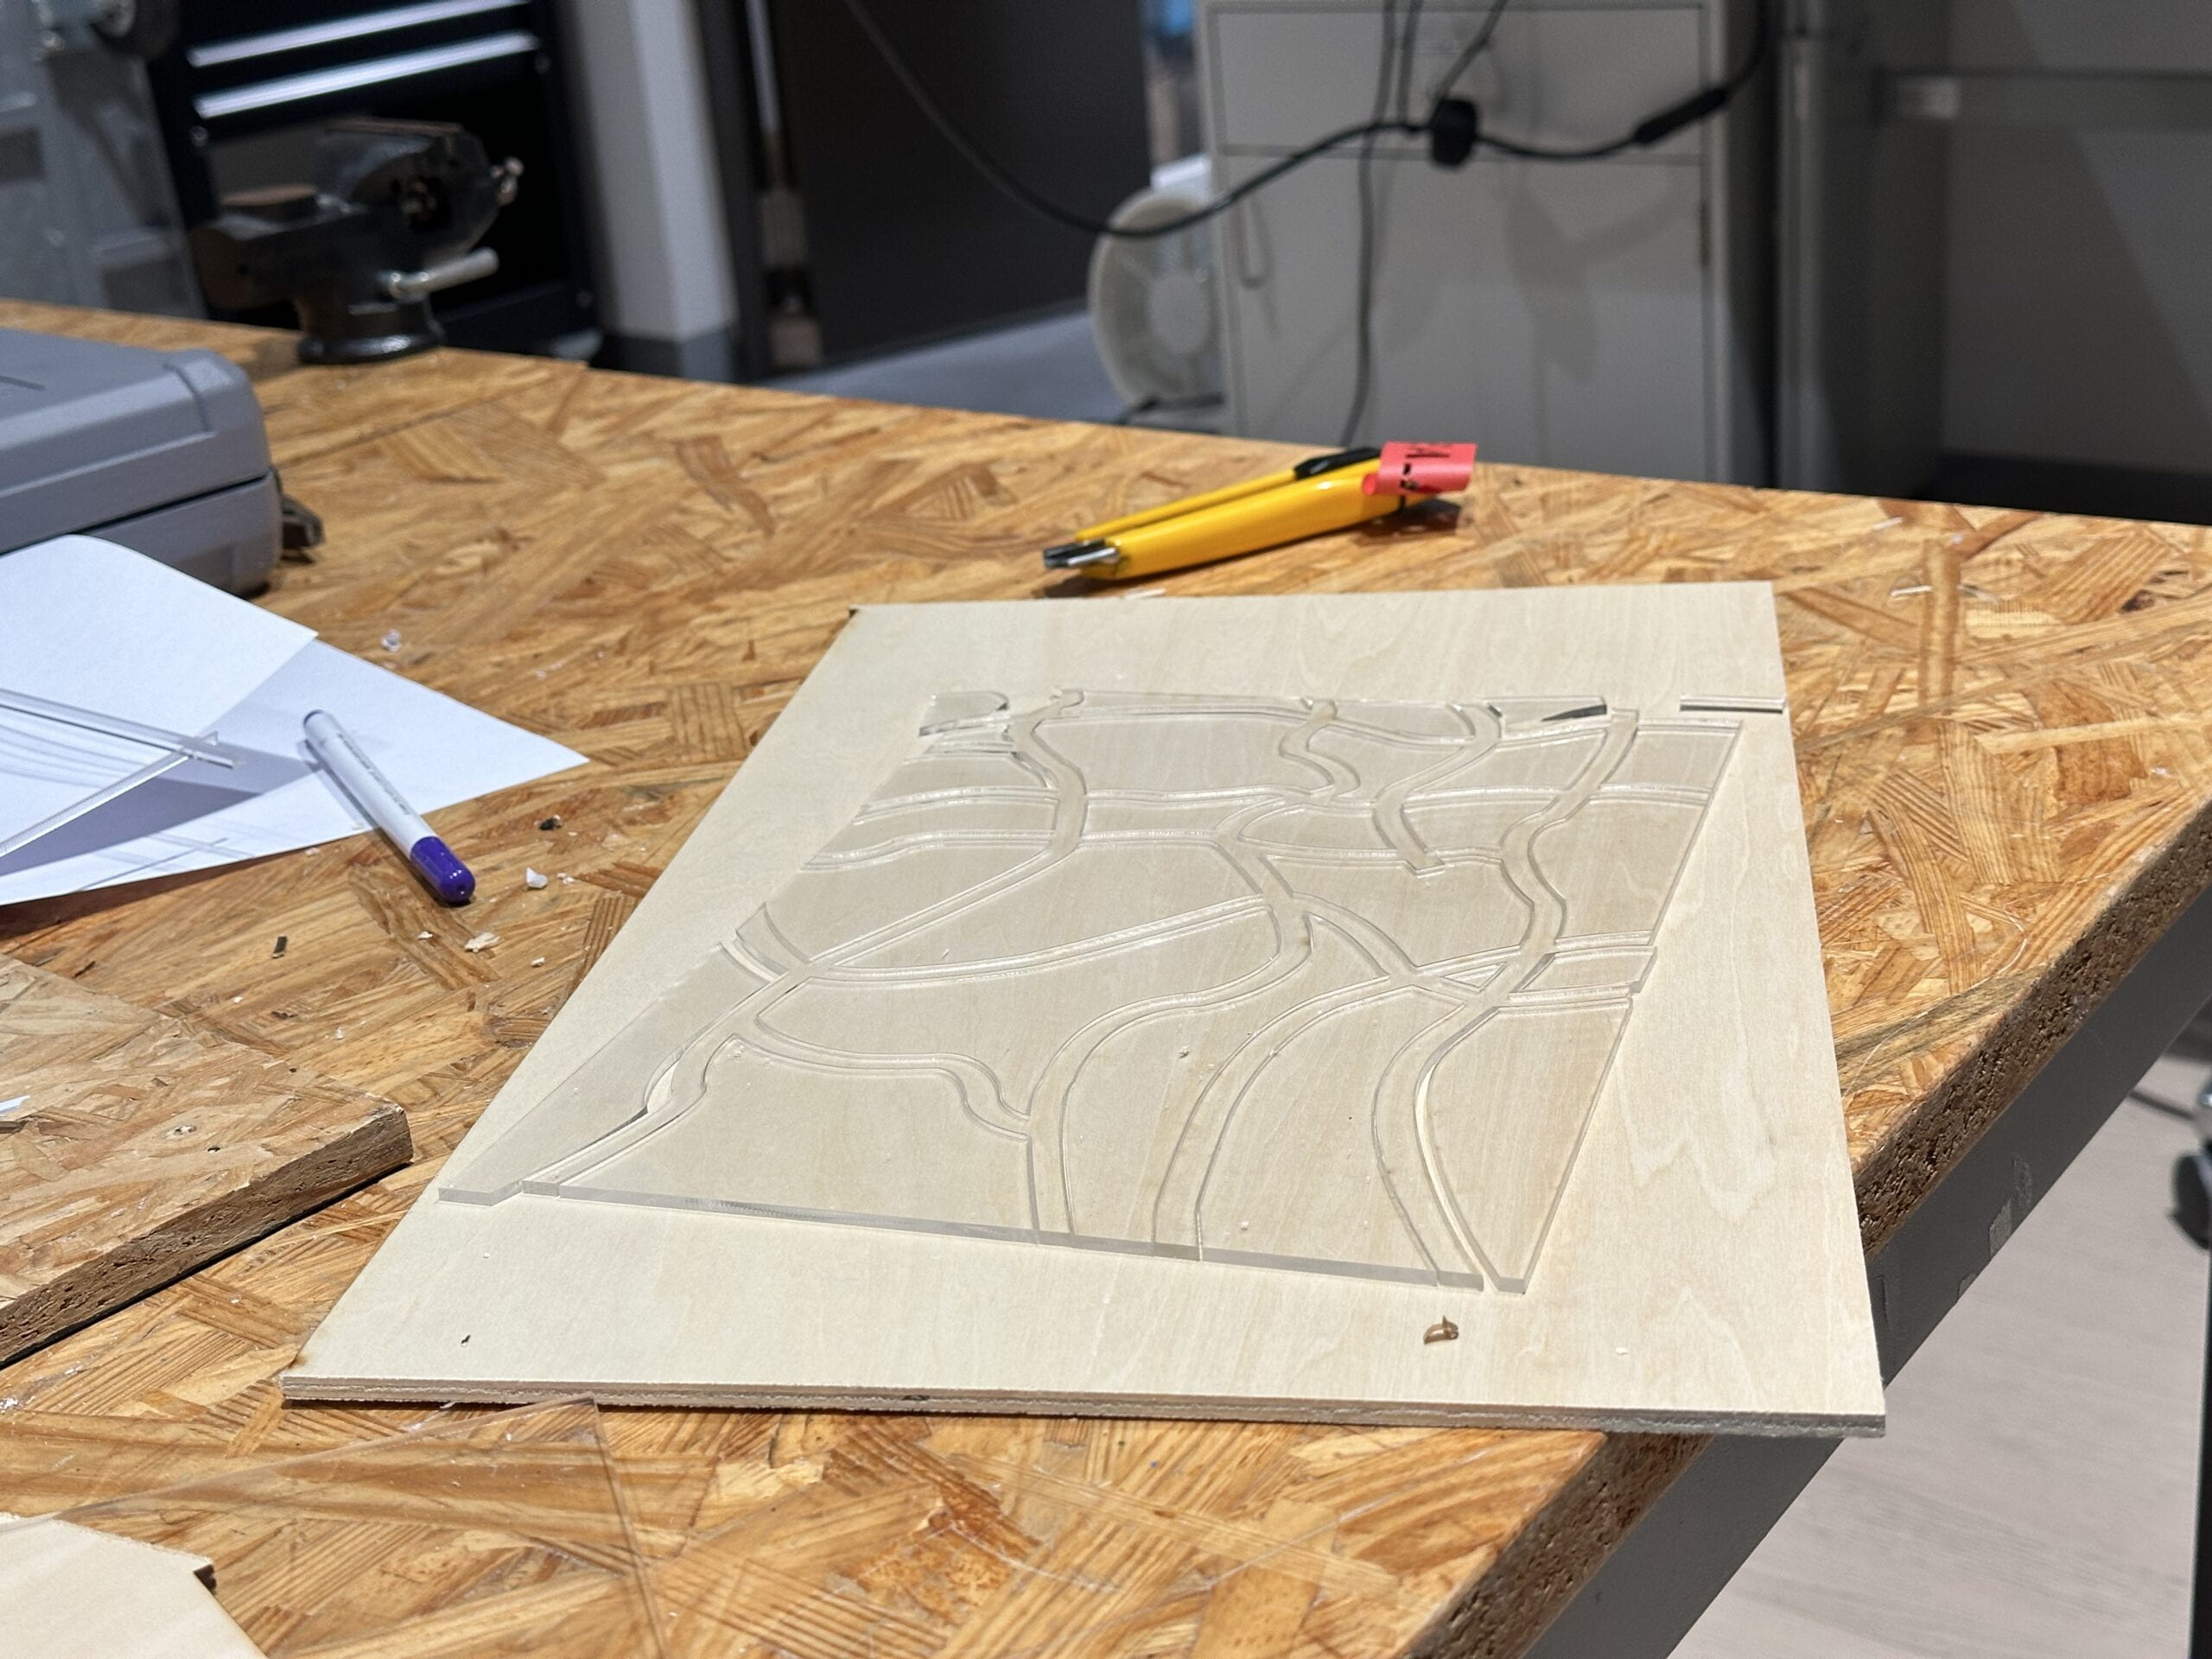
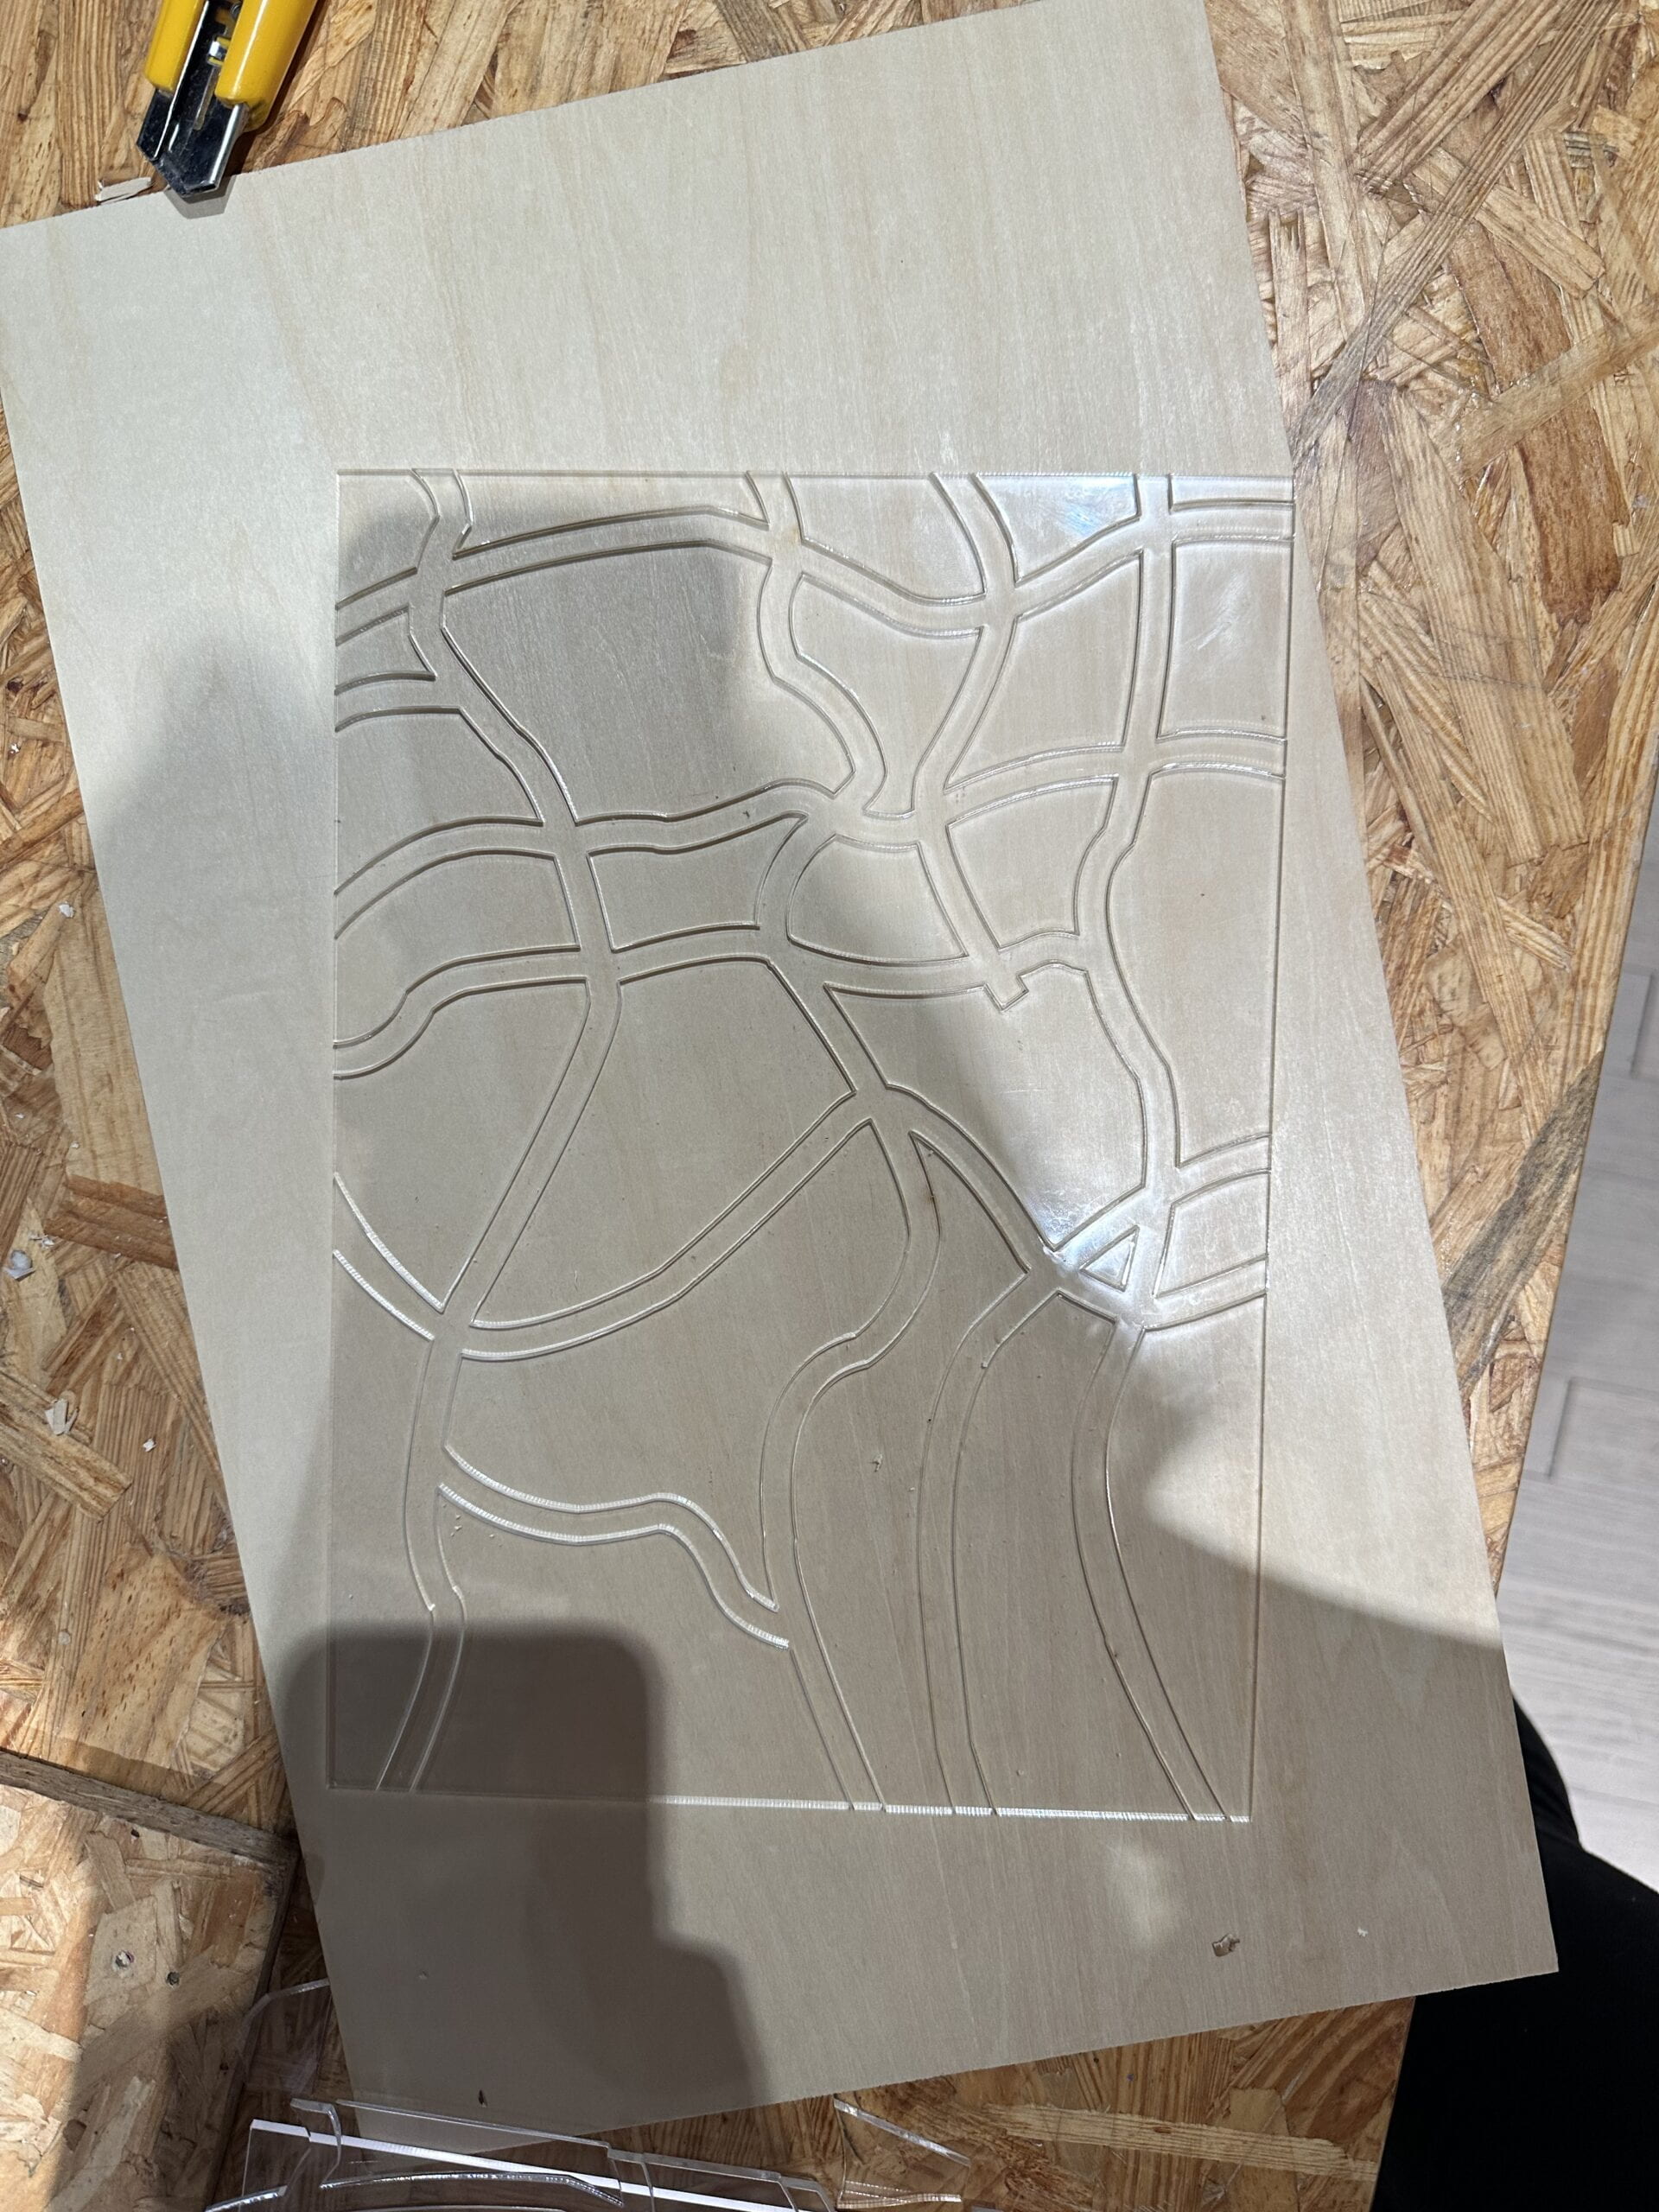
After that, I also drew a city map of Shanghai by myself to make the project more beautiful.

Then, I cut several other boards and combined these different layers together. It took me some effort, but it was worthwhile, because I was wile with joy after seeing a new map being created by myself. It brought me a huge sense of accomplishment!
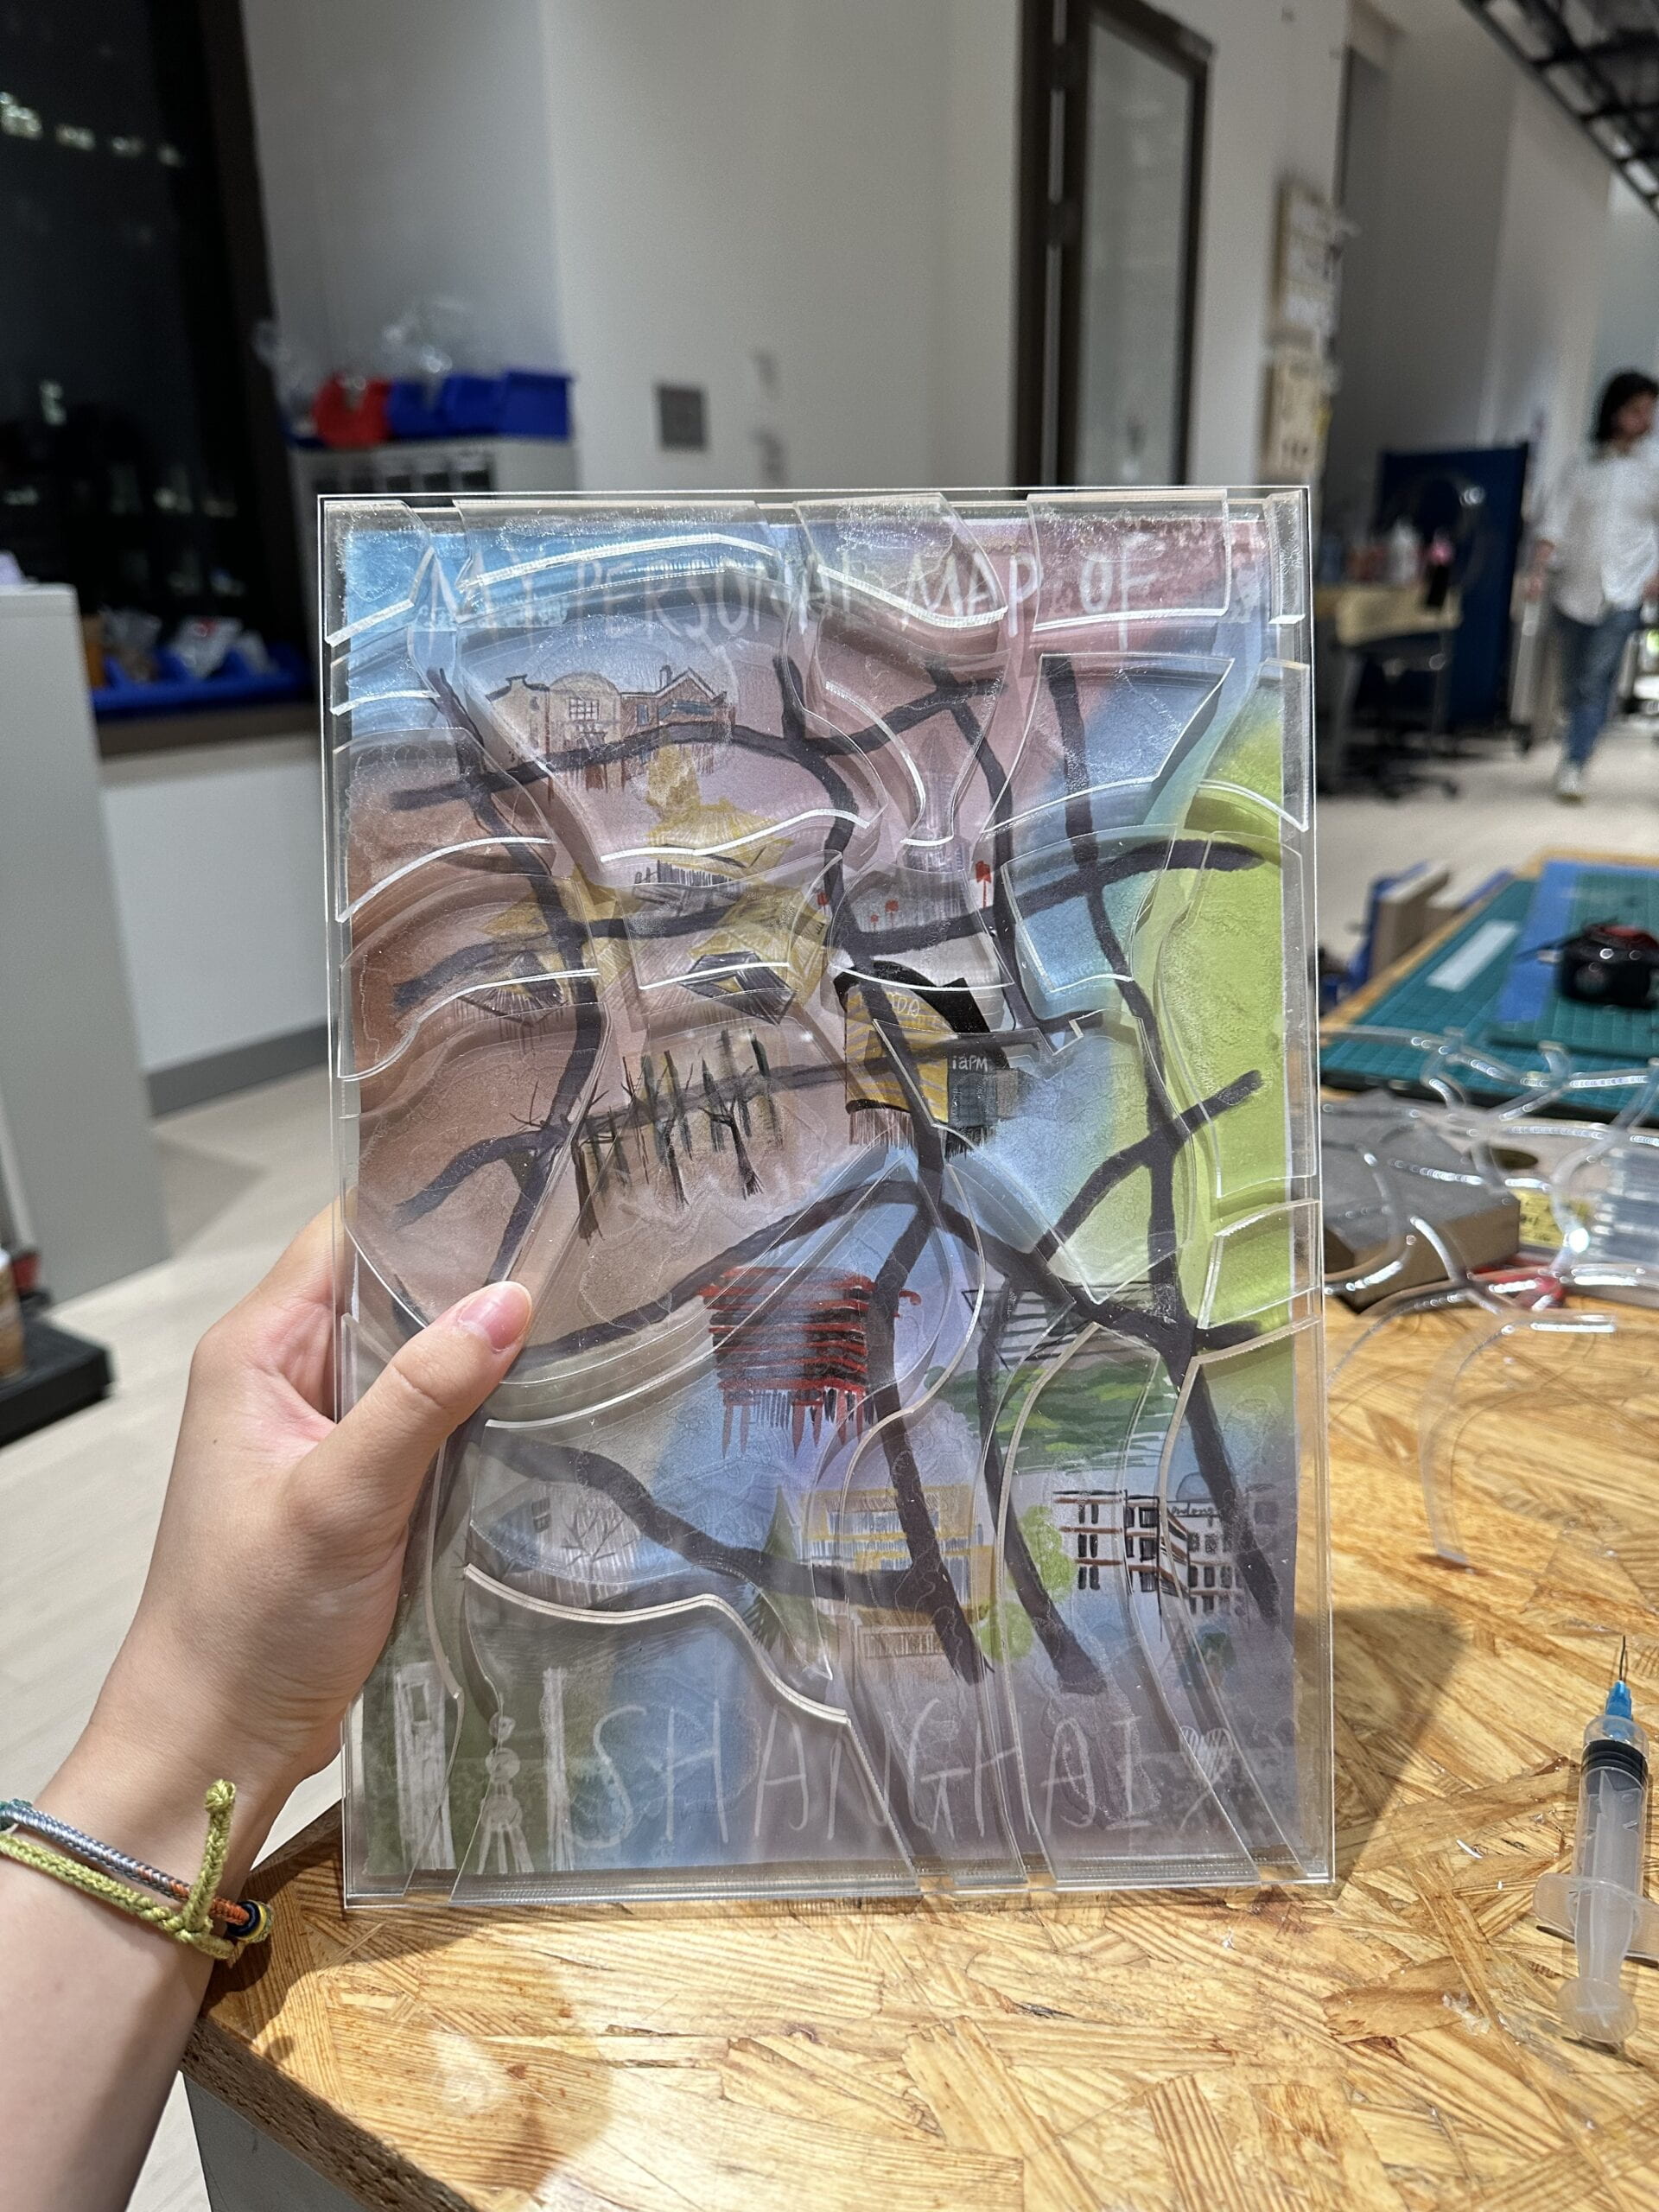
I also took the advice from the user testing day and used laser cutting to create a wooden box to hide the wires.
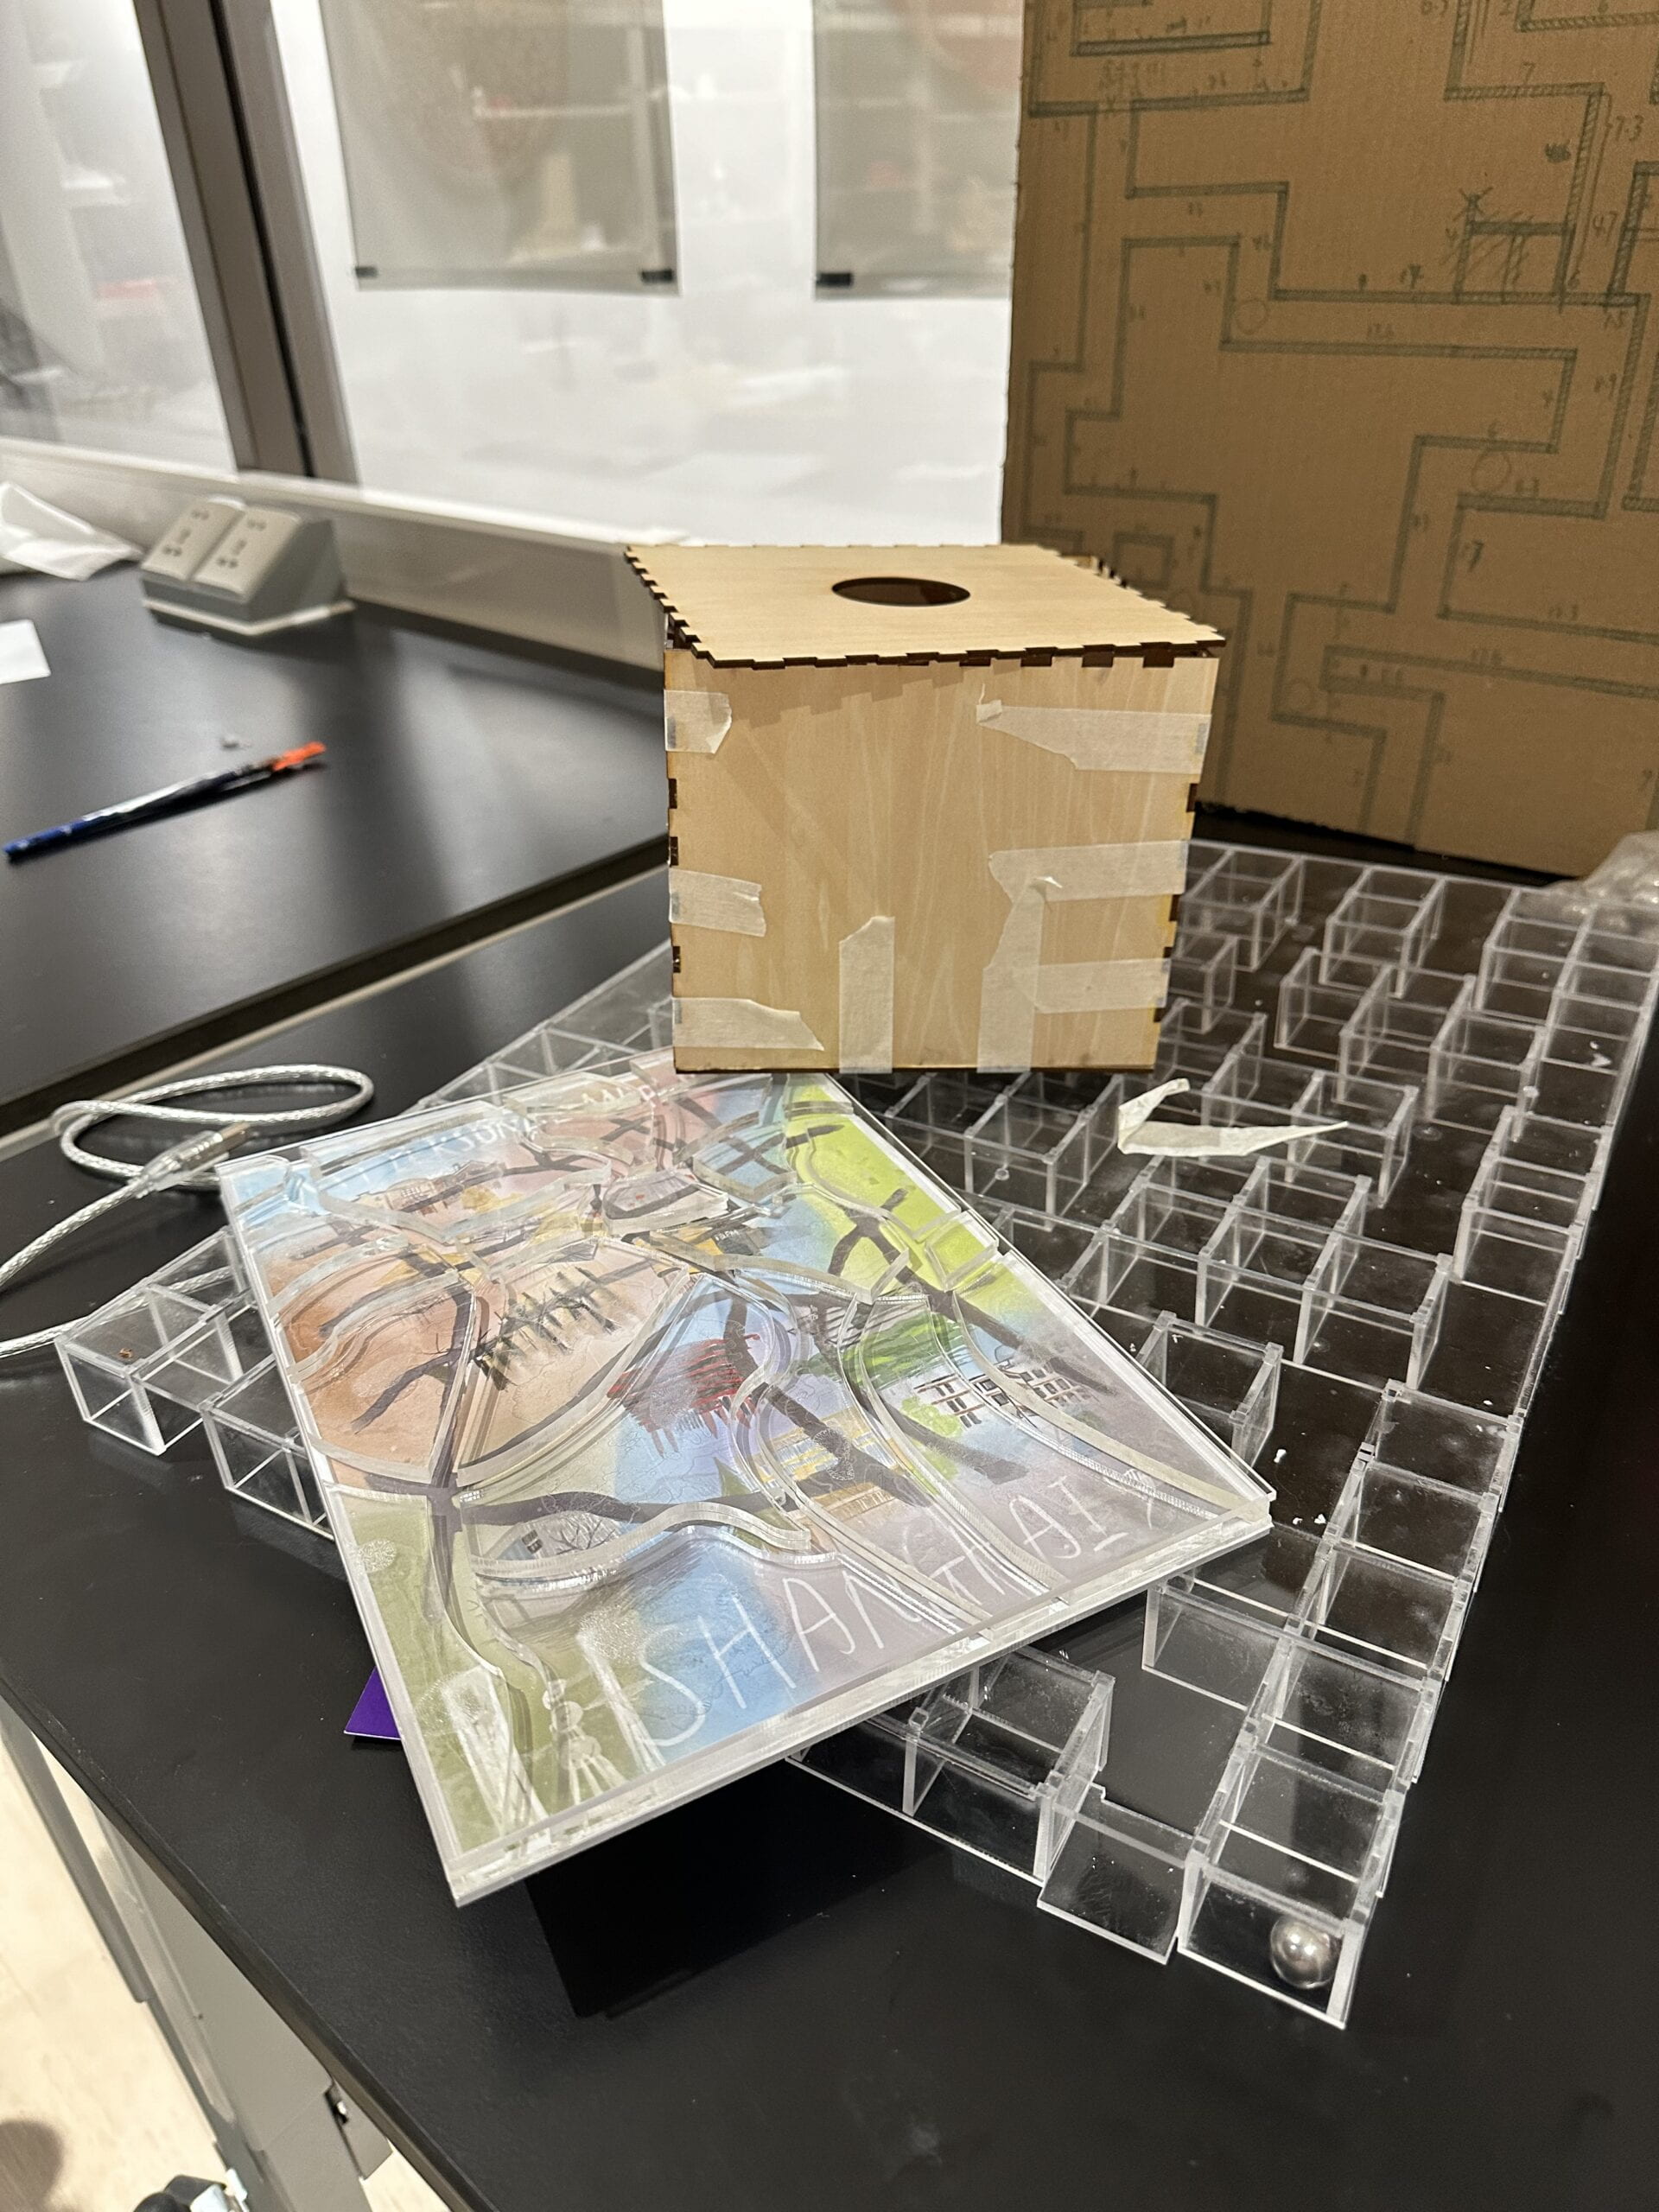
I also drilled holes on the map and inserted ten reed switches into the map. Up till now I had finished the physical fabrication part of my second version!
As for the videos, I made four more videos and added them to the data file of Processing.
2. Digital Part
In this part, the wiring and coding were basically the same as the first version. All I did was to add four extra sensors to the existing circuit and introduce four more variables in my code.
Below is a video I recorded when the metal ball stayed still near one magnet sensor. It would work similarly if the ball changes its position and heads to more sensors.
After final presentation day:
I brought the second version to the final presentation day and many people tested my project. It was overall successful, but the biggest problem was that as there was no barrier between the magnetic ball and the magnet sensors, it would be very easy for the little ball to be attracted by the magnetic sensors, and once it was attracted it would be difficult for the ball to move again if the user did not hit the map heavily. This was a serious problem, for it would cause a very unpleasant experience to the users and destroy the interactive process. I talked to my professor for more advice, and he suggested that I should add another layer between the ball and the sensors so that the magnetic force would reduce and it would be easier for the ball to move. However, as my current version was already impossible to disassemble, I decided to make a third version. Not only did I want to improve the physical fabrication, but I also wanted to modify the code a little bit and add my voice.
- Physical Fabrication
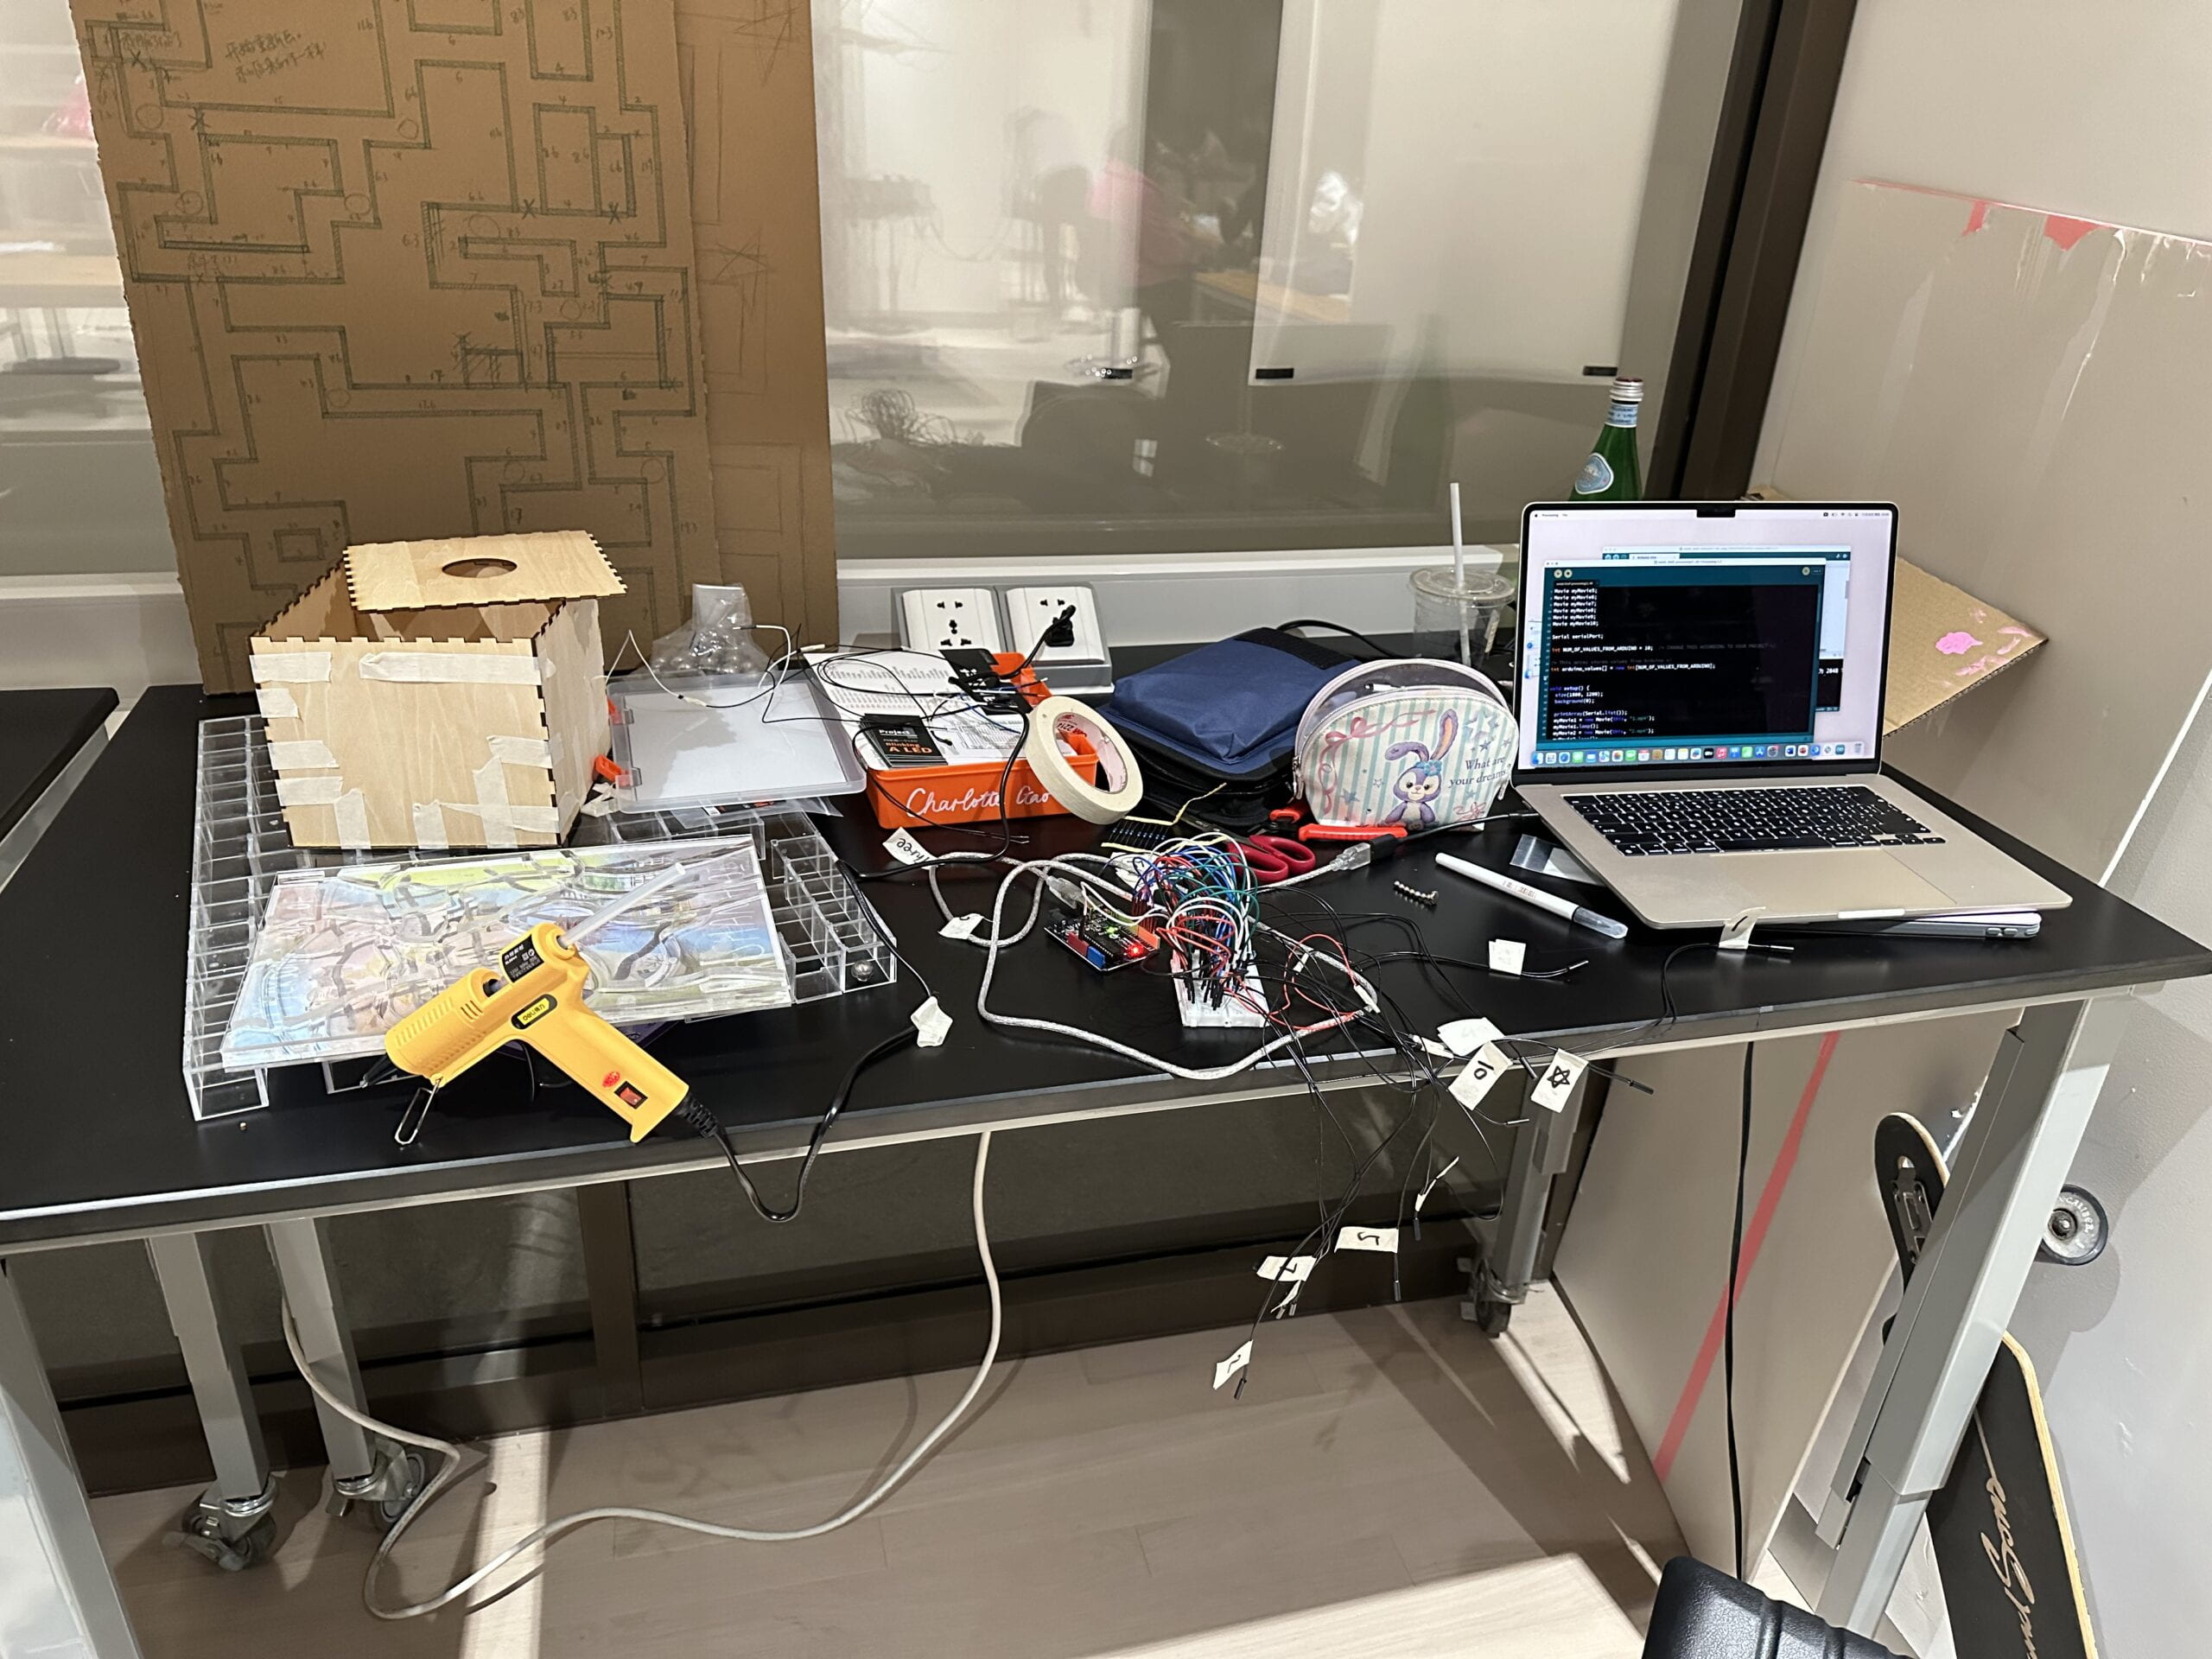
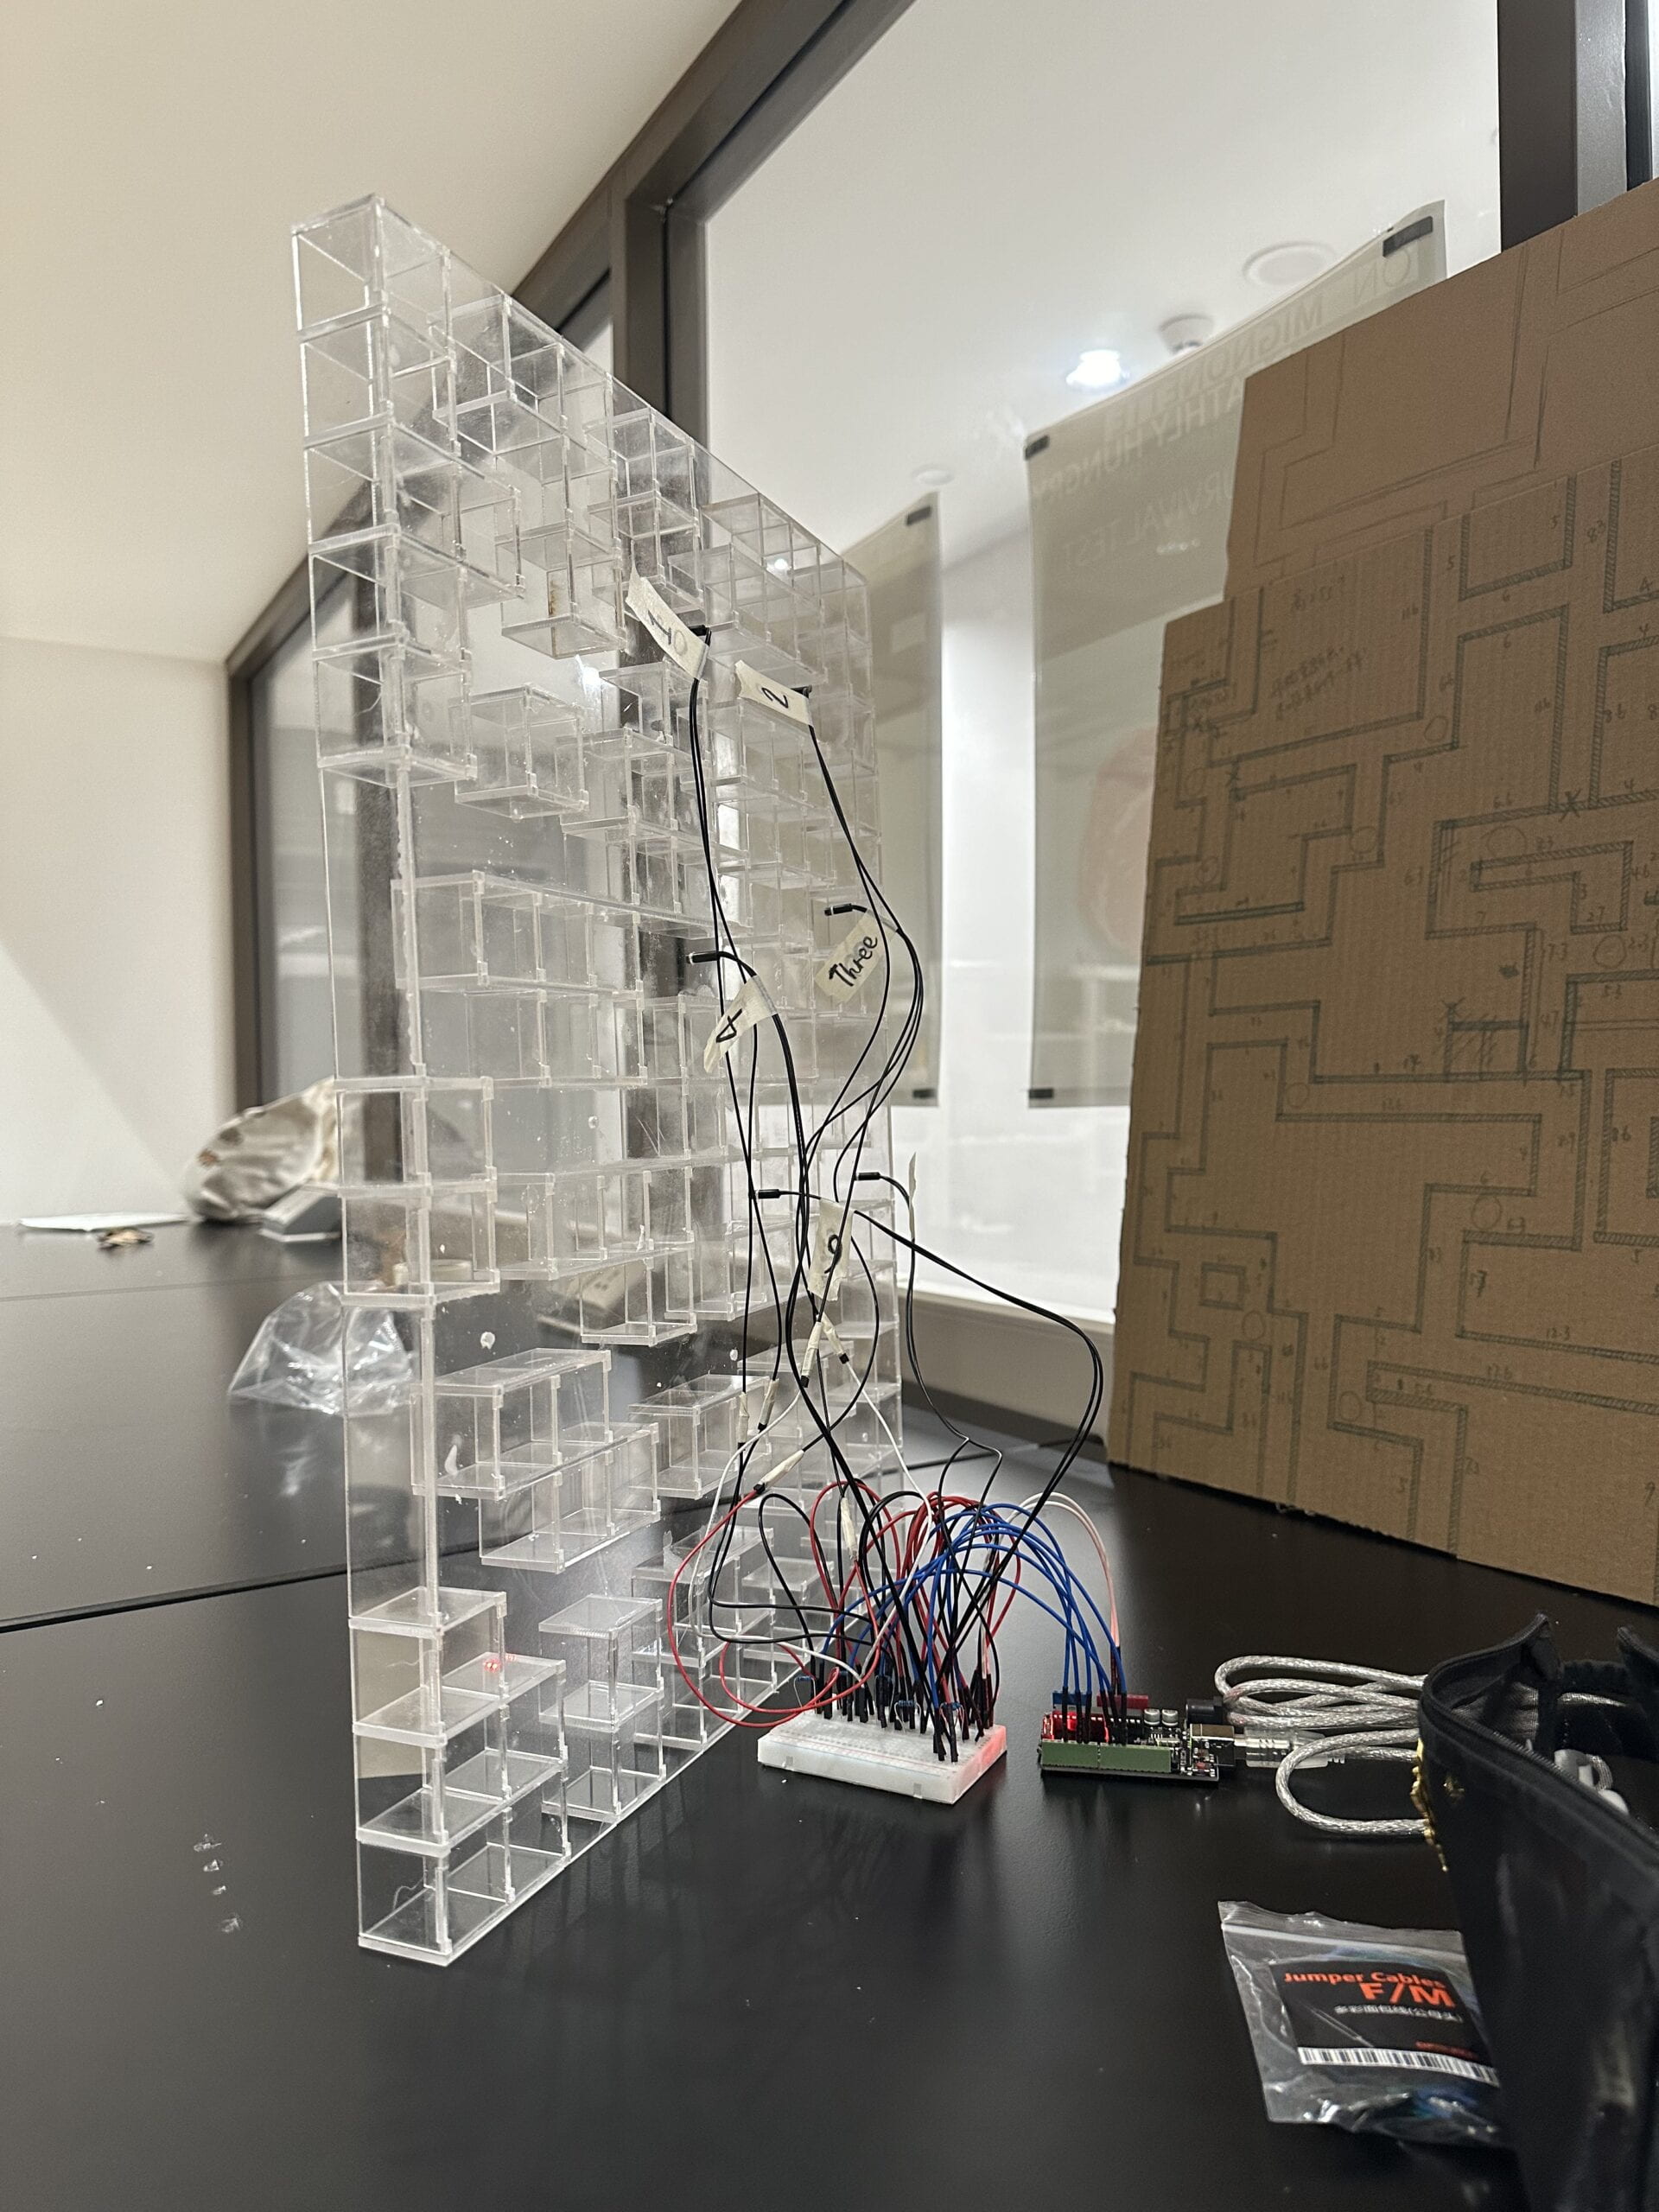
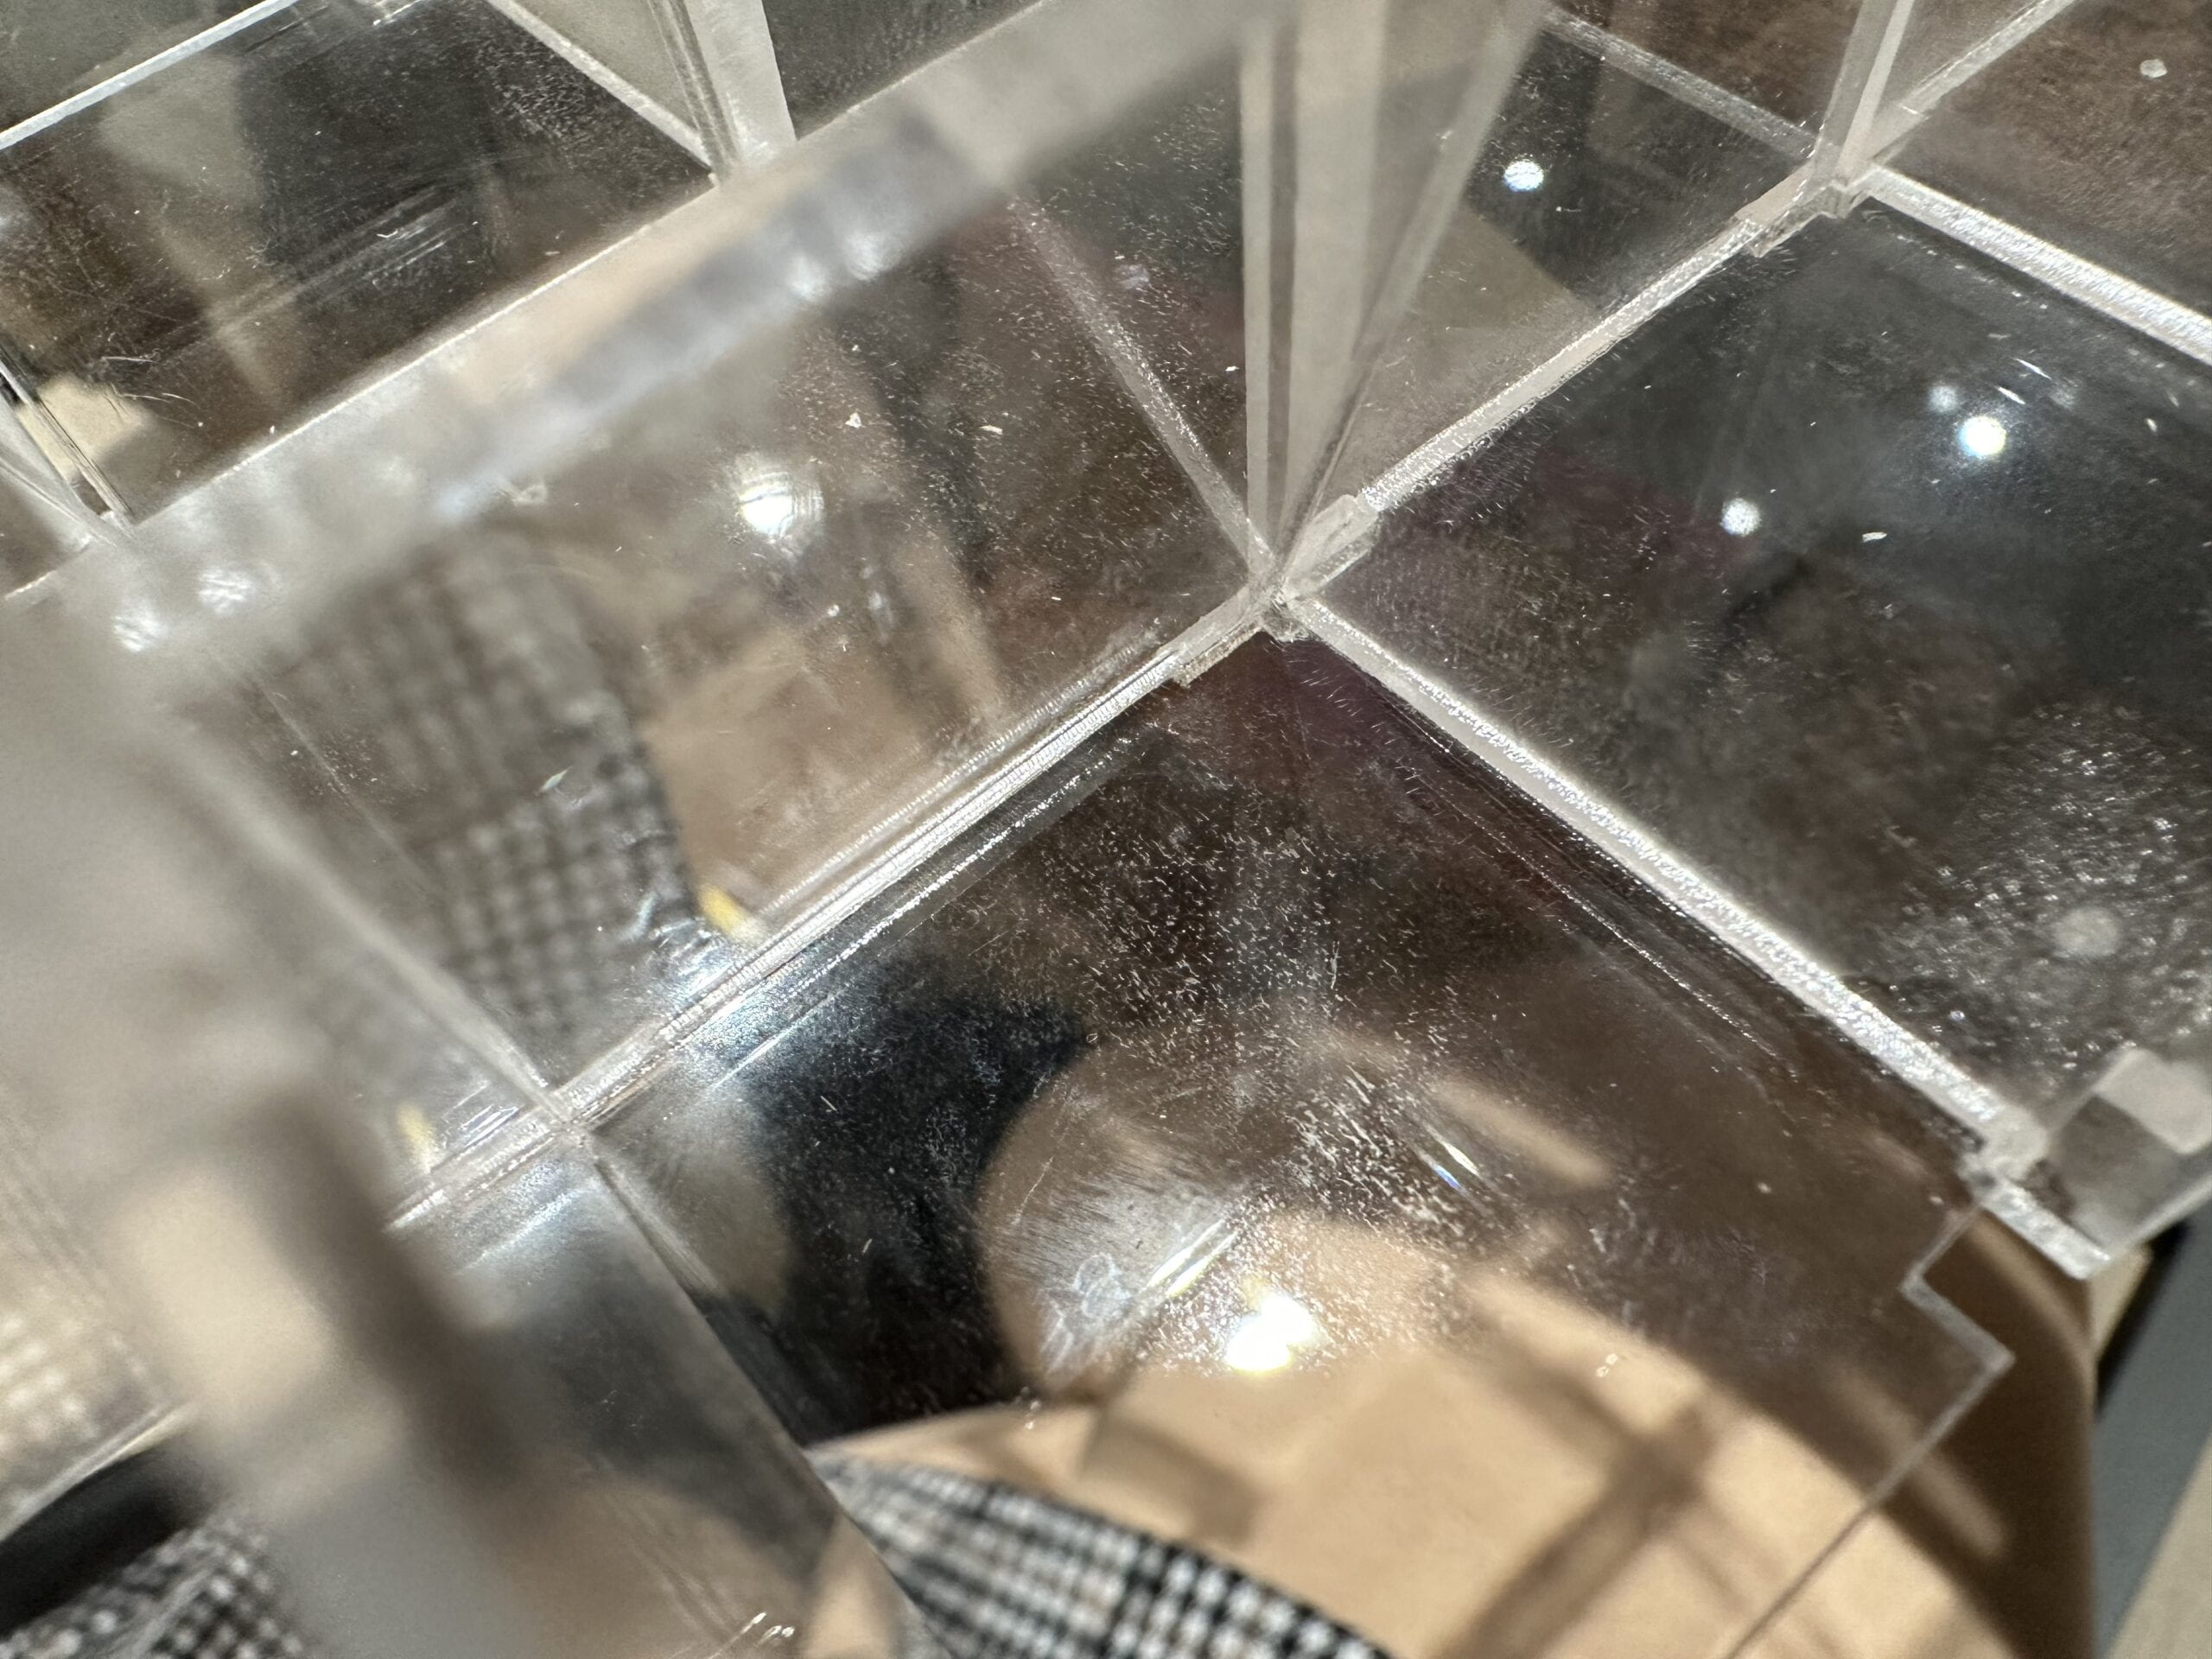
In this part, I didn’t change my original version too much. To make a new one, I repeated all of my original procedures, and the only change I made was to add a 2mm layer between the ball and the sensors. Below are the photos I took during the fabrication process.
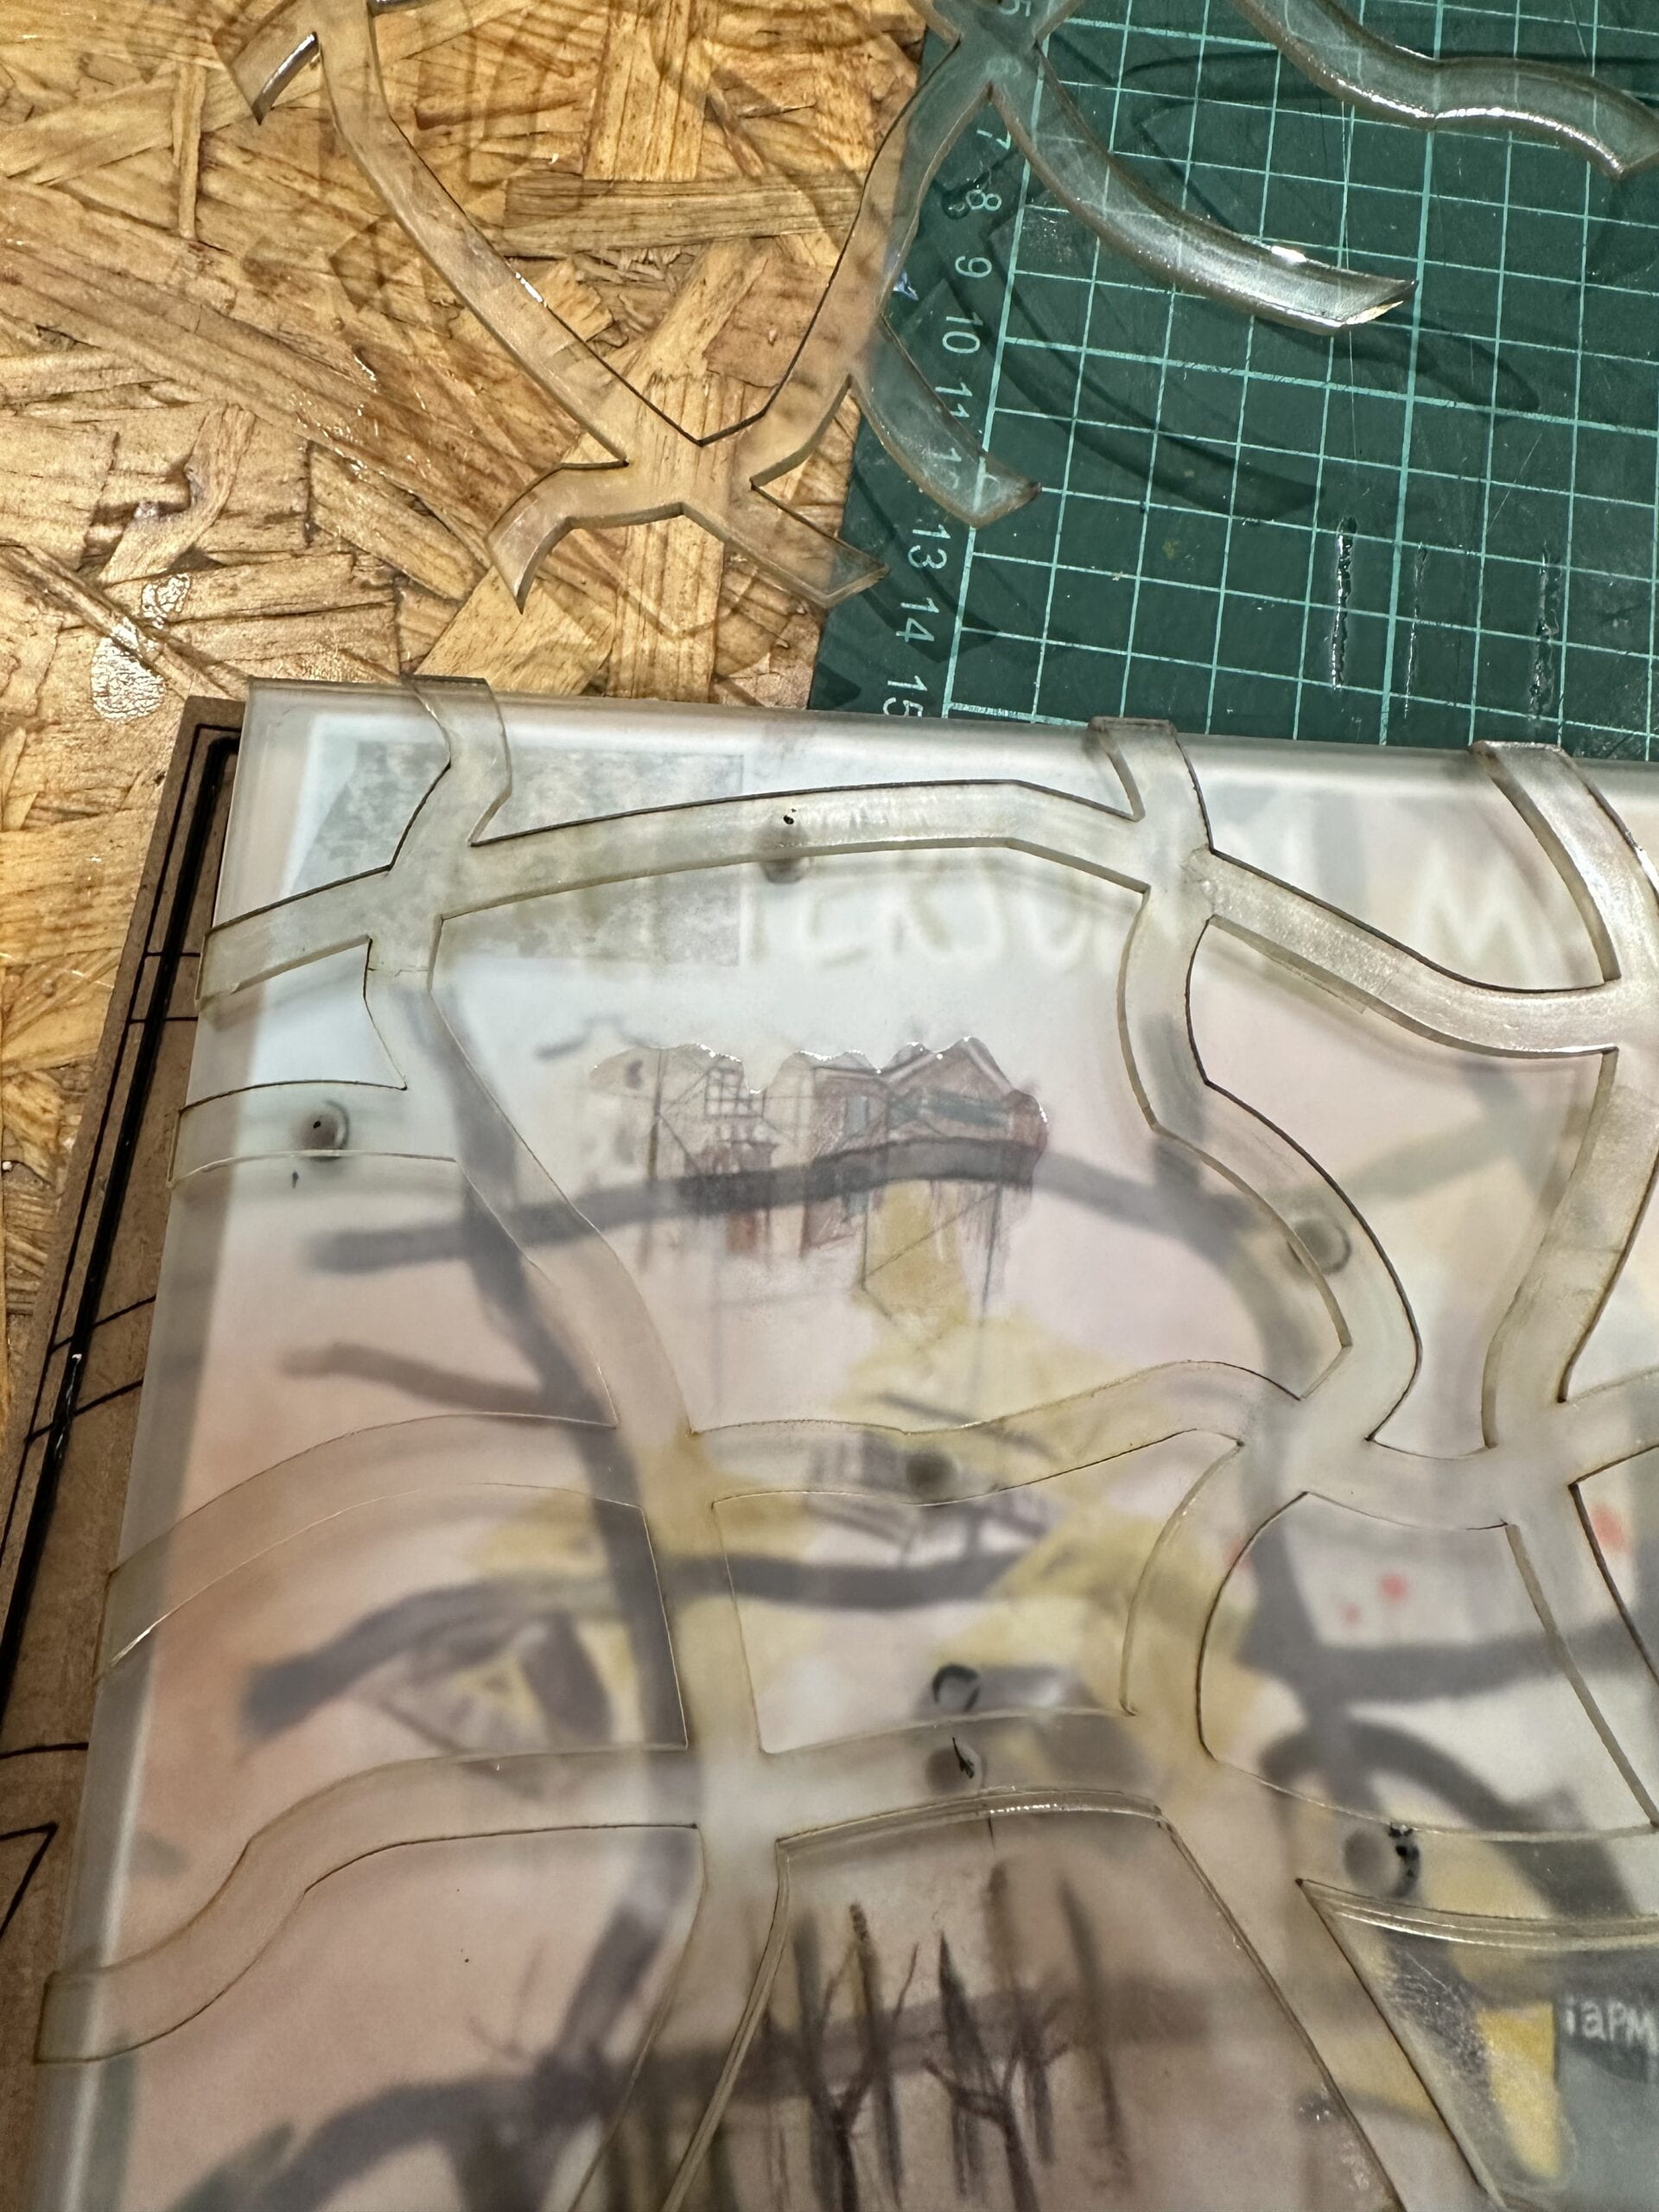
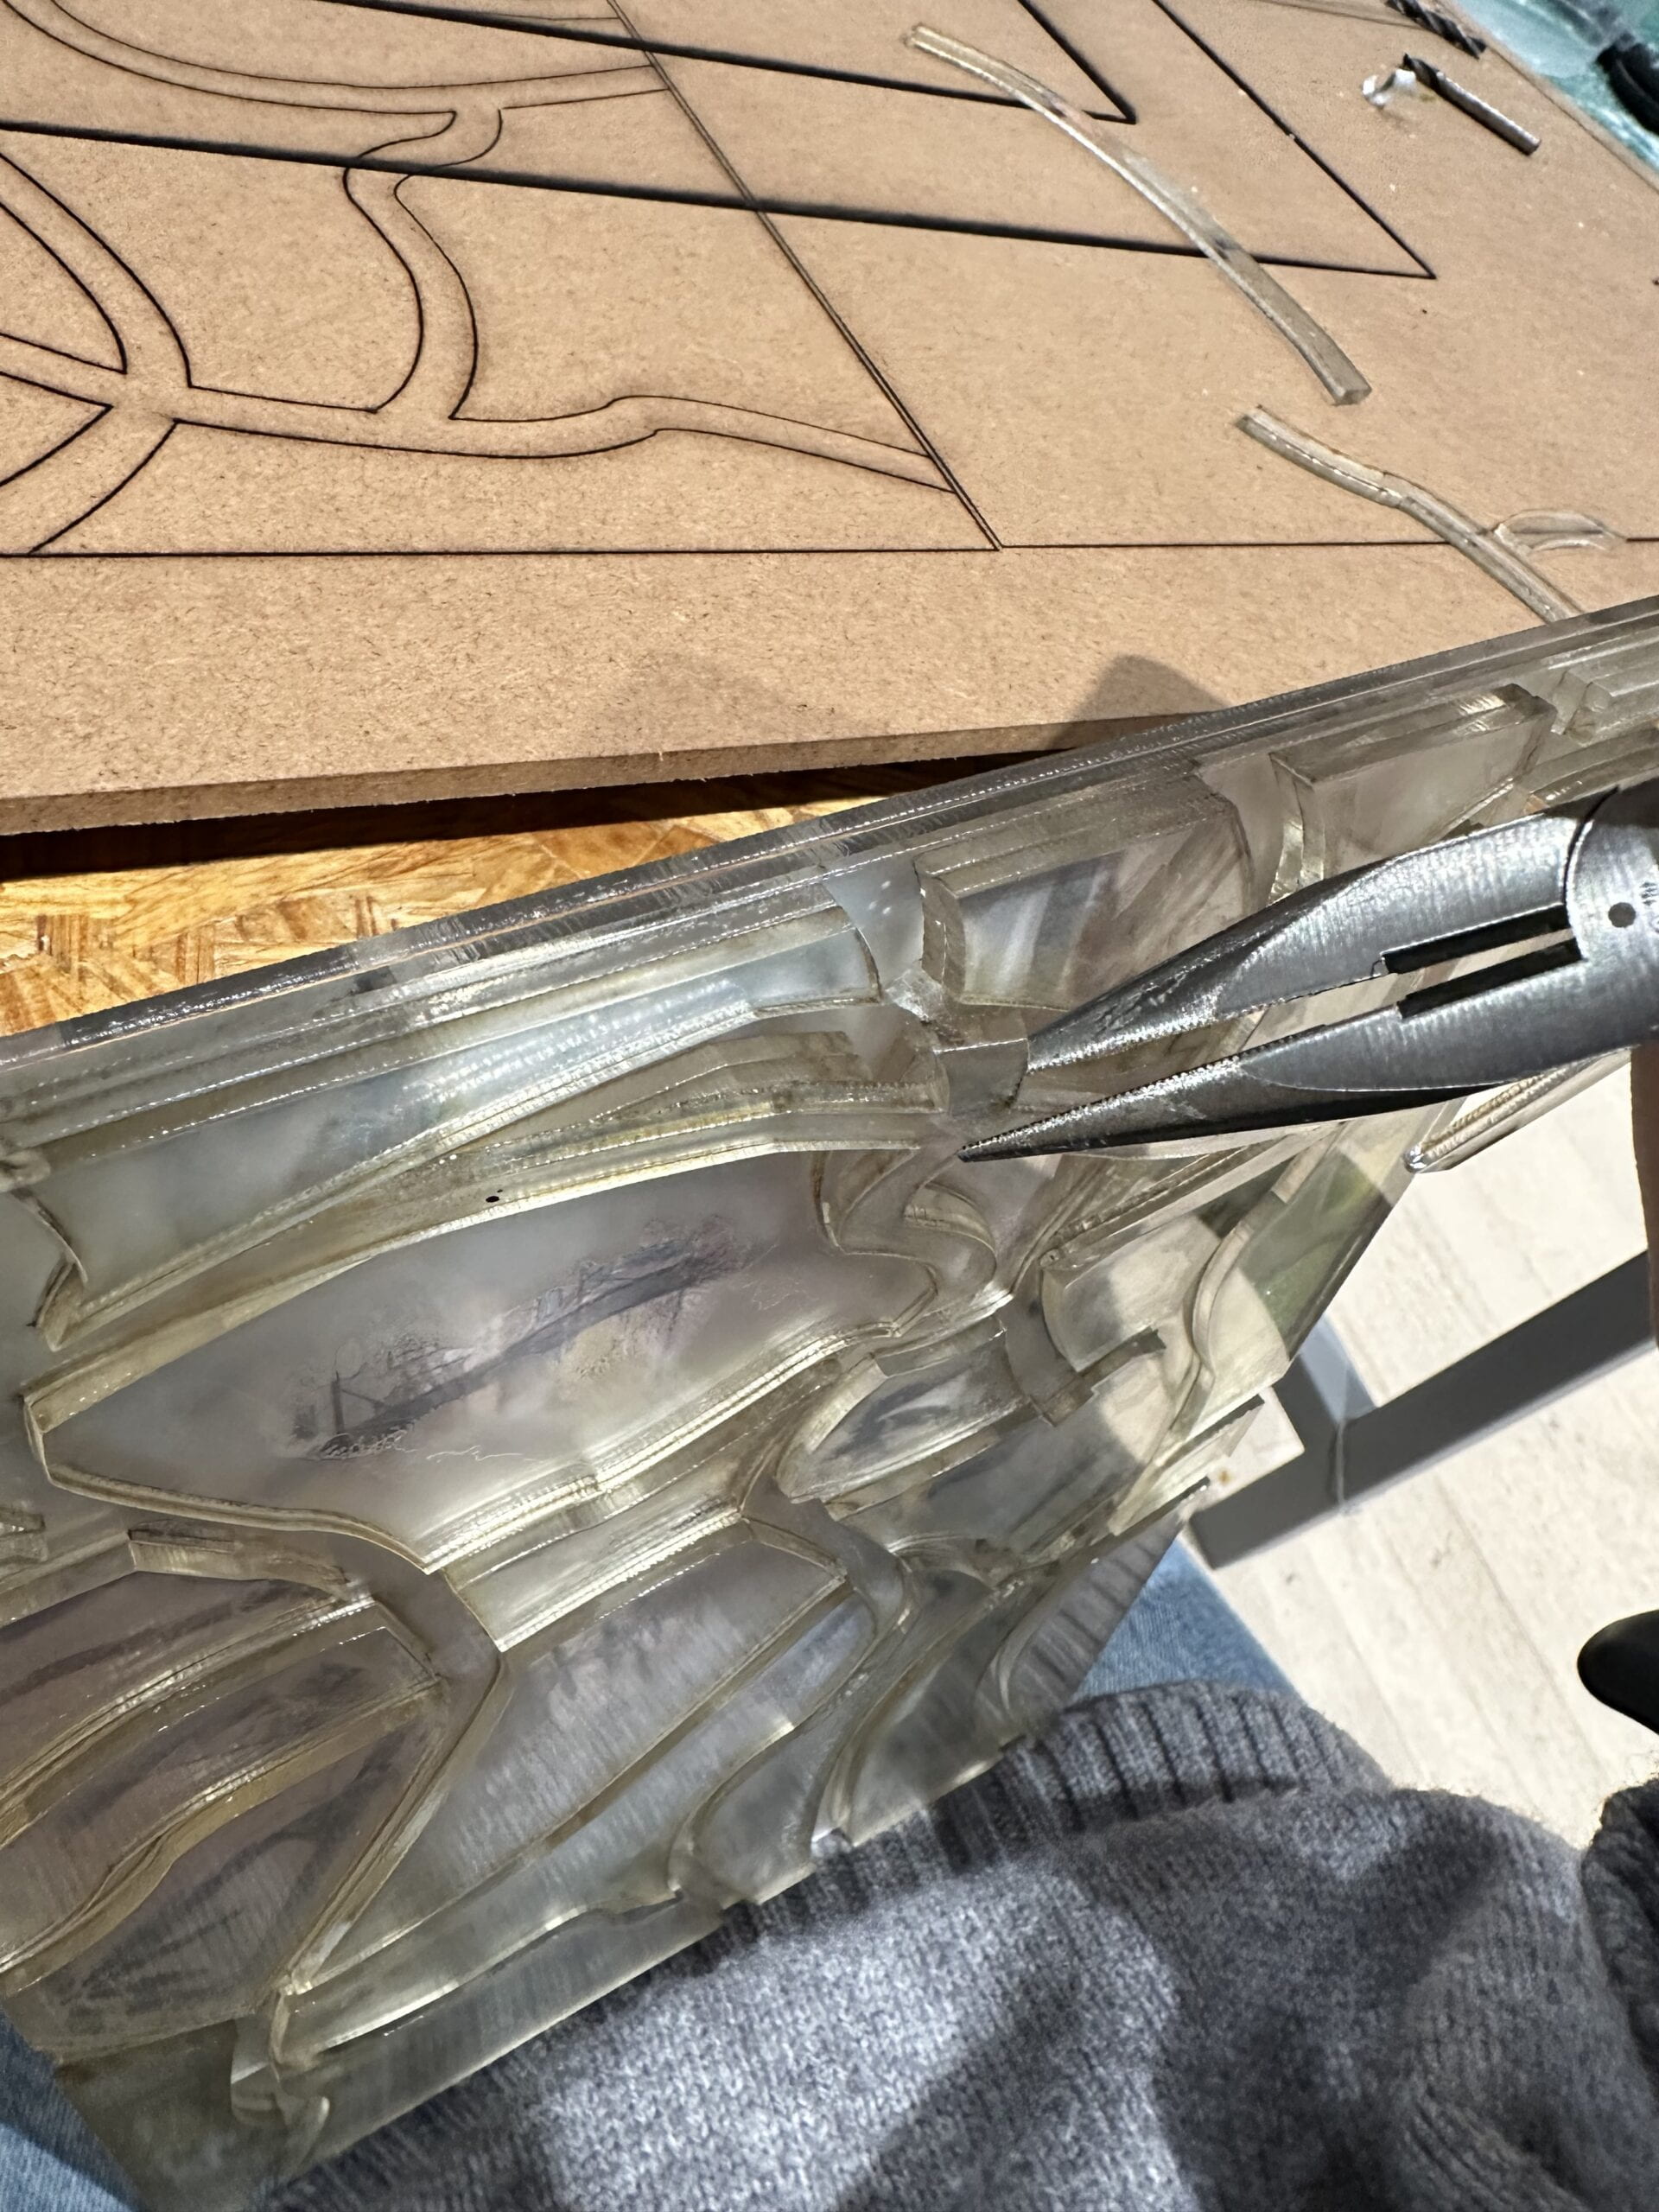
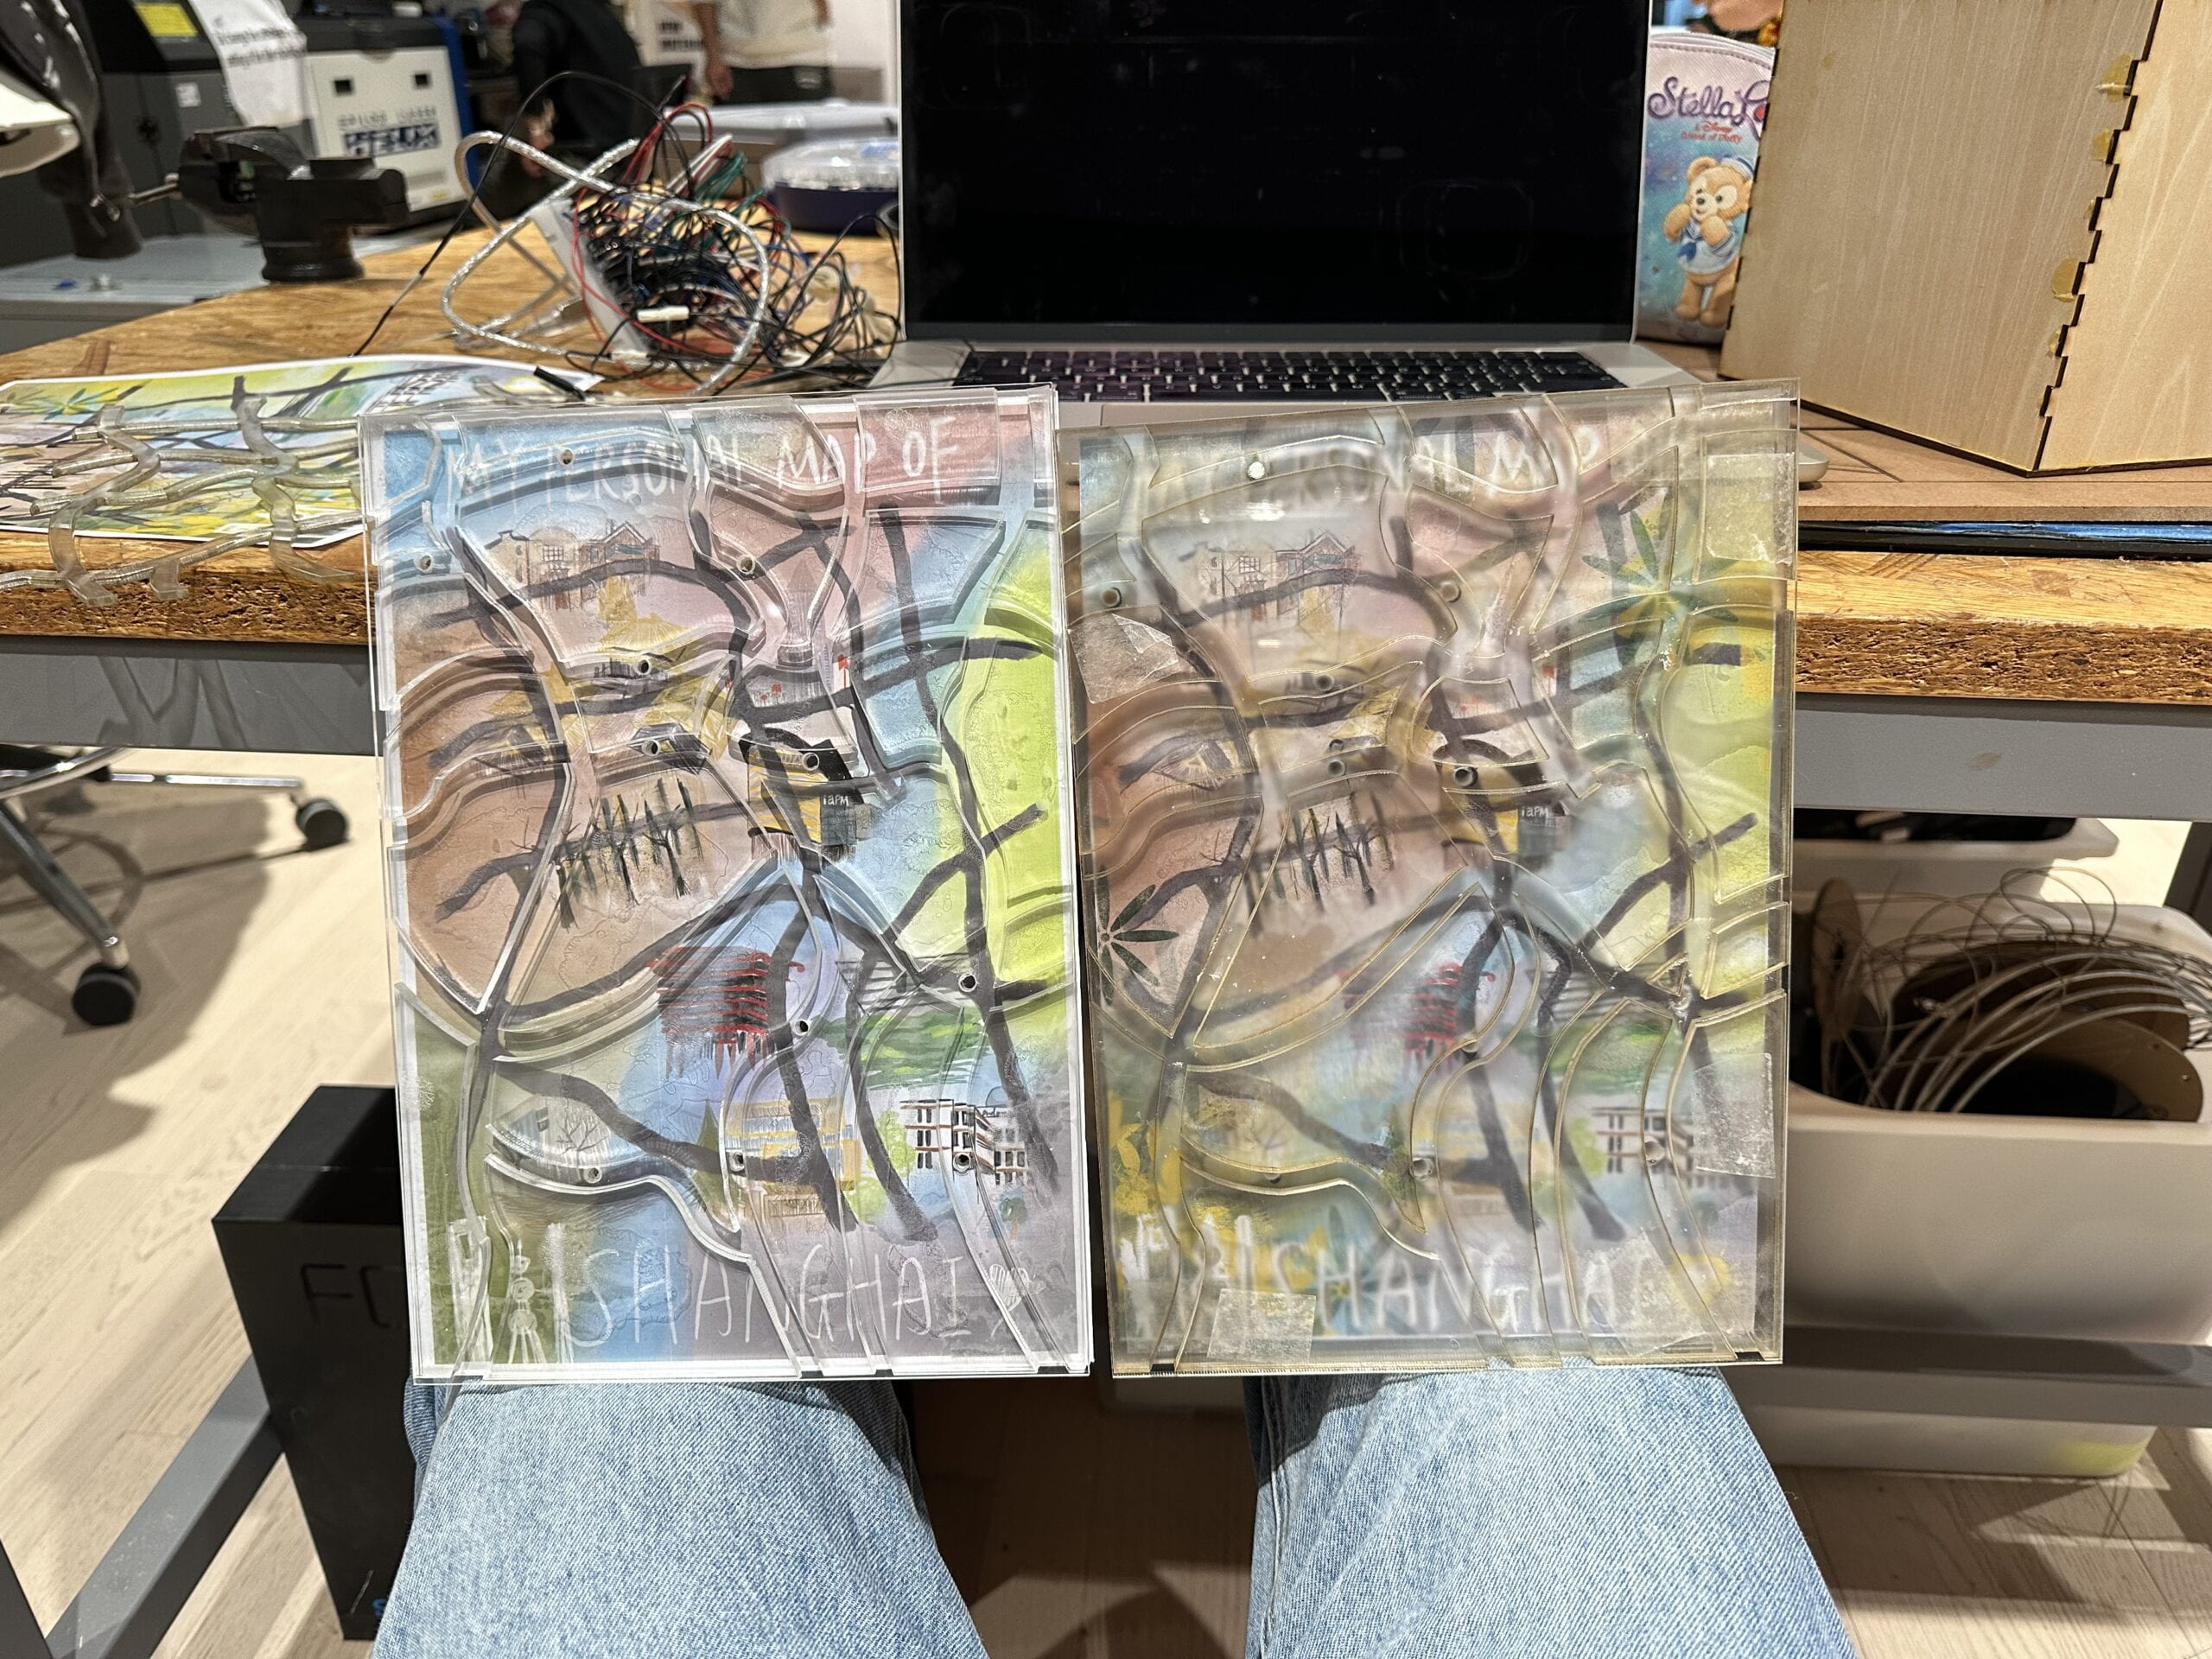
The right one of the third picture was the third version.
2. Digital Part
In this part, I changed much about both the circuit and the code.
As for the circuit, the biggest problem I encountered was the pull-down resistor. Some of the resistors had a poor contact and were not able to let the reed switches show the number 0. After talking with my professor, he told me that this was because the resistors were not stable enough to keep pulling down the switches. Hence, he suggested me to try doing it another way. He told me that the breadboard itself had the function of pull-up resistor, so what I needed to do was to change the Arduino code and write “pinMode(x, INPUT_PULLUP)” in the void setup().
The biggest change I made to Processing was the volume. In my previous experiences, as the draw loop was being executed over and over again, my voice would also be played over and over again, so it was very chaotic and people could barely hear a complete sentence. In order to change this, my professor used the if() statement and used “myMoviex.volume()” to turn up and down the volume. However, even though we tried for several times, it still didn’t work and we did not know what was wrong with it. I think that this experience was very precious, for even though we did not understand everything, I still learned a lot during this process and gained more experience in Arduino and Processing.
Below is the final code of Arduino and Processing:
void setup() {
  Serial.begin(9600);
  pinMode(3, INPUT_PULLUP);
  pinMode(5, INPUT_PULLUP);
  pinMode(6, INPUT_PULLUP);
  pinMode(9, INPUT_PULLUP);
  pinMode(10, INPUT_PULLUP);
  pinMode(11, INPUT_PULLUP);
  pinMode(2, INPUT_PULLUP);
  pinMode(4, INPUT_PULLUP);
  pinMode(7, INPUT_PULLUP);
  pinMode(8, INPUT_PULLUP);
}

void loop() {
  // to send values to Processing assign the values you want to send
  // this is an example:
  int sensor1 = digitalRead(3);
  int sensor2 = digitalRead(5);
  int sensor3 = digitalRead(6);
  int sensor4 = digitalRead(9);
  int sensor5 = digitalRead(10);
  int sensor6 = digitalRead(11);
  int sensor7 = digitalRead(2);
  int sensor8 = digitalRead(4);
  int sensor9 = digitalRead(7);
  int sensor10 = digitalRead(8);


  // send the values keeping this format
  Serial.print(sensor1);
  Serial.print(",");  // put comma between sensor values
  Serial.print(sensor2);
  Serial.println();  // add linefeed after sending the last sensor value
  Serial.print(sensor3);
  Serial.print(",");
  Serial.print(sensor4);
  Serial.print(",");
  Serial.print(sensor5);
  Serial.print(",");
  Serial.print(sensor6);
  Serial.print(",");
  Serial.print(sensor7);
  Serial.print(",");
  Serial.print(sensor8);
  Serial.print(",");
  Serial.print(sensor9);
  Serial.print(",");
  Serial.print(sensor10);
  Serial.print(",");


  // too fast communication might cause some latency in Processing
  // this delay resolves the issue
  //delay(20);

  // end of example sending values
}
import processing.serial.*;
import processing.video.*;
Movie myMovie1;
Movie myMovie2;
Movie myMovie3;
Movie myMovie4;
Movie myMovie5;
Movie myMovie6;
Movie myMovie7;
Movie myMovie8;
Movie myMovie9;
Movie myMovie10;

Serial serialPort;

int NUM_OF_VALUES_FROM_ARDUINO = 10;  /* CHANGE THIS ACCORDING TO YOUR PROJECT */

/* This array stores values from Arduino */
int arduino_values[] = new int[NUM_OF_VALUES_FROM_ARDUINO];
int playingVideo = 0;


void setup() {
  size(1800, 1200);
  background(0);

  printArray(Serial.list());
  myMovie1 = new Movie(this, "1.mp4");
  myMovie1.loop();
  myMovie2 = new Movie(this, "2.mp4");
  myMovie2.loop();
  myMovie3 = new Movie(this, "3.mp4");
  myMovie3.loop();
  myMovie4 = new Movie(this, "4.mp4");
  myMovie4.loop();
  myMovie5 = new Movie(this, "5.mp4");
  myMovie5.loop();
  myMovie6 = new Movie(this, "6.mp4");
  myMovie6.loop();
  myMovie7 = new Movie(this, "7.mp4");
  myMovie7.loop();
  myMovie8 = new Movie(this, "8.mp4");
  myMovie8.loop();
  myMovie9 = new Movie(this, "9.mp4");
  myMovie9.loop();
  myMovie10 = new Movie(this, "10.mp4");
  myMovie10.loop();
  serialPort = new Serial(this, "/dev/cu.usbmodem101", 9600);
}

void draw() {
  background(0);
  getSerialData();
  //if (myMovie1.available()) {
  //   myMovie1.read();
  // }
  //image(myMovie1, 0, 0);
  if (arduino_values[0] == 0) {
    playMovie(1);
    if (myMovie1.available()) {
      myMovie1.read();
    }
    image(myMovie1, 0, 0);
    //stateManager = 1;
  } else if (arduino_values[1] == 0) {
    playMovie(2);
    if (myMovie2.available()) {
      myMovie2.read();
    }
    image(myMovie2, 0, 0);
  } else if (arduino_values[2] == 0) {
    playMovie(3);
    if (myMovie3.available()) {
      myMovie3.read();
    }
    image(myMovie3, 0, 0);
  } else if (arduino_values[3] == 0) {
    playMovie(4);
    if (myMovie4.available()) {
      myMovie4.read();
    }
    image(myMovie4, 0, 0);
  } else if (arduino_values[4] == 0) {
    playMovie(5);
    if (myMovie5.available()) {
      myMovie5.read();
    }
    image(myMovie5, 0, 0);
  } else if (arduino_values[5] == 0) {
    playMovie(6);
    if (myMovie6.available()) {
      myMovie6.read();
    }
    image(myMovie6, 0, 0);
  } else if (arduino_values[6] == 0) {
    playMovie(7);
    if (myMovie7.available()) {
      myMovie7.read();
    }
    image(myMovie7, 0, 0, width, height);
  } else if (arduino_values[7] == 0) {
    if (myMovie8.available()) {
      myMovie8.read();
    }
    myMovie8.read();
    image(myMovie8, 0, 0);
  } else if (arduino_values[8] == 0) {
    playMovie(9);
    if (myMovie9.available()) {
      myMovie9.read();
    }
    image(myMovie9, 0, 0, width, height);
  } else if (arduino_values[9] == 0) {
    playMovie(10);
    if (myMovie10.available()) {
      myMovie10.read();
    }
    println("Test");
    image(myMovie10, 0, 0);


    //if stateManager == 1 {movie1.read()
    //image(myMovie1);}
  }


  // the helper function below receives the values from Arduino
  // in the "arduino_values" array from a connected Arduino
  // running the "serial_AtoP_arduino" sketch
  // (You won't need to change this code.)
}

void playMovie(int which) {
  if (which == playingVideo) {
    return;
  } else {
    playingVideo = which;
  }

  if (which == 1) {
    myMovie1.volume(1);
  } else {
    myMovie1.volume(0);
  }
  if (which == 2) {
    myMovie2.volume(1);
  } else {
    myMovie2.volume(0);
  }
  if (which == 3) {
    myMovie3.volume(1);
  } else {
    myMovie3.volume(0);
  }
  if (which == 4) {
    myMovie4.volume(1);
  } else {
    myMovie4.volume(0);
  }
  if (which == 5) {
    myMovie5.volume(1);
  } else {
    myMovie5.volume(0);
  }
  if (which == 6) {
    myMovie6.volume(1);
  } else {
    myMovie6.volume(0);
  }
  if (which == 7) {
    myMovie7.volume(1);
  } else {
    myMovie7.volume(0);
  }
  if (which == 8) {
    myMovie8.volume(1);
  } else {
    myMovie8.volume(0);
  }
  if (which == 9) {
    myMovie9.volume(1);
  } else {
    myMovie9.volume(0);
  }
  if (which == 10) {
    myMovie10.volume(1);
  } else {
    myMovie10.volume(0);
  }
}

void getSerialData() {
  while (serialPort.available() > 0) {
    String in = serialPort.readStringUntil( 10 );  // 10 = '\n'  Linefeed in ASCII
    if (in != null) {
      print("From Arduino: " + in);
      String[] serialInArray = split(trim(in), ",");
      if (serialInArray.length == NUM_OF_VALUES_FROM_ARDUINO) {
        for (int i=0; i<serialInArray.length; i++) {
          arduino_values[i] = int(serialInArray[i]);
        }
      }
    }
  }
}
Here are the final photos and videos of my project:
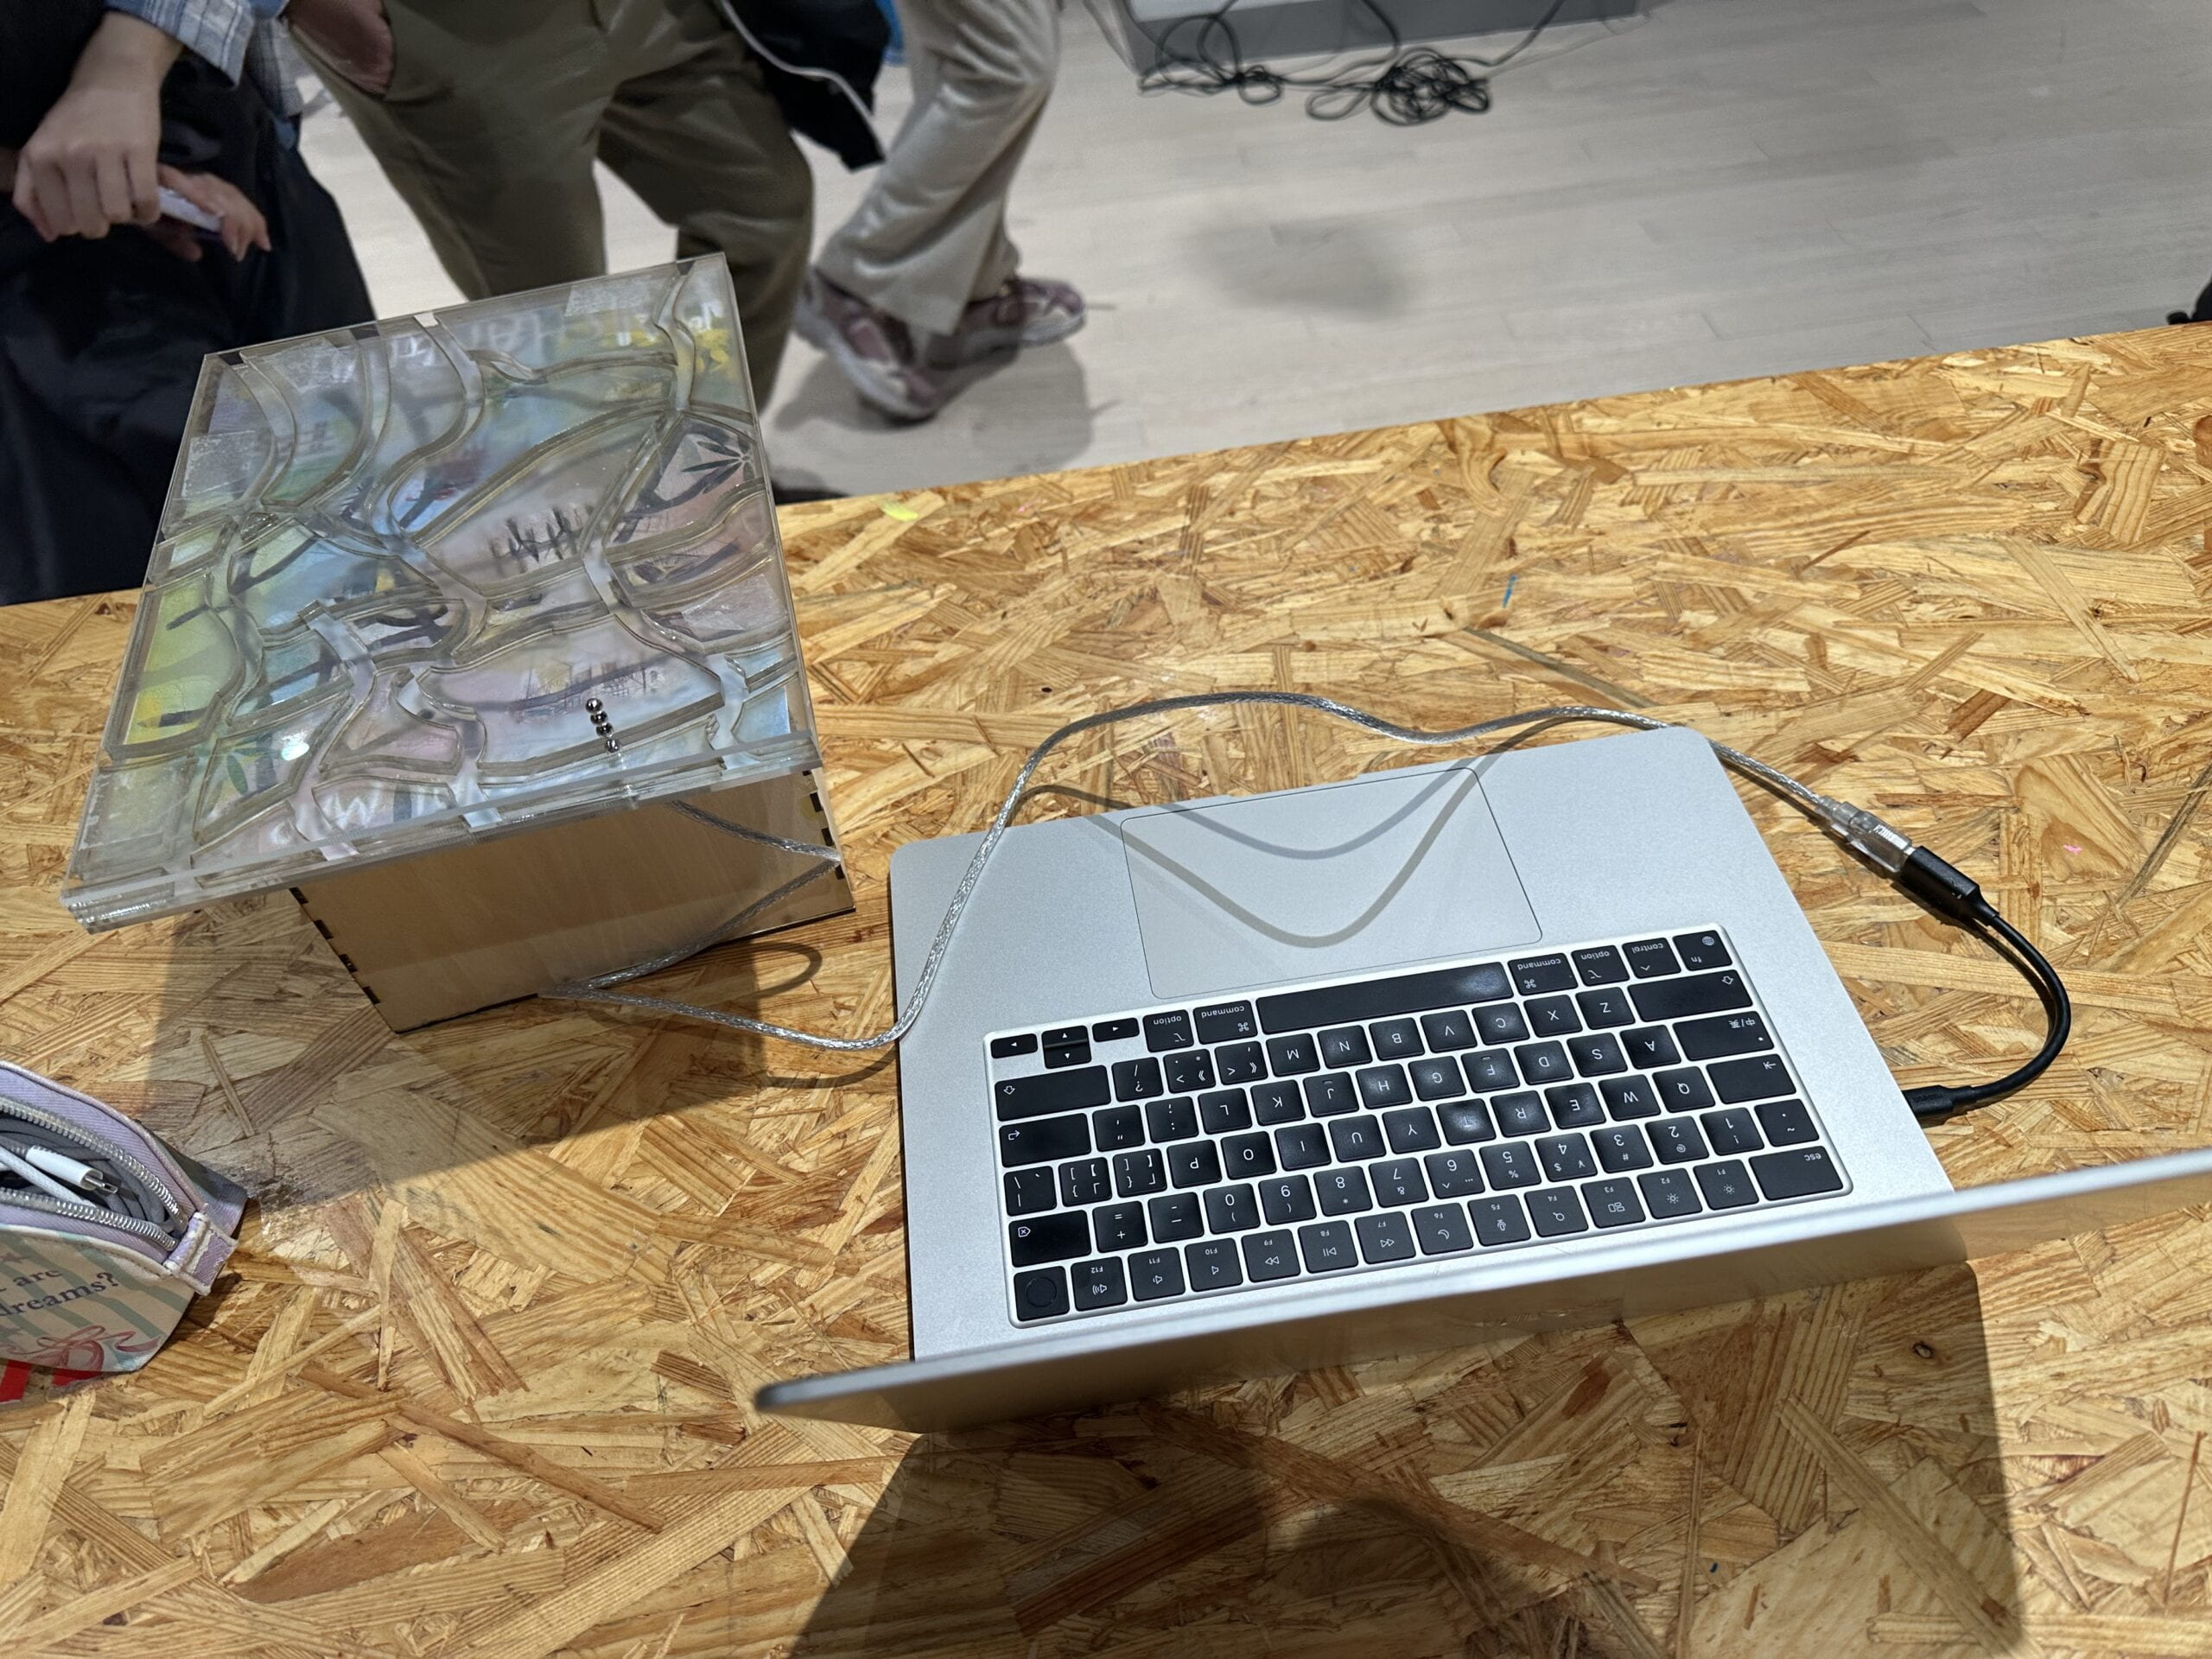
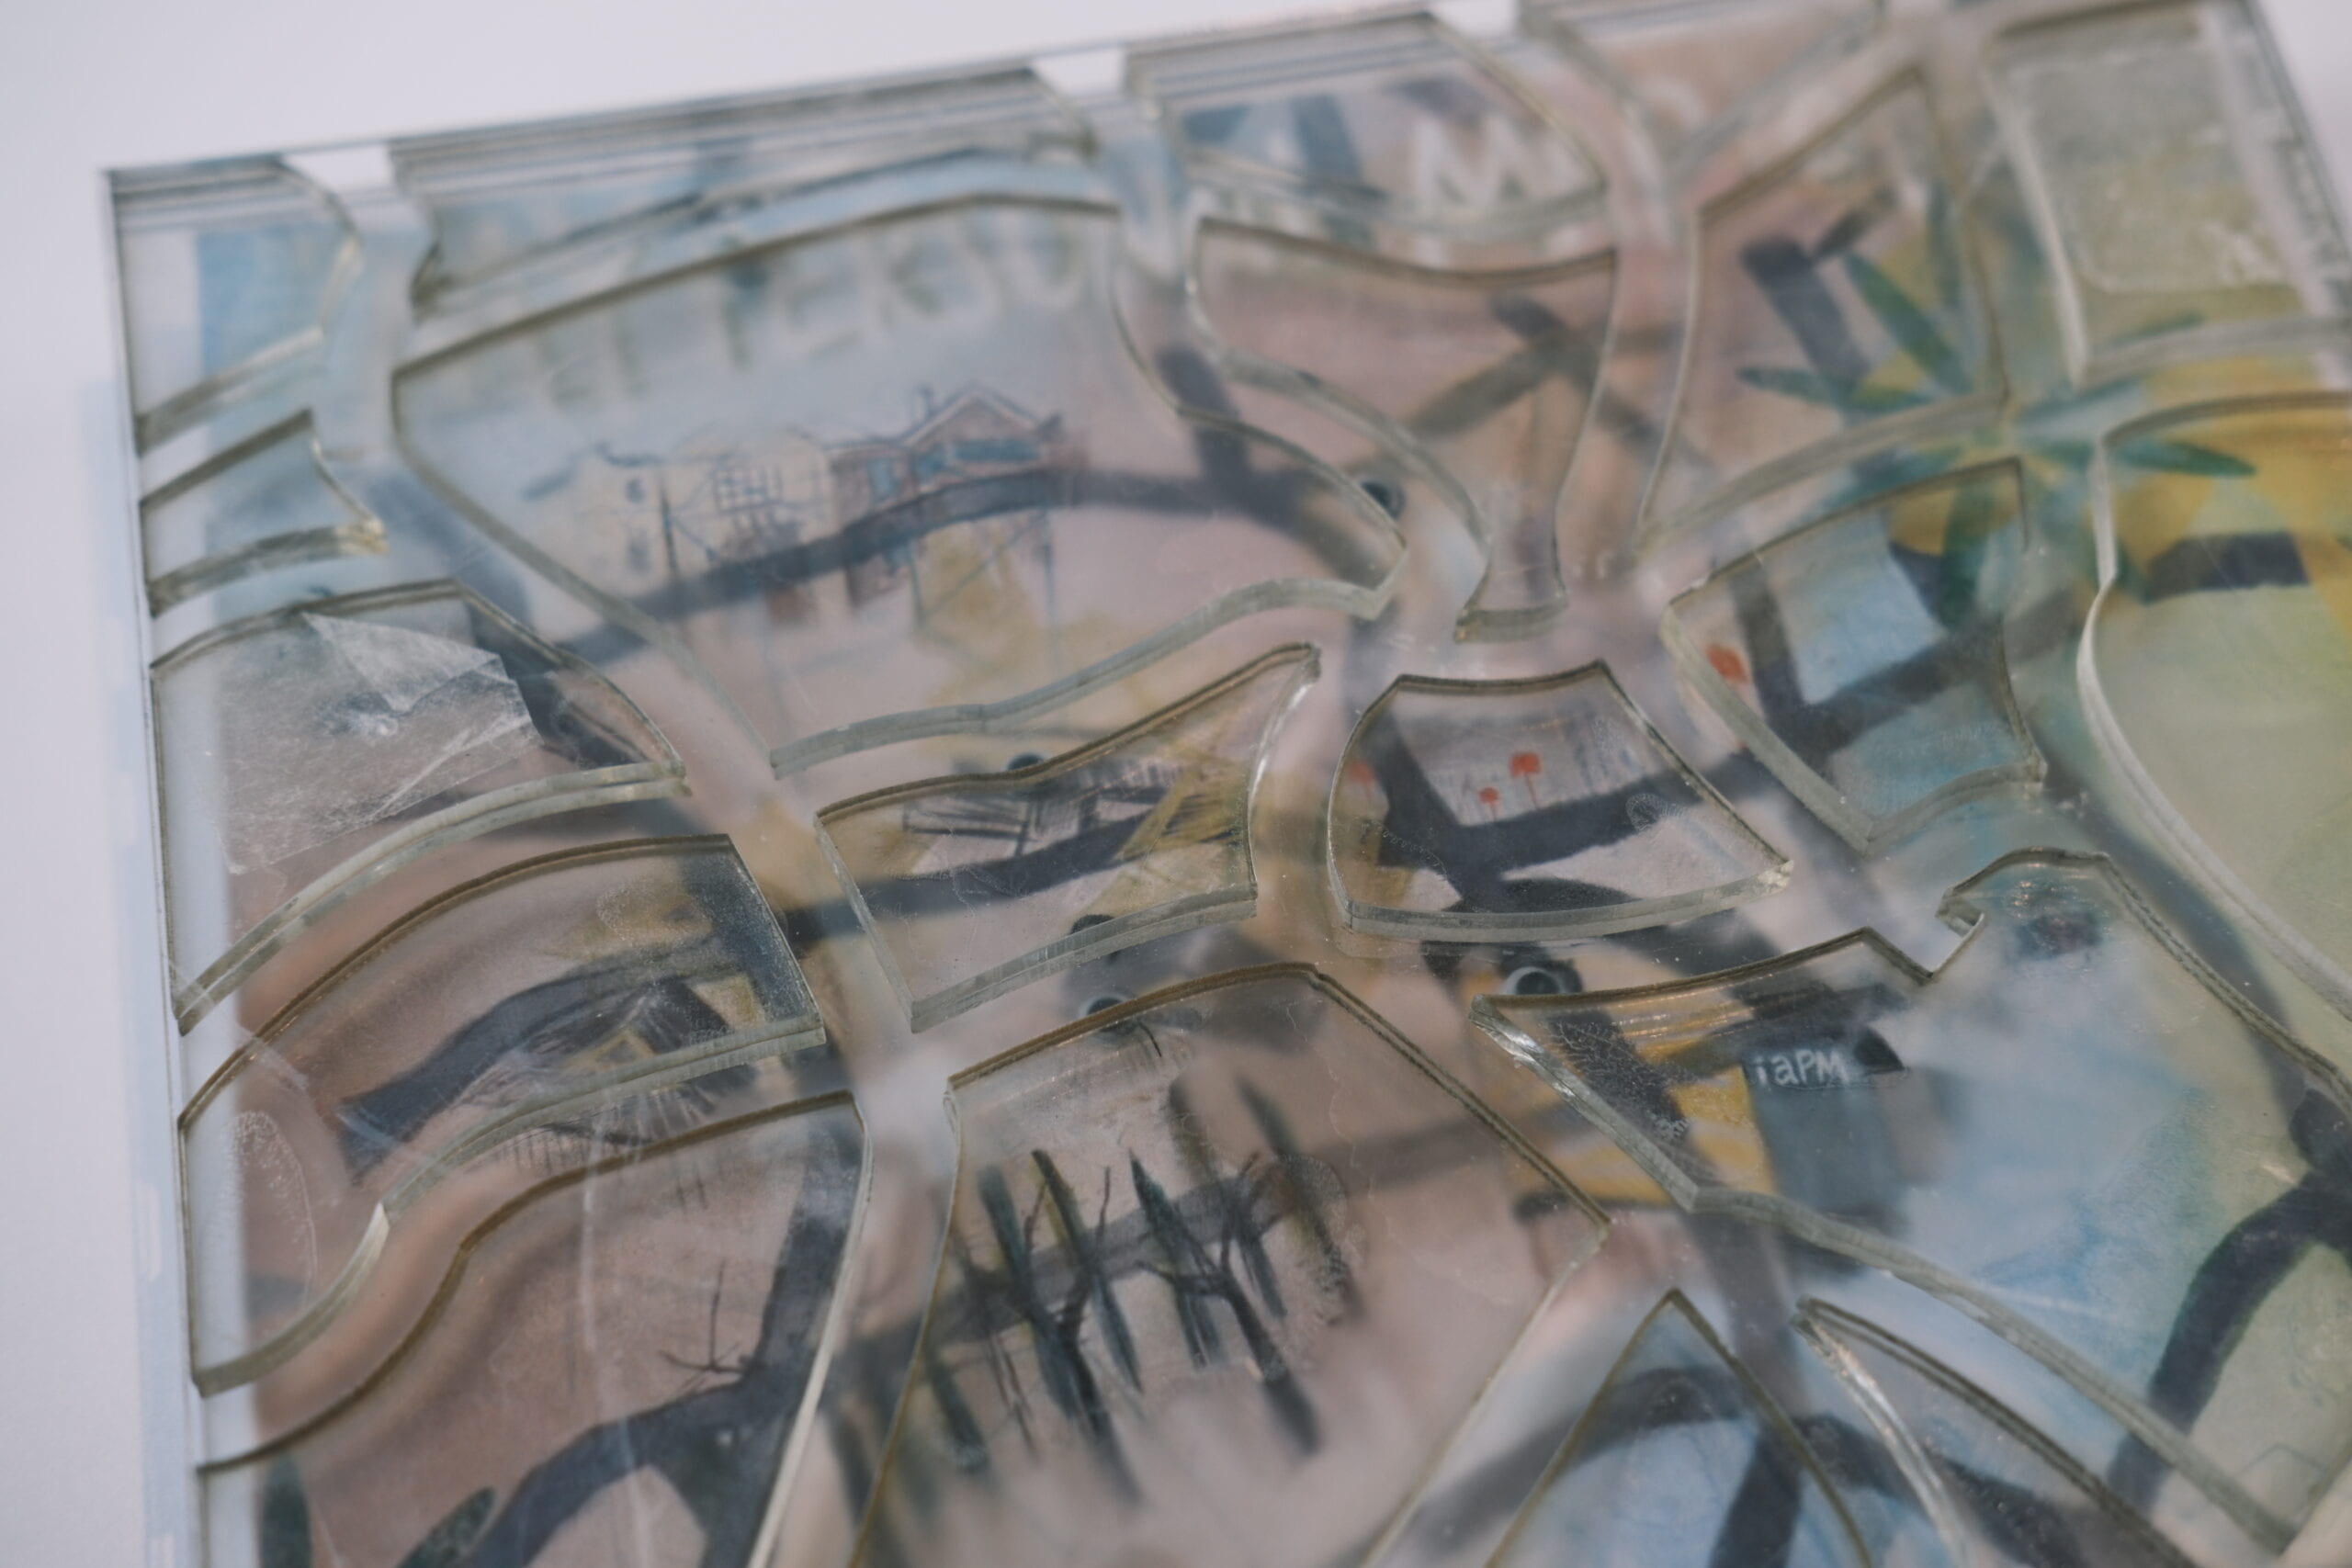
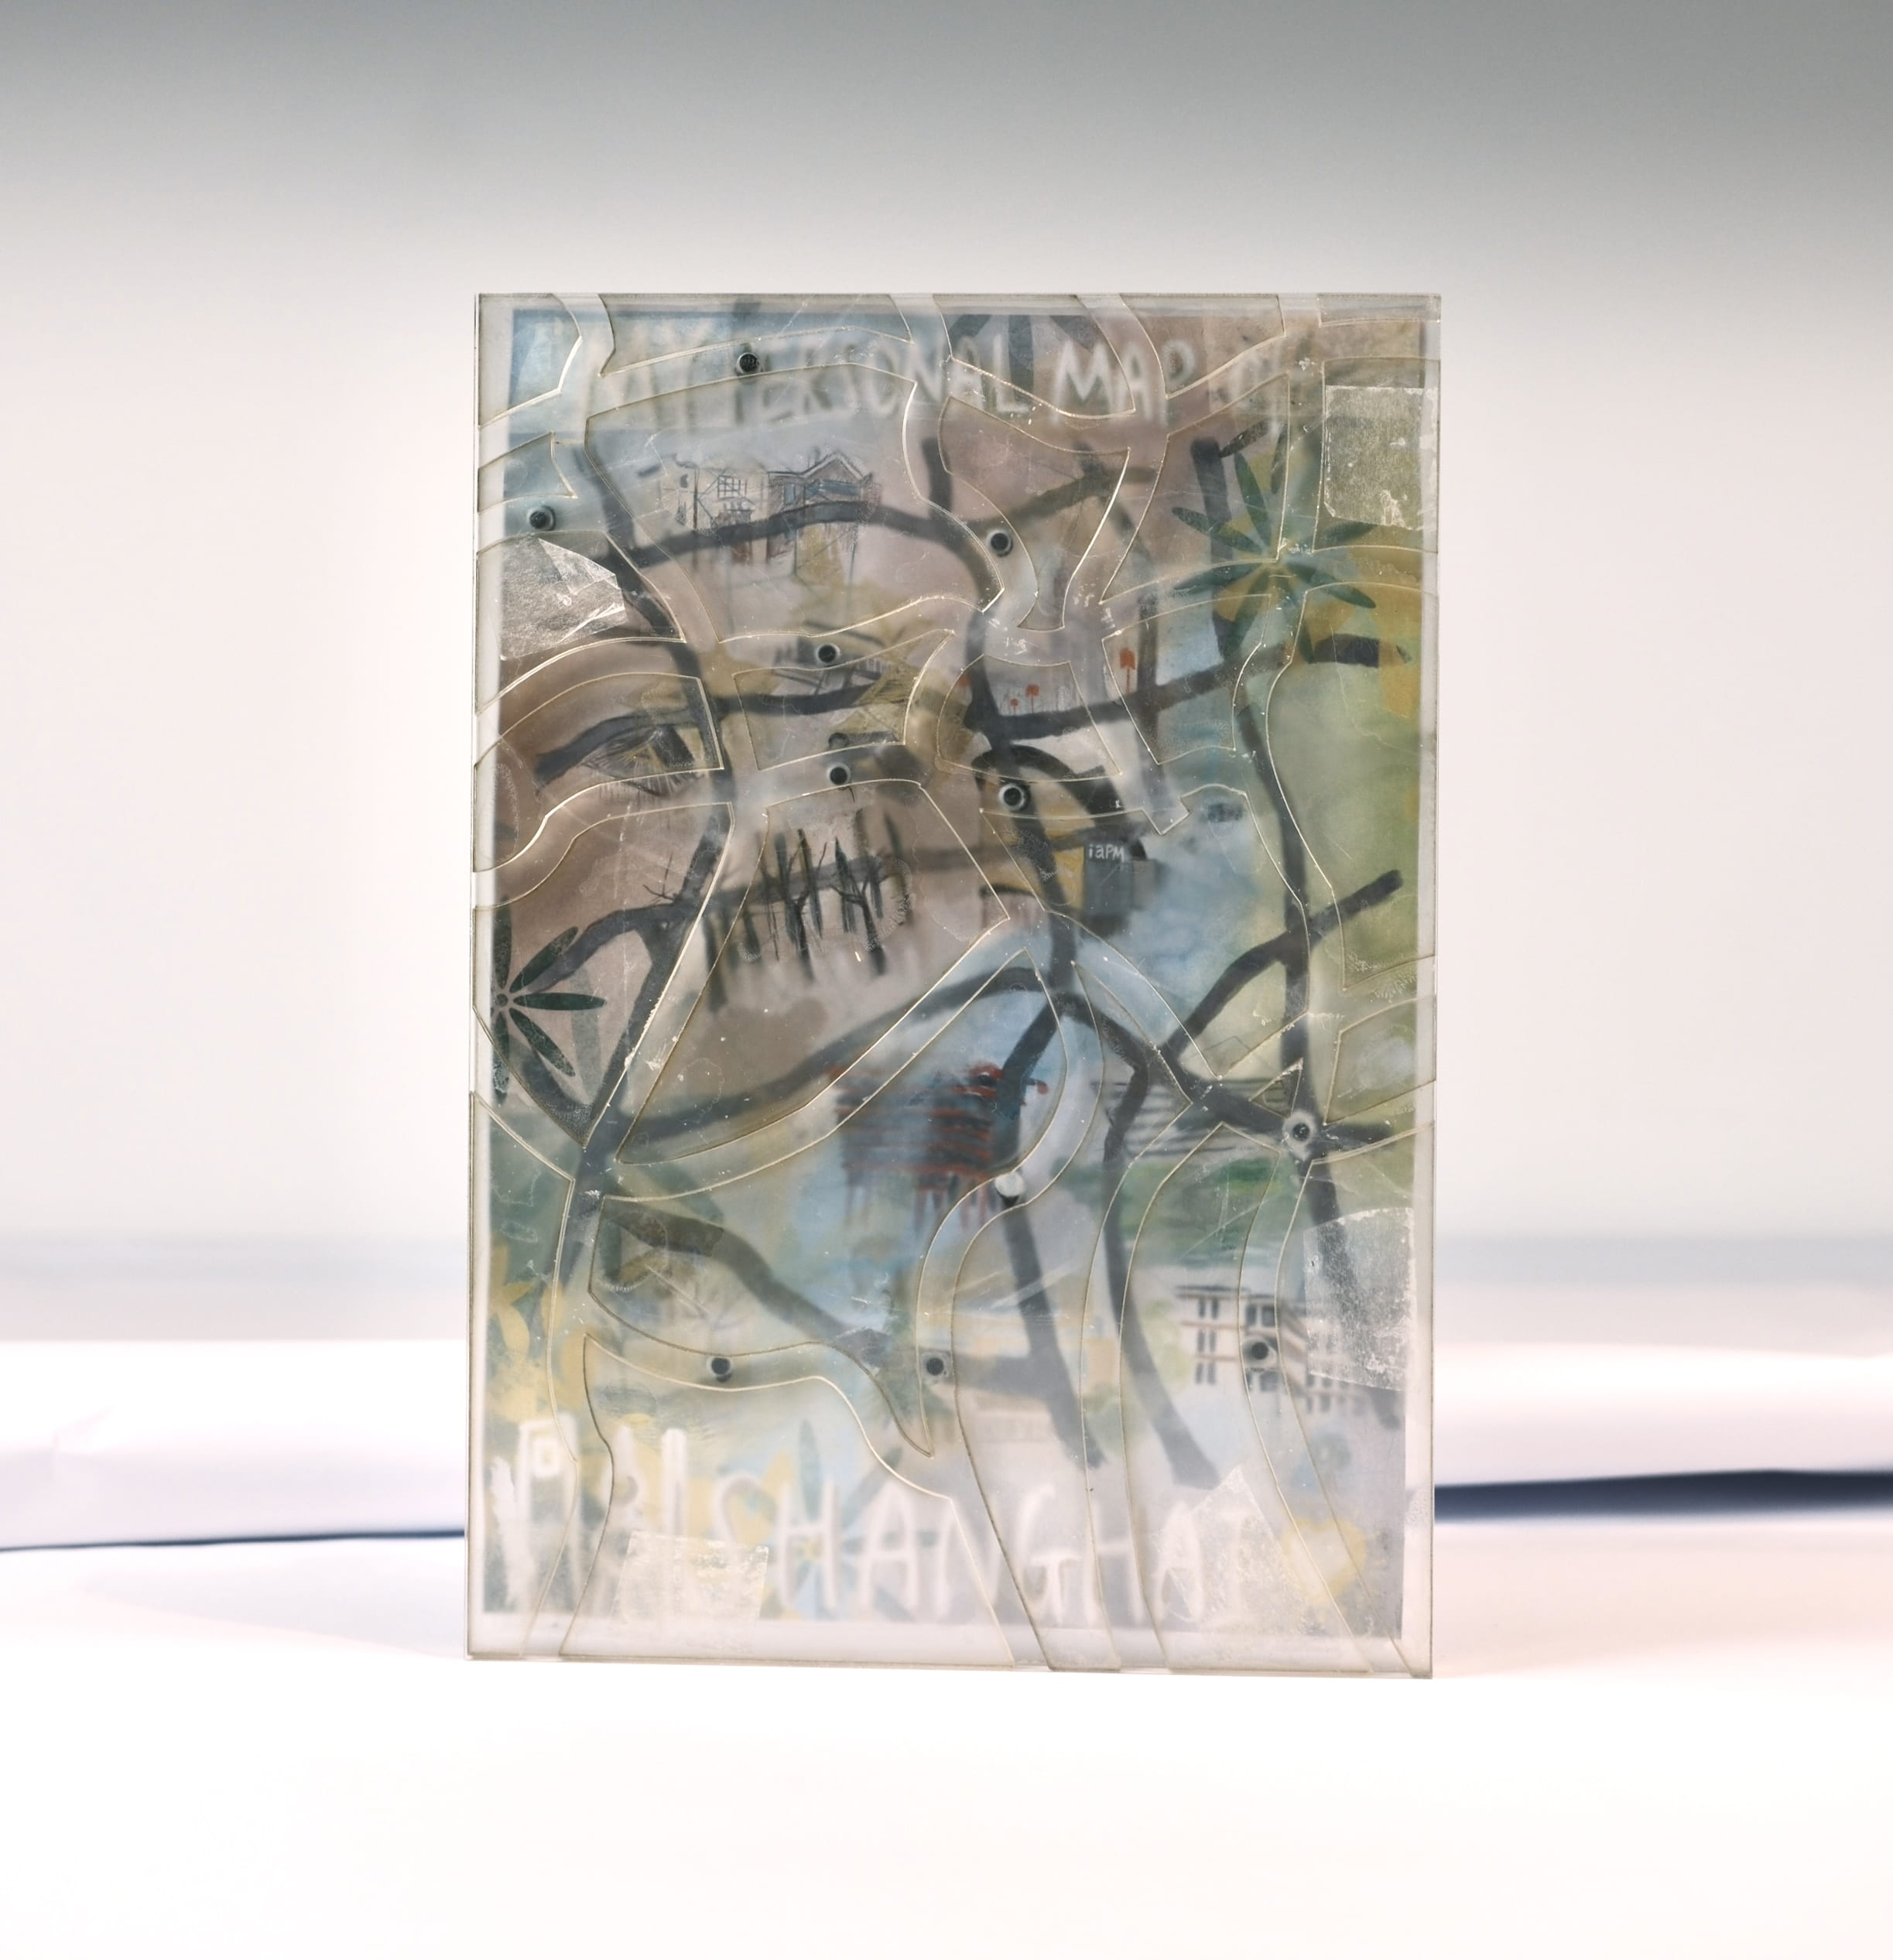

III. Conclusions
Just as I stated in my project proposal, this project enables the users to get a better view of Shanghai and look into my personal life track. As this project consists of both the physical ball game and the digital video clips which represent important moments in my life, I think it’s a novel way to combine what we may use everyday (like a toy) and the documentation of our lives together. In this era where new media is booming and everyone is eager to record their own lives and post them on social media, this project, together with its key part of interaction, may inspire the users to think of new ways to document their lives.
In my opinion, overall my project achieved the goal. When attending the IMA show, many users were inspired by my project and said that this was like the experience of “city walk” which is very popular in recent days. This comment amazed me, because at first I only thought of giving the users a “tour” around Shanghai, but I didn’t relate the popular term “city walk” to my own project. So in my opinion, not only were the users inspired by my project and they got immersed when watching the videos I made, but I myself also received new inspiration from this precious experience.
Another thing that amazed me was how the users interacted with my project. At first, inspired by my teacher, my expectation was that the users may hold the map by hand and let the ball move inside by turning the map. However, at the IMA show, one of the users accidentally found out that the magnetic ball inside the map can be guided by a string of other magnetic balls outside the map. This would be much easier for the users to interact with the project and make the experience more comfortable as well. Again, I always gain new inspirations from the users’ experiences and their interaction with my project. This was such a precious experience to me.
My definition of interaction was like a “conversation” between the users and the project. Every time the user does something to the project, the project should do something to respond. In my opinion, my project has basically fulfilled my definition of “interaction”, for every time the magnetic ball touches a magnetic sensor, the computer will automatically play a video that was recorded in the exact same place that is shown on the map. There are ten such videos, and each video is about 2 minutes long, so altogether every user can have an interactive experience of no less than 20 minutes without repetition.
However, there are still a lot of things I would like to improve if I had more time. Firstly, just as shown in the video above, when Processing was playing the videos in the data file, the videos were not smooth enough and would accidentally pause for a second from time to time. I didn’t figure out the exact reason of this phenomenon, so if I had more time, I would try to improve this part and make the videos smoother. Secondly, both my professor and I failed to add sound to the videos, which I consider to be a pity, because the users would not get a clear introduction of the places shown on the screen. During the IMA show, many users would ask me “where is it” every time a new video was played, so I do think that adding my voice and my introduction to the videos would help. If I had more time, I would definitely prioritize this part and improve it as much as I can.
The experience of making my final project was too precious and unforgettable to be described properly by words. Below are some paragraphs of my final say about this project.
Being different from my mid-term project, this final project took me much more time and more sleepless nights to complete, and altogether I made three versions to improve the interactive experience. The most significant thing I improved through this process was my ability of physical fabrication, for I used laser cutting, Acrylics glue, Adobe Illustrator, drills and many other tools and materials that I had never tried before in class. From being unskilled to being confident, I gained a lot of practical knowledge in the physical fabrication part.
During the making process, I also realized that my coding skill was very weak and needed more practice to be improved. All main problems that are still left unsolved are about coding, and sadly I am not capable for solving them at this point. Therefore, in the future, I would try to improve my relevant skills, and maybe take computer science courses to make up this shortcoming of mine.
When it comes to setbacks and failures, I think the biggest setback I encountered during the whole process was that in the second version I did not add an extra layer between the ball and the sensors, so users could hardly make the ball move. This reminded me that I should prioritize users’ feelings when making an interactive project, instead of just thinking about “finishing” it. Also, I was not creative enough when coming up solutions of setbacks. If I did not talk to my professor and inquire him about what I should do with this problem, I would barely think of the solution of adding another layer between the ball and the sensors. So next time when I face another setback, I should first ask myself and force myself to try new methods to solve problems of my own.
When it comes to successes and accomplishments, I would like to divide my “success” into two parts. The first part, which received the most praises from the users, is the idea of creating a personal map of a city. However, this idea actually came from my professor, because at first my idea was only to create a 3D ball-run game without a clear theme. Though being very grateful to my professor, I am also reflecting on myself. It seems clear that I am not creative enough, and I would try to do better in the future, but what’s more? In my opinion, the most valuable thing I learned in this “creativity” part was that a project must have a “soul”. It should have a very clear theme, such as a personal map of a city, or gender, or environmental protection, etc. Without this “soul”, however fabulous the project may be, it could not give the users a feeling of amazement, and neither can it provide the users with inspirations that they may later apply to their own creative works.
The second part is the building part, the process which made the idea came to life. What I learned in this part was that a complete and maybe “good” project definitely needs to be modified over and over again, and hard work and patience are two most important factors in this process. Never have I spent so much time on one homework or project, but without this long time being spent and some effort being “wasted”, I would never be able to reach the final success and receive the smiles of the users at the IMA show. So next time when I am doing another project, I will tell myself to be patient and hardworking, and treat every detail with much care.
In all, I can’t be more grateful for the chance I had to take the Interaction Lab course in my first semester here in NYUSH. I gained a lot not only from the final project, but also from the whole semester’s learning process. Thank you, Interaction Lab!
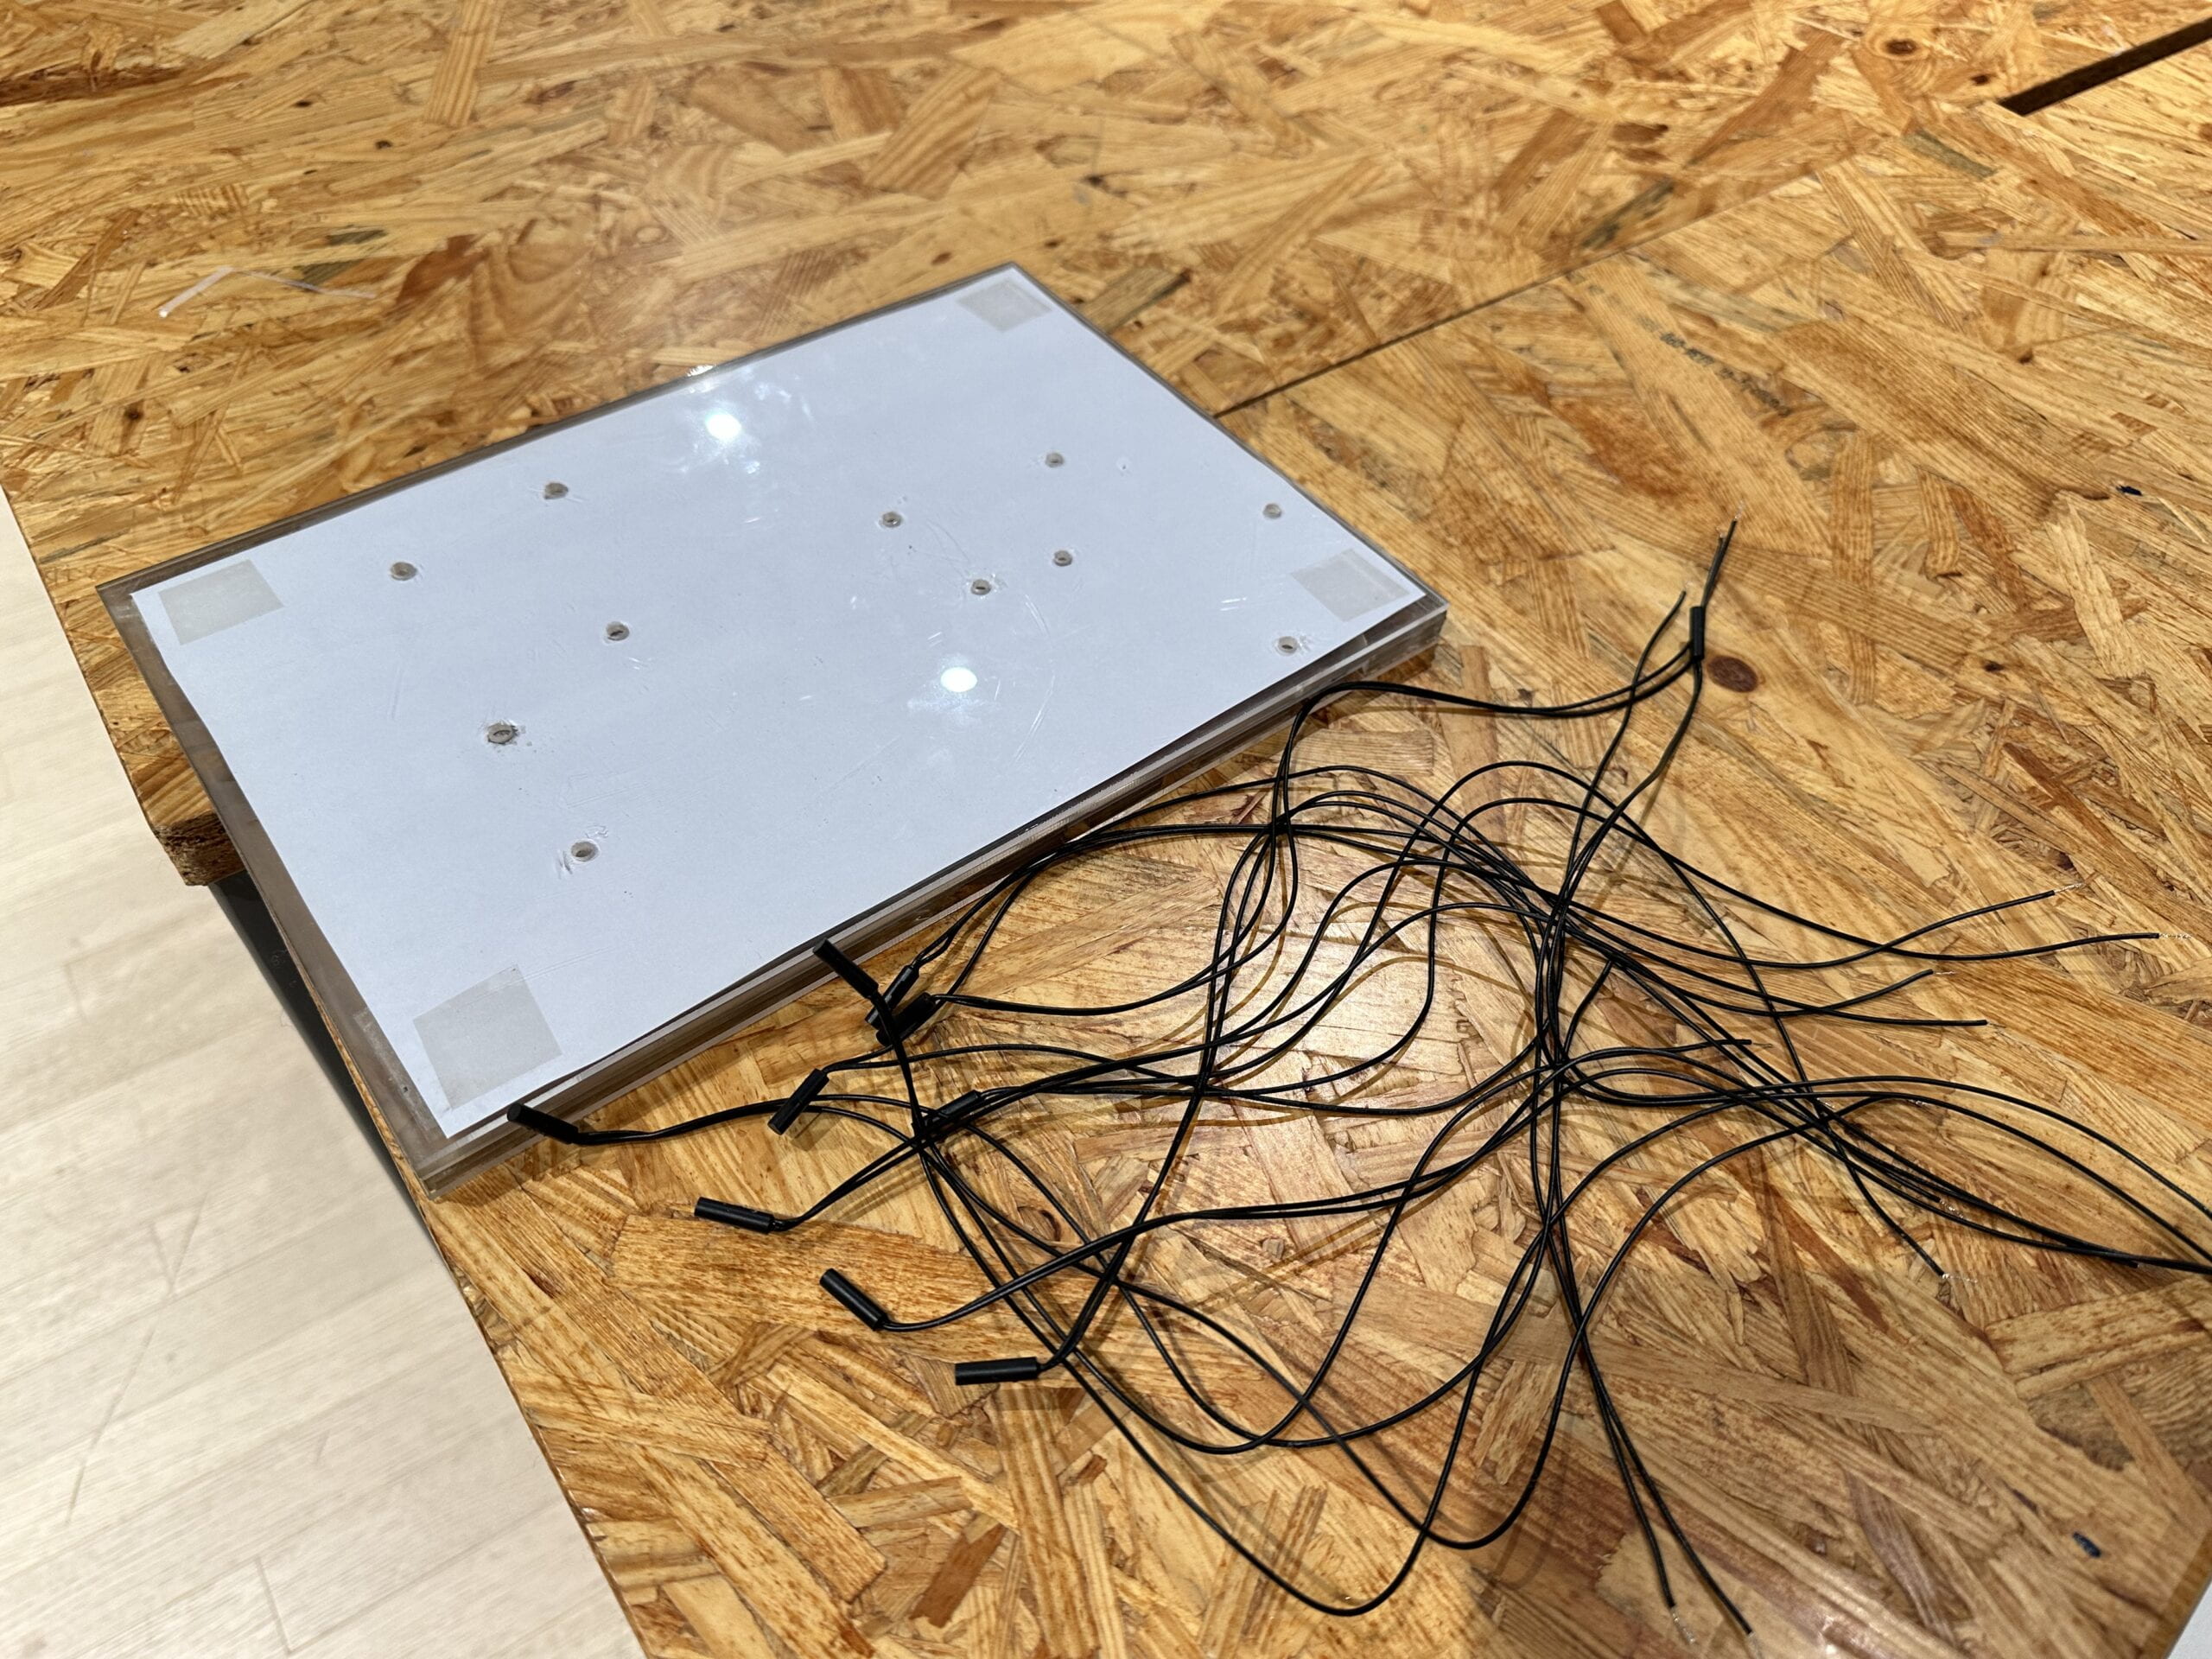
IV. Disassembly
V. Appendix 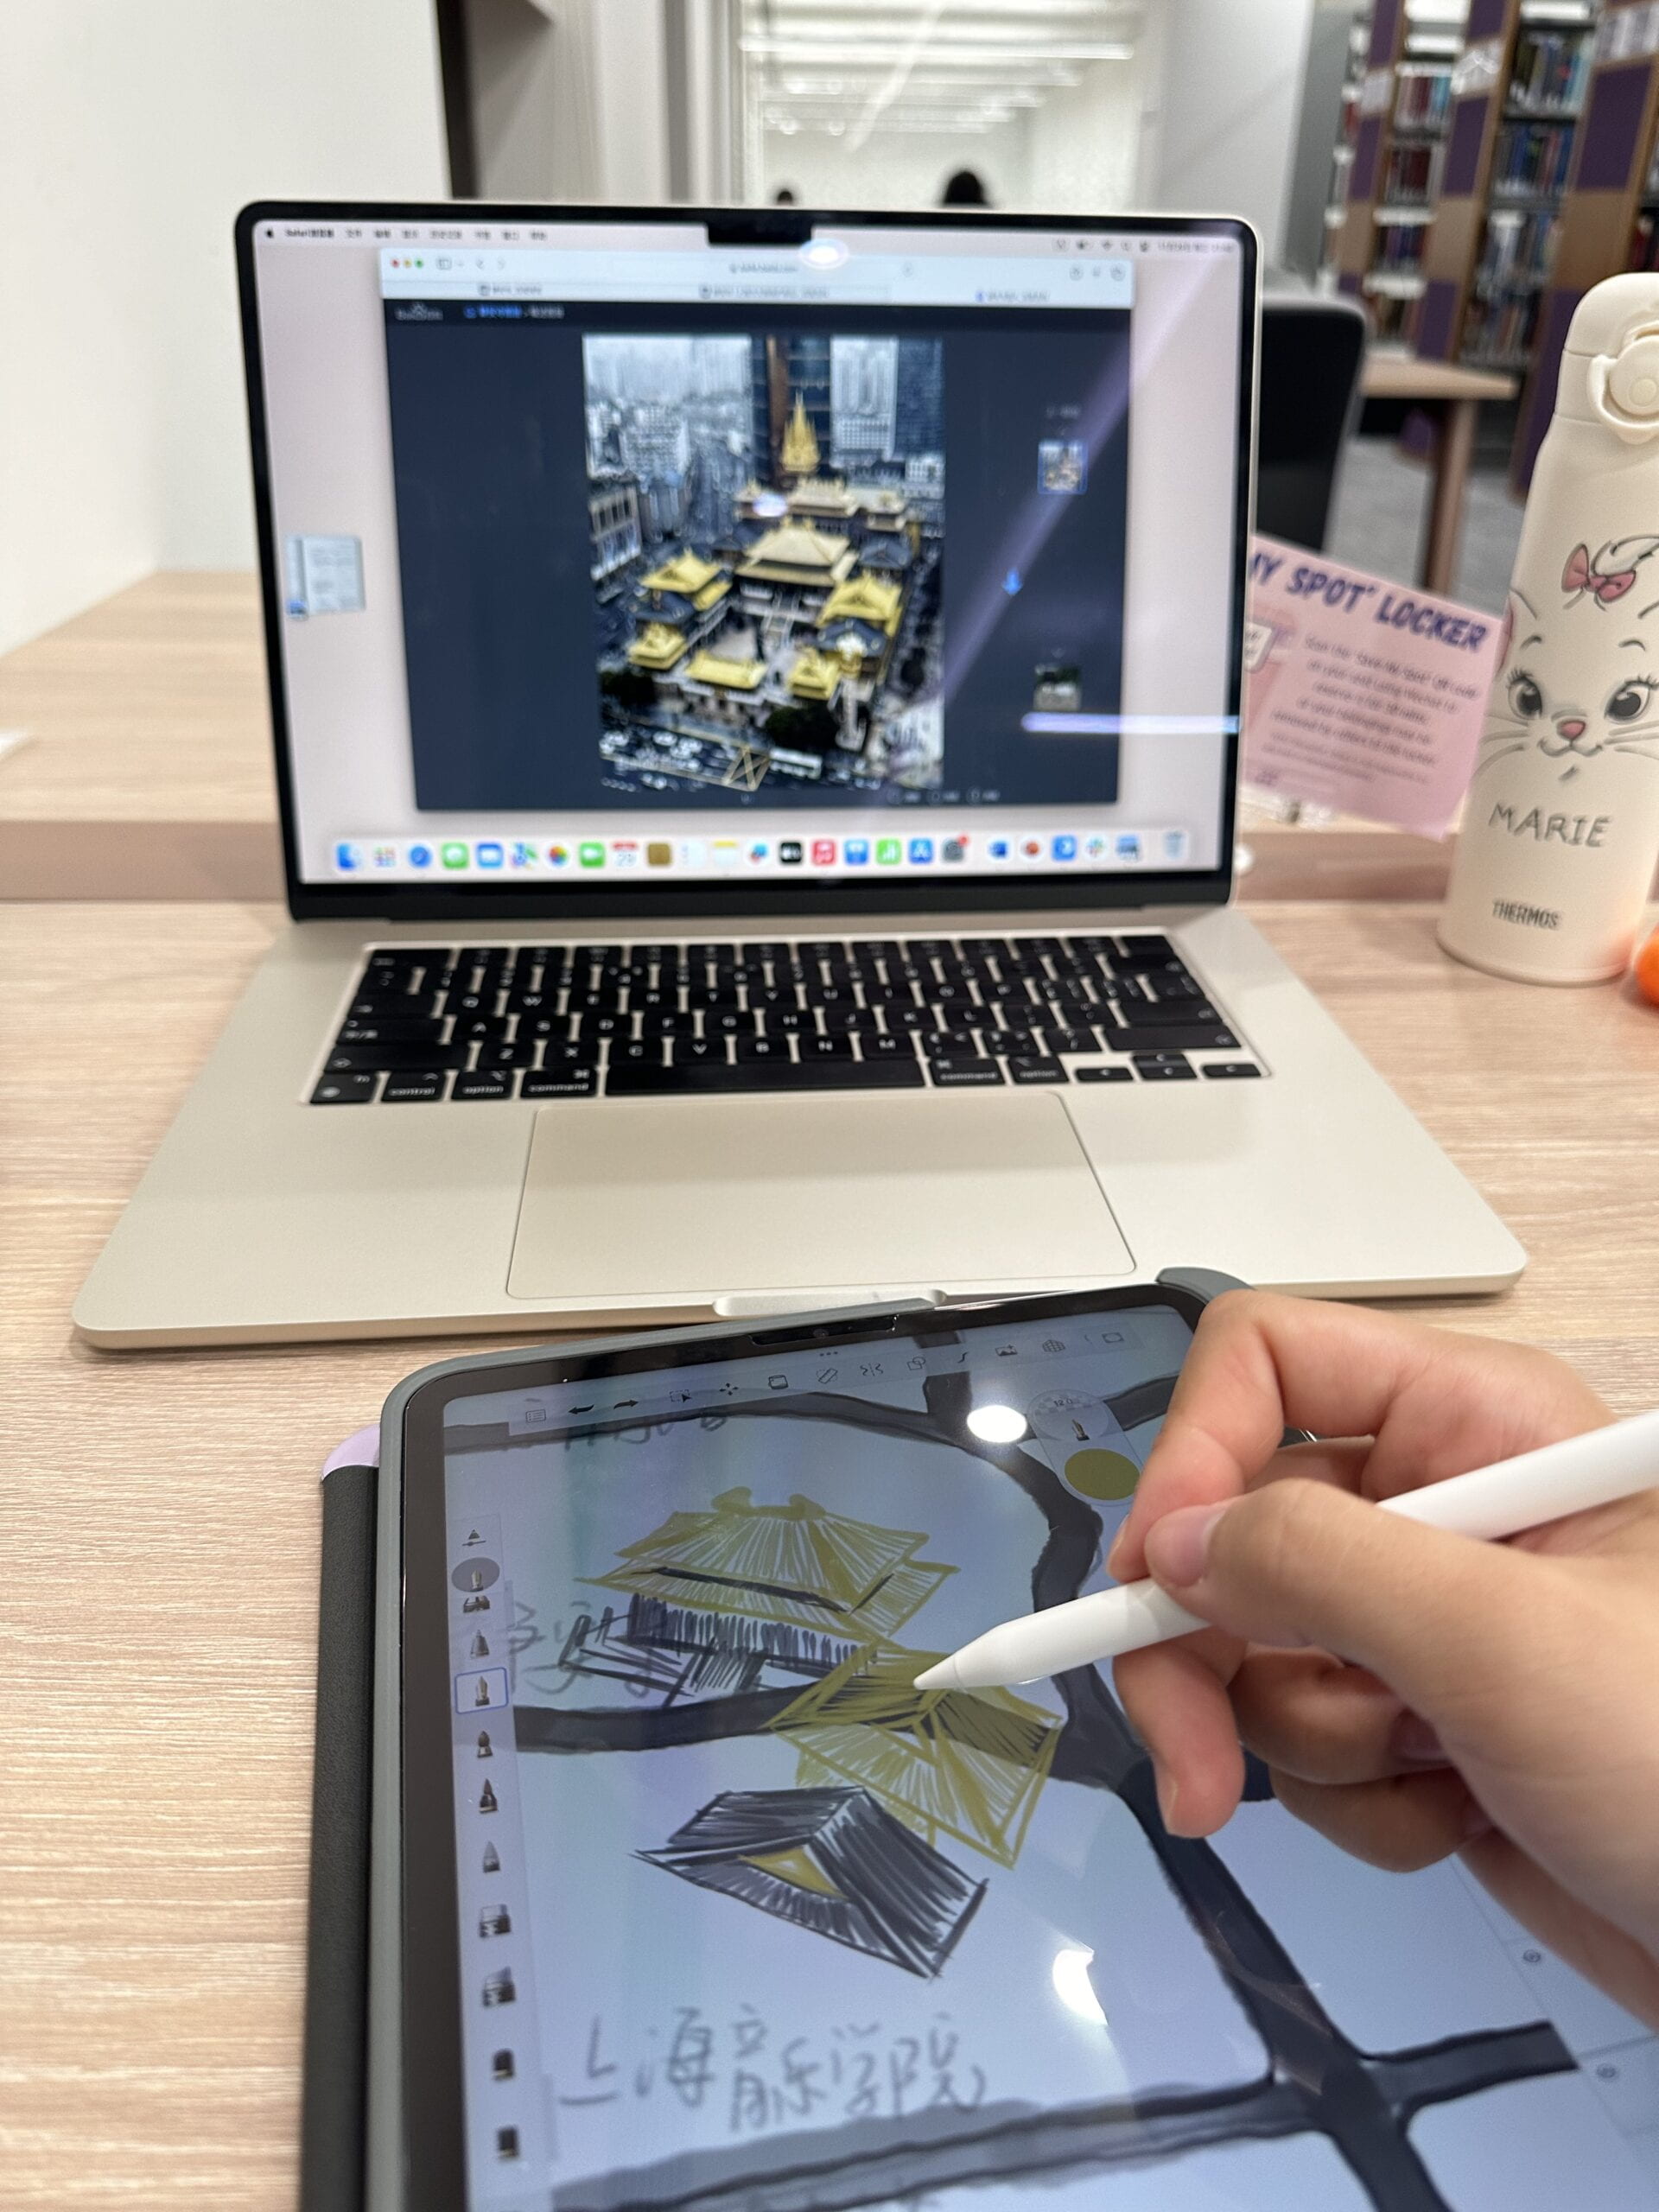
Below are my ten videos:
Below is the script I wrote for the introduction part:
This is people’s square, and it is located in the center of Shanghai. It is famous for its scenery and all the political functions it serves, but as for me, it is important mainly because of its deep relationship with my childhood. When I was a kid, I used to take the extracurricular classes of English and drawing, and both of them take place right in the people’s square, so I went there every weekend, and was able to make many friends. After I began my journey as a high school student, I quitted all the classes that were related to my personal interests and have seldom been there ever since. Thanks to this final project of Interaction lab, I was able to revisit one of my favorite spots in Shanghai and refresh my childhood memories.
What you see right now is located in the nearby area of the Jingan Temple. This is one of the most top end spots in Shanghai, for it has the most luxurious shopping malls and the most renowned enterprises of the world. This high end place is important for me because my mom used to work here. I can still recall clearly of the time when I was still a primary school student, and I took the subway for a whole hour totally by myself from my school to my mother’s company just to wait for her to have dinner together. This place contains not only the memory of myself but also and especially the memory of my mother, so it is crucial for my family and I miss it very much.
This is the Shanghai Conservatory of Music, and it is located in the center part of Shanghai. It is a very famous and renowned music school of not only the city of Shanghai but also the world. Why would I have a reletionship with a music school then? Well, the fact is that though I cannot play the piano today anymore, I used to be very good at it and I took piano classes for 11 years, from three to fourteen, but I quitted due to the pressure of the high school entrance exam. I took several years of piano classes right here in the conservatory, and I really miss the time when I was just a young kid, when I could do whatever I want to do without worrying about my grades or my future.
This video is about a road called Middle Huaihai Road. It’s near the Shanghai Conservatory of Music, and I used to go shopping here with my mom after my piano class. In spite of the luxurious shopping malls, what really impressed me and made me a lover of this road is its beautiful scenery. There are phoenix trees on both sides of the rode, and it’s especially beautiful in autumn, since I really like the way the leaves turn to yellow when it gradually gets colder. This district used to be a French Concession and that’s why most of the buildings along the road are of the European style.
This video is about a very short road in Shanghai, called Yuyuan road. It went viral on the internet in recent years because of its artistic architecture style, and young people would like to come here with their friends and take beautiful pictures, including me. I have been there for several times with my best friend whom I met for the first time seven years ago but finally became friends when both of us were first admitted to high school. We spent a lot of time hanging out together, and Yuyuan Road is definitely among our favorite places in Shanghai.
This video is about a relatively large district around Xinzha Road. It is near Jingan Temple, and is mainly a residential area. I got to know this place two years ago, during the pandemic I tried to find a cake store that was still “alive”and its cakes tasted well as well. I did find one, and it was located in this area. From then on I started to visit this place regularly. It is always glad to see some of your favorite shops survive during the pandemic. One year ago I had to wear a mask before really stepping into the shop; now I don’t need to do that any longer.
This video is about my high school, Pudong Foreign Languages School. It is a cmbination of both the junior high and the senior high, and though there aren’t many people in each grade, the school itself is large and beautiful. I spent seven years of my life here, and almost all the friends I made are from this high school as well. After I had been admitted to NYUSH, I seldom think of my middle school, because in my existing memory Gaokao casted a huge shadow on the last couple of years of my high school life. But as I was doing the video editing today, I saw how fantastic the sunsets were in the videos that my friend and I recorded in the past, and I immediately realized that the years spent in this school has already become a part of me, and that it shaped me to be who I am today.
This video is recorded one night before the final presentation of the project, and at that time I was still trying to improve my map of Shanghai. The place is no doubt NYUSH, and specifically room N406, the IMA studio. When it comes to the choice of universities, to be honest I never thought of going to a university which is only 5 minutes drive from my home, but I don’t regret at all. By the end of my first semester here, I have met so many amazing people, and my memories with them will be cherished by me forever.
This video is about the Shanghai Library where I once spent a whole winter holiday with my friend and we were preparing for Gaokao. However, this place is meaningful to me not only for this piece of memory, but also for my personal experience as a volunteer here during this summer holiday. It was my first time being a commontator, and my work was to introduce Karl Marx to people from various enterprises. The work was very challenging, but I managed to do it. Being a volunteer raised my level of happiness and is definitely among the top things I would like to do when I am free.
This video is about the West Bund Museum in Shanghai. I love arts, and this gallery is so good for people who have an interest in arts, because its exhibits are very interesting and its architecture style is very artistic too. The reason why I chose this spot was because I was a volunteer here during the past summer holiday, and thanks to this opportunity I was able to wander around the gallery several times and appreciate the drawings for as long as I wanted.

Leave a Reply