All posts by Jiasheng Li

Interaction Lab – Final Project: LIKE the post? – Jiasheng Li (Jason) – Professor Andy Garcia

A. LIKE the post? – Jiasheng Li (Jason) – Andy Garcia

(Presentation)

B. CONCEPTION AND DESIGN

This project is an installation that physicalizes the action of posting filtered photos on social media and the diverse motives behind the LIKEs for the posts besides the appreciation for its content. It explores the multifaceted nature of identity representation and interactions in the digital realm. My definition of interaction is “a reciprocal input and output cycle between the users(human) and the system(non-human), which could still linger on in users’ minds after the immediate resonance”. This project aims to establish the mutual loop between machines and humans and leave a lasting impression, aligning with my previous interpretation.

LIKE doesn’t mean “like”. The inspiration is from a storyline in the 2024 Taiwanese series Imperfect Us: Chien Ching-fen taps LIKE for the fancy posts of Rebecca, her husband’s ex. The motive behind this particular digital interaction is not out of genuine love for the content but out of jealousy and the subtle observation sign “I am reading your post, Rebecca”. It made me reflect on the social media interactions. Technically, people should LIKE the post for the content. However, in many cases, people LIKE others’ posts for various reasons, such as conformity to friendship. I talked to my friends and professor about the concept, and fortunately, they all shared these situations in life. Therefore, I would like to capture and exaggerate the nuanced intentions.

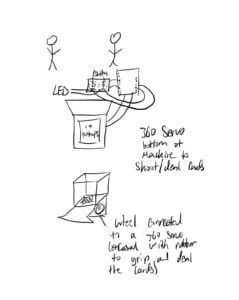
At the beginning of the project, I wanted to involve two users, one for posting a photo and the other for explaining their motives behind the LIKE. 

(Initial Design)

Professor Andy Garcia pointed out that people might not reveal their real intentions if they were friends or family members of the one who posted the pictures. Therefore, instead of the literal physicalization of social media, I chose to use a slot machine as an analogy with the randomness and diversity of the viewer feedback. Since the slot machine is not the live depiction of instant viewer feedback, the project is adjusted to one user. 

(Updated Design)

The updated design for the project proposal phase is as follows. The user operates the slide potentiometers as the filters and presses a button to freeze the camera on the computer as if they are taking a picture and posting social media blogs. Then they pull the lever, with a tilted sensor connected, to generate three random emojis that illustrate different reasons other people LIKE their posts besides the appreciation of the pictures. The whole takeaway for the audience is that we present the “filtered” us in the virtual world since the digital world can never show our multi-dimensional identity while the viewers’ LIKES might not be visceral with various other considerations.

During the User Testing, most feedback is about the interpretations of the emojis. The users would like the emojis to be explained through the installation itself rather than me explaining the LIKE psychology. So I decided to make the interface pseudo-Instagram with comments that explain the emojis. Eventually, many users realized that the comments were aligned with the slot machine outcomes. For instance, ❤️‍🩹 stands for “I LIKE it to pretend that we are fine”; 🙇‍♂️ stands for “I LIKE it to follow the trend”; 🤔 stands for “I LIKE it to look smart tho I don’t get it”. 
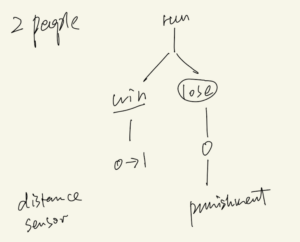
(Flowchart)

In the end, I wish my understanding of interaction could be executed. The audience can work with the system and the system deals with the input; the system outputs new instructions and the audience continues the conversation. Hopefully, they can reflect on the daily uses of social media. It does not have to be a satire on the two-sided dishonesty. After all, social media is already in a virtual world where authenticity is infeasible and LIKE is just an oversimplified function in social media. 

C. FABRICATION AND PRODUCTION:

Before User Testing:

First I tried out a potentiometer and mapped the electricity value to the filter function.  
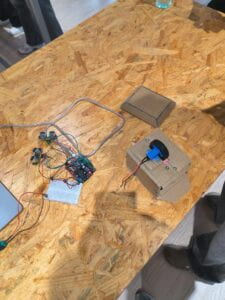
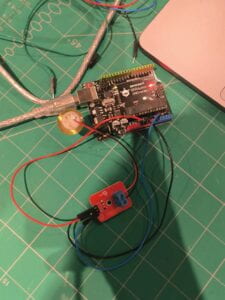
(Circuit)

(Video: Potentiometer to Filter)

The key issue here is to map the filter value for POSTERIZE to a smaller range such as 2 to 16 instead of the whole range of 0 to 256. The 0 to 256 range is too broad to have visual effects. 

int f = (int) map(arduino_values[0], 0, 1023, 16, 2);
filter(POSTERIZE, f);

Furthermore, I encountered the problem that the camera only froze once if it only detects the HIGH and LOW for the button current. 

Thankfully, IMA Fellow Kevin prompted me to draw inspiration from the millis() that records the previous value. Therefore, I introduced v to track and store the button situation and the camera state. In addition, the value for the POSTERIZE filter should be stored in the if-conditions to stop the change in the filter after the photo is taken. 

(Video: Freeze the camera)

if (v == 0) { // update filter only when camera is running
pf = (int) map(arduino_values[0], 0, 1023, 16, 2); 
}
filter(POSTERIZE, pf);
//button capture
if (arduino_values[1] == 1 && prev == 0) {
if (v == 0) {
cam.stop();
v = 1; // photo taken
} else {
cam.start();
v = 0; // camera on again
}
}
prev = arduino_values[1]; // update the previous button state
}

What’s more, I learned from the YouTube video Processing 3 – Slot machine | Game Designing #10 | HBY coding academic and embedded the slot machine by Processing. The main trick is to load pictures into arrays and make them move in the Y direction. If the previous picture exceeds a certain position, it will be replaced by the next one.

 if (y[i]>20) {
//set the image to the initial position
y[i]=0;
//prepare the next image
idx[i]++;
//if the user press the stop button, then all the reels will reduce the speed
if (stop_button==1 && acc_y[i]>0) {
acc_y[i] -= random(5, 10);
if (acc_y[i] < 0) {
acc_y[i] = 0; // Ensuring that the speed does not go negative
}
} 
}
}

(Video: Slot Machine without Arduino)

After User Testing:

As I stated before, the feedback from User Testing is mostly about the physicalization of the pseudo-phone and the slot machine, and the readable interpretation of the emojis. Following my original flow chart, I separated the project into three parts: pseudo-phone, computer screen, and slot machine. Since people can use social media platforms on computers, I decided not to cover the computer but let it be exposed. 

For the pseudo-phone, I added two extra slide potentiometers and an external camera. Adding two new potentiometers diversified the filter outcomes and the external camera makes the pseudo-phone resemble smartphones better. I chose the slide potentiometers instead of other potentiometers because the horizontal adjustment for this kind of potentiometers is closer to people trying the degree of filters on their phones. 

By using the wooden panel and the laser cutting, I managed to hide the potentiometers, the button, and the camera. Most importantly, the design for the panel should be slightly larger than the actual size to help the gadgets smoothly plugged into the panel. 

(Failed Pseudo-Phone)

(Video: Laser Cutting)

(Pseudo-Phone)

I had trouble using the Processing code for the variety of filter effects. According to Processing reference for filter() function, only 3 modes THRESHOLD POSTERIZE, and BLUR take parameters while THRESHOLD will alter the photo into black and white rather than a colored version. In other words, I could only use filter function twice. To map the third potentiometer, I used tint(). 

if (v == 0) {
tf = (int) map(arduino_values[3], 0, 1023, 0, 255);
}
tint(255, tf);

After finishing the pseudo-phone, I turned to the slot machine lever. Thanks to IMA fellow Shengli, I experimented with the tilt sensor. Fortunately, I found some wooden stickers and rubber bands for the prototype. The tilt sensor is used because it can detect whether the lever is tilted or not. It is the most intuitive choice. 

(Video: Lever Test)

Then with the help of Professor Garcia, I finished the production by cutting some slots to stabilize the rubber bands.

(Video: Tilt Sensor Test)

I included a second button to physicalize the action to stop the slot machine. (Video: Stop the Slot Machine)

During User Testing, users also suggested I should make the interface resemble social media. So I decided to make it more like an Instagram page.

After the camera is frozen, the screen will pop up an interface that looks like Instagram with a random number of likes and comments. I chose Alex as the username since it is a gender neutral name.
(Interface after camera frozen)

The comments will reveal the meaning of the emojis that stand for the motives behind the LIKES when the slot machine stopped.

(Interface after slot machine stopped)

Since this procedure involves many steps, including detecting whether the slot machine stopped, detecting the final results, and displaying the final results, I used different functions to make my code more organized. Several arrays are introduced to preload the possible outcomes and the detection for the final outcomes.

//slot machine meanings
String[] descriptions = {
"I LIKE it for the content",
"I LIKE it to follow the trend",
"I LIKE it to pretend that we are fine",
"I LIKE it to look smart tho I don't get it",
"I LIKE it unconsciously when I am scrolling social media",
"I LIKE it to let you know that I READ your post"
};
String[] names = {
"Harrison",
"Rebecca",
"Victoria"
};
boolean[] reelStopped = {false, false, false};
int[] results = new int[3]; // Results of the spin

//final result
boolean allReelsStopped() {
return acc_y[0] == 0 && acc_y[1] == 0 && acc_y[2] == 0;
}

//display results
void displayResults() {
for (int i = 0; i < 3; i++) {
int finalidx = idx[i] % 6; // Assuming you have 6 descriptions
String resultText = descriptions[finalidx];
textSize(20);
fill(0); // Black text
// Adjust text position according to your canvas setup
text(names[i], (-cam.width+25)*0.075+60, 680 + i * 30); 
push();
fill(100, 98,98);
text(resultText, (-cam.width+25)*0.075+140, 680 + i * 30); 
pop();
}
}

The overall procedure for my project is as follows.
(Video: Demo)

D. CONCLUSIONS:


(Presentation)

The goal of this project is to physicalize and gamify the online social media post-and-like function that involves the installation and audience, leaving the audience lingering on the inauthenticity of digital representation and the various motives behind LIKE. The audience interacted with the project just as expected since these gadgets are really self-explanatory. They adjusted the filters and took pictures. Then they pull the lever and get the motives behind the likes. I believe that my project results align with my definition of interaction. There are many considerable improvements that can be made if there were more time, for example: adding the wires could be hidden more appropriately; the slot machine could have special effects if the three emojis were the same; the interface could be more Instagram-like; more sensors could be introduced to physicalize more social media functions; the slot machine could also be physicalized, etc. In general, I consider this project a success. Despite numerous setbacks and challenges throughout the process, each obstacle I overcame contributed to my growth and enhancement of my problem-solving abilities. The coding skills and craft skills I learned could be translated into my future creative process. The biggest takeaway I believe would be the idea that the project does not have to be an exact revival of the real world, certain exaggerations and analogies could make the project profound and the production process easier.

(Full Demonstration)


 (IMA Show)

E. DISASSEMBLY:


F. APPENDIX

Credit: Youtube user @hbycodingacademic7667 (Processing Code); Professor Andy Garcia (Fabrication)

FULL CODE

Arduino

int buttonPin1 = 7;

int buttonPin2 = 4;

int buttonState1 = LOW;

int buttonState2 = LOW;

int previousState1 = LOW;

int tiltPin= 2;

boolean tiltState = 0;

void setup() {

Serial.begin(9600);

pinMode(buttonPin1, INPUT);

pinMode(buttonPin2, INPUT);

pinMode(tiltPin, INPUT);

}

void loop() {

// to send values to Processing assign the values you want to send

// this is an example:

int button1 = digitalRead(7);

int filter1 = analogRead(A1);

int filter2 = analogRead(A2);

int filter3 = analogRead(A3);

int tilt = digitalRead(2);

int button2 = digitalRead(4);

// send the values keeping this format

Serial.print(button1);

Serial.print(","); // put comma between sensor values

Serial.print(filter1);

Serial.print(","); // put comma between sensor values

Serial.print(filter2);

Serial.print(","); // put comma between sensor values

Serial.print(filter3);

Serial.print(","); // put comma between sensor values

Serial.print(tilt);

Serial.print(","); // put comma between sensor values

Serial.print(button2);

Serial.println(); // add linefeed after sending the last sensor value

// too fast communication might cause some latency in Processing

// this delay resolves the issue

delay(20);


//button

buttonState1 = digitalRead(buttonPin1);

buttonState2 = digitalRead(buttonPin2);

// end of example sending values

}

Processing

import processing.serial.*;
Serial serialPort;
int NUM_OF_VALUES_FROM_ARDUINO = 6;  /* CHANGE THIS ACCORDING TO YOUR PROJECT */

/* This array stores values from Arduino */
int arduino_values[] = new int[NUM_OF_VALUES_FROM_ARDUINO];
int pf = 0;
int bf = 0;
int tf = 0;
int prev = 0;
int pre = 0;
int v = 0;
int lx = 640; //lever x
int ly = 250; //lever y
int likes = 0;
int coms = 0;
//camera
import processing.video.*;
String[] cameras = Capture.list();
Capture cam;

//slot machine
//declare N-elements array for reading image
PImage [] img = new PImage [9];
int width=300/2, height=200/2;

//slot machine sound
import processing.sound.*;
// declare a SoundFile object
SoundFile sound;

//slot machine meanings
String[] descriptions = {
  "I LIKE it for the content",
  "I LIKE it to follow the trend",
  "I LIKE it to pretend that we are fine",
  "I LIKE it to look smart tho I don't get it",
  "I LIKE it unconsciously when I am scrolling social media",
  "I LIKE it to let you know that I READ your post"
};
String[] names = {
  "Harrison",
  "Rebecca",
  "Victoria"
};
boolean[] reelStopped = {false, false, false};
int[] results = new int[3]; // Results of the spin

void setup() {
  //white color background
  background(255);
  size(725, 1000);

  //camera
  //cam = new Capture(this, cameras[0]);
  // If this doesn't work, try one of the following lines instead:
  //cam = new Capture(this, cameras[0], 30);                         // for all OS
  cam = new Capture(this, "pipeline:avfvideosrc device-index=0");  // for macOS (try different indices too)
  //cam = new Capture(this, "pipeline:kvvideosrc device-index=0");   // for Windows (try different indices too)
  cam.start();

  printArray(Serial.list());
  // put the name of the serial port your Arduino is connected
  // to in the line below - this should be the same as you're
  // using in the "Port" menu in the Arduino IDE
  serialPort = new Serial(this, "/dev/cu.usbmodem101", 9600);

  //reading N images
  for (int i=0; i<6; i++) img[i] = loadImage((i+1)+".png");
  img[7] = loadImage("lever.png");
  img[8] = loadImage("stop.png");

  //sound
  sound = new SoundFile(this, "slot.mp3");
}

//array for three different reels
//y => the y position of an image
//acc_y => the speedup for scrolling down an image
int y[]={0, 0, 0}, acc_y[]={0, 0, 0}, idx[]={0, 0, 0};
int stop_button=0;

void draw() {
  background(255, 255, 255);
  push();
  if (cam.available()) {
    cam.read();
  }

  scale(-1, 1);
  if (v == 0) {
    tf = (int) map(arduino_values[3], 0, 1023, 0, 255);
  }
  tint(255, tf);
  //image(cam, -640, 0);
  image(cam, -cam.width, 50);
  //filter
  // receive the values from Arduino
  getSerialData();
  // use the values like this:
  ////float x = map(arduino_values[0], 0, 1023, 0, width);
  if (v == 0) { // Update filter only when camera is running
    pf = (int) map(arduino_values[1], 0, 1023, 2, 16); // Update posterize filter setting
    bf = (int) map(arduino_values[2], 1023, 0, 0, 8); // Update blur filter setting
  }
  filter(POSTERIZE, pf); // Apply the stored or current posterize filter
  filter(BLUR, bf);
  //filter(THRESHOLD, tf);
  //button capture
  // Handle button toggle for camera control
  if (arduino_values[0] == 1 && prev == 0) {
    // Toggle the video state with each button press
    if (v == 0) {
      cam.stop();
      v = 1; // Camera is now off
      likes = int(random(3, 1000));
      coms = int(random(3, likes+1));
    } else {
      cam.start();
      v = 0; // Camera is now on
    }
  }
  prev = arduino_values[0]; // Update the previous button state
  filter(POSTERIZE, 255); // Apply the stored or current posterize filter
  filter(BLUR, 0);
  pop();

  //3 reels
  for (int i=0; i<3; i++) {
    //show two images on the canvas
    image(img[(idx[i])%6], i*(width-100)-50, y[i]+500);

    //scroll down with speeds
    y[i]+=acc_y[i];

    //refresh
    if (y[i]>20) {
      //set the image to the initial position
      y[i]=0;
      //prepare the next image
      idx[i]++;
      //if the user press the stop button, then all the reels will reduce the speed
      if (stop_button==1 && acc_y[i]>0) {
        acc_y[i] -= random(5, 10);
        if (acc_y[i] < 0) {
          acc_y[i] = 0;  // Ensuring that the speed does not go negative
        }
      } //a decreased value
    }
  }
  pressed();
  if (stop_button == 1 && allReelsStopped()&&v==1) {
    displayResults();
  }
}

void getSerialData() {
  while (serialPort.available() > 0) {
    String in = serialPort.readStringUntil( 10 );  // 10 = '\n'  Linefeed in ASCII
    if (in != null) {
      print("From Arduino: " + in);
      String[] serialInArray = split(trim(in), ",");
      if (serialInArray.length == NUM_OF_VALUES_FROM_ARDUINO) {
        for (int i=0; i<serialInArray.length; i++) {
          arduino_values[i] = int(serialInArray[i]);
        }
      }
    }
  }
}

void pressed() {
  //current lever state
  int current = arduino_values[4];

  if (v==1) {
    image(img[7], lx, ly);
    image(img[8], lx+5, ly+10); //heart
    push();
    scale(-0.075, 0.075);
    image(cam, -cam.width+25, 100);
    pop();
    push();
    textSize(40);
    fill(0, 0, 0);
    text("Alex", (-cam.width+25)*0.075+100, 40);
    pop();
    push();
    fill(0, 0, 0);
    textSize(20);
    text(likes + " likes", (-cam.width+25)*0.075+60, 600);
    text("Alex", (-cam.width+25)*0.075+60, 630);
    pop();
    push();
    fill(100, 98, 98);
    textSize(20);
    text("check out my new profile pic!!!", (-cam.width+25)*0.075+100, 630);
    text("View all " + coms + " comments", (-cam.width+25)*0.075+60, 650);
    pop();
    if (current == 1 && pre == 0) {
      stop_button=0;
      println("pressed the lever\n");
      for (int i=0; i<3; i++) {
        acc_y[i]+=random(10, 50); //random number
      }
      // if the sound is not already playing
      if (sound.isPlaying() == false) {
        // start playing it
        sound.play();
      }
    }
  }
  pre = current;

  //button2
  if (arduino_values[5] == 1) {
    println("pressed the stop button\n");
    stop_button = 1;
    if (sound.isPlaying() == true) {
      // start playing it
      sound.stop();
    }
  }
}

//final result
boolean allReelsStopped() {
  return acc_y[0] == 0 && acc_y[1] == 0 && acc_y[2] == 0;
}

//display results
void displayResults() {
  for (int i = 0; i < 3; i++) {
    int finalidx = idx[i] % 6;  // Assuming you have 6 descriptions
    String resultText =  descriptions[finalidx];
    textSize(20);
    fill(0);  // Black text
    // Adjust text position according to your canvas setup
    text(names[i], (-cam.width+25)*0.075+60, 680 + i * 30);
    push();
    fill(100, 98, 98);
    text(resultText, (-cam.width+25)*0.075+140, 680 + i * 30);
    pop();
  }
}

Laser cutting design
 
Emoji meanings:
❤️”I LIKE it for the content”,
🙇‍♂️”I LIKE it to follow the trend”,
❤️‍🩹”I LIKE it to pretend that we are fine”,
🤔”I LIKE it to look smart tho I don’t get it”,
🎲”I LIKE it unconsciously when I am scrolling social media”,
🤳“I LIKE it to let you know that I READ your post”
 
Physical Ingredients:
Wires; 3 slide potentiometers; 2 buttons; 2 10k resistors; 1 tilt sensor; 1 camera; 1 computer; 1 breadboard; 1 Arduino board
 
Slot Machine sound:
https://freesound.org/people/pierrecartoons1979/sounds/118240/
 
Slot Machine code inspiration:
https://www.youtube.com/watch?v=4bIfMN7KQuc
 
Codes with data:
https://drive.google.com/file/d/1PaavEtr3vSii4MF4mDYWztbFUDmjjVdO/view?usp=drive_link

Midterm Project Report: Deal A Workout – Jiasheng Li – Andy Garcia

Context and Significance

After reading “The Art of Interactive Design” by Chris Crawford in the previous group project, I realized that interactive products are similar to a good conversation. It would be better if the project combined both the interactions between the users and the projects and the interactions between the users via the products. My team partner Robert Cen, as a card player, prompted that we could do a card dealer since the servo and motor in the previous recitations could be useful in making the outputs. Initially, it started with a running race but after the User Testing, we changed it to Drum Master. The details of User Testing will be covered in Fabrication and Production. The significance of our project is that the card is for the loser of the race in the interactive game and we created a system of workout instructions for the poker cards to enhance interactivity. After all, you lost, indicating you need more exercise. If one of the players loses the race then they will have to do the workout as the instructions given by the card dealt with by the card dealer. For instance, the loser would have to do 5 push-ups if the card is Heart 5. We believe the target audience is the people who would like to make the workout fun and the game and the card instructions are capable of meeting the expectations.

Conception and Design

Originally, the project would be a racing game plus a card dealer for exercise penalty. The two players run to the project and the one who gets to the project first wins. The loser will be assigned a card as the penalty to do the workout. We thought that the first interaction could be the distance sensor sensing the distance between the project and the players. The distance sensor measures how close the player is to the project, making it the most direct measurement for the race. Then the card dealer would give out the card through the servo and the motor. The cardboard in the IMA studio is useful for structuring the card dealer and the sensor. The springs can be stuffed in the cardboard box to deal cards better when the card size decreases as the cards are shot out. As you can see, the main criteria was on the function. In other words, we came up with an idea and then thought about the gadgets that would realize the movements. 

Fabrication and Production

For the project, I mainly worked on the sensors, circuits, and code while my partner Robert focused on the cardboard and the card dealer. We would check on each other’s process give feedback to each other and combine the input and output together.

At first, we tried to use the distance sensor since it was about the running race.

//1

int triggerPin1 = 6;

int echoPin1 = 7;

long distance1;

//2

int triggerPin2 = 3;

int echoPin2 = 4;

long distance2;

int w=0;

int gamestate = 0;

//condition

void setup() {

Serial.begin(9600);


//set 1

pinMode(triggerPin1, OUTPUT);

pinMode(echoPin1, INPUT);

//set 2

pinMode(triggerPin2, OUTPUT);

pinMode(echoPin2, INPUT);

}

void loop() {

// additional 2 microsecond delay to ensure pulse clarity

//loop1

digitalWrite(triggerPin1, LOW);

delayMicroseconds(2);

digitalWrite(triggerPin1, HIGH);

delayMicroseconds(10);

digitalWrite(triggerPin1, LOW);

// pulseIn waits for signal to go from HIGH to LOW,

// timeout according to max range of sensor

//1

long duration1 = pulseIn(echoPin1, HIGH, 17400);

//loop2

digitalWrite(triggerPin2, LOW);

delayMicroseconds(2);

digitalWrite(triggerPin2, HIGH);

delayMicroseconds(10);

digitalWrite(triggerPin2, LOW);

//2

long duration2 = pulseIn(echoPin2, HIGH, 17400);

// sound travels roughly 29cm per microsecond so we divide by 29,

// then by 2 since we recorded sound both going forth and back

distance1 = duration1 / 29 / 2;

distance2 = duration2 / 29 / 2;

//conditions

//if 1 hits and 2 not hit

if(distance1 < 10 && distance1>0){

w = 1;


}elseif(distance2 < 10 && distance2>0){

// if 2 hits and 1 not hit

w = 2;


}

//print test

Serial.print("distance1:");

Serial.print(distance1);

Serial.print(" distance2:");

Serial.print(distance2);

// Serial.print("distance1:");
ab
//if not equal to 0, then someone won state 1

}

The code above helped us try out the distance sensor. The following video is a demonstration of how the distance sensors work.

https://drive.google.com/file/d/1N8KmzAkgbtwQXgIO-sxINK8QBiUO53Ay/view?usp=sharing

During the User Testing Session, we tried to deal the card with the card dealer. However, the card dealer was not working as expected, the cards were stuck in the machine and the distance sensors were not as efficient as we expected. If the distance is too far, the sensor cannot sense the player. Also, in the previous video, when I removed my hands, the distance suddenly changed from 13 to 65, detecting some mysterious object.

User Testing Session 

Fortunately, we received a lot of feedback from the users. Learning Assistant Amelia suggested that we change the sensor to a pressure sensor to set the time instead of measuring the distance. Professor Andy Garcia advised that the game should have a shortcut to restart and visual cues for the players to know the game is on. Other advice included that the card dealer spin card might not be as “intense” as the running race. Based on this feedback, the first adaptation is to switch the game to drum master. For the sensor, we tested both the vibration sensor and the pressure sensor. The vibration sensor detected the wave of the vibration:

https://drive.google.com/file/d/1ftOagVBww0U1Irg2I0dEF9ujkHdfjjfh/view?usp=drive_link

However, as shown in the video, it still activates vibrantly after I stopped interfering.

The pressure sensor detected the pressure on it:

https://drive.google.com/file/d/1NA8sgF-9jvrfJ7QWZwv-qqHg_C6so4Bl/view?usp=drive_link

It is more stable than the vibration sensor after the interaction. The second adaptation was to add a button to restart and the LED to visually cue the players who won. The winner side’s LED would be on.

https://drive.google.com/file/d/1p1xB9Z2ZvsD6ZM1OrtRD4usZwSPosZ3c/view?usp=drive_link

The problem that I encountered was how to stop the game when the time was up.

if(millis() - startTime >= 10000){
Serial.print("GAME OVER!");
// stop the game by setting an unreachable pressure 
HIT1 = 1500; 
HIT2 = 1500;

Originally, I wanted to use millis() – startTime == 10000, but it didn’t work as expected. Professor Garcia explained that the time was too instant to detect so it would be better to use >= instead. At the same time, Robert finished the servo and the card dealer. The servo is to point at the loser to cue them to get the card.

https://drive.google.com/file/d/1EByl1kbUEftUgMMsmoGYk8A_ulKXEGI_/view?usp=drive_link

https://drive.google.com/file/d/1vm4fDy9z9uS3PpRWr8NwClLSk-Cz21Ay/view?usp=drive_link

https://drive.google.com/file/d/1cu7FRDn5tT8iKJlijgMi9cB3aa4UrNL1/view?usp=drive_link

The final demonstration is shown in the following video and the code is attached.

https://drive.google.com/file/d/1_X0WzuAjVlsJ0AfuKvE4I6G3ZMHIEwu7/view?usp=drive_link

#include <Servo.h>

Servo myservo;

int servov;

int p1;

int p2;

int val;

int prevVal;

int count1 = 0;

int count2 = 0;

int HIT1 = 210;

int HIT2 = 50;

int winner;

long startTime;

long shuffleTime;

int ledPin1_GREEN = 9;

int ledPin2_RED = 10;

int shuffle = 5;

bool shuffled = false;

void setup() {

myservo.attach(11);

Serial.begin(9600);

pinMode(2, INPUT);

pinMode(ledPin1_GREEN, OUTPUT);

pinMode(ledPin2_RED, OUTPUT);

pinMode(shuffle, OUTPUT);

}

void loop() {

//timer

val = digitalRead(2);

if(prevVal == LOW && val == HIGH){

Serial.println("Pressed");

startTime = millis();

count1 = 0;

count2 = 0;

HIT1 = 210;

HIT2 = 50;

shuffled = false;

// digitalWrite(ledPin1_GREEN, LOW);

// digitalWrite(ledPin2_RED, LOW);

digitalWrite(ledPin1_GREEN, HIGH);

digitalWrite(ledPin2_RED, HIGH); // turn the LED on (HIGH is the voltage level)

delay(1000); // wait for a second

digitalWrite(ledPin1_GREEN, LOW);

digitalWrite(ledPin2_RED, LOW); // turn the LED off by making the voltage LOW

delay(1000);

digitalWrite(shuffle, LOW);

myservo.write(90);

}

prevVal = val;

// read the input on analog pin 0 GREEN

p1 = analogRead(A1);

// print out the value of the sensor

Serial.print("player1:");

Serial.print(p1);

if(p1>HIT1){

count1 += 1;

}

Serial.print(" 1Hits:");

Serial.print(count1);

// delay for stability

delay(10);

// read the input on analog pin 0 GREEN

p2 = analogRead(A0);

// print out the value of the sensor

Serial.print(" player2:");

Serial.println(p2);

if(p2>HIT2){

count2 += 1;

}

Serial.print(" 2Hits:");

Serial.print(count2);

// delay for stability

delay(60);

//GAME OVER AFTER 10 SECONDS

if(millis() - startTime >= 10000){

Serial.print("GAME OVER!");

// stop the game by setting an unreachable pressure

HIT1 = 1500;

HIT2 = 1500;

if(count1>count2){

Serial.print("1 win!!!!!!");

digitalWrite(ledPin1_GREEN, HIGH);

digitalWrite(shuffle, HIGH);

myservo.write(0);

}elseif(count2>count1){

Serial.print("2 win!!!");

digitalWrite(ledPin2_RED, HIGH);

myservo.write(180);

}else{

Serial.print("DRAW!!!");

digitalWrite(ledPin1_GREEN, HIGH);

digitalWrite(ledPin2_RED, HIGH);

myservo.write(90);

}

if((count1>count2 || count2>count1) && shuffled == false){

digitalWrite(shuffle, HIGH);

shuffleTime = millis();

shuffled = true;

}

if(millis() - shuffleTime >= 3000 && shuffled){

digitalWrite(shuffle, LOW);

myservo.write(90);

}

}

}

The adaptations, the drum game, and the visual cues worked mostly as expected. The game is easier to monitor with straightforward winners and losers. The visual cues could show who won and who needed to do the exercise.

Conclusion

The project is called Deal A Workout. The 2 players try to hit the drum as fast as they can after they press the button and the lights go off. After 10 seconds, the game stops. The winner side’s LED will be on and the arrow will point at the loser. The card dealer will work for 3 seconds. The loser needs to get the card and do the exercise as the card indicates. Spades mean jumping jacks; hearts mean push-ups; clubs mean squats; diamonds mean burpees. For instance, if it is Heart 5, the loser needs to do 5 push-ups. If you press the button, the game starts again. The project aligns with my definition of interaction because the project responds to the users’s behaviors and the users can have an activity afterward. Ultimately, the audience interacted with the project mostly. I would improve the project in aesthetics, visual and sound cues, and the card dealer if we had more time. First, the wires could be hidden in some boxes rather than exposed to air. That would make the project more organized. In addition, the physical cues could be more obvious. The audience might not realize that the game has stopped as the LED is not that obvious. Especially, it might be difficult for the loser to know that since only the winner side’s LED will be on. We could add a buzzer to notify the players that the game is over. I have learned from the setbacks that the most direct instinct might not be the most practical approach to realizing the expectations. Sometimes, it might take some detours to make it. For this project, we changed 3 types of sensors from the most intuitive distance sensor to the pressure sensor. It took some time to realize that. Furthermore, the timer setting is another example. The game should stop after 10 seconds. The most instant one would be to stop it when it reaches 10 seconds. But in practice, it should be when the time is over 10 seconds. The takeaway from my accomplishments is that the logic of the conditions is not that scary as long as you have a flowchart.

Disassembly

Trash and the stuff we returned.

Appendix

Testing the outcomes for the win-lose two pressure sensors.

https://drive.google.com/file/d/1Iv_S2eF4CBAoF8aUO3G9Jx12ZiZ3Rxod/view?usp=drive_link

Project B: Sounds Familiar? – English in Shanghainese

Part 1

PROJECT DESCRIPTION

SOUNDS FAMILIAR? : ENGLISH IN SHANGHAINESE

by Jiasheng Li (Jason)

2023

Interactive Storytelling & Tool

link: https://jasonlee557.github.io/CCLab/project-b/

ELEVATOR PITCH

The project “Sounds Familiar?” uses an interactive story to engage the audience in the loanwords in Shanghainese from English. By exploring the story, the audience will have a general sense of Shanghainese words, take a quiz to check their learning outcome, and learn more in the dictionary. 

Abstract:

As a Shanghainese, I found out that a lot of peers cannot speak or forget Shanghainese after going to school due to the requirement of a Mandarin-speaking environment at school. I realized that it is important to preserve Shanghainese and engage more people to learn this dialect. Being at NYU Shanghai, I want to let more people participate in this project. Given that everyone knows English in this community, it inspired me to make this website based on English loanwords in Shanghainese. In other words, it might be easier for English users to start with words that sound similar to English pronunciation. To make the journey interesting, I made up a story based on six of the words. Hope you can learn these words with the quiz and learn more in the extra dictionary. Enjoy!

Open the Camera to be Joey & feel like a baby boss!
Take a quiz for what you just learned!
Eager learner? Six more words for you!

Part 2

1) Process: Design and Composition

VISUAL

The first page is a statement about the website and its goals. 

侬好Hello!

From page 2 to page 4 is the interactive story.

Skimming a series of Shanghainese loanwords from English, I picked six words [taxi(charter), dashing, biscuit, nougat, baby boss(kite), and slightly(a minimum)]. The six words were separated into three pages (taxi, bakery, and baby boss). Each page is a sentence with a pair of words. The sentences are connected. 

One day, Joey is in a taxi, feeling dashing as if on a limo.

Arriving at a bakery, Joey buys some biscuits and nougats.

Joey slightly feels like being a baby boss.

The visual designs are related to the storylines. Here is an example from the bakery page.

Arriving at a bakery, Joey buys some biscuits and nougats.

As for the quiz part, the red box is used as a visual cue for the audience to click on the dictation. The white box is used for the audience to input their answers. Lastly, the grey box is for the audience to submit their answers and get to the next exercise.

Quiz

Lastly, the dictionary is designed to show the original English word, the Shanghainese pronunciation, and its (new) meaning in Shanghainese.

Dictionary (English-Shanghainese-Meaning)

INTERACTION

The interaction within the story on each page is related to the scene on that page. Users can use buttons to go back and forth from different pages.

1)Sound

Generally, users can press ENTER to get the audio of the part of the story on that page. They can also press the first letter of the English word to get the sound of the Shanghainese, except for the bakery page where the interaction of the story and the sound play are mixed together. 

“t” for “taxi” on Taxi Page

2)Story Interaction

For the taxi page, the interaction is for the users to move the MOUSE to park the taxi at the bakery. It would stop when it is at the bakery. 

For the bakery page, users can use LEFT RIGHT UP DOWN to “eat” the items. LEFT and RIGHT are for eating the nougats while UP and DOWN are for eating the biscuit. The pronunciation of the eaten food would be played once it is eaten. The video below is a demonstration without sound.


For the baby boss page, users could open their cameras to be the baby boss. I specifically chose JOEY as the name, for its gender neutrality to bring more inclusion in the user engagement.

3)QUIZ

The quiz is designed for the users to click the red box to listen to the words that they just learned. They should type in the meaning of the Shanghainese. If they get the correct answer, the score will add one. The answer to the question will be shown in the next question. The video below is a demonstration without sound.

4)Dictionary
 Users can click the speaker token 📢 to get the sound of the Shanghainese.

2) Process: Technical

Website Structure

The website’s inner code structure is basically an HTML with other HTML.

I had problems with linking pages with each other because I individually created one folder for each sketch with their assets, JS, HTML, and CSS at first. The problems would be tedious and hard to call for the files, and the folder names would be like “page1/page2/page3/page4″ as if nesting dolls. It would cause errors if the folder being called is not the subfolder of the folder.

Therefore, I merged them into one folder, and directly called the HTML instead. 

</div> <button class="button1"><a href="index2.html">nougats</a> </button>

</div> <button class="button2"><a href="quiz.html">quiz</a> </button>
 
Text Position
 
For CSS, styling, I struggled with the position of the text. At first, I used “px” to sign the position, but it sometimes worked as I expected it to be only on my device. Later on, I reviewed the course slides and changed it into “%”
.text {

position: fixed;

top: 10%;
left: 50%;
background-color: #f0d7a7;
text-align: center;
padding-top: 100px;
padding-bottom: 100px;
width: 50%;

}
 
P5 Sketch
For the first sketch, the position moves with the mouseX.
 
I tried to stop the taxi at the bakery by using Boolean variables namely True and False, but it didn’t work. Then I used a counter which would be more than 0 if it is over the ScreenWidth. Lastly, if the counter is more than one, the position will be fixed. 
let carX = 0;
let check = 0;

carX = mouseX;

if (mouseX > width – 10) {
check = check + 1;
}
if (check > 0) {
carX = width – 10;
}

The smoke is made by randomness and transparency

//smoke
push();
translate(width-100, height / 2);
fill(255,255,255,150);
noStroke();
arc(0, -51, 25, 20, 0, PI);
triangle(-12.5, -50, 12.5, -50, 0, random(-300,-150));
pop();

The taxi is made through function for the convenience of moving as a whole.

function drawCar(xPos, yPos, name) {
push();
translate(xPos, yPos);
scale(3);

// light
c1 = "white";
fill("c1");
ellipse(-10, -40, 10, 20);

// body
fill("green");
rect(-20, -40, 40, 40);
rect(-60, 0, 120, 40);

// decoration
fill("white");
rect(-60, 20, 120, 5);
rect(-60, 25, 120, 5);

fill(255);
textSize(20);
text(name, -50, 20);

// wheels
fill(0);
drawWheel(-25, 40);
drawWheel(25, 40);
pop();

function drawWheel(xPos, yPos) {
push();
translate(xPos, yPos);

fill(50);
ellipse(0, 0, 35, 32);

pop();
}
}

The bakery scene is an example of how the sound is played. It first checks whether the key is pressed and then whether the sound is being played. By checking whether the sound is played or not, the interaction avoids the annoying echoes. 

function draw() {
if (keyIsPressed) {
// eat left
if (keyCode == LEFT_ARROW&&nougat.isPlaying() == false) {
fill("white");
noStroke();
rect(0, 0, candy.width*0.25/2, height);
nougat.play();
}
// eat right
if (keyCode == RIGHT_ARROW && biscuit.isPlaying()==false) {
fill("white");
noStroke();
rect((2 * width) / 3, 0, width / 3, height);
biscuit.play();
}
// eat mid
if (keyCode == UP_ARROW) {
fill("white");
noStroke();
rect(width / 3, 0, width / 6, height);
}
if (keyCode == DOWN_ARROW) {
fill("white");
noStroke();
rect(width / 2, 0, width / 6, height);
}
// story sound
if (keyCode == ENTER && story2.isPlaying() == false) {
story2.play();
}
}
}

For the baby boss sketch, the main issue is to add another layer for the camera to float on the baby boss cartoon. It is done by Graphics.

function setup() {

createCanvas(355, 530);
// float on the pic
pg = createGraphics(300, 300);
cam = createCapture(VIDEO);
cam.hide();

}
function draw() {

background(245);

image(img, 0, 0, img.width, img.height);
translate(width,0);
scale(-1, 1);
//zoom in the user's face
pg.image(cam, -200, 0);
//display
image(pg, 65, 30, 230, 250);

For the quiz, I used the list to keep track of the question-answer-sound. 

let questions = [
"1.What is the sound in the red?",
"2.What is the sound?(answer1:taxi)",
"3.What is the sound?(answer2:dashing)",
"4.What is the sound?(answer3:biscuit)",
"5.What is the sound?(answer4:nougat)",
"6.babyboss(answer5:slightly)",
"Click the button at the bottom",
];
let answers = ["taxi", "dashing", "biscuit", "nougat", "slightly", "babyboss"];
let s = [];
function draw() {
clear();
textSize(20);
fill(0);
text(score, 10, 20);
text(questions[counter], width / 2 - 100, height / 2 - 50);
push();
fill("red");
rect(width / 4, height / 2, 50, 50);
pop();
if (
mouseIsPressed &&
mouseX > width / 4 &&
mouseX < width / 4 + 50 &&
mouseY > height / 2 &&
mouseY < height / 2 + 50 &&
s[counter].isPlaying() == false
) {
s[counter].play();
}
}

3) Reflection and Future Development

Generally, I am proud that I recorded all the Shanghainese pronunciations myself because I didn’t find useable resources online for me to embed into the website. I completed the project with an interactive story, a quiz, and a dictionary. And during the presentation day, everyone was engaged in my project. I would like to thank them for repeating the Shanghainese with me.

I felt a sense of satisfaction when people asked me about Shanghainese during the Q&A session. Presentation makes impression; visibility emerges opportunity. I really appreciate the questions about whether Shanghainese is about to extinct and the difference between the Shanghai dialect and Mandarin raised by Ethan and Professor Moon. They recognized and sublimated the value of the project.

There is also a lot of constructive advice that I received throughout the whole process. I have appropriated them in the updated version.

At first, I only chose the topic of Shanghainese for the input of sound and then Professor Godoy told me to narrow down it to a specific part. I realized that the project should have a more nuanced angle. Also, she pointed out that taxis can just drive horizontally instead of driving from top to bottom. It is an obvious and natural thing but I didn’t notice that in my hand-written sketch at the beginning. 

After skimming a list of Shanghainese loanwords, I came up with the story. During the pitch presentation, Joey suggested that I add a camera for the user to see themselves speaking Shanghainese. I changed it into the interaction that everyone could be Joey and feel like a baby boss.

During the presentation day, IMA Fellow Carrot and Professor Godoy suggested I add a quiz for people to test what they just learned. I added them later on in the updated version.

For future development, I think the most important parts are the aesthetics and making the interactions more seamless as Professor Moon advised. Currently, the cartoons are a bit childish and the interactions are more separated within each individual page. Even though I added a “bakery” with a chimney in the updated version, there is still more that could be done for continuity. 

As for the quiz and dictionary, I believe they could be better developed in terms of interface. For now, they are just in a simple version. Images could be added to make them more colorful.

4)Credits

The topic, Shanghainese, is inspired by Mia Fan’s Dialect Protection in China in IMA Capstone Show 2023 at NYU Shanghai. The format, interactive storytelling, is introduced by XKCD. The Shanghainese words and further details are from an article called: Tracing the Heritage of Pidgin English in Mainland China: The Influences of Yangjingbang English on Contemporary Culture and Language in Shanghai by Jian Li published online by Cambridge University Press: 03 January 2017.

As the project went on, I was unclear about the loading issues. Professor Godoy said that it would be better to call assets online instead of calling things locally. I thought that would be the same case for inserting the sketches into HTML. Fortunately, with the help of the professor, I changed the website links of p5 sketches to js files.

To add the camera as another layer, Professor Godoy taught me how to use Graphics. 

I learned how to set up the input box and the button in p5 through YouTube video “How to make a Quiz in P5 JavaScript“. 

Lastly, thank the IMA community for the support and companionship. The caring and non-competitive environment generated a lot of helpful feedback and inspiration. 

Mini Project 7. Project B Website Draft

link: https://jasonlee557.github.io/CCLab/project-b-draft/

Title: English in Shanghainese

Description:

This is a draft of my project B. It will be an interactive storytelling that helps people to learn Shanghainese.

Reflection:

  • How can orderly file name convention (html files, css files, images, etc.) prevent errors when building a website?
    • By classifying different files into different folders and distinct names, I don’t think people will mix different files up. Different types of files have different purposes, so a taxonomy can help people to distinguish things.
  • When would you want to use classes, when IDs?
    • Classes are for HTML files and identifying different paragraphs, and different divs while IDs are not used regularly in HTML.
  • Which limitations did you run into in the styling of your page?
    • I can only style of the text styles, the margins and padding in one page and I am not sure about how to create more than one page and making them have the button to jump back and forth.
  • How does editing and styling a text in (WYSIWYG) text editor, such as Microsoft Word, compare to writing HTML? What are advantages of each over the other?
    • Microsoft Word gives users the freedom of choice and it is easier to vary the style, while HTML is more difficult to use with Google fonts.
  • Explain how different web technologies come together in your webpage. How is writing HTML or CSS different from writing p5.js (JavaScript)?
    • HTML sets the tone and the structure of the website while CSS is used for the styling of the web page, whereas p5.js can add more interactivity and get the immediate outcome to the web page.
       

Project B: Proposal

Project Description:

The project will be a mix of interactive storytelling and a tool. It is a website about learning English loanwords in Shanghainese. The minimum goal is to let the users learn six words after using the website.

The project will start with an introduction of the content, loanwords in Shanghainese, and the purpose. It will then follow with an interactive story about a kid feeling as if he were the child of a boss after going to a bakery by taxi to buy biscuits and nougats. The story will contain six loanwords in Shanghainese. Hopefully, the audience will learn from them. The interaction will be the taxi driving, the snacks eaten, and the camera capture of the audience’s figure as if he were the character in the story. 

If the users are eager learners, there will be an appendix of many loanwords in Shanghainese for them to learn more. Sound of the pronunciations and interaction to play the sound will be included.

Presentation:

https://docs.google.com/presentation/d/1VzXFv9OeKYW9xzgiCz-6d4zmrpARO3kffWSJ6U8E7-4/edit?usp=sharing

Mini Project 7: Particles – Tadpoles to Frogs

Project Title: Tadpoles to Frogs

link: https://editor.p5js.org/jl14064/sketches/kjU3aX4h3

Description: 

In this project, I tried to explore the principles and dynamic applications of Object-Oriented Programming (OOP) by creating the tadpoles’ growth into frogs.

Initially, they are just tiny tadpoles while their sizes will grow bigger as they swim in the pool. They will try to avoid colliding with each other by shaking their bodies. And if the size exceeds 70, the tadpole will become a frog. Eventually, the grown frogs will inhabit the surface of the pool in a “V” sequence. 

You should hear the frogs’ sound in the program though the following video doesn’t include the sound.


Coding:

During the coding process, I encountered several problems. 

At first, I put Class Tadpoles in the draw() function, which made several variables not defined before being called.

In addition, to count how many tadpoles successfully grow up, I introduced variable fn as a counter. I put it in Class Tad at first and made it this.fn. However, fn would be a local variable instead of a global variable, which would not be called when I tried to push Frog into the frog array. Therefore, I created a global variable called fn in the first few lines.

By introducing Class Frog after Class Tad, I also finished the challenging option of making two classes. 

let fn = 0;

function draw() {
background(152, 218, 248);
......
//remove tads
for (let i = tads.length - 1; i >= 0; i--) {
if (tads[i].isGone == true) {
if (tads[i].frog == true) {
fn += 1;
}
tads.splice(i, 1); // (index, quantity)
console.log(tads.length);
console.log(fn);
}
}

//frogs
for (let i = 0; i < fn; i++) {
if (i < fn / 2) {
frogs[i] = new Frog(
i * (width / frogs.length) + 20,
i * (height / (frogs.length / 2)) + 20
);
} else if (i == fn / 2) {
frogs[i] = new Frog(width / 2 + 20, height - 20);
} else {
frogs[i] = new Frog(
i * (width / frogs.length) + 20,
height - (i - fn / 2) * (height / (frogs.length / 2)) + 20
);
}
}
for (let i = 0; i < fn; i++) {
let frog = frogs[i];
frog.display();
}
}

To meet the challenging options, I created interactions among the tadpoles by making them shake if they were too close to each other.

detectCollition(other) {
let d = dist(other.x, other.y, this.x, this.y);
if (d < (this.w + other.w) * 0.8) {
this.y += random(-5, 5);
}
}

Reflection:

  • What is Object-Oriented Programming (OOP), a Class and an Instance of the Class?
    • Programming with objects is called Object-Oriented Programming (OOP). A class is a grouping of related data and subroutines. A Class is like a blueprint for an Object, describing what an Object like this should have. An Instance is a specific version of an object, with its own particular details.
  • Discuss the effectiveness of OOP. When is OOP useful? In what way can it be utilized?
    • OOP is useful when the code is designed to create an object, and it can be easily utilized for different purposes and it can be reused easily.
  • Describe the objects you have created. What properties and methods were implemented? What kind of behaviors did you create by manipulating them?
    • I created a tadpole-like and a frog-like class. I used methods: update(), display(), detectCollition(), checkOutOfCanvas(), growth(). The tadpoles will grow bigger as they move around and their tails will make waves. If they are big enough, they will become frogs.

Reading 3: New Media Art

New Media Art:

The authors defined New Media Art as projects that use emerging media technologies and are concerned with culture, politics, and aesthetics. In other words, it is the intersection of arts, media, and technologies. In my opinion, New Media Art refers to projects that use emerging technologies to not only translate artworks from other forms into new media but also to realize certain functions and effects that are exclusive to new media and are hard to achieve via “old media”. Nowadays, technologies and concepts have developed for 16 years since the text was published. The hype of VR, AR, and metaverse takes people’s sensorial experience to a new domain and era. However, the accessibility is concerning for the hardware requirements to create and appreciate these kinds of artwork.

Art Historical Antecedents, Themes, Tendencies:

· Before 2000:

http://numeral.com/projects/web/everyIcon/everyIcon.php

Description:

This is Every Icon by John F. Simon Jr. in 1996. It is an icon described by a 32 X 32 grid, which allows any element of the grid to be colored black or white. It would be unstoppable to display all the possible while technically it would cost more than a person’s life to see all the possibilities.

Artist:

John F. Simon Jr. is a new media artist who works with LCD screens and computer programming. He currently lives and works in Warwick, New York. He once said, “My feeling is that an artist’s state of mind when making a work is critical to what the work transmits to the viewer. I have always worked to improve on methods, technique, and materials, but only recently have I found that I can also improve the inner workings; I can develop the mental aspects of my art practice.” I think it pointed out the importance of expression and content in an artwork instead of mechanical techniques.

Context:

John F. Simon Jr. is one of the New Media artists who consciously reflect art history in their works. Every Icon revisits Paul Klee’s experimental use of the Cartesian grid. It is a piece of conceptual art realized in software by showing the potential of canvas. Although it takes only 1.36 years to display all of the variations along the first line, it takes an exponentially longer 5.85 billion years to complete the second line. Even in the limited visual space, there are more images created than humans could perceive. The concept penetrates technology, software coding, and the digital world. 

· After 2000:

https://www.aftersherrielevine.com/

Description: 

After Sherrie Levine is a new media work created by Michael Mandiberg in 2001. The artist scanned Sherrie Levine’s re-photographing of Walker Evans’s classic Depression-era photographs of an Alabama sharecropper family in 1979. Then he posted them on the Web at AfterSherrieLevine.com. 

Artist: 

Michael Mandiberg is an American artist, programmer, designer and educator. One of his noticeable works is Print Wikipedia, a visualization of how big Wikipedia is, which is a collection of printed-out content with pdfs uploaded online and available for printing.

Context:

This work is an example of how new media artworks feature “appropriation”. In my opinion, it is an extension of existing works. The reproduction, changes in sequence and collage could even influence the audience better than the “original” source. In this case, the photos were appropriated but still conveyed authenticity. The work has a certain “cultured value but little economic value”. This kind of appropriation develops with the progress in New Media Arts, which simulates the intellectual laws and open sources development later.

Mini Project 6: Object Dancers – Candle Dancer

Project Title: Candle Dancer

link:https://editor.p5js.org/jl14064/sketches/nsa8tytad

Description:

The candle dances with flames.

The flames get stronger if the mouse is pressed.

Candle Dancer is inspired by Lumiere from Beauty and the Beast (1991)

Coding:

In this mini project, IMA Fellow Carrot helped me with the rotation by pointing out how to use map() in the update function. It is my first time using a map() in my project. The following code also includes sin() display(), which fulfills one of the challenging options.

update() {
// update properties here to achieve
// your dancer's desired moves and behaviour
this.angle = map(sin(frameCount * 0.03), -1, 1, -PI / 8, PI / 8);
}
.....
//candle
display() {
......
push();
translate(0, -15);
rotate(this.angle);
//tray
noStroke();
fill(251, 200, 135);
arc(0, 0, 30, 50, 0, PI);
//white candle
noStroke();
fill("white");
rect(-15, -50, 30, 50);
//melt
noStroke();
fill("black");
arc(0, -51, 30, 20, 0, PI);
//fire
fill(255, 141, 0);
noStroke();
arc(0, -51, 25, 20, 0, this.range);
triangle(-12.5, -50, 12.5, -50, 0, this.flame);
pop();
......
}

The randomness was included to create the flame effect. To make it interactive, I used the if condition to make the flames stronger by pressing the mouse.

this.flame = random(-60, -55);
this.flameside = random(-45, -35);
//make it stronger
if (mouseIsPressed) {
this.flame = random(-70, -60);
this.flameside = random(-55, -45);
}

Speaking of the arms, Professor Godoy suggested I should make the lines into “little circles” and utilize sin() to make the movement smooth. Later, I figured out that the “circles” are actually Points. 

 //arms
push();
translate(0, 15);
stroke(251, 200, 135);
strokeWeight(8);
//double
for (let i = 0; i < 2; i++) {
rotate(i * PI);
//rolling arms
for (let x = 10; x < 45; x += 0.1) {
this.arm = sin(x * 0.1 + frameCount * 0.1) * this.amp;
point(x, this.arm);
}
}
pop();

Reflections:

  • What is the benefit of your class not relying on any code outside of its own definition?
    • In my opinion, the benefit of my class not relying on any code outside of its own definition is the certainty of the module and the flexibility to be reused as a template. Since there is no code outside of its own definition, the variables change values without tedious manual adjustment. 
  • What makes it challenging to write code that has to harmonize with the code other people have written? 
    • To harmonize with the code other people have written, there are a lot of constraints such as the size and where to write the code. For this project particularly, I had to make my dancer smaller than 200×200 pixels and put all my code in the class. 
  • Describe the terms modularity and reusability using the example of your dancer class.
    • Modularity means it could be called as a whole to perform certain tasks. For instance, my dancer class could be called to display and update.
    • function setup() {
      // no adjustments in the setup function needed...
      createCanvas(windowWidth, windowHeight);
      // ...except to adjust the dancer's name on the next line:
      dancer = new Candle(width / 2, height / 2);
      }
      function draw() {
      // you don't need to make any adjustments inside the draw loop
      background(0);
      drawFloor(); // for reference only
      dancer.update();
      dancer.display();
      }

      Reusability means the convenience of being called and duplicated. In my dancer class Candle, this.x and this.y in the constructor could be changed by the parameters given to move the appearance of the candle.

    • function setup() {
      // no adjustments in the setup function needed...
      createCanvas(windowWidth, windowHeight);
      // ...except to adjust the dancer's name on the next line:
      dancer = new Candle(width / 2, height / 2);
      ......
      class Candle {
      constructor(startX, startY) {
      this.x = startX;
      this.y = startY;
      ......

Project A: Acid Leaves

Project A: Acid Leaves

https://jasonlee557.github.io/CCLab/my-first-project/

2023 

Creative Coding by Jiasheng Li (Jason)

The leaves migrate with the blowing wind to survive. The audience can press the mouse to blow a wind and release the mouse to stop the wind.

The Elevator Pitch

Not only do the animals migrate, but also the plants do! The project establishes an environment where the leaves falling are from a polluted area with acid rains and they will migrate to a sunny and safe environment with the wind blowing by the audience pressing the mouse.

Abstract

Acid Leaves is about leaves migrating from a toxic environment to a safe environment. The leaves are red by default due to the pollution from the acid rain while they will be green and healthy again after migrating to the safe zone. The project aims to create a creature and embed a narrative and interaction with the audience in it. The audience can interact with the project by pressing the mouse to blow the wind and releasing the mouse to stop the wind. It resembles the process of exhalation, pressing the mouse compared to blowing. 

Reflection

1) Process: Design and Composition

It costs you something to be here, that makes you some kind of immigrant.

– Past Lives (2023)

The concept is inspired by the line in my recent favorite movie Past Lives (2023) directed by Celine Song. Though I am not an immigrant, I thought about migration and this quotation. On the other hand, the project requires me to create a kind of creature. So, why not make plants migrate? 

In terms of visualization, I was so ambitious that I wanted to include elements from every week. I tried to create two environments, one toxic and one healthy, where the leaves falling change between polluted and healthy states due to being blown into different environments.

In my project, the core elements are trees, rain, leaves, and sun. For the trees, I drew inspiration from Nina Wang’s mini-project 1. I used her tree structure as a reference and made it iterate. During Interaction Day, I noticed Ada Chen made a meteor shower in her Space Duck draft, which influenced me to add the acid rain in the toxic environment to make the pollution explicit. 

The leave template

The interaction is mainly the wind blowing by the audience pressing the mouse. At first, the movement was too fast and not “natural”. In the later version, the movement is smoother and slower. I also cut out my plans of making syndromes such as measles, which is not practical. 

In conclusion, the overall process is a journey to make my articulation much more visualized and explicit to the audience. By establishing the background and making the effects smoother, the project became easier for the audience to understand. 

2) Process: Technical

Because this was a mid-term project, I wanted to deploy skills learned every week as much as possible. In the trees, I used function() to initialize the template and integrated the trees into the forest by constantly calling the function. The trees used the mini project1 knowledge of drawing with codes. The sun’s rays are made by angular movements, which contain a loop. For the leaves, I tried out arc.

The main problems that I encountered were the rain and the wind. 

 //toxic rain
push();
for (let i = 0; i < 500; i++) {
let rainX = random(width / 2);
let rainY = random(height);
stroke("red");
line(rainX, rainY, rainX, rainY + 20);
}
pop();

I tried out the rain in only one column with random. But later on, I turned to Ada Chen, my classmate, she told me to use a loop. Thanks for the help. 

As for the wind, Professor Godoy suggested I use Noise instead of simply changing the x. Thanks Teaching Assistant Cissy for her detailed explanation. She also pointed out the nuances between mouseIsPressed once and mouseIsPressed constantly, which impacted my project narrative. 

//falling leave
x = x + 5 * sin(ld) - 5 + noise(xoff) * 10; //noise
y = y + random(5);
ld = ld + 0.1;
arc(x, y, 100, 100, ld, ld + PI / 3);

//wind
if (mouseIsPressed) {
speedX = random(-15, 20);
x = x + speedX;
y = y + random(5);
}
3) Reflection and Future Development

In retrospect, I am really satisfied with the structure, the variety of coding and the narrative while I think certain effects after the interaction and variety of situations could be more developed. My presentation had a nice reaction from the audience which showed my narrative went well. 

During the feedback session, IMA fellows and my classmates suggested I improve the details and the interaction. Joey Yang was confused by the shape of the leaves as if they were pizza, which she recommended be changed by using curves. Professor Godoy advice me to think more about the time it took for the leaves to recover instead of making them cured instantly after crossing the border. Professor Eric Jiang commented that the wind was “not natural enough” for the reappearance of the leaves from the same position. He also suggested the background transition could be less apparent. Fatima Kazim proposed that the wind could impact the rain as well. 

I appreciate all these suggestions and I do think they are all valid. In the future, I think I should continue to draw inspiration from nature. As for the coding, the interaction and the effects after the interaction could be more complexed. I was only limited to the mindset that one interaction could only have one outcome. I should make the outcome more vibrant and colorful. 

Reading 2. Long Live The Web

In Long Live The Web, the author mentioned the beneficial and “ill effects”. From my own experience on the web, one of the beneficial effects is that a lot of data are shared so I can find the information that I need in most cases; the most reflected “ill effects” is that people would argue online fiercely online about some tricky social issues and it would eventually be taken over by trolls, which would make the divergence larger. 

Universality means that the web allows the users to have access to it no matter what kind of hardware, software, network connection, disability, or language they use. Isolation means that this kind of distribution is limited to certain hardware, software, network connection, ability or language. Universality is mostly related to the egalitarian ideal while isolation is about specific priorities and superiority. 

Open Standards refers to free, without certain restrictions and no need to pay, access for the experts to explore and design. Closed Worlds refers to a virtual community that is limited within that area with a certain entrance cost. Open Standards empower various experts to get into the construction of the web while Closed Worlds prevent the constructions from being altered by any John Doe. 

The Web is an application that runs on the Internet. The Internet is an electronic network that links a lot of information and distributes them into diverse media. The Web is a layer of the Internet. In other words, the Web is just a small combination of certain information while the Internet is a vast field of connections. From my experience, I use the webs individually when necessary while I also use them interactively with the Internet.

The author envisions the future of the web with four trends: open data, social machines, web science and free bandwidth. A decade after the article was published, we can witness a lot of realizations. Open data is widely used as getting information is much easier, especially with ChatGPT. In addition, it is also becoming a social machine for people to connect with each other and promote social justice with social media, ranking apps, and hashtags such as #metoo. Furthermore, Web science is around the corner when people start to realize the web can do more than just mimic the real world, especially during the hype of the metaverse. 

Unfortunately, the free bandwidth is more difficult than before. As artificial intelligence costs more resources and finance, the divergence between developed and developing countries is becoming wider. Other problems such as violation of privacy also arose during the COVID era when people moved a lot of life online. They are mentioned in the author’s articulation as side effects that should be taken into account.