Project:
This is my css code to display my first ever mini project in CCL.
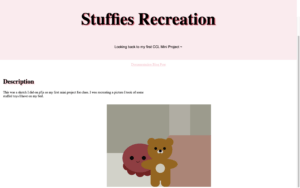
I had a lot of struggles with this, as it is different from what I have become accustomed to in p5js. I am happy with how the header turned out, and the link to my documentation blog is clickable and changes colors when hovered over.
.topnava{float:center;display:block;color:pink;text-align: center;padding: 14px16px;}.topnava:hover{background-color: rgb(236, 99, 122);color: white;}However, my big issues were in the positioning of the description text and the canvas on the page. I found a tutorial on the site provided on the week 11 slides to add columns to the page, and I tried this but I could not figure out how to call the canvas into the second column, so it does not align side by side with my other column like I would have liked it to.
Reflections:
Orderly file name convention can prevent errors because it allows the coder to be able to see each file in a block, making it easier to spot and fix errors.
When coding in css, it is best to use classes when you are trying to work with multiple elements on the page, and id when you are selecting one element specifically.
The biggest limitation I ran into were trying to move the canvas around on the page.
Editing and styling text is different in HTML than in WYSIWYG text editor because when coding you do not have a menu of options laid out for you, but instead you need to know what you want the result to be before you complete it.
Writing in CSS is different than p5js because p5js already has all of the html and css styling prepared for you, and all you have to worry about is writing the sketch. When combining p5js and CSS what changes is using html and css to stylize the page the canvas is presented on.