A. Back-to-the-Future Music Box- Yijia Chen – Gottfried
B. CONTEXT AND SIGNIFICANCE
At the previous stage of my research, I define the concept of interaction as “an installation that gives the user instant feedback once the interaction is initialed, which affects the next move of the user”. Based on this concept, I proposed an interactive keyboard with light effects. In the actual making process, we decided to remove the light effect functions and added a jukebox-like function instead. I mostly contribute to the making of basic components in the prototype, as well as the aesthetic design (the soldering of press buttons, the making and assembling of the keyboard & the music box, and all the decorations). In a sense, it is a re-creation of a retro electronic organ integrating with the concept of a retro arcade (which is not only shown in the exterior design of the box but also in the interface of the keyboard as a game handle). We hope that it brings the simultaneous experience of playing with the arcade and exploring one’s own music.
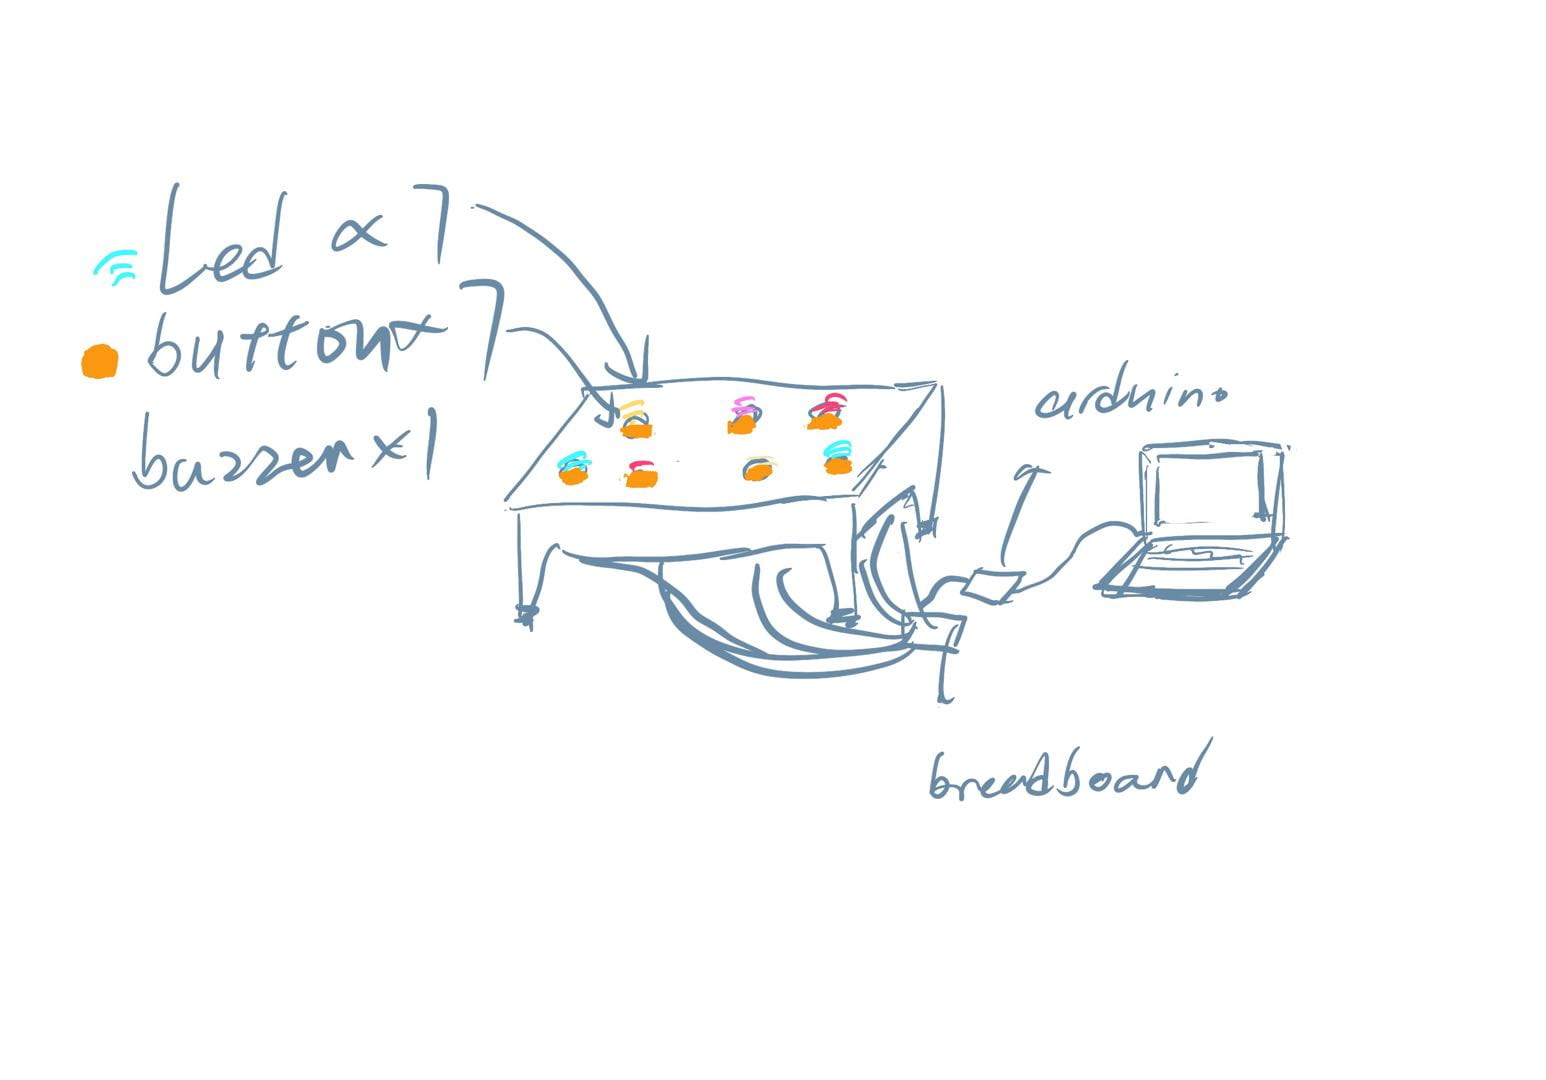
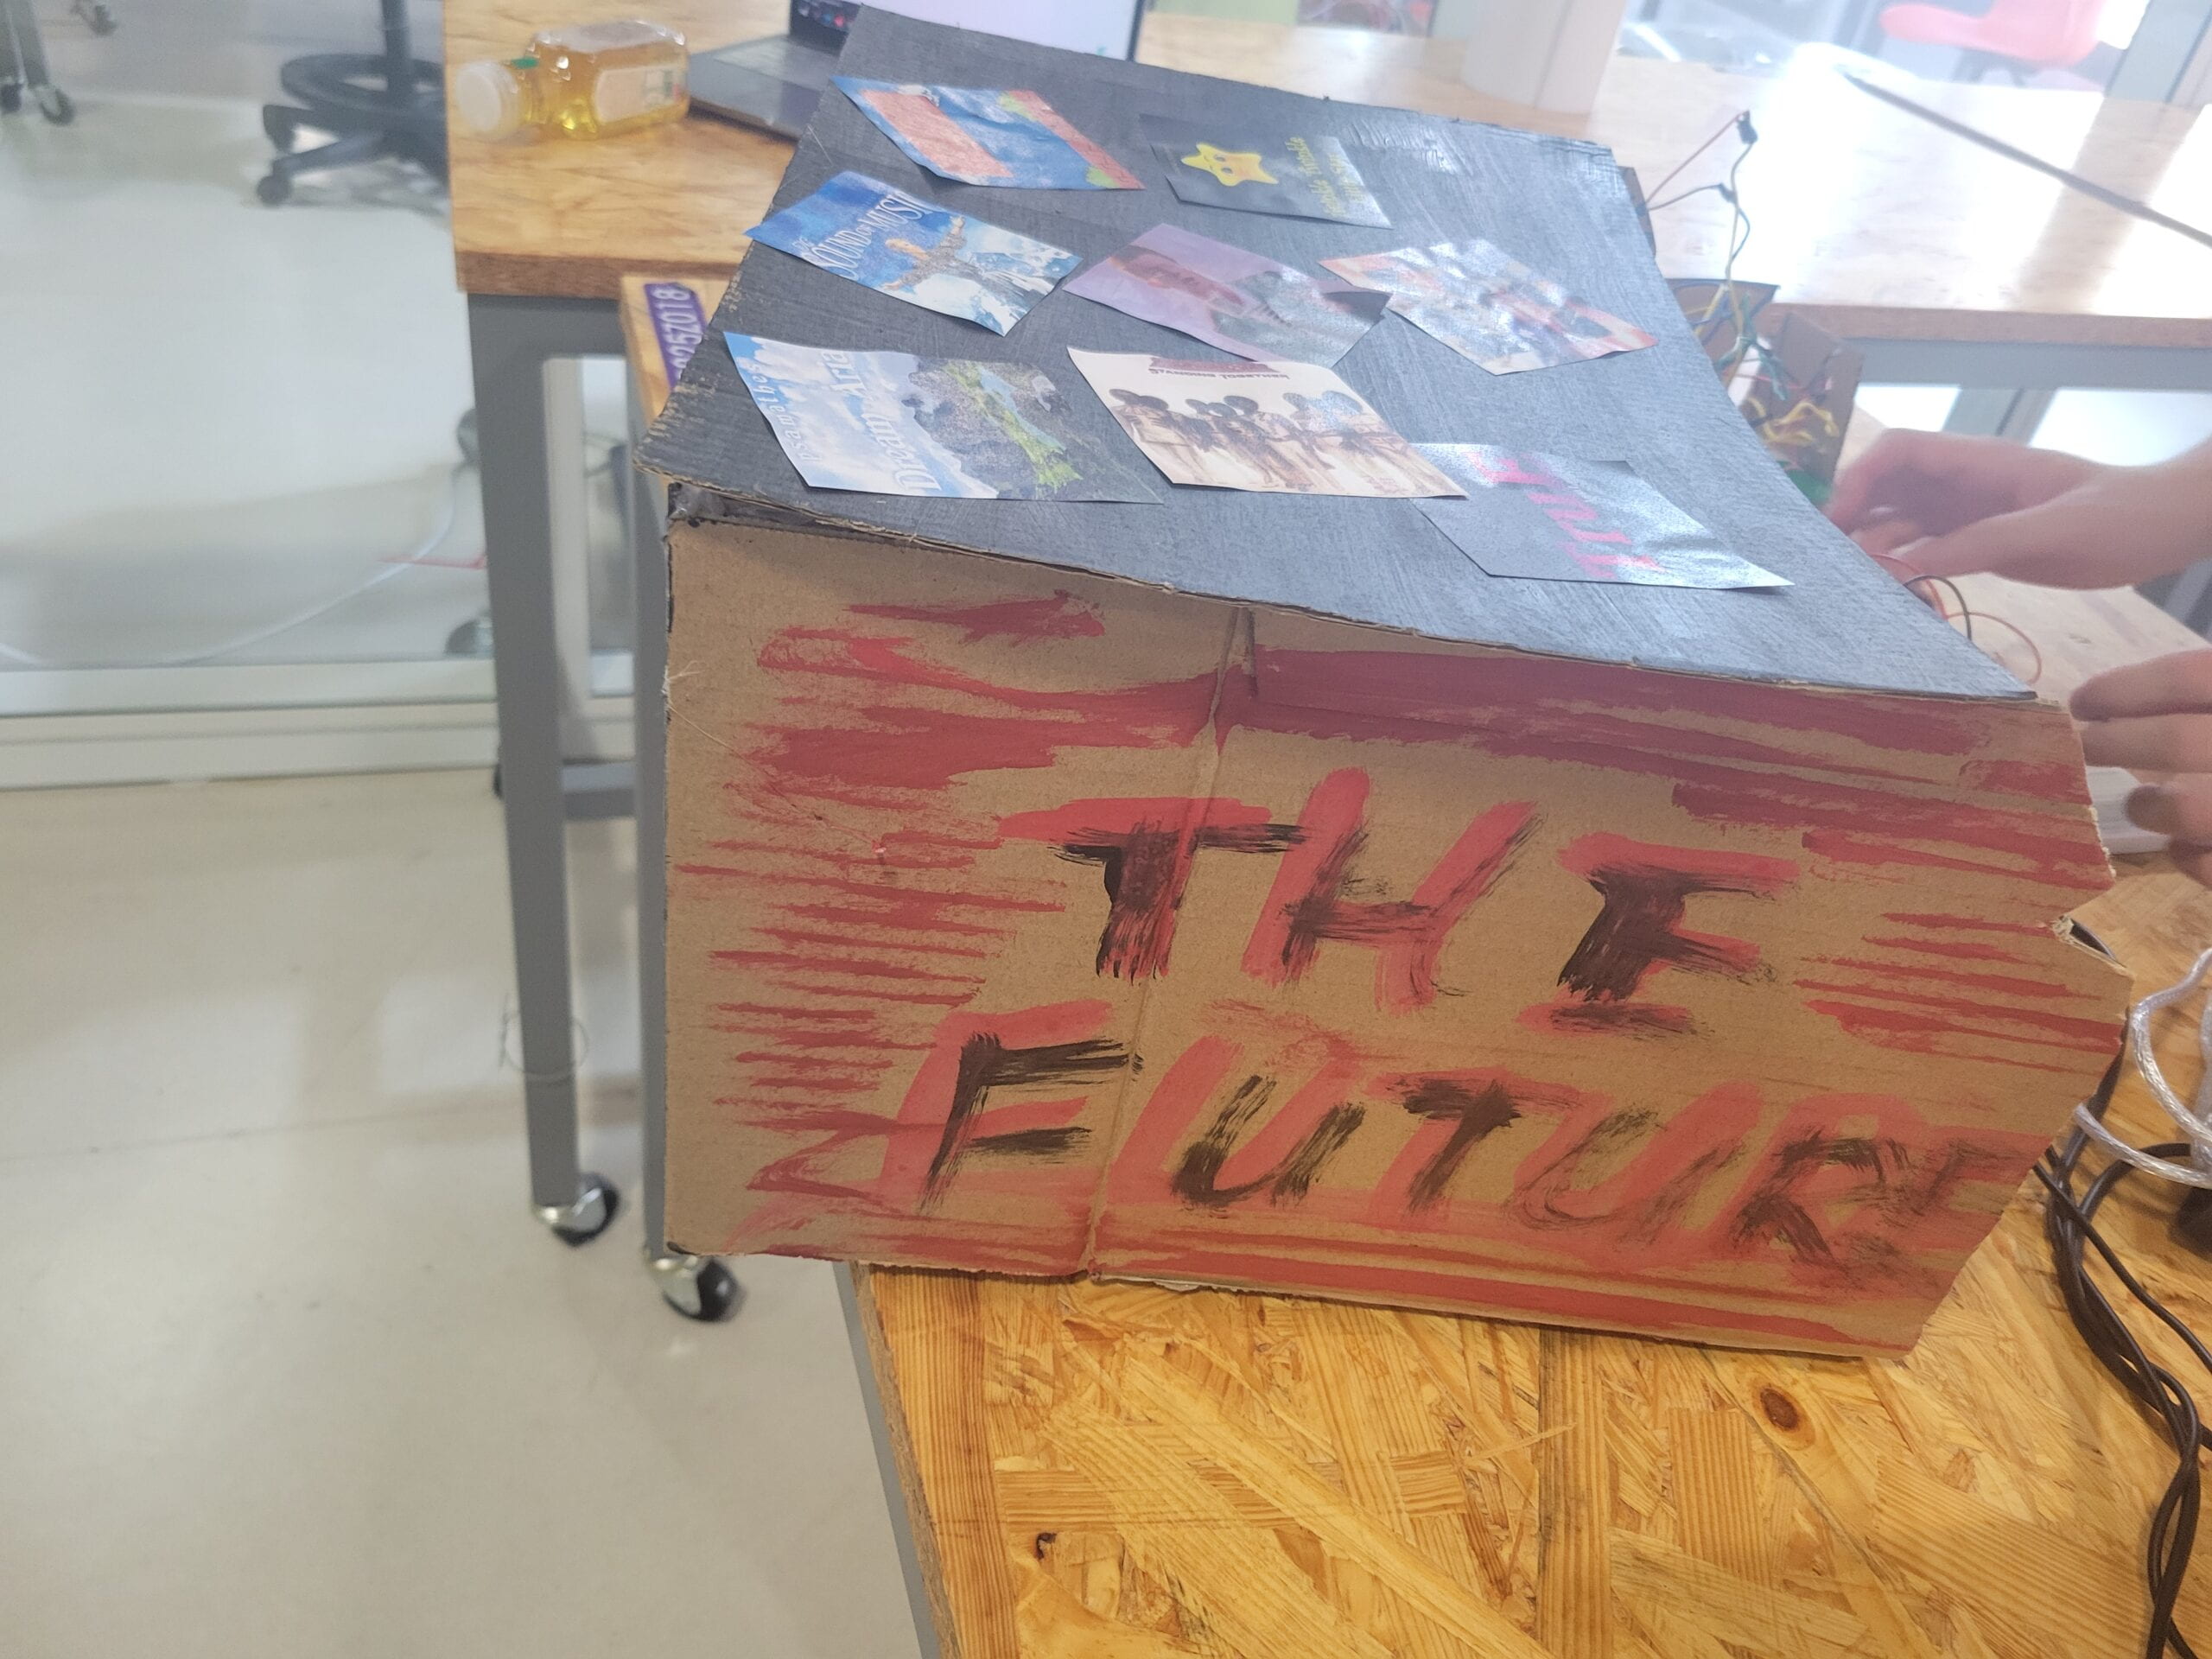
The original draft:
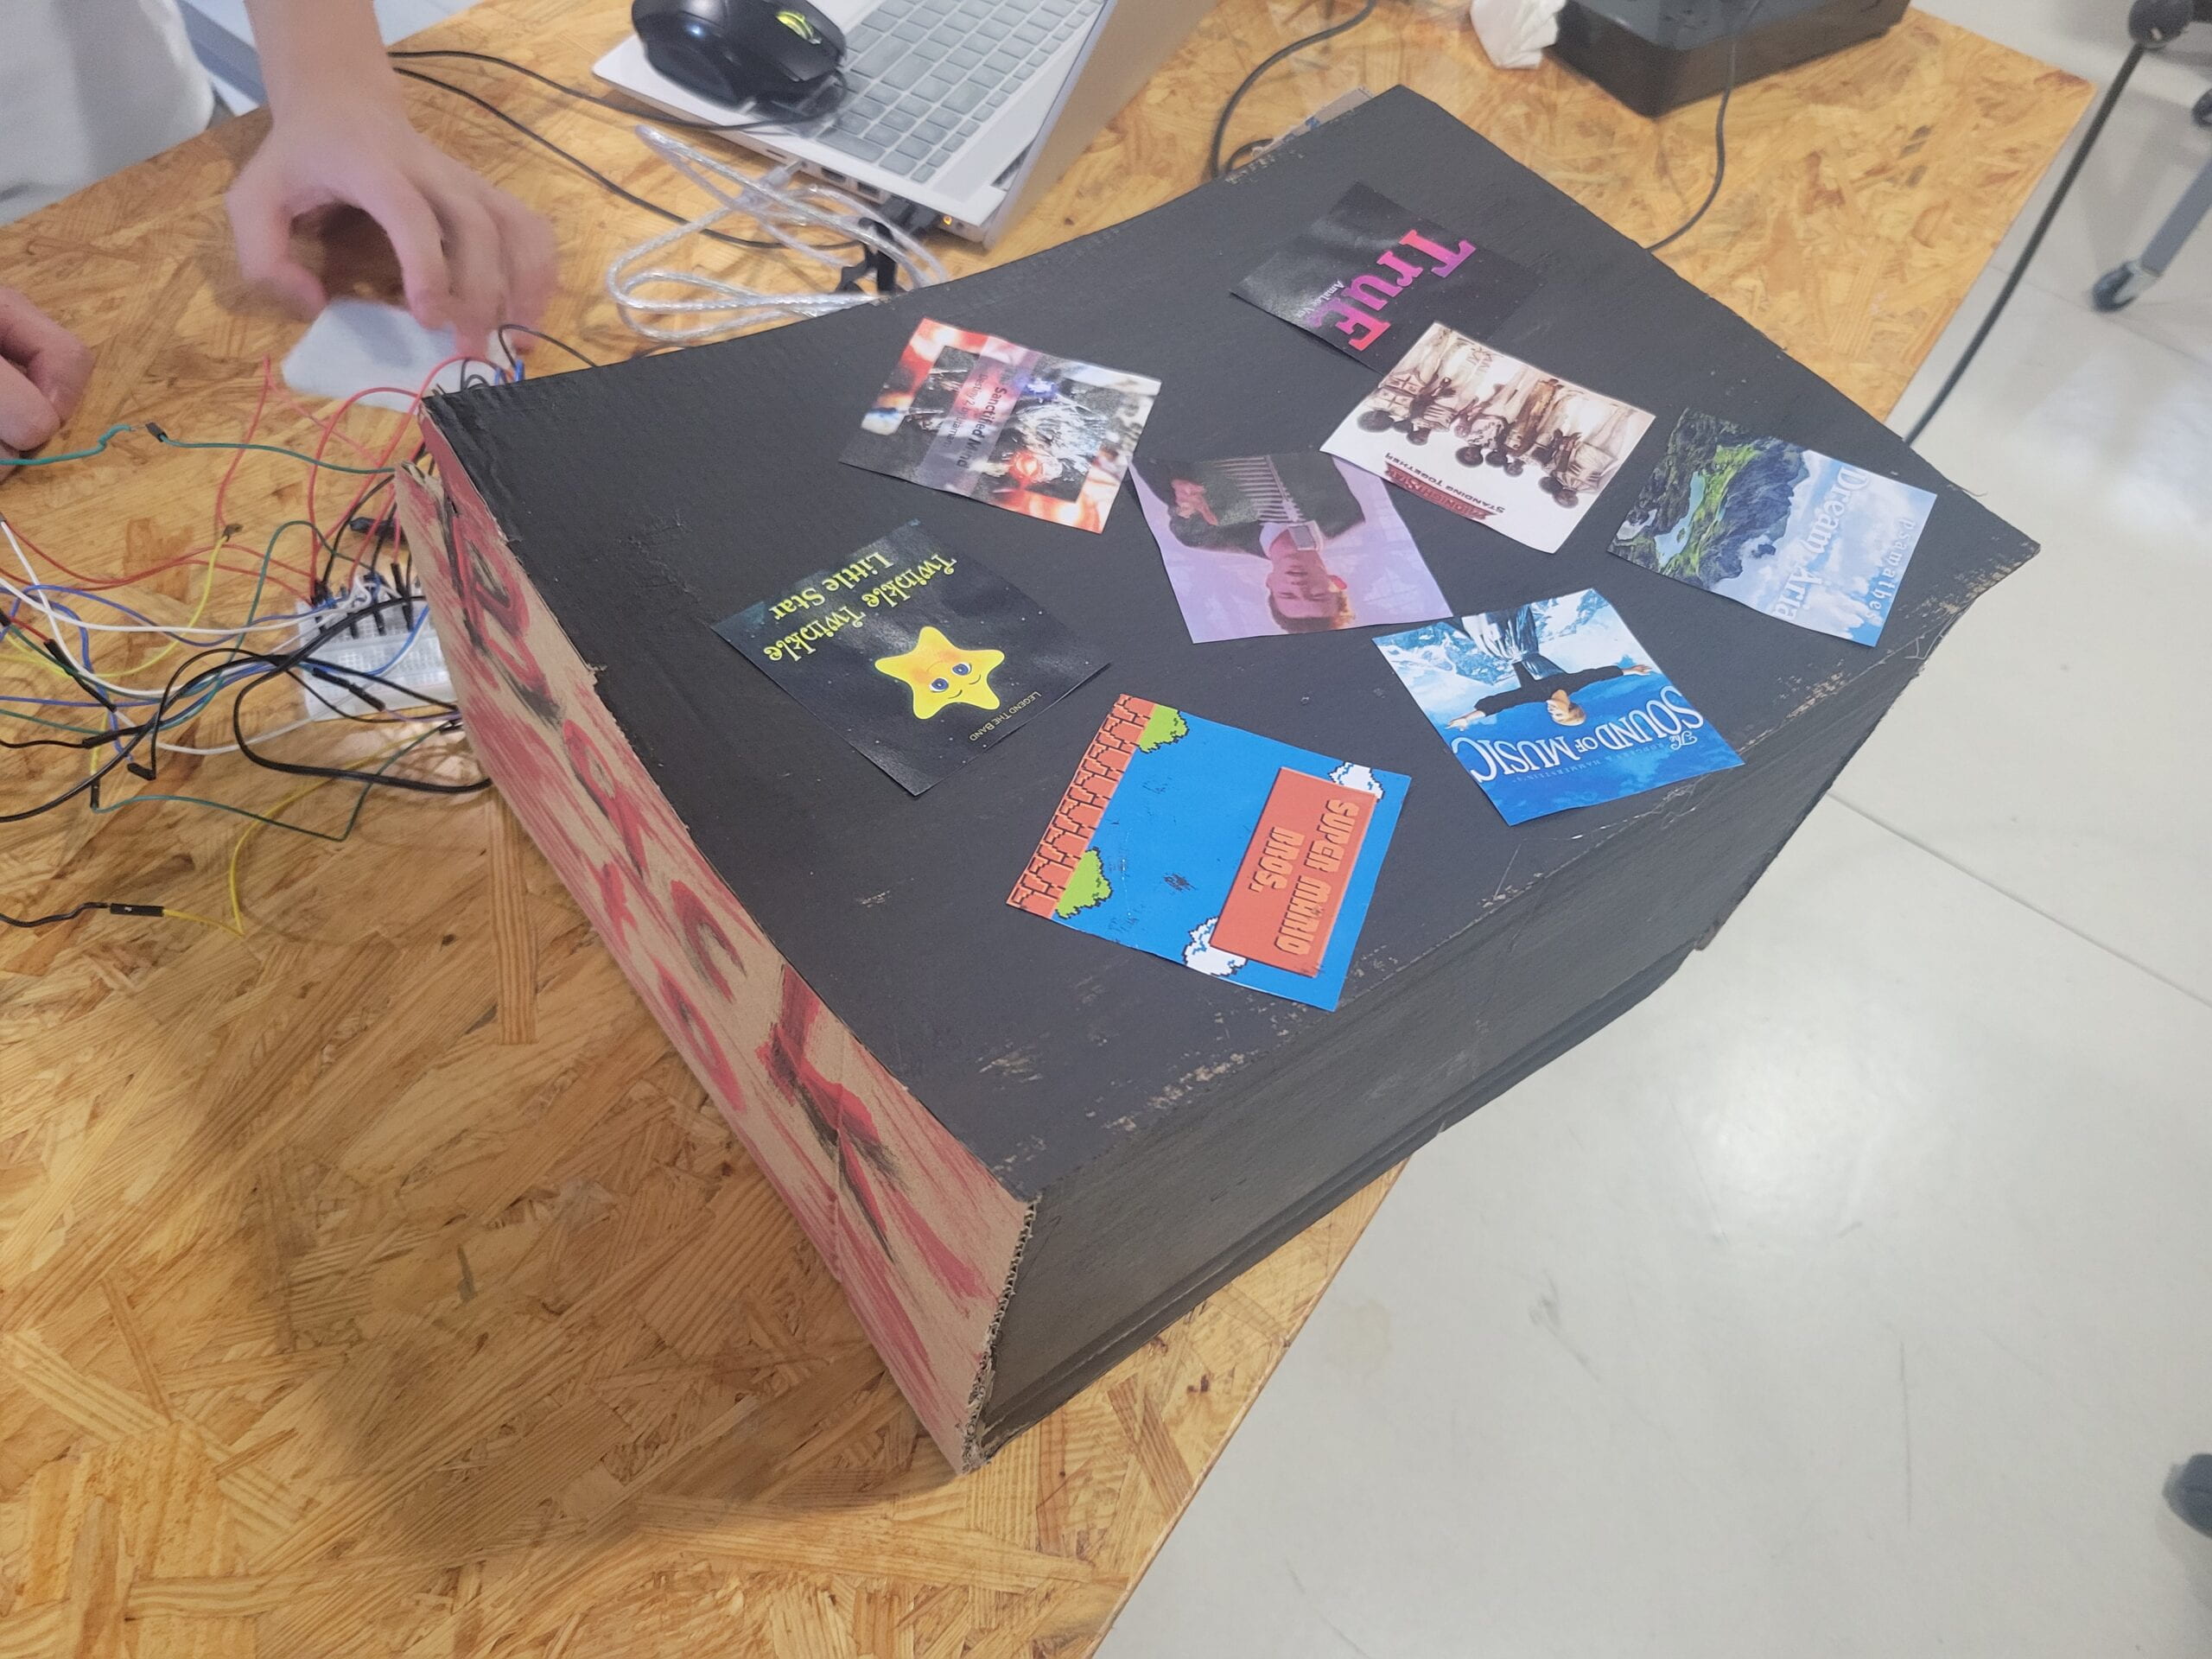
The final version:
C. CONCEPTION AND DESIGN:
The music style of our project is the 8-bit chiptune, which fits in the overall retro aesthetic. It is also easy to achieve with the buzzer we were given in the tool kit. The songs we prepared in the music box include hit songs and classic game themes in y2k, and it’s easy for the user to recreate them with the keyboard. We didn’t set any specific goals for the user to achieve, because we want the experience to have more freedom.
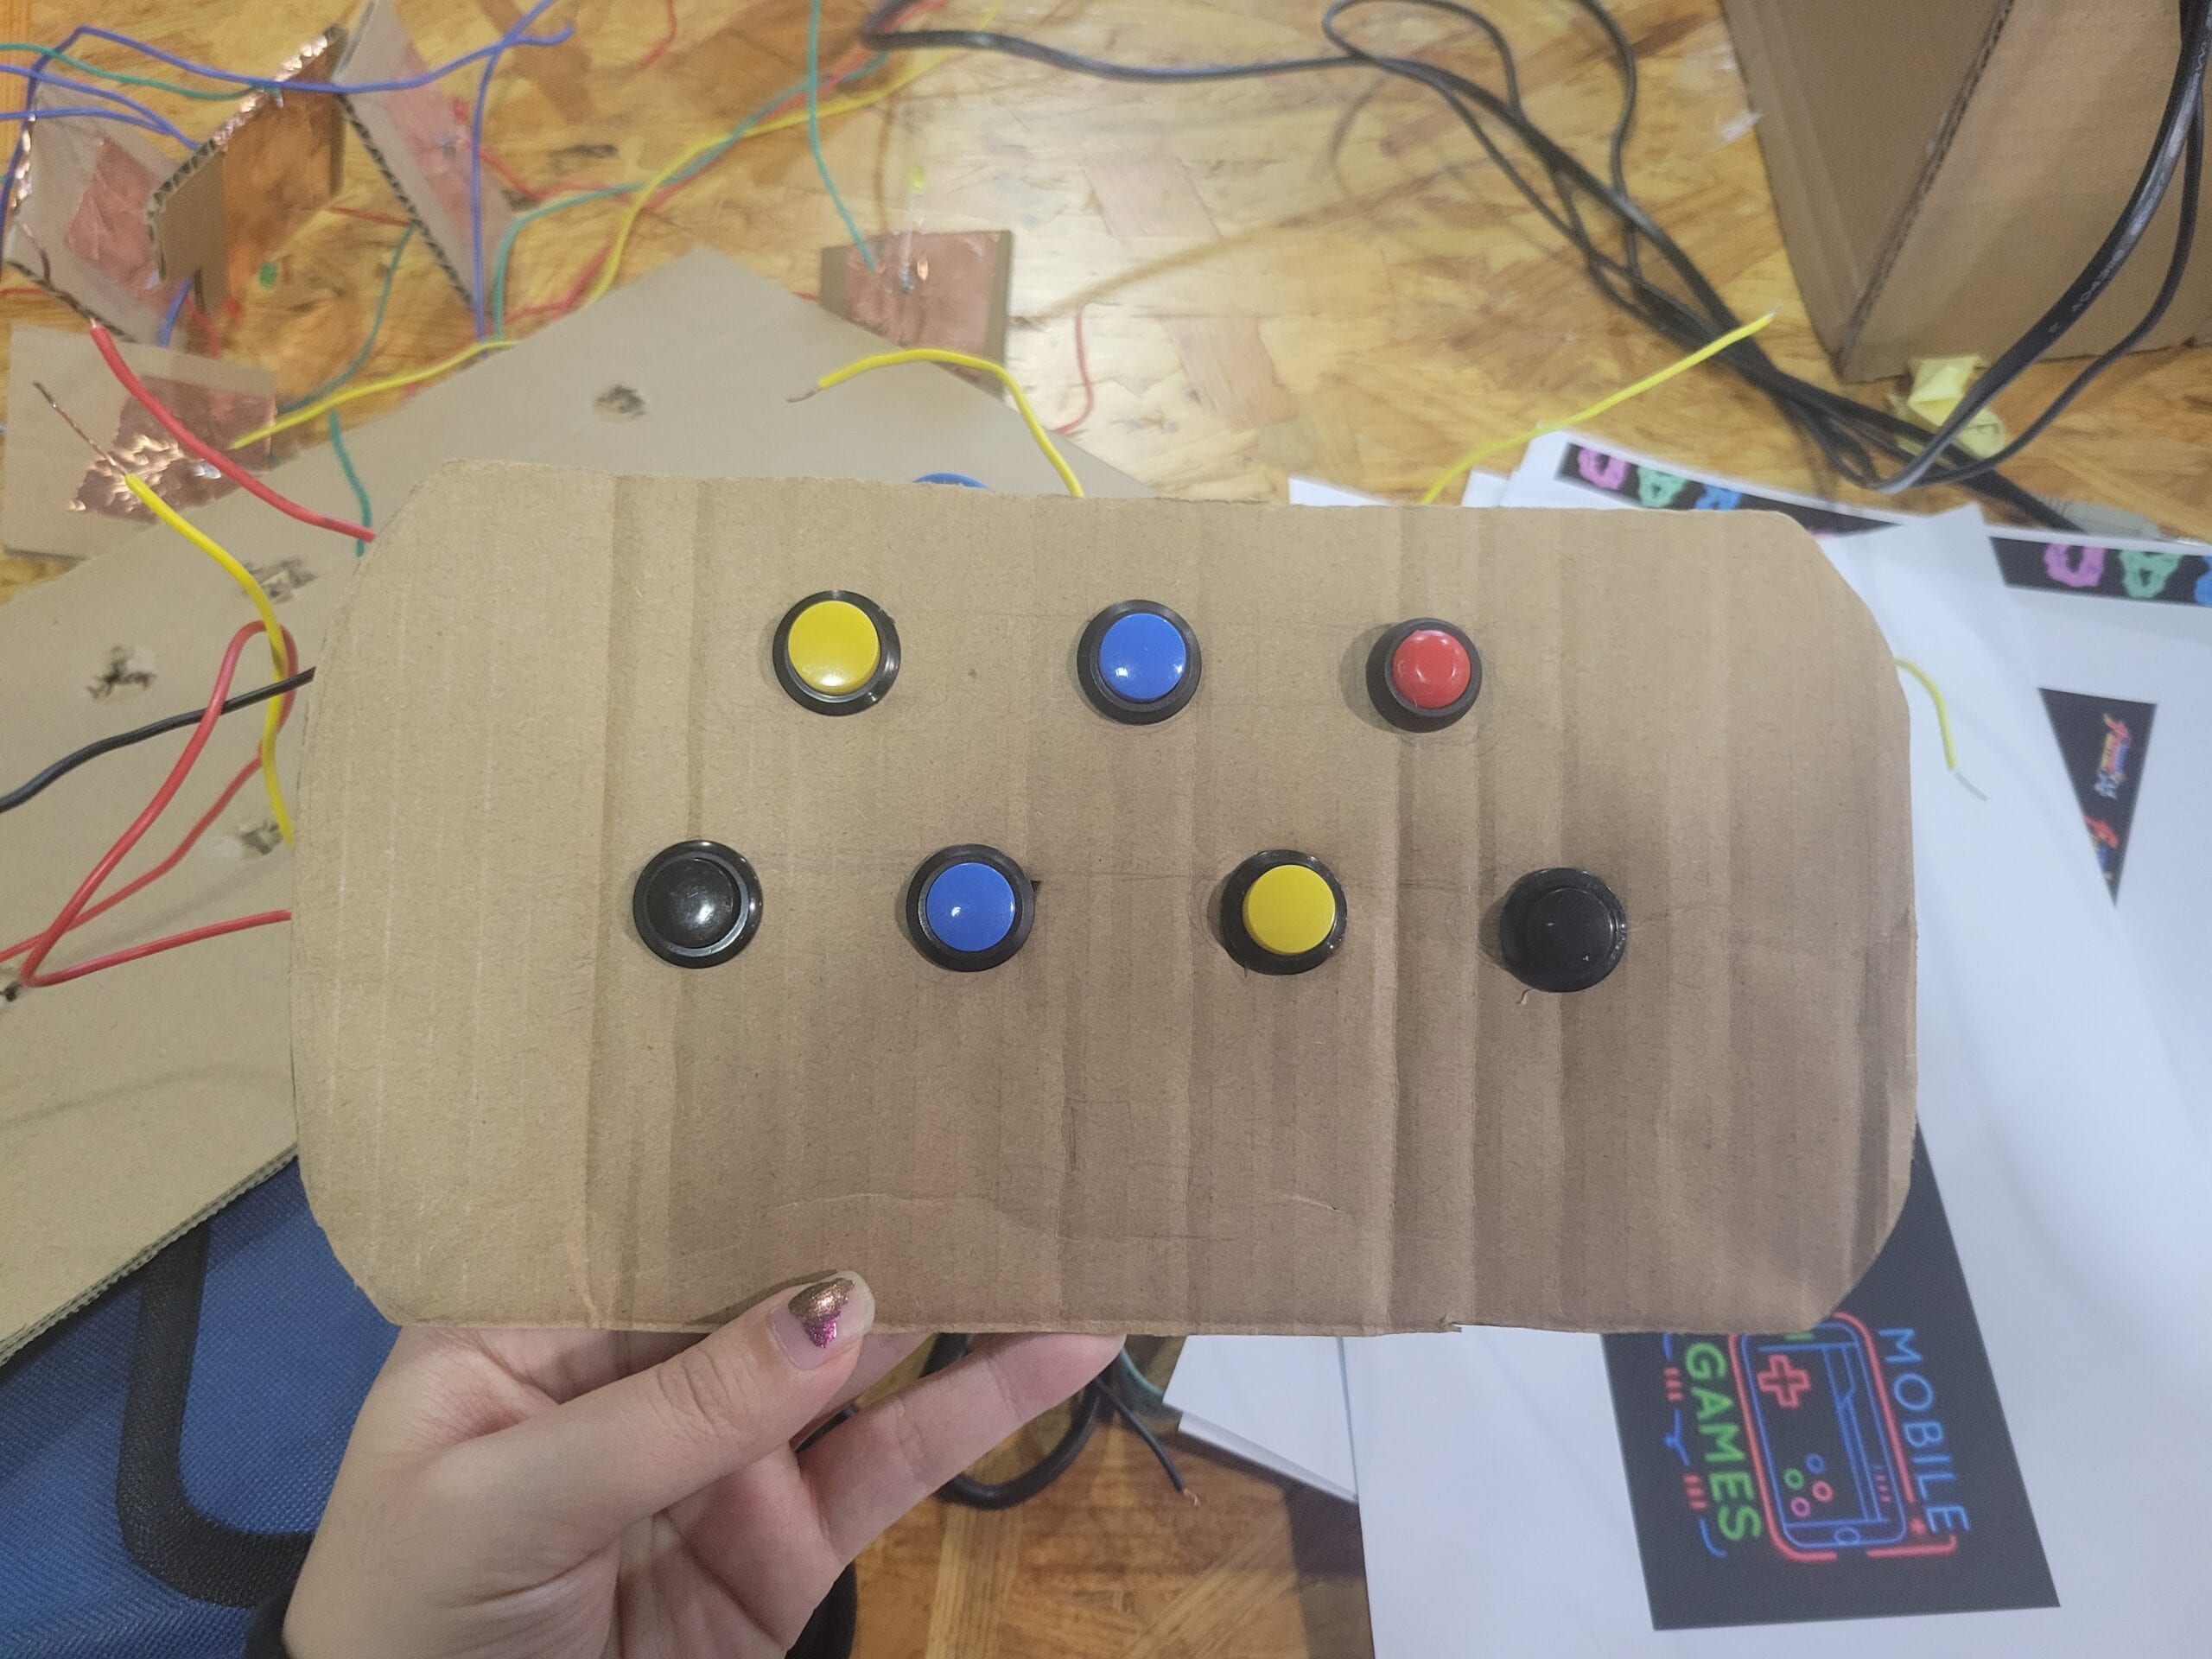
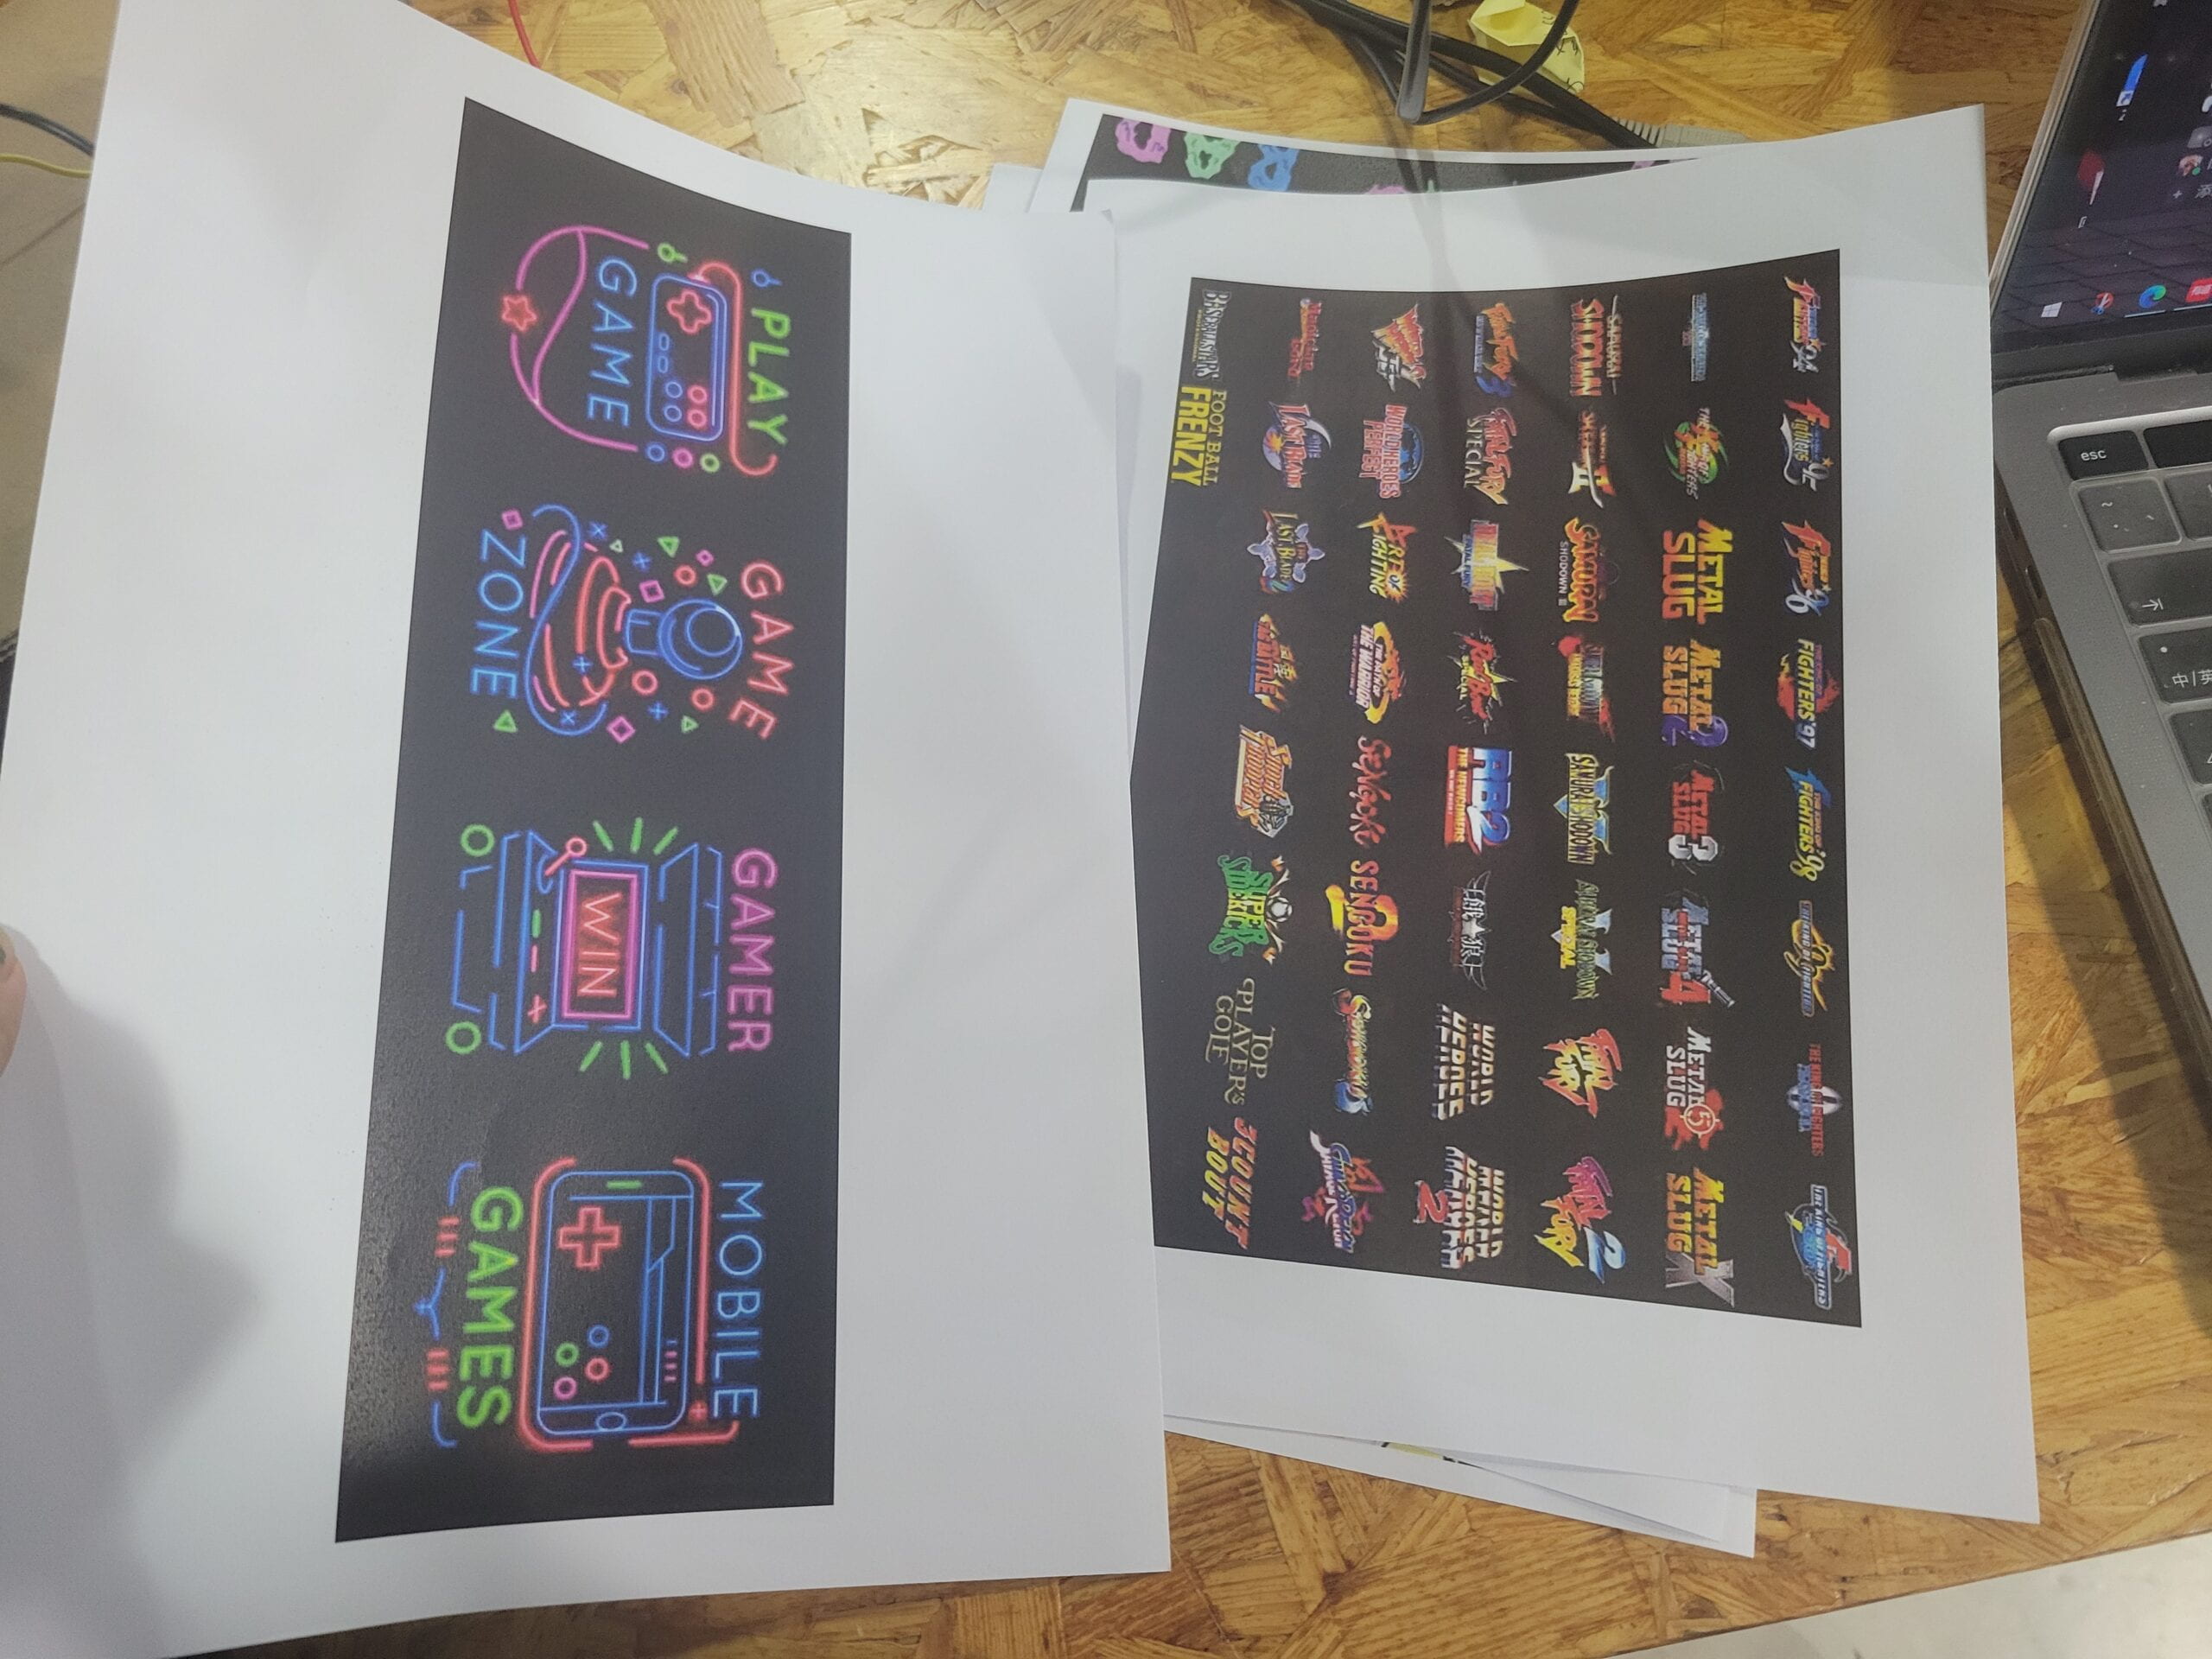
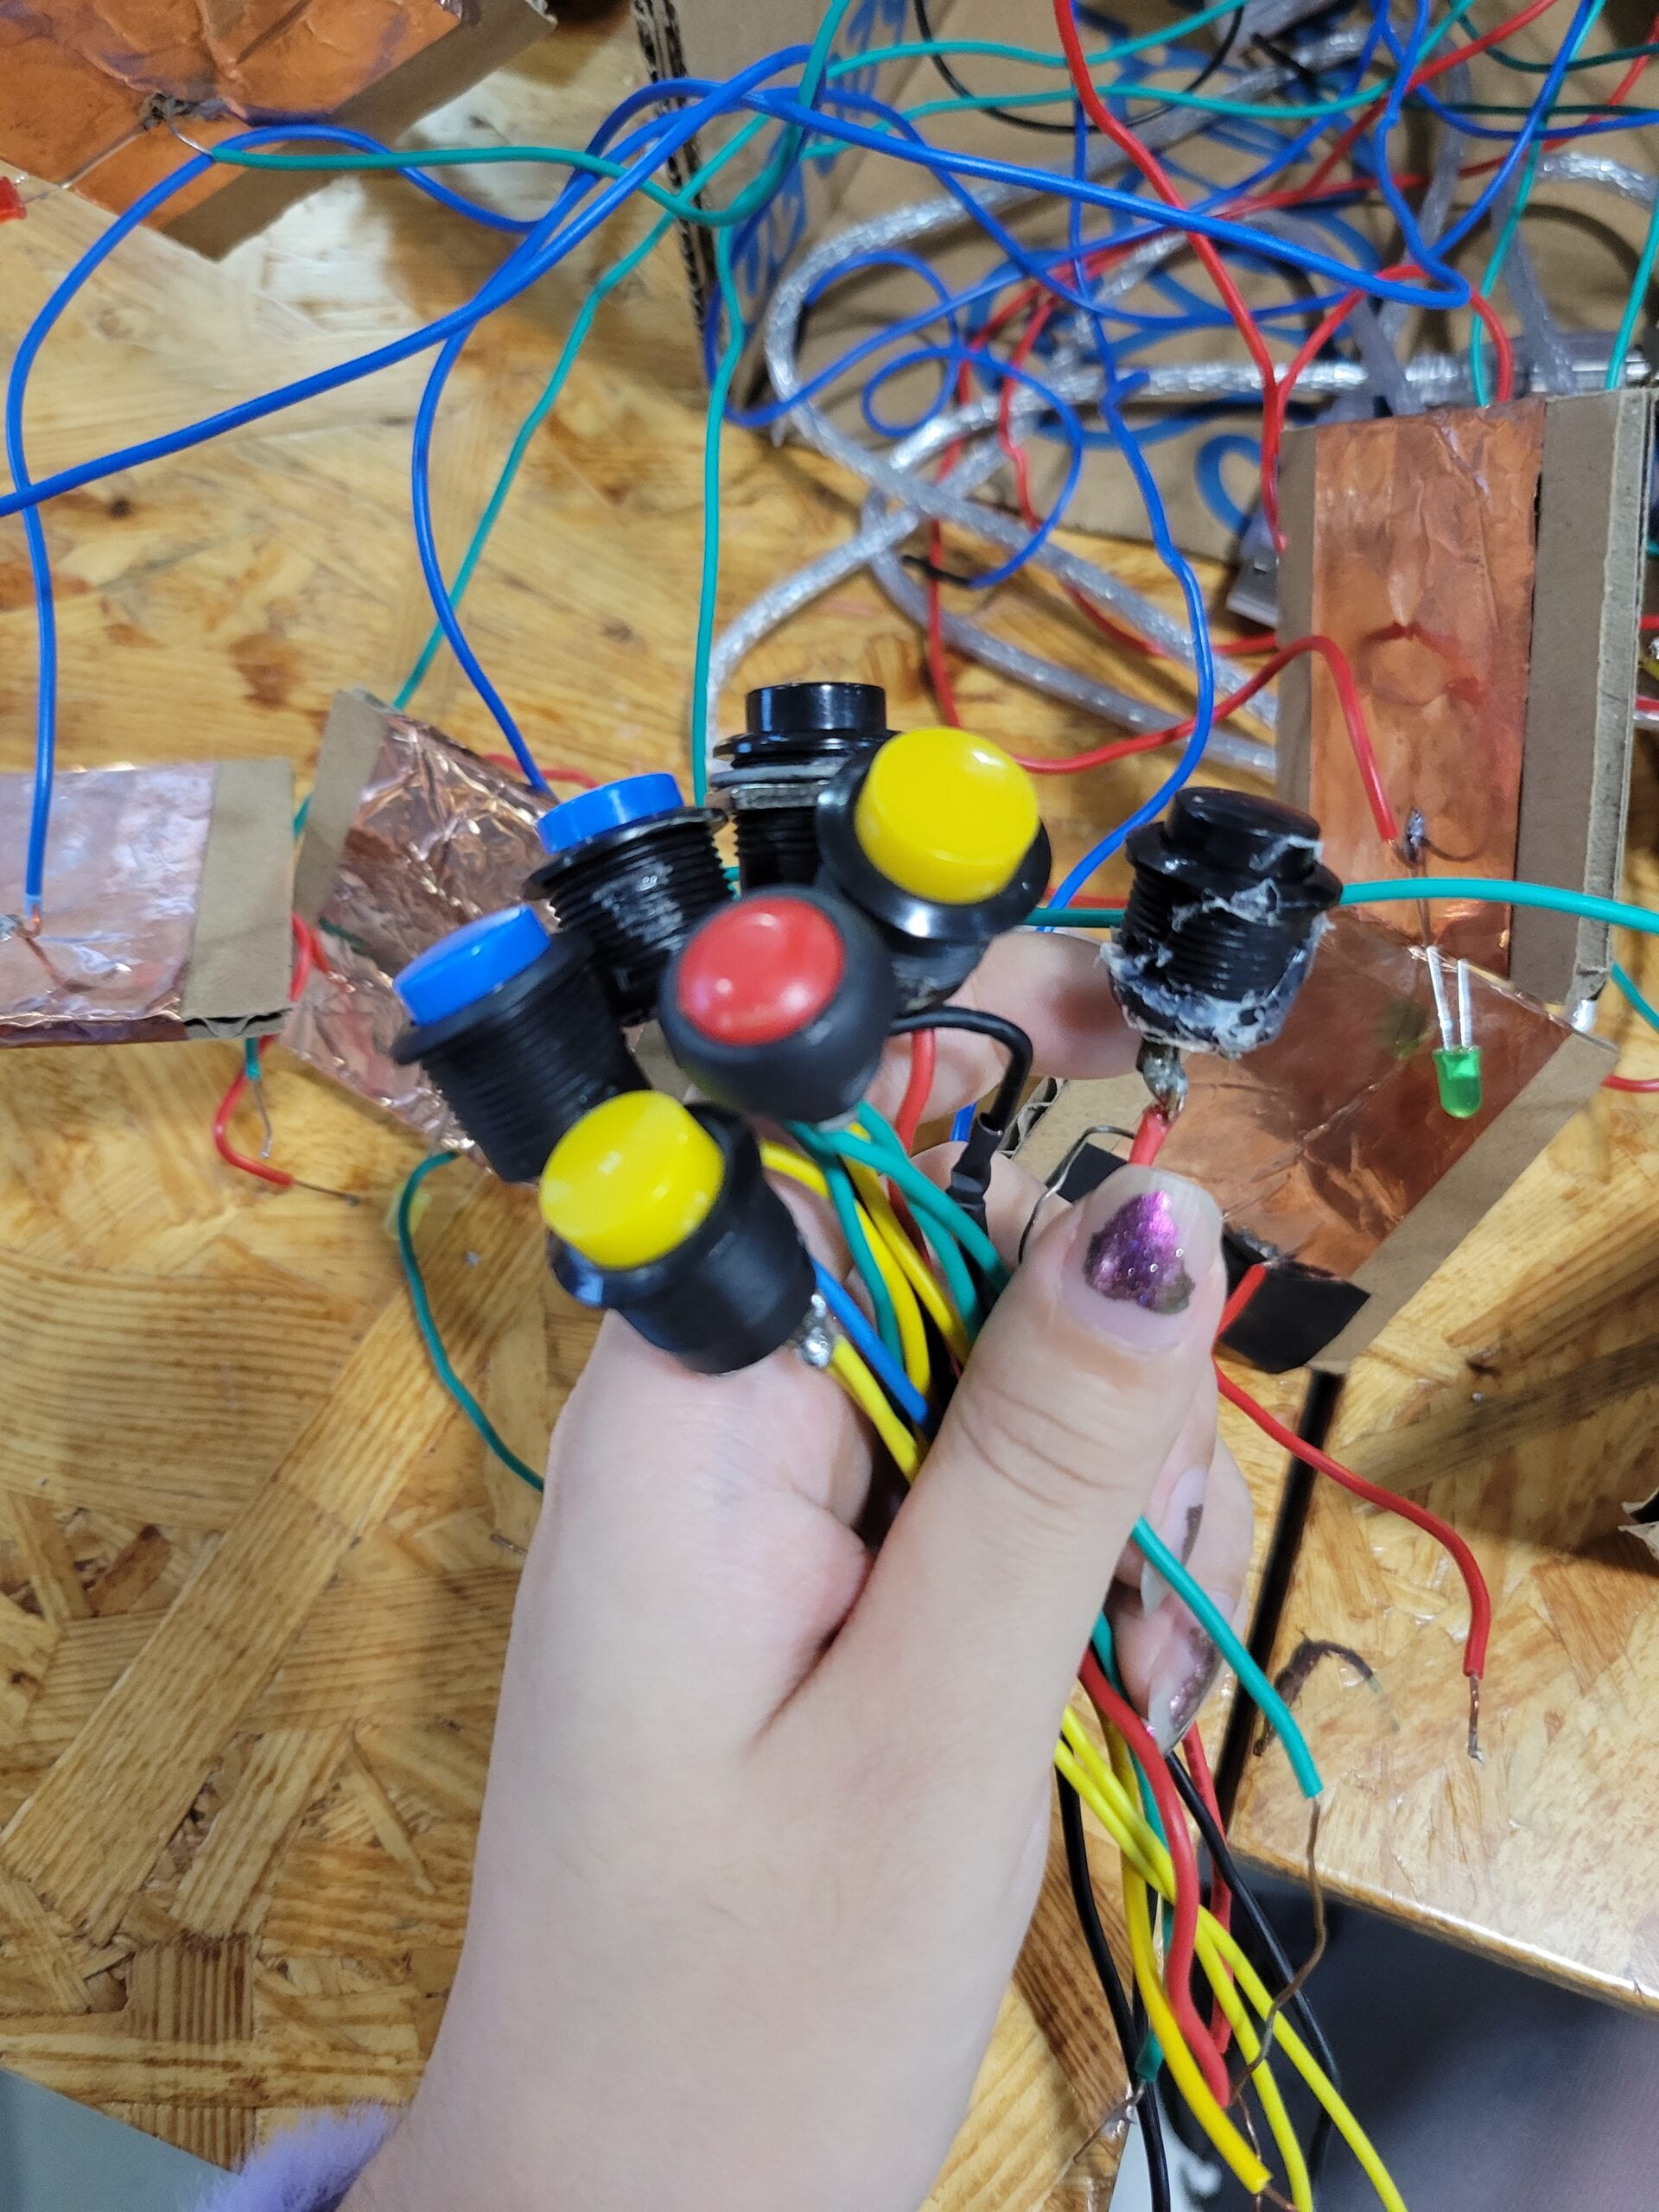
For the buttons, we choose the classic press buttons that have simple and vivid colors, while also giving the user a solid tactile feeling when they are pressed. The exterior design also intends to be harmonious with each component in terms of colors and aesthetics, as I choose to imitate the exterior of an arcade game box using black paint as a base and red graffiti-style letters. I also print the album pictures of each song as well as classic arcade game thumbnails as decorations.
D. FABRICATION AND PRODUCTION:
As I mentioned above, I mostly contribute to the overall aesthetics and concept of the prototype, as well as the making and assembling of several components. My groupmate is in charge of the coding and the realization of the circuit. It means that after the main theme and functions are decided, we can work individually and simultaneously at the beginning of the process, and collaborate at the end.
One major problem of this working pattern is that the coding has too many variables when we first tried to put everything together, the circuit didn’t work, and it took a long time to de-bug while also finding out if some of the components had mal-functions. This led to the failure in our user testing process, during which we haven’t found the exact problem and had to spend most of the time fixing the prototype rather than demonstrating it. It did teach us the importance of using appropriate components, as we switched to the buttons we are using now, which had more stable connections; we also fixed the major bug in coding that led to the result of only one button that wouldn’t stop buzzing.
The first version we presented in the user testing and the bug we came across:
E. CONCLUSIONS:
As I put in the beginning, the interaction is fully achieved when the user’s moves are influenced by the feedback from the keyboard. Our goal is to allow the user to explore the music world between the past and future; in this case, the jukebox function represents the past, and the free interaction with the keyboard signifies the future.
We got a lot of useful feedback after the presentation, I do think there’s a lot to be improved in terms of the interaction process. The freedom led to a lack of purposes and goals in the interaction, which may confuse the user. Professor Margaret Minsky mentioned that we could have explored more with the “reverse Shazam” effect, which let the user imitate the tunes they heard, and when they recreate the music successfully the installation will give major feedback like “you win!”. This is a very valuable suggestion for us to consider if we can do it again, for we realize that too much freedom given to the player might result in boredom and a lack of stimulation. The current design does not necessarily distinguish our prototype from any electronic organs.
Another thing that I would like to improve is our progress management as a team. Although we did communicate a lot in coordinating the respective individual working process, there were still a lot of asynchronies that lead to several last-minute refinements of the prototype. Since the division of work is very solid in my team, I have to wait for my groupmate to assemblage the circuit with them and see what could go wrong in my previous component-making process, instead of working in a dual-thread way. Our differences in personal schedules also undermine our efficiency greatly, as I could start earlier to finish my part but my teammate couldn’t. In the next group project, I will make sure we have better time management, which could be realized through a more detailed timetable of progress that takes every kind of potential accident into account, and prioritizes the coding and debugging.
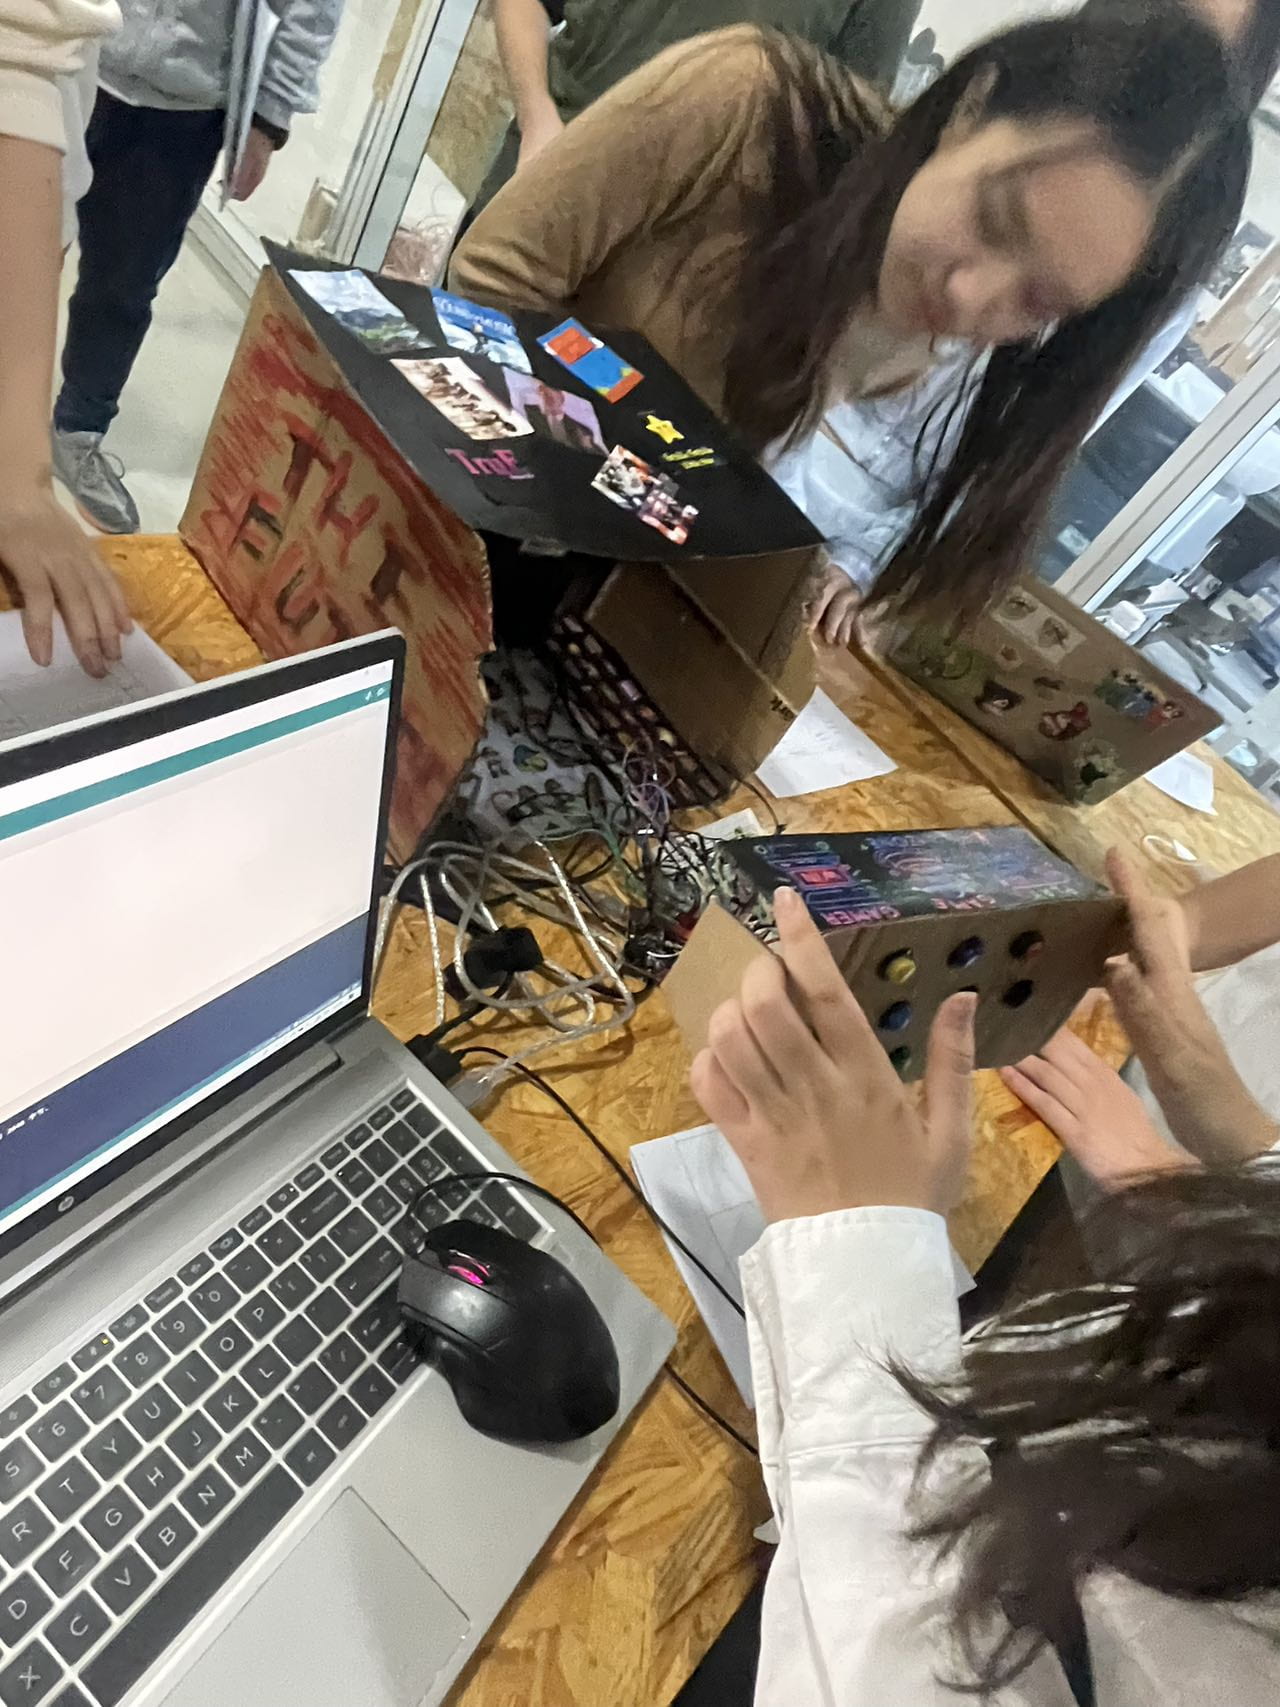
The final presentation and the player’s interaction:

F. ANNEX
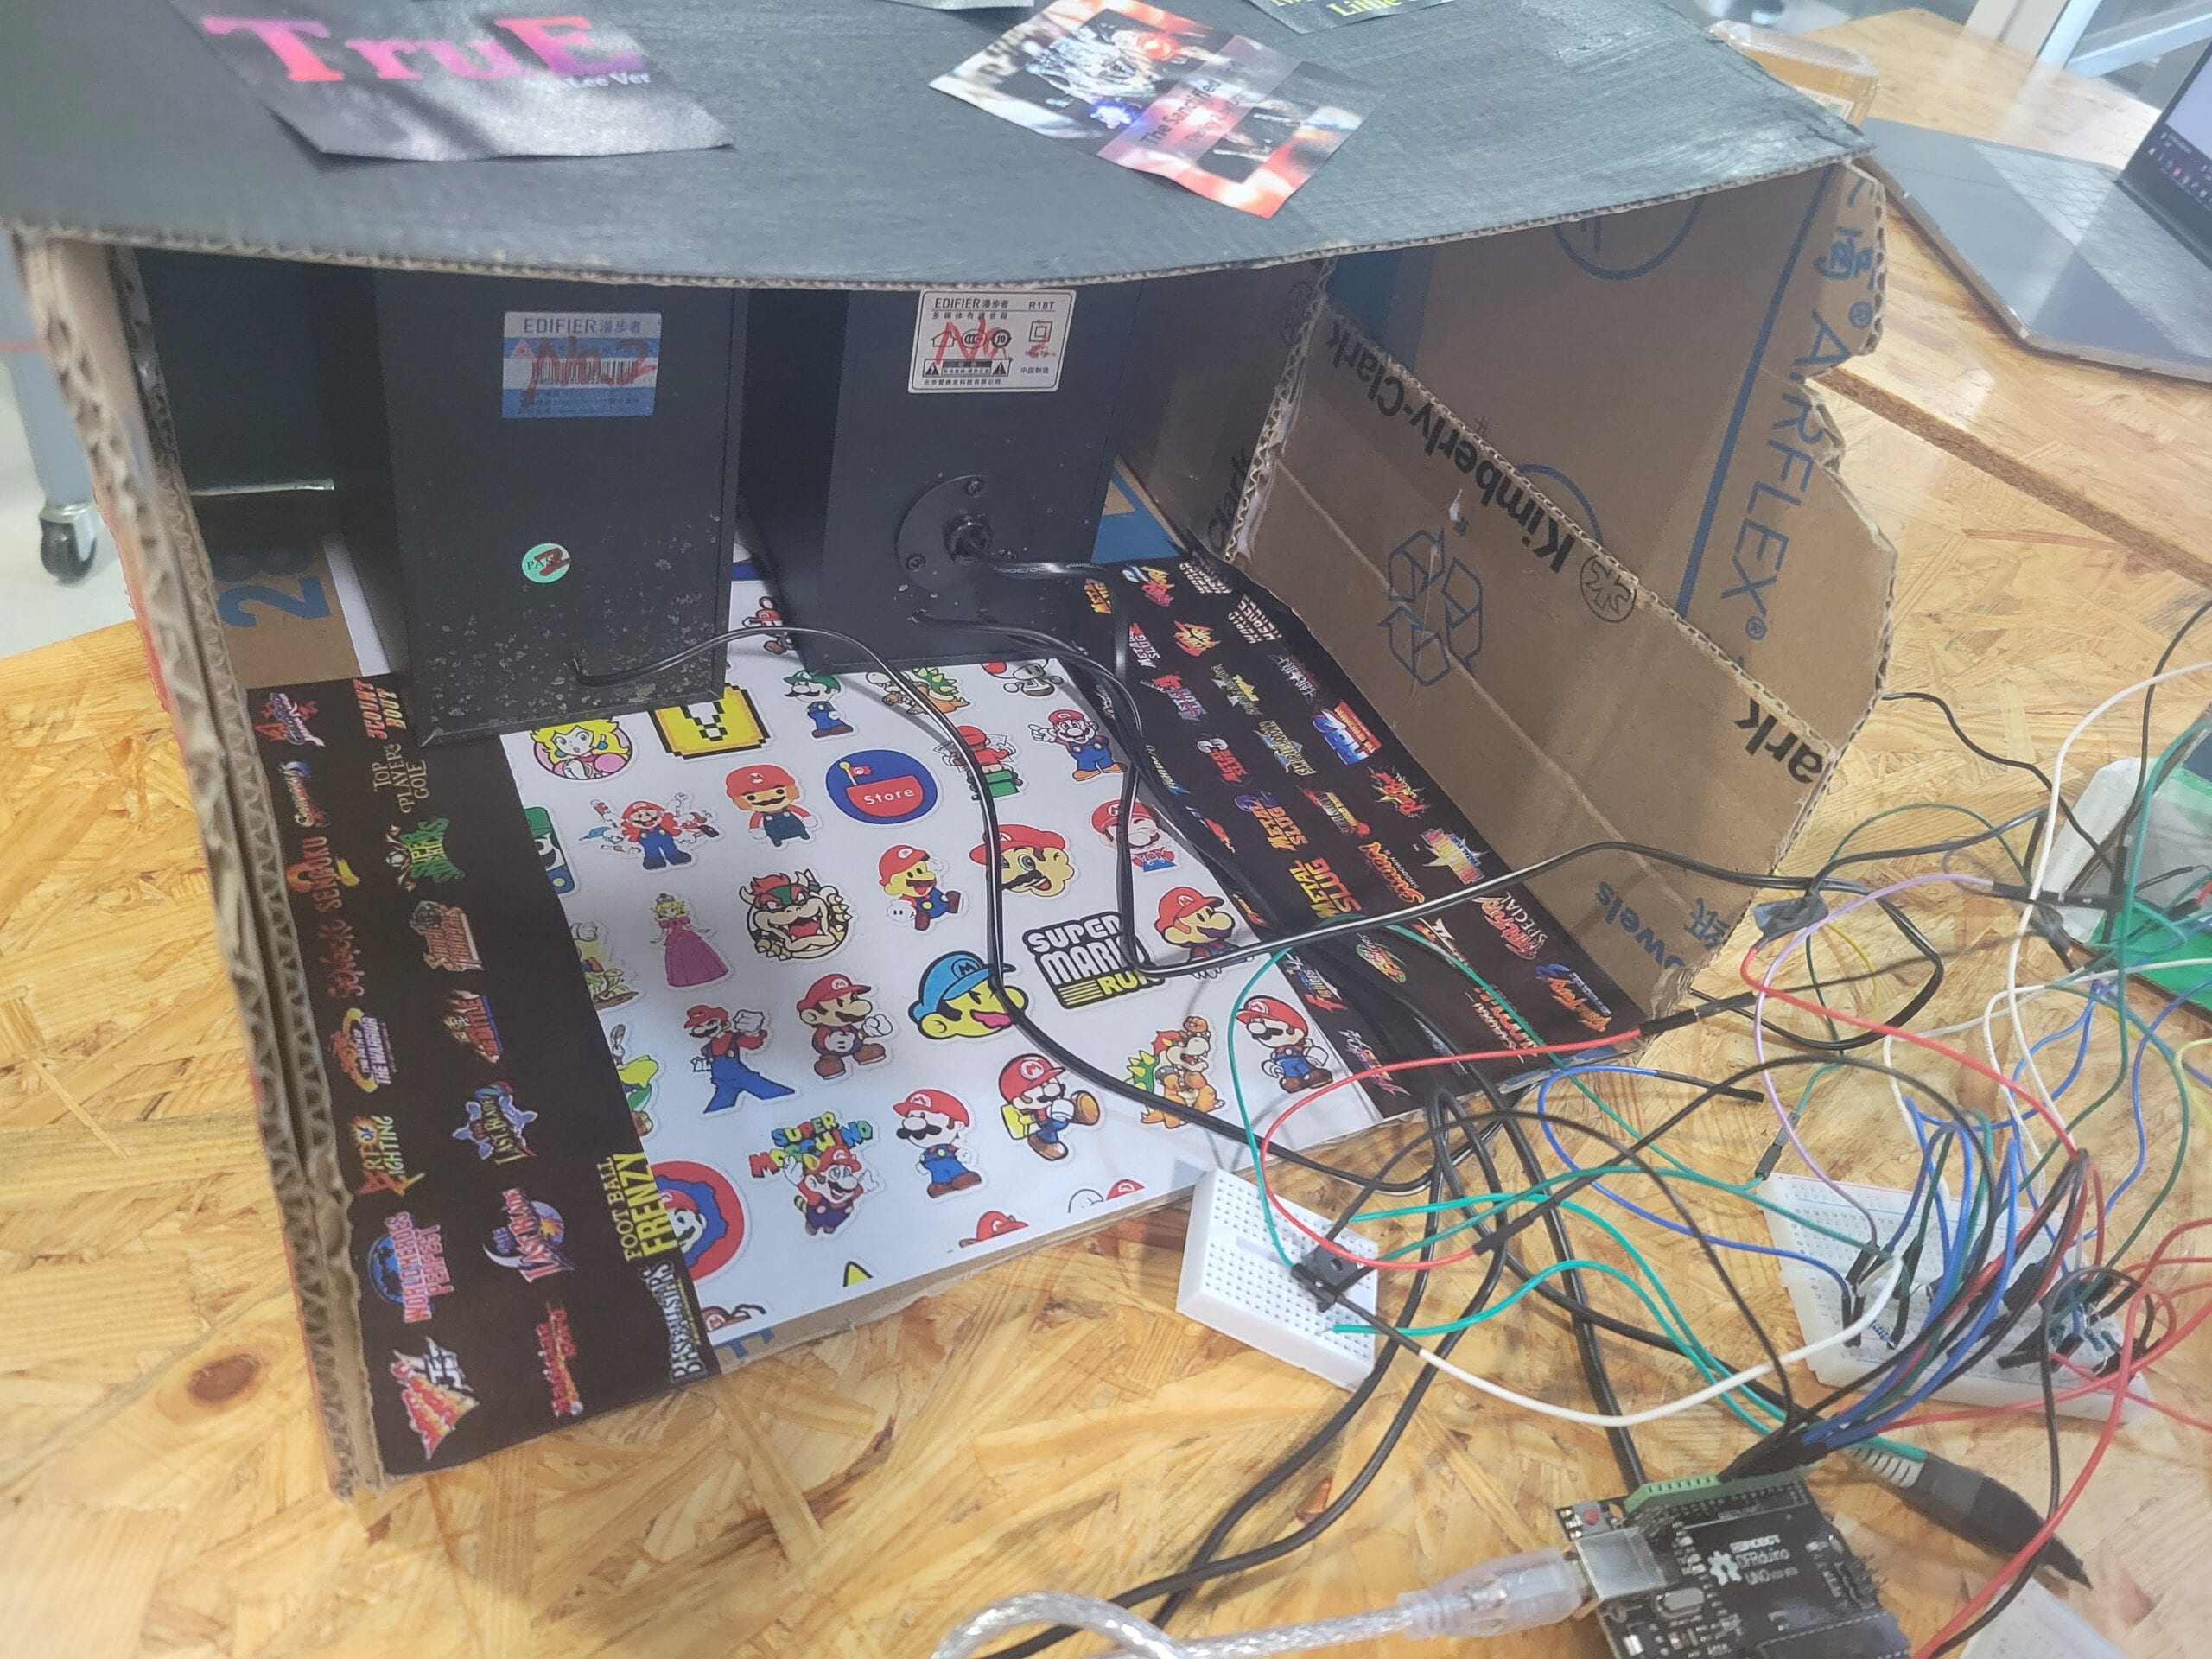
The decoration materials:

Original Coding:
#define NTE1 330
#define NTE2 370
#define NTE3 410
#define NTE4 441
#define NTE5 495
#define NTE6 556
#define NTE7 624


// constants won't change. They're used here to set pin numbers:
const int buttonPin1 = 2;     // the number of the pushbutton pin
const int buttonPin2 = 3;     // the number of the pushbutton pin
const int buttonPin3 = 4;     // the number of the pushbutton pin
const int buttonPin4 = 5;     // the number of the pushbutton pin
const int buttonPin5 = 6;     // the number of the pushbutton pin
const int buttonPin6 = 7;     // the number of the pushbutton pin
const int buttonPin7 = 8;     // the number of the pushbutton pin

int buzz = 9;

int buttonState1, buttonState2, buttonState3, buttonState4,buttonState5,buttonState6,buttonState7;
// variables will change:
int buttonState = 0;         // variable for reading the pushbutton status
// int tone[1] = {NTE1}
// int tone[2] = {NTE2}
// int tone[3] = {NTE3}
// int tone[4] = {NTE4}
// int tone[5] = {NTE5}
// int tone[6] = {NTE6}
// int tone[7] = {NTE7}

void setup() {
  Serial.begin(9600);
  // initialize the pushbutton pin as an input:
  pinMode(buttonPin1, INPUT);
  pinMode(buttonPin2, INPUT);
  pinMode(buttonPin3, INPUT);
  pinMode(buttonPin4, INPUT);
  pinMode(buttonPin5, INPUT);
  pinMode(buttonPin6, INPUT);
  pinMode(buttonPin7, INPUT);

}

void loop() {
  // read the state of the pushbutton value:
 buttonState1 = digitalRead(buttonPin1);
 buttonState2 = digitalRead(buttonPin2);
 buttonState3 = digitalRead(buttonPin3);
 buttonState4 = digitalRead(buttonPin4);
 buttonState5 = digitalRead(buttonPin5);
 buttonState6 = digitalRead(buttonPin6);
 buttonState7 = digitalRead(buttonPin7);


 // check if the pushbutton is pressed. If it is, the buttonState is HIGH:
  Serial.print(buttonState1);
  Serial.print(buttonState2);
  Serial.print(buttonState3);
  Serial.print(buttonState4);
  Serial.print(buttonState5);
  Serial.print(buttonState6);
  Serial.println(buttonState7);

  if (buttonState1 == HIGH) {
    // turn LED on:
    tone(buzz, NTE1);
  } else if (buttonState2 == HIGH) {
    tone(buzz, NTE2);
  } else if (buttonState3 == HIGH) {
    tone(buzz, NTE3);
  } else if (buttonState4 == HIGH) {
    tone(buzz, NTE4);
  } else if (buttonState5 == HIGH) {
    tone(buzz, NTE5);
  } else if (buttonState6 == HIGH) {
    tone(buzz, NTE6);
  } else if (buttonState7 == HIGH) {
    tone(buzz, NTE7);
  }
  else {
    // turn LED off:
    noTone(buzz);
  }
  /*
  if (buttonState2 == HIGH) {
    // turn LED on:
    tone(buzz, NTE2);
  } else {
    // turn LED off:
    noTone(buzz);
  }if (buttonState3 == HIGH) {
    // turn LED on:
    tone(buzz, NTE3);
  } else {
    // turn LED off:
    noTone(buzz);
  }if (buttonState4 == HIGH) {
    // turn LED on:
    tone(buzz, NTE4);
  } else {
    // turn LED off:
    noTone(buzz);
  }if (buttonState5 == HIGH) {
    // turn LED on:
    tone(buzz, NTE5);
  } else {
    // turn LED off:
    noTone(buzz);
  }if (buttonState6 == HIGH) {
    // turn LED on:
    tone(buzz, NTE6);
  } else {
    // turn LED off:
    noTone(buzz);
  }if (buttonState7 == HIGH) {
    // turn LED on:
    tone(buzz, NTE7);
  } else {
    // turn LED off:
    noTone(buzz);
  }
  */

  delay(10);
}
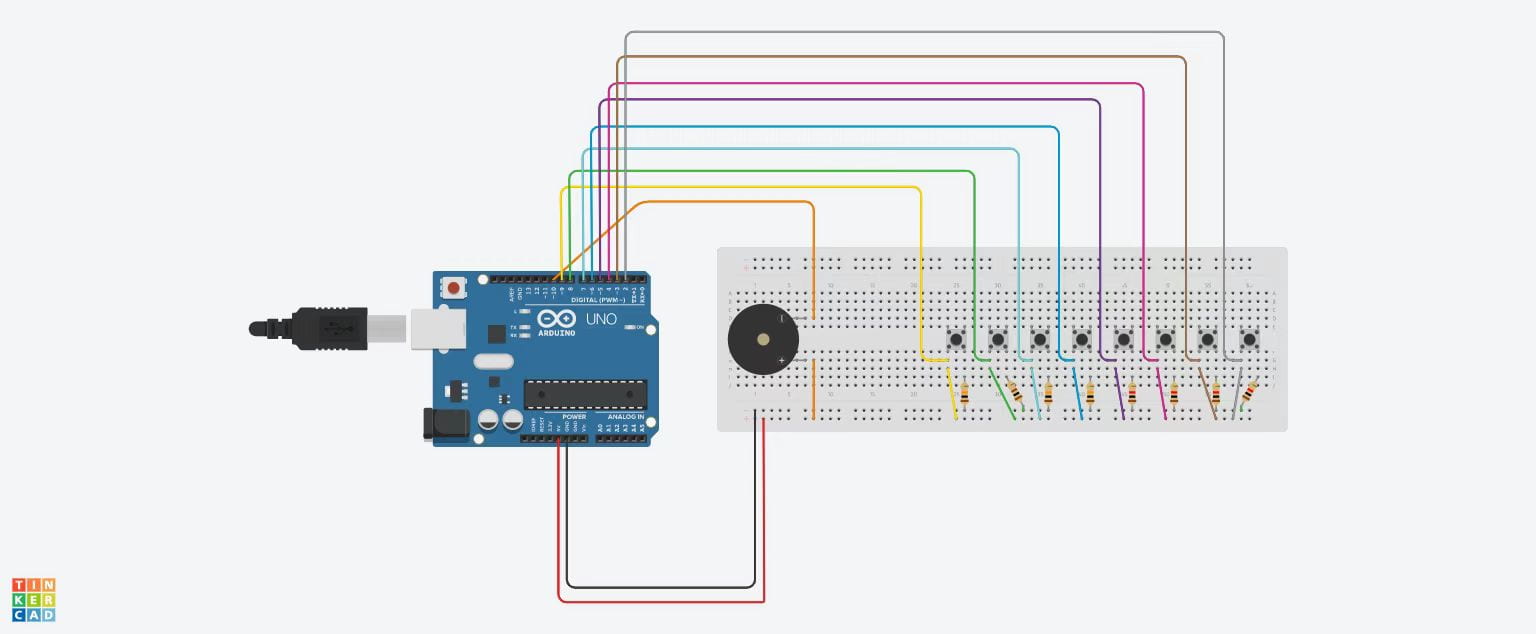
The Diagram: