Task 1:
If you press the button, the speaker will make a sound. There is a power to bring the electricity to the circuit, and there are some electric wires to connect the speaker and the button.
The process of building the circuit: In the beginning, we forgot to connect the power, so we asked the teaching assistant to help us. And then I didn’t realize that I can use the button to cross the line in the middle. I thought there were not enough places for me to connect the electric wire, we then asked the professor for help. Also, I didn’t notice that the breadboard connected transversely in the middle and connected lengthwise in the edge, we found that the circuit doesn’t work, so I checked how the breadboard worked on the IMA website and finally accomplished it.

Task 2
The goal is to build a working switch that could be connected to the circuit we previously built. We were brought to the soldering station, where we started to use pliers to peel off about 2 cm of the electro-insulating rubber off the wires’ both ends.
After the wires are prepped, copper tapes are stuck to the cardboards as the conductor. The next step is soldering, which is also the first time for me and my teammate to solder. The soldering gun can only be used after reaching the set temperatures, and we tapped the tip of the gun on the connection of solder and wire to melt the solder, allowing the wire to connect with the copper tapes. After they were firmly welded together, the device worked as a switch when electrified.

Task 3
On the basis of task 2, we had to parallel connect a resistance, a pot and a LED on the circuit. At the beginning, we found that we need more electric wire the connect the things, and there is not enough space for us to do that. So we just tried a lot of times to move the electric wire to make it work. Then we found that the original light and speaker still work but the new LED doesn’t work. We asked the teaching assistant for help, she said we didn’t put the pot into the circuit. After following the guidance of the assistant, we finally finished task 3.
Answers to Questions
A1: The resistor R1 is used to control the current that passes through the circuit so that they do not get damaged due to overcurrent.
A2: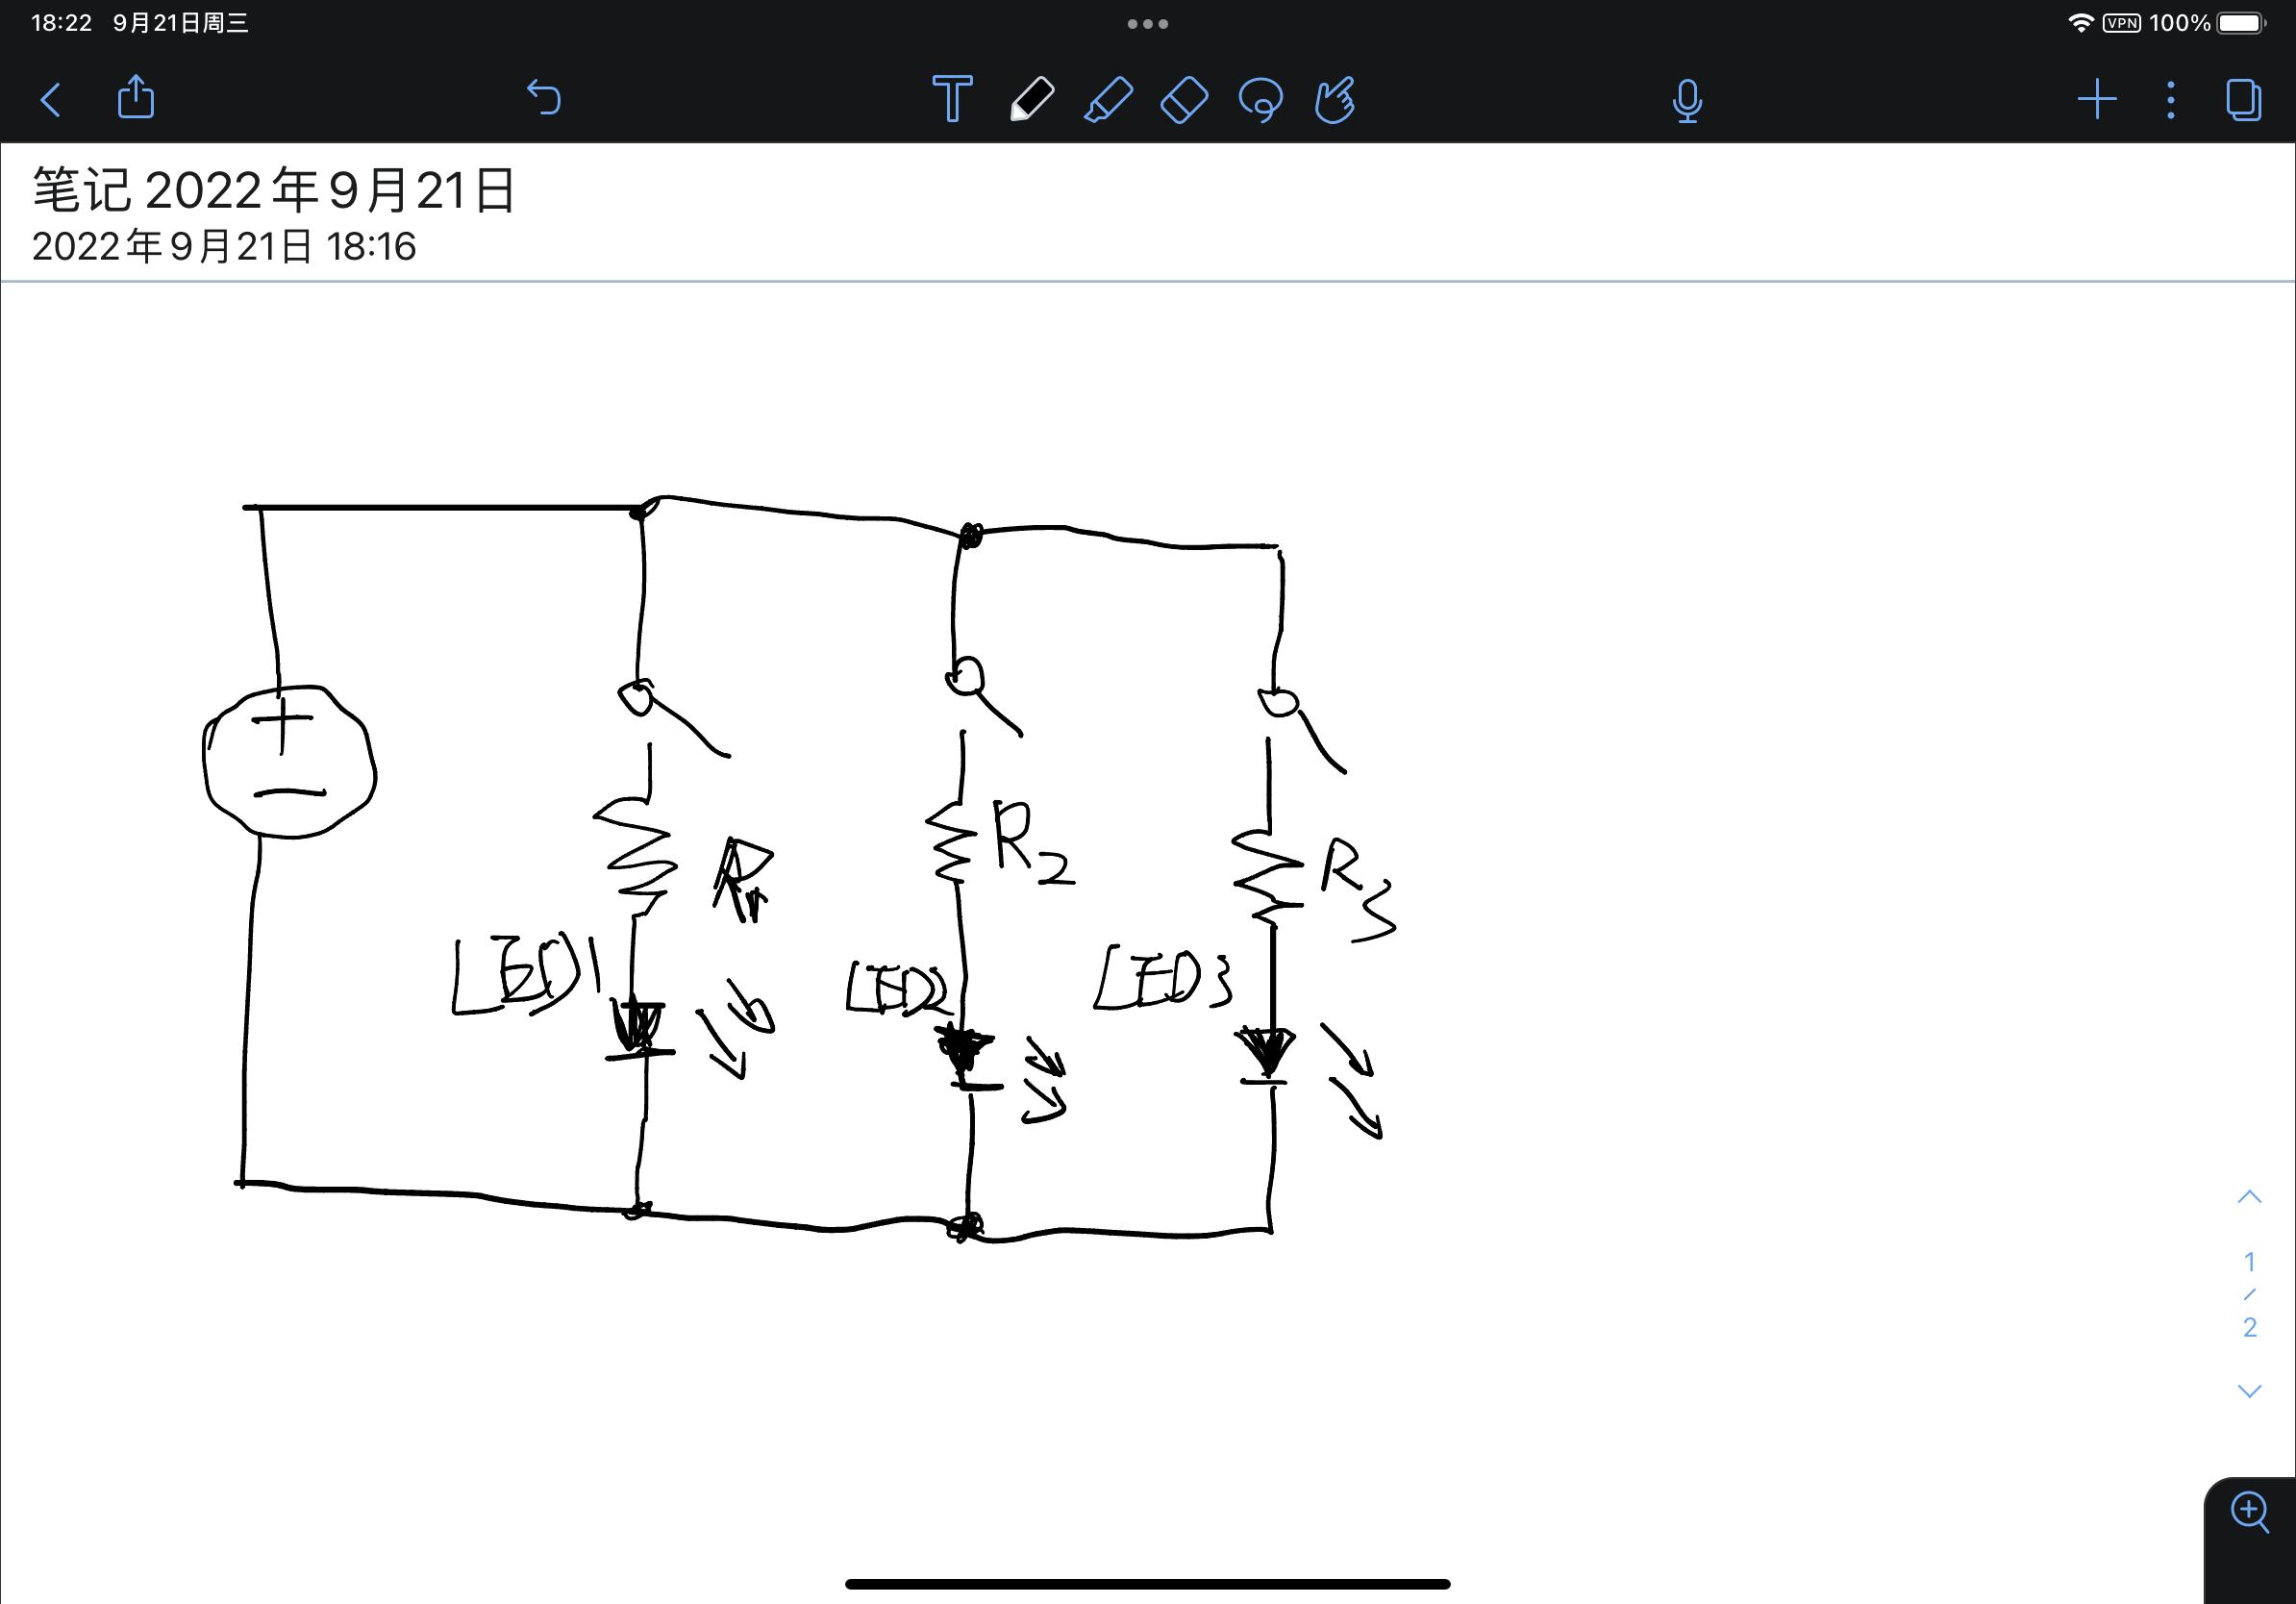
A3: The author defines interaction as “a cyclic process in which two actors alternately listen, think, and speak”; therefore, to talk about interactivity must involve two parties, one makes action and receives its response, which in return affects the next action. In this sense, I think our work in this session didn’t reach interactivity unless we saw the process of finding errors in the circuit as a kind of interaction (the response that came from the LED influences our build of the circuit).
A4: In Zach Lieberman’s case, Interaction Design and Physical Computing create new meanings for humans to share their unique perceptions of the external sensory world, and in the meantime actively alter the way one another perceives the world. People that cannot paint with their hands in a traditional way can now use their eyes as a new instrument, this technology simultaneously changes the way people paint and the definition of painting itself as a creative process.