Frank And Charlie Go To The Big Kitchen – Frank Lai – Andy Garcia
Project Report Prompt
- CONCEPTION AND DESIGN:
We aimed to extend our midterm project by continuing Charlie and Frank’s adventures because we felt the journey shouldn’t end just yet. Building on the feedback from our heart rate sensor game, we recognized the need for sensors that were less sensitive and more consistent. Therefore, we chose a tilt sensor, a pressure sensor, and an Arduino rotary sensor. We believed that by integrating more sensors, we could develop a game with increased longevity and engagement. While we primarily relied on class code examples, we also received significant guidance from our professor, particularly for implementing the plate washing system using the rotary sensor, which presented some challenges. Since we had previously used a pressure sensor in one of our recitations earlier in the semester, incorporating it into our tilt pan wasn’t too daunting.
During the user testing session, we discovered that students appreciated the novelty and interactivity of the game. However, they expressed dissatisfaction with how quickly the game ended and suggested the inclusion of different levels and a scoring system. These were adjustments we knew were crucial to finalize our project.
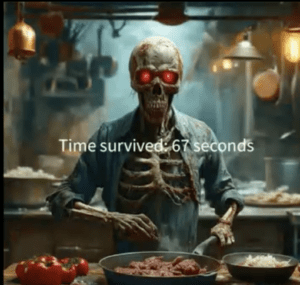
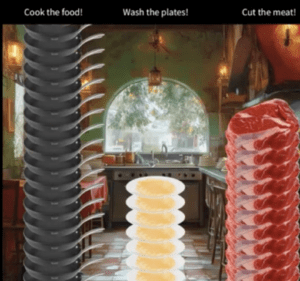
Consequently, we incorporated the meat cutting and pan frying segments into our final project. This addition would enhance interactivity, requiring two players to communicate and strategize for efficient cooking operations. We also implemented a scoring mechanism so users could track their performance in the kitchen. Furthermore, we reduced the speed at which food items dropped on the screen to prolong the game duration.
Overall, the user testing proved highly effective, providing valuable feedback that allowed us to make the necessary adjustments for a more interactive and polished project.
- FABRICATION AND PRODUCTION:
Similar to the first project, Charlie and I decided to divide the work to increase efficiency. While we both contributed to both the code and the physical assets of our project, I primarily focused on constructing the physical kitchen, while Charlie concentrated on the coding aspect. Our collaboration was seamless, resulting in the successful realization of our project.
For the final documentation, we created a 3-minute movie that we both participated in editing and filming. The process was enjoyable, and I am eager for you to see our video.
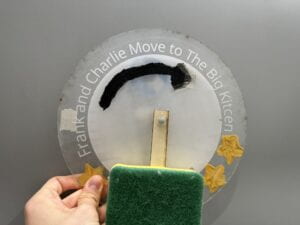
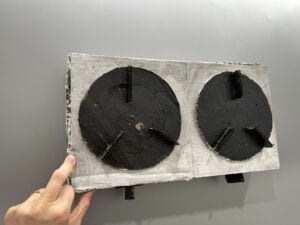
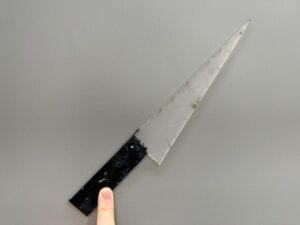
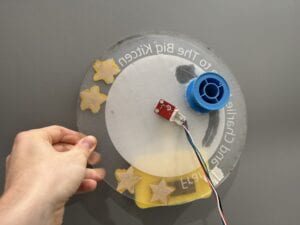
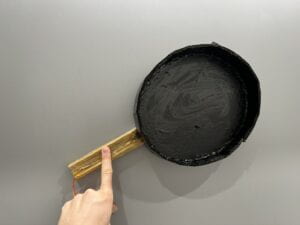
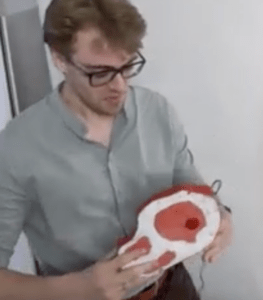
We opted to utilize a tilt sensor, a rotary sensor, and a pressure sensor to enhance the realism of the cooking process. A pressure sensor was attached to the meat, allowing us to simulate the feeling of cutting meat in a kitchen using our laser-printed knife. A rotary sensor, measuring clicks, was installed on the pan to replicate the sensation of washing dishes with a sponge in a clockwise motion. Lastly, we incorporated a tilt sensor to capture the motion of tilting a pan while cooking food in a wok or frying it.
- CONCLUSIONS:
Our aim was to create an interactive game that’s both fun and fosters teamwork, and I’d say we succeeded. The audience enjoyed playing our game, and they genuinely seemed to have a good time. There was plenty of laughter and positive feedback, and we encountered minimal errors or bugs during the final user test. We made significant improvements from our midterm project, and we’re proud of how it all turned out.
This game strongly resonated with my definition of interaction, which I developed during the Reading & Analysis 1 project: “the exchange of information or action between two different entities, often with reciprocal or mutual response, characterized by differing degrees of complexity.” With three different sensors, our project was more complex than those using just one. Additionally, using Sketch and Arduino to create a video game display wasn’t easy, but it succeeded in emulating the sensation of playing a real video game. The game is repeatable, allowing users to change their strategy and improve each time, offering a different experience each playthrough.
If we had more time, we would have implemented a scoring system that not only tracks how long users survived in the big kitchen but also provides a score for comparison with previous attempts. We also planned to add sound effects for washing plates, cutting meat, and frying food in the pan.
Deep down, our goal was to create an experience that brings people together—a project that’s lighthearted and doesn’t take itself too seriously, yet is sophisticated enough to offer a dynamic and enjoyable user experience. I believe we achieved that. Don’t forget to watch our video, which provides more in-depth documentation, including our design process and the finished product. Enjoy! You can find the video in the appendix.
- DISASSEMBLY:

- APPENDIX
All technical documentation that was not included in previous sections should be attached here. Include your code from both Processing and Arduino, wiring diagrams (e.g. made with TinkerCad Circuits), pictures, videos and all related documentation that would help to understand the technical development process. If you used code or any assets that were not your own, properly cite them.
Materials
-Cardboard for kitchen cutout, meat cutout
-Laser printed knife
-Laser printed plate
-23 extension chords
-Tilt sensor
-Rotary sensor
-Pressure sensor
-Sponge
-Lots of hot glue
-22 M/F cables
-Breadboard
Code
Processing Code:
import processing.serial.*;
import processing.sound.*;
SoundFile file;
Serial myPort;
int NUM_OF_VALUES_FROM_ARDUINO = 7;
int arduino_values[] = new int[NUM_OF_VALUES_FROM_ARDUINO];
// Plate variables
PImage platePhoto;
float plateImageScale = 0.6;
float plateX, plateY;
float plateAmount;
// Pan variables
PImage panPhoto;
float panImageScale = 0.2;
float panX, panY;
float panAmount;
// Beef variables
PImage beefPhoto;
float beefImageScale = 0.1;
float beefX, beefY;
float beefAmount;
PImage endscreen;
PImage startscreen;
long lastChange;
long startgame;
long endgame;
long score;
int stage = 0;
PImage bg;
float playbackSpeed = 1.0;
void setup() {
size(1024, 1024);
// Plate setup
platePhoto = loadImage(“plate.png”);
platePhoto.resize(int(platePhoto.width * plateImageScale), int(platePhoto.height * plateImageScale));
plateX = width / 2;
plateY = height;
plateAmount = height;
panAmount = height;
beefAmount = height;
// Pan setup
panPhoto = loadImage(“pan.png”);
panPhoto.resize(int(panPhoto.width * panImageScale), int(panPhoto.height * panImageScale));
panX = width / 5;
panY = height;
// Beef setup
beefPhoto = loadImage(“beef.png”);
beefPhoto.resize(int(beefPhoto.width * beefImageScale), int(beefPhoto.height * beefImageScale));
beefX = width * 3.4/4;
beefY = height;
startscreen = loadImage(“startgame.png”);
endscreen = loadImage(“endscreen.jpeg”);
imageMode(CENTER);
// Serial Communication
printArray(Serial.list());
String portName = “COM5”;
myPort = new Serial(this, portName, 9600);
// Music and Background
file = new SoundFile(this, “mama.mp3”);
file.loop();
bg = loadImage(“washing.jpeg”);
}
void draw() {
getSerialData();
background(bg);
bg.resize(width, height);
fill(0);
noStroke();
rect(0, 0, width, 80);
if (stage == 0) {
background(startscreen);
startscreen.resize(width, height);
textAlign(CENTER);
textSize(60);
// Draw a white box behind the text
fill(255); // White color
rect(width/2 – 500, 500 – 60, 1000, 80);
fill(0); // Black color for the text
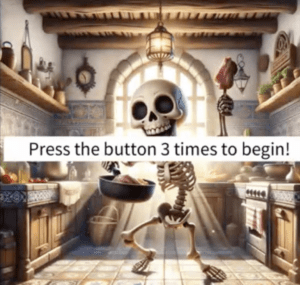
text(“Press the button 3 times to begin!”, width/
