FLOW CHART

TEXT EDITION
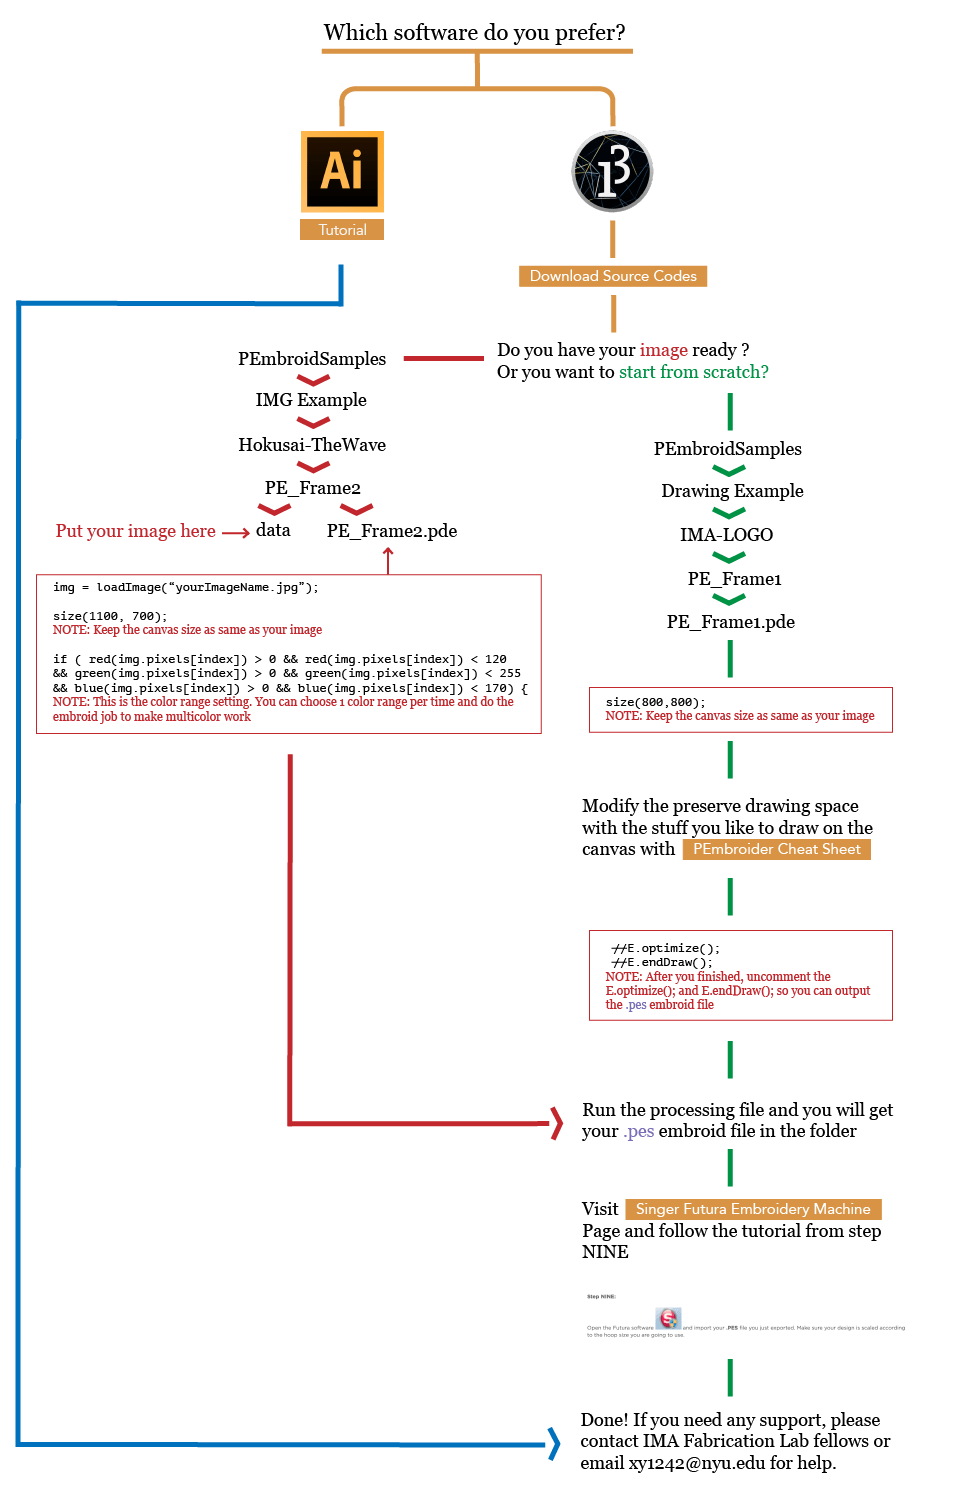
- Question: Love Adobe Illustrator or Processing?
 – Jump to 2;
 – Jump to 4
 - Visit https://ima.shanghai.nyu.edu/en/page/singer-futura-embroidery-machine and follow the tutorial
- Jump to 19
- Download Source Codes: https://github.com/YileXu/NYUSH-IMA-PEmbroidSamples
- Question: You already have an image or want to start from canvas? Image – Jump to 6; Start from the canvas – Jump to 13
- Open PEmbroidSamples/IMG Example/Hokusai-TheWave/PE_Frame2/data and put your image there
- Open …/PE_Frame2/PE_Frame2.pde
- Modify img = loadImage(“hokusai2.jpg”); to your own image
- Modify size(1100, 700); to your image size
- Modify if ( red(img.pixels[index]) > 0 && red(img.pixels[index]) < 120
&& green(img.pixels[index]) > 0 && green(img.pixels[index]) < 255
&& blue(img.pixels[index]) > 0 && blue(img.pixels[index]) < 170) { to the color range that you want to present - NOTE: You can choose 1 color range per time and do the embroid job to make multicolor work
- Jump to 17
- Open PEmbroidSamples/Drawing Example/IMA-LOGO/PE_Frame1/PE_Frame1.pde
- Modify size(800, 800); if you want
- Modify the preserve drawing space with the stuff you like to draw on the canvas with PEmbroider Cheat Sheet
- After you finished, uncomment the E.optimize(); and E.endDraw(); so you can output the .pes embroid file
- Run the processing file and you will get your .pes embroid file in the folder
- Visit Tutorial and follow the tutorial from step NINE
- Finished!!! If need any support, ask IMA fabrication lab follows or email xy1242@nyu.edu for help!