For my sensor, I chose the joystick sensor. The joystick sensor is essentially two potentiometers on the X and Y axis, with the middle having a single push button.
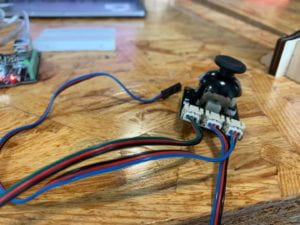
Since the joystick has three separate areas of input, it requires three sets of wires. I connected every set’s power and ground to the breadboard where I set a rail to power and a rail to ground. Button connected to digital out, and the X and Y axis wires connected to analog out.
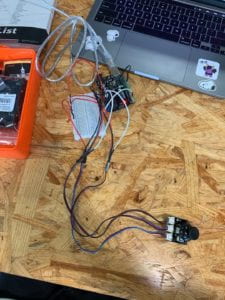
Here is the initial code I used:
int JoyStick_X = 0; //x
int JoyStick_Y = 1; //y
int JoyStick_Z = 3; //key

void setup()
{
  pinMode(JoyStick_Z, INPUT);
  Serial.begin(9600); // 9600 bps
}
void loop()
{
  int x,y,z;
  x=analogRead(JoyStick_X);
  y=analogRead(JoyStick_Y);
  z=digitalRead(JoyStick_Z);
  Serial.print(x ,DEC);
  Serial.print(",");
  Serial.print(y ,DEC);
  Serial.print(",");
  Serial.println(z ,DEC);
  delay(100);
}
When I moved the joystick along a certain axis, this displayed the position of the stick in the Arduino’s text box. In addition, it also displayed when I pressed down the “z” axis, which was just the button.
After my initial build, I then incorporated a small servo motor. This servo would move based on how I moved the joystick.
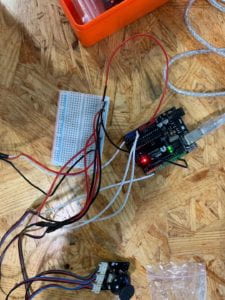
The servo is not visible in this photograph, but the wires connected to it can be seen on the left side. In order to connect these wires, I put the power and ground into the power and ground rails on the breadboard, then put the third wire into analog out, just like the joystick.
I then added the following code:
int JoyStick_X = 0; //x
int JoyStick_Y = 1; //y
int JoyStick_Z = 3; //key
int val;
#include <Servo.h>

#define fsrpin A2

int fsrreading;

Servo myservo;

void setup()
{
  pinMode(JoyStick_Z, INPUT);
  pinMode(A5, OUTPUT);
  Serial.begin(9600); // 9600 bps
  myservo.attach(A5);
}
void loop()
{
  int x,y,z;
  x=analogRead(A0);
  y=analogRead(A1);
  z=digitalRead(JoyStick_Z);
  Serial.print(x ,DEC);
  Serial.print(",");
  Serial.print(y ,DEC);
  Serial.print(",");
  Serial.println(z ,DEC);
  val = map(x, 0, 1023, 0, 180);
  {
  myservo.write(val);
 }
  delay(100);


}
This code meant that, depending on the direction of the joystick, the servo motor would spin.
Finally, I added a force-sensitive resistor (FSR) into the circuit. FSR’s can measure the amount of pressure exerted on them, and I used this to create an “if” statement where the servo would only run if a certain amount of pressure was exerted on the FSR.
To incorporate the FSR into the circuit I connected it to power and ground, the latter requiring a 10K resistor and then routed the output of the FSR into digital out.
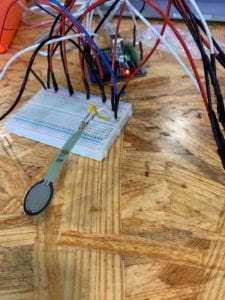
After adding the resistor, I then added it to the code like this:
int JoyStick_X = 0; //x
int JoyStick_Y = 1; //y
int JoyStick_Z = 3; //key
int val;
#include <Servo.h>

#define fsrpin A2

int fsrreading;

Servo myservo;

void setup()
{
  pinMode(JoyStick_Z, INPUT);
  pinMode(A5, OUTPUT);
  Serial.begin(9600); // 9600 bps
  myservo.attach(A5);
}
void loop()
{
  int x,y,z;
  x=analogRead(A0);
  y=analogRead(A1);
  z=digitalRead(JoyStick_Z);
  Serial.print(x ,DEC);
  Serial.print(",");
  Serial.print(y ,DEC);
  Serial.print(",");
  Serial.println(z ,DEC);
  val = map(x, 0, 1023, 0, 180);
 int force = analogRead(A2);
 if (force > 250) {
  myservo.write(val);
 }
  delay(100);


}
The addition of the “if” statement meant that when the FSR had more than 250 units of force on it, the joystick would be able to move the servo. However, if less than 250 units of force were on the FSR, then the joystick would not move the servo.
Finally, here’s a diagram of the final circuit:
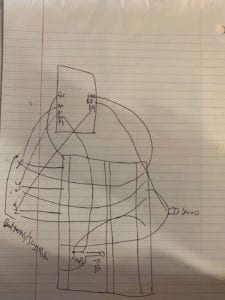
This type of circuit could be used in a multitude of ways. For example, just the joystick motor combination could be used in things as small as remote-control cars, or as large as construction equipment. The addition of the FSR sensor could further expand the safety of things like cars, where the engine (in this case, the servo) could only be run when someone is in the driver’s seat. This could also be done to save electricity since the motor is only active when the person is using it.
I think code is comparable to following a recipe because as long as you do the steps correctly, and in the right order, your final product will be successful. However, if you deviate from the recipe, you may end up with something that doesn’t work well. Just like if you substitute salt for sugar, if you mess up your “if” statement, the end product won’t be correct.
I believe that computers influence human behavior in many ways. For example, I heard a story of a young child calling their mother “Alexa” when asking for things such as snacks and drinks because they were so used to using their family’s Amazon Alexa. More broadly, we are now extremely dependent on our cell phones. The first thing in the morning I use is my cell phone, and the last thing I use before I sleep is my cell phone. You can’t pay for things without your cell phone, you can’t access much of the information available, and you can’t even enter buildings due to a lack of a green health code. Most people can barely go an hour without touching their phone, lest five minutes. Our entire existence now centers around a little electronic box.