Recitation 6: Animating an Interactive Poster


For my 6th recitation’s poster I chose the eyes topic. It pursues people to watch the show and looks pretty good. Also it contains three different basic shapes and can be modified for different tasks. For the begginer as me, it seemed to be a good option. I started with doing the 0mechanical part as functions and parametrs and later added decorations as colors and background. 

For the first task I made this code :

float a = 0;
int b = 0;
int speed = 5;
PFont f;


void setup() {
size(1024, 768); 
background(#F7FA7E); 
 f = createFont("Arial",32,true);
int gridSize = 40;
for (int x = gridSize; x <= width - gridSize; x += gridSize) {
  for (int y = gridSize; y <= height - gridSize; y += gridSize) { noStroke(); fill(#FFCF6F); rect(x-1, y-1, 3, 3); stroke(255, 100); line(x, y, width/2, height/2); } }//background } void draw() { fill(random(0), random(200), random(100)); ellipse(110, b, 50, 50); a = a+speed; if (a>width){speed*= -1;}
 if (a<0){speed *= -1;} b = b+speed; if (b>height) {speed *=-1;}
  if (b<0){speed *=-1;}//moving circle fill(random(0), random(200), random(100)); rect(890, b, 50, 50); a = a+speed; if (a>width){speed*= -1;}
 if (a<0){speed *= -1;} b = b+speed; if (b>height) {speed *=-1;}
  if (b<0){speed *=-1;}//moving rect
  
mytext();
 Eyes();
 }
 
  void Eyes() {
  fill(255);
  ellipse(480, 400, 50, 150);
  ellipse(550, 400, 50, 150);
  
  fill(0);
  circle(480, 370, 40);
  circle(550,370, 40);
  fill(255);
  rect(480,359,5,5);
  rect(550,359,5,5);
  
  //eyes
  }
  
  //make eyes, change font, decorate
  
 void mytext(){
   stroke(175);


  textFont(f);
  fill(0);

  textAlign(CENTER);
  text("IMA Fall 22 End-Of-Semester Show",width/2,160);

  textAlign(LEFT);
  text("                   8th floor",width/2,200);

  textAlign(RIGHT);
  text("December 16, 6-8pm    ",width/2,240);} 


The result: 

For the first task I increased the amount of eyes and made a pattern of them (ypou can the the pattern result in the third code combined with the drawing concept):

background (#FAFF76);
size(800,800);
int gridSize = 30;
for (int x = gridSize; x <= width - gridSize; x = x+60) {
  for (int y = gridSize; y <= height - gridSize; y = y+160) {
    fill(255);
  ellipse(x, y, 50, 100);
  ellipse(x, y, 50, 100);
  
  fill(0);
  circle(x, y, 40);
  circle(x,y, 40);
   fill(255);
  rect(x,y,5,5);
  rect(x,y,5,5);
  //eyes
  }} 

For the second task I made eyes to randomly appear on the screen with variour colors:

float a; float b; float c;
float x; float y;
PFont f;

void setup() {
size(1024, 768); 
background(#F7FA7E); 
 f = createFont("Arial",32,true);
}
void draw() {
  fill (255);
  rect(130, 90, 800, 200);
 
  mytext();
 Eyes();
 }
 
  void Eyes() {
  fill(255);
  x=random(1000);
  y=random(786);
  ellipse(x, y, 50, 150);
  ellipse(x+100, y, 50, 150);
  a=random(255);
  b=random(255);
  c=random(255);
  fill(a, b, c);
  circle(x, y, 40);
  circle(x+100,y, 40);
  fill(255);
  rect(x,y,5,5);
  rect(x+100,y,5,5);
  
  //eyes
  }
   void mytext(){
   stroke(175);


  textFont(f);
  fill(0);

  textAlign(CENTER);
  text("IMA Fall 22 End-Of-Semester Show",width/2,160);

  textAlign(LEFT);
  text("                   8th floor",width/2,200);

  textAlign(RIGHT);
  text("December 16, 6-8pm    ",width/2,240);}


The result :


For the third task I added the drawing concept on the pattern. You can draw with your mouse here by eyes and you can change the background to the random colors by pushing the keyboard:

float x; float y; float z;

void setup () {background (#FAFF76);
size(800,800);}
void draw() {


  Eyes();
  }
  void Eyes() {
 
 int gridSize = 30;
for (int x = gridSize; x <= width - gridSize; x = x+60) {
  for (int y = gridSize; y <= height - gridSize; y = y+160) {
  
    fill(255);
  ellipse(x, y, 50, 100);
  ellipse(x, y, 50, 100);
  
  fill(0);
  circle(x, y, 40);
  circle(x,y, 40);
   fill(255);
  rect(x,y,5,5);
  rect(x,y,5,5);
  //eyes
  //eyes
  }}


  Eyes(mouseX, mouseY);
  }
  void Eyes(int a, int b) {
 
 int gridSize = 30;
for (int x = gridSize; x <= width - gridSize; x = x+60) {
  for (int y = gridSize; y <= height - gridSize; y = y+160) {
  
    fill(255);
  ellipse(a, b, 50, 100);
  ellipse(a+100, b, 50, 100);
  
  fill(0);
  circle(a, b, 40);
  circle(a+100,b, 40);
   fill(255);
  rect(a,b,5,5);
  rect(a+100,b,5,5);
  //eyes
  //eyes
  }}}
  void keyPressed () {
    background(x,y,z);
    x=random(255);
     y=random(255);
      z=random(255);
  } 


Additionally, for the second and third task I added the text about the event to correlate together all the parts of homework. There were not much problems that I needed to solve. The main of them consist of that I know many concepts and ways to write codes, but I realised that I don’t know which of my lines are functions and which of them are parametrs. Also, we covered really small amout of coding in class, just the basics, so I needed to do a deep research and self-educate to use more difficult concepts in work. For all of the tasks I started to do the mechanical part of coding and later tried to add the decorations and colors. I am not good at design yet, also because of the limited ampunt of time which is divided for these recitations, but the main point of them is to get to know how to code. And with the coding experiencw later I will be able to develop my designing abilities on the basis of coding knoweledge.  

Midterm project individul report

Unity Machine -Zinchenko Dana –  Margaret Minsky
 

When I was doing my group midterm project I became 100% convinced that interaction which is happening between people with the help of your project is very significant. All projects that I researched supported my claim. When the project pushes people to interact with each other it is more likely to be remembered and have the influence over the audience. It is the only project in our class which requires two people to work together to achieve the goal, to turn on the light. It is meaningful for me. Also, we all are somehow new to each other here – large part of us are freshmen or just don’t know each other, and this project is the opportunity for them to initiate the dialogue and have some fun with this interactive invention. My project is intended for all the people. I think that it would be fun and interesting to all range of ages – from childhood friendship to long-term marriage. People with different backgrounds and in various relationships with each other – all can use our project. It is about love or about starting the communication. Even grandmother and her grandson can participate in this cute interactive project and unite their hearts together. People usually want not just to know about love, but to see it too. And when something goes wrong with the project – for example, handlers are for the opposite sides – pair of individuals should unite their thinking and discuss how to solve this problem, how to win the mini-game. So it will also help to start talking to stranger.

 I was inspired by one Russian project – virtual marriage machines. It looks like the arcade game or like the vending machine. You need to input your personal information there like name and date of birth of you and your partner, it will take a photo of you together and give you two plastic rings – and now, you are married! But just for the game🥰 There are many of these things in my hometown and it was really fun to use them with friends and parents. My contribution to it was to make it much smaller and to add more interactivity between person and machine. Now you don’t just type letters, you need to think, to rotate, to enjoy the lights.

For this project I wanted to use the thin cardboard. I tried to use paper in the beginning, but it was crumpling. It was an opportunity to just interpret it as broken pieces of heart, but I chose to make the project less messy. Also, I found the reddish cardboard for the heart and white cardboard of intersecting shape for the standing. It results like the frame of the project. Also, for the atmosphere on the presentation I added pink fabric (to hide the wires) and non-interactive lights.

I wanted to use the light sensor at first. I proposed to put it between people and require them to hug each other or to hold hands around the sensor – it would result in O light and the heart shaped LED should light up. However, Professor suggested not to use physical interaction between people, because if they are strangers it may be uncomfortable for them to touch each other. So I decided to use POTs connected to the servo motors.

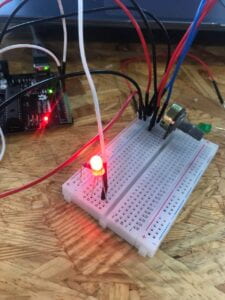
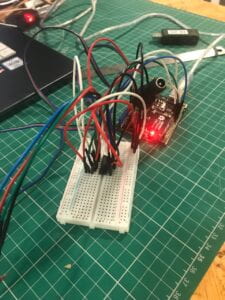
First the idea was mine and then we with my partner developed it and fixed. The first I built the circuits and Alaia made the cardboard surface. We together combined them. First trouble which we experienced was that the servo motors were rotating, so we glued them to fix on one place. Later, I made the code, and my partner made the hearts. Everything worked pretty good. We needed just to solder the LEDs. I worked on a code, so I briefly asked someone in studio if we need the 220 resistor and got the answer “no, you need the 10K one”. And that was the problem two. I further need to be more careful whose advice to use, and recheck all the information. Alaia soldered 12 LEDs and that’s a huge work, but no one of them worked because of wrong resistors. It was a fail, but we were really fast in the morning prior to user testing. We found different lights which were even more beautiful and used them. During the user testing the main problem was that the wires were poorly connected to the breadboard. They just fell out of it because of the inconvenient construction. Also, I didn’t like the design. It looked more like than prototype than the project. Also, when heart was rotating it bumped into the LED, so we needed to extend the distance. After user testing, I completely changed the heart and the surface, rearranged all the circuits. It became less messy and more strong connection appear between the breadboard and the wires. These adaptations were very effective. The overall view of the project became better, the heart halves are now more strong and pretty. The handlers are more convenient to use, and the circuits is much less messy.

The process: 

User testing:

The goal of my project was to create something that would cause interaction between people and give them some fun. I think that we achieved our goals. People were really working together to solve the quiz and became happy together when they saw the result. My project results align with my definition of interaction. One only thing that I want to add later is the deeper meaning of the project. Ours is just interactive and fun, but I want to convey some deeper ideas through it. Audience controlled the movements of the heart halves and communicated with each other during the solving, they also appreciated the beauty of lights. I can add more underlied meaning like the people are themselves controlling the part of heart, and in the relationship everyone controls their action. Only work of two people will create great relationships.

If I had more time, I would add the buzzer into it or used the distance sensor to input the information. I learned that you should use stronger glue to connect the important parts of the project. Also, you need to check it many times before the presentation to get sure that nothing will break. Also, you first need to make sketches and only after that start to make circuits. Additionally, you should not be afraid to use something new in your projects. I saw that many people used things that we didn’t cover in our lessons and I am really inspired by this. I hope I will have many opportunities and time to try all that we have in kits. I appreciate that even in our project people were able to find the interesting part. One of our accomplishments is that the meaning of the project and the instructions how to use it were clear enough. We didn’t need to explain why we made it and for what reason. It was my first time to make something that will interact with another people. I used all the concepts we studied and  learned a lot in the process of making this project. I had many failures on this way, but the main purpose of such projects is to learn how to fix your mistakes, how to invent, how to design, and how to make. It was a hard presentation for me, because I wanted to be much better. I want my projects to be meaningful and inspiring. I want to learn more and to try more. I will definitely became better. 

Individual project proposal

Uniting/unity machine – Dana Zinchenko- Margaret Minsky

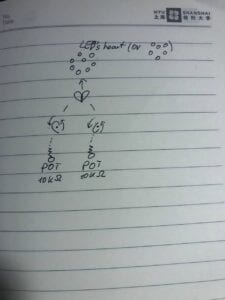
We want our project to connect people, it will provide interaction not just between person and the mechanism, but also between individuals. A pair of people need to work together to light up the LED heart: the first they need to rotate two different POTs which are connected to the servo motors or steppers(still deciding). The two halves of one heart are on these motors, so people need to connect them together like a puzzle and then they will win – the LED heart lights up (programming code with If concept).

Recitation 4: Actuators and Mechanisms


Me and my partner were a bit scared when we saw what is waiting us in this recitation. We decided to work as fast as we can and be the most focused on our work. We started pllugging in wires even prior to start of the class. Me and my partner saw that we need to make just one circuit and one mechanism. We decided to divide tasks. I chose to do the circuit and she was making the cardboard part. However, we were helping each other along all the way. There were some new materials and concepts in this work.

The new important part is that we needed to use usb protectors. The first problem was that I tryed to connect arduino directly to the H-bridge using f/m wires, but I get an advice to connect them using breadboard. It was much more convinient. When I finished my part, we asked professors to check it for not to burn something occasionally. It was working, but the movements were weird. We tryied to understand what was wrong together with the professors. When they were distracted for a minute, I found out that I haven’t yet placed two wires, so I was able to fix it by myself. Also, I grab one of the debugging strategies from the professor for my future projects. I think it will be helpful for me.

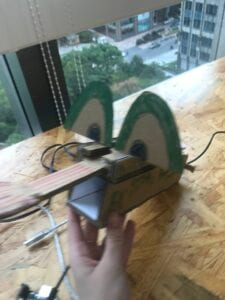
After finishing the circuit I started to discuss the ideas for personalization task with my friend. We created many ideas, but we needed to chose the one whose motions are similar to our mechanism – forward and backward.I proposed to make the tongue. We together came up with the idea of making a frog. The important thing is that our stepper worked hard, so it was like running away from the mechanism, hence we added one more cardboard detail to keep it fixed on it’s place. We made eyes and decorated the frog, added some cute parts. We used the same cardboard as for the base of the mechanism, because the texture of frogs and their tongues isn’t flat. I also used my lipstick for decoration.


For the code variation part we changed all 4 of the proposed things:  delay()myStepper.setSpeed()myStepper.step() , and random().We did the code part together and it was not hard for me, I started to understand this language better. 

One of our codes:

*
 This program drives a unipolar or bipolar stepper motor.
 The motor is attached to digital pins 8 - 11 of the Arduino.

 The motor should revolve one revolution in one direction, then
 one revolution in the other direction.


 Created 11 Mar. 2007
 Modified 30 Nov. 2009
 by Tom Igoe

 */

#include 

const int spr = 400;  // change this to fit the number of steps per revolution
// for your motor

// initialize the stepper library on pins 8 through 11:
Stepper myStepper(spr, 8, 9, 10, 11);

void setup() {
  // set the speed at 60 rpm:
  myStepper.setSpeed(56);
  // initialize the serial port:
  Serial.begin(9600);
}

void loop() {
  // step one revolution  in one direction:
  Serial.println("clockewise");
  myStepper.step(spr);
  delay(random(200-400));
/*
  // step one revolution in the other direction:
  Serial.println("counterclockwise");
  myStepper.step(-stepsPerRevolution);
  delay(500);
  */
}


At the end we got our project: a frog who is trying to catch and eat the fly. It moves her tongue back and forward at a random moments of time. Surprisingly, we finished the first: 20 minutes prior to the end of recitation. We also heard many sweet words about our work from professors and fellows -me and my friend are really proud of our work. We made videos and photos and cleaned our working space at the end. Actually, I had very bad morning, but succeses of this recitation and the whole atmosphere in the studio made my day so much better. I really love recitations and Interaction lab as  a whole.

Q1- I want to share some of my thoughts about the ‘Waves’ project by Daniel Palacios Jimenez. I love the idea of it and the visual output is great – it is beautiful and attracting. It is also interacting, because people can play with it. Author uses motors as we used in our recitation. Motors in this project are rotating the ropes and the motor in our recitation was rotating the mechanism which was moving our frog’s tongue. Also, there is a range of different reactions for the viewers’ motions. And our frog is moving her tongue chaotically as the ‘waves’ project produces chaotic patterns. I think that the author chose motors because it is a simple way to make his idea alive, they are also very convinient to work with. He chose elastic rope for making the illusion. It can create the effect of blur and make the project more interesting.

Q2- For my midterm I want to use two motors which are connected to the POTs and LEDs. The person would rotate the POT and it would rotate the small puzzle on the motors. When the puzzle will be solved, the LED in a heart shape will light on. When you are using animation you can’t get the feel of real interaction. When you are experiencing these types of projects you want to be physically connect to the mechanism. For the materials I will also use wires, resistors, Arduino, cardboard with glue. 

Group Research Project: Report


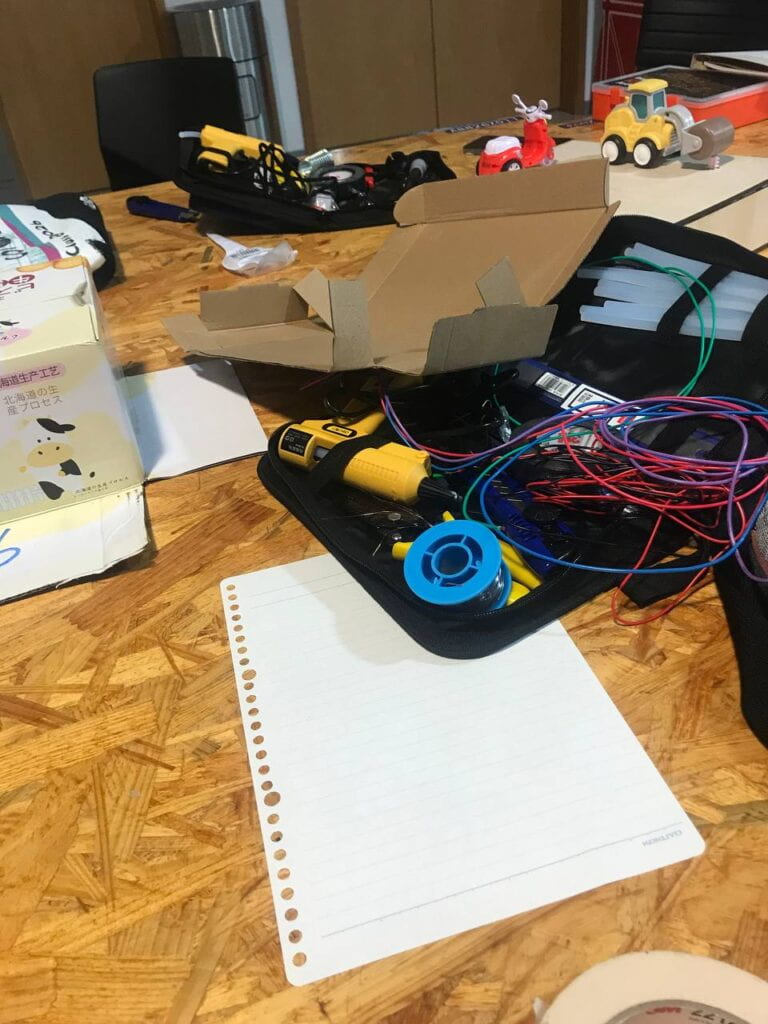
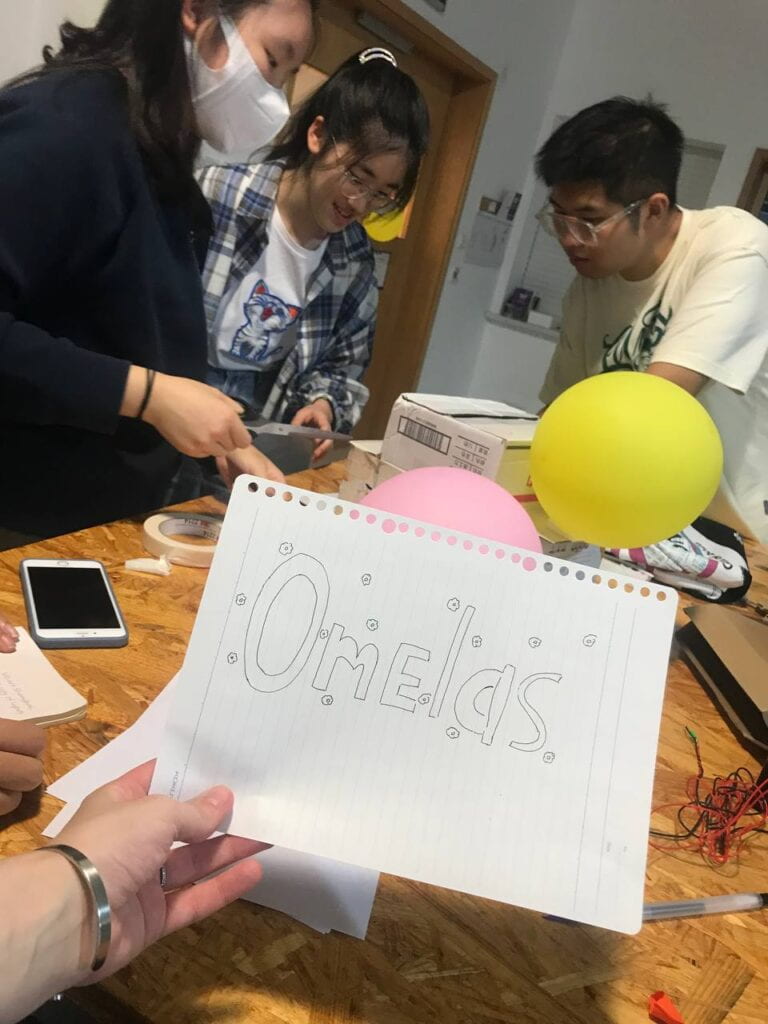
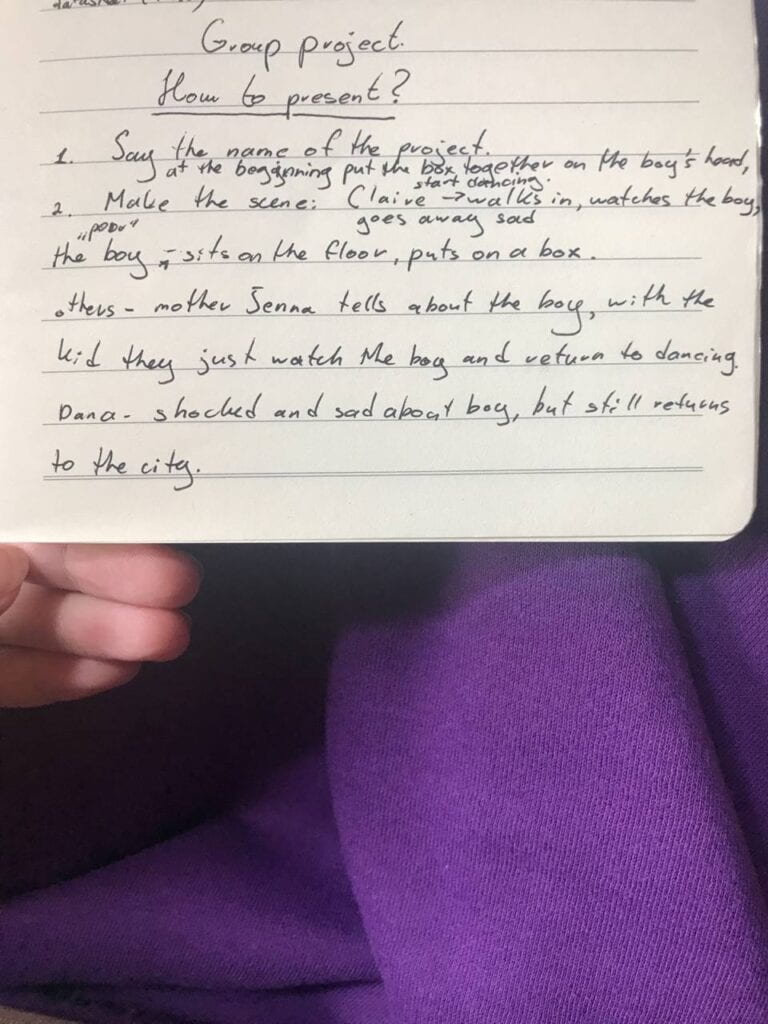
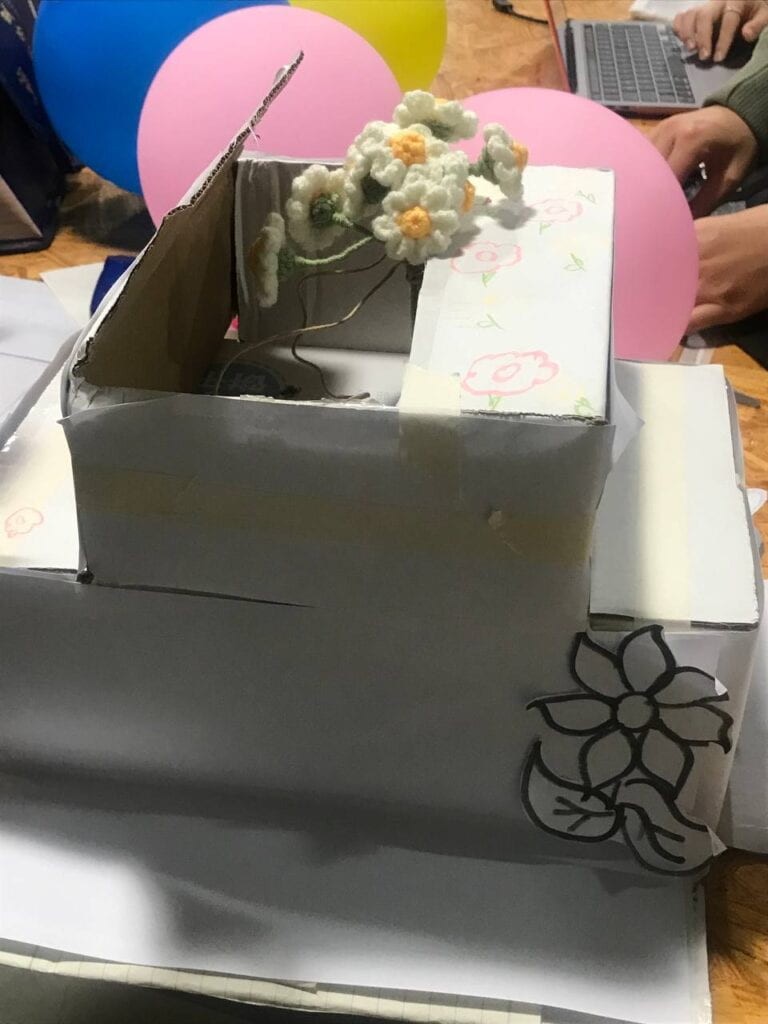
1. We started with making the WeChat group together. We found all our group members from other sections, and started proposing ideas in the chat. We picked up the best idea, developed it further, and chose the date of meeting. We all came together to the studio and started making our project. It was very fun! We were trying to use all the materials we saw around. Everyone was into the making, so it was team work. We made and decorated the box, wrote the script, and rehearsed it in the hall. We also picked different roles for everyone and tried to come up with ideas for costumes and makeup. 

On the second meeting we added flowers and rehearsed the play for the second time. It is not really easy to convey your idea without actually talking about the idea of your invention with the audience. We were adding many lines and ideas during the rehearsals. At the begging the ideas of the box and script were mine, but group contributed very much with the flowers idea and making techniques. This was truly a group project, because everyone worked hard and together.


 2. The successes of the project is that it gave us the opportunity to learn how to work in a group and to think deeper about the story.The mechanism of pushing flowers worked and no one failed with the lines or improvisation parts of the performance. I think we could be better at decorating the box (to make it more of more quality). Also, I noticed that not everyone got ours idea, so it wasn’t really clear what we were trying to explain with this metaphorical box. We could also add more interactivity to it. But I am 100 percent sure that each of us would be better next time. It was a good lesson for all of us.

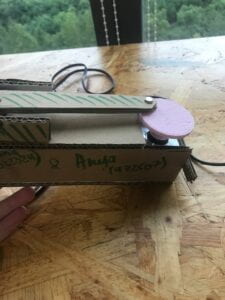
 3. Our project is the box of pain. It is from ‘The One Who Walked Away From Omelas’. In the story they used the boy as a constant reminder how bad their lives might be. The boy is living in awful room like a prison. People come to see him to make themselves feel the other way. They see the boy who is poor and dirty and hasn’t got any alternative options to live, and they feel happier, because their lives are not so bad. They start appreciate their lives more after thinking of the pity of others. This box is the more humanistic way to remind them how life in the freedom and fresh air is great. It puts you in the black and small space, but the other people can see just how flowers are pushing up. So when someone is struggling in the box, the lives of others becoming better, because they see just flowers. This is a metaphorical box.

It is interactive, because box responses to your movements. Analog input is here- the deeper you put your head into, the higher the flowers will rise.The more someone in this city is struggling, the better lifes of others are becoming. It is also interacting, because it pushes your mind to work, to think, to discuss your ideas with other people – so you are actually interacting with other people after seeing this project. Also, this box doesn’t require you to use electronics to made it. It is great, because it was prohibited for us to use them for this project.

 4. I really loved the project of the first group. It was something like helmet or glasses with switches for IQ and EQ levels. First, this is an interesting invention which is consistent with all the group project guidelines. Second, the presentation of the project was amazing. It was well developed and organized, confident and really funny. The creative modifications of the environment were great. Their performance definitely helped me to understand what is their invention and how it works, also they showed us the possible negative consequences of using their device. The design was simple, but it is not bad, because it gives everyone the opportunity to use it without any additional knowledge. My only suggestion for the improvement is to connect artifact to the story clearer. I love this project, but I don’t think that it is actually relevant to the 2 story. It just can be relevant everywhere, so it fits. However, overall presentation and project were great.

Our Box:


Recitation 3: Workout


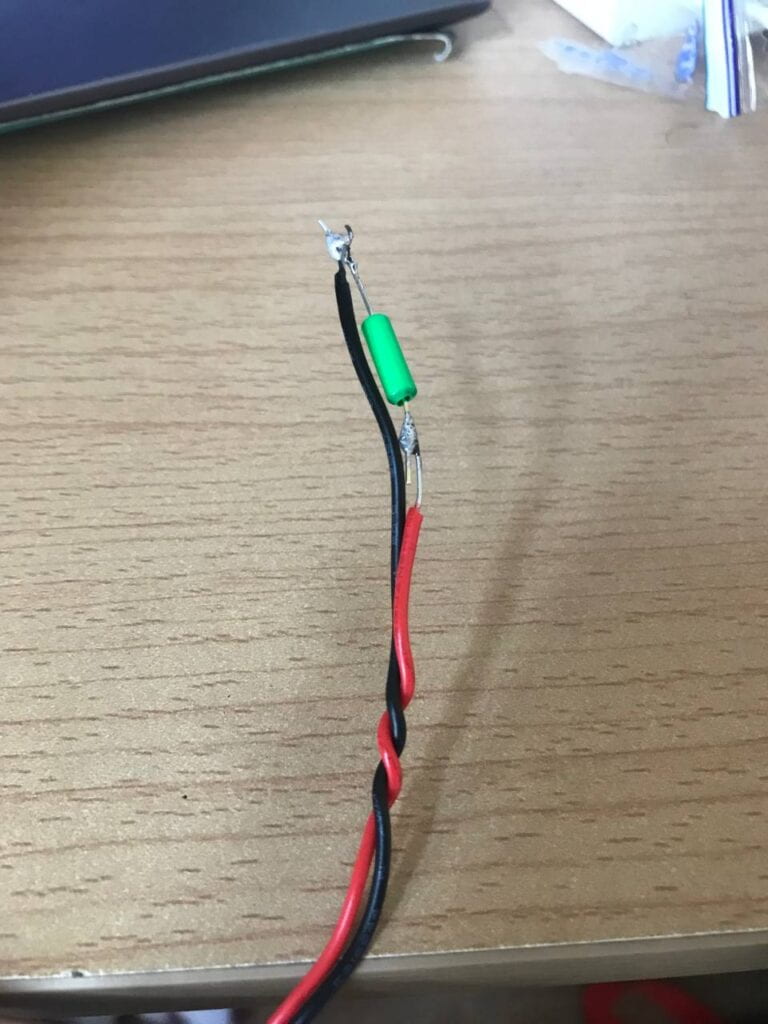
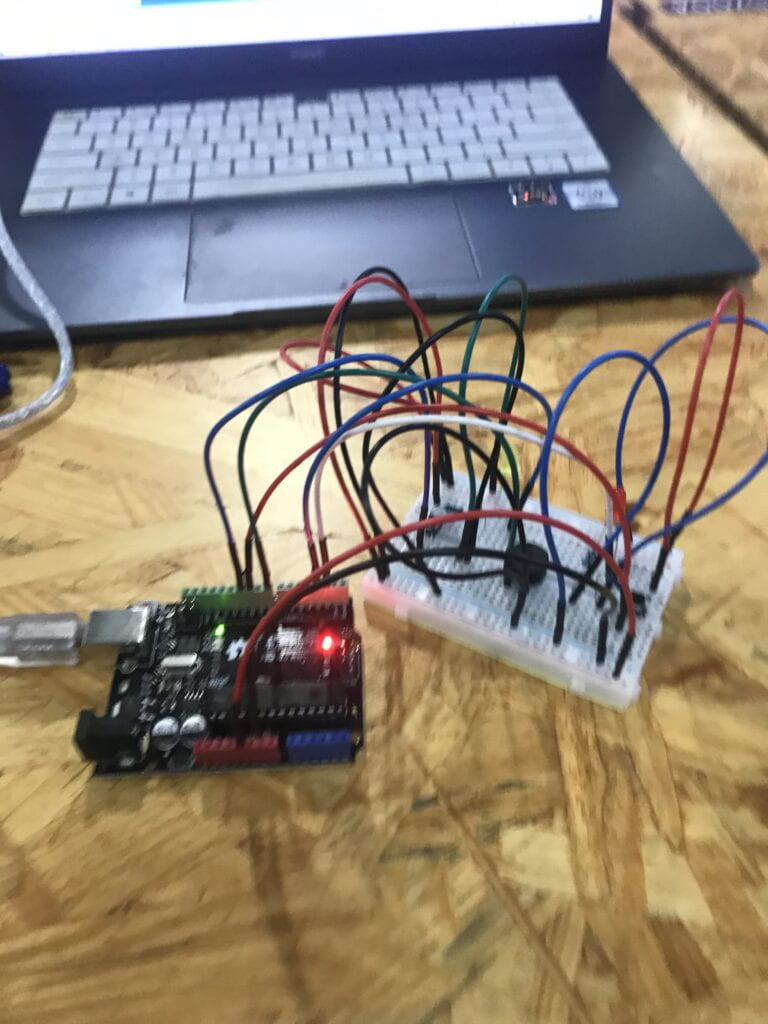
For the first task we needed to prepare our tilt sensors. That was interesting, because I love working with the soldering station. It was questionable is the tilt sensor polarized or not, but we all found out that it is not polarized. In addition, we learned that it is much easier to work when you make cables together (like on the photo), I think it will be extremely helpful to know that you can make any shape you like of these wires.

Tilt sensor

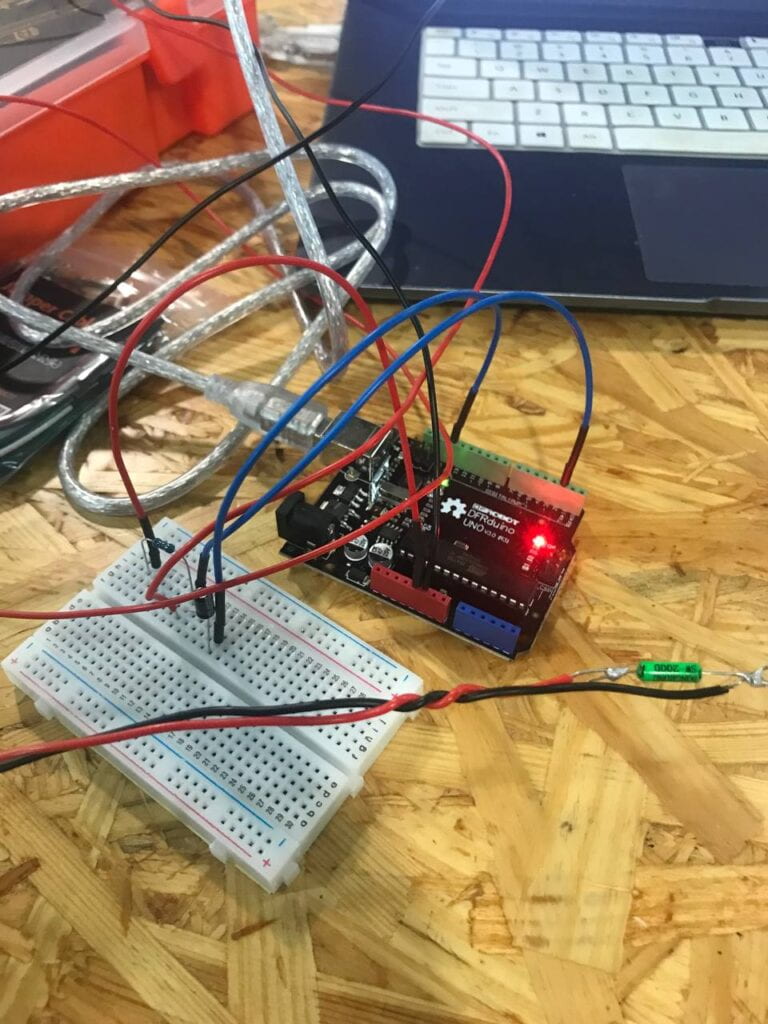
Second task was harder for me, because I have never ever worked with this type of diagrams. I used some help from the professors. Now I know what D2 means on this diagrams and what it C 22uF. But I also noticed my improvement of building the circuits. I became faster, and now understand more. I was even  able to help a little bit people around me to build their circuits.

circuit connected

For the task three of the first step we tried to use our Arduinos. Mine worked immediately, so everything was correct.

 In third step me and my recitation partner agreed that it is much easier to just hold the sensor, not to use paper tape. This way it is also easier to do tryouts when working.

Step four was the hardest one. I have not got really much knowledge about Arduino programming language, there were some tasks which we did not study in this course, so my friend helped me a little. I noticed that this language is someway similar to Processing programming language. And I know some basics of it, so it was easier for me to just translate the commands. I understand how the coding is working. But you need to be really careful with punctuation, because one mistake – and your code is broken and you need to debug it. I was able to understand what we need to do, but I didn’t know what is the global variable. Now I know it. Plus, we considered to make the delay bigger for our own comfort and convinience. Device became less sensorable to switching positions, so it was really counting curls when the whole arm is raised.

1st code (we used ‘Great!’ to identify HIGH, and nothing to print LOW, so just the raisings of arm will count) and the second one where we added counting:

int SENSOR_PIN = 2;
int tiltVal;
int prevTiltVal;
int count = 0;

void setup() {
  pinMode(SENSOR_PIN, INPUT); // Set sensor pin as an INPUT pin
  pinMode(6, OUTPUT);
  Serial.begin(9600);
}

void loop() {
  // read the state of the sensor
  tiltVal = digitalRead(SENSOR_PIN);

  if (tiltVal == 1)
   {Serial.println("Great!");
   
   }
  delay(1000);} 

int SENSOR_PIN = 2;
int tiltVal;
int prevTiltVal;
int count = 0;

void setup() {
  pinMode(SENSOR_PIN, INPUT); // Set sensor pin as an INPUT pin
  pinMode(6, OUTPUT);
  Serial.begin(9600);
}

void loop() {
  // read the state of the sensor
  tiltVal = digitalRead(SENSOR_PIN);

  if (tiltVal == 1)
   {Serial.println("Great!");
   count++;
   Serial.println(count);
   }
  delay(1000);} 

1st code working:

2nd code working:

3rd code:  (here you can also see how we added ‘tone’ variable to use the buzzer in the 5th task)

 int SENSOR_PIN = 2;
int tiltVal;
int prevTiltVal;
int count = 0;

void setup() {
  pinMode(SENSOR_PIN, INPUT); // Set sensor pin as an INPUT pin
  pinMode(6, OUTPUT);
  Serial.begin(9600);
}

void loop() {
  // read the state of the sensor
  tiltVal = digitalRead(SENSOR_PIN);

  if (tiltVal == 1)
   {Serial.println("Great!");
   count++;
   Serial.println(count);
   }
   if (count==8) {Serial.println ("Yay, you’ve done one set of curls");
   count = 0;
   tone(6, 440);
   }

  delay(1000);
}

3rd code in action:

The lifehack that I was able to remember is to use ‘count ++’ instead of ‘count = count +1’.

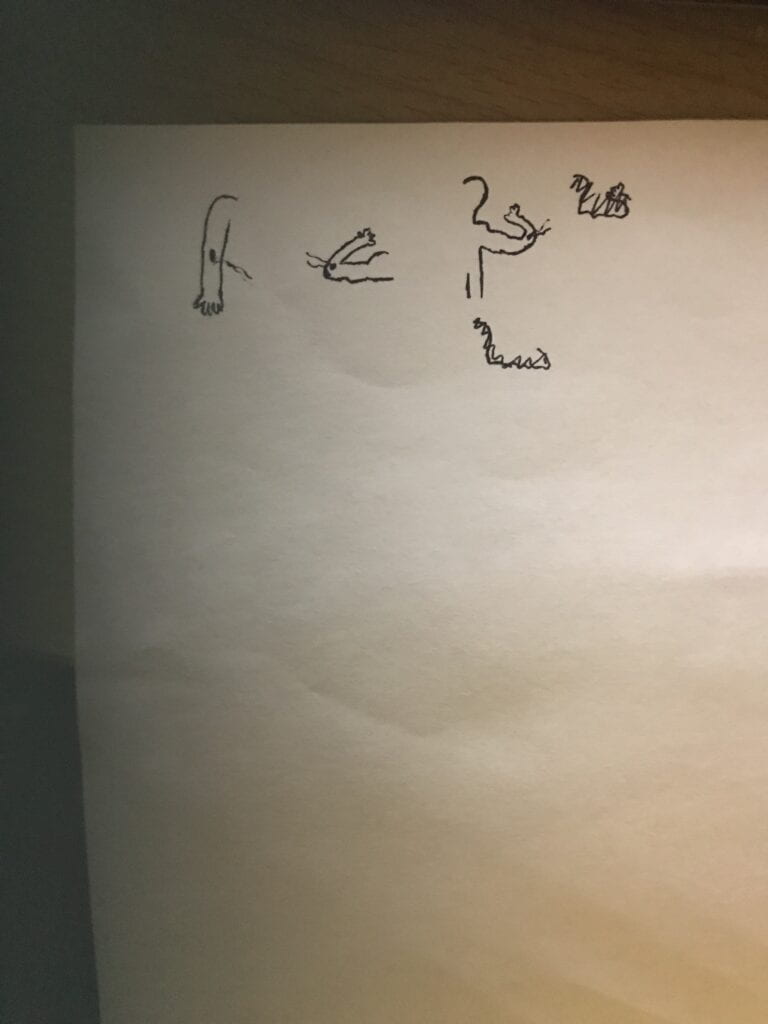
Step five was interesting, but we have very limited time to finish it, so we picked just the first idea. One of the possible ways is to change the workout – you can connect sensor to your leg or other part of body to make it counting. We also added buzzer to make our sensor more interactive. 

This sensor can be used in many many ways. I was really exited to see how our own code, circuit, and sensor are working.


Scetch of how possibly people can use this device:

Bicep curls counting 

Recitation 2: Arduino Basics


At the start of recitation all of us got our Arduino kit beginner boxes. It was unexpected, but very nice. I love to work with my own equipment. Also, I was very happy that professors turned on the music in the studio. It was a pleasure to work on my circuits today. In addiction, I am working faster with music, and I am more concentrated and relaxed( no panic ). Our first circuit has to be connected with the computer with a help of arduino microprocessor. We needed to use the code to make our LED blinking. There was no troubles with the code, but my circuit didn’t want to work. At first, Professor helped me and explain that we now use the different Arduino, and I should choose the another port in the app to make it work. I also get the knowledge of where the reloading button is on the microcontroller. But actually it wasn’t able to work. I was trying to find the mistake in my circuit. I tried many different position of the elements, but no one of them worked. I was confused. My friend suggested me to use the different LED. And it worked! I suppose that when I was moving the elements I get out the resistor and my LED broke. I am sad about it, but this was a good example of what you don’t need to do. Important rule number one: disconnect the arduino when you are changing positions of the circuits’ elements.

For the second circuit, we needed to add the buzzer instead of LED. And the code contained the nusic which should be able to play with the help of buzzer.  Building wasn’t hard at all. But I was struggling with the code. It says that there is the mistake in code. But I just copied it from the site professors gave us. Later, I found out that there was another code inside of the first one and we needed to setup it too. Especially, to add this code and to changes its name. It was working pretty good. The melody was fun. Important rule number two: read instructions. It was clearly said what I need to do, but I just missed them at first. 

Third circuit was the easiest for me. I loved the clearness of the scheme. And it was lovely to build it with the music. I got all elements right and changed their positions only when it was no power. For this circuit we needed to use many many cables. But it is convenient to match their colors with the colors on the scheme. We needed to build a game when you need to push the button 10 times and to be faster than your mate and then the light turns on and the music of your win is playing. I got some self-confidence after this building. I finished it one of the first and it was fun to play this game with my friend. I am a little confused of how to draw diagram for it, but I will do my best. 

Q1 – I am not quite sure that I understand this question right, but my proposal is first – to make the button many times bigger. like to the size when person can stand on it. Second, it is a good idea two connect to buttons of this size for making the game more interactive. So, we have two pairs of buttons and each pair works onle if all of two buttons in this pair are pressed. Pressed by two standing persons. It makes this more interactive, because people now need to jump to press the button, so they using more muscles and get more happiness hormones. Also, they interact with each other. Now it is a game for 4 players divided by two teams, all of them need to work together to win and this will be much more funny.

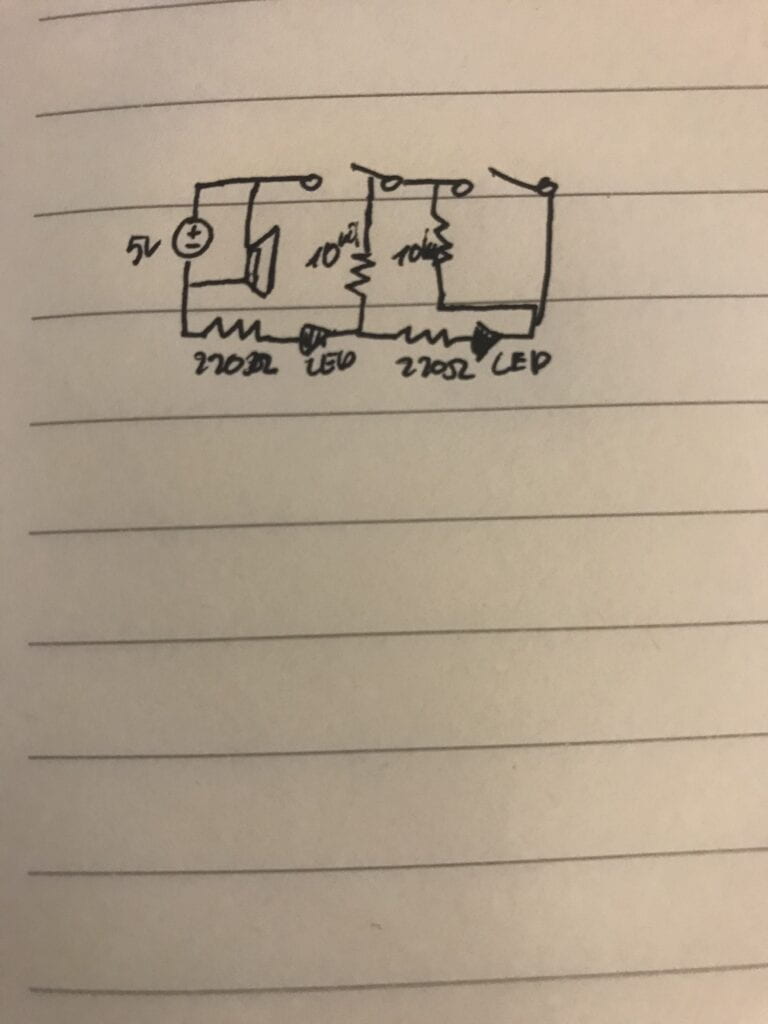
Q2- We are using 10k0hm resistor for this button, because we need to be sure that when the button is unpressed it isn’t reading HIGH. We need this resistor so our button would be connected only to the Ground when we are not pressing it. Resistor is important here, because the input pin would be connected to nothing sometimes if we will not use it. And when the input pin is unconnected it is reading in random values which can make our process really hard and unrelevant.

Q3 – I found the project Punch Activated Arm Flamethrowers by Allen Pan very interesting. It uses not only the Arduino platform, but also many other resourses such as pipes. This project also is not only interactive, it inspires people and creates art. person with this arm flamethrowers can create somethig beautiful, unique. you can find the infinite number of options of this project. In addition, if you see the project and still have questions how it works – then it is a good project, because there should be the mystery in your invention:). I love this Arduino project and see how interactive it is. For example, you can make the fire show and create the art and interact with other people with the help of this invention.

Group Research Project: Read


  1. The Veldt

For the Veldt story, I would like to invent the special sensors(maybe cameras) which would be able to control using the nurseries rooms. In this story we can watch how badly this invention affects people and their lives, but also we can read about the great possibilities of this room. It is helpful and innovative, but very dangerous. I think it can be a good idea to create the control-cameras for it or maybe a special microprocessor which would be able to define the necessary time out of this room for children. It can be built in the room construction. My interactive artifact will watch for kids and analyze their behavior. In addiction, it would provide them necessary psychological tests for controlling how good or bad the room affects them. If the test results would be bad, then the room will be automatically turned out. Similar design can be found in our laptops. For example, the ProctorU technology can analyze your behavior – where do you watch, what are you doing, and give the special signals for proctors. So they know when you are cheating. All tests which we have on our computers use the technology of providing quizzes. It can be translated through the interactive walls of this room. Foreseen problems can be found in every invention. This one can cause problems if it will turn off the room in the inconvenient moment. For instance, when the children are in the automatic scrub bath. Also, the people usually don’t like when something or someone is trying to control them. So, my invention is out of boarders for controlling people and they can be hugely disagree with the helpfulness of my imaginary interactive artifact. 

2. The Ones Who Walk Away from Omelas

The boy in the second story served for Omelas as a reminder how beautiful and peaceful their life is. I propose for this story to built something less cruel for the same needs. Imagine : in every home there is a small machine. When people start feeling that there life is somewhere bad, they click the button. And then loud annoying noise comes out, pain feels in finger, and light blindes you for some seconds. These feelings are disgusting and they will remind every person how great their life is without such things. Production  is similar to our circuits – push button, LED, buzzer, but in the bigger size and with more powerful lights and buzzers. It should looks like a box with a hole for the button and you finger. Foreseen problem is that people can get used to these sounds and feelings and this will no longer be a problem for them. But we can program the machine to randomly change the amount of power. Other problem is that people may not use it. But when you are living in the heaven like this city where nothing happens and where too much good, people start to miss the bad feelings, so it won’t be a problem. 

3. The Plaque

 For the third story I want not only to prove for the society that infected people are still alive, but also to give them opportunity to communicate. I imagined the special sensors which are connected to the muscles of these people. It said that the person is able to think and to move muscles. At first it can be simple machine with binary code. Prestory: there is one movement in dance when you contract the muscle for a second and then relax it – it is called pop. So code can be simple: one pop – yes, two pops -no. When the person yet not all petrified, you can connect special cables to his or her arm. These cables can sense the pops and provide the signals to the machine which is talking. Yes or no. And then we can develop these technology further to provide patients the ability to talk. (if it would be discovered that they cannot hear, then we can add special connections to their ears like hearing aid which would be able to transmit the speech signals). The construction and design may be similar to DECtalk which is helping Steven Hocking to communicate. The production can be similar to artificial limbs. They are also working by censoring muscles’ movements. Foreseen problems is that people can drive themselves mad trying to speak every time with their infected relatives and lose their own lives. Also, chaos can start when the government will told people that all these burnings were truly murders. 

My definition of interaction

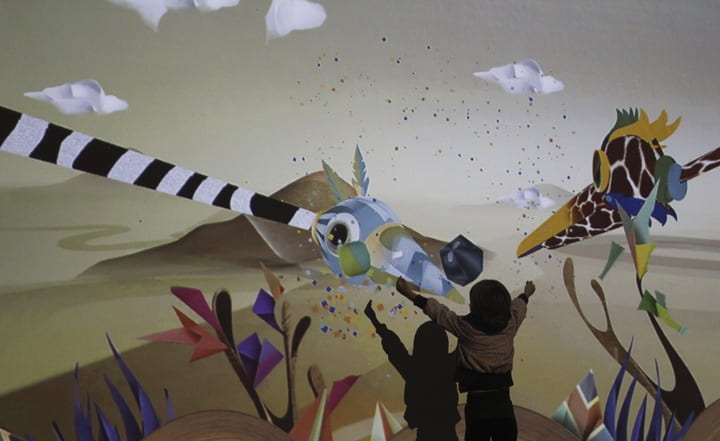
  What defines interactivity? Interaction is when you can affect something and got a response and this response affects you too. In addiction, this interaction spawns another interaction: between people. Like when you are interacting with one project and at the same time or later it causes you to connect with other people. For example, you see one interesting project, you interact with it, than you want to talk about this project with someone else and you interact with this person because of the project. So it connects people and become well-known. And also it gives you the emotion – it makes you happy or exited or shocked or even scared. It affects you so much that you want to affect someone else by it. It can even make changes in your character or in your views. One project which somehow aligns with my explanation of the word “interactive” is the puppet parade by Emily Gobeille and Theo Watson. It’s the project where people can not just interact with the screen and “puppies”, they also interact with each other. It is kind of a game. People are using their hands to control the puppies – they can change their size and feed them. Puppies on the screen are moving, eating and interacting with people. The video will describe better the concept of this project. 

Puppies Parade 

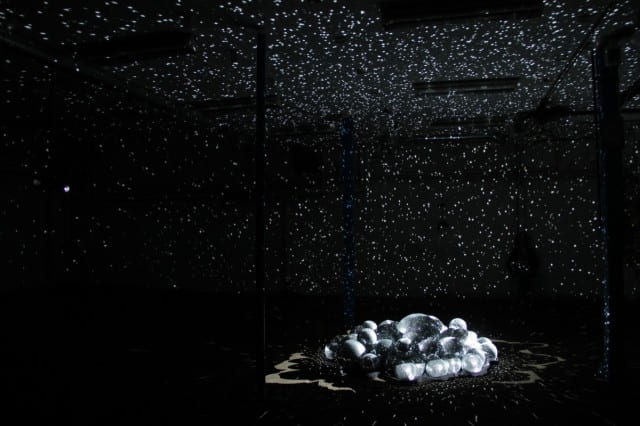
  I can’t say that there are any projects that would not align by my description. Maybe it is because of subjectiveness. Like I can be fascinated by something and other people can just go by it and don’t be surprised. But interaction is a dialogue, so not just the project affects you. You need to be able to somehow change it too. So there are many projects that can’t offer you this opportunity. For instance Light Leaks from Jonas Jongejan and Kyle McDonald. First, let me talk about this project. It is a room which is full of lights. It is the installation of fifty mirror balls which are projecting the controlled light in the room (Kyle McDonald | Jonas Jongejan) This project is really beautiful. It moves you like to the another universe. So, it aligns the first part of my definition – it affects me. It will be incredible to go to this room and these spectacular lights and be exited by this beauty. But you can just watch it. So that’s a monologue. You cannot interact with it. As a result, interactiveness consists of many factors. The most important for me is that the person can affect the installation and that people can interact with each other by the help of interactive projects.