Sound Visualization Documentation


A.    Dana Zinchenko, Disfruto, Carla Morrison

B.      Concept and Design

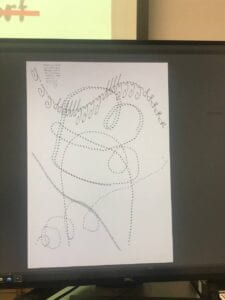
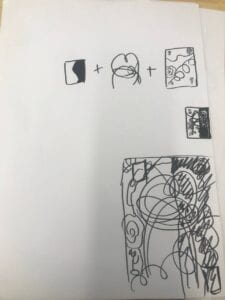
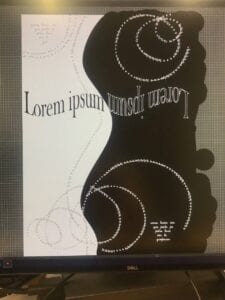
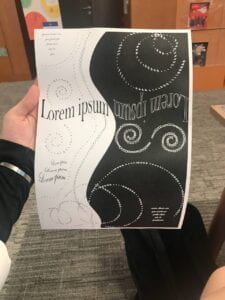
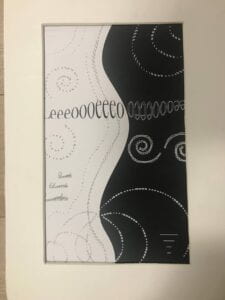
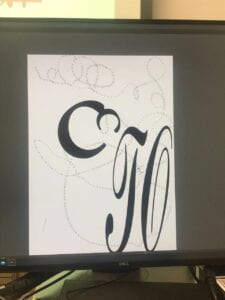
         I wanted my project to have a simple, elegant, and balanced design, with some white space and flowing curves to create a warm atmosphere. This mood of the whole project was chosen to align with the emotions and lyrics of the song.  For the figure/ground relationships, I wanted my image to expand a little outside of the frame.  I have a lot of elements that are “connected” together by the use of proximity (elements that are close to each other are perceived as a group) effect. For example, spirals are going from one to another, however, there is no pictured link between them – the human eye connects them together because of the proximity and closure effect. The closure effect also works here, because people are filling that missing part with their brains as one connected line. It gradually flows from one to another even though there is a space between the two of them. I also used similarity right in the center – I mirrored and turned my central letters to connect them into a wave, however, the main purpose of it was to connect black and white backgrounds. I linked two parts of my image by mirroring that phrase and making it one whole element to create a flowy connection. I used ScriptS font as my main theme because it’s curvy and not that bold – it looks classic, but creative which fits the atmosphere of my song and Spanish phonetics. I also used repetition/similarity in my depictions of small notes – I balanced them to the opposite corners and different colors. One Black Square project influenced my design a lot. I got inspired by the balance of white/black and wanted to try it in this work. I also used similar principles. When I was doing my Black Square I loved repetitions and proximity effect (grouping closely placed objects together), so I tried to explore it deeper in this project. 


C.    Process


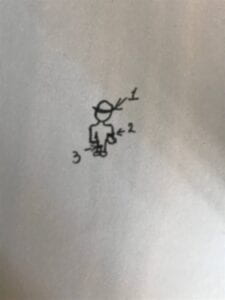
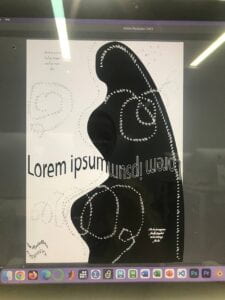
       I started by trying out what the illustrator can do. I tried some functions to get an idea of what I could produce. Then I started to think of my own project.  In the beginning, I wanted to find an idea creatively, so I just played the song and started my free-drawing on a piece of paper. I always use paper drafts at first. It helps me to get the design faster and better. I did a lot of corrections along the way.  I decided to use two background colors and to create a balance between them. I tried to make a silhouette of hugging people, but it was against the rules of the assignment, so I just changed to two parts of the picture. I was drawing curvy lines a lot, however, really often they were not as pretty as I wanted. Later, I discovered the figure “spiral” in settings and used it a couple of times. One of the things that disturbed me was the constant change of a computer. I started at the Windows lab, then went to the Mac lab, and then used library computers – and they all have different available fonts, so I needed to change my fonts every time I changed a computer. Critique influenced my project a lot. First, it made me do it more accurately – better lines and figures. I used all of the advice and it made my work look so much better. The second round of critique (one-on-one talk) made me change my “Lorem Ipsum” to other letters. I found it funny, but useful. Also, I changed my “Spanish” non-words (originally they were supposed to be small romantic notes) to letters “I” placed horizontally, so it would look like lines for the same small notes. This gives the whole picture a feeling of incompleteness and an open ending where people can by themselves think of the content of these notes. I also deleted my white corner – this was one of the best pieces of advice. I love how balanced my picture looks now with half black and white. For the biggest failure, I forgot to add trim marks and did the whole picture in A4 format. So I opened a new document with the right dimensions and redid the whole design. Also, I had trouble with printing. Even though I went to the printing store with my Chinese-speaking friend, we still did not receive the right size. So I went there a second time with the example printed by Professor Danni and they did it right. 


D.  Conclusion


       If I had more time, I would’ve used more techniques of the illustrator. I feel that you can do so many different things in this program and I would like to try them. Because my work consists mostly of self-drawn curves and spirals and different fonts, I used some effects too, but I wanted to try more, to experiment more. I would’ve also changed the font of the spirals in the right center. I would want to try using letters for building different objects or frames.

E.  Process documentation:

  1. Trying out different functions and the first draft: 

2. Idea 

3. First big change of an idea (minus the silhouette)

4. The second big change of the idea (after some critique – deleted white corner and font change)

5. Final on A4

6. After format change 


Communications lab post – Pioneer Plaque


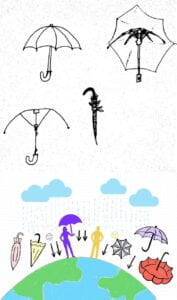
To describe an umbrella to aliens we tried to think how aliens think. But the thing is that we can’t be sure that they even have the same thinking process as human beings. Based on the story, I know that those aliens perceived (better say understood) results easier than the sum of the parts. When scientists tried to explain physics concepts to them it was clearly visible.  That’s why our main focus is to show how to use an umbrella and not how to build it. However, we included technical pictures as well in case it will help them better understand. Those aliens also had a different sense of space. Their bodies have radial symmetry, and their writing is all curvy and nonlinear (the logograms weren’t arranged in rows, or a spiral, or any linear fashion) – that’s why our picture is also not perfectly horizontal, but maybe even messy for the human eye. We purposefully didn’t arrange it – maybe it will make a picture more understandable to aliens. For me, one of the most important parts was to show gravitation. From my general knowledge, I remember that different planets have different gravities (so aliens may even question why we are not falling from the side of the Earth or why our rain is coming towards the center of the planet). So we used a physics symbol of arrows towards the center of the Earth – to show aliens the approximate level of gravitation and its existence here. It explains why human rain is falling the way it is. Maybe aliens don’t even know what the rain is, however, this information was unnecessary for our Plaque. Our main topic is an umbrella and it can protect from many kinds of things. We also used comparison and other easy symbols to show the purpose of an umbrella. Our Pioneer Plaque basically consists of two parts – technical (what does an umbrella consist of, how to make it and how does it work) and our second part showing in practice why humans need umbrellas and how we use them. We also depict the Earth to explain where humans live. One of the parts that I remembered from the real Pioneer Plaque is the depiction of human beings. I consider this really important because aliens have different anatomy and hence different needs. Maybe some of them are even protected from the rain by their own body. We don’t know, so we need to try and show as much as we can. We tried to use emoji to distinguish between a happy human who uses an umbrella and a sad one without it, however, we can’t be sure that aliens will understand it, primarily because they have different faces and because emoji is a part of human literacy and writing system which is also unclear for aliens. That’s why we used color-code to indicate the difference on the level of sensation and perception. Even if aliens perceive colors differently, they will still be able to see that colors differ from each other. 


Final Project: Make, Present and Report


The New Game – Dana Zinchenko – Margaret Minsky

CONCEPTION AND DESIGN:

Two main goals of my project is interactivity and adaptivity. It is an interacticve game which connects computing world with the physical world. Person can see how the game is doing on on the computer, but instead of controlling the player he is a player himself. Second, adaptivity – for such a long period of time I was thinking about various inventions which are now making lives of disabled easier. I also think that fun should be affordable to everyone, so I created a physicall game which can be adapted to every person and bring some fun in their life. I want every game to be in the interaction with the real life, I started with the game which is very similar to Geometry Dash, which is quite popular among teenagers and young-adults. I made my game easier and more cute. Instead of triangle cute creature is jumping through the barriers. There are three different ways to play my  game. You can choose which part of your body will move the creature which is a player in my game – your arm, your leg or your head. You can jump like in the original version of game, you can use your arm to do some workout during playing, or you can wait or choose to use your head. The game has also two variations – easy level to nod forward and the harder one is to move your head backwards to make a jump. When you are moving backwards it is harder to see the barries, so the game is funnier.  All of the sensors are working separately, but on the one coding basis, so you can choose between apparatus. Imagine, someone broke the arm and too lazy to jump right now, but want some action and gameplay. You need just to wait 15 seconds, not even press any buttons or something like it, and the game will start itself. These pretty things which are holding sensors are also adaptive to everyone, even kids, because they can change size. During the User Testing Session I heard many valuable constructive suggestions. And also I got some self-confidence, because I was able to see that people really like my project and enjoy the game. After this session I added more clarified losing part, some time in the beginning, moved score count so it is more easy to see it while playing the game, and also add more concrete instuctions. These adaptations very very effective. I later tested the project on my friends, and they even not knowing what is the project about were faster to understand how to play and what is going on.

FABRICATION AND PRODUCTION:

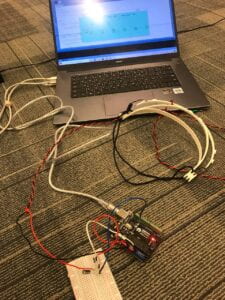
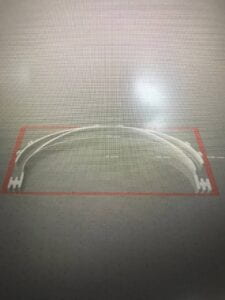
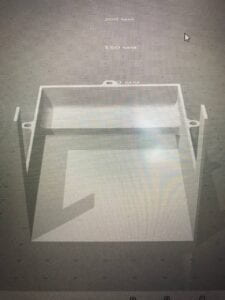
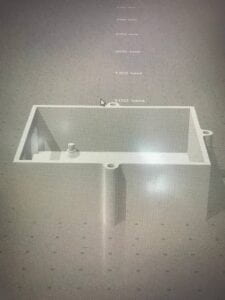
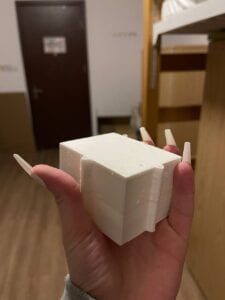
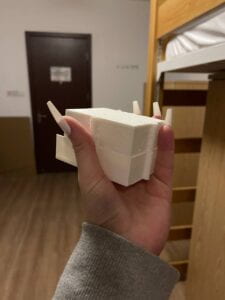
I wanted the design to be simple and working, so the users will intuitevely know how to play. I started my production with circuit. I soldered tilt sensors – they are easy to use and they provide exactly this type of values which I needed to make my project. I could’ve use distance sensor, I was thinking about it, but I decided to make game more physical and more understandable. My first trouble was that I wasn’t able to find capacitors – they were not in the equipment room and not in the lab, but Professor Minsky saved me and gave me some of the capacitors for my project. At first I made the project just for the one sensor – head and only after the experiments with it added other two sensors. After circuit building I worked with coding – made serial communication and modified the code from open resourse to finish my game. I changed some visual interpretations – colors, sizes, texts, positions, and added some bigger modifications – serial communication for three values, losing part, reset, and introductory part with choosing the apparatus with which you want to play this particular time. For the digital fabrication part I founded the basic sketch of headband and adapted it to the needs of my project. I decided to make it flexible, but in our fabrication lab there is only non-flexible plastic, so I came up with the idea to make it smaller and thinner, so it would become flexible enough. I made the first one, tested it and after printed two others. Also, theis design have special holes in the end of two unconnected parts of the headbands whic gaves me the opportunity to use special laces which are working to udjust sizzes. This holes hold these laces. For the packaging part I wanted to maake it minimalistic, so I printed white small box both for Arduino and breadboart and connected two parts of the box with wood stickes. I decided not to glue them together to have the opportunity to check and modify my circuit when I need it. It was a very good decision, I was able to fix any problem in a matter of seconds, because the box was easy to open and close. 

CONCLUSIONS:

Did my project achive the main goals of it? I think yes. It is interactive and adaptable to everyone. You can not just to control the creature on the screen, but to be the actual player. This project connects virtual reality in my computer to the physical world of human-computer interaction. And also it makes people to somehow interact with each other. I think that all games should have adaptations for everyone. All of us can be in different life situations, so the fun should be affordable. I want my project to make people think – what they can do? So, in this project we can see not only human-machine interaction, but also person-person interaction. It is valuable for me. If we will think deeper, we can make this kind of adaptations not only for gaming environtment, but also for various computer using movements. For example, my mum is a disabled person, and mostly every time her arm is in pain and she cannot really use it for many hours. But she is an artist, she needs to use it. I was thinking that if it is possible to make her life easier to make maybe her head to control computer? What if she will be able to draw with the use of her head? It will make her life much less dangerous and her arm conditions better. I would definetely did this if I had more time.  I learned a lot from this process of project making. For instance, learned that I always should think deeper. I further developed my knoweledge in coding, got to know some digital fabrication basics, learned how to apply my ideas to the real life, I practiced circuit building and idea’s developing. Also, during the whole project I had much problems with my computer, and all of these technical issues made it really hard for me to do the project and to present it properly. However, working together with my professor, I learned how to solve different problems, how not to lose hope, how to have a backup plan everytime, how to save sketches in all the places you can and how to find exits even from the worst situations. This knoweledge is very valuable for me, because it will help me not only in my future projects and classes, but in my life. This course gave me broad sphere of knoweledge. I learned basics of many different techniches. It is impossible to overestimate the usefullness of this course. You are learning how to make projects from the zero to the final presentation. How to research, how to create ideas, how to prepare for the start of work drawing sketches or making mindmaps and brainstorming, how to work on a project together with someone else, how to make circuits, how to code, how to connect all the parts of your work, how to use digital fabrication tools- both physical and computing, how to solder, how to us cardboard, how to make prototypes, how to decorate projects and how to present them. All of these is very interesting and beneficial knoweledge. I am so grateful that I had opportunity to learn all of these, and the final project was an opportunity to combine all together and to really make something. Overall, this project had special value for me, for my family, for my learning process. I want to emphasize the importance of the problem of adaptations and to use creativity in creating interactivity. I have very much on what to work with further, but also I have much enthusiasm to develop myself, to push my isead further. And now I know how to apply my knoweledge to make my ideas alive, to make them make some influence on others.

About the more practical part, I was working for a long time, however, there still seems to be some problems with the coding part. Reset is one of the most questionable parts for many of this year Interaction Lab students. And I am not an exception. Game is doing reset very well, but if I am adding losing slide, then after the reset you can make only one jump. I need to further explore it and fix this detail.

In the following section you will be able to see my working process, arduino and breadboard 3d printed box, sketches, troubles with my laptop at the most important moments, user testing session, final presentation. Also when semester finished, I still wanted to show my project, so I myself made a small event for some people from the university and gave them the opportunity to try out my project in the dorms. You can also see some recaps from this self-made presentation:) I apologize for the lack of some video parts, because when I understood that I didn’t film enough, it was actually too late to do this. Winter break started and I haven’t got access to my Arduino kit to finish the documentation process. However, in the video from user testing section, even if it is too short, it can be seen how values from the sensor and my hand moving the sensor controls the jumping of the creature in the game. When I will be back from winter break I will definitely film everything more transparent and clear, so I would be able to include this project in my portfolio as my first experience of using such techniques and coding. I learned a lot, and I need to learn more. I will strive to achieve my goals and now you can see my first steps in these pieces of documentation.  

Processing code:

//THE CODE IS ADAPTED FROM OPENGENIUS FOUNDATION 
import processing.serial.*; 
import osteele.processing.SerialRecord.*; 
 
Serial serialPort; 
SerialRecord serialRecord; 
 
boolean gameLost = false; 

class Barrier 
{ 
  float bottom; //This contains height of barriers 
  float w = 40; //This contains width of barriers 
  float x; //This contains x location of the barrier 
  float barrier_speed = 3; //This is the rate of change in position of barrier 
 
  Barrier() 
  { 
    bottom = random(150, 160); //Set value of height of barrier 
    x = wid + w; //Increase the x location by with 
  } 
  void update () 
  { 
    //if the game is going on modify barrier x-locations if the game is going on 
    if (start) 
    { 
      x -= barrier_speed; 
    } 
  } 
 
  //Check for collision, if locations of the player and the pipe is overla 
  boolean hits(Player b) 
  { 
    return ((b.pos.x > x) && (b.pos.x < (x + wid))) && (b.pos.y > (height - bottom - b.r)); 
  } 
  void show(boolean hit) 
  { 
 
    if (start) //display barriers if game is in progress 
    { 
      if (hit) 
      { 
        gameLost = true; 
      } else 
      { 
        //fill green normally 
        fill(65, 224, 129, 127); 
      } 
      stroke(0, 0, 0); 
      strokeWeight(2); 
      rect(x, height - bottom, w, bottom-110); 
    } 
  } 
} 
class Player { 
 
  PVector pos; //This contains position of player 
  PVector acc; //This contains acceleration of player 
  PVector vel;  //This contains velocity of player 
 
  float r=40; ////This contains radius of player object 
 
  Player() 
  { 
    //initialise the player data members 
    pos = new PVector(50, (height-200)); 
    vel = new PVector(0, 20); 
    acc = new PVector(); 
  } 
 
 
  void applyForce(PVector force) 
  { 
    acc.add(force); 
  } 
 
  void update() 
  { 
    applyForce(gravity); //applies downward gravity 
    pos.add(vel); // in order to update pos wrt velocity 
    if (pos.y >=height-170) 
    { 
      pos.y=height-170; 
      vel.mult(0); 
    } 
 
    vel.add(acc); //in order to update the vel as per acc 
    vel.limit(4); // in order to cap the vel for a smooth run 
 
    acc.mult(0); 
  } 
 
  void show() 
  { 
    fill(#DF9DF7); 
    stroke(0, 0, 0); 
    strokeWeight(2); 
    imageMode(CORNER); 
    image(pl, pos.x, pos.y, r*2, r*2); 
  } 
} 


Player b; //The object that jumps the barriers 
PImage pl; //Image for the player object 
 
int score=0; // keeps track of current game score 
int highScore=0; //Keeps track of High Score 
boolean safe=true; // Keeps track of whether the player hit an obstruction 
boolean start=false; //Keeps track of whether the game is going on 
 
PVector gravity = new PVector(0, 0.1); //Pushes the player down on the ground (when it jumps) 
ArrayList barriers = new ArrayList(); //List of Obstructions 
int wid = 1100; //The width of our screen 
 
int tilt = 0; 
int bodypart = 0; 
boolean startGame = false; 
float t = 0; 
 
void setup() { 
  fullScreen(); 
 // size(1100,400); //Initialise a canvas 
  b = new Player(); //initialise a player 
  pl = loadImage("snowball.png"); //Load the image in the variable 
 
 
  String serialPortName = SerialUtils.findArduinoPort(); 
  serialPort = new Serial(this, serialPortName, 9600); 
  serialRecord = new SerialRecord(this, serialPort, 3); 
} 
 
void draw() { 
  t = millis(); 
  if (t > 15000) { 
    startGame = true; 
  } 
  if (startGame == true && gameLost == false) { 
    if (serialRecord.read()) { 
      tilt = serialRecord.values[bodypart]; 
    } 
 
 
    if (start) 
    { 
      //Add barriers at random distances such that 
      //minimum distance is 60 frames to make the 
      //game playable only if th game is in progress. 
      if (random(1)<0.5&&frameCount % 60 == 0) { barriers.add(new Barrier()); } } if (tilt==1) { start = true; //Start the game on pressing the key if (b.pos.y == height-170) //Jump only if the player is already on the ground { PVector up = new PVector(0, -100); //Defining an appropriate upward force b.applyForce(up); //Applying the upward force just defined } } background(#9DF7CC); //Set background to the yellow colour b.update(); //Update the player's position and speed b.show(); //Display the player //traverse and display the obstructions for (int i=barriers.size()-1; i>=0; i--) 
    { 
      Barrier p = barriers.get(i); 
      p.update(); 
 
      if (p.hits(b)) 
      { 
        p.show(true); 
        safe=false; 
      } else 
      { 
        p.show(false); 
        safe=true; 
      } 
 
      //Remove the barriers that went out of frame 
      if (p.x < -p.w) 
      { 
        barriers.remove(i); 
      } 
    } 
 
    if (safe&&start) //Increment the score if game is going on smoothly 
    { 
      score++; 
    } else 
    { 
      //Restart the game 
      score=0; 
      text("MOVE TO START", width/2-500, 50); 
      start=false; 
    } 
 
    fill(16, 53, 201); //fill the text with colour for score 
    textSize(32); //Set size for the score 
 
    //Display score 
    text("Score", 100, 300); 
    text(score, 250, 300); 
 
    //Set and display high score 
    if (highScore < score) { 
      highScore = score; 
    } 
 
    text(highScore, 280, 50); 
    text("High Score", 100, 50); 
  } else if (gameLost == false && startGame == false){ 
    background(0, 255, 255); 
  textSize(100); 
  fill(0); 
  text("Press 'l' for leg", 0, height/2-100); 
  text("Press 'a' for arm", 0, height/2); 
  text("Wait or press 'h' for head", 0, height/2+100); 
} 
else if (gameLost == true && startGame == true){ 
  background(255, 0, 0); 
  textSize(100); 
  fill(0); 
  text("You Lost!", 0, height/2); 
} 
}
 
 
void keyPressed() { 
  if (key=='s') { 
  startGame = true; 
  } 
  if (key == 'l' || key == 'L') { 
    bodypart = 1; 
  } if (key == 'a' || key == 'A') { 
    bodypart = 2; 
  } if (key == 'h' || key == 'H') { 
    bodypart = 0; 
    startGame = true; 
  } 
  if (key == 'r' || key == 'R'){ 
    gameLost = false; 
    startGame = false; 
    safe=true; 
  } 
}

Arduino code:

#include "SerialRecord.h"


SerialRecord writer(1);


void setup() {
  Serial.begin(9600);
  pinMode(0, INPUT);
  pinMode(1, INPUT);
  pinMode (2, INPUt);
}

void loop() {
  int tilt1 = digitalRead(0);
  int tilt2 = digitalRead(1);
  int tilt3 = digitalRead(2);
 writer[0] = tilt1;
writer[1]=tilt2;
writer[2]=tilt3;
  writer.send();

  delay(20);
} 
Recitation 10: Media Controller


For this recitation at first I chose to use the button as the media controller, however, later I understood that it is better to use potentiometer. I spent a lot of time working with button, so I needed to change all the code and circuit very fast. I made the second circuit and changed digital to analog read. For the media part I chose video from one of the examples we didn’t covered in class. I most love to work with filters, so I decided to do the coding using the filter. Also, as I first wanted to work with digital values I made the potentiometer working just by providing digital values (not the range of them, but just two positions). However, outside of the recitation time just for myself I changed it to analog values and mapped it with the tint function.

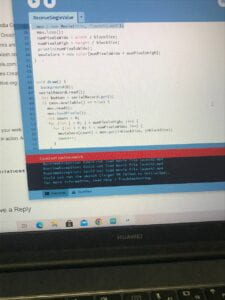
First trouble was that my video wasn’t working. I put it with the same folder with code, but later Professor helped me realize that I need to create a new folder with the name “data” into the existing one and put my code into it.  

for not to get such messages:

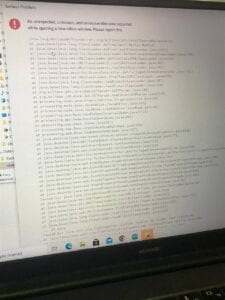
Later we tried to put my whole processing programm folder out of drive and unexpectedly it died. I get a message like this, so I needed to install processing and all of the libraries again and write the code from the very beggining. 

The result was that potentiometer at some value changed the filter to the grey one. It looks simple, but knoweledge that I know have after this recitation provides many opportunities of how to change video and images using physicall media controllers like this one. You can use digital or analog values, change sizes, colors, tints, the range of all of these. It is a broad topic and I am enthusiastic to experiment with it further.

Arduino Code and Processing Code:

#include "SerialRecord.h"


SerialRecord writer(1);

void setup() {
  Serial.begin(9600);
  pinMode(A0, INPUT);
}

void loop() {
  int sensorValue = analogRead(A0);

writer[0] = sensorValue;
  writer.send();
  delay(20);
} 
import processing.serial.*;
import osteele.processing.SerialRecord.*;

Serial serialPort;
SerialRecord serialRecord;
import processing.video.*;

int numPixelsWide, numPixelsHigh;
int blockSize = 10;
Movie mov;
color movColors[];

void setup() {
 

  String serialPortName = SerialUtils.findArduinoPort();
  serialPort = new Serial(this, serialPortName, 9600);
  serialRecord = new SerialRecord(this, serialPort, 1);
  
   size(560, 406);
   
  noStroke();
  mov = new Movie(this, "launch2.mp4");
  mov.loop();} 

Recitation 9: Digital Fabrication


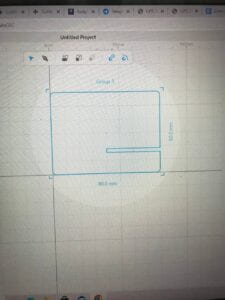
This recitation I started even before the begginming of it. First, I watched the tutorials on the cuttle website and started working. I decided to work as student B, because I had literally no experience with such programms. At first, I even didn’t know how to fix my shape on the canvas, but later I guessed that I should just drag it instead of painting. I made first rectangle, changed sizes, added curved angles, and made the secind rectengular. I really appreciated the simplicity of this platform. You can intuitively guess how to do what you need to.  I did all the work, but my shapes were not intersecting. I started to fix it. Later I realized that my first rectangle was some millimetrs away from the origin. I moved it and fixed the bug. Second step, I measured the servo motor and we used this measurements in the student A’s work. You need to be very careful when making such stand, because one mistake and the two parts of your project will not be stably connected. I want to mention that instuctions on this recitation are very clear – I love it.


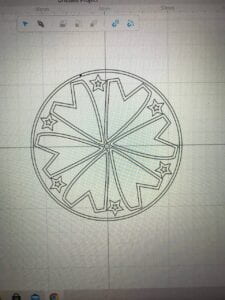
Second part and my next step was to make a creative pattern.  I made it, but when we came to the fabrication lab professor Andy exolained that this pattern is great, but I should fix some mistakes to make it better. I fastly did it and we cutted all the details. When it came to connect all the details we didn’t use any additional resourses, because with our measurements all the connections were strong enough to survive sweep. 

PROPOSAL ESSAY


  1. Title – The New Game

After some time of thinking about my project, I realized that it can be used by all the people in different ways.  But for now, I want to realize it from just one perspective – the most important one. Now, I want to propose to make a game for disabled people. I want to try to shift the game on the computer to the phisical world. It will make every game more interactive. For start I want to use The Flappy Bird game. In original you need to tap the keyboard or your phone screen, but I want people to use their own parts of body. It will provide people a small workout while they are playing games. Many researchers are trying to make lives of disabled people easier by inventing some things, but who is thinking of their fun?These people are ordinary people just with some special needs, so they also need to have fun and play games. All games should be adapted for these people. 

First for these project I made the research and tried to figure out future steps. Next I will try to edit the code of The Flappy Bird. Then I will solder the motion sensor and try to use it. I wil merge two codes together. Later, if we are required to use digital fabrication, I will made a design or find some similar examples in the internet of phisicall interpretetion in the world. I want to put this sensor into the device and I want this device to be the helmet or something which can be attached to the head. person can move the head and it will make the bird jumping. The emphasising of the special need of my audience will be made through the design and from the original idea of the project. I will made all of these as soon as possible. 

I had not much ideas when I was researching what to make for these. Then, my friend was listening her Application Lab class next to me. They had a topic about making adjustments for disabled people and I created my idea. It is meaningful for me, because one of my closest people is disabled. Also, this project in advance can lead not just to sreate games with this mechanism, but to make they using the computer easier. My technology is simple, but it later can be transformed into device which can help to control the laptop with the use of just head or finger or any other part of body.  It will help these people to work, to create art, to play and have fun.  It is interactive, because here the computing world and phisical world connect with each other. Also, this project conveys the idea which will make other people think of it. This game can be adapted for two users or other game can be changhed by the same way. 

THREE PROJECT PROPOSALS


1st proposal:

Title – water counter

In the recent years  people are more worried about their health. If you want to stay fit and healthy you need to each day drink the enough amount of water. But how to easily count it? I was also lazy to right down how much water I drink, especially during work or study hours. I propose to create the device which will count the amount of water you drink while working or sitting with homework. special sensor which is connected to the bottle of cup will count your gulps and translate them into programm. The computer will give you the information and interactive pretty output which looks like a game will inspire and motivate you to drink enough. It is easy to use and this counting will not disturb you when you are busy. You can set goals according to your weight and age and accompish this goals. 

2nd proposal:

Title – New Game 

This project is made for specific audience, but can be used by everyone. I was thinking about disabled people. How many games they can play? Isn’t it tiring to play them? Is it overall convinient? I decided to make the specific device which will allow them to have some fun playing with friends or family. As a prototype I want to use “Flappy bird” game. Special sensors will track the movements of head or hands and collected data would be able to control the bird. So this game will be extracted to the phisical world. It will provide some interactivity to the lives of disabled people. 

3rd proposal:

Title – Music controller 

Music is an important part of our lives. It can create an atmosphere and change your mood. Many people love and want to create music. However, it is hard and long to study how to play musical instruments. So, I decided to create a fun device which will be able to produce notes by many different ways. Various sensors in a shape of a game will create some music and everyone will be able to contribute to this music piece. Also, light and drawing effects will make it even more interactive and fun.

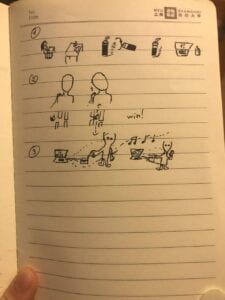
Sketches:

Recitation 8: Serial Communication

Task #1

It started great. I fastly buildt the circuit and than tried the first code. I seted up the Arduino part without any surprises or failures. I added the second POT to the code and everything worked. I also haven’t got troubles with the circle which needed to move consistently with the POTs. It was perfectly controllable. For the part with adding a line I had some questions. The first one was how to track the previous x and y values. I knew what I needed to do, but I wasn’t sure that this will work. I asked for help Learning Assistant and grabbed important knoweledge. I changed coordinates (x,y,a,b) to (a,b,x,y).A and B was the variables which I added to create a code for line, whereas x and y coordinates were previously used for circle movements. I also remembered to assign  the variables to 0 prior to setup part. It worked! I quickly moved the background from draw part to setup so the dot converted to continuous line. It was controllable and fun to use this code. 

import processing.serial.*;
import osteele.processing.SerialRecord.*;
Serial serialPort;
SerialRecord serialRecord;
float x2 = 0;
float y2 = 0;
void setup() {
  size(500, 500);
  String serialPortName = SerialUtils.findArduinoPort();
  serialPort = new Serial(this, serialPortName, 9600);
  // If the Arduino sketch sends a different number of values, modify the number
  // `2` on the next line to match the number of values that it sends.
  serialRecord = new SerialRecord(this, serialPort, 2);
  background(0);
}
void draw() {
  serialRecord.read();
  int value1 = serialRecord.values[0];
  int value2 = serialRecord.values[1];
  float x1 = map(value1, 0, 1023, 0, width);
  float y1 = map(value2, 0, 1023, 0, height);
  stroke(255);
  line(x2, y2, x1, y1);
  x2 = x1;
  y2 = y1;
} 

Task #2

First, I wrote the code for ball and then merged it into the example code for receiving multiple values. I fastly connected the servo motors and started to charge the code. But then my laptop broke. It was awful, it was reloading every time I tried to write a sketch and all the code was deleting ecvery time. However, this task was in pairs, so, fortunately, I was able to work with my partner on her laptop. She alslo taught me one interesting concept of acceleration. I previously used framecount, speed functions, and x=x+1 speed. Acceleration is much more convinient to use.  We added servo to the code. And started to connect the servo recived values with the ball. We wrote the code, but it seemed that there were some troubles with it. First, we tried to debug it by ourselves, but were not able to find any mistakes. Professor helped us. The problem was, if I understood right, that in this library we can not use -1. So we changed it. And the code became great. It was working according to our expectations and the task.  All the steps which we made can be seen in the code:

#include "SerialRecord.h"
#include 

// Change this number to the number of values you want to receive
SerialRecord reader(1);
Servo myservo;
Servo myservo2;
int pos = 0;


void setup() {
  Serial.begin(9600);
  myservo.attach(9);
  myservo2.attach(10);
}

void loop() {
  if (reader.read()) {
  if (reader[0] == 2) {
      myservo.write(180);
      delay(100);
      myservo.write(0);
  } else if (reader[0] == 1) {
      myservo2.write(180);
      delay(100);
      myservo2.write(0);
  }
  }
  //delay(20);
} 

Recitation 7: Neopixel Music Visualization


For the start of recitation we needed to download all neseccary libraries and to connect the neopixel strip. It was easy enough for me. For the second task we used the codes which were wrote in class and tried them. Accidently, I forgot to close the Arduino IDE programm, so nothing worked. Now I learned this lesson. read instructions more careful.

For the third task, we needed to add music. It was fun to choose song in my native language. Some people including me had troubles with playing this music. I converted the file to aiff format and tryied some variations of where to put the file. Finally, Professor helped us to treplace the music file, so it all worked pretty good.

For the second step at first I added just some simple rectangles which were working by the same mechanism as the circle in the code from class. Later, I wanted to try different visualisation, so I added the change of colors according to the volume. I mapped volume with the color. 

For the next task, I added some more color modifications with the use of millis(). I analyzed the output information on the serial monitor and the numbers helped me to get to know which of them to use as starting points. 

For the last step, I just added some more variations. And tried to play with the code and music and lights. 

import processing.serial.*;
import osteele.processing.SerialRecord.*;

Serial serialPort;
SerialRecord serialRecord;

int W;         //width of the tiles
int NUM = 26;  //amount of pixels
int[] r = new int[NUM]; //red of each tile
int[] g = new int[NUM]; //red of each tile
int[] b = new int[NUM]; //red of each tile

import processing.sound.*;


SoundFile sample;
Amplitude analysis;

void setup() {
  size(640, 480);
  // load and play a sound file in a loop
  sample = new SoundFile(this, "million.aiff.aiff");
  sample.loop();

  // create the Amplitude analysis object
  analysis = new Amplitude(this);
  // analyze the playing sound file
  analysis.input(sample);
  
  W = width/NUM;


  // You can use this syntax and change COM3 for your serial port
  // printArray(Serial.list());
  // serialPort = new Serial(this, "COM3", 9600);
  // in MacOS it looks like "/dev/cu.usbmodem1101"
  //or you can try to use this instead:
  
  String serialPortName = SerialUtils.findArduinoPort();
  serialPort = new Serial(this, serialPortName, 9600);
  serialRecord = new SerialRecord(this, serialPort, 4);
  serialRecord.logToCanvas(false);
  rectMode(CENTER);

}

void draw() {
  println(analysis.analyze());
  noStroke();
  fill(255, 0, 150);
  
  //long t = millis();
  //if(t < 2000){
  //  background(0);
  //}
  //else if (t < 4000){ // background(255, 0,0); //} //else { // background(0, 255, 0); //} // analyze the audio for its volume level float volume = analysis.analyze(); if (volume > 0.4 && volume < 0.7){ background(0, 0, 255); } else if (volume > 0.7){
    background(255, 0, 0);
  }
  else {
    background(255);
  }
  
  
  float x = map( volume, 0, 1, 0, 255);
  // volume is a number between 0.0 and 1.0
  // map the volume value to a useful scale
  
  float diameter = map(volume, 0, 1, 0, width);
  // draw a circle based on the microphone amplitude (volume)
  float colorOfCircle = map(volume, 0, 1, 0, 255);
  fill(colorOfCircle);
  circle(width/2, height/2,diameter);
  
  
    for (int i=0; i<NUM; i ++) {
    fill(r[i], g[i], b[i]);
    rect(i * W + W/2, height/2, 10, 10);

}

if (mousePressed == true) { 
    int n = floor(constrain(mouseX/W , 0, NUM-1));

    r[n] = floor(x);
    g[n] = floor(x);
    b[n] = floor(x);

    serialRecord.values[0] = n;     // which pixel we change (0-59)
    serialRecord.values[1] = r[n];  // how much red (0-255)
    serialRecord.values[2] = g[n];  // how much green (0-255)
    serialRecord.values[3] = b[n];  // how much blue (0-255)
    serialRecord.send();            // send it!
  }}


Final Project: Research

 
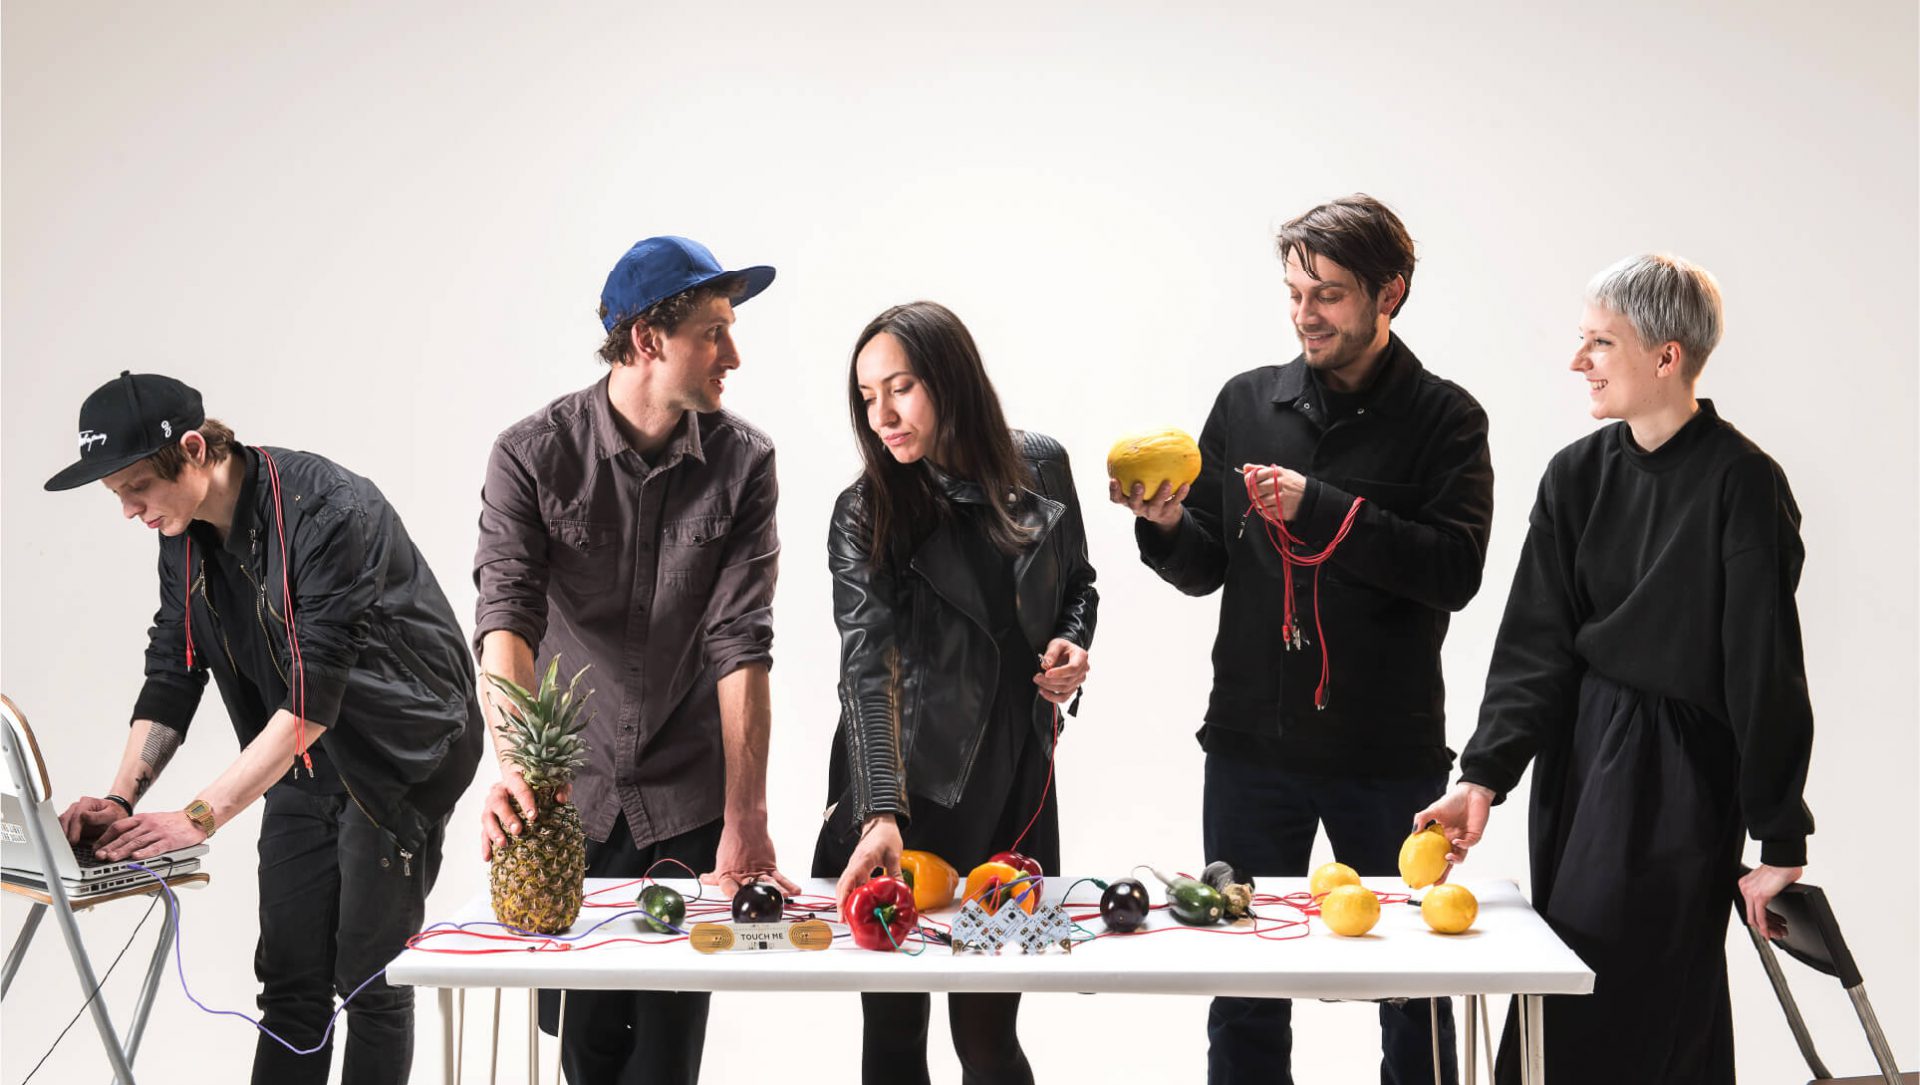
       There are many factors that contribute to the success of interactive project. When I was defining what interaction means I pointed out that exchange of actions should be jot just between project and people, but also between individuals. It is meaningful for me to help people start the dialogue and to immerse them into the idea of my project. Playtronica studio was founded by Sasha Pas. It is a creative interactive project which provides people with the opportunity to play music not just on musical instruments, but on every thing in everyday life. The goal of the project was to “achieve a deeper understanding between humans and ideas, to extend sensorium”. Invented devices can turn anything into musical controller. In gives people the opportunity to use a new way of communication and interaction. It is also meaningful for me that this project is more often using by a group of people who are interacting with each other trying to make a music of individual sounds. This project conveys meaning – it is about breaking boarders between life and music, between possible and impossible. It unites people and make them research and develop their own creativity. It can completely change the music industry and our perception of music and sounds.
Playtronica - team
      The second project I researched is also connected with music industry. It maybe be like this, because art and especially music connects people, so these project have bigger probability to align with my definition of interaction. Monogram company created the Creative Console. Monogram's Creative Controle is based on a user-centered design approachIt is the device which helps people to work on the computers or other devices. It helps to establish the interaction between people and computers and also makes it easier to create something. It is suitable for people of all professions, but it would most fit creators such as designers, producers, photographers and etc… This device can change form and shape due to the wishes and needs of individuals. The interaction here is not direct or clear, but creating something with the use of this device will push people forward in artwork, and art connects people together how this console connects person with the computer and helps to easier convey the ideas from mind to computer and to reality. The further development of project’s actions should be “determined by audience”( Ernest Edmonds 16).
        One of the most important factors of successful interactive project is that your creation and presentation should involve “active audience experience” (Ernest Edmonds 16). Additionally, I think that design really matters. Your project should look good and fancy, or if you need to create some creepy atmosphere it should allocate with your goal. “Does my challenge drive toward ultimate impact, allow for a variety of solutions, and take into account context?”(Field Guide to Human Centered Design, IDEO) – this is the question that every desigher should ask himself prior rto start making a project. In this question we also can find useful concepts and parts of definition of the succesful interaction project. Successful project in ideal should push forward the development of other projects in the industry and gave opportunities for further development, it should inspire. Design also serves for people to win in this industry’s “intense competition to create new digital products that monopolise people’s attention ( Schumpeter – The Economist). Every dedicated creator should strive to achieve this goal to change people’s minds and contribute to the development of the industry. Successful interactive experience includes many important factors.