Recitation 9: Digital Fabrication


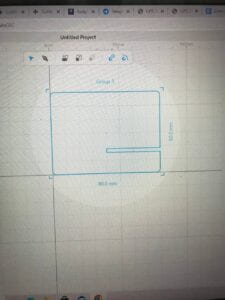
This recitation I started even before the begginming of it. First, I watched the tutorials on the cuttle website and started working. I decided to work as student B, because I had literally no experience with such programms. At first, I even didn’t know how to fix my shape on the canvas, but later I guessed that I should just drag it instead of painting. I made first rectangle, changed sizes, added curved angles, and made the secind rectengular. I really appreciated the simplicity of this platform. You can intuitively guess how to do what you need to.  I did all the work, but my shapes were not intersecting. I started to fix it. Later I realized that my first rectangle was some millimetrs away from the origin. I moved it and fixed the bug. Second step, I measured the servo motor and we used this measurements in the student A’s work. You need to be very careful when making such stand, because one mistake and the two parts of your project will not be stably connected. I want to mention that instuctions on this recitation are very clear – I love it.


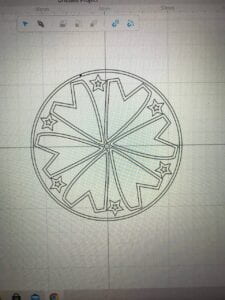
Second part and my next step was to make a creative pattern.  I made it, but when we came to the fabrication lab professor Andy exolained that this pattern is great, but I should fix some mistakes to make it better. I fastly did it and we cutted all the details. When it came to connect all the details we didn’t use any additional resourses, because with our measurements all the connections were strong enough to survive sweep. 

PROPOSAL ESSAY


  1. Title – The New Game

After some time of thinking about my project, I realized that it can be used by all the people in different ways.  But for now, I want to realize it from just one perspective – the most important one. Now, I want to propose to make a game for disabled people. I want to try to shift the game on the computer to the phisical world. It will make every game more interactive. For start I want to use The Flappy Bird game. In original you need to tap the keyboard or your phone screen, but I want people to use their own parts of body. It will provide people a small workout while they are playing games. Many researchers are trying to make lives of disabled people easier by inventing some things, but who is thinking of their fun?These people are ordinary people just with some special needs, so they also need to have fun and play games. All games should be adapted for these people. 

First for these project I made the research and tried to figure out future steps. Next I will try to edit the code of The Flappy Bird. Then I will solder the motion sensor and try to use it. I wil merge two codes together. Later, if we are required to use digital fabrication, I will made a design or find some similar examples in the internet of phisicall interpretetion in the world. I want to put this sensor into the device and I want this device to be the helmet or something which can be attached to the head. person can move the head and it will make the bird jumping. The emphasising of the special need of my audience will be made through the design and from the original idea of the project. I will made all of these as soon as possible. 

I had not much ideas when I was researching what to make for these. Then, my friend was listening her Application Lab class next to me. They had a topic about making adjustments for disabled people and I created my idea. It is meaningful for me, because one of my closest people is disabled. Also, this project in advance can lead not just to sreate games with this mechanism, but to make they using the computer easier. My technology is simple, but it later can be transformed into device which can help to control the laptop with the use of just head or finger or any other part of body.  It will help these people to work, to create art, to play and have fun.  It is interactive, because here the computing world and phisical world connect with each other. Also, this project conveys the idea which will make other people think of it. This game can be adapted for two users or other game can be changhed by the same way. 

THREE PROJECT PROPOSALS


1st proposal:

Title – water counter

In the recent years  people are more worried about their health. If you want to stay fit and healthy you need to each day drink the enough amount of water. But how to easily count it? I was also lazy to right down how much water I drink, especially during work or study hours. I propose to create the device which will count the amount of water you drink while working or sitting with homework. special sensor which is connected to the bottle of cup will count your gulps and translate them into programm. The computer will give you the information and interactive pretty output which looks like a game will inspire and motivate you to drink enough. It is easy to use and this counting will not disturb you when you are busy. You can set goals according to your weight and age and accompish this goals. 

2nd proposal:

Title – New Game 

This project is made for specific audience, but can be used by everyone. I was thinking about disabled people. How many games they can play? Isn’t it tiring to play them? Is it overall convinient? I decided to make the specific device which will allow them to have some fun playing with friends or family. As a prototype I want to use “Flappy bird” game. Special sensors will track the movements of head or hands and collected data would be able to control the bird. So this game will be extracted to the phisical world. It will provide some interactivity to the lives of disabled people. 

3rd proposal:

Title – Music controller 

Music is an important part of our lives. It can create an atmosphere and change your mood. Many people love and want to create music. However, it is hard and long to study how to play musical instruments. So, I decided to create a fun device which will be able to produce notes by many different ways. Various sensors in a shape of a game will create some music and everyone will be able to contribute to this music piece. Also, light and drawing effects will make it even more interactive and fun.

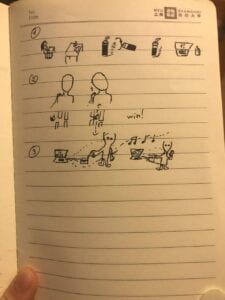
Sketches:

Recitation 8: Serial Communication

Task #1

It started great. I fastly buildt the circuit and than tried the first code. I seted up the Arduino part without any surprises or failures. I added the second POT to the code and everything worked. I also haven’t got troubles with the circle which needed to move consistently with the POTs. It was perfectly controllable. For the part with adding a line I had some questions. The first one was how to track the previous x and y values. I knew what I needed to do, but I wasn’t sure that this will work. I asked for help Learning Assistant and grabbed important knoweledge. I changed coordinates (x,y,a,b) to (a,b,x,y).A and B was the variables which I added to create a code for line, whereas x and y coordinates were previously used for circle movements. I also remembered to assign  the variables to 0 prior to setup part. It worked! I quickly moved the background from draw part to setup so the dot converted to continuous line. It was controllable and fun to use this code. 

import processing.serial.*;
import osteele.processing.SerialRecord.*;
Serial serialPort;
SerialRecord serialRecord;
float x2 = 0;
float y2 = 0;
void setup() {
  size(500, 500);
  String serialPortName = SerialUtils.findArduinoPort();
  serialPort = new Serial(this, serialPortName, 9600);
  // If the Arduino sketch sends a different number of values, modify the number
  // `2` on the next line to match the number of values that it sends.
  serialRecord = new SerialRecord(this, serialPort, 2);
  background(0);
}
void draw() {
  serialRecord.read();
  int value1 = serialRecord.values[0];
  int value2 = serialRecord.values[1];
  float x1 = map(value1, 0, 1023, 0, width);
  float y1 = map(value2, 0, 1023, 0, height);
  stroke(255);
  line(x2, y2, x1, y1);
  x2 = x1;
  y2 = y1;
} 

Task #2

First, I wrote the code for ball and then merged it into the example code for receiving multiple values. I fastly connected the servo motors and started to charge the code. But then my laptop broke. It was awful, it was reloading every time I tried to write a sketch and all the code was deleting ecvery time. However, this task was in pairs, so, fortunately, I was able to work with my partner on her laptop. She alslo taught me one interesting concept of acceleration. I previously used framecount, speed functions, and x=x+1 speed. Acceleration is much more convinient to use.  We added servo to the code. And started to connect the servo recived values with the ball. We wrote the code, but it seemed that there were some troubles with it. First, we tried to debug it by ourselves, but were not able to find any mistakes. Professor helped us. The problem was, if I understood right, that in this library we can not use -1. So we changed it. And the code became great. It was working according to our expectations and the task.  All the steps which we made can be seen in the code:

#include "SerialRecord.h"
#include 

// Change this number to the number of values you want to receive
SerialRecord reader(1);
Servo myservo;
Servo myservo2;
int pos = 0;


void setup() {
  Serial.begin(9600);
  myservo.attach(9);
  myservo2.attach(10);
}

void loop() {
  if (reader.read()) {
  if (reader[0] == 2) {
      myservo.write(180);
      delay(100);
      myservo.write(0);
  } else if (reader[0] == 1) {
      myservo2.write(180);
      delay(100);
      myservo2.write(0);
  }
  }
  //delay(20);
} 

Recitation 7: Neopixel Music Visualization


For the start of recitation we needed to download all neseccary libraries and to connect the neopixel strip. It was easy enough for me. For the second task we used the codes which were wrote in class and tried them. Accidently, I forgot to close the Arduino IDE programm, so nothing worked. Now I learned this lesson. read instructions more careful.

For the third task, we needed to add music. It was fun to choose song in my native language. Some people including me had troubles with playing this music. I converted the file to aiff format and tryied some variations of where to put the file. Finally, Professor helped us to treplace the music file, so it all worked pretty good.

For the second step at first I added just some simple rectangles which were working by the same mechanism as the circle in the code from class. Later, I wanted to try different visualisation, so I added the change of colors according to the volume. I mapped volume with the color. 

For the next task, I added some more color modifications with the use of millis(). I analyzed the output information on the serial monitor and the numbers helped me to get to know which of them to use as starting points. 

For the last step, I just added some more variations. And tried to play with the code and music and lights. 

import processing.serial.*;
import osteele.processing.SerialRecord.*;

Serial serialPort;
SerialRecord serialRecord;

int W;         //width of the tiles
int NUM = 26;  //amount of pixels
int[] r = new int[NUM]; //red of each tile
int[] g = new int[NUM]; //red of each tile
int[] b = new int[NUM]; //red of each tile

import processing.sound.*;


SoundFile sample;
Amplitude analysis;

void setup() {
  size(640, 480);
  // load and play a sound file in a loop
  sample = new SoundFile(this, "million.aiff.aiff");
  sample.loop();

  // create the Amplitude analysis object
  analysis = new Amplitude(this);
  // analyze the playing sound file
  analysis.input(sample);
  
  W = width/NUM;


  // You can use this syntax and change COM3 for your serial port
  // printArray(Serial.list());
  // serialPort = new Serial(this, "COM3", 9600);
  // in MacOS it looks like "/dev/cu.usbmodem1101"
  //or you can try to use this instead:
  
  String serialPortName = SerialUtils.findArduinoPort();
  serialPort = new Serial(this, serialPortName, 9600);
  serialRecord = new SerialRecord(this, serialPort, 4);
  serialRecord.logToCanvas(false);
  rectMode(CENTER);

}

void draw() {
  println(analysis.analyze());
  noStroke();
  fill(255, 0, 150);
  
  //long t = millis();
  //if(t < 2000){
  //  background(0);
  //}
  //else if (t < 4000){ // background(255, 0,0); //} //else { // background(0, 255, 0); //} // analyze the audio for its volume level float volume = analysis.analyze(); if (volume > 0.4 && volume < 0.7){ background(0, 0, 255); } else if (volume > 0.7){
    background(255, 0, 0);
  }
  else {
    background(255);
  }
  
  
  float x = map( volume, 0, 1, 0, 255);
  // volume is a number between 0.0 and 1.0
  // map the volume value to a useful scale
  
  float diameter = map(volume, 0, 1, 0, width);
  // draw a circle based on the microphone amplitude (volume)
  float colorOfCircle = map(volume, 0, 1, 0, 255);
  fill(colorOfCircle);
  circle(width/2, height/2,diameter);
  
  
    for (int i=0; i<NUM; i ++) {
    fill(r[i], g[i], b[i]);
    rect(i * W + W/2, height/2, 10, 10);

}

if (mousePressed == true) { 
    int n = floor(constrain(mouseX/W , 0, NUM-1));

    r[n] = floor(x);
    g[n] = floor(x);
    b[n] = floor(x);

    serialRecord.values[0] = n;     // which pixel we change (0-59)
    serialRecord.values[1] = r[n];  // how much red (0-255)
    serialRecord.values[2] = g[n];  // how much green (0-255)
    serialRecord.values[3] = b[n];  // how much blue (0-255)
    serialRecord.send();            // send it!
  }}


Final Project: Research

 
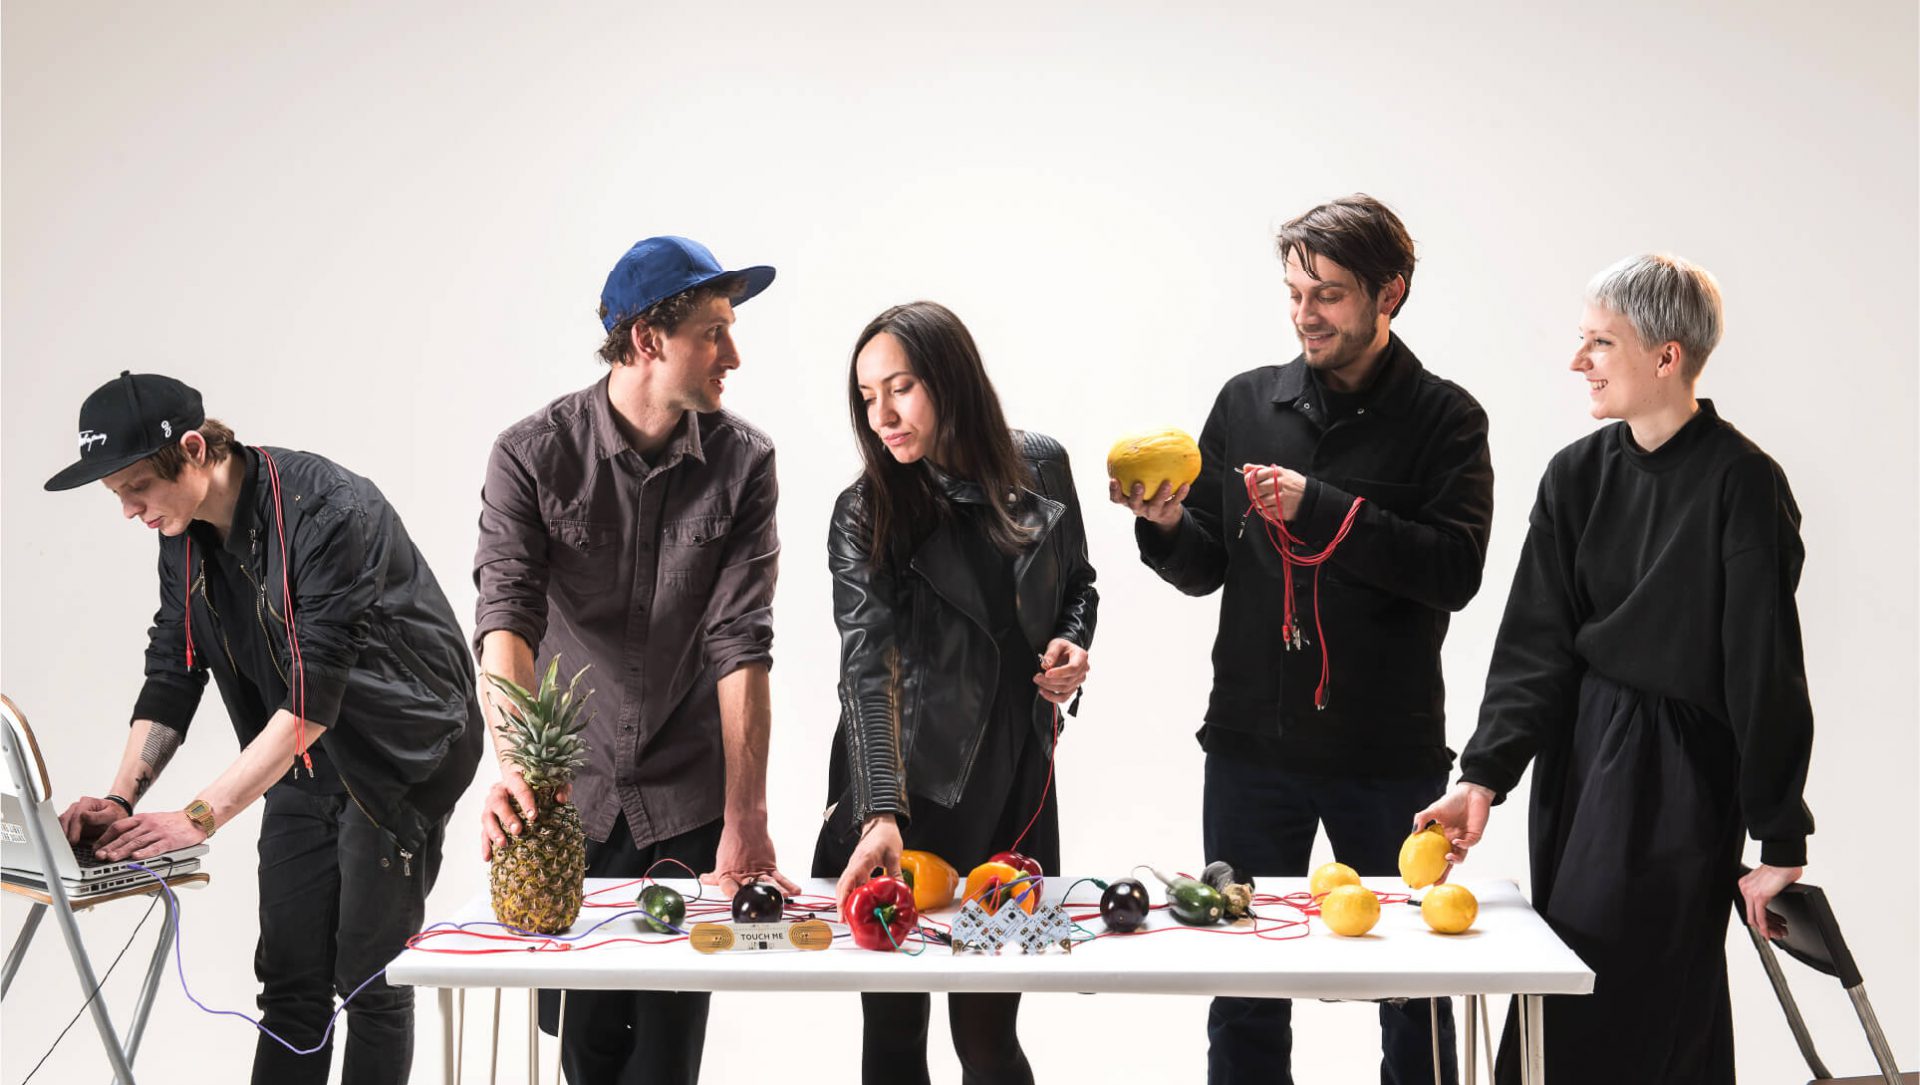
       There are many factors that contribute to the success of interactive project. When I was defining what interaction means I pointed out that exchange of actions should be jot just between project and people, but also between individuals. It is meaningful for me to help people start the dialogue and to immerse them into the idea of my project. Playtronica studio was founded by Sasha Pas. It is a creative interactive project which provides people with the opportunity to play music not just on musical instruments, but on every thing in everyday life. The goal of the project was to “achieve a deeper understanding between humans and ideas, to extend sensorium”. Invented devices can turn anything into musical controller. In gives people the opportunity to use a new way of communication and interaction. It is also meaningful for me that this project is more often using by a group of people who are interacting with each other trying to make a music of individual sounds. This project conveys meaning – it is about breaking boarders between life and music, between possible and impossible. It unites people and make them research and develop their own creativity. It can completely change the music industry and our perception of music and sounds.
Playtronica - team
      The second project I researched is also connected with music industry. It maybe be like this, because art and especially music connects people, so these project have bigger probability to align with my definition of interaction. Monogram company created the Creative Console. Monogram's Creative Controle is based on a user-centered design approachIt is the device which helps people to work on the computers or other devices. It helps to establish the interaction between people and computers and also makes it easier to create something. It is suitable for people of all professions, but it would most fit creators such as designers, producers, photographers and etc… This device can change form and shape due to the wishes and needs of individuals. The interaction here is not direct or clear, but creating something with the use of this device will push people forward in artwork, and art connects people together how this console connects person with the computer and helps to easier convey the ideas from mind to computer and to reality. The further development of project’s actions should be “determined by audience”( Ernest Edmonds 16).
        One of the most important factors of successful interactive project is that your creation and presentation should involve “active audience experience” (Ernest Edmonds 16). Additionally, I think that design really matters. Your project should look good and fancy, or if you need to create some creepy atmosphere it should allocate with your goal. “Does my challenge drive toward ultimate impact, allow for a variety of solutions, and take into account context?”(Field Guide to Human Centered Design, IDEO) – this is the question that every desigher should ask himself prior rto start making a project. In this question we also can find useful concepts and parts of definition of the succesful interaction project. Successful project in ideal should push forward the development of other projects in the industry and gave opportunities for further development, it should inspire. Design also serves for people to win in this industry’s “intense competition to create new digital products that monopolise people’s attention ( Schumpeter – The Economist). Every dedicated creator should strive to achieve this goal to change people’s minds and contribute to the development of the industry. Successful interactive experience includes many important factors.
 

Recitation 6: Animating an Interactive Poster


For my 6th recitation’s poster I chose the eyes topic. It pursues people to watch the show and looks pretty good. Also it contains three different basic shapes and can be modified for different tasks. For the begginer as me, it seemed to be a good option. I started with doing the 0mechanical part as functions and parametrs and later added decorations as colors and background. 

For the first task I made this code :

float a = 0;
int b = 0;
int speed = 5;
PFont f;


void setup() {
size(1024, 768); 
background(#F7FA7E); 
 f = createFont("Arial",32,true);
int gridSize = 40;
for (int x = gridSize; x <= width - gridSize; x += gridSize) {
  for (int y = gridSize; y <= height - gridSize; y += gridSize) { noStroke(); fill(#FFCF6F); rect(x-1, y-1, 3, 3); stroke(255, 100); line(x, y, width/2, height/2); } }//background } void draw() { fill(random(0), random(200), random(100)); ellipse(110, b, 50, 50); a = a+speed; if (a>width){speed*= -1;}
 if (a<0){speed *= -1;} b = b+speed; if (b>height) {speed *=-1;}
  if (b<0){speed *=-1;}//moving circle fill(random(0), random(200), random(100)); rect(890, b, 50, 50); a = a+speed; if (a>width){speed*= -1;}
 if (a<0){speed *= -1;} b = b+speed; if (b>height) {speed *=-1;}
  if (b<0){speed *=-1;}//moving rect
  
mytext();
 Eyes();
 }
 
  void Eyes() {
  fill(255);
  ellipse(480, 400, 50, 150);
  ellipse(550, 400, 50, 150);
  
  fill(0);
  circle(480, 370, 40);
  circle(550,370, 40);
  fill(255);
  rect(480,359,5,5);
  rect(550,359,5,5);
  
  //eyes
  }
  
  //make eyes, change font, decorate
  
 void mytext(){
   stroke(175);


  textFont(f);
  fill(0);

  textAlign(CENTER);
  text("IMA Fall 22 End-Of-Semester Show",width/2,160);

  textAlign(LEFT);
  text("                   8th floor",width/2,200);

  textAlign(RIGHT);
  text("December 16, 6-8pm    ",width/2,240);} 


The result: 

For the first task I increased the amount of eyes and made a pattern of them (ypou can the the pattern result in the third code combined with the drawing concept):

background (#FAFF76);
size(800,800);
int gridSize = 30;
for (int x = gridSize; x <= width - gridSize; x = x+60) {
  for (int y = gridSize; y <= height - gridSize; y = y+160) {
    fill(255);
  ellipse(x, y, 50, 100);
  ellipse(x, y, 50, 100);
  
  fill(0);
  circle(x, y, 40);
  circle(x,y, 40);
   fill(255);
  rect(x,y,5,5);
  rect(x,y,5,5);
  //eyes
  }} 

For the second task I made eyes to randomly appear on the screen with variour colors:

float a; float b; float c;
float x; float y;
PFont f;

void setup() {
size(1024, 768); 
background(#F7FA7E); 
 f = createFont("Arial",32,true);
}
void draw() {
  fill (255);
  rect(130, 90, 800, 200);
 
  mytext();
 Eyes();
 }
 
  void Eyes() {
  fill(255);
  x=random(1000);
  y=random(786);
  ellipse(x, y, 50, 150);
  ellipse(x+100, y, 50, 150);
  a=random(255);
  b=random(255);
  c=random(255);
  fill(a, b, c);
  circle(x, y, 40);
  circle(x+100,y, 40);
  fill(255);
  rect(x,y,5,5);
  rect(x+100,y,5,5);
  
  //eyes
  }
   void mytext(){
   stroke(175);


  textFont(f);
  fill(0);

  textAlign(CENTER);
  text("IMA Fall 22 End-Of-Semester Show",width/2,160);

  textAlign(LEFT);
  text("                   8th floor",width/2,200);

  textAlign(RIGHT);
  text("December 16, 6-8pm    ",width/2,240);}


The result :


For the third task I added the drawing concept on the pattern. You can draw with your mouse here by eyes and you can change the background to the random colors by pushing the keyboard:

float x; float y; float z;

void setup () {background (#FAFF76);
size(800,800);}
void draw() {


  Eyes();
  }
  void Eyes() {
 
 int gridSize = 30;
for (int x = gridSize; x <= width - gridSize; x = x+60) {
  for (int y = gridSize; y <= height - gridSize; y = y+160) {
  
    fill(255);
  ellipse(x, y, 50, 100);
  ellipse(x, y, 50, 100);
  
  fill(0);
  circle(x, y, 40);
  circle(x,y, 40);
   fill(255);
  rect(x,y,5,5);
  rect(x,y,5,5);
  //eyes
  //eyes
  }}


  Eyes(mouseX, mouseY);
  }
  void Eyes(int a, int b) {
 
 int gridSize = 30;
for (int x = gridSize; x <= width - gridSize; x = x+60) {
  for (int y = gridSize; y <= height - gridSize; y = y+160) {
  
    fill(255);
  ellipse(a, b, 50, 100);
  ellipse(a+100, b, 50, 100);
  
  fill(0);
  circle(a, b, 40);
  circle(a+100,b, 40);
   fill(255);
  rect(a,b,5,5);
  rect(a+100,b,5,5);
  //eyes
  //eyes
  }}}
  void keyPressed () {
    background(x,y,z);
    x=random(255);
     y=random(255);
      z=random(255);
  } 


Additionally, for the second and third task I added the text about the event to correlate together all the parts of homework. There were not much problems that I needed to solve. The main of them consist of that I know many concepts and ways to write codes, but I realised that I don’t know which of my lines are functions and which of them are parametrs. Also, we covered really small amout of coding in class, just the basics, so I needed to do a deep research and self-educate to use more difficult concepts in work. For all of the tasks I started to do the mechanical part of coding and later tried to add the decorations and colors. I am not good at design yet, also because of the limited ampunt of time which is divided for these recitations, but the main point of them is to get to know how to code. And with the coding experiencw later I will be able to develop my designing abilities on the basis of coding knoweledge.