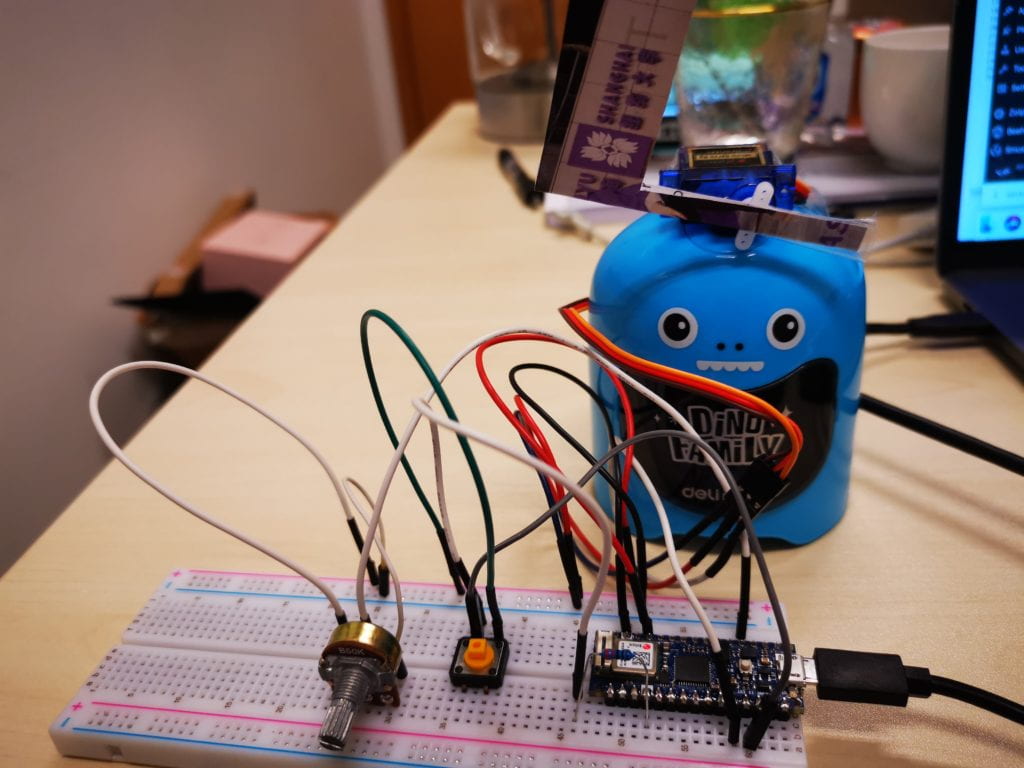
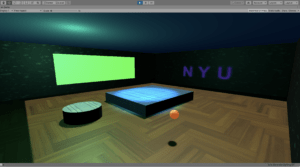
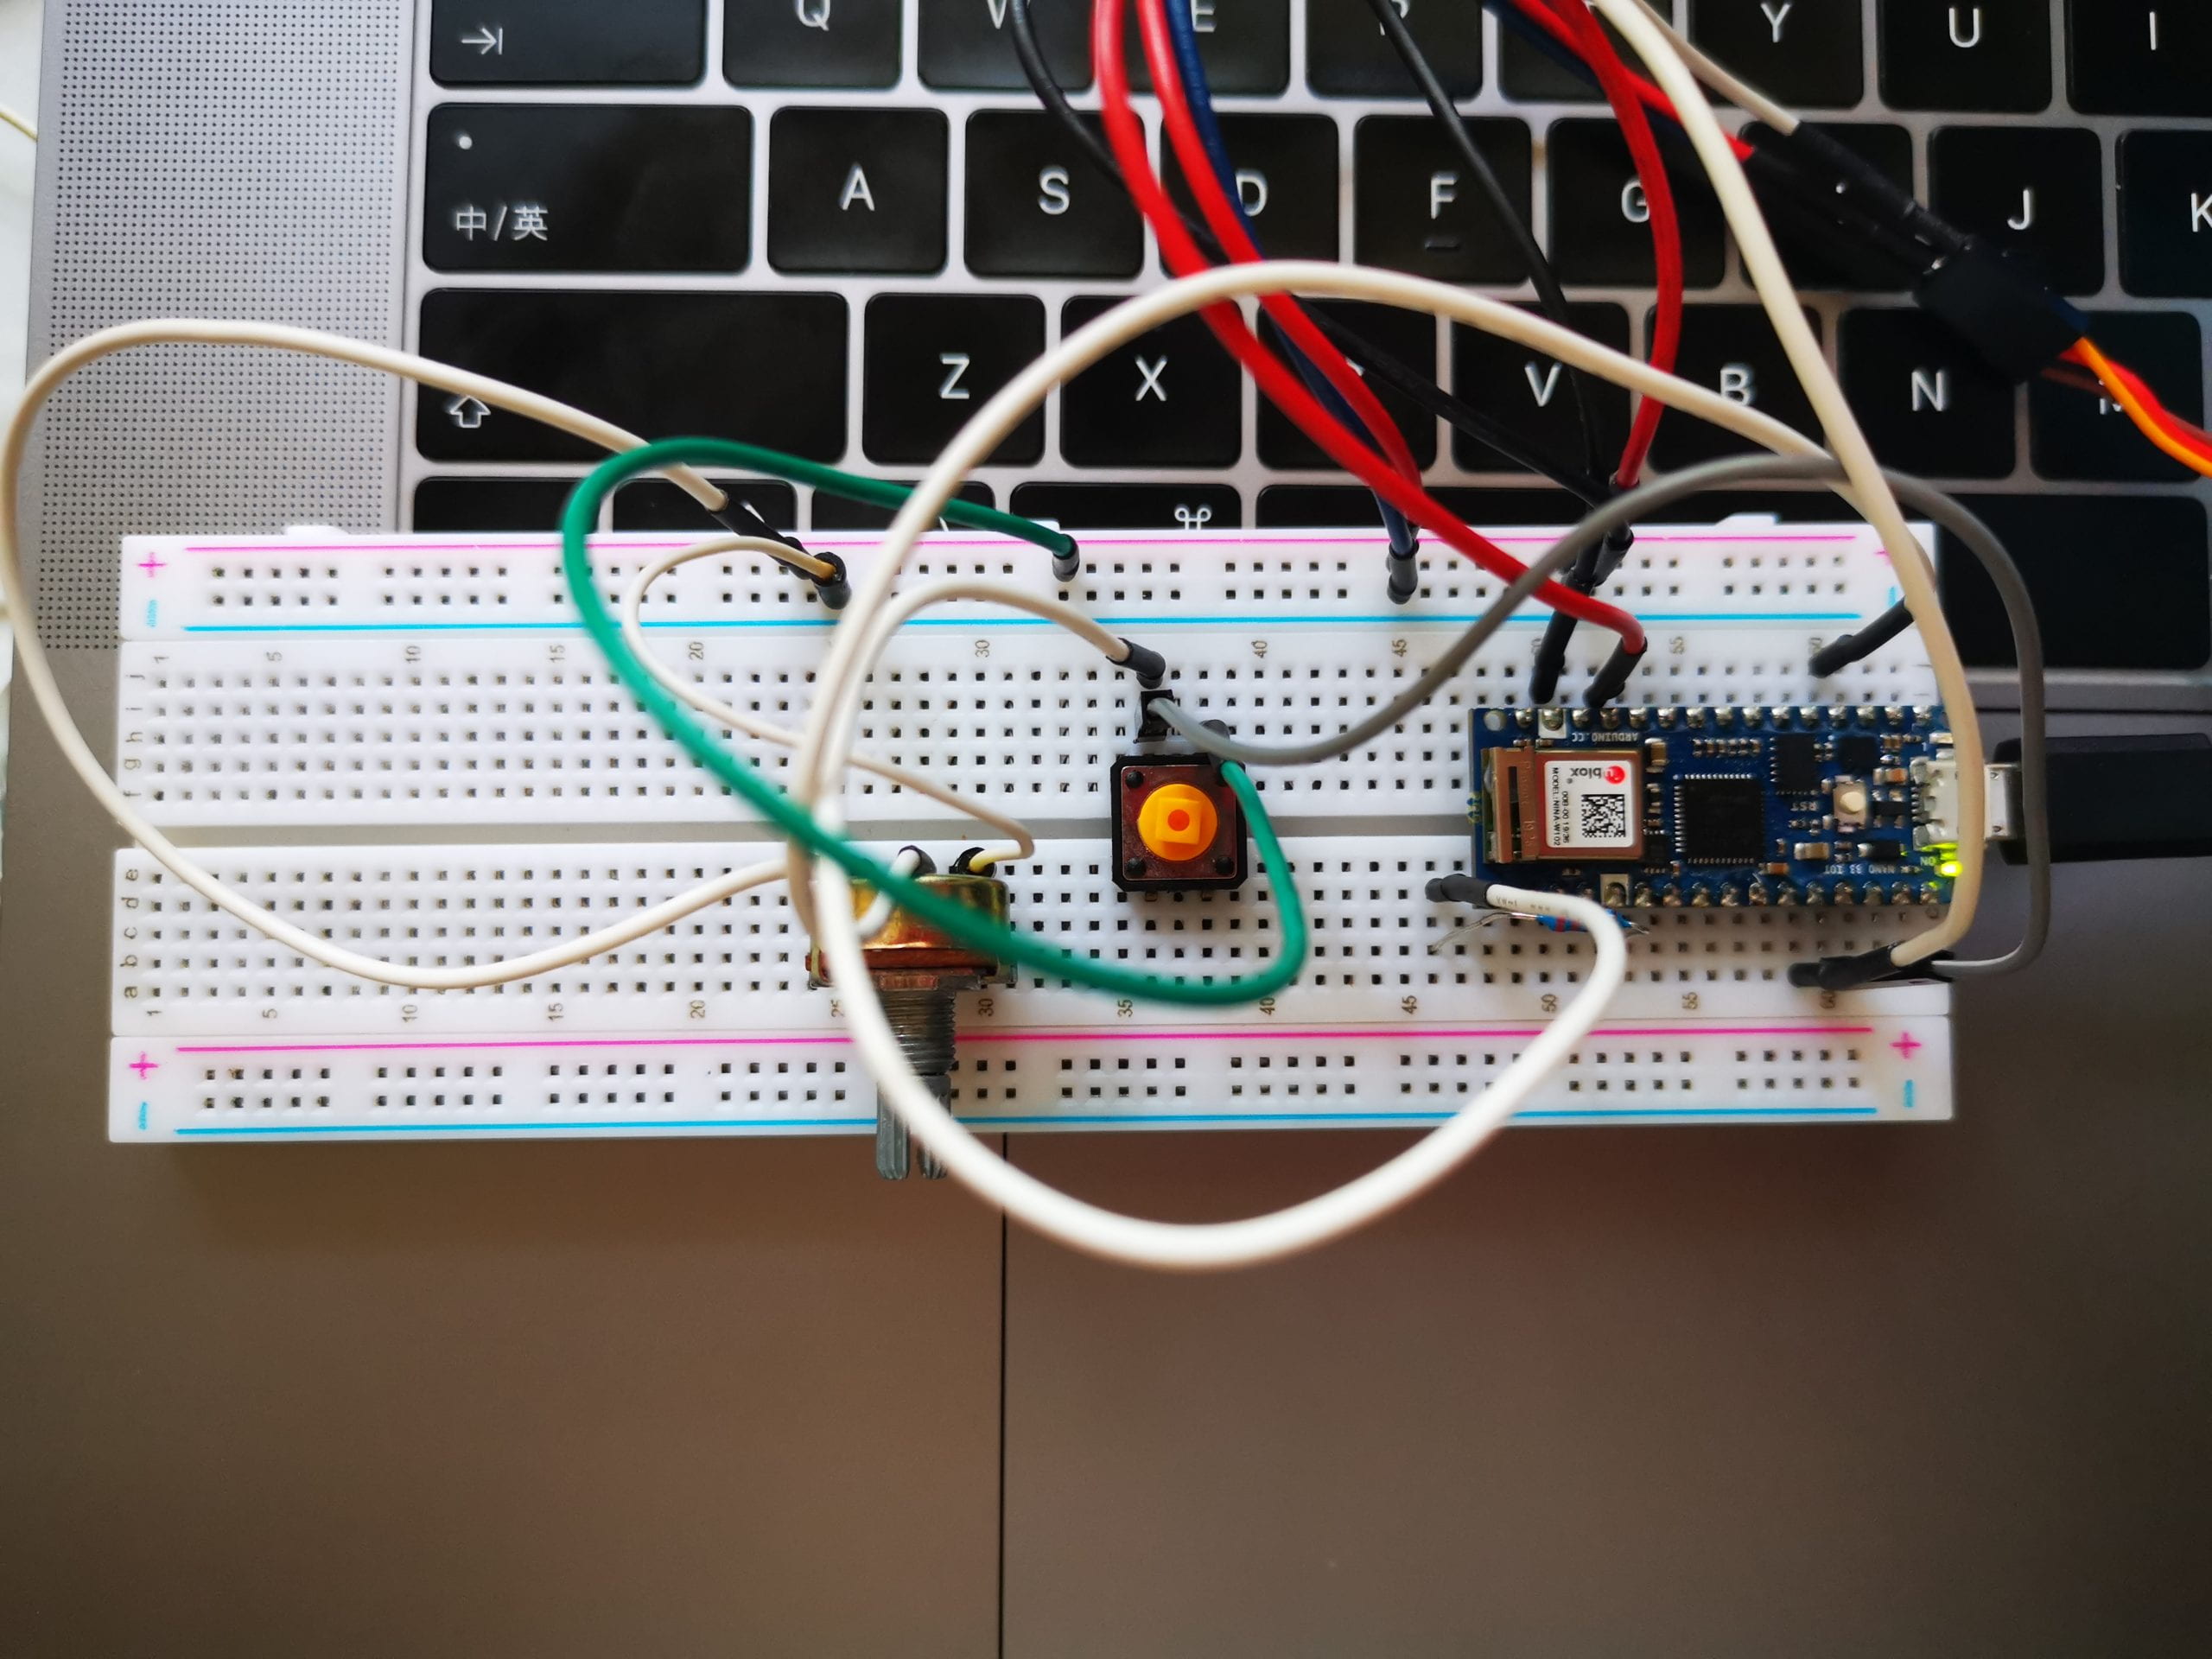
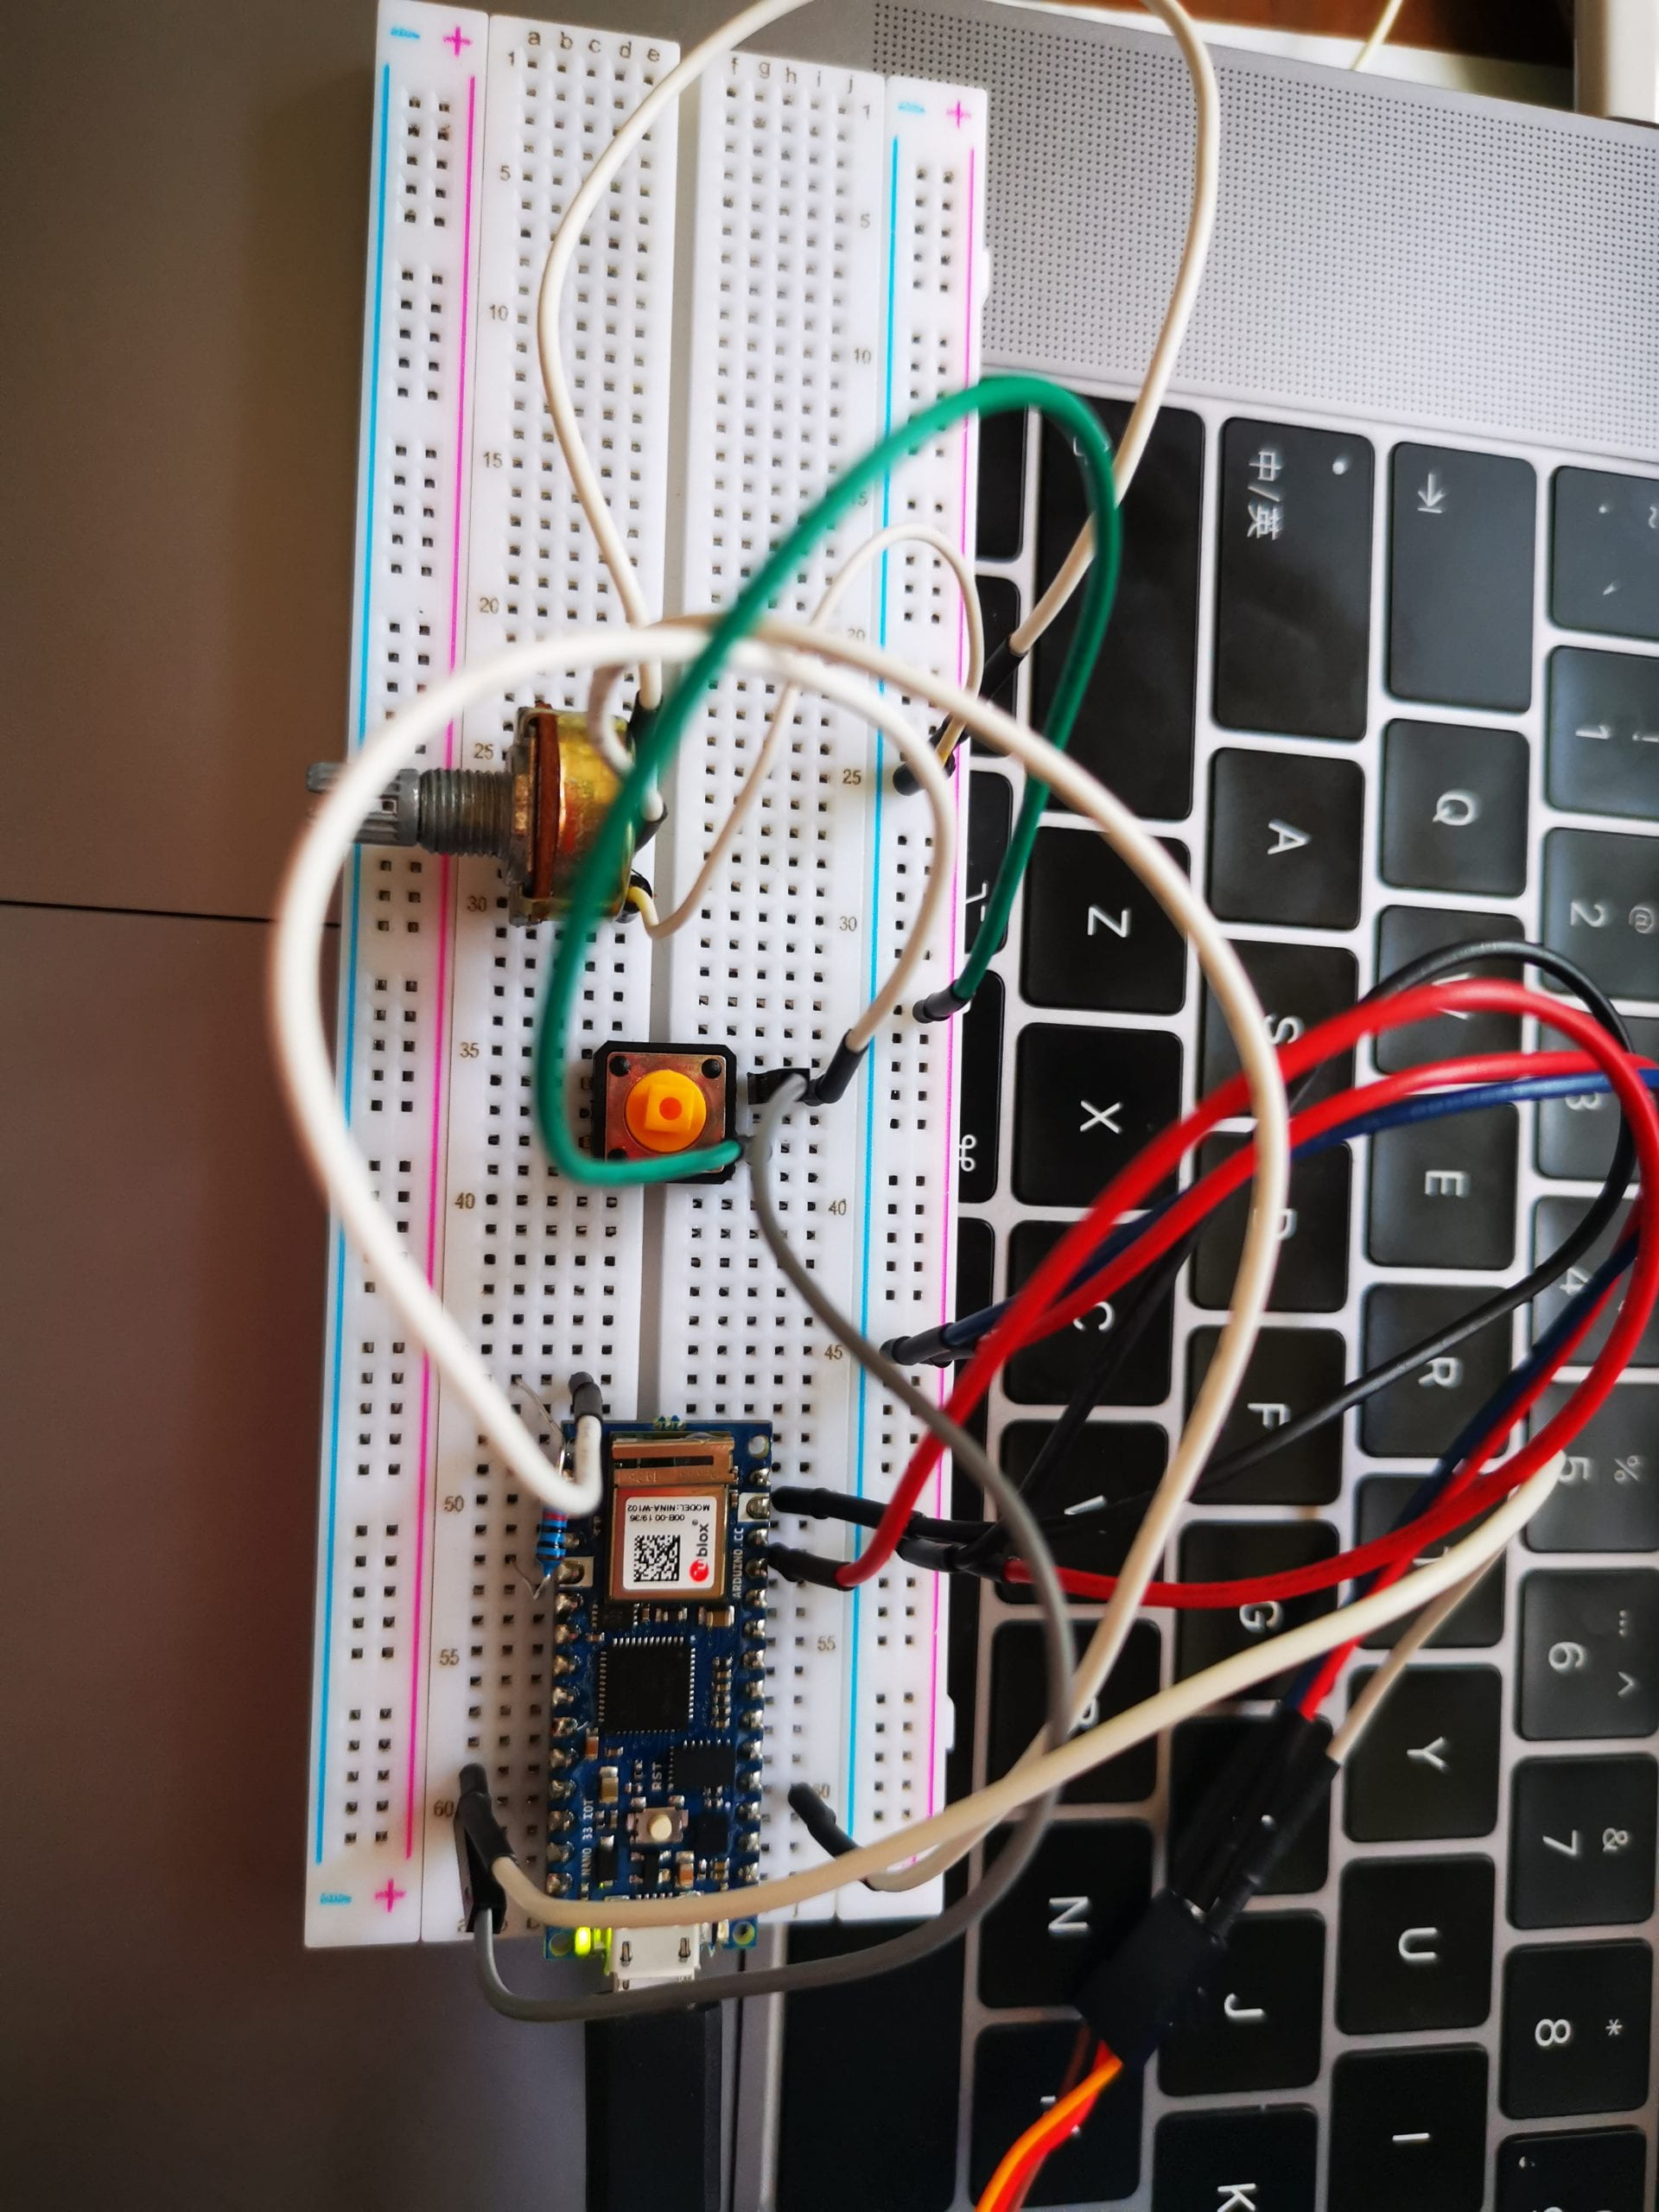
For the Final Project, I have made a game with two external interface controllers Potentiometer and Push Button. The Potentiometer can control the RGB color of Ball via turning around, and Push Button can change the Ball color to White when pushing on.
The rule behind the game I designed is you must keep the ball as the same color with the coming cube, if the same the Servo will be triggered and move one time as well as score text displays on the left core of the game scene will ++. Else, the Servo will not be triggered and score will be -2. I have setting up a Game Bonus, that is the Push Button. Once you push the button, the color of the ball will turn to be white color and the system will recognize it’s always the same color as the coming cubes. That means whenever you push the button && the coming cube collides the ball, the score displayed will always ++ and triggers the Servo moving one time.
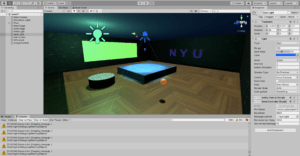
Documentation of Coding:
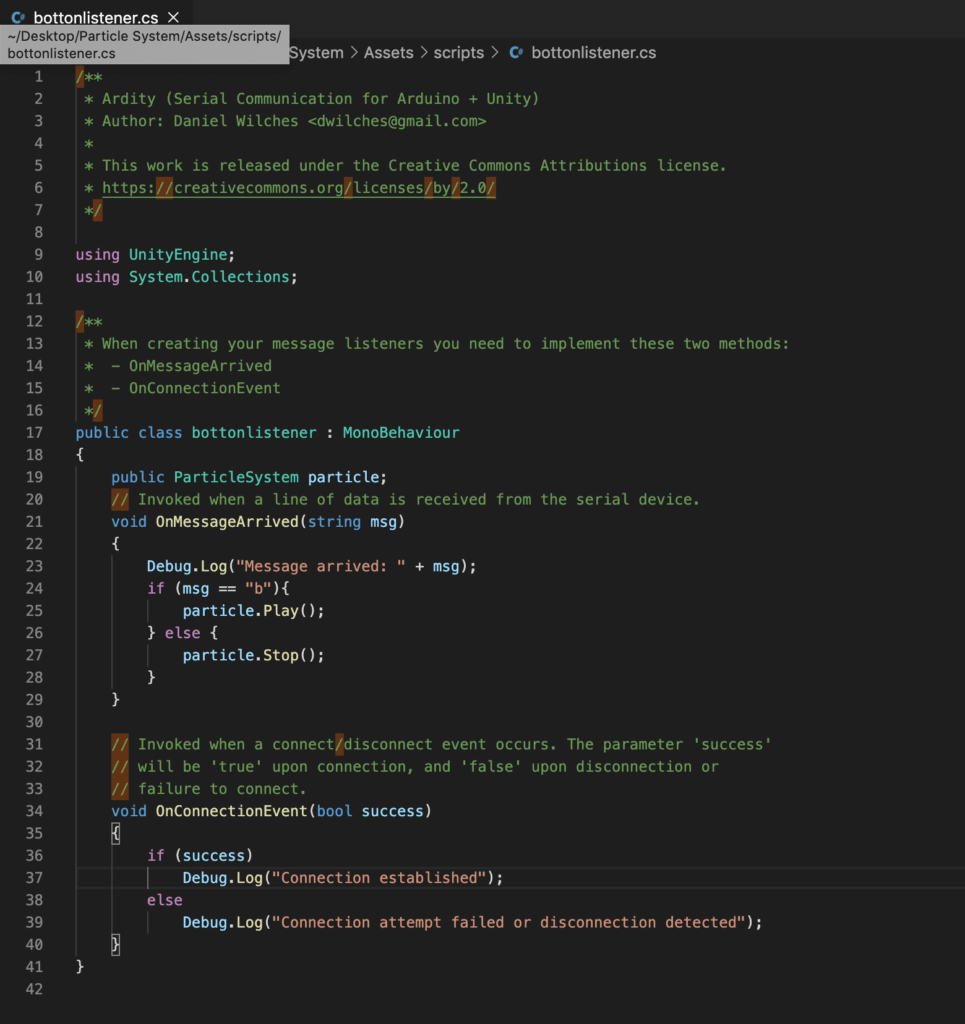
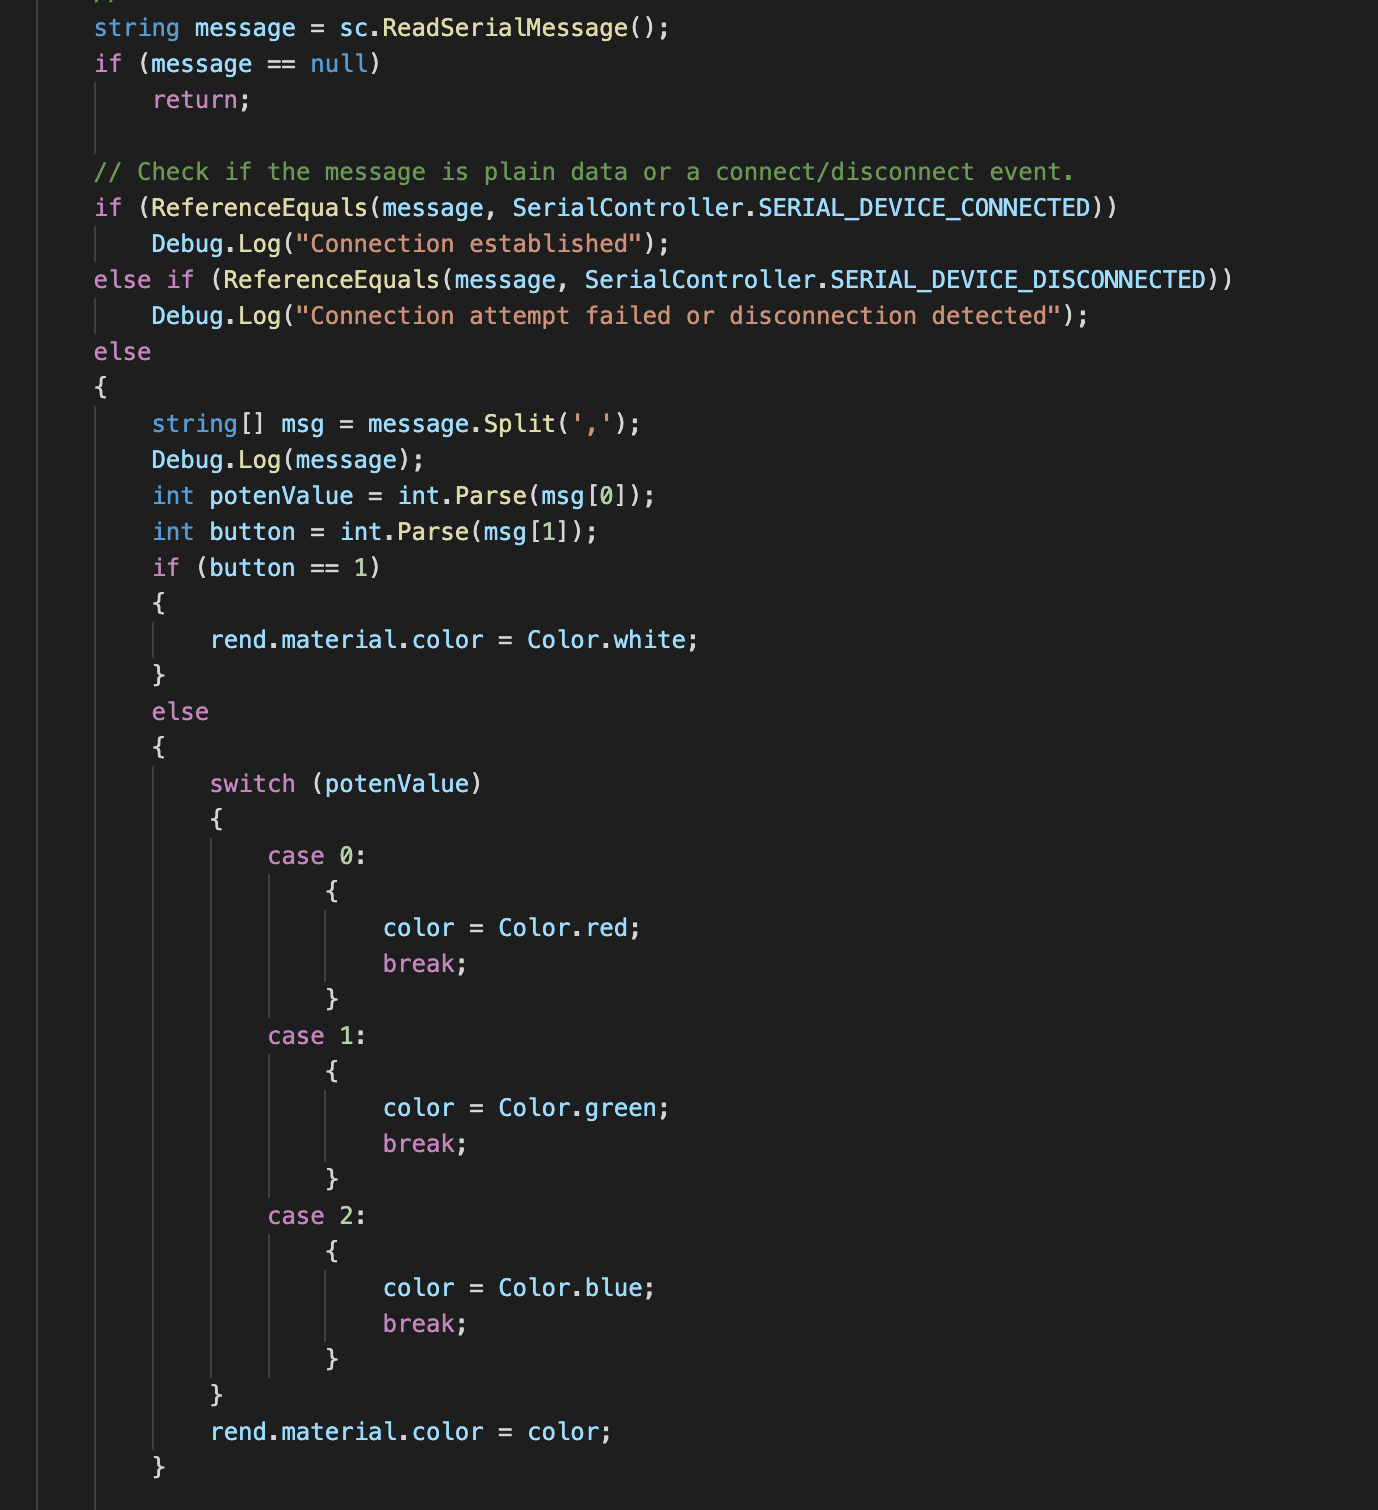
Trigger Code: This is the code in Unity which connected to Serial.read from Arduino side, as ‘MyListener’ we created for pervious projects. Of course with the bridge of Ardity.
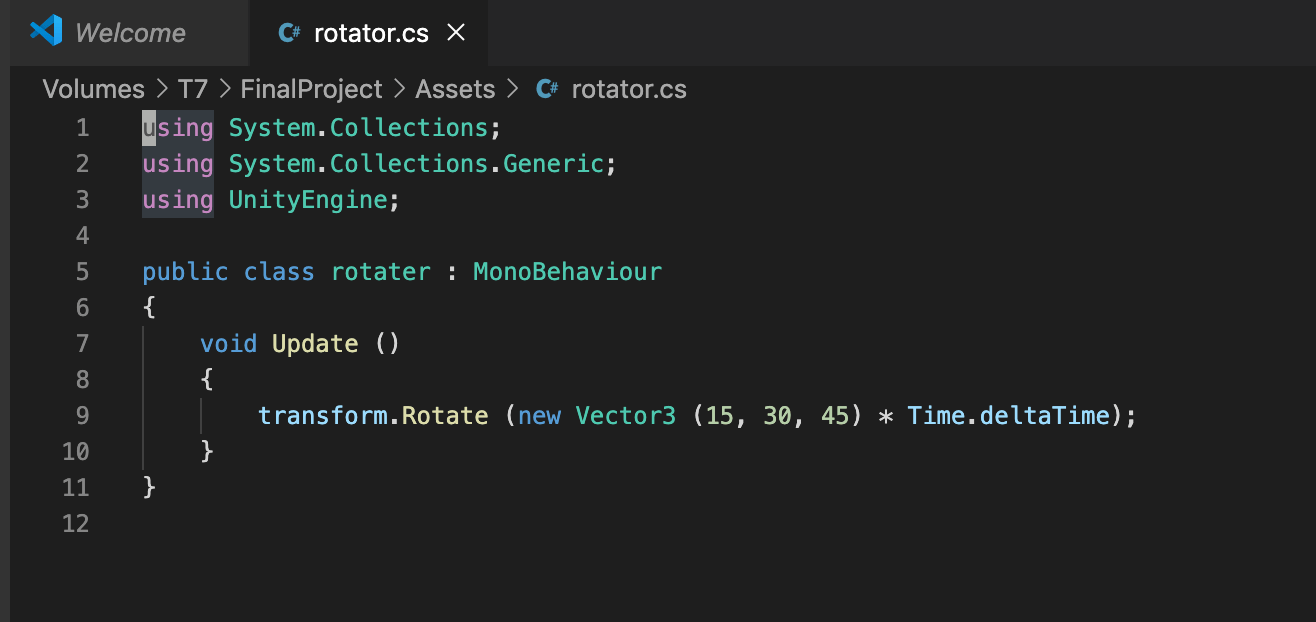
Rotator Code: This code makes the coming cubes self-rotated.
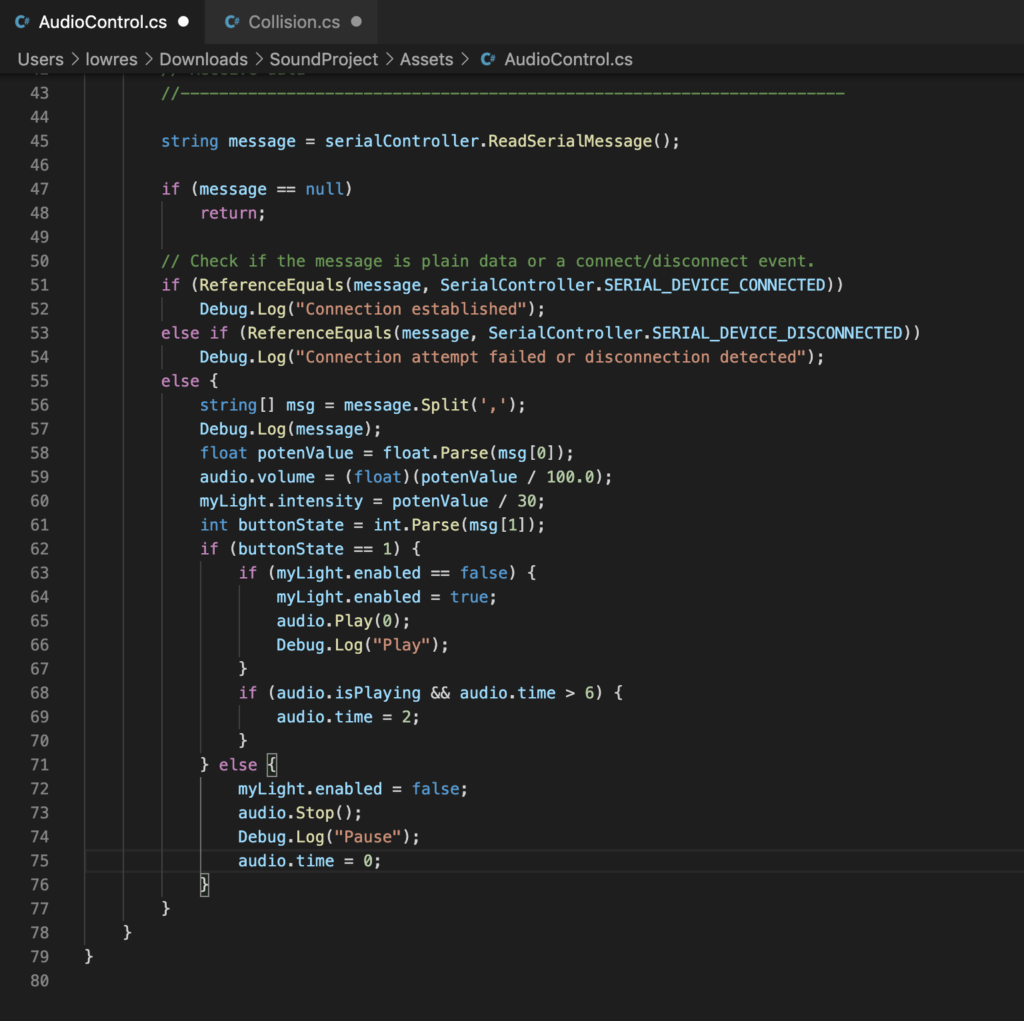
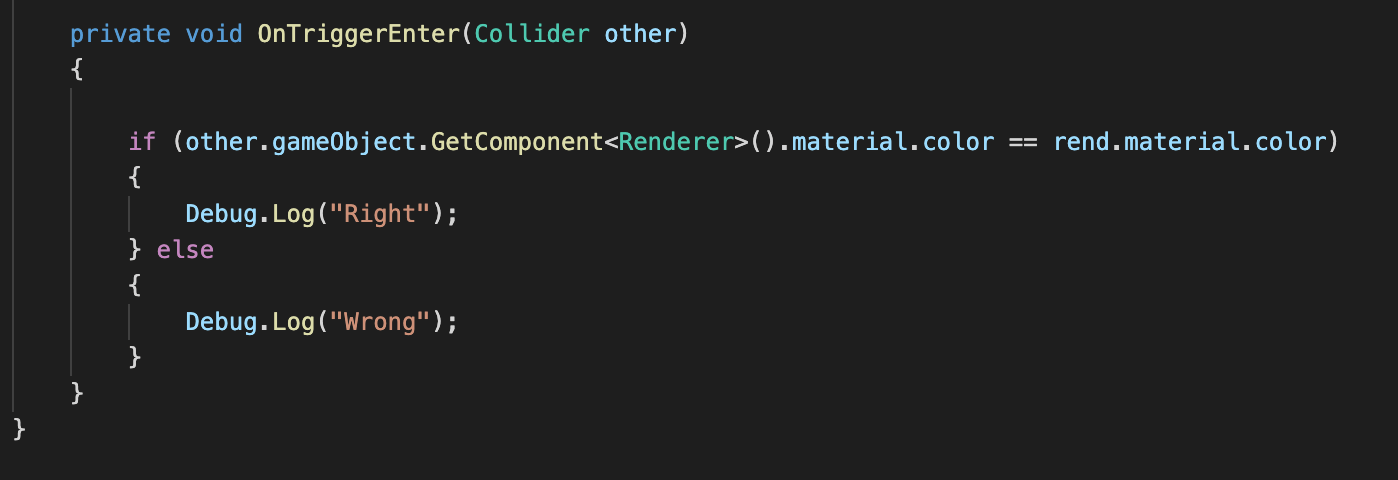
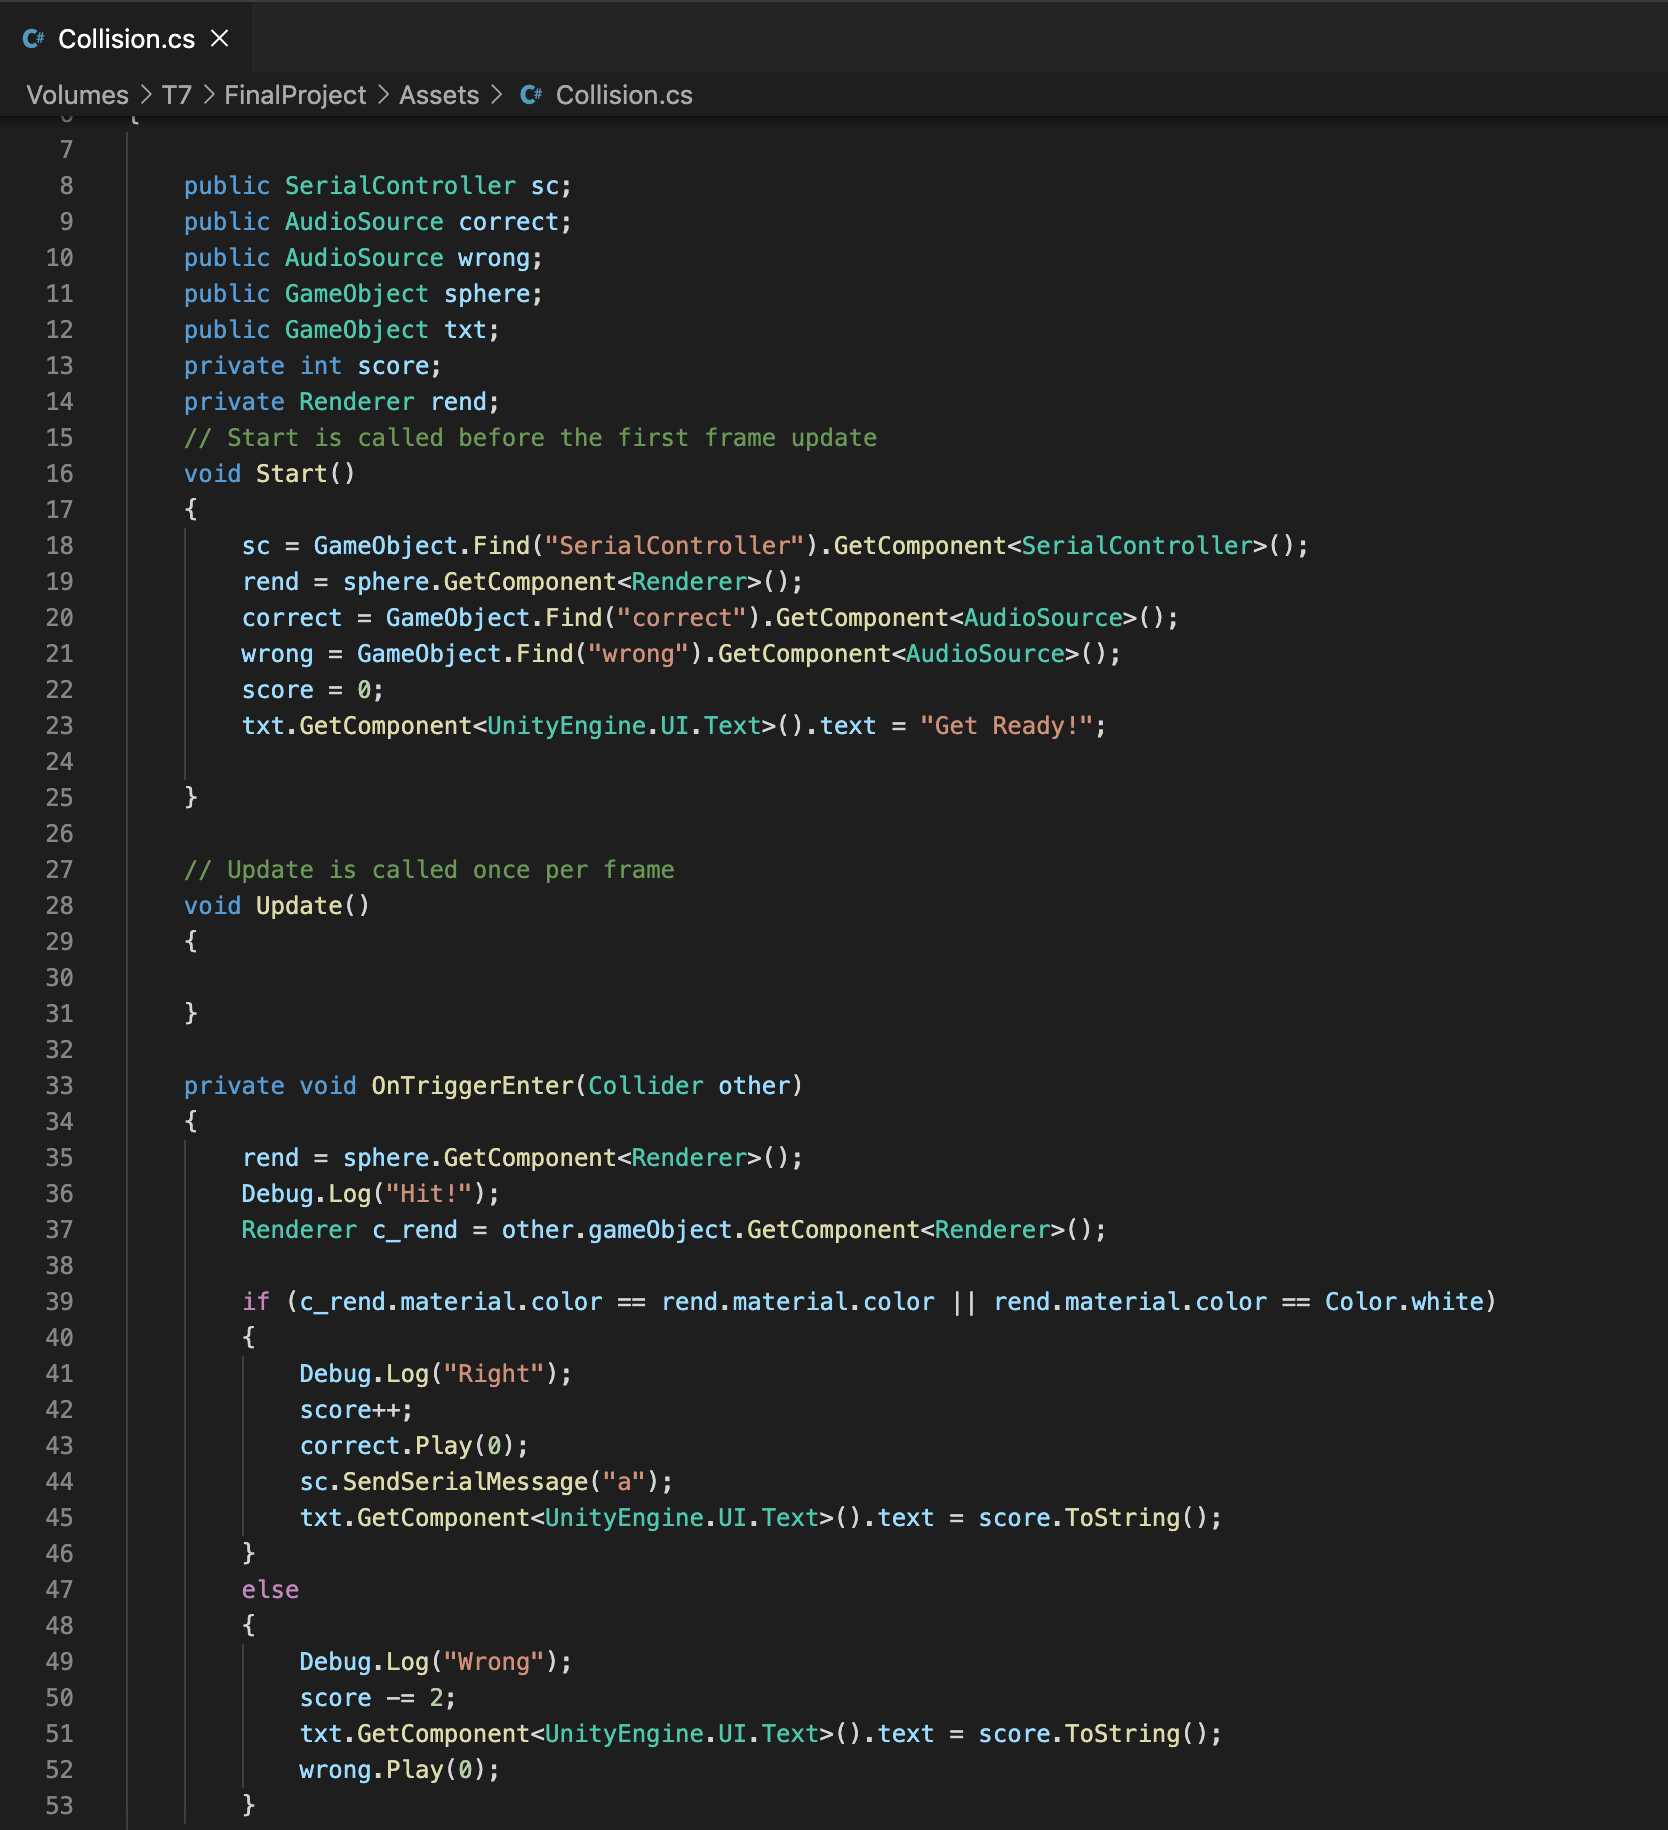
Collision Code: Do the judgement: if (c_rend.material.color == rend.material.color || rend.material.color == Color.white)
Debug.Log(“Right”);
score++;
correct.Play(0);
sc.SendSerialMessage(“a”);
txt.GetComponent<UnityEngine.UI.Text>().text = score.ToString();
else
Debug.Log(“Wrong”);
score -= 2;
i.e. While ‘Ball color is the same as coming Cube color || Ball Color == White’, score displayed will ++, else will -2. This code will identify if the colors are the same when collision and get feedback the result to the score.
Cube Code: It will lead the Cubes walking through the path with random RGB color, and destroy itself once the position pass the Ball. 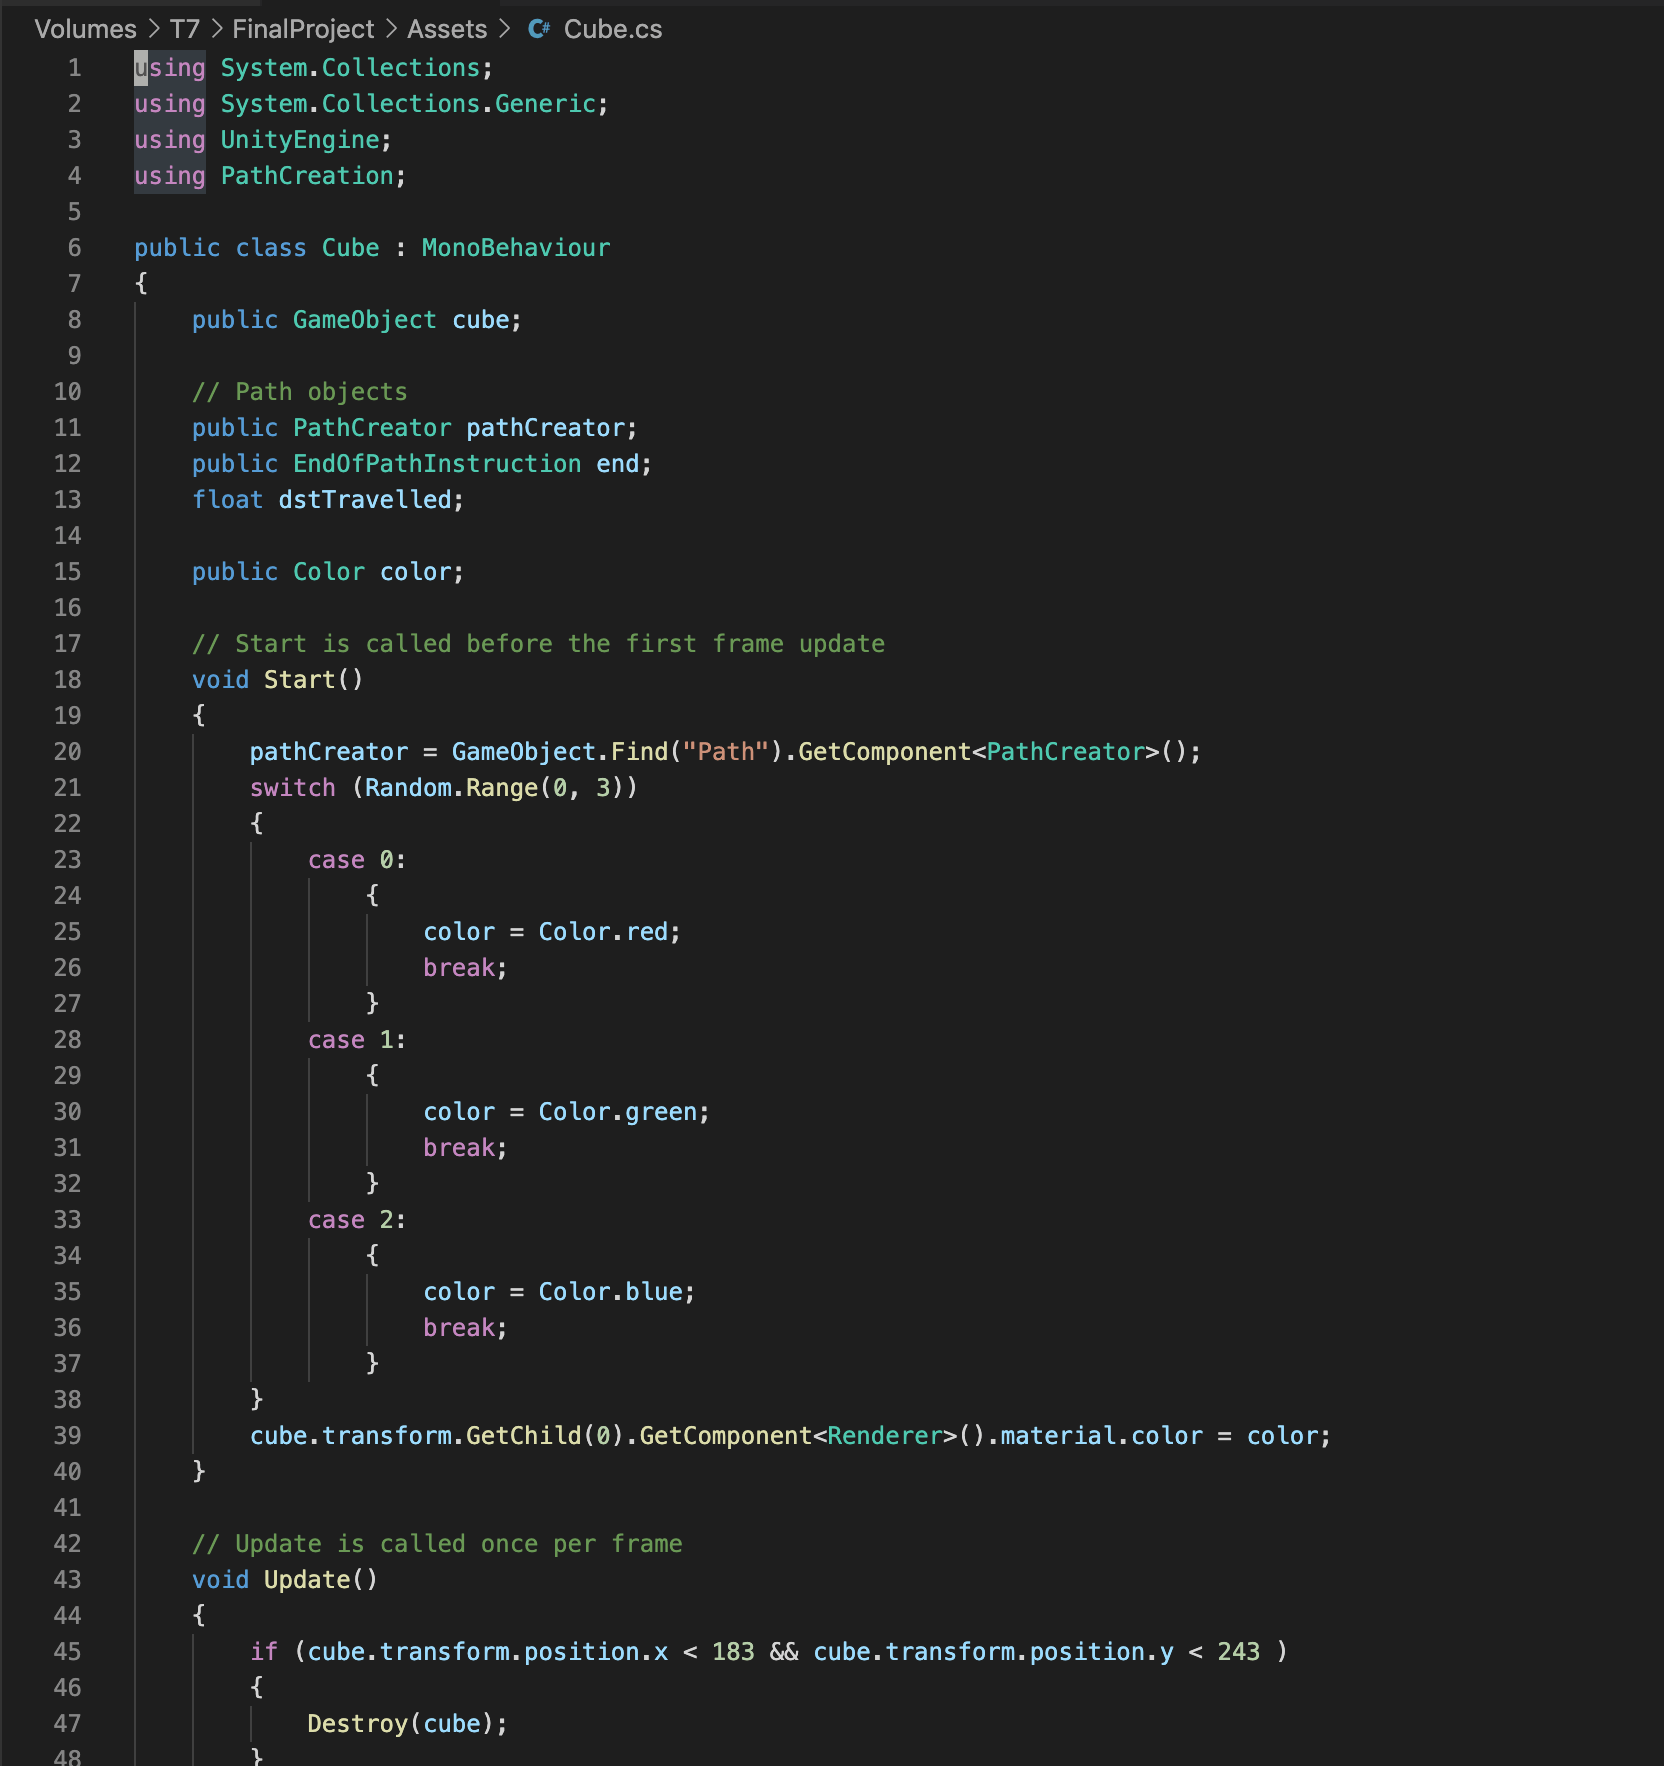
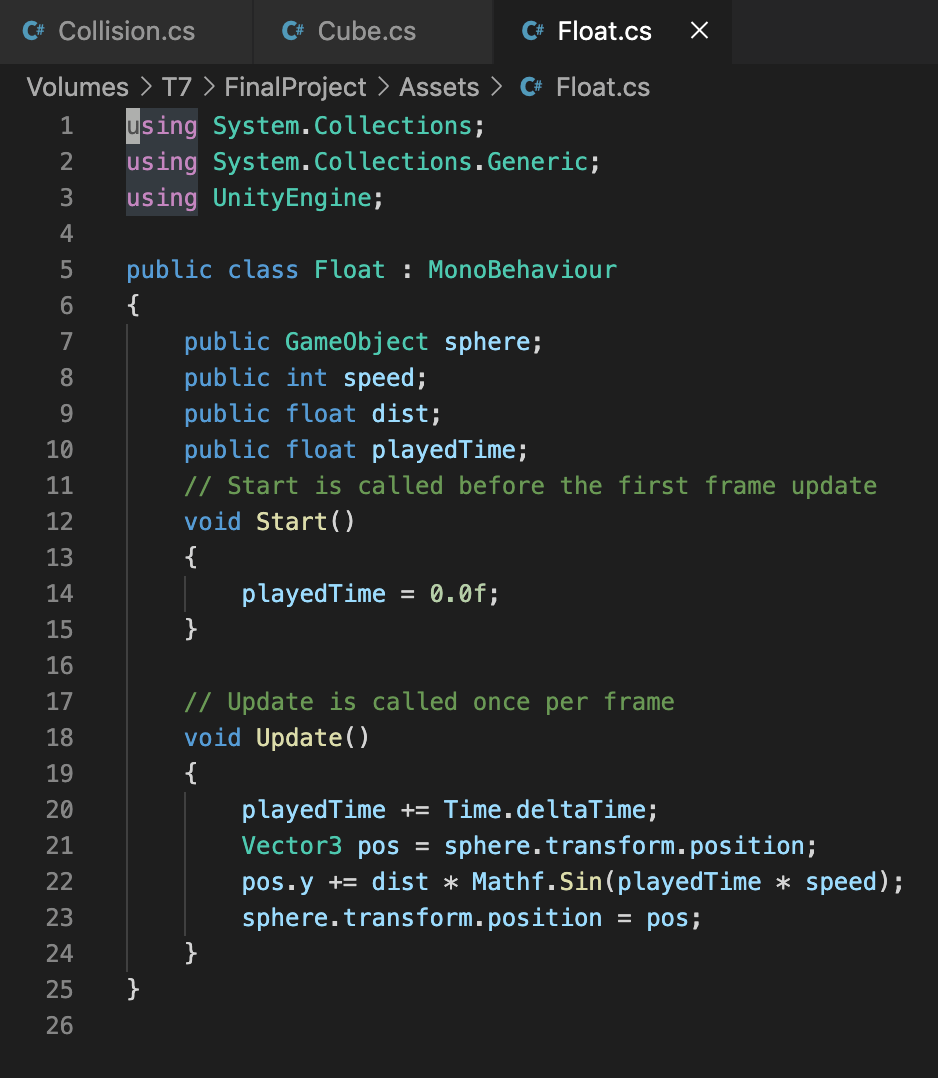
Float Code: That’s the code which makes the Ball always move up and down.
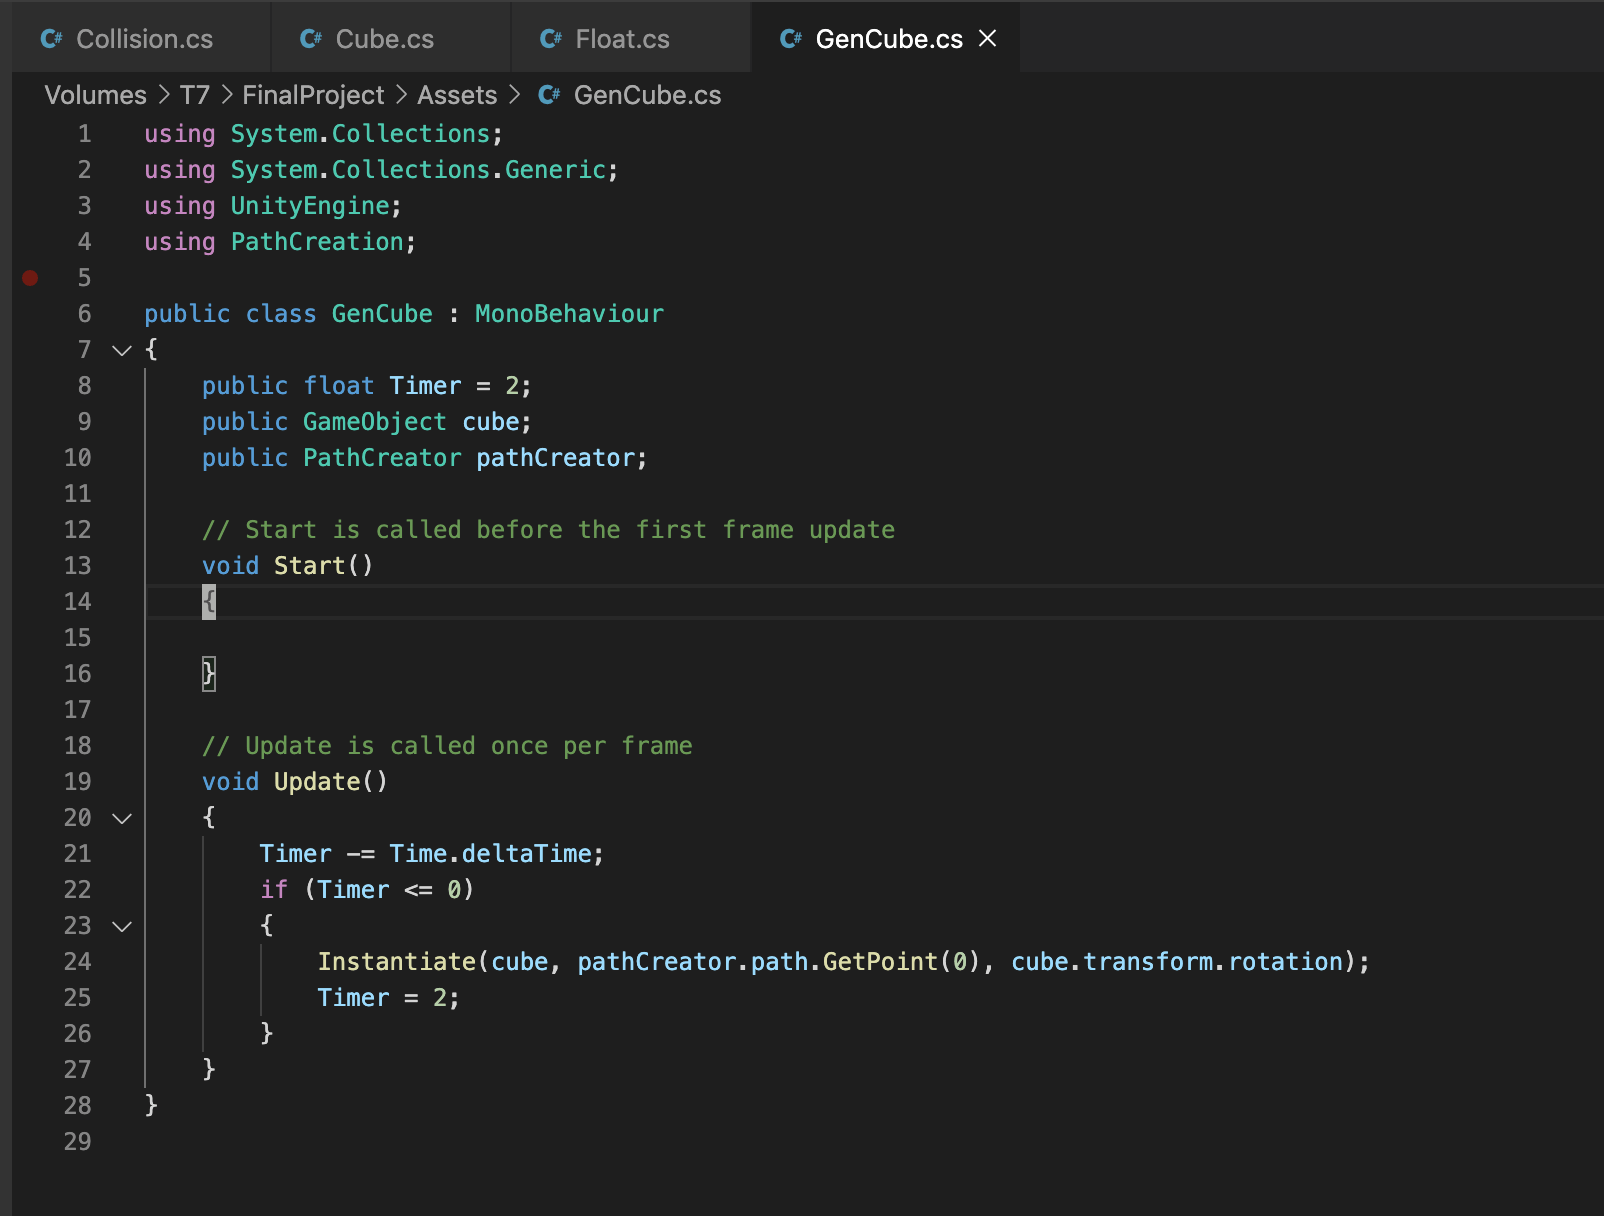
GenCube Code: That’s the code to create Cube automatically with settled timeline at the beginning of the path in the scene.
I have defined a Variable called ‘Timer’ and initial it via code of ‘float Timer = 2’
Whenever ‘Timer -= Time.deltaTime, Timer <= 0’, Cube will be created automatically. And then reset/redefine the Timer back to 2. Put this code in Update() to make the loop happened.
Because every picture in the game is being put together frame by frame. Making the ‘Timer’ minus ‘the time of each frame of the game'(Time.deltaTime) here, it will be equal to around how long the time has passed.
So the whole code means every time when 2 seconds passed, the Cube will be created automatically at the beginning of the path.
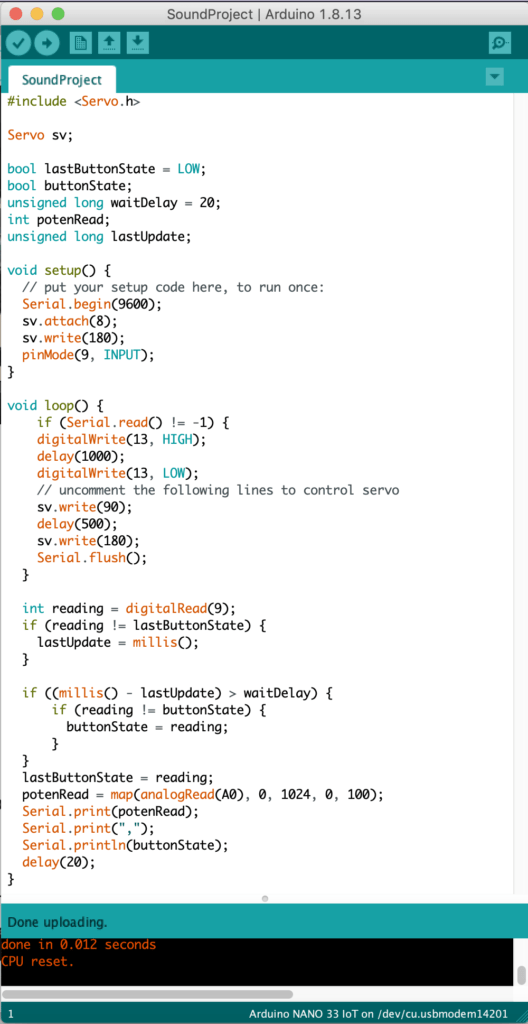
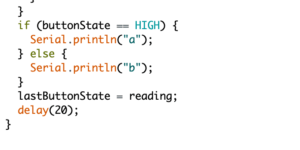
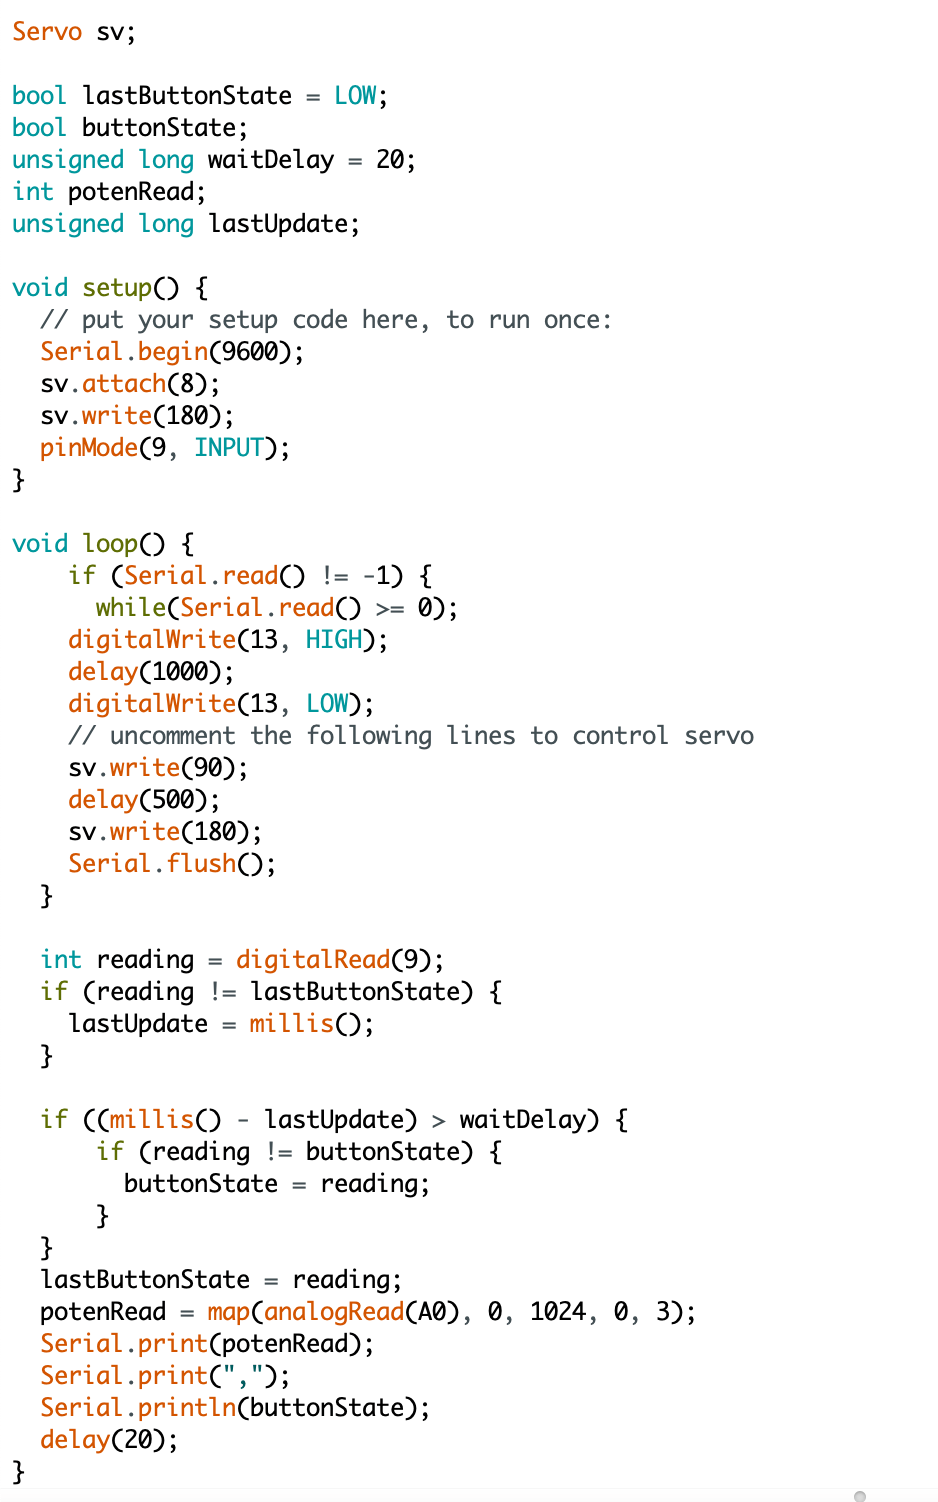
Arduino Code: I am keeping using the code from Week4 Servo Project. The only part I want to mention and changed in this week is I have mapping the value of Potentiometer from 0-1023 to 0-2, instead of 0-100 in last week project. In this way, it can coordinate with the Cube Code listed above in Unity to control the RGB color of the Ball object in Unity.
Thank you for watching!