Recitation 2: Arduino Basics
Circuit 1: Fade
This circuit allow this LED to fade on anf off at differnt speeds and brightnesses. In this step, I used 2 wires, a 220 ohm resistor, and a LED. The red wire is connected to -9, declared in the code, which is connected to one side of the resistor which is also connected to the positive charge on the LED. The black wire is plugged in to ground which is connected on the same horizontal as the negative charge of the LED. After this I running my code, I was able to adjust the brightness and speed of fading.
Circuit 2: toneMelody
This circuit allows the buzzer to play different melodies by just changing the code. For this circuit I used two wires and a buzzer. The red wire is plugged into -8 declared in the code and the black wire is connected to ground. The red wire is connected on the positive side of the buzzer aligned on the horizontal with the legs of the buzzer and the black wire is on the horizontal with opposite legs of the buzzer. When I first finished all the plug-ins my buzzer did not work and later found out that this was due to not selecting the correct plug-in on my computer. After selecting it, my code worked perfectly.
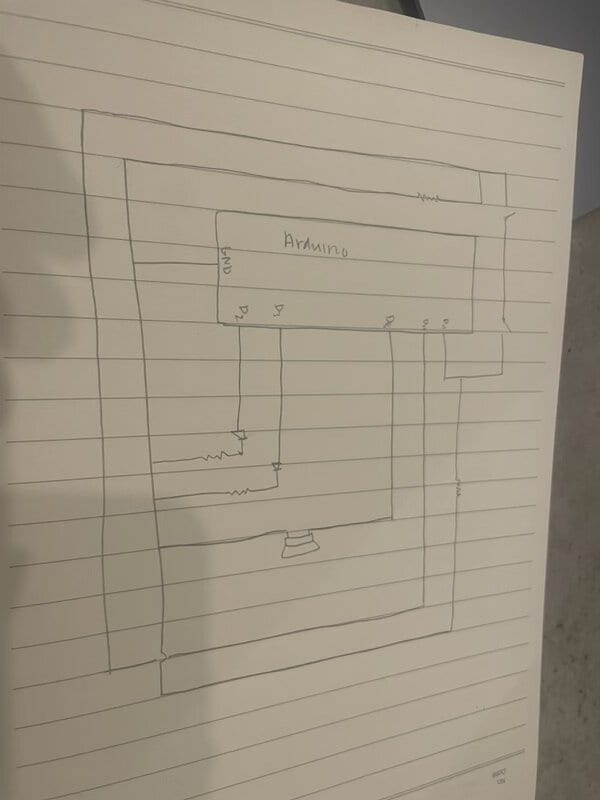
Circuit 3: Speed Game
This circuit allows two people to play a game of who can click the button 10 times the fastest. The one who succeeds will be indicated by the LED light that lights up on either side. Yeah This circuit was a lot more complicated because of the wires. I was able to follow the picture on tinkercad very carefully and slowly, so I got all the placement of the wires, resistors, buttons, LED and buzzer right. However after running the code I realized that it didn’t work. I read examined my circuit and had friends and teaching assistants come look at it but no one could find what was wrong with the circuit. After that, I re-copied the code from the tinker cad website and pasted it on Arduino. surprisingly it worked what I learned from this is that it is very important to do every step with care because every little mistake could mess up the whole project.

Question 1:
Another button that we learned about is the one we made with the cardboard, wire, and copper tape. You can make the game more interactive using this button to write words. Like the Morse code test we did and recitation one we could use this button in this game to see who can type words the fastest. This button would make this game more interactive because it makes you think more, and it requires more skill. Rather than banging on the button you have to make sure you’re getting every . or -correctly to spell the word.
Question 2:
We add a 10 kOhm resistor to ensure that we always read LOW when the button is not pressed.
Question 3:
This is a floor cleaning robot. I picked this project because it is using juck with, circuits, and Arduino to create a useful tool. Without modifitcation, the pieces separately would be considerate useless trash.

https://all3dp.com/2/most-useful-arduino-projects/ By: Saiyam