RECITATION 1: Electronics and Soldering
In my first recitation project, I experimented with building circuits and soldering. Both are activities that I have never done before, so the following information will be my first experience with them.
Task 1: Build the Circuits
Step 1:
When I was given all of the materials, I had no clue where to place each piece. However, after a few minutes of thinking, I finally asked the Professor. I could not understand the use of each wire embedded on the board, so the professor drew a simpler representation of how the circuit looked. In this step, the red wire indicates the positive, so it is connected to the positive side of the buzzer. The black wire connects to the negative side of the buzzer, which is connected to the button, which intersects the black and white wires. This allows the buzzer to sound when the button is pressed down because the circuit becomes complete. 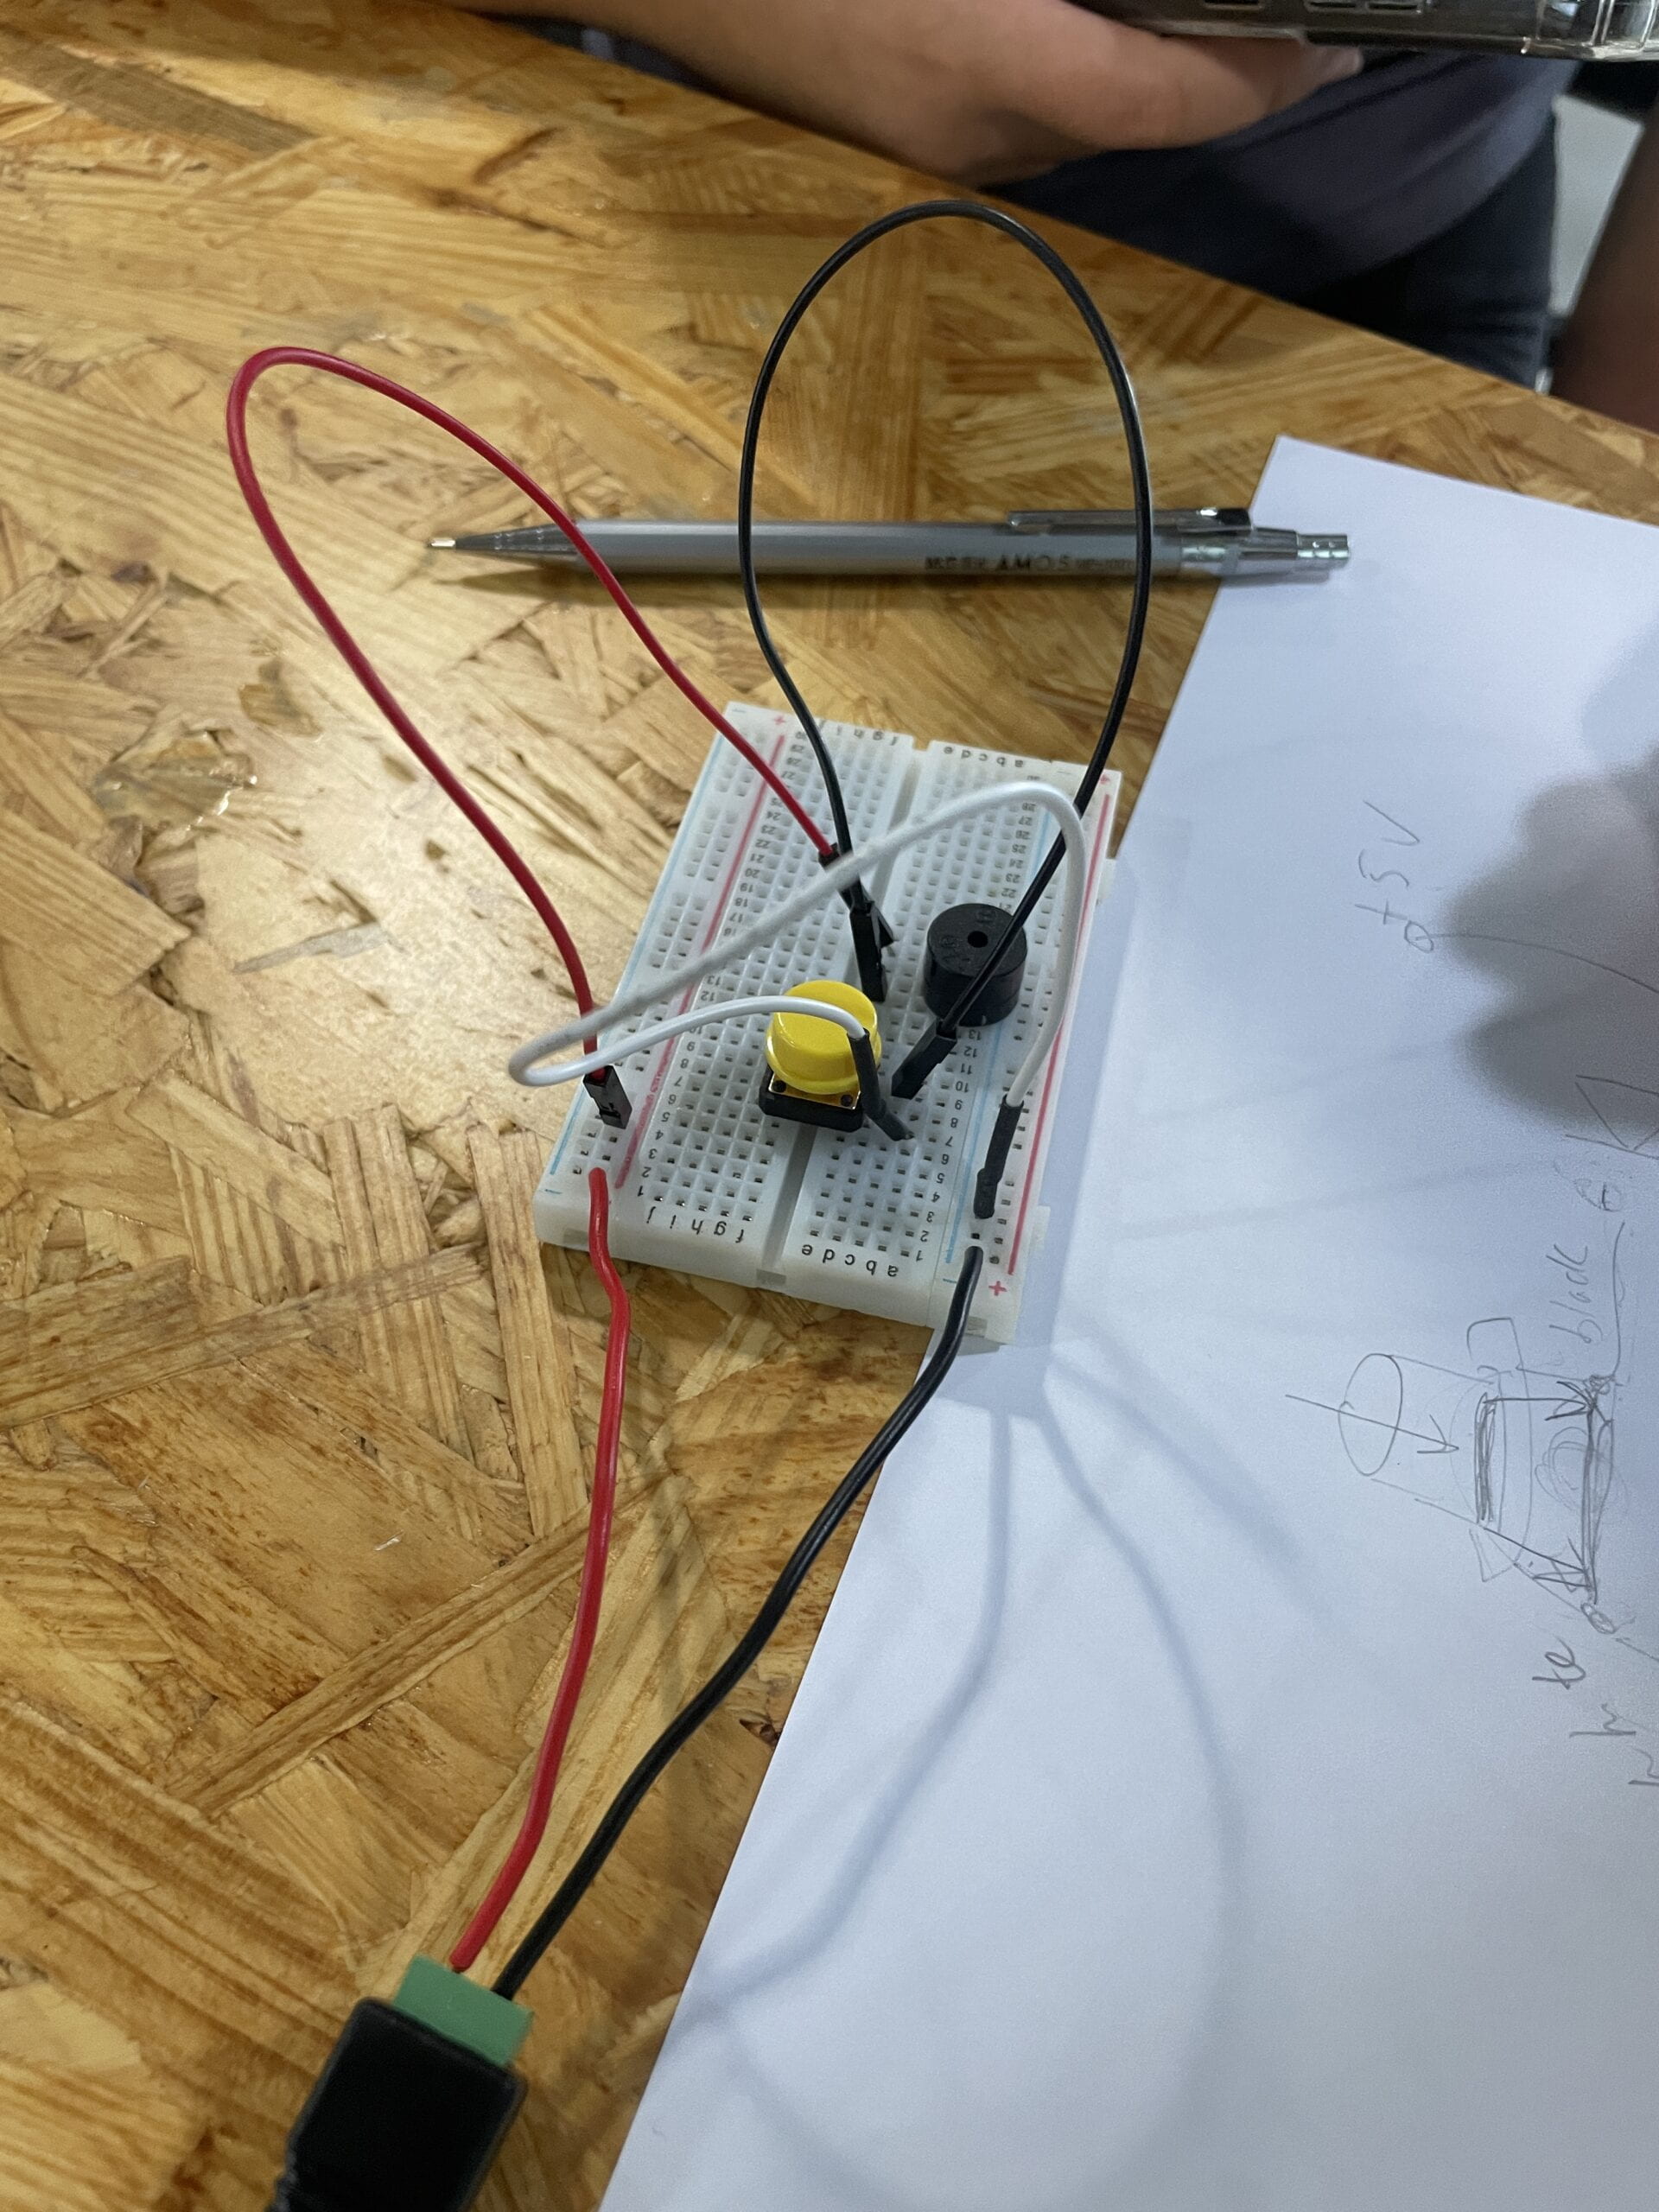
Step 2:
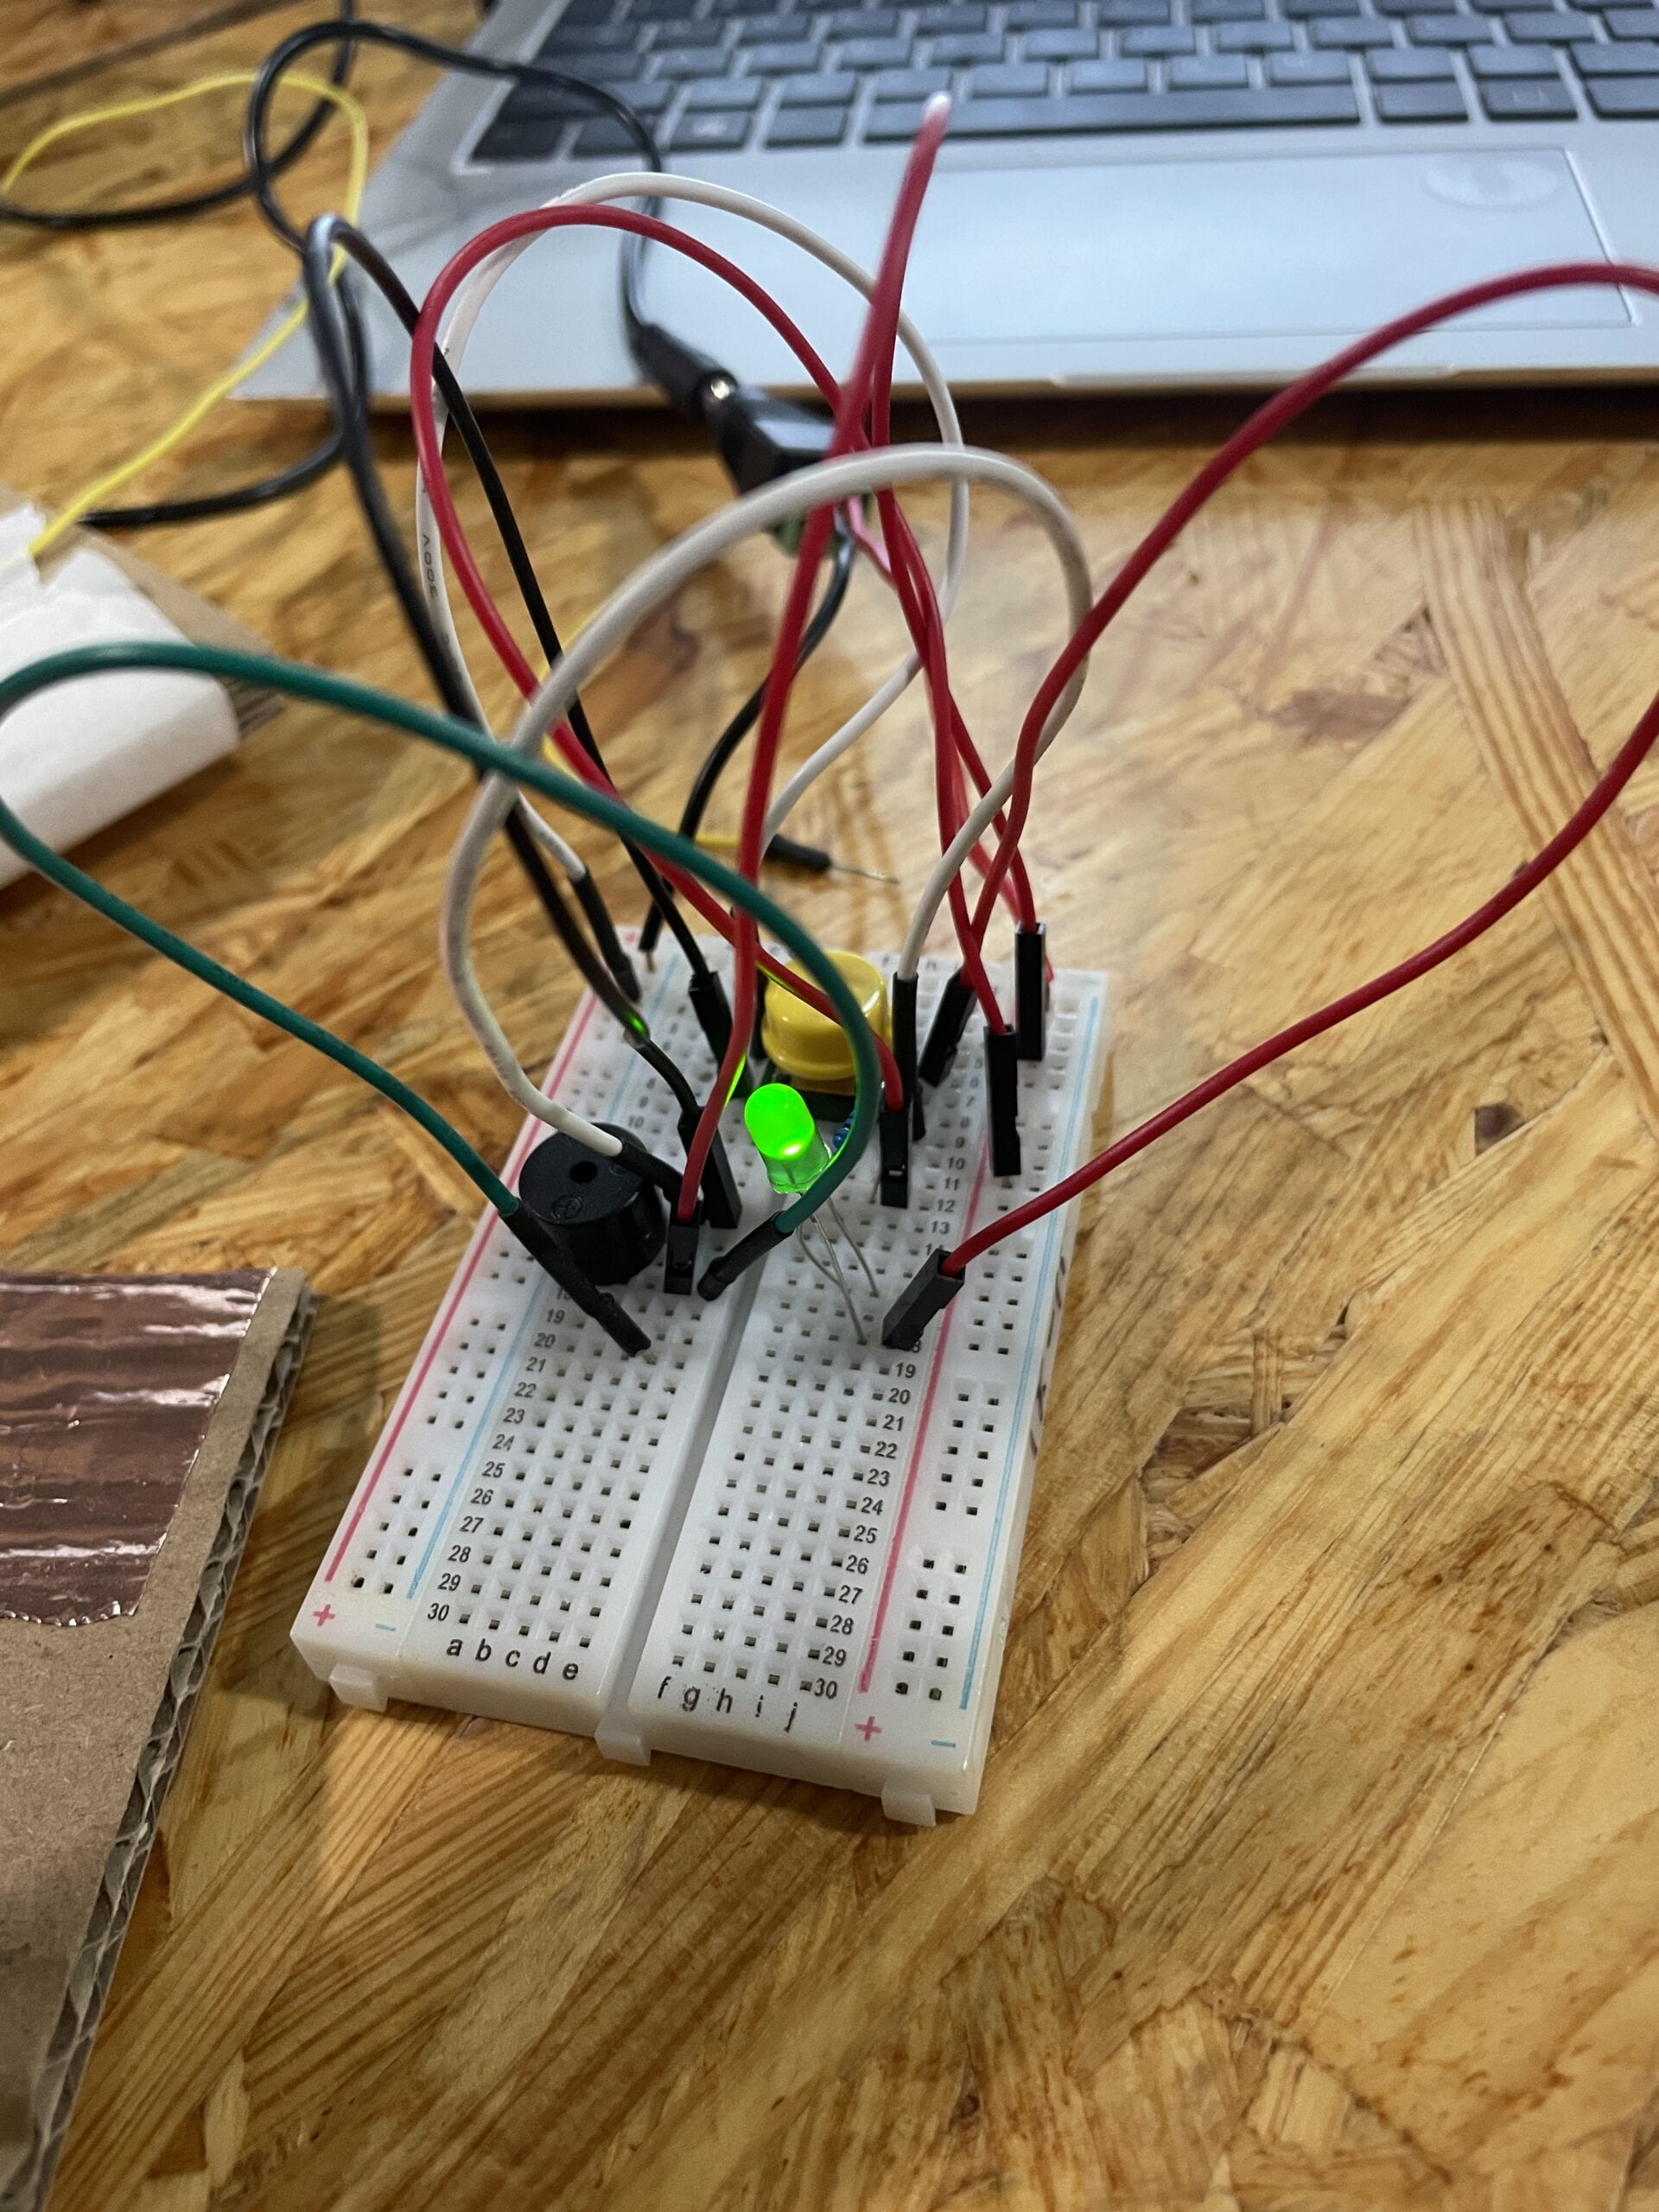
In this step a resistor, a LED, and wire, as needed, were added so that when the button was pressed, the LED would light up. In my first attempt, the LED did not light up because I lined it up on the breadboard vertically. So my I took a closer examination and lined it up on the same horizontal row(18) and it worked. The resistor was added so the LED does not blow up.
Step 3:
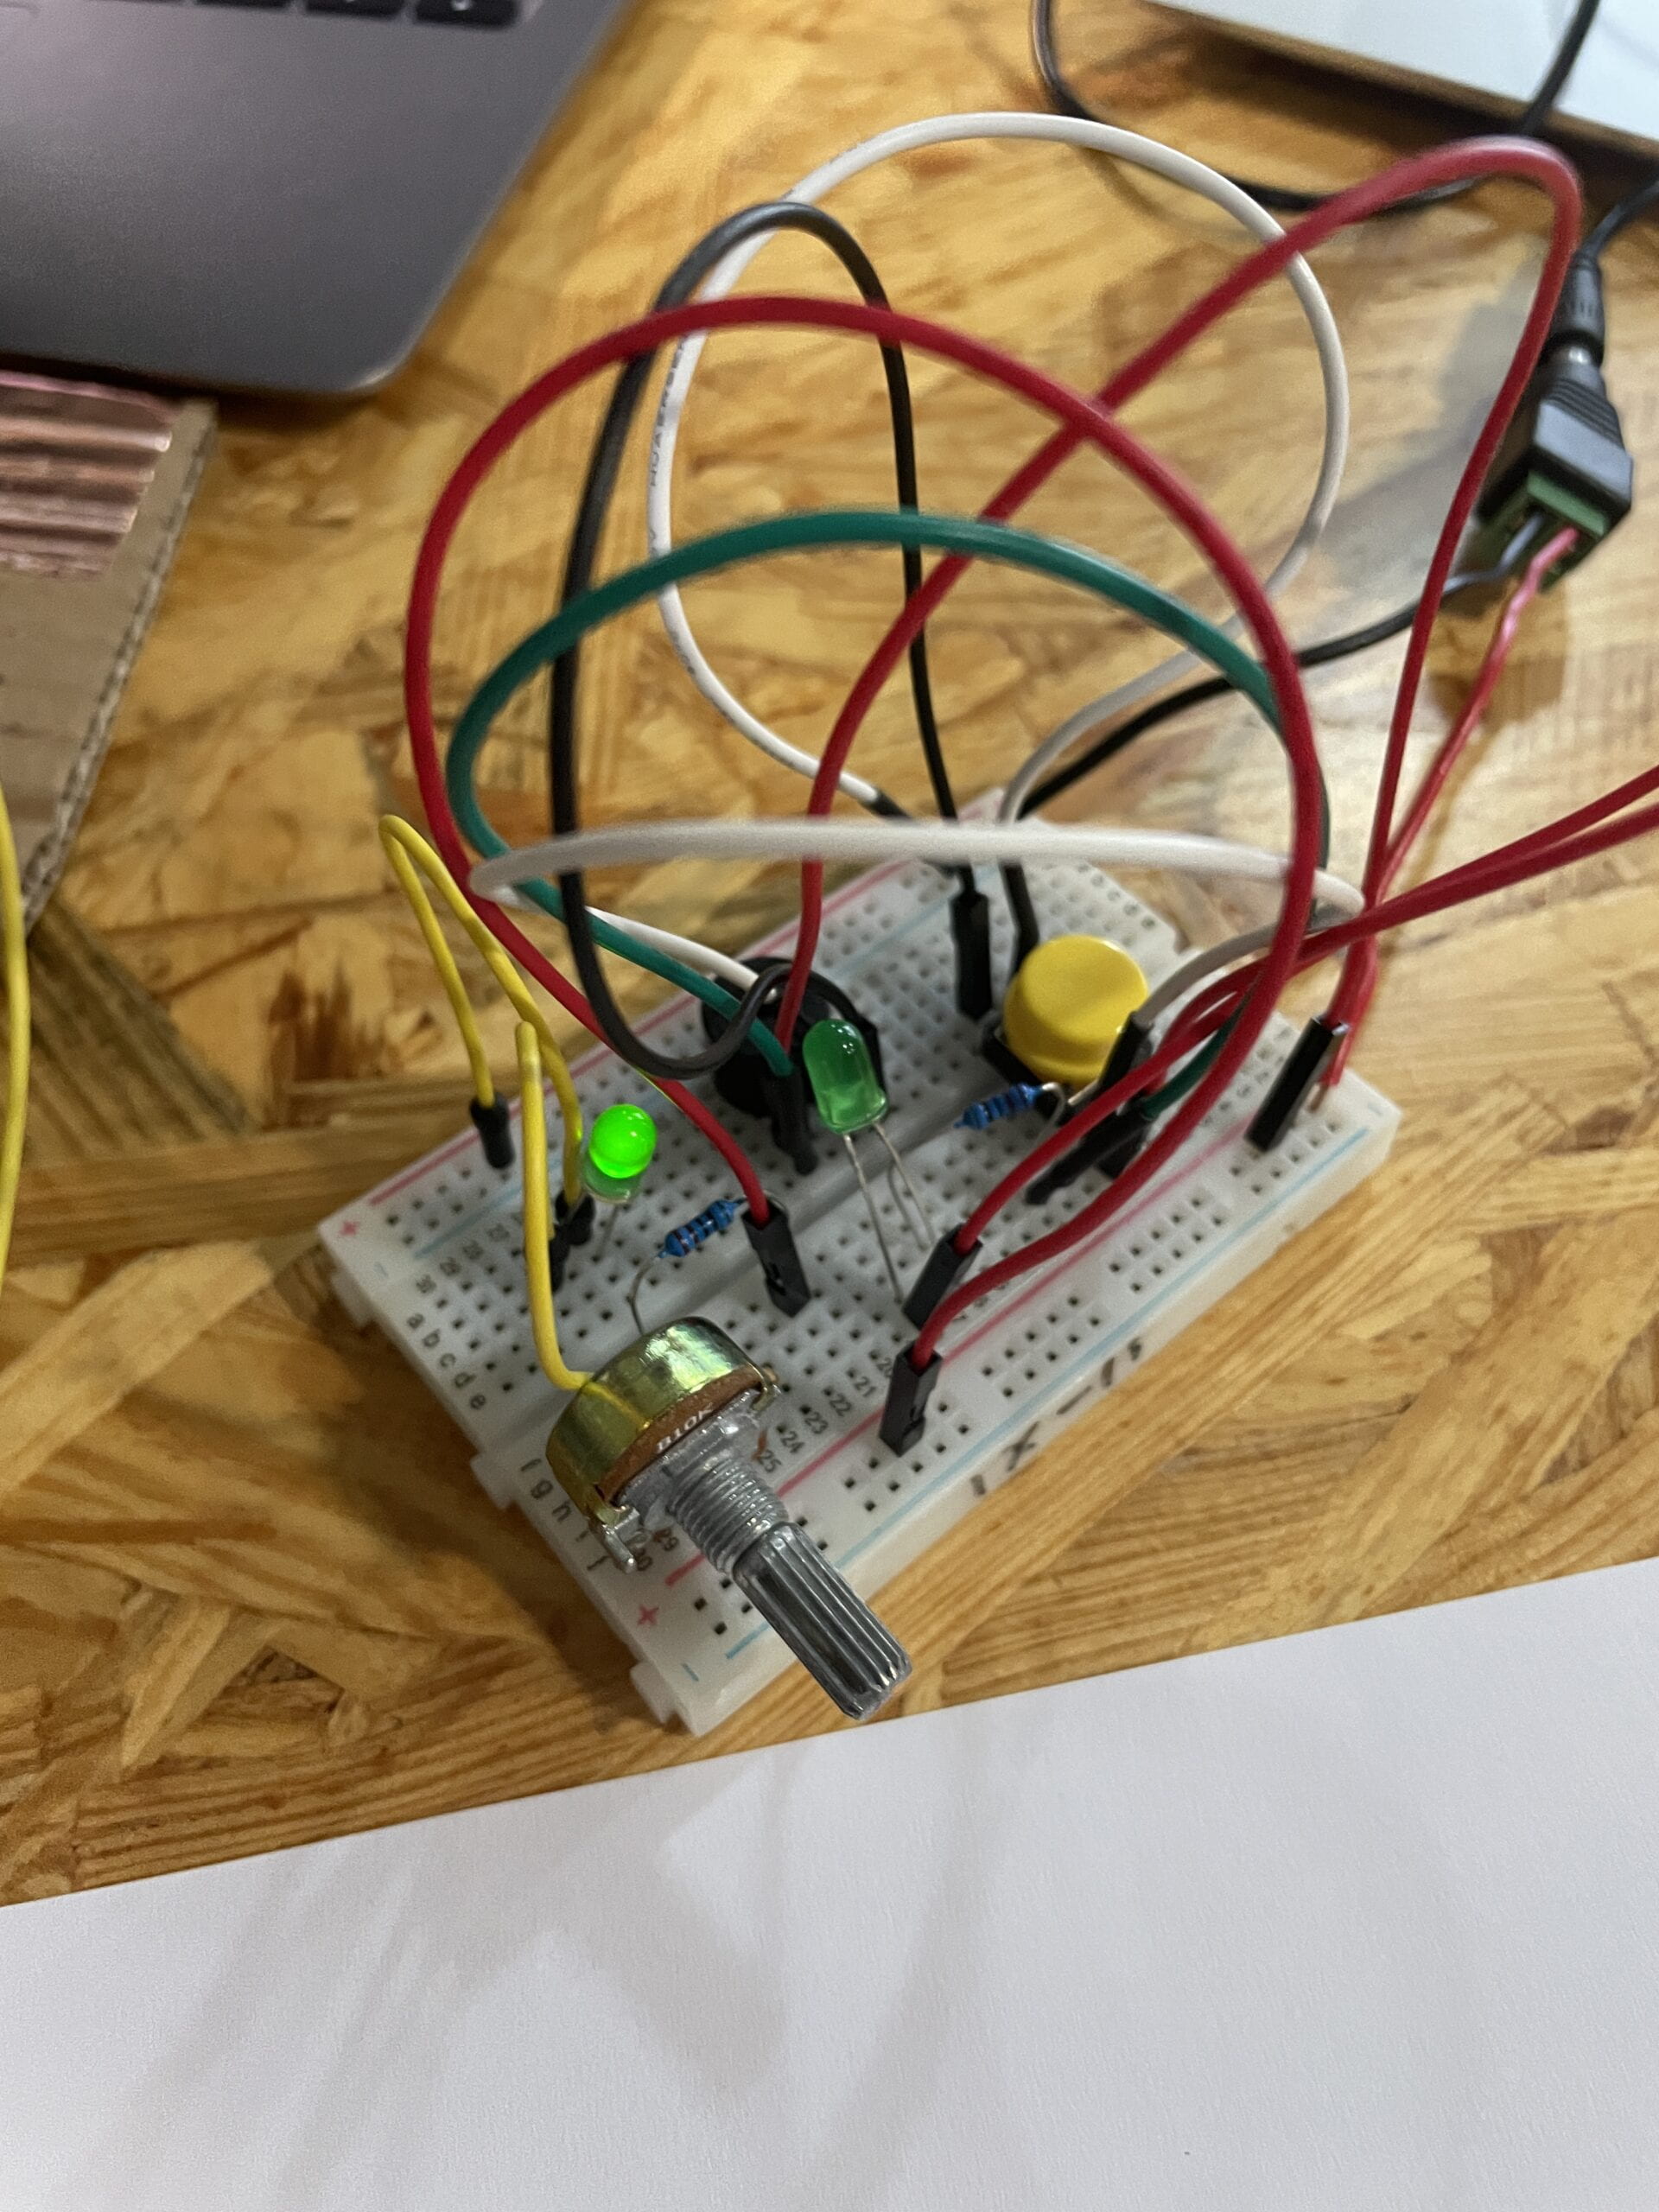
This circuit allows the buzzer to buzz and the LED to light up when the button is pressed, all while on LED stays on. This step was a little confusing due to all of the wires, but we were extra careful and made sure the connections were complete.
Task 2: Build a Switch
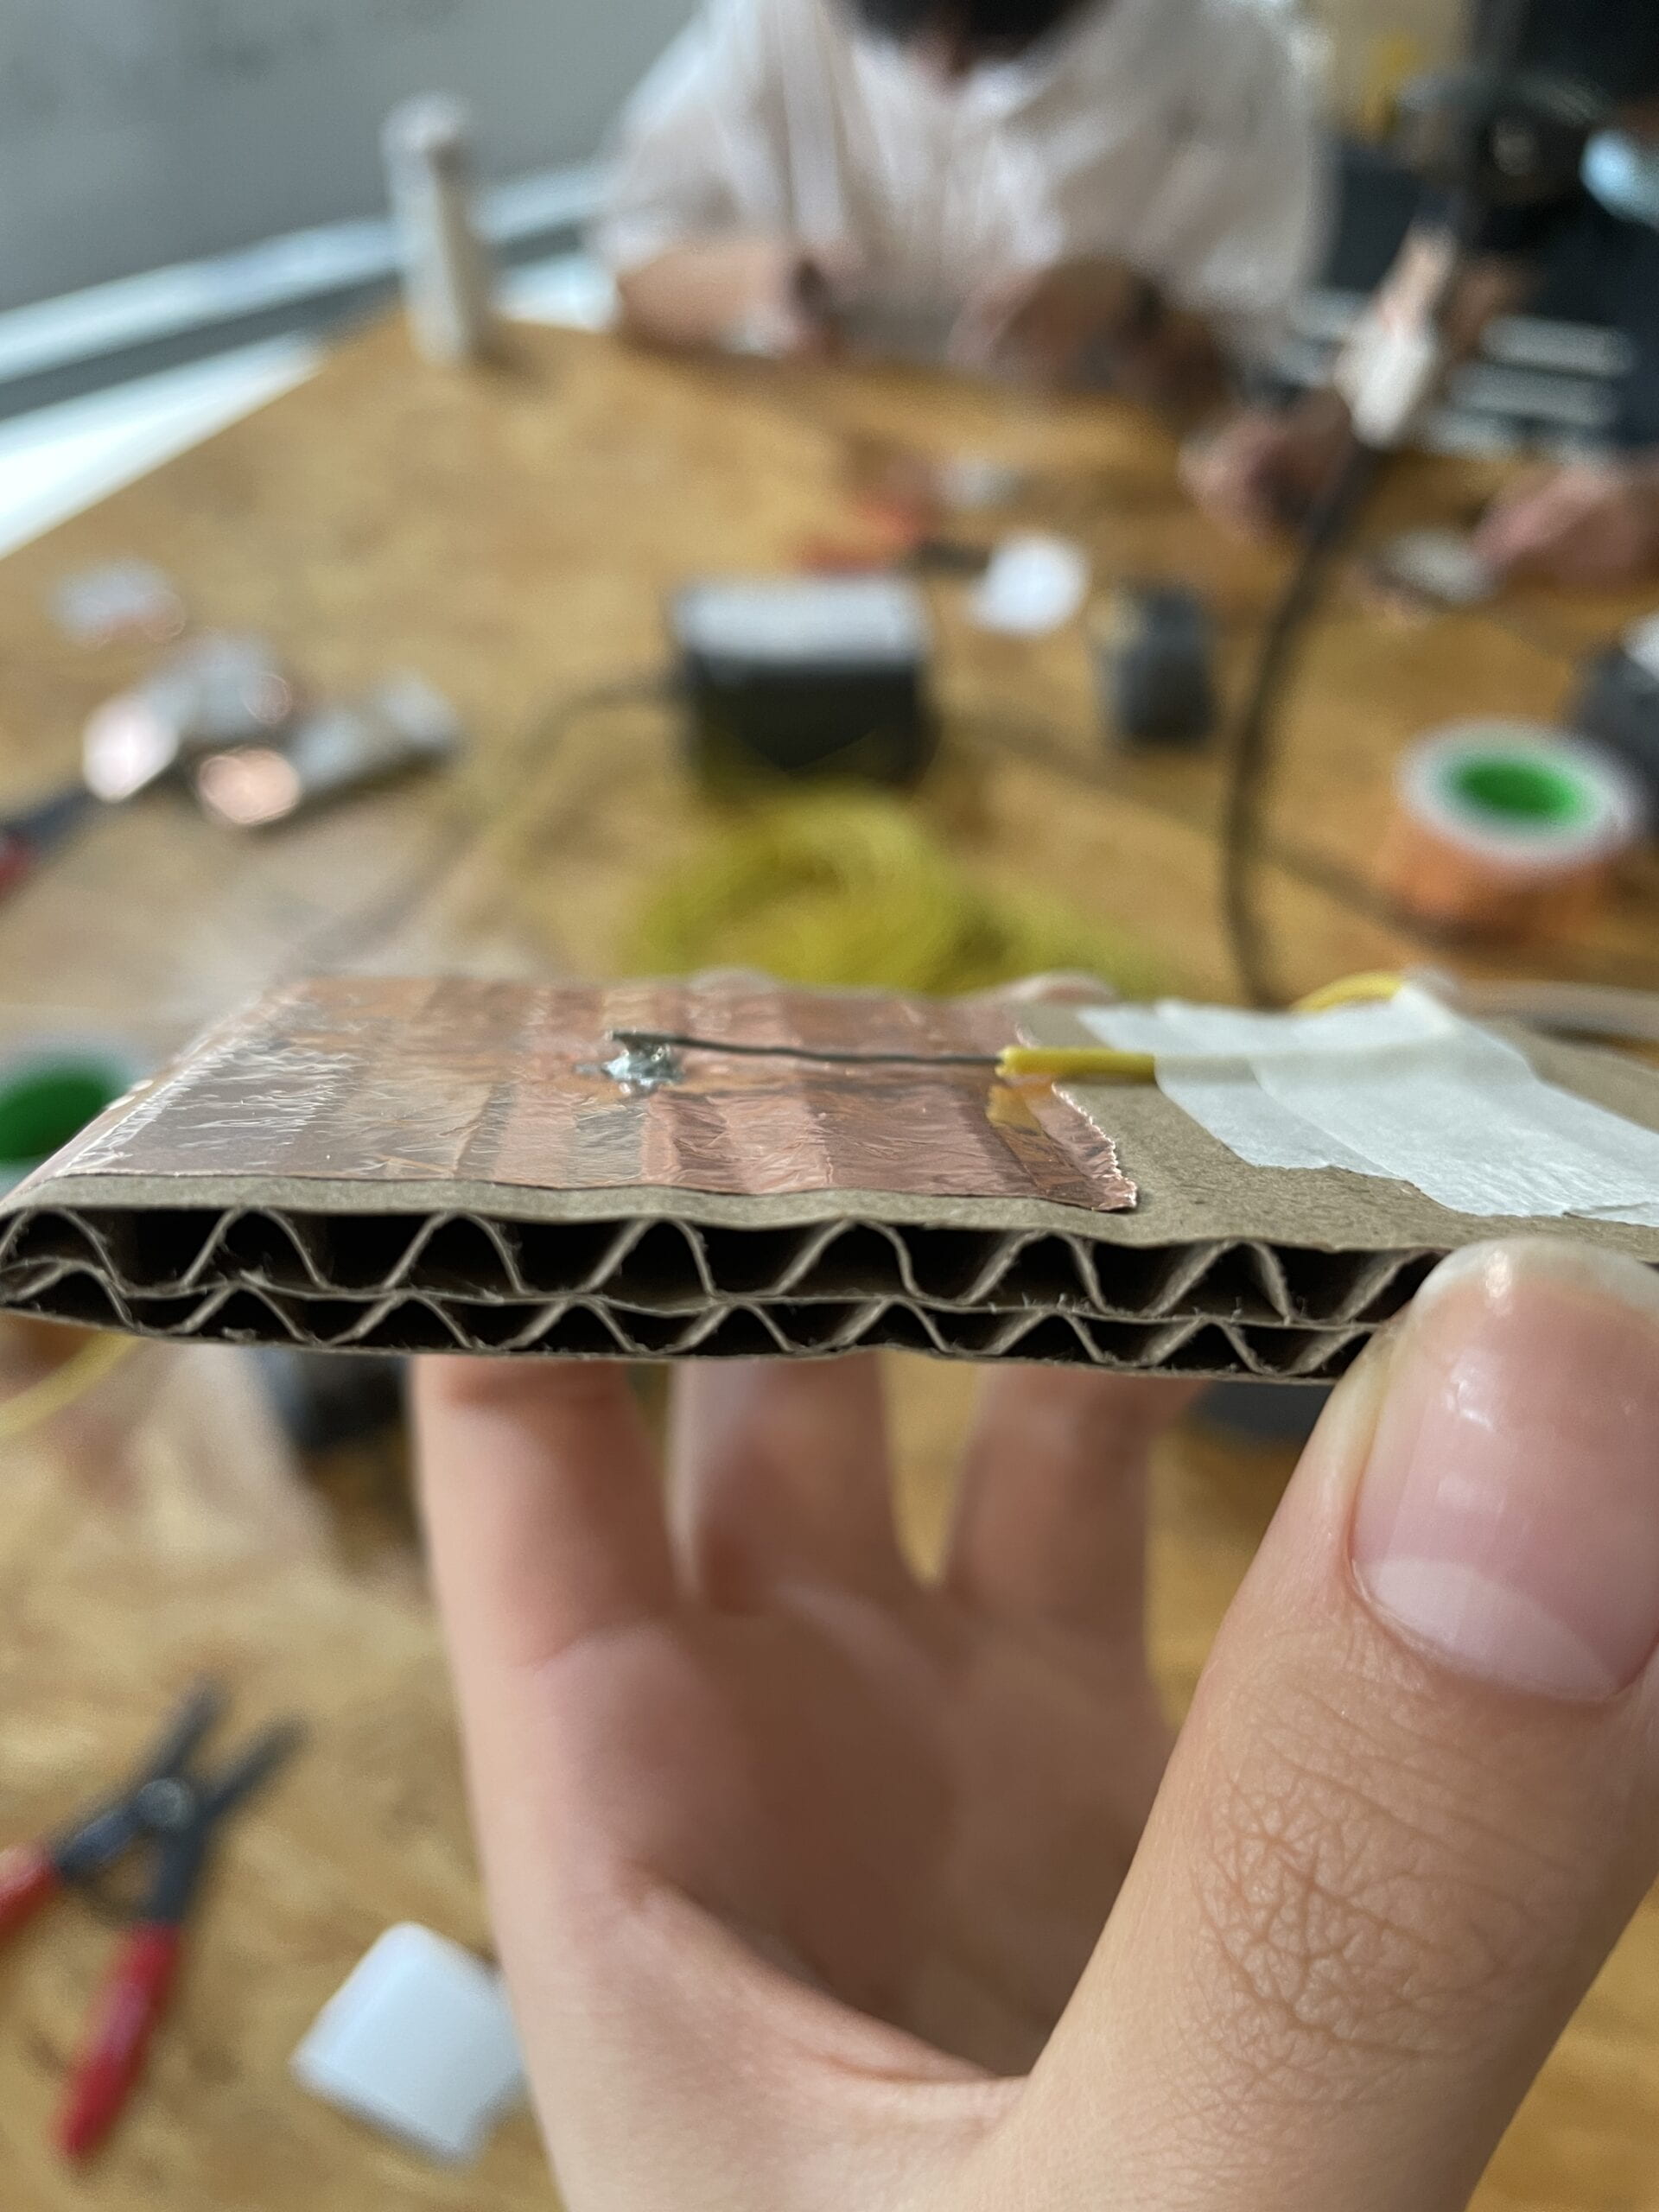
From this task, I learned that the machine has to be at 700 degrees to melt the wire for soldering. I also realized that you have to be very careful in every step. For example, if I took off the casing of the wire too aggressively, it could leave knicks in the wire that would affect its functions. As you can see from the picture, my wire lifted from the copper tape because I forgot to heat up the copper tape and wire before melting the soldering stick.
For Task 3:
The yellow button was replaced by the cardboard switch. Every time the 2 pieces of cardboard touched, the buzzer buzzes. 4 dots = Hair. We originally coded the word “hair”, but there is no video of it, so this is a shorter video of it in action.
Additional Required Questions
Question 1: Since LEDs have voltage and current ratings that should not be exceeded, the resistor helps to limit the flow of the current. This helps prevent the LED from being damaged.
Question 2:
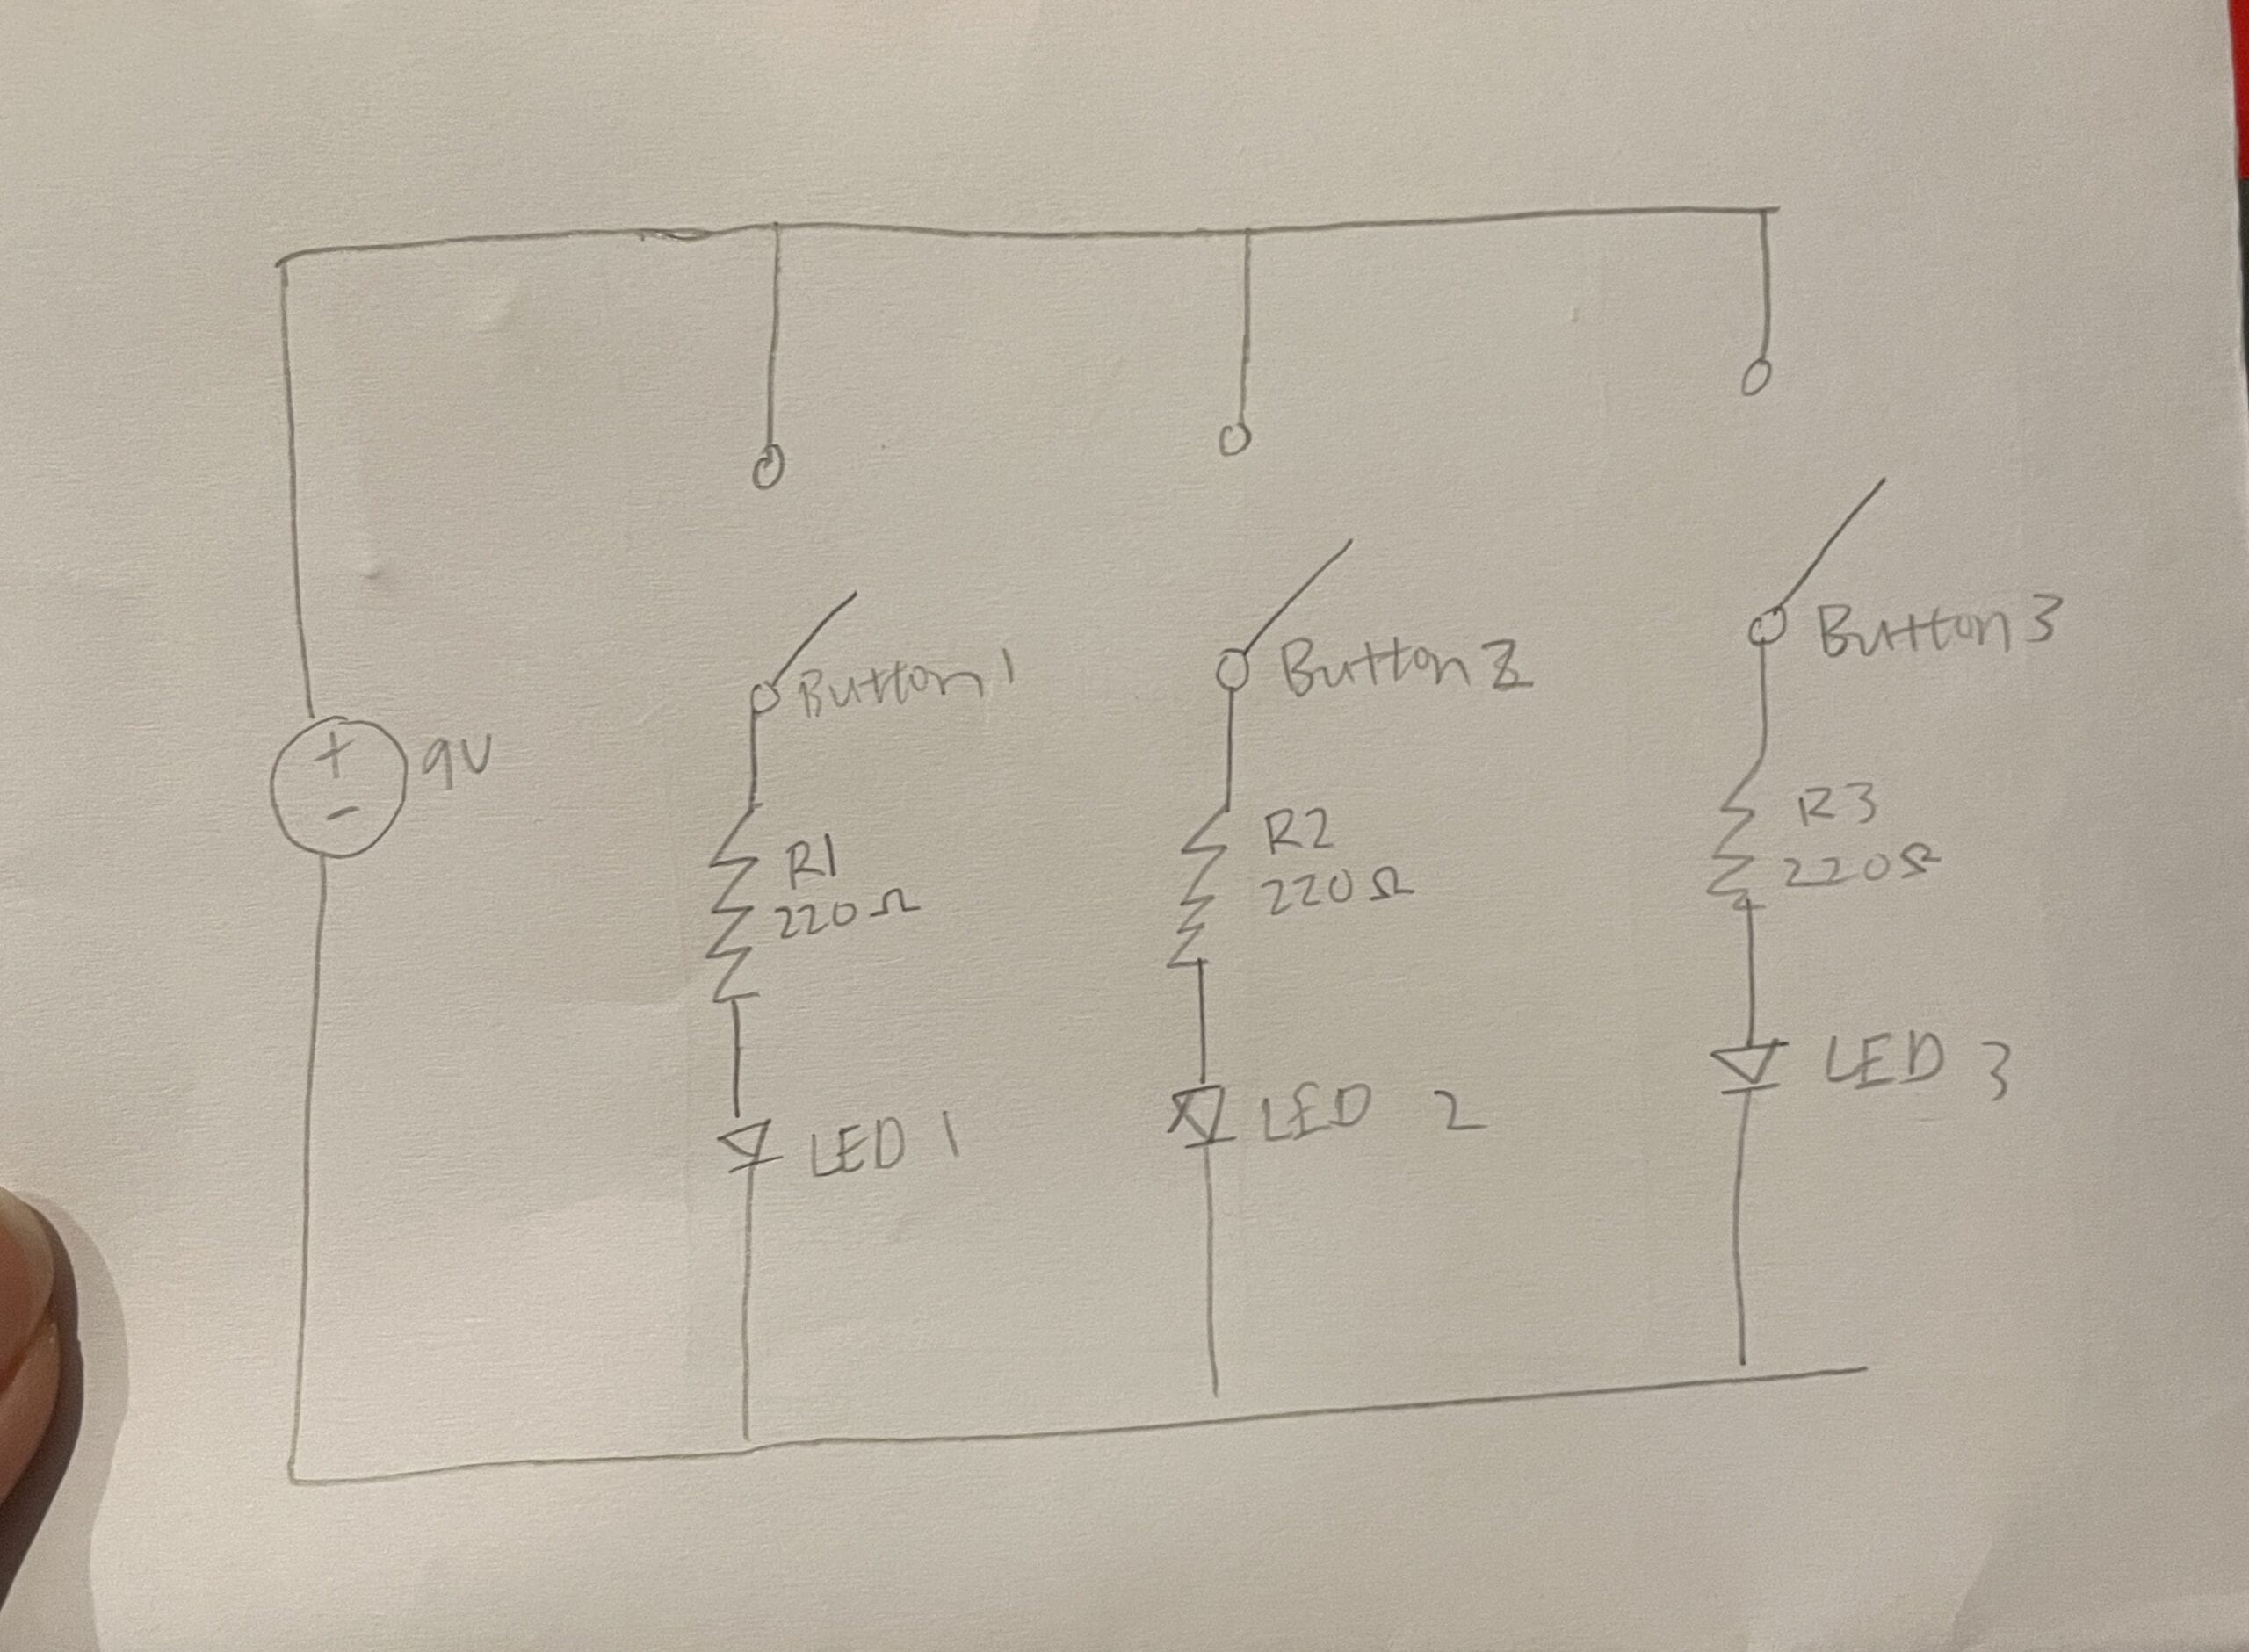
Question 3: I believe that the switch we built today includes interactivity because you press the button and the buzzer buzzes. This is just like the example given in the text, “…when you open a refrigerator and the little light inside turns on…”. From this, I can conclude that the level of interactivity is low, just like the fridge. The interaction here is simple and limited.
Question 4: Interaction Design and Physical Computing be used to create Interactive Art. In Zack’s “Drawn” project you can see that his work allows people to play with and move around the items that they painted. Along with that, his “Eyewriter” project allowed a disabled person to use just use the movement of his eyes to draw. This interaction is very inspiring and is a great representation of interactive art.
A WordPress Commenter
Hi, this is a comment.
To get started with moderating, editing, and deleting comments, please visit the Comments screen in the dashboard.
Commenter avatars come from Gravatar.