Task #1: Test the NeoPixel
Step 1:
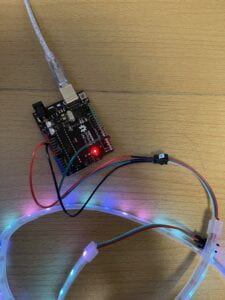
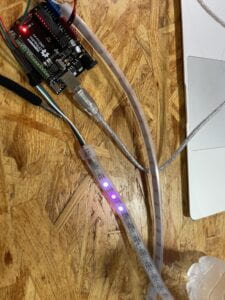
I connected the NeoPixel Led strip to the Arduino. The NeoPixel Led Strip had white, green, and red wires. I attached the white wire to GND, the green wire to D3, and the red wire to 5V.
Step 2:
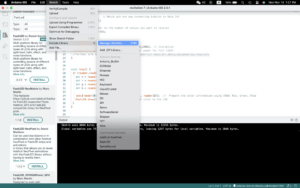
For this step, I downloaded the library that we would be using for this recitation. I went into Sketch -> Include library -> Manage libraries. Inside the library, I searched: fastLED and clicked install.
Step 3:
In order to test if the NeoPixels are working, I used the FastLED/Blink found in the examples.
Task #2: Use your computer to light up NeoPixels
Step 1:
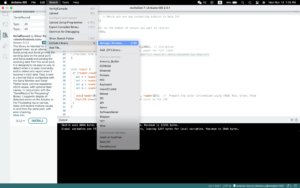
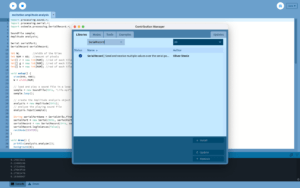
For this step, I downloaded the SerialRecord to my Arduino. I selected from the menu Sketch -> Include library -> Manage libraries, and input SerialRecord.
I repeated this process on Processing too.
Step 2:
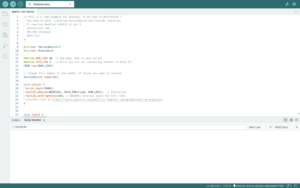
I programmed my Arduino using the code we made in class: IxLab_recitation7_ARDUINO.ino
I used the Serial Monitor to test whether the code worked or not. When using the Serial Monitor, the first digit will represent the pixel number. The second, third, and fourth digits represent the amount of red, green, and blue. After each number, there should also be a “,” between them.

Step 3:
I used the code given in the recitation for this step: IxLab_recitation7_PROCESSING.pde
I closed the Serial Monitor that was currently running, or else this code will not work. It will show an error of “PORT BUSY”.
Task #3: Add Music!
Step 1:
I downloaded this sketch that was provided in the recitation. This sketch plays an audio file and analyzes the amplitude of the audio. From there we replaced beat.aiff with the song I choose.
I went to this website: https://www.to-convert.com/en/diverse/youtube-to-mp3.php
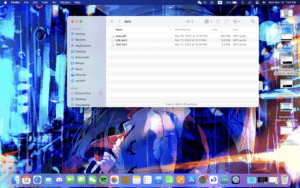
I inputted the youtube link into this website and it automatically generated an mp3 version of it. From here I added this mp3 file to the folder that also held beat.aiff. I named the file Life.mp3 and I had another version of it titled Sad.mp3. I was testing this because I wanted to see if a bigger file would produce better-quality sound. But through this testing, they both sounded the same.
Step 2:
For this step, I merged the code from the Processing sketch from Task #2 into the current one. The code simply just changes the colors when you drag the mouse back and forth. But for me, it did not seem to interact with the music enough. So I did some changes in Step 3.
Step 3:
I changed a few components from the original code. First, I changed the original rectangles that show up on the screen to circles. The code was similar but circles have three digits inside rather than four compared to rectangles. The major changes that I made to make it more interactive to the music were this part of the code:
 if (mousePressed == true) {

 }
Within this code, I made it so that when the volume is within a certain range the colors red, green, and blue with have this much value. For example, if the volume is between .1 and .2, red, green, and blue, will have a value of 50, 100, 50. So the whole song will have a different color coordinated with it based on how high or low the volume is.
CODE:
import processing.sound.*;
import processing.serial.*;
import osteele.processing.SerialRecord.*;

SoundFile sample;
Amplitude analysis;

Serial serialPort;
SerialRecord serialRecord;

int W;         //width of the tiles
int NUM = 60;  //amount of pixels
int[] r = new int[NUM]; //red of each tile
int[] g = new int[NUM]; //red of each tile
int[] b = new int[NUM]; //red of each tile

void setup() {
  size(640, 480);
  W = width/NUM;

  // load and play a sound file in a loop
  sample = new SoundFile(this, "Life.mp3");
  sample.loop();

  // create the Amplitude analysis object
  analysis = new Amplitude(this);
  // analyze the playing sound file
  analysis.input(sample);

  String serialPortName = SerialUtils.findArduinoPort();
  serialPort = new Serial(this, serialPortName, 9600);
  serialRecord = new SerialRecord(this, serialPort, 4);
  serialRecord.logToCanvas(false);
  rectMode(CENTER);
}

void draw() {
  println(analysis.analyze());
  background(0);
  noStroke();
  fill(205, 120, 150);

  // analyze the audio for its volume level
  float volume = analysis.analyze();

  // volume is a number between 0.0 and 1.0
  // map the volume value to a useful scale
  float diameter = map(volume, 0, 1, 0, width);
  // draw a circle based on the microphone amplitude (volume)
  circle(width/2, height/2, diameter);

  for (int i=0; i<NUM; i ++) {
    fill(r[i], g[i], b[i]);
    circle(i * W + W/2, height/2, 10);
  }

 if (mousePressed == true) {
    int n = floor(constrain(mouseX/W , 0, NUM-1));
    if (volume < .1) {
      r[n] = floor(100);
      g[n] = floor(50);
      b[n] = floor(50);
    } else if (( volume >= .1) && volume < .2) {
      r[n] = floor(50);
      g[n] = floor(100);
      b[n] = floor(50);
    } else if ((volume >= .2) && volume < .3) {
      r[n] = floor(50);
      g[n] = floor(50);
      b[n] = floor(100);
    } else if (( volume >= .3) && volume < .4) {
      r[n] = floor(100);
      g[n] = floor(50);
      b[n] = floor(150);
    } else if (( volume >= .4) && volume < .5) {
      r[n] = floor(150);
      g[n] = floor(100);
      b[n] = floor(50);
    } else if (( volume >= .5) && volume < .6) {
      r[n] = floor(50);
      g[n] = floor(150);
      b[n] = floor(100);
    } else if ((volume >= .6) && volume < .7) {
      r[n] = floor(150);
      g[n] = floor(50);
      b[n] = floor(200);
    } else if ((volume >= .7) && volume < .8) {
      r[n] = floor(200);
      g[n] = floor(150);
      b[n] = floor(50);
    } else if ((volume >= .8) && volume < .9) {
      r[n] = floor(50);
      g[n] = floor(200);
      b[n] = floor(150);
    } else {
      r[n] = floor(100);
      g[n] = floor(200);
      b[n] = floor(250);
    }

    serialRecord.values[0] = n;     // which pixel we change (0-59)
    serialRecord.values[1] = r[n];  // how much red (0-255)
    serialRecord.values[2] = g[n];  // how much green (0-255)
    serialRecord.values[3] = b[n];  // how much blue (0-255)
    serialRecord.send();            // send it!
  }


}