PENTA-MUSICAL LAMP – CALVIN LIN – PROFESSOR GOTTFRIED
CONTEXT AND SIGNIFICANCE:
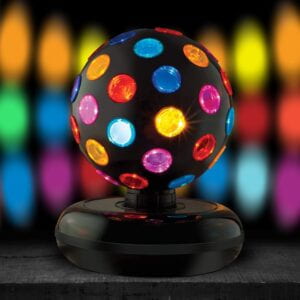
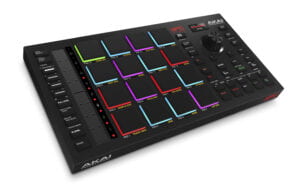
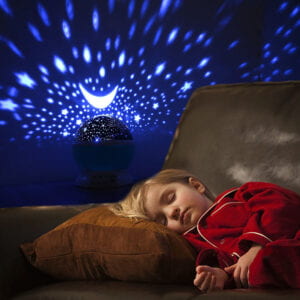
The inspiration originated from my love for music and clubbing. As a child, I often had a lamp, be it a lava lamp or something else. There was always a lamp or some sort of light that was placed next to my bed. Our original idea was to make a lamp. We wanted the aesthetic to be the main part of it. But simply a lamp to me was not interactive enough. A simple lick or pull was not how I defined interaction to be. I wanted the lamp to have more than just light. This made me think about disco balls/LED lights at clubs. The lights changed with every movement, sound, and music that was played. So that inspired me to add a beat pad or a D.J. pad on top of the idea I already had. Further planning later, our idea solidified into a lamp that was A: able to change colors, B: able to produce sound and musical notes with the corresponding button that was pressed, C: the light and sound are correlated with each other, and lasting D: able to spin and produce reflections of the lights coming out from the ball. Just like music, there are no set variables. That is how I defined interaction. Users will have the opportunity to play any songs they enjoy with the notes provided to them. Since the buttons are only limited to 9, the notes that they will have access to will be limited. But there are infinite possibilities they can do with the notes provided for them. This matches with my definition of interaction as the user are not going on a set path created for them, but rather can use the project I made and play as they wish. I do not classify my project as unique, as the concept of lamp and music has definitely already been invented. But many times, we do not see the combination of music and lamp together. It is either a lamp for light or music for music. As we often associate a lamp with something quiet rather than an instrument. I believe my project is defiantly for children, individuals who love playing music (aka piano), or even people who can go to clubs during the pandemic. So that they can make a mini club at their own home and D.J. away. Even without the music part of it, the reflection of the lamp is soothing and relaxing to look at. This can help children who are scared at night to have some light and something to look at before they fall asleep.

CONCEPTION AND DESIGN:
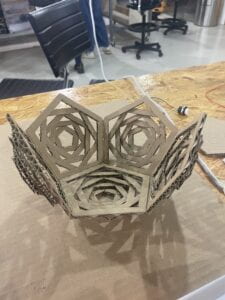
Being a former art student, I believed in the wow concept. Even before the user even has the opportunity to use it, I want them to be wowed just by looking at the fabrication of it. I relate this type of idea to cooking, you taste with your eyes before your mouth. It must be pleasant to the eyes, in order to draw the user’s interest in the project. Children choose toys not because they think this might be fun, how would they know before they even try them? That is because the toy is pleasing to them and their imagination. They are eager to try something that is aesthetic rather than something that looks plain and simple. Having this in mind, we made sure to put emphasis on the design of the lamp. Cardboard can many times seem flat and unappealing. So one of our challenges was to make it more 3-dimensional. We achieved this by layering the cardboard on top of each other. So instead of one side of the lamp just be a simple pentagon. We added 4 more layers of pentagons of different sizes on top of the original one. This will be explained more in-depth in the next section, where I will discuss the fabrication part of my project. Ultimately for our project, we choose to use cardboard for a couple of reasons. Firstly, it was easily obtainable. We were able to find cardboard pieces from the cardboard recyclable in Room 826. To our surprise, we even found a very beautiful circular platform from it. Secondly, cardboard is very flexible. Even if you made a mistake it can be quite easily fixed. Thirdly, cardboard is quite easy to work with compared to other materials such as metal or glass. Lastly, cardboard quite frankly the own material we have learned to use. A lot of other materials require a lot of other tools to fully use them to their max compacity. For example, for wood, you need bigger tools to make it into the shape and design you want. Glass and metal are both similar, they require tools sometimes not accessible to us. That was why we figured cardboard would be the best material used for this project. If we did use wood, I feel like the final project would have more depth and a wow factor to it. But the level of difficulty will also increase.
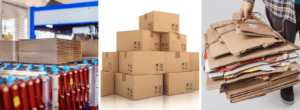
IT IS EVERYWHERE!
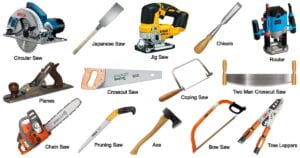
WOOD TOOLS:
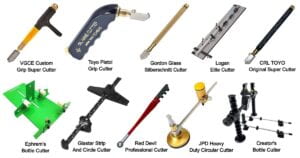
GLASS TOOLS:
FABRICATION AND PRODUCTION:
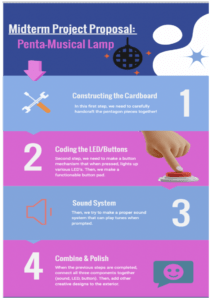
This was our original plan:
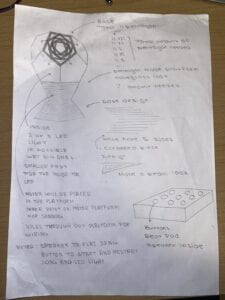
Looking back, the most tedious and time-consuming part of our project was definitely making the design of the lamp. We had to cut out a total of 55 pentagons: 11 XXL, 11XL, 11L, 11M, and 11S. This made up the basis of our light design. Cutting them took a very long time. Especially since me and my partner are both perfectionists, a simple mistake we had to throw it away and start over. So I consider one of our failures was just wasting some of the cardboard we threw away because it did not meet our expectations. In another way, I felt that because of this tedious mindset, our project turned out really nice aesthetically.
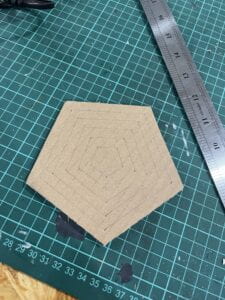
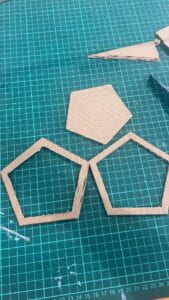
After completing the lamp shape, we did a light test at home. We did this simply by putting a phone flashlight under the lamp. We wanted to see how the light would go through the shapes, just in case we needed to make any adjustments.
We were quite satisfied with the result and we moved on to the coding part of the project. We started out by testing the motor. We used the same steps and codes as we did in recitation 4. We made it so that it spun at a slower rate. At first, we programmed it to spin one way at a speed of 30. Then we realized that making it spin only one way was not gonna work. As the wires of the LED light will get tangled up and become unfunctional. In the end, we made it turn 180 before going back and repeating. Although the motor did give us a lot of trouble. We had to in total switch out 4 motors. We did not know the exact issue, but we had a few guesses. Some issues included the H-bridge being fried, a broken motor, the code having too much stuff on it, the motor receiving the wrong amounts of power, and the Arduino breaking. It was quite a big headache, to say the least. We then added the 3D-printed motor platform, completing the motor step of the project.
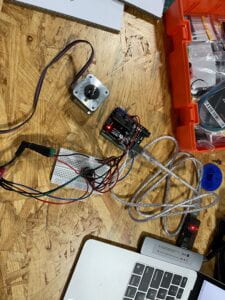
After the motor, we started working on the light for the project. We started with one button and then increased it bit by bit. This was to ensure we catch any flaws or errors in the code as we worked on it. We made sure that whenever a button was pressed, the LED associated with it also lit up.
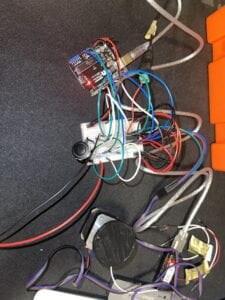
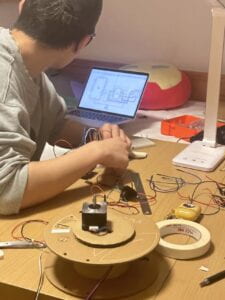
After completing the LED light, we started to add the buttons to the project. Our goal was for each button to have a specific piano note attached to it. We did this through the pitch library.
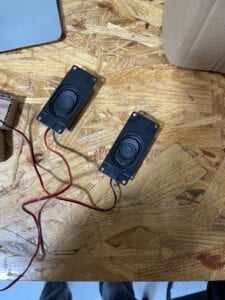
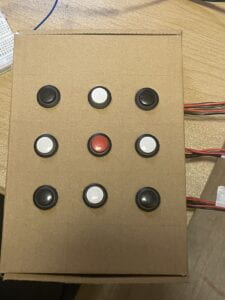
After completing the buzzer and making it work, we were close to finishing the project, so we started doing the final touch of the project. We made the last component of our project, which was the beat pad. We soldered 9 buttons and cut holes into a box that we found. The challenging part of this portion was soldering the buttons. We messed up a few times when we held the soldering iron too close to the plastic part of the button, which caused the metal piece to become unstable. After finishing soldering all of them we placed them into the cardboard box. We cut holes from the inside for the wires to come out. To organize all the wires, we tapped each wire GND and 5V together. This way we will not get mixed up with each wire.
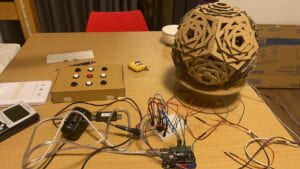
As we were working on the project, we discovered that the LED lights were not bright enough. We had to find something more bright for the effects to be there. Thankfully, we were able to receive a Neo-Pixel Ring from Professor Margaret. With the Neo-Pixel Ring, the light was finally bright enough to show the lamp pattern. We hot glued the Neo-Pixel Ring onto a circular cardboard. Then we hot glued that onto the 3D printed platform. Since our platform already had holes throughout it. We just put the wires of the Neo-Pixel Ring through them and connected them to the breadboard.
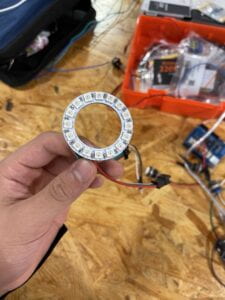
This was a test we did with the Neo-Pixel Ring. The effects were quite good.
For the final touches, all we had to do was connect the wires together. In this case, we had to use a different computer and Arduino for the motor. The motor seemed to not want to work with the rest of the code so we separated the motor code from the rest of the code.
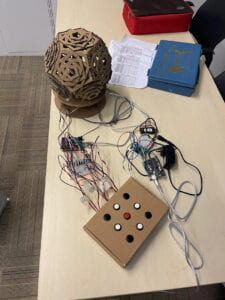
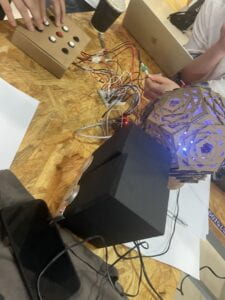
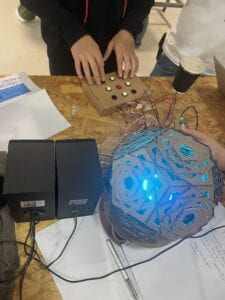
During the user testing, it worked quite well. Everyone seemed to enjoy it and had a fantastic time playing with it. The only downside during the whole process was that the room was too bright, so sadly they were not able to see the reflection of the light on the wall. There were some really good suggestions. The first was about the sound of the project. Since the tone was quite quiet compared to the rest of the room which was quite loud. The user was not able to fully hear the notes. We solved this on the spot by renting a speaker from the resource center. It did a great job amplifying the sound of the note. Another suggestion made by professor Andy was to make a box that covered all the wires. We thought that it was a great suggestion and later inputted that comment into our project.
CONCLUSIONS:
The goal of our project was to create an item that inspired people to play music or even use it as a substitute for clubbing. It is cheaper and safer compared to clubbing. For children, it will inspire them to play music. Furthermore, it can act as a guardian for kids who are afraid of the light. Act as their little lamp and source of light at night. Our project, in my opinion, has many forms of interaction. There is a visual interaction of the artwork. Users have the ability to play any notes, with any combination that likes. At the same time, they are able to hear it and see it physically change through color and sound. My definition of interaction is something with no set variable, with the user creating their own pathway. Rather than going down a specific path, we creators made for them. Freedom to me is the essence of the interaction. If we had more time there are some parts of the project that I would have wanted to work more on. Firstly, I think the sound of the project could have been made smoother. When the user was testing it out on the loudspeaker. The sound was very scratchy and not clean. Could have been the code or it could have been the speaker. Secondly, I think it would have been cool if I had a set of song playlists playing in the background of the project. When the user clicks a button it will generate a random song from our playlist. From there they can add to it with the notes on the beat pad. Making it more D.J.-like. But they are always able to play a song with their phone and do it that way. Lastly, I would organize the wires more. The box that was used to cover the wires, in my opinion, was too big and close to the lamp itself. I think in a way it took away from the aesthetic part of the project. I think that the important value that I took away from this project was that there are always more answers to the problem. If one way does not work out try another way. Have your mind and options open when you make the project. There are bound to challenge you to make a project, but be open to mistakes and change according to them. I think my biggest accomplishment was being able to create something sophisticated at the start of this class. Now looking forward, I want to make something that surpasses this for my final project.
What a cheap option that satisfies both your and your child’s interest, look at Penta-Musical Lamp. Covid like darkness is all around us. We only feel safe at home. Let Penta-Musical Lamp be the light to your child’s darkness at night. Let it be the tool for you to transition to the long-awaited clubs that have closed down. Everyone’s musical journey starts somewhere, let Penta-Musical Lamp be that start of the journey.
ANNEX:
POSTER:
MATERIAL:
- 42STH33-0404AC stepper motor
- L293D chip (H-bridge)
- Power jack
- 12 VDC power supply
- USB protector
- Motor Platform
- Neo-Pixel Ring
- Wires
- 9 Buttons
- Arduino Uno
- Breadboard
- Pingpong Ball
- Cardboard
- Soldering Iron/Metal
- Buzzer
- Speaker
- Electrical Clamps
CODE: NEO-PIXEL RING, BUTTON, AND TONE
#include <Stepper.h>
const int stepsPerRevolution = 100; // change this to fit the number of steps per revolution
// for your motor
// initialize the stepper library on pins 8 through 11:
Stepper myStepper(stepsPerRevolution, 8, 9, 10, 11);
void setup() {
// set the speed at 60 rpm:
myStepper.setSpeed(10);
// initialize the serial port:
Serial.begin(9600);
}
void loop() {
// step one revolution in one direction:
myStepper.step(stepsPerRevolution);
// step one revolution in the other direction:
myStepper.step(-stepsPerRevolution);
PITCHES:
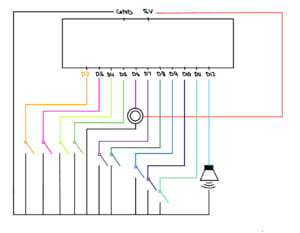
CIRCUIT DIAGRAM: NEO-PIXEL RING, BUTTON, AND TONE
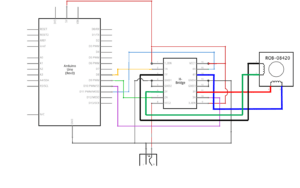
CIRCUIT DIAGRAM: MOTOR
WORK-CITED:
Pictures:
Admin. “12 Types of Wood Cutting Tools and Their Uses [with Pictures & Names].” Engineering Learn, 28 Nov. 2021, https://engineeringlearn.com/12-types-of-wood-cutting-tools-and-their-uses-with-pictures-names/.
Admin. “Types of Glass Cutting Tools and Their Uses [with Pictures].” Engineering Learn, 18 Nov. 2021, https://engineeringlearn.com/types-of-glass-cutting-tools-and-their-uses-with-pictures/.
Amazon.com: Kicko Spinning Disco Ball with LED Lights – for Parties … https://www.amazon.com/Kicko-Spinning-Disco-Ball-Lights/dp/B09XB672RW.
General Kinematics. “What Is Cardboard Made Of.” General Kinematics, General Kinematics, 7 Sept. 2021, https://www.generalkinematics.com/blog/the-life-cycle-of-cardboard/.
“MPC Studio.” Music Production Hardware & Software, https://www.akaipro.com/mpcstudio.
“Nightclub.” Wikipedia, Wikimedia Foundation, 19 Sept. 2022, https://en.wikipedia.org/wiki/Nightclub.
“兒童燈Star Projector Lamp Children Bedroom Led Night Light Baby Lamp Decor Rotating Starry Nursery Moon Galaxy Projector Table Lamp.” 燈神世界數碼, https://shop.price.com.hk/light/product/874327.
Code:
/**
* An Neo-Pixel Ring that turns ON and OFF
* This was adapted from the tutorial found here:
* https://www.arduino.cc/reference/en/libraries/adafruit-neopixel/
* https://github.com/adafruit/Adafruit_NeoPixel
[…]
*/