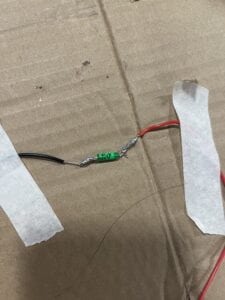
Step 1: Prepare your tilt sensor
I grabbed two wires and stripped both ends of them. I then took the tilt switch and intertwined it together with the exposed wire. I then heated up my soldering iron and soldering metal and soldered them together.
Task #2: Connect
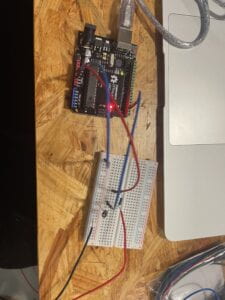
I connected a blue wire to GND and red wire to 5V on the Arduino Uno. I also connected another blue wire to D2 on the Arduino Uno. I placed a resistor onto the breadboard and connected the 5V wire on one side and D2 wire to the other side of the resistor. I also connected the GND wire to the negative power source of the breadboard. Then I took the black wire on my tilt switch and connected that to the negative power of the breadboard. I then took the red wire of my tilt switch and connected it on the same row of the D2 wire. Lastly, I connected the negative end of the capacitor to the negative power source and the positive end on the same row as the D2 wire and the red wire of the tilt sensor.
Task #3: Program
CODE:
int SENSOR_PIN = 2;
int tiltVal;
void setup() {
pinMode(SENSOR_PIN, INPUT); // Set sensor pin as an INP
Serial.begin(9600);
}
void loop() {
// read the state of the sensor
tiltVal = digitalRead(SENSOR_PIN);
Serial.println(tiltVal);
delay(10);
}
Step 2: Refine the code
CODE:
int SENSOR_PIN = 2;
int tiltVal;
int prevTiltVal;
void setup() {
pinMode(SENSOR_PIN, INPUT); // Set sensor pin as an INPUT pin
Serial.begin(9600);
}
void loop() {
// read the state of the sensor
tiltVal = digitalRead(SENSOR_PIN);
// if the tilt sensor value changed, print the new value
if (tiltVal != prevTiltVal) {
Serial.println(tiltVal);
prevTiltVal = tiltVal;
}
delay(10);
}
Step 3: Wear your sensor
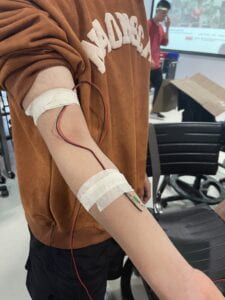
Step 4: Bicep Curl Workout!
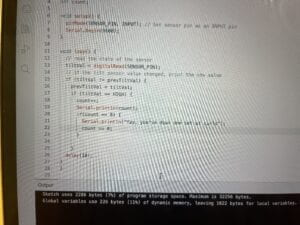
CODE:
int SENSOR_PIN = 2;
int tiltVal;
int prevTiltVal;
int count;
void setup() {
pinMode(SENSOR_PIN, INPUT); // Set sensor pin as an INPUT pin
Serial.begin(9600);
}
void loop() {
// read the state of the sensor
tiltVal = digitalRead(SENSOR_PIN);
// if the tilt sensor value changed, print the new value
if (tiltVal != prevTiltVal) {
prevTiltVal = tiltVal;
if (tiltVal == HIGH) {
count++;
Serial.println(count);
if(count == 8) {
Serial.println(“Yay, you’ve down one set of curls”);
count = 0;
}
}
delay(10);
}
}
Step 5: Exercise Challenge
Since my group was not able to get to this step, I’m here to explain a little bit about what we would’ve done. Our group was thinking about doing jumping jacks. When the arm goes down it will be LOW and when it goes up it will be HIGH. In this case when it goes from LOW to HIGH it will count as 1. We were also thinking about adding a line of code in which when the individual has done 8 jumping jacks it will peep or play a short music.
Reflection:
The tilt sensor has a small ball within it that tracks HIGH and LOW. So when the ball moves from one side to the other it will count 1 if the code is written to count that. So if the tilt sensor is not placed in the right angle it might miscount or not count in some cases. We had to adjust our tilt sensor a few times for the code to work accurately. We did try shaking it and the sensor kinda went wild, but due to the line of code that says delay it will slow the down the amount of time it is registered into the system. We also noticed an error when we were programming. I tried to reset the count back to zero and coded (count == 0), but this in fact was a coding error. I later changed the code to (count = 0) and it worked. So we figured out that one equal sign and two equal sign has fundamentally different meanings to them.

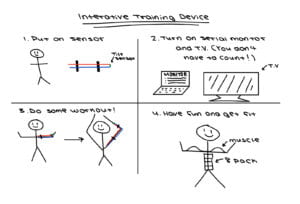
Interactive Training Device:
