The Escape Room — You’re Monitored
Instructor: Rodolfo Cossovich
Group members: Arial Hu & Jenny Tan
CONTEXT & SIGNIFICANCE
Before we start our project, we researched a lot using word entry ‘arduino interactive game’ on Youtube. The games that appear the most are target game, speed game, arcade game, maze and using arduino as a controller to play games on computer. Their interactions are engaging, repetitive and they take a short time to understand, which bring people’s attention to a immersive and highly concentrated standard.
According to this previous project Musical Swings by Daily Tous Les Jours, it is what regarded as a positive example of interaction. The object respond to user accoding to users’ behaviour. The ideas here overlapped with my comprehension of interaction. Within a short time, we could attrack participants so that their interest and desire would be mobilized, in this case, the Humen-Computer interaction could be smoother and more multiple. These specifities triggered my thinking towards our own midterm project——How to build a interactive and immersive game? As the games that listed above are common to build, me and my teammate related back to our own interest in immersive scenery. Both of us love to play room escape, the feeling of decryption is what we enjoy and we would like to share the joy with everyone. The uniqueness of this project is the presentation of a miniature form, we minimize the size of a real escape room and try our best to make the inner decoration seems real. This would surprise the participant with their first glimps and arouse their curiosity.
CONCEPTION & DESIGN
- Motif
The idea of this room escape is originally from The Trumen Show. Trumen was monitered, but he found out the weirdness in his world and finally escaped. Let’s look at this in a different perspective and put our attention onto the one who is watching the show. It seems like they were monitoring Trumen and it’s true, however, their behaviour when reacting to the show was also recorded. In this case, they were monitored. Here comes the question, when we are monitoring others, are we not monitored? Monitor and monitored is inside a infinit loop, they exist on the same object for the same time.
According to this conceive, we intended to seperate our room escape into three parts. Help Trumen to escape, Trumen discovers himself been monitored, the participants found themselves been monitored. Our purpose is to remind our participants that while you are inspeciting others, you are been survalianced, so, be vortuous to the world and the people around you, and don’t let yourself be the target of criticisms and danger.
As we were going to build three rooms, we set the scene from the room where the character live to the room behind the camera to the monitoring room which monitor the participants.
We made the first room split into two halfs, when the participants trigger the last organ in the room, the two halfs will rotate to the side. For the sequence, there is a light sensor in the hollow bed, when the bed is open, the painting which sticks to a electronicmagnet sensor will fall down. After the participants destroy the journal that provide hint to the bed in the fireplace, a key will drop from the desk controlled by a servo. When using the key to open the wardrobe, a button is waiting to be pressed. After pressing it, the two halfs of the room rotate.
The mission in the second room is to clean up the studio so that the character could finally successfully escape. By catagorizing the stuffs into right place, the pressure sensor will reach certain value which triggers an audio and the rolling shutter door will open.
After the door open, the mirror behind will reveal and the participants could see their own face reflect by it.
- Materials
For the rotation of the first room, we tried the blue little servo at first, but it could not stand the gravity, so we change a bigger motor to support the room. Mobilization and power are important factors here.
The back of the third room is a mirror, we decided to write “mirror” on the wall to pretend there is a mirror reflecting te participants’ face. But when considering the visualization and efficacy, we at last bought a mirror to make the project more complete.
FABRICATION AND PRODUCTION
- Significant steps
This is the coding part. We divided the first room into three sections, the light sensor with the electromagnet sensor, the reed sensor with the servo and the botton with the motors. The code are seperately written and put together afterwards. It took us a long time to complete the combination of these codes, because they got chances to influence each other.


This is the machenism part. For the position of the two motors which make the halfs of the room rotate, we came up with three ideas. They could be stuck on the outside of the left and right wall of the box, or on the top of the box, or we could cut out the corners of the second room to stuck them in. When we tried the first method, the support rods of the motors were too far from the walls they supposed to connect or else it would be too fragile. If they are stuck on the top, the strength of the motor would easily make themselves rotate, because compared to the cardboard they needed to mobilize, they were too light. In this case, we chose the third way, and their positions could help them perfectily coordinate with other components.
- Responsibility allocation and cooperation
I am good at fabrication and my teammate is good at popping up with ideas. So when it comes to cutting the cardboard, gluing the components, making adjustment and soldering, I become the mainforce and my teammate did a really good job in providing assistance. When it comes to link up the whole story and make the connection much smoother, my teammate provide most of the ideas and we filled it up with details together.
- After user testing
During user testing, we guided our participants through the whole process. Some mentioned that they would like to clearly understand what their position was when first encountered teh game, a specific context would be better. They proposed that we could add more social issue to the project, for example, my friend is missing and the last place she at was the hotel, when we get into the hotel, we discover the camera and find out the truth. This was a good proposal, however, if we follow this logic, then the link among the three rooms would be not as fluent as it was before. In this case, we made our concept clearer, the participants here are randomly dropped in a room and they might discover something strange in it, soon they will know their mission is to observe the life of the character in the room and help him to escape, at last, they will surprisingly notice that their behaviour is under monitor.
When the tester encounters the second room, they felt a little bit confusing that to what extent they catagorize all the stuffs could the next step happen. We have several miniatures inside including PC, chairs and cameras, and we made three black blocks on the ground as a hint of where they should put them. The hint was not obvious enough, so we adjust the size of the blocks to the size of the stuffs to make it clearer.
For the connection of the three rooms, our ideas iterated a l, ot, so we let participants to make the choice so that we could figure out which is the most convenient for them. The choices are audio in a whole piece, a journal telling the background which is a little bit long and audio instructions after finishing each step. The feedback was, if the audio is not too long, then the participants would be patient enough to listen to it. So, we break down the audio into pieces and make it as short as they could, and turn the journal into the short instruction.
- Obstacles
During fabrication, we encountered several obstacles which are as follows.
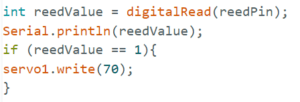
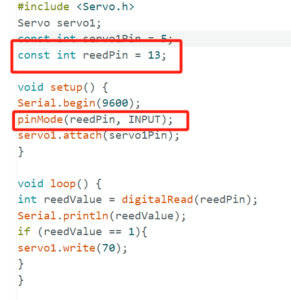
The first one is the reed switch. Once the value of the reed switch is ‘1,’ the servo it controls will rotate 70 degrees. The problem came as the servo will rotate by itself no matter we trigger the reed switch or not. Thanks to LA, she pointed out that these components should not be in series circuit but parallel circuit, and by reading the value by the pin could the arduino control the servo.

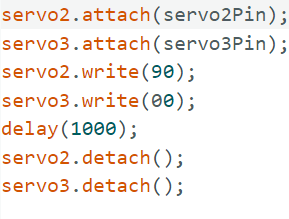
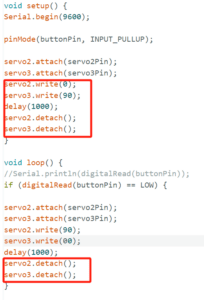
The second one is the rotation of the two motors. We aim to let them rotate simultaneously after the button is pressed, but one of them would automatically rotate right after we push the code and the other will rotate as we wish.
To fix this, we turned to professor Rudi for help and he helped us with coding.

The third one is the machenism of the rolling shutter door. We first decided to use a motor to drive the door(made by the cover of the cardboard) to roll up, but the resistance was too intense and the motor was unable to rotate. So we changed the cardboard cover into paper and use ur hand to roll it up. Hoever, after we rolled it up, the paper door would pop up and was very hard to restore. In this case, we made a funnel-like track at the top of the door to fix the last position of the roll and it turned out to be ok.
The fourth one is the application of the audio to arduino. Since it takes a long time to prepare, Rudi suggested that we could fake it till make it. We then record them in our phone and play them when the participants reach certain steps.
CONCLUSION
Our goal of this project is to bring the joy of escaping from the room by decoding and raise the awareness that we are all under survalliance, and it truly does attracted most of the participants. As I mentioned before, my definition towards interaction is ‘Within a short time, we could attrack participants so that their interest and desire would be mobilized, in this case, the Humen-Computer interaction could be smoother and more multiple.’ Our porject needs to improve is its timing, because it takes long for participants to finish. Additionally, the scale of the project could be larger or else the crowded feeling is not a good sign for user experience. Also, we could learn how to apply audio into coding so that the whole project could be more complete. IMA project never ends and we are looking forward to future development.
APPENDIX
Component list
Reed switch, light sensor, electronicmagnet sensor, servo button, pressure sensor, DIODE, power supply 5v*1
Motor, 10kΩ resistor*2
Sketch
Test for the electronicmagnet sensor
Final version
The code for the first part
#include <Servo.h>
const int lightSensorPin = A0;
const int electromagnetPin = 9;
const int pressurePin = A1;
const int servo1Pin = 5;
const int reedPin = 13;
Servo servo1;
void setup() {
Serial.begin(9600);
pinMode(electromagnetPin, OUTPUT);
pinMode(reedPin, INPUT);
servo1.attach(servo1Pin);
}
void loop() {
int lightSensorValue = analogRead(lightSensorPin);
digitalWrite(electromagnetPin, HIGH);
if (lightSensorValue > 50) {
digitalWrite(electromagnetPin, LOW);
}
int reedValue = digitalRead(reedPin);
Serial.println(reedValue);
if (reedValue == 1){
servo1.write(70);
}
Serial.print(“Light Sensor Value: “);
Serial.println(lightSensorValue);
delay(100);
int pressureValue = analogRead(pressurePin);
Serial.print(“Pressure: “);
Serial.println(pressureValue);
}
The code for the second part
#include <Servo.h>
const int servo2Pin = 6;
const int servo3Pin = 5;
const int buttonPin = 2;
Servo servo2;
Servo servo3;
void setup() {
Serial.begin(9600);
pinMode(buttonPin, INPUT_PULLUP);
servo2.attach(servo2Pin);
servo3.attach(servo3Pin);
servo2.write(0);
servo3.write(90);
delay(1000);
servo2.detach();
servo3.detach();
}
void loop() {
//Serial.println(digitalRead(buttonPin));
if (digitalRead(buttonPin) == LOW) {
servo2.attach(servo2Pin);
servo3.attach(servo3Pin);
servo2.write(90);
servo3.write(00);
delay(1000);
servo2.detach();
servo3.detach();
}
delay(100);
}