For the in-class activities:
When building the first circuit, I first could not make the light turning on but I then found that I accidentally mistook the way LED light is linked into the circuit by reversing the positive and negative end. Fortunately, I changed it into the correct way after Amelia reminded me. Here is the circuit I built.
For the circuit3, It is interesting to make the buzzer sound like a song but it was difficult for me to understand the code. However, after I looked at the explanation provided by the arduino website, I got a little bit idea of how this code runs. Here is the video recording how the circuit works.
For the circuit3, in the first circuit I built, the yellow one will light up even if the button is not pressed ten times as below video shows.
I checked the circuit carefully since there were so many wires. I found that I actually did not put the green one into the circuit because I put one end of the wire which connects the green LED and arduino board wrong. After I fixed the circuit, it worked like this.
For questions:
1. I want to propose another kind of button which is pushed down only if a little plastic cube falls on it and the plastic cube is from a little gaming device above it looking like a large piece of ice. The two users who play the game will randomly pick one small part of the ice which is represented by plastic cubes and try to knock it down with a small hammer specialized for this game. Among all these cubes, only several of them can be knocked down and the person who first knocked down ten times of these cubes will win. This button will make the game more interactive because the way people input their action is more interesting. As Tom lgoe and Dan O’Sullivan argue in their book, many people are already happy with their ability to express themselves on a computer, either through the screen or the speakers, but they still feel constrained by the input format of just using mouse and keyboard. I consider that this theory also works in the circuit because only pushing the button is not that interesting and challenging, which can lead to the result that the game will not attract people for more than ten minutes and make it less interactive. However, if using my button, it will add more uncertainty into the game which can finally add the interaction into the game. By using the new button, it can also adds more transduction in the entire process—-the transform from the pressure made by the plastic cube when user knocks it down to the energy that presses the button.
2. We used a 10 kOhm resistor with each push button here because the resistor can provide a connection to ground when the button is not pressed. This connection can avoid the situation that the input pin is not connected to anything which is also named “floating”, and lead to the an antenna that means reading in random values. Therefore, we add a 10 kOhm resistor to ensure that we can read LOW when the button is not pressed.
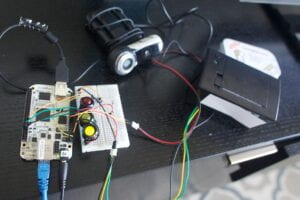
3. I found a project named Descriptive Camera created by Matt Richardson. The camera in this project works quite like a regular camera — users can just point it at scenery and press the shutter button to capture the scene. However, instead of outputting an image, this camera gives a text description of the scene. Here is the link to the project. The core technology of the project is Amazon’s Mechanical Turk API which is an existing technology before the project and this demonstrates that the designer used tinkering method by reusing the existing technology. The designer also worked with several people or gained help from specialists and this shows the collaboration between different designers. To create this camera, the designer connects all the stuff together like this. This connecting is also consistent with the method patching.
