Final Project Report: Mural Marathon!

A. “MURAL MARATHON!” – Nicole Cheah – Andy Garcia

The Project From All Angles: 

B. CONCEPTION AND DESIGN 

In terms of the development of our project’s concept and how previous preparatory research + the essay lead to its final formation: Our project’s development was extremely dynamic– what I mean by this is that we had to tweak our project numerous times throughout the building process depending on what code worked for us, what materials worked for us– and with this, what mechanisms worked for us. The initial concept of our project was thoroughly developed in the “Three Ideas” and “Project Proposal Essay” Assignment. After completing the “Three Ideas” Mini-Assingment, my partner Eric Jiang and I looked at both of our submissions and decided to use one of my designs (at the time I called it the ‘Virtual Graffiti Wall) that I created (see attached below of what I wrote and handed in). After choosing our favorite design along with a few others, we had a meeting with Andy (see attached below notes from meeting with Andy) and we three consulted each of our ideas (including our main one) and discussed how we could best flesh out the idea and bring it to life– this ‘bring to life’ implying how to source materials and incorporate materials and code together to create a moving mechanism. After meeting with Andy, we revised the concept and created new concept drawings (also attached all the concept drawings from Three Ideas and Project Proposal Essay) and submitted these as our Project Proposal Essay. My initial idea for this project was a virtual graffiti wall where users can ‘paint’ onto a projected large wall using ‘light pens’ or simply using their finger (through light tracking + digital painting). I thought, at the time, and also based off of research, the way we could incorporate Arduino + Processing would be how: a) Arduino would track the position and movement of the light pens / fingers while b) Processing would help render on the ‘paint’ (‘paint’ is in quotation marks as there won’t be actual paint on the wall, it is like what we did in the Etch-a-Sketch exercise on Nov.10 recitation but much more largescale) on the wall. Additionally, I really was inspired by a pop-up exhibition at K11 (mall in Shanghai) where it was a dynamic collective art-piece on a wall where everyone could draw on it and sign their signatures (see link attached below). My idea, as expressed in the Three Ideas and Project Proposal Assignment was that Eric and my project would kind of be like a memory of the “IMA 2023 show”– I thought that not only would this be a meaningful cumulative art piece but also can help users or whoever is interacting with our project to destress and have fun with others as mental health is a big thing to consider at the time of our IMA show (which was during Finals week). Things that changed from meeting with Andy– that we realized were more ‘feasible’ to do in real life were using ultrasonic sensors (to help calibrate the position / distance of the spray can– at that time we didn’t even know that we were going to use a spray can, we thought it was going to be like a ‘light pen) and pressure sensor on the tip of the then-decided-on light-pen. I think the way in which we also wanted to make it more interactive was to add paint buckets on the left side of the Processing canvas– that was our initial idea, but in the end, we decided upon using 10 sensors in total: 5 buttons, 2 NeoPixel Strips, 2 Ultrasonic (distance) sensors, and 1 pressure sensor.

I think throughout deciding upon how we were going to put together and make our project work, we constantly thought about how our users are going to interact with our project and how can we elevate this experience + perhaps add more interactive components. With this being said, I think thinking about things like this really influenced our design decisions. As, in the end, we used 10 sensors in total– each triggering all the user’s senses (not really for ultrasonic sensor as it is only calibrating the distance for the spray can, but with every other sensor it did as: neopixel triggers vision because of colour, you can hear police siren sound in the background, you press on the pressure sensor to draw and you can see it on the screen, and then you can press the five buttons with left hand to change colour, clear screen, and take screenshot). I recall clearly, whenever we accomplished something– for example, we got our ultrasonic sensor AND our pressure sensor to work together– the LA’s, Andy, and Kevin would encourage us to look at other ways we can elevate our project. With this, I think Eric and I did quite a bit of reflection during these stages to see what else we could add to our project and ultimately, all of these little improvements we made helped us craft our narrative and shape the story we were trying to tell with our project. You can see how it changed with how the concept went from originally being a collective drawing ‘memory’ board to more of a ‘Mural Marathon’ Graffiti + Police experience!

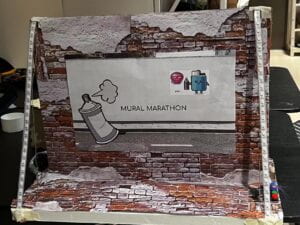
The User Testing Session was incredibly important to us as we were able to a) get direct feedback from user testers in regards to areas they believe can be improved + b) hear what they think regarding how our functions were working then. I asked my boyfriend, Brian Kwok (CO ‘2024) to be our official user tester and two main feedback points he gave included: a) perhaps incorporating a visible cursor on the screen to make it more clear where every stroke starts and b) maybe add a cap or like a cardboard bit to the top of the spray can for more satisfaction when pressing the ‘spray can’ button. The rest of our ‘user testing notes’ are attached below for your reference. However, I think after a lot of people came around and tested our project, the main feedback points that Eric and I believed we had to focus on after the session were: a) change the wall (which at the time of user session was plain, refer to Appendix to see) to be a brick wall so that users can feel like they are immersed in an alleyway spraying graffiti, b) Andy brought up maybe users can wear something to feel as if they are being rebellious and painting graffiti while being chased by police, c) wrap up the wires to make them look more neat / refined, d) and perhaps find a way to screen-capture one’s drawings after they finish using our project (at the time of user-testing, we didn’t have this function yet). Everything that we implemented post user-testing up till final presentation day / IMA show (note: not many major changes were made in between the presentation day + IMA show time frame) really made our project the experience we wanted to create– which was the feeling of freely painting on a wall with graffiti while being chased by police! I think at the time of user-testing I was a bit confused and was proposing to Eric + Andy whether we should make it into a game (points system) with the whole graffiti + police idea. However, Andy suggested that we keep it as an experience. Now reflecting upon this post-IMA show, I think this was a really good idea as at the IMA show many little kids or even adults who came to play with our project didn’t feel the rush or pressure to draw something. Instead, they took their time to curate something they liked or thought looked good!

INITIAL STAGES: We decided to use one of my ideas that I submitted (Design #3) from the ‘Three Ideas’ Assignment: In this step I was able to brainstorm certain concepts I wished to further explore at the time–

INITIAL STAGES: Our Initial Inspiration (Click the Link to See the Video!) https://drive.google.com/file/d/1dJWCYSUDtOReAx4dh1v6FhjYYusD-hc5/view?usp=sharing

CONSULTING THE IDEA WITH ANDY:  Notes from Meeting with Andy–

POST-MEETING WITH ANDY: Concept Sketches / Drawings We Decided Upon–

POST-MEETING WITH ANDY: The Workflow We Decided Upon and Subsequently Created For Our Final Project–

Our User Testing Comments / Problems (Notes)–

C. FABRICATION AND PRODUCTION 

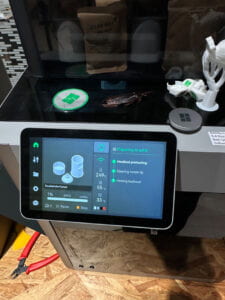
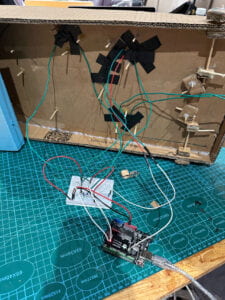
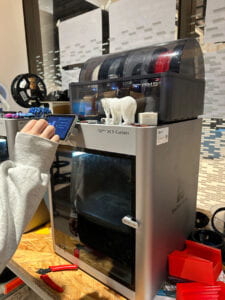
I think the biggest challenge we had right from the very start was re-mapping the project constantly– this re-mapping function involved constantly calibrating our ultrasonic (distance) sensors. We had to– in the first place, learn how to code as this class was Eric and my first time coding and actually putting the skill into practice. Even though this was extremely challenging, we constantly referred to slides regarding how to put together a code and eventually we got started with our Arduino main code (the full code which is attached at the very bottom of this report). For the ultrasonic sensor, we had to figure out how to bring the “virtual mouse x and mouse y concept” to life– into physical components. Through a lot of trial and error we were able to figure out how to bring it to life and realized that– for example, we needed a table as our base, and we needed to create a wall (which we ended up creating from cardboard) on the left hand side to mimic the x and y axis in real life (and which the signals can bounce off of, as that is how both ultrasonic sensors communicate and work). After figuring out how to use the ultrasonic sensor, we moved onto digital fabrication and used a) 3D printer to print a spray can which we used TinkerCad program to alter the dimension and b) laser cutter to create a wooden box which we can hide all of our wires + our two arduino unos + breadboard in (design for wooden box was tweaked using the Cuttle.xyz program). After we retrieved what we made from the 3D printer (the spray can) and laser cutter (wooden box) we then moved onto figuring out how to use the pressure sensor– as this was supposed to act as the spray can’s button (what is triggering the painting feeling). After having both our ultrasonic sensor and pressure sensor installed (and codes combined already), we spent a lot of time (a few hours everyday leading up to the user-testing session) to locate the computer in a fixed space (on a table, with the wall we constructed on the left hand side) and just tested the drawing function constantly. Please refer to the Appendices section down below to see videos of this process in particular.

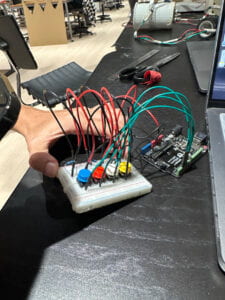
Like mentioned before, since we encountered more success than failures in terms of figuring out how to use our main sensors– which we actually figured out way faster than what we expected (as we are beginner coders)– we kept reflecting on our production choices and revising them (ex: adding new sensors + components, which helped change the narrative as a whole in the end). In the end we used 10 sensors in total, like mentioned above (2 ultrasonic sensors, 1 pressure sensor, 5 buttons, and 2 LED Neo-pixel strips). The criteria we used to pick these sensors were based on a) whether they fit into the story / experience we are trying to show and best present and b) whether they trigger a certain sense (touch, sound, sight, etc…)– as triggering different senses, we discussed, could help make our project more interactive and unpredictable. The sensors we chose were decided upon the day we met Andy for our session where we discussed what ideas we had in mind. Originally, from doing simple research on the internet, I was a bit lost in terms of what sensors could actually make this project work using the sensors / materials available at school’s lab. However, after discussing it with Andy, we realized that using ultrasonic sensors + pressure sensor would definitely be best suited to how our project functions. Looking back, I do not think we played with that many options, as like I said before, we decided upon which sensors we were going to use the day we met with Andy– however, thinking back to a time like this– I remember we changed the way we were going to let users ‘change colours’ from implementing paint buckets in Processing (which users can tap in real life) to using external buttons that were wired into our Arduino Uno.

In terms of this being a jointly-developed project, Eric and I split our time in the lab and on working on the project very equally. The strategy we had throughout the time we were given to work on it was to just figure every step out together as we both had just learned coding from this class starting this semester. I think this was extremely effective and that our hard work paid off in the very end. Moreover, I think the time-management approach we took with this project was similarly extremely effective as we started really really early in the week (many days ahead of user testing / the schedule in general) and everyday spent a few hours working on different components of the project + testing it (trial-and-error, especially with the ultrasonic sensor and pressure sensor function). Since we took this approach with our time-management, we did not need to rush before any major deadline (user testing; final presentation day; IMA show) and we always had our code figured out and working as we tested our project so much. In addition to this cooperation aspect, I just wanted to add that despite not knowing Eric before working with him on this project, it was overall a super fun experience working together. I think I was a bit scared to take on the final project as I was not able to be in the same group as my midterm project (being with friends I already knew outside of class: Tammy and Jess). However, working with Eric over the last month on this project was refreshing and I think we can both say we learned a lot and grew from working with each other!

D. CONCLUSIONS

I think to sum it all up– I feel like this final project was really rewarding as I felt like I was able to apply every skill I learned throughout the semester into one project. I think what was super valuable to me after finishing this project was just the confidence boost I had and ‘Wow, I can really do it’ mindset I had. I have always told myself I cannot code as  I have just always thought I am super weak in coding without having ever tried it before. Despite feeling really lost at times during the project, for example when I could not figure out a code for the life of me– I feel like now, post-IMA show + reflecting upon the final project in its entirety, can say that it was really refreshing and rewarding doing this type of project at school. I say this because– with my major being finance, most of the work I have to do is very monotonous like group projects and presentations. This class really taught me step-by-step all the way from which strips on the breadboard is positive and which is negative all the way to having to apply all the concepts we learned on my own– this was really incredible to me.

With that being said, I am really proud of my final project and believe that it definitely aligns with my definition of interaction which I established way earlier on in the semester. My project –like what I mentioned in the mini-assignment on what I define interaction as– both requires time and effort. If you do not spend time trying to figure out how to use the spray can, you will not be able to grasp the full interaction. You need to take your time and figure out how to use the spray can, listen to the police sirens, figure out how to change colors, and just have a fun time drawing.

Our audience on IMA presentation day were extremely interested and engaged– because of this, they interacted with our project exactly how we hoped they would from the start. Little kids playing with our project made it feel even more rewarding as seeing them go up to their parents and show them what they drew, made me feel really happy on the inside (scroll way down to see videos below in Appendices section!)

I think that if I had the chance to further improve this project, like what Andy said on our final presentation day– we could consider a) making it large-scale, making it similar to drawing on an actual wall, and b) implementing a ‘pssffhhhh’ sound to imitate what a spray can really sounds like. In terms of what value I have learned in terms of setbacks and failures– I don’t think we encountered too many, as mentioned before– however small hurdles we encountered such as figuring out the re-mapping taught me about pure perseverance and that anything is possible (like coding, in the case of this situation) if I put time and effort into working on it.

The goals Eric + I wrote about in our Project Proposal Essay Assignment: 

E. DISASSEMBLY 🌏

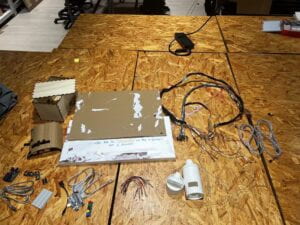
Photo Showing the Disassembly of Our Project: Broke it down into elemental components so they can be recycled and used again by future Interaction Lab Students! 🙂
F. APPENDIX

Complete Materials List:

  • 1x Duct Tape– to wrap up wires to make it look neater at the end of the project
  • 1x Normal basting tape to mark on the table the dimensions the user has to stay within when using the spraycan
  • Jumper Cables–both M-M and M-F
  • 5x buttons (with extensions on them) 
  • Printer so that it can be used to print the ‘brick wall’ images 
  • 2x LED Neo-Pixel strips 
  • 3x pieces of white printer paper that can be used to create the title page and instructions page 
  • 1x medium styrofoam board 
  • 1x medium / large cardboard board 
  • Laser Cutter to make a wood box to hold arduino uno + breadboard + all the extra wires (box is meant to help make the set-up look neater along with the duct tape that wraps around all the external wires that are out of the box) 
  • 2x Arduino Uno 
  • 1x Breadboard 
  • 3D Printer to make Spray Can 
  • 2x Ultrasonic (distance) Sensors
  • 1x Ruler / Tape Measure to help in the re-mapping stage of the project
  • 1x Pressure Sensor 
  • 1x Box cutter / pen-knife
  • Scissors 
  • 1x Computer Stand + 1x Laptop (ideally with 3 plug-ins if using projector; if not using projector, computer only needs 2 plug-in ports)
  • 1x Sharpie 
  • 1x USB-C to USB adapter cord (from TaoBao)

Additional Images and Videos:

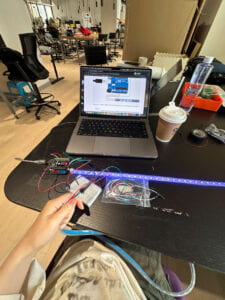
Prototype (Pre-User Session)– Wiring (with lots and lots and lots of soldering!) + Building the Base (you can see our Cardboard Prototype of the Spray Can in the videos)!

Figuring out how to Re-Map (Pre-User Session): For the 2 Ultrasonic (Distance) Sensors we used in the 3D Printed Spray Can Bottle

Digital Fabrication (Pre-User Session): a) Using the 3D Printer to Make our Spray Can! 
Digital Fabrication Pt. 2 (Pre-User Session): b) Using the Laser Cutter to make a Wooden Box to contain all of our Wires + Arduino Unos (2 of them in Total) + Breadboard 

Putting it All Together (Still Pre-User Session)– Figuring out the ‘Set-Up’ + Lots of Re-Mapping to Make the ‘Draw’ Function Work (bringing the concept of ‘mouse x and mouse y) into real life / physical mouse x, mouse y)– Lots of Trial and Error in this Step! Frustrating and Confusing at the start, but was incredibly rewarding at the end when it all worked out~

Positioning of Ultrasonic Sensors (bottom sensor cannot be seen clearly in the two images, but the ‘Y-Axis’ one can be) and Pressure Sensor + Our 3D model of our Spray Can 

User-Testing Day! 

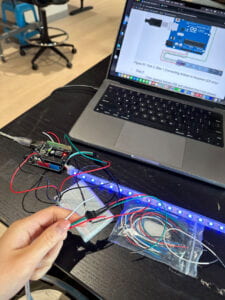
Adding the LEDs (Post User-Testing)
Adding Buttons (Post User-Testing): So that Users can a) change colours, b) take screenshots when they want to ‘save’ their drawing after interacting with our project, c) ‘reset’ the Processing canvas
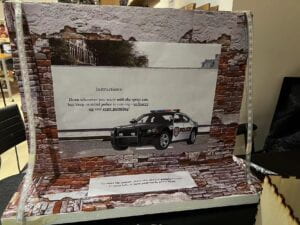
Our Brick Wall That We Made (Post User-Testing): You can see the LEDS that flash ‘Police-Siren’ lights (Red + Blue) on both sides (R+L) and the title page saying ‘Mural Marathon’ and the instructions side 
Final Presentation Day In-Class!

IMA Show– so many people and small kids came to test out our project– was so rewarding to see our project working and people (especially small kids) having fun with what we built! 
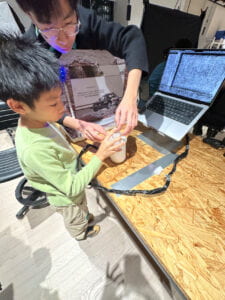
Finally, Our Set-Up on Photoshoot Day!

The Full FINAL CODE We Used For Our Project (3 codes in total; 2 arduino, 1 processing)

*Notes before running code:

  • For processing, in order for the code to run, we had to make sure we clicked ‘save as’ to save the processing sketch to ‘Desktop’ before running the code. Then, we put the concrete wall image + police siren sound in a new folder ‘data room’ before running the code. We had to make sure both files are spelt correctly (ex: “Police Siren Ambience in Busy City.mp3” and “concrete wall.png”) as the code would not work if it wasn’t spelt correctly. Refer to the two images below in regards to what I am talking about. 
  • If using projector: we had to make sure a) the projector is 25-30 cm away from the left wall to the left edge of the macbook, and b) that the projector is sitting on top of the laser cutting board 

FIRST ARDUINO CODE –> (1/2 arduino code– this is the MAIN code controlling majority of the sensors)

*Note: As we had two Arduino codes running at the same time, we always started running this one first, and then subsequently the second code. Note that this code pasted below is the ‘main code’ of our project– so the code controlling the 2 ultrasonic sensors, 5 buttons, and pressure sensor. 

// constants won’t change. They’re used here to set pin numbers:
const int buttonPin1 = 2; // the number of the pushbutton pin
const int buttonPin2 = 3; // the number of the pushbutton pin
const int buttonPin3 = 4; // the number of the pushbutton pin
const int buttonPin4 = 12; // the number of the pushbutton pin
const int buttonPin5 = 13; // the number of the pushbutton pin
// variables will change:
int buttonState1 = 0; // variable for reading the pushbutton status
int buttonState2 = 0;
int buttonState3 = 0;
int buttonState4 = 0;
int buttonState5 = 0;
//first ultrasonic sensor
int TRIG_PIN1 = 9;
int ECHO_PIN1 = 10;
//second ultrasonic sensor
int TRIG_PIN2 = 5;
int ECHO_PIN2 = 6;
float SMOOTHING = 0.08;
long duration1, duration2;
long distance1, distance2;
float smoothed1, smoothed2;
void setup() {
Serial.begin(9600);
// initialize first sensor
pinMode(TRIG_PIN1, OUTPUT);
pinMode(ECHO_PIN1, INPUT);
// initialize second sensor
pinMode(TRIG_PIN2, OUTPUT);
pinMode(ECHO_PIN2, INPUT);
// initialize the pushbutton pin as an input:
pinMode(buttonPin1, INPUT);
pinMode(buttonPin2, INPUT);
pinMode(buttonPin3, INPUT);
pinMode(buttonPin4, INPUT);
pinMode(buttonPin5, INPUT);
}
void loop() {
buttonState1 = digitalRead(buttonPin1);
buttonState2 = digitalRead(buttonPin2);
buttonState3 = digitalRead(buttonPin3);
buttonState4 = digitalRead(buttonPin4);
buttonState5 = digitalRead(buttonPin5);
int sensorValue = analogRead(A0);
// first sensor
digitalWrite(TRIG_PIN1, LOW);
delayMicroseconds(2);
digitalWrite(TRIG_PIN1, HIGH);
delayMicroseconds(10);
digitalWrite(TRIG_PIN1, LOW);
duration1 = pulseIn(ECHO_PIN1, HIGH);
distance1 = duration1 / 2.9 / 2;
if (distance1 > 500) {
distance1 = 0;
}
smoothed1 = smoothed1 * (1.0 – SMOOTHING) + distance1 * SMOOTHING;
// second sensor
digitalWrite(TRIG_PIN2, LOW);
delayMicroseconds(2);
digitalWrite(TRIG_PIN2, HIGH);
delayMicroseconds(10);
digitalWrite(TRIG_PIN2, LOW);
duration2 = pulseIn(ECHO_PIN2, HIGH);
distance2 = duration2 / 2.9 / 2;
if (distance2 > 500) { //
distance2 = 0;
}
smoothed2 = smoothed2 * (1.0 – SMOOTHING) + distance2 * SMOOTHING;
Serial.print(smoothed1); // floor distance
Serial.print(“,”); // put comma between sensor values
Serial.print(smoothed2); // side
Serial.print(“,”);
Serial.print(sensorValue);
Serial.print(“,”); // add linefeed after sending the last sensor value
//Serial.println(sensorValue);
// read the state of the pushbutton value:
Serial.print(buttonState1);
Serial.print(“,”);
Serial.print(buttonState2);
Serial.print(“,”);
Serial.print(buttonState3);
Serial.print(“,”);
Serial.print(buttonState4);
Serial.print(“,”);
Serial.print(buttonState5);
Serial.println();
//delay(1); // delay in between reads for stability
}

SECOND ARDUINO CODE –> (2/2 arduino code– this is the LED code)

*Note: This is the second code we ran (again, both run at the same time during presentation mode). This code is our LED code. We knew this code was working when one side of the LED was flashing red light, and the other side flashing blue– just like a police siren! 

/// @file    ArrayOfLedArrays.ino

/// @brief   Set up three LED strips, all running from an array of arrays

/// @example ArrayOfLedArrays.ino

// ArrayOfLedArrays – see https://github.com/FastLED/FastLED/wiki/Multiple-Controller-Examples for more info on

// using multiple controllers.  In this example, we’re going to set up three NEOPIXEL strips on three

// different pins, each strip getting its own CRGB array to be played with, only this time they’re going

// to be all parts of an array of arrays.

#include <FastLED.h>

#define NUM_STRIPS 2

#define NUM_LEDS_PER_STRIP 60

CRGB leds[NUM_STRIPS][NUM_LEDS_PER_STRIP];

// int next_led = 0;   // 0..NUM_LEDS-1

// byte next_col = 0;  // 0..2

// byte next_rgb[3];   // temporary storage for next color

// For mirroring strips, all the “special” stuff happens just in setup.  We

// just addLeds multiple times, once for each strip

void setup() {

// Serial.begin(115200);

// tell FastLED there’s 60 NEOPIXEL leds on pin 2

FastLED.addLeds<NEOPIXEL, 8>(leds[0], NUM_LEDS_PER_STRIP);

// tell FastLED there’s 60 NEOPIXEL leds on pin 3

FastLED.addLeds<NEOPIXEL, 7>(leds[1], NUM_LEDS_PER_STRIP);

}

void loop() {

for (int i = 0; i < NUM_LEDS_PER_STRIP; i++) {

  leds[0][i] = CRGB::Red;

  FastLED.show();

  leds[0][i] = CRGB::Black;

  delay(1);

}

for (int i = 0; i < NUM_LEDS_PER_STRIP; i++) {

  leds[1][i] = CRGB::Blue;

  FastLED.show();

  leds[1][i] = CRGB::Black;

  delay(1);

}

}

PROCESSING CODE –> (only used ONE processing code)

*Note: In addition to the notes above (right under the start of the code section) it is also important before running this processing code to a) make sure both (two in total) wires are plugged into the computer that is running all the codes,(if using projector, there should be three plugs in total)– also must b) make sure port is correct (ex: 1101 is 101)– change in Processing accordingly.

import processing.serial.*;

import processing.sound.*;

Serial serialPort;

SoundFile sound;

// declare an Amplitude analysis object to detect the volume of sounds

Amplitude analysis;

int NUM_STRIPS = 2;

int NUM_LEDS = 60;                   // How many LEDs in your strip?

color[][] leds = new color[NUM_STRIPS][NUM_LEDS];  // array of one color for each pixel

PImage brickwall;

int NUM_OF_VALUES_FROM_ARDUINO = 8;  /* CHANGE THIS ACCORDING TO YOUR PROJECT */

/* This array stores values from Arduino */

int arduino_values[] = new int[NUM_OF_VALUES_FROM_ARDUINO];

float oldx;

float oldy;

void setup() {

  //size(1400, 800);

  fullScreen();

  //background(255);

  frameRate(30);

  brickwall = loadImage(“concrete wall.png”);

  image(brickwall, 0, 0, width, height);

  sound = new SoundFile(this, “Police Siren Ambience in Busy City.mp3”);

  //sound.loop();

  // load and play a sound file in a loop

  // create the Amplitude analysis object

  analysis = new Amplitude(this);

  // use the soundfile as the input for the analysis

  analysis.input(sound);

  printArray(Serial.list());

  // put the name of the serial port your Arduino is connected

  // to in the line below – this should be the same as you’re

  // using in the “Port” menu in the Arduino IDE

  serialPort = new Serial(this, “/dev/cu.usbmodem101”, 9600);

  println(“Loading mp3…”);

}

void draw() {

  // receive the values from Arduino

  getSerialData();

  // use the values like this:

  float x = map(arduino_values[1], 200, 500, 0, width);

  float y = map(arduino_values[0], 350, 50, 0, height);

  float size = map(arduino_values[2], 100, 800, 0, 50);

  if (arduino_values[2] > 100) {

    strokeWeight(size);

    line(oldx, oldy, x, y);

    //circle(x, y, size);

  }

  oldx = x;

  oldy = y;

  if (arduino_values[3] ==1) {

    saveFrame(“line-######.png”);

  } else if (arduino_values[4] ==1) {

    stroke(#16F063);

  } else if (arduino_values[5] ==1) {

    image(brickwall, 0, 0, width, height);

  } else if (arduino_values[6] ==1) {

    stroke(255, 255, 143);

  } else if (arduino_values[7] ==1) {

    stroke(255, 0, 0);

  }

  if (sound.isPlaying() == false) {

    sound.loop();

  }

}

void getSerialData() {

  while (serialPort.available() > 0) {

    String in = serialPort.readStringUntil( 10 );  // 10 = ‘\n’  Linefeed in ASCII

    if (in != null) {

      print(“From Arduino: ” + in);

      String[] serialInArray = split(trim(in), “,”);

      if (serialInArray.length == NUM_OF_VALUES_FROM_ARDUINO) {

        for (int i=0; i<serialInArray.length; i++) {

          arduino_values[i] = int(serialInArray[i]);

        }

      }

    }

  }

}

G. REFERENCES (WORKS-CITED)

Midterm Project Report: Aqua Arcade– A Pinball Odyssey

A. “AQUA ARCADE: A PINBALL ODYSSEY” – Nicole Cheah – Andy Garcia

The Project From All Angles: 

B. CONTEXT AND SIGNIFICANCE

The goal of our project was to create an engaging game of pinball to deliver a powerful message on ocean conservation– more specifically we wanted to create a fun experience linking gameplay to the overarching concern of ocean conservation.

 I think our target audience for this project is not limited to any age or particular demographic– as the topic is so relevant to everyone living on Earth.  Humans are indirectly affected by ocean pollution as they consume micro-plastics through the food chain subconsciously and unknowingly. We wish to, through our project, shed light on this ever-growing issue but in a very inviting way– so one is attracted to test out the project upon first glance and whilst and after playing and interacting with it, they will catch on with the ‘theme’ and ‘message’ we are trying to share. We wanted our project to look ‘fun’ and ‘inticing’ and what our final project ended up looking like (with cartoon animals on it and bright colours), I am sure would intice the younger ages, however not-to-say, adults would also be intrigued and drawn-in. I think our pinball machine is of special value and unique to its audience and itself as it functions more than just a simple and ordinary pinball game that you could find at any arcade– it is rather a message of what effect humanity’s waste decisions hold on aquatic life while being a medium of entertainment and interaction, bringing people together to have fun but also think about the bigger picture. We bring a significant issue and embed it into a fun, interactive project that has no particular specific audience– it is for anyone it draws in!

In creating our proposal prior to actually building the full physical component of this project, we conducted research as a group that helped us gain inspiration on what we should base our midterm project on– the theme / message. We decided to choose ‘ocean conservation’ as our main theme of focus after reading a few articles on the concerning ever-growing problem of the impact of waste pollution on marine life and build-up in oceans. We found the topic extremely sad to read as so much marine life has been destroyed due to human’s careless actions. Some articles we read include those from: Forbes India, The Ocean Cleanup, Mercury News, and The Convention on Migratory Species (CMS). I think, like we wrote in our proposal, we were really interested in linking this concept to the ‘aesthetics’ or the ‘decoration’ of our project– we thought this would be a really great way to express the theme and also an easy way for the player to quickly catch-on. Adding onto this, we took inspiration from certain articles in what we should include (aesthetics-wise) in our physical component of a pinball machine– for example, what waste or animals we should include. As mentioned in our proposal: “the first two articles from Forbes India and The Ocean Cleanup, delve into the escalating issue of plastic pollution in our oceans and how these plastics end up in the ocean in the first place, respectively. The last two articles that we read from Mercury News and The Convention on Migratory Species (CMS) opened our eyes to which animals in particular suffer the most from plastic pollution being littered in their habitats. They cite several cases such as, how whales are ingesting shocking amounts of plastic per day and how migratory species are one of the most vulnerable to plastic pollution.” I think now reflecting upon how we decorated our project and what we wrote, we definitely included the components that we read in articles into our physical project. 

In terms of previous projects and interactions that we were inspired by, if you refer down to the ‘reference photo’ under this section, you can see a pinball machine that we were inspired by and liked the design of. I think in terms of scale, we were originally looking at doing something similar for our final product, however, we ended up going with a much smaller scale as we found it a) much more manageable to play, b) smaller size was easier to handle in terms of the kind of cardboard we used, and finally c) we were able to use more sensors and decorate more intricately in the small area of our final product. I think comparing the reference photo to our final project– there are definetely noticeable differences between the two: a) the concepts are indeed super different (the reference photo is more arcade style, while ours focuses more on a theme); b) scale, as mentioned earlier, is very different. However, I must say, we did like the skeleton of the structure of their project in where everything was laid out (for example, with where the flippers were, etc…)

If we recall what I wrote earlier in the semester in, ‘Group Research Project: Research Response’ in regards to how I define the term, ‘interaction,’ I wrote: “The way in which I would describe the term ‘interaction’ is something that, I feel, is dependent on two factors– (1) a ‘connection and reaction’ cycle and (2) time. The first factor is the ‘cycle’ and I believe it acts as something similar to a feedback loop where –in the case of interactive art– there is some kind of connection between the artwork and observer that is the binding point / bridge between two foreign unfamiliar entities. Time and effort goes hand-in-hand and this shows why time matters and why I have set it as the second component of my definition of ‘interaction.’ This example can be directly applied to interactive art pieces– I believe it’s the time one spends that really ‘makes’ or ‘breaks’ the experience that the original artist intends to give their target audience– especially for an interactive piece. I think the way interactive pieces are time-dependent is definitely a limitation / challenge as since the experience is dynamic and not static– one is not able to judge the art at face-value, but rather the audience needs to take their own time to decipher how to even interact with the project on their own.” Pointing to the reference photo below (the project we were inspired by) and pinball machines in general, I think the definition I created to what interaction means to me really falls in line with both (the project and pinball machines in general). I think this because in regards to the (1) ‘connection and reaction’ cycle and (2) time component as I mentioned in my definition, pinball machines trigger these two in the way: (1) for the connection reaction cycle– when our audience is playing our pinball machines it is the binding point / bridge between two foreign unfamiliar entities (artwork and observer) and (2) how the person’s success in winning our game is definitely time and effort dependent. 

Reference Photo: 

C. CONCEPTION AND DESIGN

Having already used and played pinball machines throughout our childhood, Tammy, Jess and I a) already kind of knew which components we had to make, b) had a picture of what was expected out of our final project, and could picture c) what kind of interaction our final user testers would have with our project. Knowing already what a pinball machine was and how it works, we just had to figure out which materials we could buy in Shanghai or use from the Interaction Lab workspace / resources to make certain functions work and be flawless. Several questions we asked ourselves when thinking about this included: What kind of cardboard should we use for our physical prototype base (this was important as it was the sturdy foundation that people would be tampering with while playing our game)? What material should our flippers be? In regards to our flippers– what material would be best to apply force to whichever ball we choose to use? What kind of ball should we use? Should we use a big ball or a small marble? In regards to the whole ‘interactive’ process and using Arduino and sensors– we had to think how to intersect two factors: how to play the game (win and lose) and incorporate sensors throughout the face of our physical component so that it is flawless but able to send signals to our code to indicate a ‘win or loss.’

As mentioned in our proposal, our original plan for the materials / elements we were going to use in our prototype was “crafting our pinball game using sustainable materials such as cardboard for the main structure + 3D printed ‘buttons; incorporate LEDs, utilizing red lights with the bad buzzer to signify the harm caused by waste to marine life and green lights with the positive buzzer sound to represent responsible waste disposal.” Please refer to the two concept sketches we drew down below for reference of what we visualized our first prototype skeleton would look like. For our final prototype– we ended up using sturdy cardboard as our base, skewer sticks, elastic bands, copper wire, hot glue, super glue, carved out by laser wood cutter flippers, metal ball, and popsicle sticks.

I think the only big thing we changed mid-project was the flippers that was used in the bottom-middle of the pinball machine to flick the ball upwards (with force) in order for the ball to hit the copper wires. Just for some background for the copper wires– we decided to use a metal ball instead of our original plan of using a marble because Andy suggested we could use both copper wire and metal ball and when the metal ball touch the copper wire it sends a signal and with this makes the LED light up. This is how we decided to program our game– so we tied the copper wire around the skewer sticks to make triangles (refer to Appendix below) and whenever the ball would hit the copper wire we coded the project so that when it hits the light would turn on. When the metal ball would hit it again (already lit up triangle), it would turn off. In the end we coded our project to play sound– a happy noise for when someone ‘wins’ (a win was considered all three triangles lit up, refer to appendix below to see an example of what a ‘win’ scenario would look like) and sad noise for when someone ‘loses.’ Back to talking about the problem we had with the flippers– — more specifically, we started creating our flippers using just cardboard (thick pieces), hot glue, and skewer sticks. If you go down to the Appendix section under the ‘flippers’ part you can see how flimsy they were, especially in the video. After many people commented on how they were flimsy and often would get stuck, we decided for our final project to use the laser wood-cutting machine in the lab to make wooden flippers which were a lot more sturdy as we hot glued two together. Our prototype and final project– the base was mostly the same, it was just the flippers and pushers that we changed up as this mechanism was one of the most important components of our project as it was the only way the player could push the ball up the face of our machine in the efforts to hit the three triangles surrounded by wire.

Please note that all of what I have just described (materials and the trouble we went through with the flippers) can be found in the appendix section. 

I think the criteria we used to select the materials we included in our project was their structural integrity. We chose every component very carefully and you can see how precise we were with our details even down to choosing a metal ball that were attracted to conductive copper wires– I think everyone who tested our project did not realize until after a bit how ‘smart’ our pinball machine was in how it had sensors seamlessly placed and disguised throughout the machine. 

Concept Sketches / Drawings:

D. FABRICATION AND PRODUCTION

As mentioned in the previous section, I think that the two most challenging parts of our project that we had to overcome and ‘figure out’ were dealing with the flippers and the code portion of our project. I think additionally, another challenge we ran into throughout the user sessions or whenever someone would come over to our station to test our project was when our wires were faulty or when our soldered wires got loose and we had to redo them. I think this was really frustrating but we were able to figure out solutions for each individual problem so that on presentation day we could present our project working at its full capacity / capability: 1) all three lights could turn on and 2) when all three lights were on a happy sound would play to indicate to the player that they have won, 3) and vice versa if they lost within 60 seconds (the timer that we set for how long the game is) a sad sound will play. I think we were successful in following through with our initial concept (ocean conservation theme) and bringing our idea of the ‘pinball machine’ to life. I think at first we thought it would be incredibly challenging, but through many trial and error rounds and testing, we were able to figure out how to properly engineer and construct our project to work well. 

In terms of how I personally contributed to the project– I think that I chipped in for most steps of the project, we as a team, Tammy, Jess and I, worked on every step of the project together and helped each other in making the process go faster and be more efficient. I think since we were friends already, it was really easy working with them and quite fun! I think the only time when we divided roles was when Tammy was more focused on working on the code, while Jess and I spent a lot of time trying to construct, carefully place, and glue down the copper wires. After we figured out our own parts, we came together to test whether the copper wire signal was working and whether it was connected to the LED. We did not have a set or strict process when working together– our mentality was more-so, ‘lets spend as much time as we can to finish this, as long as it takes, and figure it out component-by-component.’ I think we really believed in trial-and-error and by testing lots and lots we were able to refine our project slowly but effectively (as all the components be-it the ball-launcher, flipper, and pusher, copper wire signals, all worked out in the end). 

The User Testing Session was critical for us and we really learnt a lot from our peers, Professor, LAs, and our personal user testers. Here are the notes we took during the session of certain areas we could improve on based off of people’s experience playing our game: 

“Our User Testing Comments / Problems (Notes):

(1) incorporate buzzer for music (indicating win/lose), blinking lights for winning– a reward;

(2) include a sign for objective (for all lights to light up! for example);

(3) flippers need more space in between (redo this– right flipper is not as strong);

(4) lights don’t work as well, rewire sensors;

(5) switches need to have more resistance, some get stuck;

(6) rules ned to be more obvious;

(7) high score point system;

(8) add copper tape?;

(9) delete ability for it to dim the second time it touches (restart button; everything sets to 0 but every time you touch it is always lit up);

(10) feeding the ball back into slingshot;

(11) triangles need to be better placed);

(12) “pressing better than pulling” sometimes flippers get stuck;

(13) slingshots should have more resistance? (use stronger rubber band?);

(14) work on positioning of all of the sensors (better positioning = perhaps easier to score points);

(15) advanced motor on the popsicle stick (automatic spinning, but we worry about aesthetics then)? the popsicle sticik on motor can spin randomly to throw bal in weird direction;

(16) lights flashing?;

(17) more paint + decoration;

(18) add sign indicating what kind of game it is (objective would be helpful, they need to figure out that all three need to light up, in the actual presentation we cannot explain anything so make sure goal is clear and user has some way of knowing when first looking at the project;

(19) want the project to kind of be like ‘sensory overload’ with music, etc…;

(20) reset button for player (sensor indicating round is over;

(21) left pusher gets stuck;

(22) add more lights (when the buzzer goes off for win, they light up);”

Please look below the text in this section to see some videos from our User Testing Session– one video is of Andy playing with our project and of Brian Kwok and Will Liang– the two user testers (they are both Senior students) we invited to the session to help us give constructive feedback. If you read the notes above, you will notice that there are some overlapping comments / comments that are repeated and I think the more problems we heard and the more overlapping they were– the more we understood the need to change that particular component. So I think that overlapping component was mainly a) fix the flippers, b) add more sensory elements, so music, etc…, and c) some type of score system or incentive to win.  I think because pinball machines are quite well known around the world– upon looking at the project, all the user testers during the session had some kind of inkling on how to use the project without us telling them any instructions. I think some people had trouble understanding the pushers and how they worked– some people would pull on them, and we were not able to figure this out up until the final presentation date, however, it is something we can definitely fix and learn from for our final project or if we do something similar such as re-make a pinball machine in the future. 

With all of this being said, and definitely keeping in mind our initial and dynamic project goals as we moved through the whole building, testing, and presenting process, I think our various production choices and changes we made were completely justified and effective. Us changing the initial elastics that were supposed to be around the triangle skewer sticks to copper wires and changing the cardboard hard glue flippers to sturdy wood ones made by a laser machine brought our project to the next level and the whole concept never changed– from the start of the production process when we were making our cardboard base to the very end when we were decorating and coding, our project still was a fun interactive game with a underlying message of ocean conservation (the goal, like mentioned all throughout section B of this report). 

User Testing Day Videos: 

^^Will Liang (Senior student, Left) and Brian Kwok (Senior student, Right) at our user testing session 

^^Andy playing our game!

E. CONCLUSIONS

I think certain things that I have taken away from this learning experience / full course of this midterm project include knowing how hard one must work to make something work both physically (physical component) and electronically (coding + sensors). I think I take away strong time-management skills, balancing this class among other midterms was a really hard thing to do but I found various coping mechanisms and will bring this on for future projects within this course– especially for the final project (which I know will be around exam time as well). I think I also take away the skill of building a pin-ball game machine. I have never done something like this before, and my interest for making this sort of thing really grew on me throughout the project and is definetely something I wish to further explore in the future– be-it in this class or in my free-time. I found making each individual component of the game extremely satisfying and when everything was put together and working, even more rewarding. I also really loved seeing people play our game and getting to connect over it– this made me really happy and also made me understand how something so simple can bring so much joy. I strive to make some more things like this project so that I can feel the same way I did after accomplishing everything we did with this project.

I furthermore want to say that every setback and failure we encountered be-it with the physical components malfunctions (flippers, pushers, etc…) or code (copper wires and ball not sending signal to LED), I will take this all as a learning experience into my next projects in this class or in the future as the experience was incredibly valuable! 

Please find below the references we used throughout our project– from the start to the end, especially in the proposal portion and the Appendices for the full code we used for our final project, and additional images and videos with guiding comments.

F. REFERENCES

https://all3dp.com/2/arduino-game-project/

https://projecthub.arduino.cc/Frogger1108/homemade-arduino-pinball-machine-65b3db

https://www.forbesindia.com/article/bharatiya-vidya-bhavan039s-spjimr/the-evergrowing-problem-of-plastic-pollution-in-the-oceans/85821/1 

https://theoceancleanup.com/ocean-plastic/

https://www.mercurynews.com/2022/11/01/whales-off-california-coast-eat-10-million-pieces-of-tiny-plastic-pollution-a-day-new-stanford-study-estimates/

https://www.cms.int/en/news/new-un-report-finds-migratory-species-are-likely-among-most-vulnerable-plastic-pollution

G. APPENDIX

Materials List:

  • For our final prototype– we ended up using sturdy cardboard as our base, skewer sticks, elastic bands, copper wire, hot glue, super glue, wood flippers cut out by laser wood cutter, metal ball, and popsicle sticks.
  • Components we changed:
    • Elastic bands around the three triangular skewer stick poles to copper wire around the sticks. With this, when the metal ball touches the copper wires it sends a signal due to the wires being conductive (both metal). 
    • Cardboard hot glue flippers to wood flippers cut out by laser wood cutter. 

^^We were originally going to use marbles, but we switched to using a metal ball mid-production process due to its conductive nature. 

^^Fun fact! We had to eat four whole chocolate and vanilla ice-creams in order to get popsicle sticks for our project. We used the popsicle sticks to imitate the motion of ‘fidget-spinners’ and placed it on the face / front of our pinball machine. The popsicle sticks, which moved similar to the motion also of wind turbines, helped give the a) ball more momentum when going up and down the machine and b) gave the player more visual stimuli. 

Additional Images and Videos:

Prototype (Pre-User Session)– Building the Base

Wiring Explained!–

Testing the Functions Out– Testing, testing, and more testing! (note: this stage was really trial & error, getting people to try out and test our prototype helped us understand the areas we needed to focus and spend more time on)– the videos here are from when we first started the project all the way to the mid-point all the way to the final testing stages

Fixing the ‘flippers’– one of the biggest problems we had with our project was that they were flimsy and not strong enough to push the metal ball with enough force up the surface of the pinball machine to hit the ‘trash cans’ / copper wires in order to light up the LED and win the game

^^You can see in these videos how they get constantly stuck!

^^What our original flippers looked like (the back-side; how they were glued on); extremely messy and easy to get stuck

^^Laser wood cutter machine we used in order to make the final version flippers we used. 

Visual representation on what it looks like to ‘win the game’ & drawing, spray-painting, and decorating in preparation of making the final version– Working on the aesthetics of the physical component

^^Tammy spray-painting the back of our ‘Aqua Arcade’ (sign shown below) sign. We spray-painted the back-side with dark blue, and this can be seen below also later in the Appendices in the ‘presentation section’ when you can see the back-side of the project. 

Showcasing functions of our project at the documentation studio–

Final Version of Physical Component on Presentation Day–


The Full Final Code We Used For Our Project:

int pushButton1 = 2;  // wire 1

int pushButton2 = 6;  // wire 2

int pushButton3 = 4;  // wire 3

int pushButton4 = 8;  //start button

int led1 = 13;

int led2 = 12;

int led3 = 11;

int led1hitnum = 0;

int led2hitnum = 0;

int led3hitnum = 0;

//int buttonState = 0;

long startTime = –1;  // starts out as stopped

#include “pitches.h”

// notes in the melody:

int melody[] = {

 NOTE_C4, NOTE_D4, NOTE_E4, NOTE_F4, NOTE_G4, NOTE_A4, NOTE_B4, NOTE_C5, NOTE_C4

};

// note durations: 4 = quarter note, 8 = eighth note, etc.:

int noteDurations[] = {

 8, 8, 8, 4, 8, 8, 8, 2, 4

};

int melody2[] = {

 NOTE_C4, NOTE_F4, NOTE_F4, NOTE_F4, NOTE_E4, NOTE_D4, NOTE_C4, NOTE_G3, NOTE_E3, NOTE_C3

};

// note durations: 4 = quarter note, 8 = eighth note, etc.:

int noteDurations2[] = {

 8, 4, 8, 8, 8, 8, 8, 8, 8, 8

};

// the setup routine runs once when you press reset:

void setup() {

 // initialize serial communication at 9600 bits per second:

 Serial.begin(9600);

 // make the pushbutton’s pin an input:

 pinMode(pushButton1, INPUT);

 pinMode(pushButton2, INPUT);

 pinMode(pushButton3, INPUT);

 pinMode(pushButton4, INPUT);

 pinMode(led1, OUTPUT);

 pinMode(led2, OUTPUT);

 pinMode(led3, OUTPUT);

}

// the loop routine runs over and over again forever:

void loop() {

 int buttonState4 = digitalRead(pushButton4);

 // print out the state of the button:

 //Serial.println(buttonState);

 delay(1);  // delay in between reads for stability // moved up from loop, green and yellow don’t work

 // // read the input pin:

 int buttonState = digitalRead(pushButton1);

 //print out the state of the button:

 //Serial.println(buttonState);

 delay(10);  // delay in between reads for stability

 if (buttonState == 1) {

   //Serial.println(led1hitnum);

   led1hitnum = led1hitnum + 1;

   if (led1hitnum % 2 == 1) {

     digitalWrite(led1, HIGH);

   } else {

     digitalWrite(led1, LOW);

   }

   delay(100);

 }

 int buttonState2 = digitalRead(pushButton2);

 //Serial.println(buttonState2);

 delay(10);  // delay in between reads for stability

 if (buttonState2 == 1) {

   //Serial.println(led2hitnum);

   led2hitnum = led2hitnum + 1;

   if (led2hitnum % 2 == 1) {

     digitalWrite(led2, HIGH);

   } else {

     digitalWrite(led2, LOW);

   }

   delay(100);

 }

 int buttonState3 = digitalRead(pushButton3);

 // print out the state of the button:

 //Serial.println(buttonState3);

 delay(10);  // delay in between reads for stability

 if (buttonState3 == 1) {

   //Serial.println(led3hitnum);

   led3hitnum = led3hitnum + 1;

   if (led3hitnum % 2 == 1) {

     digitalWrite(led3, HIGH);

   } else {

     digitalWrite(led3, LOW);

   }

   delay(100);

 }

 if (buttonState4 == HIGH) {

   startTime = millis();

   tone(7, 262);  //

   delay(500);

   noTone(7);

 }

 if (led1hitnum % 2 == 1 && led2hitnum % 2 == 1 && led3hitnum % 2 == 1) {

   if (millis() – startTime < 60000) {

     win();

   }

 }

 if (startTime != –1 && millis() – startTime > 60000) {

   noTone(7);       // turn it off

   startTime = –1;  // mark as stopped again

 }

 Serial.println(millis() – startTime);

 //Serial.println(millis() – startTime);

    if (millis() – startTime > 600000) {

     lose();

   }

 }

void win() {

 //for(int thisNote = 0; thisNote < 9; thisNote++) {

 for (int thisNote = 0; thisNote < 9; thisNote++) {

   // to calculate the note duration, take one second divided by the note type.

   //e.g. quarter note = 1000 / 4, eighth note = 1000/8, etc.

   int noteDuration = 1000 / noteDurations[thisNote];

   tone(7, melody[thisNote], noteDuration);

   // to distinguish the notes, set a minimum time between them.

   // the note’s duration + 30% seems to work well:

   int pauseBetweenNotes = noteDuration * 1.30;

   delay(pauseBetweenNotes);

   // stop the tone playing:

   noTone(7);

   digitalWrite(led1, LOW);

 }

 delay(10000);

}

void lose() {

 for (int thisNote = 0; thisNote < 12; thisNote++) {

   // to calculate the note duration, take one second divided by the note type.

   //e.g. quarter note = 1000 / 4, eighth note = 1000/8, etc.

   int noteDuration = 1000 / noteDurations2[thisNote];

   tone(7, melody2[thisNote], noteDuration);

   // to distinguish the notes, set a minimum time between them.

   // the note’s duration + 30% seems to work well:

   int pauseBetweenNotes = noteDuration * 1.30;

   delay(pauseBetweenNotes);

   // stop the tone playing:

   noTone(7);

   digitalWrite(led1, HIGH);

 }

 delay(10000);

}

/*************************************************

  Public Constants

*************************************************/

#define NOTE_B0 31

#define NOTE_C1 33

#define NOTE_CS1 35

#define NOTE_D1 37

#define NOTE_DS1 39

#define NOTE_E1 41

#define NOTE_F1 44

#define NOTE_FS1 46

#define NOTE_G1 49

#define NOTE_GS1 52

#define NOTE_A1 55

#define NOTE_AS1 58

#define NOTE_B1 62

#define NOTE_C2 65

#define NOTE_CS2 69

#define NOTE_D2 73

#define NOTE_DS2 78

#define NOTE_E2 82

#define NOTE_F2 87

#define NOTE_FS2 93

#define NOTE_G2 98

#define NOTE_GS2 104

#define NOTE_A2 110

#define NOTE_AS2 117

#define NOTE_B2 123

#define NOTE_C3 131

#define NOTE_CS3 139

#define NOTE_D3 147

#define NOTE_DS3 156

#define NOTE_E3 165

#define NOTE_F3 175

#define NOTE_FS3 185

#define NOTE_G3 196

#define NOTE_GS3 208

#define NOTE_A3 220

#define NOTE_AS3 233

#define NOTE_B3 247

#define NOTE_C4 262

#define NOTE_CS4 277

#define NOTE_D4 294

#define NOTE_DS4 311

#define NOTE_E4 330

#define NOTE_F4 349

#define NOTE_FS4 370

#define NOTE_G4 392

#define NOTE_GS4 415

#define NOTE_A4 440

#define NOTE_AS4 466

#define NOTE_B4 494

#define NOTE_C5 523

#define NOTE_CS5 554

#define NOTE_D5 587

#define NOTE_DS5 622

#define NOTE_E5 659

#define NOTE_F5 698

#define NOTE_FS5 740

#define NOTE_G5 784

#define NOTE_GS5 831

#define NOTE_A5 880

#define NOTE_AS5 932

#define NOTE_B5 988

#define NOTE_C6 1047

#define NOTE_CS6 1109

#define NOTE_D6 1175

#define NOTE_DS6 1245

#define NOTE_E6 1319

#define NOTE_F6 1397

#define NOTE_FS6 1480

#define NOTE_G6 1568

#define NOTE_GS6 1661

#define NOTE_A6 1760

#define NOTE_AS6 1865

#define NOTE_B6 1976

#define NOTE_C7 2093

#define NOTE_CS7 2217

#define NOTE_D7 2349

#define NOTE_DS7 2489

#define NOTE_E7 2637

#define NOTE_F7 2794

#define NOTE_FS7 2960

#define NOTE_G7 3136

#define NOTE_GS7 3322

#define NOTE_A7 3520

#define NOTE_AS7 3729

#define NOTE_B7 3951

#define NOTE_C8 4186

#define NOTE_CS8 4435

#define NOTE_D8 4699

#define NOTE_DS8 4978

My First Interaction Lab Blog Post

^Our performance was on September 24th in the Recital Hall of the West Wing!

My Reflection: The Mirror (Group E)

Reflection on our Preparation Process leading up to the Performance

The title of our performance was “The Mirror.” In the preparation stages of our performance, and in deciding what we wanted to do for our artifact, we read each other’s stories (that we wrote for Part Two of the Group Research Project). After reading each other’s stories and lots of discussion we decided to base our artifact off of the story I wrote. 

Here is what I wrote for Part Two of this project– my paragraph describes an idea I came up with for an artifact for Short Story #2 which was ‘The Ones Who Walk Away from Omelas’ by Ursula K. Le Guin.

“The imaginary interactive artifact I would create for the short story, “The Ones Who Walk Away from Omelas” by Ursula K. Le Guin, would be an interactive two-sided ‘mirror’ art piece that would be placed in the middle of the city of Omelas. I think the city is described as one that is quite happy on the surface, but a city that has a dark secret that lies underground– a child who suffers at the expense of everyone’s (citizens of Omelas) happiness. I think placing this ‘interactive mirror’ in the city, would be more-so a surprising exhibition that would shock townspeople as the child’s suffering is one that is known to all people but not spoken of. The guilt of this moral dilemma consumes certain people in the town and leads them to disappear and walk away to an unknown place– however, the installation of this ‘mirror’ could help create dialogue and open-reflection amongst the townspeople and help them confront the ethical problem that is directly tied to the child’s suffering. To describe this ‘mirror’ in further detail, I think it is an artifact that on one side will show the city as it is normally (happy on the surface, while everyone being ignorant of the child’s misery), and on the other side a visual of the amount of pain the child suffers on a day to day basis. The artifact encourages some sort of introspection for the citizens and I believe would be something that could wake the citizens up in confronting the moral dilemma the town faces. Despite me saying before, how this ‘mirror’ can perhaps prompt conversation and dialogue between the townspeople as the subject is like the ‘elephant in the room’– a potential problem that may be caused by the controversial exhibition and interactive artifact could be an overwhelming sense of guilt that may be felt by the citizens when seeing and interacting with the piece. As the child lives underground –under the city– the citizens may not know or have ever visualized how bad the conditions are for this one child– this artifact, thus, I feel, has the risk to make more people want to walk off into the unknown land. I think that there are many artifacts, and in-fact, art exhibitions that act similarly to this interactive artifact for the town of Omelas. The article I have linked below from Goodness Exchange, shows an exhibition of an NYU Associate Arts Professor and Israeli-American artist’s work (that of Daniel Rozin). He creates mechanical mirrors out of strange materials that reflect a “new reflection” (Allerton) of the person looking into it. I think this project is extremely interesting and eye-opening as I feel like the technology Rozin has created is kind of an inspiration of what I would like to base my artifact off of, as the mirror for Omelas is supposed to reflect a kind of ‘alternate reality.’ Instead of showing a different or per-say new reflection of a person, like the work of Rozin’s, I feel like the interactive artifact for Omelas would more-so reflect what I mentioned before; the dichotomy between the happy city and the child’s suffering– a citizen would see these visualizations when peering into the mirror.”

I think reflecting upon the whole preparation process leading up to our presentation date and what we accomplished, I can now post-performance identify numerous successes we had. I think we did a really great job in terms of bringing the idea I pitched in my story to life. More specifically, that idea being a double sided mirror where on one side it had the sad child from the story and on the other side of the happy ‘normal state’ of the city of Omelas. I wanted the mirror to represent the dichotomy of what life is like in the short story. The intention was to place the artifact in the middle of the city by someone unknown and citizens of Omelas would progressively start to notice its strange and sudden appearance out of nowhere. The presence of the artifact was supposed to 1) help spark conversation amongst the citizens of Omelas about the moral / ethical dilemma of the child’s sacrifice for the happiness of those who live in Omelas and 2) prevent more people from walking away from Omelas. I think that we did a really good job in recreating what I just described. We had our artifact (the double sided mirror, which we painted on one side and on the other was a regular mirror) and other stage props (a horse prop) to help give more points of visualization to our audience. I was really happy when one of the professors commented at the end of our performance and said that he loved the extra props we made for our performance as it gave a more ‘theatrical’ feel to it. This justified the way I felt post-performance– that we were able to successfully ‘tell a story’ to our audience and bring our idea to life! 

I do not think there were that many failures that I can point out in our group project. I think, however, if I were to point out one flaw it would probably be the quality of the materials we used in order to make the project ‘interactive.’ Our concept was that whenever someone smiled (in the presence of the mirror), the mirror was supposed to turn around and show it’s ‘ugly’ side– the side showing the condition of the kid’s living conditions and himself (this was supposed to help spark conversation regarding the moral dilemma of caging a child up for the town’s happiness). In order to make this work, since we had limited time and resources, we put the mirror (painted on the backside) on a rolling chair and the wheels on the chair allowed us to spin the mirror around whenever a character smiled. Ideally instead of using just a rolling chair, we could have used something more high-tech such as motors or sensors and I think this could have definitely been achievable if we had more time– and this is one thing I would change about our performance.

However, despite all of this, I believe that the final artifact we performed with directly relates to the established form of interaction I identified in my research and matches the artifact I described in my story. It was a clear form of interaction (the link between facial expression and the mirror moving /flipping sides) and I believe it was quite clear to the audience as well as one of the Professors picked up on the interaction and how our idea of using a ‘rolling chair’ to depict the interaction as something very ‘smart’ and innovative! 

Reflection on Teamwork Dynamics

My personal contributions to this project was in helping paint the mirror. I think at the start when we delegated roles we decided we needed people to build the horse, buy the mirror and paint it, and someone to write the script. I think our communication in getting all of these tasks done was really great as we were all easily reachable through WeChat. Furthermore, we each made time throughout the week before the presentation to meet up to make our props / artifact, practice the script, and fully rehearse and run through the performance. I think one challenge, for me in particular, was how the rest of my group lives at dorms and I live off-campus– because of this, the first few times when we met over zoom it was challenging for me to communicate certain questions or comments I had. We quickly resolved this problem though, when I communicated this concern / worry of mine to them, and we from then on met at school everytime we needed to meet.

As the only senior student in the group (they were all freshmen), I feel grateful to have met my group members as there are not many chances for me, as a senior, to collaborate and meet with freshmen in my other courses!

Our Script

*It starts with the boy being bullied for a little bit

Boy: “Please, I’ll be good, I promise I’ll be good

Bully: Shut up, filthy. You disgust me, you represent everything that is wretched

[bully walks off stage]

boy, alone: But I’ll be good

*On the stage everyone stands with a partner whispering to them, the microphone is positioned so that the audience can hear the vague whispers and gossip 

The whispers stop as the focus is shifted onto the mirror in the center of the stage

Someone at the side where the audience can’t see:‘ hurry up we have to get to the festival’ 

12: ‘Okay okay let’s go’ 

[skipping with a 8 year old across stage until they see the mirror, maybe there’s bells chiming or they’re laughing or something and then they stop when they see the mirror]

8: Ive never seen this mirror before

12: Do you see that? Inside, in there! It’s a boy

[points]

8: Quick Quick we have to get him out

12: [ name of 8 year old ] we can’t

8: What do you mean we can’t?

12: I’ve seen him before, hasn’t your mom told you about him?

8: No. . . but why can’t we let him out?

[pause]

12: Think about it like this: You’re happy, right?

8: Well, sure of course

12: How do you know?

8: [shrugs]

12: When you see that boy, you know.

8: But he’s just like me, why can’t I be his friend? 

12: [frantic] Hey hey! look! when you frown I can’t see him..

8: Oh.. But everytime I smile because of something that makes me happy he comes back

12: I wonder who put this mirror here, I’m not sure I like the way it makes me feel …

Horse: What are you kids doing here? Quickly, go up to the Green Fields for the procession

12: yea, we should do that. Quickly [ name of 8 year old ], c’mon

[ walk off stage]

Horse, talking to himself/horse: Oh what a lovely day it is to be joyous. What a lovely life . . . easy, quiet girl, can’t you see the beauty of the world around you? It’s the first day of summer, and the sun is shining so. What a gift it is to know joy. 

Horse: Come with me, observe the beauty of your mane in the reflection.

[stands in front of the mirror] 

[slowly realizes and gets disgusted]

[kids come back with their parents] 

[parent one steps up, kids and parent two talk in a little circle farther on stage]

Horse: have you seen this mirror, this monstrosity?

Parent 1: The children were just telling us about it, but sir it isn’t so bad is it . . . It’s not as if you didn’t know 

Horse: yes, i knew, but do you think it should just be out like this . . . wouldn’t you rather forget at times?

Parent 1: Well, sure, but we shouldn’t

Horse: Look at me, aren’t I the picture of joy? Exuberance? And my horse, don’t you think thinking about . . . it. . . that, takes away from the festivities?

Parent 1: I think you should be wary of vapid irresponsible happiness, lest you end up like him, unable to be helped. . .

[bully enters again, kicking and spitting on kid in the mirror] [people watch in shock] [bully walks around stage as if to walk out of building and towards town square]

Bully: Shouldn’t you all be out enjoying life?

Horse: look, this mirror, we just saw you through it

Bully: ugh, not that poor wretched thing

Horse: I suppose so . . .

Bully: I think it’s good to go and give it a good kick sometimes, keep things in order

Horse: wouldn’t you rather just forget it exists at all?

Bully: don’t you understand you can’t just forget about it? You need to hurt it. You can’t let it know that it is important or even cared for, that will ruin everything

Parent 2: you’re supposed to take those feelings and put them in your own children, don’t you understand?

Parent 1: This is just the way things are

Bully: This mirror shows you how the world works

Horse: I do understand but I don’t like it, it horrifies me . . . I don’t think I can stay here, are we not just prisoners? 

Parent 2: Maybe we are . . . but you can’t just leave Omelas. Too many young people have just left and never returned. You don’t know where you’re going and it could be dangerous out there

Horse: But how can I stay when I know that this is happening, when this mirror reminds me of reality every time I am happy?

Parent 2: [exasperated] Why can’t you honor this boys sacrifice? 

Horse: Because it is wrong

Parent 2: If that is wrong then all of our joy, the nobility of our architecture, the poignancy of our music, the profundity of our science is also wrong

Horse: I can not agree with you

Parent 2: I can not agree with you either, but please stay

8: please don’t go away

12: please don’t walk away from Omelas

Horse: i’ll stay

Parent 2: I’ve never been able to talk about the boy with anyone before, I try to just forget it like you, but no one here wants to ignore it anymore

12: maybe being able to talk about it is a good thing?

8: I think so too

Horse: maybe this mirror is what the people of Omelas need

Parent 2: There’s a chance it could make more people try to walk away, like you, but there’s also a chance that it makes people talk about the truth more

Bully: [kinda interjecting/interrupting, purposefully sounds awkward/ruins sentimental moment] Sooooo…. Do you guys want me to move this from the middle of town or..?

Parent 1: No, no, I think you should leave it

Horse: Yes, I agree, please leave it right there.

Critical Analysis: The Suit (Group D)

I really liked the performance of Group D– ‘The Suit,’ I think it was a really clever idea to have someone press an activator and a suit (made out of garbage bags) envelops the wearer’s body to protect him from danger. I think it was extremely creative and it was easy for me to understand the concept when Tammy, at the end of the performance, said that the function of the suit can be comparable to Black Panther’s suit in how it automatically encapsulates his body when activated by touch. I definitely do not think it strayed far away from the short story topic at all– the idea still directly related and solved a problem in the short story; so this was helpful to me as I had already read the short story on The Plague prior to watching their performance. 

I think one thing I can suggest, that another Professor pointed out after their performance, is perhaps changing the ‘manual’ part of putting the suit on. Perhaps finding a way to embed sensors or motors or buttons to automate this ‘encapsulation’ would be really cool and really enhance the quality of the artifact! However, my group struggled with this also– due to the time constraint and lack of resources, thus, I feel like this is extremely relatable and also understandable on some level.

Photos

These photos are from the day a few members from my group (Charlotte, Beatrice, Roman, Serena) and I got together in room 406 in the North Wing to paint our artifact (the mirror) to depict a sad boy. We only painted the mirror on one side (the side that did not have a mirror on it, but was the backside of the mirror we bought)– and used paint we found at school, paint brushes Beatrice brought from her home, and trash that we made when we were making our artifact. 

After finishing painting the boy (using the reference photo, as shown above), we decided to stick on trash that we produced and glue it on the backside of the mirror to 1) give the painting a more 3-D effect (which one of the Professors mentioned he really liked after our performance on the 24th) and 2) to really depict the horrible conditions of the boy, as described in the short story.