For this week’s assignment, I defined my first machine learning model and train it with my computer based on the previous setup and the tutorial videos/coding.
Setup
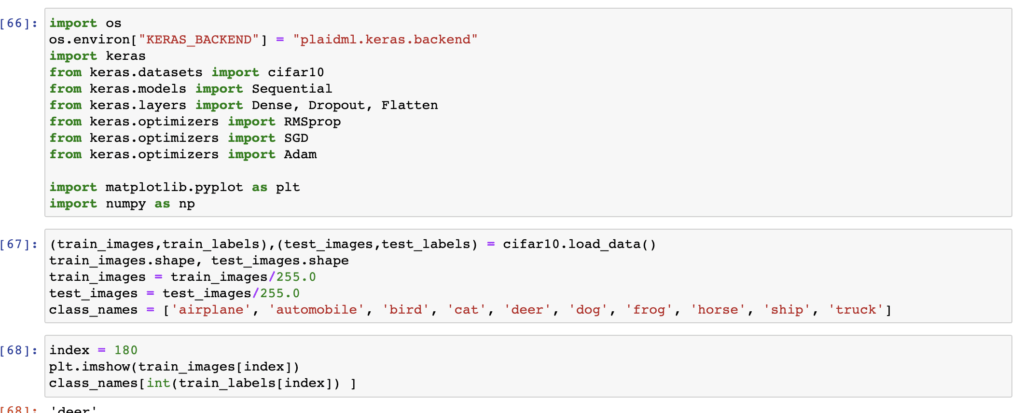
Firstly, I used the foundational setting from the fashion_mnist coding to setup my cifar10 model setting. I changed several places:
- Import cifar10 in the first code block
- import other optimizers from Keras
- load cifar10 data in the second code block
- change the class names of dataset
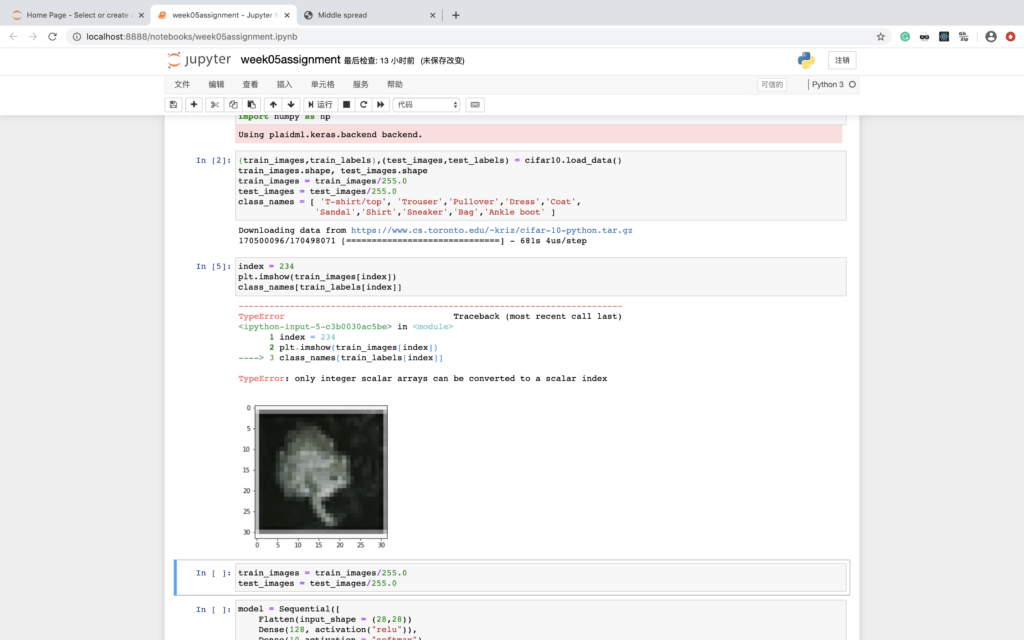
Then I spent 681 seconds on downloading cifar10 data.
I encountered some problems in the whole process. For example:
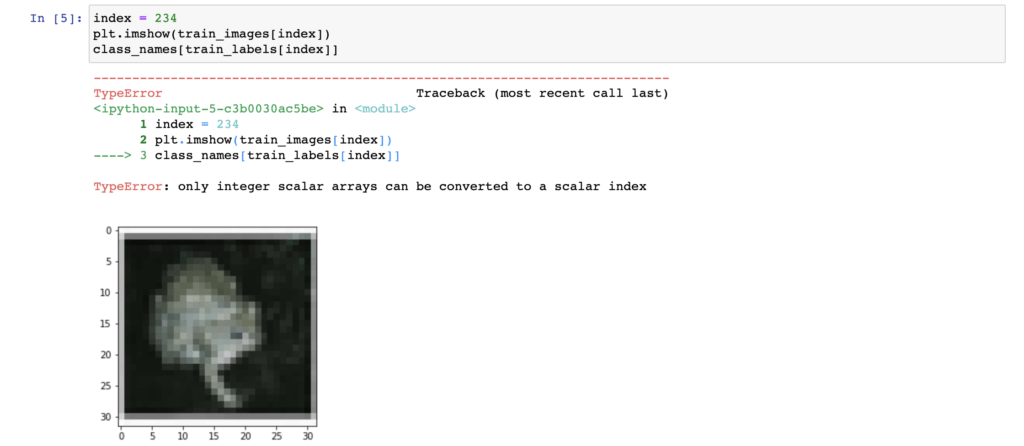
Since it is different from the fashion mnist project, the input of cifat10 is not the same as fashion mnist(actually I didn’t know what it is.) I follow the error message and change the code: class_names[int(train_labels[index])]
start training:
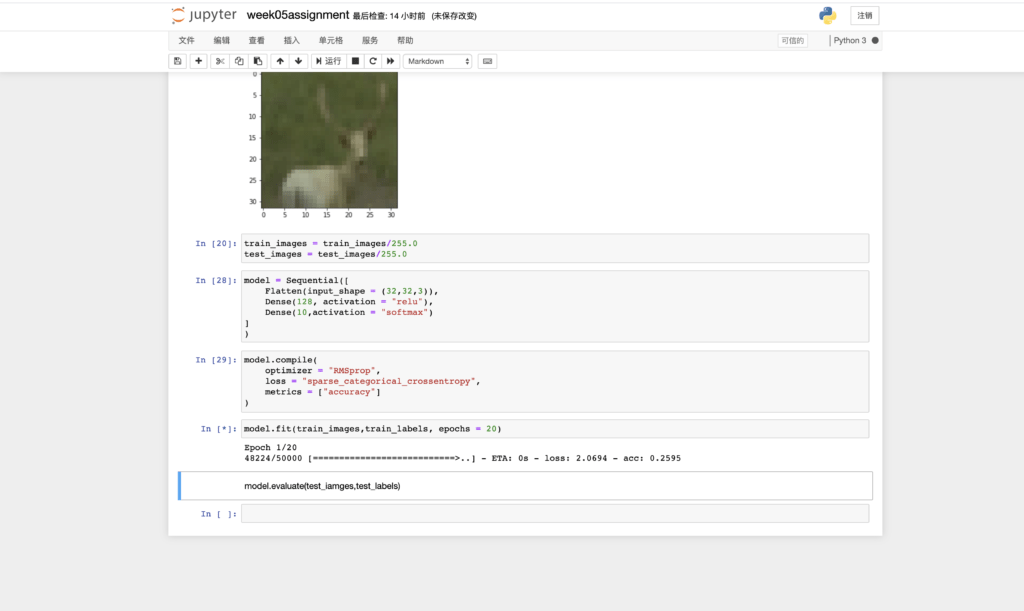
Finish training.:
Optimizer: RMSprop
Loss function: Cross-Entropy
Total time: 136s
Loss: 1.5224
Accuracy: 0.4642
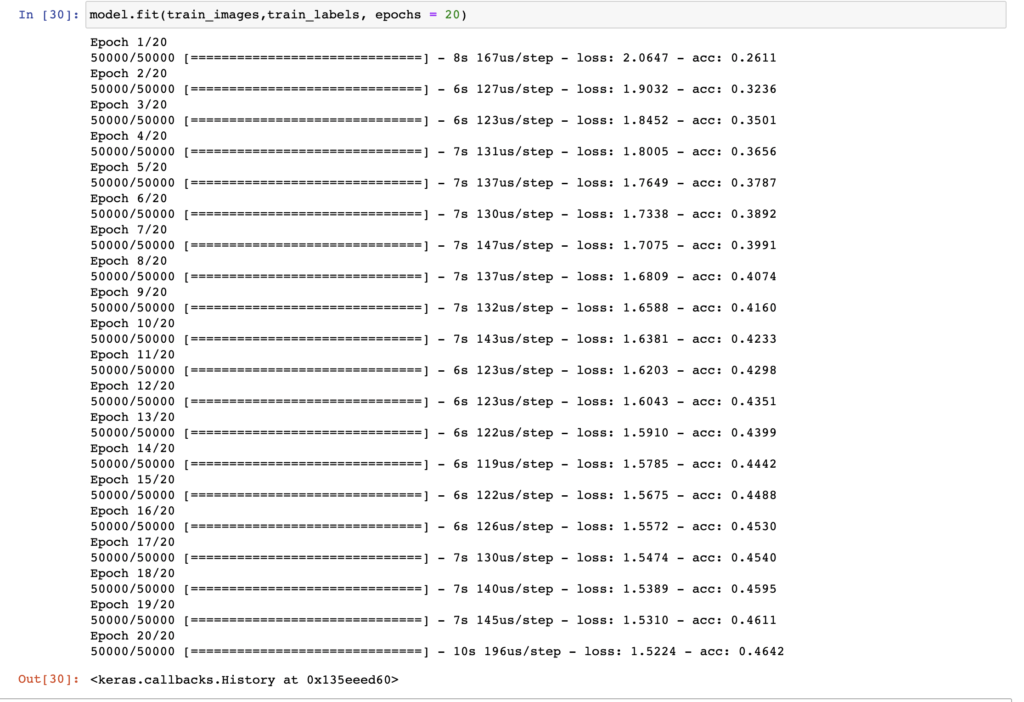
Change optimizer and loss function
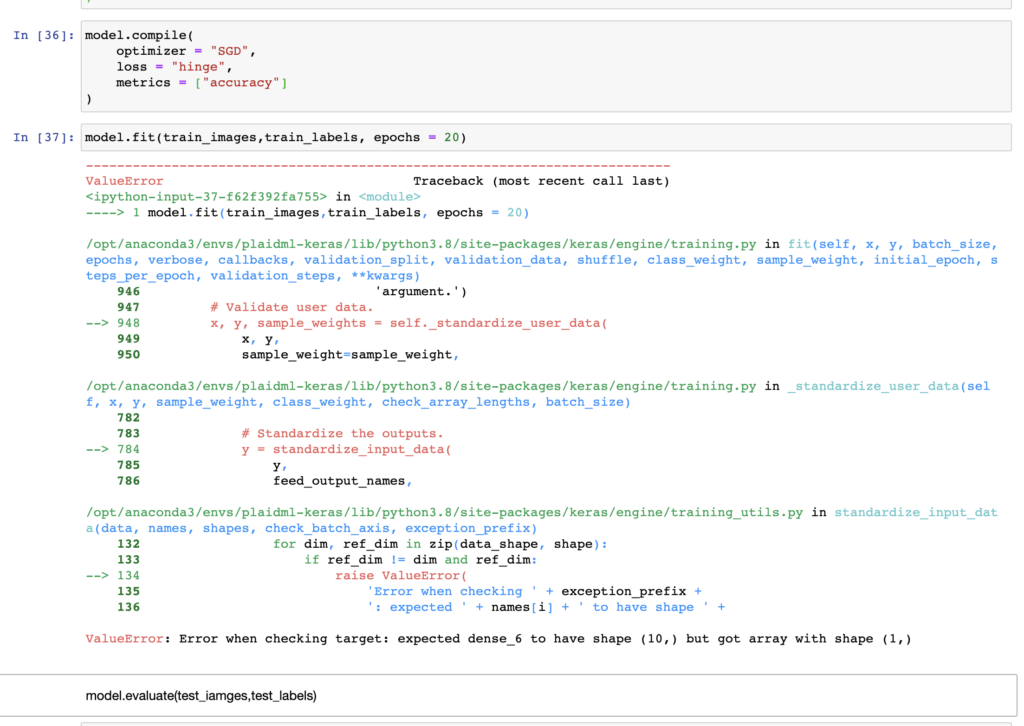
I changed optimizer and loss function to SGD and Hinge. For SGD, I did not know that much. But for Hinge, I learned from loss function cheat sheet
https://ml-cheatsheet.readthedocs.io/en/latest/loss_functions.html#cross-entropy
Hinge is a loss function for classification, which fits the cifar1o project.
However, I got an error and I could not solve it. Aven told me that the problem is the input shape is not exactly what the next layer expects to receive.
After that, I tried several loss functions, but all failed.
Only change optimizer

SGD+Cross-entropy
Time: 120s
Loss: 2.2906
Accuracy: 0.1748
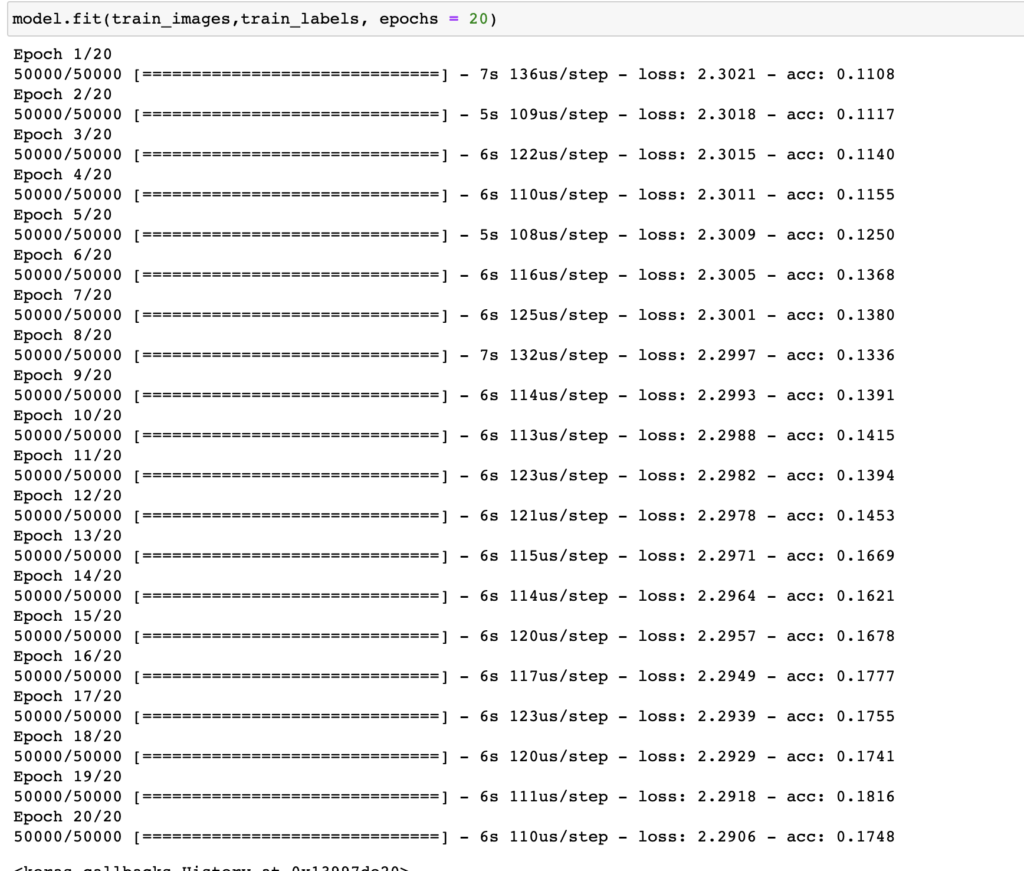
Conclusion: compared to RMSprop, SGD is faster but worse in loss and accuracy.

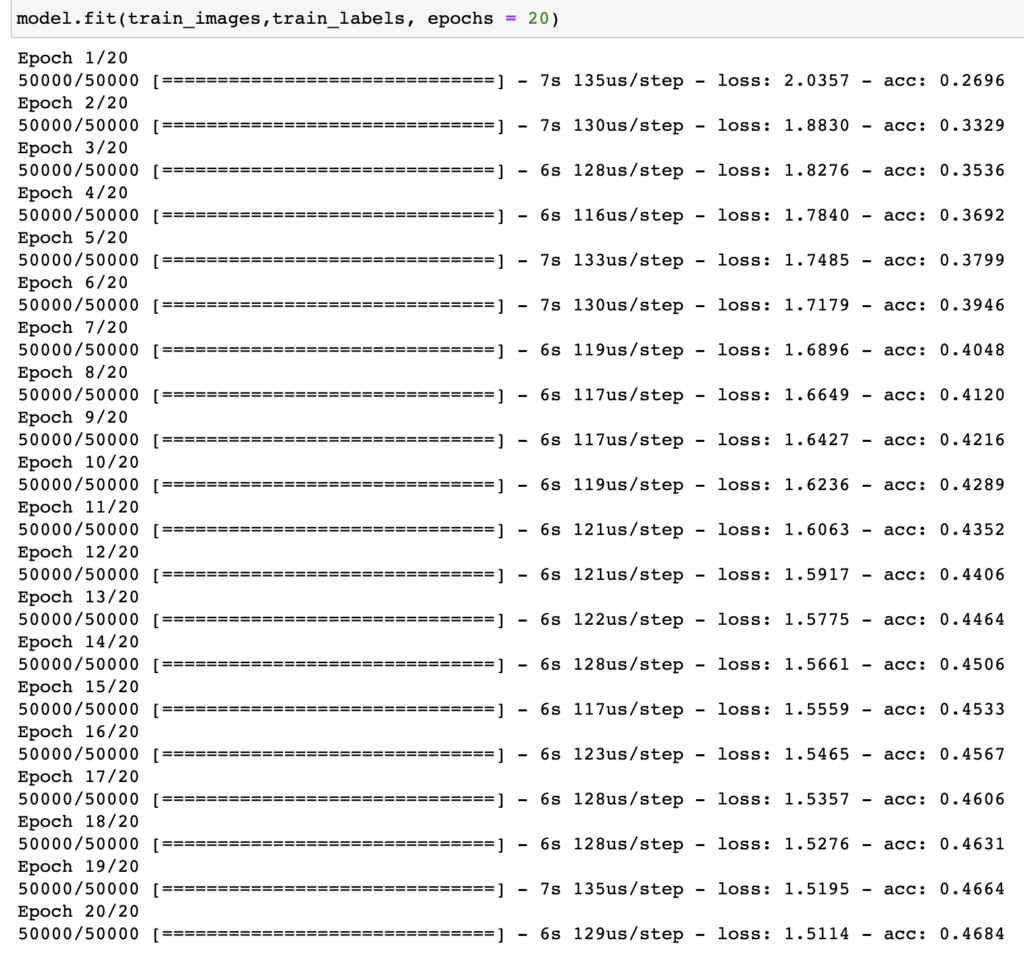
Adam + Cross-entropy
Time: 125s
Loss: 1.5115
Accuracy: 0.4684
 \
\
Conclusion: Adam as an optimizer, is almost as fast as SGD, as accurate as RMSprop.
Data augmentation method
I tried to use a data augmentation method to enrich the dataset. But I failed. I used the code below
|
3
4
5
6
7
8
9
10
11
12
13
14
15
16
17
18
19
20
21
22
23
24
25
26
27
28
|
# example of vertical shift image augmentation
from numpy import expand_dims
from keras.preprocessing.image import load_img
from keras.preprocessing.image import img_to_array
from keras.preprocessing.image import ImageDataGenerator
from matplotlib import pyplot
# load the image
img = load_img(‘bird.jpg’)
# convert to numpy array
data = img_to_array(img)
# expand dimension to one sample
samples = expand_dims(data, 0)
# create image data augmentation generator
datagen = ImageDataGenerator(height_shift_range=0.5)
# prepare iterator
it = datagen.flow(samples, batch_size=1)
# generate samples and plot
for i in range(9):
# define subplot
pyplot.subplot(330 + 1 + i)
# generate batch of images
batch = it.next()
# convert to unsigned integers for viewing
image = batch[0].astype(‘uint8’)
# plot raw pixel data
pyplot.imshow(image)
# show the figure
pyplot.show()
|
I adjusted the code to fit in my code.
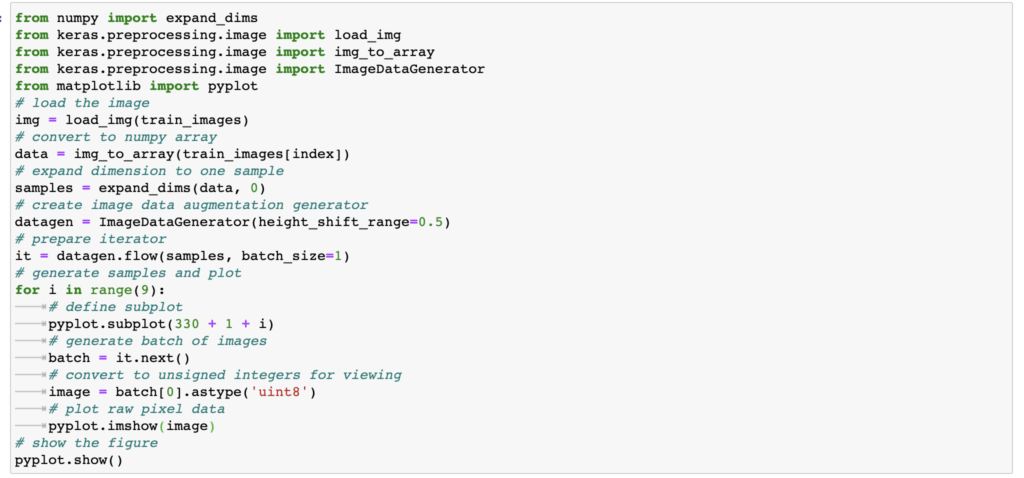
But I got one error:

After googling, I found out I need a “pillow” package to run this code. And then

I downloaded it. However, I still got the same error.
Leave a Reply