Midterm Project: Individual Proposal

Mini Shot by Jack

Instructor:Rudi

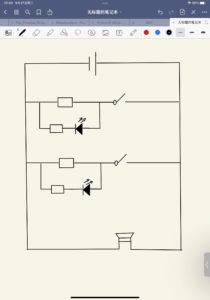
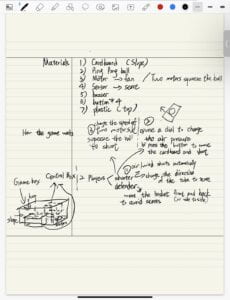
The basketball shooting machine in the arcade was one of the most attractive device for me when I was a child and I recently learned how to use motors in the Arduino,so I decided to create a mini version.It’s a device with two players:one is the shooter whose goal is to use the motor and button to score and the other is the defender who moves the hoop to prevent the shooter from scoring.The hidden challenge is the shooting process but everyone can play since the game mechanics aren’t complex,and maybe the device can be placed at B1 for recreation.

Group Research Project: Make, Perform & Report

Group work this time!

Our team wanted to design an artifact that not only match the storyline but also go further from it.In order to be imaginative and feasible at the same time,we chose the second story”The Ones Who Walks Away From Omelas” by Ursula K.Le Guin as our creating background. In the story, a child had to be stuck in a broken room with limited survival supplies to ensure the whole town’s happiness.In other words,the key plot is the comparison or the transition between sadness and happiness.Inspired by this,we decided to make a helmet that can change a person’s negative feelings into positive ones while reading his or her brain waves.The artifact indicated our wishes that everyone could have a positive attitude towards life and find their own ways to face negative emotions.

Firstly,we decided to use cardboard as the main materials because Calvin and Blake were skilled in using cardboard and I attended the workshop for cardboard skills.Most importantly,cardboard was easy to learn.

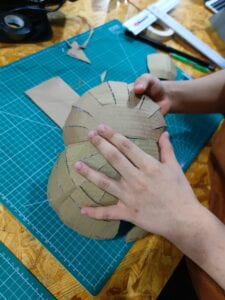
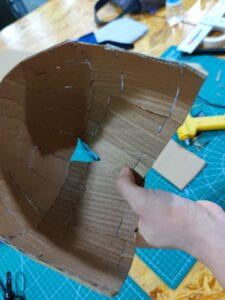
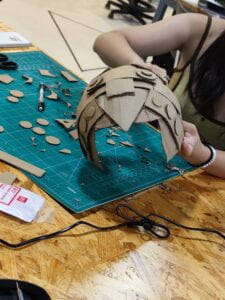
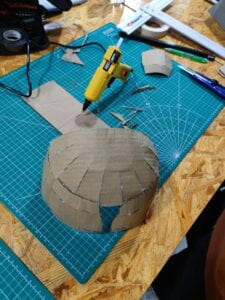
My main task was to cut the cardboard into 2 big semicircles and help cutting other shapes such as trapezoids when necessary.I also cut several lines on the edge of the semicircle to stick it with the hot melt glue gun while arching.Another task of mine is to take photos.

The rudiment of the helmet had shown!

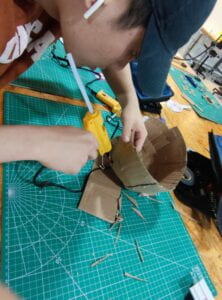
Then,I started to do some supporting work as well as taking pictures of the working process.

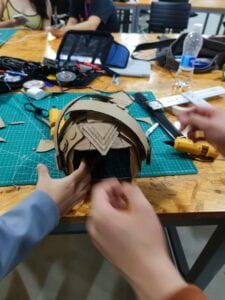
This was Calvin using the hot tube glue gun to strengthen the connection between the top and bottom parts.

The integral construction of the helmet was basically finished!

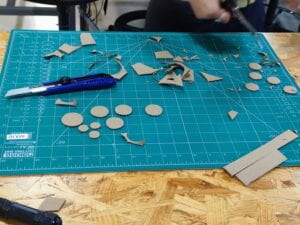
Meanwhile,Tina and Vicky had already made circles of different sizes for the external decoration.The circles that folded up were used as the buttons connected with different parameters.

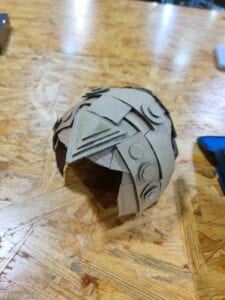
Later,they sticked the circles to the helmet according to their design.(Did you notice that the helmet looks like a bird face if you look from the top?)

Afterwards,Blake and I tried to design an adjustable goggle to make the artifact more interactive.We actually managed to cut the cardboard into right shapes,but it was too hard to fix the goggle and it might fall off when changing the direction.In the end,we dismantled the goggle and changed the helmet into its original look. 

This was the final version!

From a objective view,our artifact was in tune with the original story and went further using our imagination so it was a creative design.On the other hand,I thought that the artifact needed to be more interactive because it lacked playability and variability.For example,could we connect it to the Arduino with sensors or put some light tubes linked with circuits on the helmet? In that way,the artifact was much more fun.


This was how we did the rehearsal and how we actually performed during the recitation.

Our script was divided into two parts.The first one was about the scene in the original story when the helmet freed the child from all miseries and sorrows and enabled him to reach happiness.The other one was about the days when the helmet was put into wider use and all the people over the globe could use it to turn their negative emotions into positive ones,which benefits mankind.

In our performance,everyone did his or her own job and participated wholeheartedly even if we were not professional performers.(Proud of our team!)

The most interesting part was when Tina touched the helmet and drew the brain waves,which demonstrated what was the functions of the helmet.

However,there were still something that needed to improve,for example,we could make more props to fill in the gaps between each scenes and to add more fun to the play.Besides, the scene of me and Blake building the NYU School gate might confuse the audience,so it needed to be explained more clearly.In addition,as Rudy suggested,Calvin should face towards the audience so that the audience could see his facial expressions.

In a word,it was a wonderful experience and I hope that everyone could be happy,brave and optimistic,no matter what happens.

Recitation 3: Workout

Recitation day!

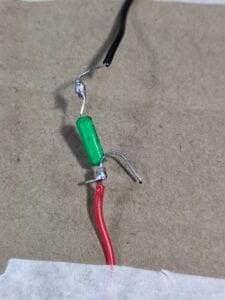
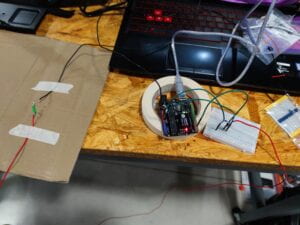
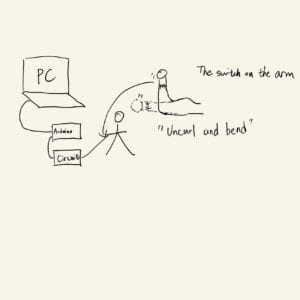
First,I soldered the sensor to the two wires to make a switch.Next, I built the circuit with the switch,a 10k ohm resistor and a capacitor. Then I sticked the switch to my right arm and began to type the codes.

Step 4 was basically divided into 3 tasks.

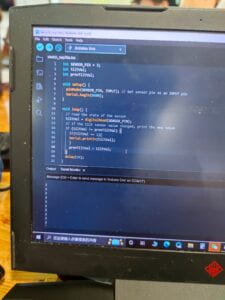
For task1,I used a conditional that had the criteria so that the sensor only detected transitions LOW to HIGH, showing only when the user had raised their arm completely. Here is the code and its demonstration.

int SENSOR_PIN = 2;
int tiltVal;
int prevTiltVal;

void setup() {
  pinMode(SENSOR_PIN, INPUT); // Set sensor pin as an INPUT pin
  Serial.begin(9600);
}

void loop() {
  // read the state of the sensor
  tiltVal = digitalRead(SENSOR_PIN);
  // if the tilt sensor value changed, print the new value
  if (tiltVal != prevTiltVal) {
    if(tiltVal == 1){
     
    Serial.println(tiltVal);
     prevTiltVal = tiltVal;
    }
   
   
  }
  delay(10);
  }

For task 2, I needed to add a variable called”count” to count the curls.Here is how it works.

int SENSOR_PIN = 2;
int tiltVal;
int prevTiltVal;
int count=0;

void setup() {
  pinMode(SENSOR_PIN, INPUT); // Set sensor pin as an INPUT pin
  Serial.begin(9600);
}

void loop() {
  // read the state of the sensor
  tiltVal = digitalRead(SENSOR_PIN);
  // if the tilt sensor value changed, print the new value
  if (tiltVal != prevTiltVal) {
    if(tiltVal == 1){
      count=count+1;
    Serial.println(count);
   
    delay(1000);
 
    ;
    }
   
   
  }
  delay(10);
  }
  prevTiltVal = tiltVal;
}

When it comes to task 3,I had to set a limit and reset the curls.Here is the code and its demonstration.

int SENSOR_PIN = 2;
int tiltVal;
int prevTiltVal;
int count=0;

void setup() {
  pinMode(SENSOR_PIN, INPUT); // Set sensor pin as an INPUT pin
  Serial.begin(9600);
}

void loop() {
  // read the state of the sensor
  tiltVal = digitalRead(SENSOR_PIN);
  // if the tilt sensor value changed, print the new value
  if (tiltVal != prevTiltVal) {
    if(tiltVal == 1){
      count=count+1;
    Serial.println(count);
    if(count>=8){
    Serial.println(“Yay, you have done one set of curls”);}
    if(count>=8){
    count=0;
    delay(1000);
 
    ;
    }
   
   
  }
  delay(10);
  }
  prevTiltVal = tiltVal;
}

For step 5,I set the time interval between two groups of training and added the words””It’s time to workout!Let’s go!” to remind the user that a new group of training was about to start.

int SENSOR_PIN = 2;
int tiltVal;
int prevTiltVal;
int count=0;

void setup() {
  pinMode(SENSOR_PIN, INPUT); // Set sensor pin as an INPUT pin
  Serial.begin(9600);
}

void loop() {
  // read the state of the sensor
  tiltVal = digitalRead(SENSOR_PIN);
  // if the tilt sensor value changed, print the new value
  if (tiltVal != prevTiltVal) {
    if(tiltVal == 1){
      count=count+1;
    Serial.println(count);
    if(count>=8){
    Serial.println(“Yay, you have done one set of curls”);}
    if(count>=8){
    count=0;
    delay(10000);
    Serial.println(“It’s time to workout!Let’s go!”);
    ;
    }
   
   
  }
  delay(10);
  }
  prevTiltVal = tiltVal;
}
 (Since there was something wrong with my sensor,the poor contact might affect the demonstration.)

And this was how the device worked:
Some reflections:

1.Be careful not to mistake the positive side with the negative side when building the circuit.

2.When typing the code, I can click the line of the brackets to check whether it has a start combined with an end.It’s also useful to use “blank space” and “TAB” to make the structure clearer.
3.The transition between high and low occurs when the angle reaches 50-60 degrees,which is not so precise and needs to be improved.

4.If I rotate the arm with the sensor, it will count as one curl as long as the sensor feels the transition from horizontal to vertical.But if I shake it,the result is uncertain.Therefore,we should design a bigger device so that it will keep the position of the arm stable and avoid the mentioned situations.

5.Thanks to the device’s simplicity and convenience , I think it can be used by any user,from the young to the old.

6.What’s more,it may indicate a new way to work out—-the”interactive gym” which allows everybody to work out with the device,no matter where they are.
Recitation 2: Arduino Basics

Recitation Friday!!! 

The two former classes had shown us the basic functions and usages of Arduino.Therefore,I would use the Arduino circuits to make 3 fun devices this time.


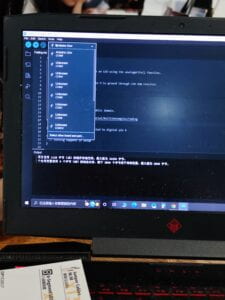
Since it was my first time using the Arduino toolkit, I had some troubles connecting the computer with the Arduino Uno.Later,I clicked” Select other board and port” and typed “Arduino Uno” in the selection bar to search for the right port.The problem was quickly solved.

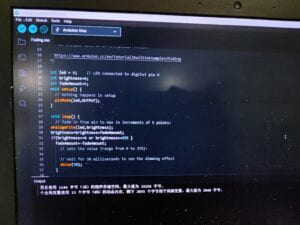
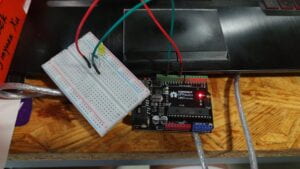
For the first task,a LED, a 220 ohm resistor and the breadboard were connected to the Arduino by wires.I typed the code according to the example to exhibit the whole process of light’s fading.However,when I upload the code instructions,the light didn’t work.Then I realized that the positive and negative terminals were connected backwards,so I fixed the problem and every part did its job. 

(The demonstration)

For the second circuit, the buzzer was probably the most important element because the code defined each note as a specific tone. For example, NOTE_C4 was middle C. NOTE_FS4 was F sharp, and so forth.Since I’m fond of music,I really found the beauty of playing melodies with codes.Besides, I think the sound is similar to the music in the 8-bit games.Hence,the design can actually promote further thinking into game industry or contemparary arts.

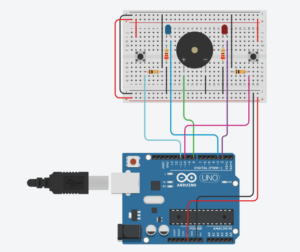
Speaking of the third circuit,it was much more difficult and complex than the other two circuits due to its requirement of elements,including one buzzer,two LEDs,two buttons,four resistors and more than ten wires.Even though the code wasn’t hard to complete,the connection of circuit was a big challenge for me.What’s worse,my own design on the breadboard and the example are mirror images,which meant that I had to swtich several positive and negative terminals.Luckily,I managed to build the circuit with the learning assistant’s help.Once the code was uploaded,there would be guidances shown on the serial monitor.The two players had to try their best to press the buttons as the rules said that who pressed most won. Here is how it worked.

Question 1:

I will replace the original switch with the ball switch.The operating principle of ball switch is to tilt the switch so as to let the metal ball brought into contact with the two leads.In my new design of circuit 3,the winning condition is that the person who tilts the switch faster after seeing the instructions on the serial monitor wins.The new game is all about reaction and I suppose it will be fun and interesting.

Question 2:

To help limit the current that passes through the button so that it doesn’t get damaged and the circuit won’t short out.

Question 3:

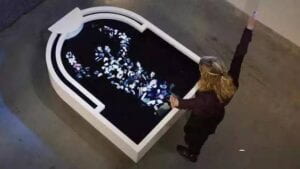
In the book”Getting Started with Arduino : The Open Source Electronics Prototyping Platform“,the author explained the main idea of Arduino:”The Arduino philosophy is based on making designs rather than talking about them. It is a constant search for faster and more powerful ways to build better prototypes.”(Banzi, Massimo, and Michael Shiloh 5).Among the more detailed philosophies and events,”We Love Junk!”impressed me the most.It argued that junk could be useful in designing and motivating new ideas.In addition,it was much cheaper than buying a new one.

(Pictures are from the Internet)

“Plastic reflection” is an interactive device which uses 601 pieces of plastic pieces from the world and sets motion sensors to record the movements of people and bulid the reflection image with junk,which perfectly matches the idea of “We Love Junk!”.More importantly,it reminds people of the importance of protecting the environment and everyone should deal with waste problem.

Group Project: Step 1 – Read

1.The Veldt—Dimension door
In the story”The Veldt”,the main characters are able to open the nursery’s door and thus entering a virtual world with lifelike creatures such as lions.Inspired by the idea,I want to design a dimension door.A huge cardboard box will be used as the main material of the room,and there’s an automatic induction door on one side of the cardboard box.Inside the box,projectors,mirrors,lights and kaleidoscopes work together to build the moving images of the African savannah.Through sensors,the images will change as people turn their heads.Besides,electric fans may be included to simulate the winds and thus creating a better atmosphere.The idea of changing views based on people’s visions is a little bit similar to VR or AR,which is widely used in game fields.But my design focuses more on the elements of lights.In addition,there are artists inspired by dimension door,but they tend to design the interaction outside the box or devote to creating holographic portrait generator.The new problem caused by the invention will probably be immersing oneself in the virtual.

2.The Ones Who Walk Away from Omelas—Bright outside,dark inside

After reading”The Ones Who Walk Away from Omelas”,I feel sorry for the child’s misfortune.Therefore,I want to create an artifact to imply or show the misery but not in a direct way.A house built with all black materials sets up a depressing atmohphere.Inside the black house,an old electric lamp is swinging at the top.It gives off a faint light at interval,which indicates the glimmer of hope.The most interesting part is the door:the door is nearly closed but leaves a seam of light.However,everytime a person tries to open the door,it will automatically close after a second,which means no matter how hard we try,the child in the story can’t be rescued due to his and the city’s destinies.Besides, the artifact is also inspired by the idea of “Useless Box”,a box that will automatically switch to “closed” when a person press the open button.But in my artifact,I regard the”useless” as a way to imply the child’s misfortune.The new problem caused by the invention is that people may feel amused by the door’s design instead of feeling sympathy for the child and thus the artifact lacks far-reaching implications,so it’s necessary to mention the background and brief introduction of the story.

3.The Plague—Petrifaction

“The Plague” story is about a widespread epidemic whose common symptom is petrifaction.At the moment,the world is still suffering from covid-19.Inspired by this,I want to create an artifact about the process of petrifaction.First we have to build the bone structure of a bird.Next,we may put the artificial(3D-printed)feather equipped with sensors on the surface of the bone structure.In this way,the sensors capture people’s visions. When people look from the bird’s head to its feet,all the feather will turn into disorganized and strange shape to imply offensive behaviors in society.But when they look from the feet to its head,the feather will get back into good shape.Actually,my inspiration is from the first class of interaction lab when Rudi showed us the design of 3D-printed design that catched people’s views and my design is not as complex as that one.The new problem caused by the invention is that people may think that 3D-printing is too far away from daily use and may have a negative attitude towards 3D-printing.