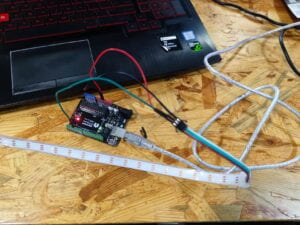
Recitation Friday!In this recitation,I would send data from Arduino to Processing and vice versa by using serial communication.
Task #1: Make a Processing Etch-A-Sketch
The first step went well.I built the circuit with two potentiometers. Based on the example of SendMultipleValues,I added another variable called sensorValue2 to send the second potentiometer’s serial information to the Processing.Here is the code of Arduino:
#include “SerialRecord.h”
// Change this number to send a different number of values
SerialRecord writer(2);
void setup() {
Serial.begin(9600);
}
void loop() {
int sensorValue = analogRead(A0);
int sensorValue2 = analogRead(A1);
writer[0] = sensorValue;
writer[1]= sensorValue2;
writer.send();
delay(10);
}
Just like an Etch-A-Sketch, one potentiometer controlled the circle’s x-axis movement, and the other controlled the circle’s y-axis movement.
However,when I wanted to change the circles into lines,some problems occurred.
The first problem was that the start point of the line stuck at the top left corner.Then I fixed the problem by substituting the new x position for the old x position.So was the y position.
The second problem was that the track of the lines wasn’t marked.So I put the background setting in void setup rather than void draw.
Here was how users could draw by using the two potentiometers.The code is attached below.
import processing.serial.*;
import osteele.processing.SerialRecord.*;

Serial serialPort;
SerialRecord serialRecord;
float oldx;
float oldy;

void setup() {
   background(0);
  size(500, 500);

  String serialPortName = SerialUtils.findArduinoPort();
  serialPort = new Serial(this, serialPortName, 9600);

  // If the Arduino sketch sends a different number of values, modify the number
  // `2` on the next line to match the number of values that it sends.
  serialRecord = new SerialRecord(this, serialPort, 2);
}

void draw() {

  serialRecord.read();
  int value1 = serialRecord.values[0];
  int value2 = serialRecord.values[1];

  float x = map(value1, 0, 1024, 0, width);
  float y = map(value2, 0, 1024, 0, height);
  stroke(255);
  strokeWeight(15);
  line(oldx,oldy,x,y);
  oldx=x;
  oldy=y;
}
Task #2
My pair teammate is Sid.At first,we both worked out how to design the code of the bouncing ball without connecting the motors.
Here was my way of designing the bouncing ball.
int x=50;
int xdirection=1;
void setup() {
  fullScreen();
  background(0);


}

void draw() {
  background(0);
  circle(x,height/2,50);
  x=x+5*xdirection;
  if (x>width-50||x<50){
    xdirection*=-1;}

}
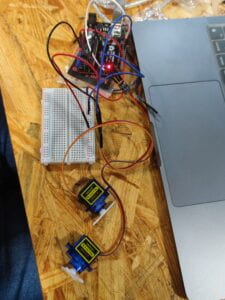
Nevertheless,we did spend some time on the code of spinning the two motors according to the position of the ball.We had problems such as only one motor rotated or the angle of the motor went wrong.Finally,we managed to deal with the problem by revising in the code.After several tests,the motors managed to spin at the right time(when the ball hit the edges) and right angle,just like this:
/*
ReceiveMultipleValues
This sketch repeatedly receives a record that contains a single value, and
uses it to control the builtin LED. The value should be 0 or 1.
This sketch pairs well with the SendSingleValue example from the Processing
SerialRecord library <https://osteele.github.io/Processing_SerialRecord/>.
You can also interact with this sketch from the Serial Monitor. Enter
`100,200` into the text area at the top, and press “Send”. Then enter `!e` to
ask the Arduino to send back the last values it received.
by Oliver Steele, 2020-2022
This example code is in the public domain.
*/
#include “SerialRecord.h”
// Change this number to the number of values you want to receive
SerialRecord reader(1);
#include <Servo.h>
Servo myservo; // create servo object to control a servo
Servo myservo2;
int potpin = A0; // analog pin used to connect the potentiometer
int val; // variable to read the value from the analog pin
void setup() {
Serial.begin(9600);
myservo.attach(9);
myservo2.attach(10);
}
void loop() {
reader.read();
//Serial.println(reader[0]);
val = 100;
if (reader[0] > 1420) {
myservo.write(val);
}
else if (reader[0] > 1400){
myservo.write(val – 100);
}
if (reader[0] < 10) {
myservo2.write(val);
}
else {
myservo2.write(val – 100);
}
//delay(20); // reads the value of the potentiometer (value between 0 and 1023) // scale it for use with the servo (value between 0 and 180)
// sets the servo position according to the scaled value
}
