Recitation Friday!!Today,it’s my first time to draw an image in Processing based on a photograph that inspired me.
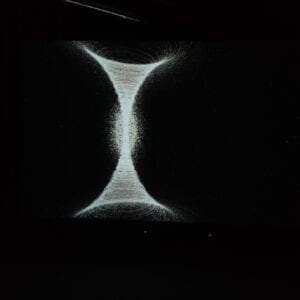
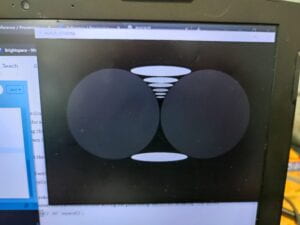
The day before recitation,I visited the Institude of Contemporary Art in NYUSH and there was an exhibition.When I was visiting the artwork of a video,I was deeply impressed by the beauty of shape and light.Therefore,I took this picture.Since the picture had an aesthetic quality and geomatric features,it perfectly matched the prompt of the recitation.
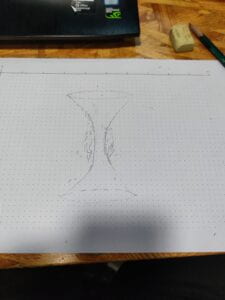
In the Processing,my general design was to use two ellipses on the top and the bottom and put two circles on left and right to create the curves.
Firstly, I roughly sketched on the paper to set the position and size of graphs.
Next, I coded two ellipses and two circles.
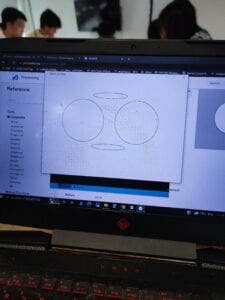
Oops…It seemed that something went wrong in the calculation.So I reset the position and size of the circles.To make the joint of the two shapes more fluent,I also set the strokeweight as 1.
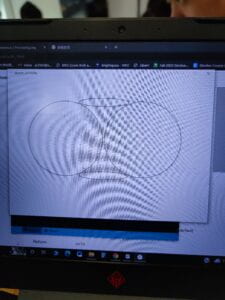
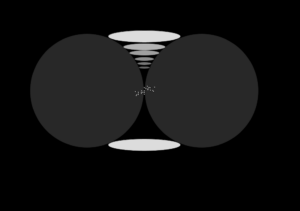
In order to enhance the visual effects and to make it more three-dimensinal,I painted the background and circles in black.Based on the original work,I substituted small ellipses for the small white circular rings.What’s more,I only put the small ellipses on the top half while the bottom half remained black because asymmetry was also a helpful way to promote the aesthetic quality.
Lastly,I added several white points in the middle.At first,I used the code of point but it was too small to be seen.As a result,I chose circles with small sizes to meet my requirement.Here is the final work and its code.
void setup() {
  background(0);
  size(1000, 700);

  fill(255, 220);
  ellipse(480, 479, 240, 40);
  fill(255, 40);
  circle(290, 300, 377);
  circle(670, 300, 377);

  stroke(0);
  strokeWeight(1);
  fill(255, 220);
  ellipse(480, 120, 240, 40);
  fill(255, 180);
  ellipse(480, 155, 140, 23);
  fill(255, 160);
  ellipse(480, 175, 100, 17);
  fill(255, 140);
  ellipse(480, 195, 65, 13);
  fill(255, 120);
  ellipse(480, 210, 48, 10);
  fill(255, 100);
  ellipse(480, 223, 38, 8);

  fill(255);
  circle(500, 290, 4);
  circle(490, 295, 4);
  circle(480, 300, 4);
  circle(470, 305, 4);
  circle(460, 310, 4);
  circle(500, 298, 4);
  circle(490, 285, 4);
  circle(480, 289, 4);
  circle(475, 305, 4);
  circle(480, 290, 4);
  circle(492, 297, 4);
  circle(480, 305, 4);
  circle(470, 309, 4);
  circle(460, 312, 4);
  circle(470, 299, 4);
  circle(495, 289, 4);
  circle(485, 292, 4);
  circle(471, 300, 4);
  circle(510, 302, 4);
  circle(499, 290, 4);
  circle(514, 288, 4);
  circle(450, 303, 4);
  circle(508, 299, 4);
  circle(493, 294, 4);
  circle(455, 313, 4);
  circle(453, 316, 4);
  circle(480, 311, 4);
  circle(460, 305, 4);
}
Due to the restriction of time and skills, I didn’t go further to explore the step 4.But I supposed in the following practice or works,I would definitely have a try based on the ideas in the prompts.
Comparing to the original artwork,my works was more of a simplified version since I kept the main design while deleting the complex white circular rings .Meanwhile,I added more ellipses in the top half and used several small circles in the middle to create nebula-like graphs.I also made them tilt. From my point of view,using Processing to draw wasn’t the most ideal way to realize my design because the curves and circular rings were hard to draw with codes for a beginner like me.(Or it was because I lacked the skills in Processing) Still,it was a fun experience.