Recitation 4 Documentation
This recitation project is AMAZING! We made an artifact that can automatically push and pull a cube periodically. Here is the documentation of the process of our making.
Step 1 was quite easy for us. I did the coding and Arduino connecting while Siwei Chen, my partner, made the circuit. I thought that making the circuit would be hard, but Siwei told me that it was not that hard, and we finished this step quickly.
Here’s the documentation of Step 1.
Step 2 requires us to build the shell of the machine with cardboard. I think this is the most difficult part of the project. We spent quite a long time cutting down the cardboard, gluing it together, and connecting the dc motor with the artifact. Finally, with the joint effort of me and Siwei, we made it, and we drew a cube and stuck it onto the electric arm.
Here’s the video of the result of Step 2:
Finally, we tried to change the rotation speed and the delay to make it spin faster. This is the step where we met with difficulties. We found that every time we tried to increase the value in the code, the motor would stop spinning and only make buzzes, before we asked the instructor, and surprisedly found that we should connect a wire with a larger voltage to run the motor. We eventually made the motor spin faster.
For the additional questions:
- The project of The drumming and drawing Subhuman, 2000 used spinning motors as the core actuator for controlling the electric arms of the robot percussionist. I think it is in line with the project done in the fourth recitation, where spinning DC motors are used for pushing and pulling the electric arm.
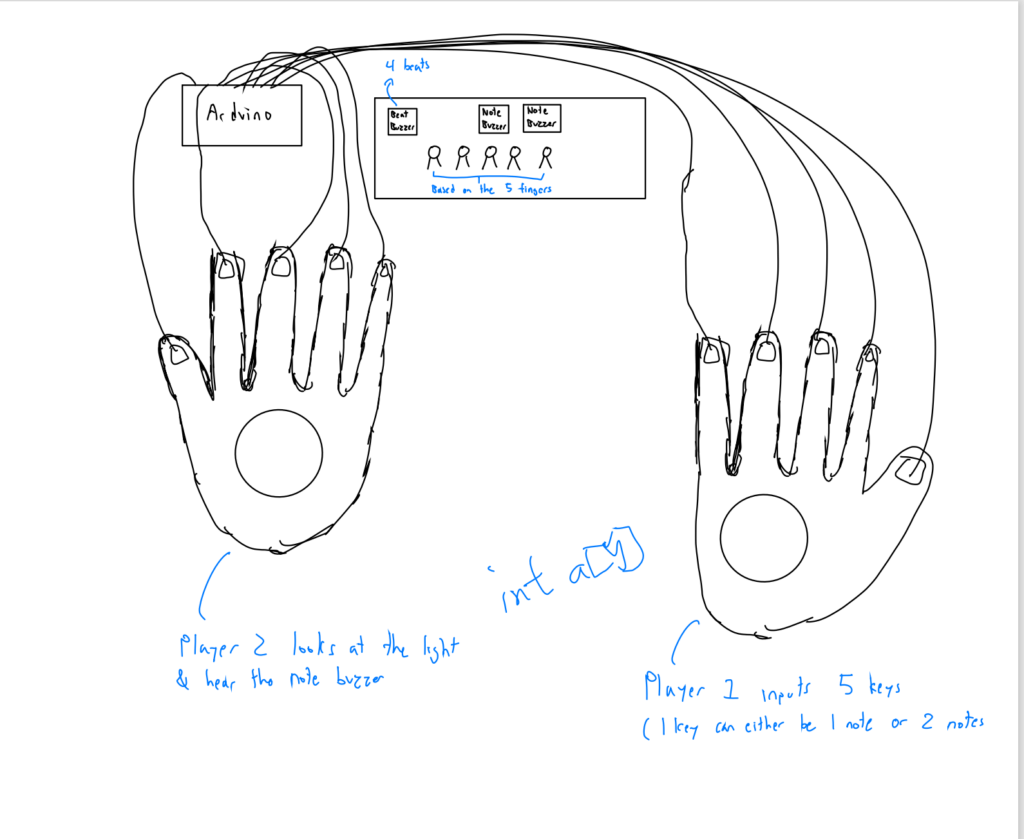
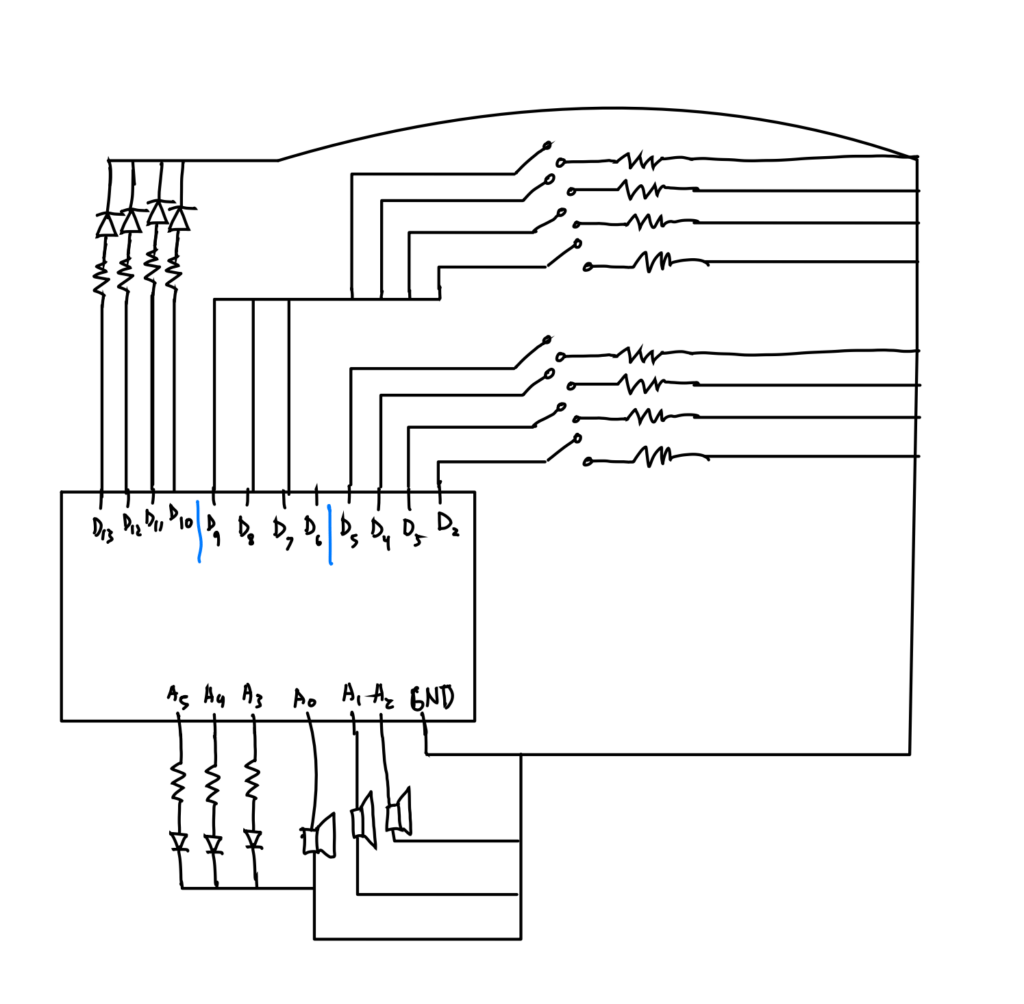
- I plan to design an interactive multiplayer game which is based on lighting, buzzers, and touch sensors for our midterm project. And our conceptual and technical sketch is as below:


The mechanism of the device is that: the two players put on the gloves devised, and then player A plays five notes using the according to the rhythm (bpm:92-160), at the same time the led light will light up every time he plays a note signalizing which finger/fingers he uses together with notes played by the buzzer. Then player B sees how the LED lights show up and play the rhythm accordingly. If he played all 5 of the notes right, the green light will light up. If 2-4 is right, the yellow. Below 2, the red.
All the materials that we plan to use are listed below:
1 Arduino set, 1 breadboard, several cables, 3 buzzers, 7 led lights, a pair of plastic gloves, 8 10kOhm resistors, 3 220Ohm resistors, cardboard, and aluminum foam.
Our interactive design is different from using animation on a digital screen in that its input is more creative and interactive than simply clicking the screen. We use the clickings between the fingers instead. Sounds interesting, isn’t it? 🙂
