
One-man band synthesizer — Raphael & Jennifer — Instructor: Eric
I. CONCEPTION AND DESIGN
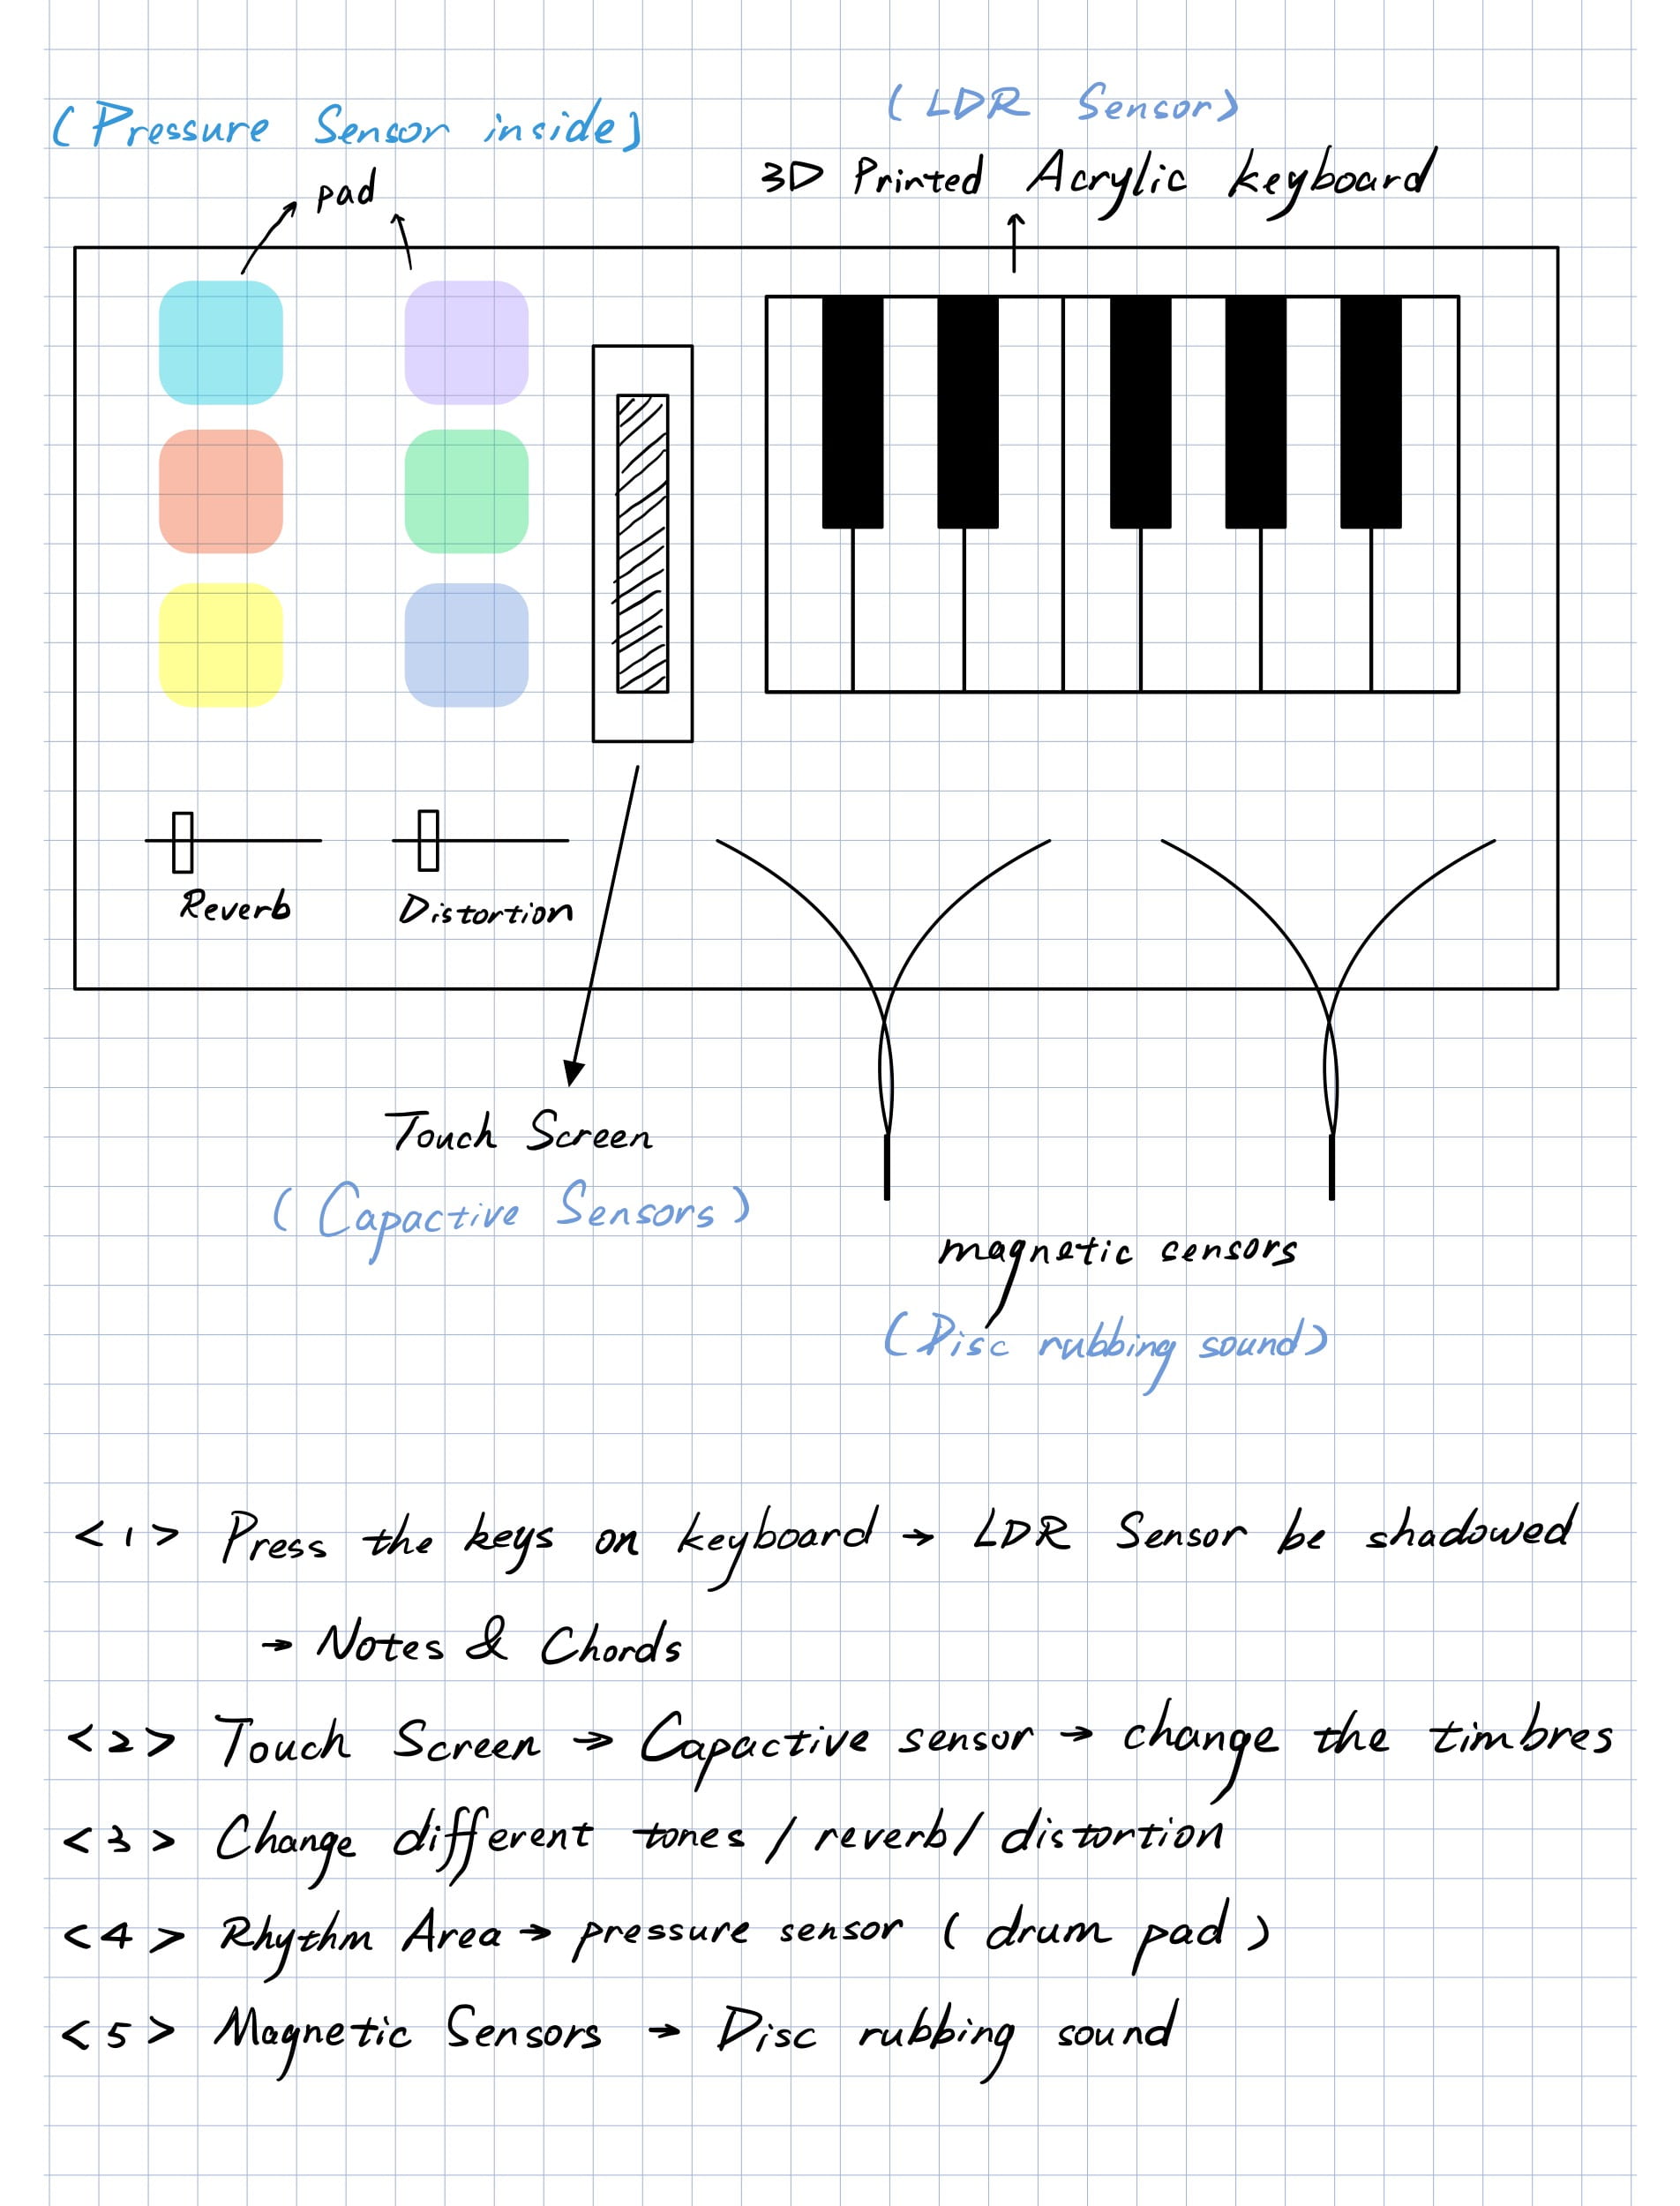
This is a project we initially wanted to make into an arranging machine for people who don’t know much about music arranging. It allows one person to make a whole orchestra. This was inspired by the loop station show, and I wanted to make a machine that could record the user’s playing and play it on a loop to achieve the effect of a one-person performance and arrangement. As a musical instrument, this project is definitely very interactive with the user, allowing the user to get timely feedback from the operation of the machine and the final result, and the finished product is very personal and original.
Our draft
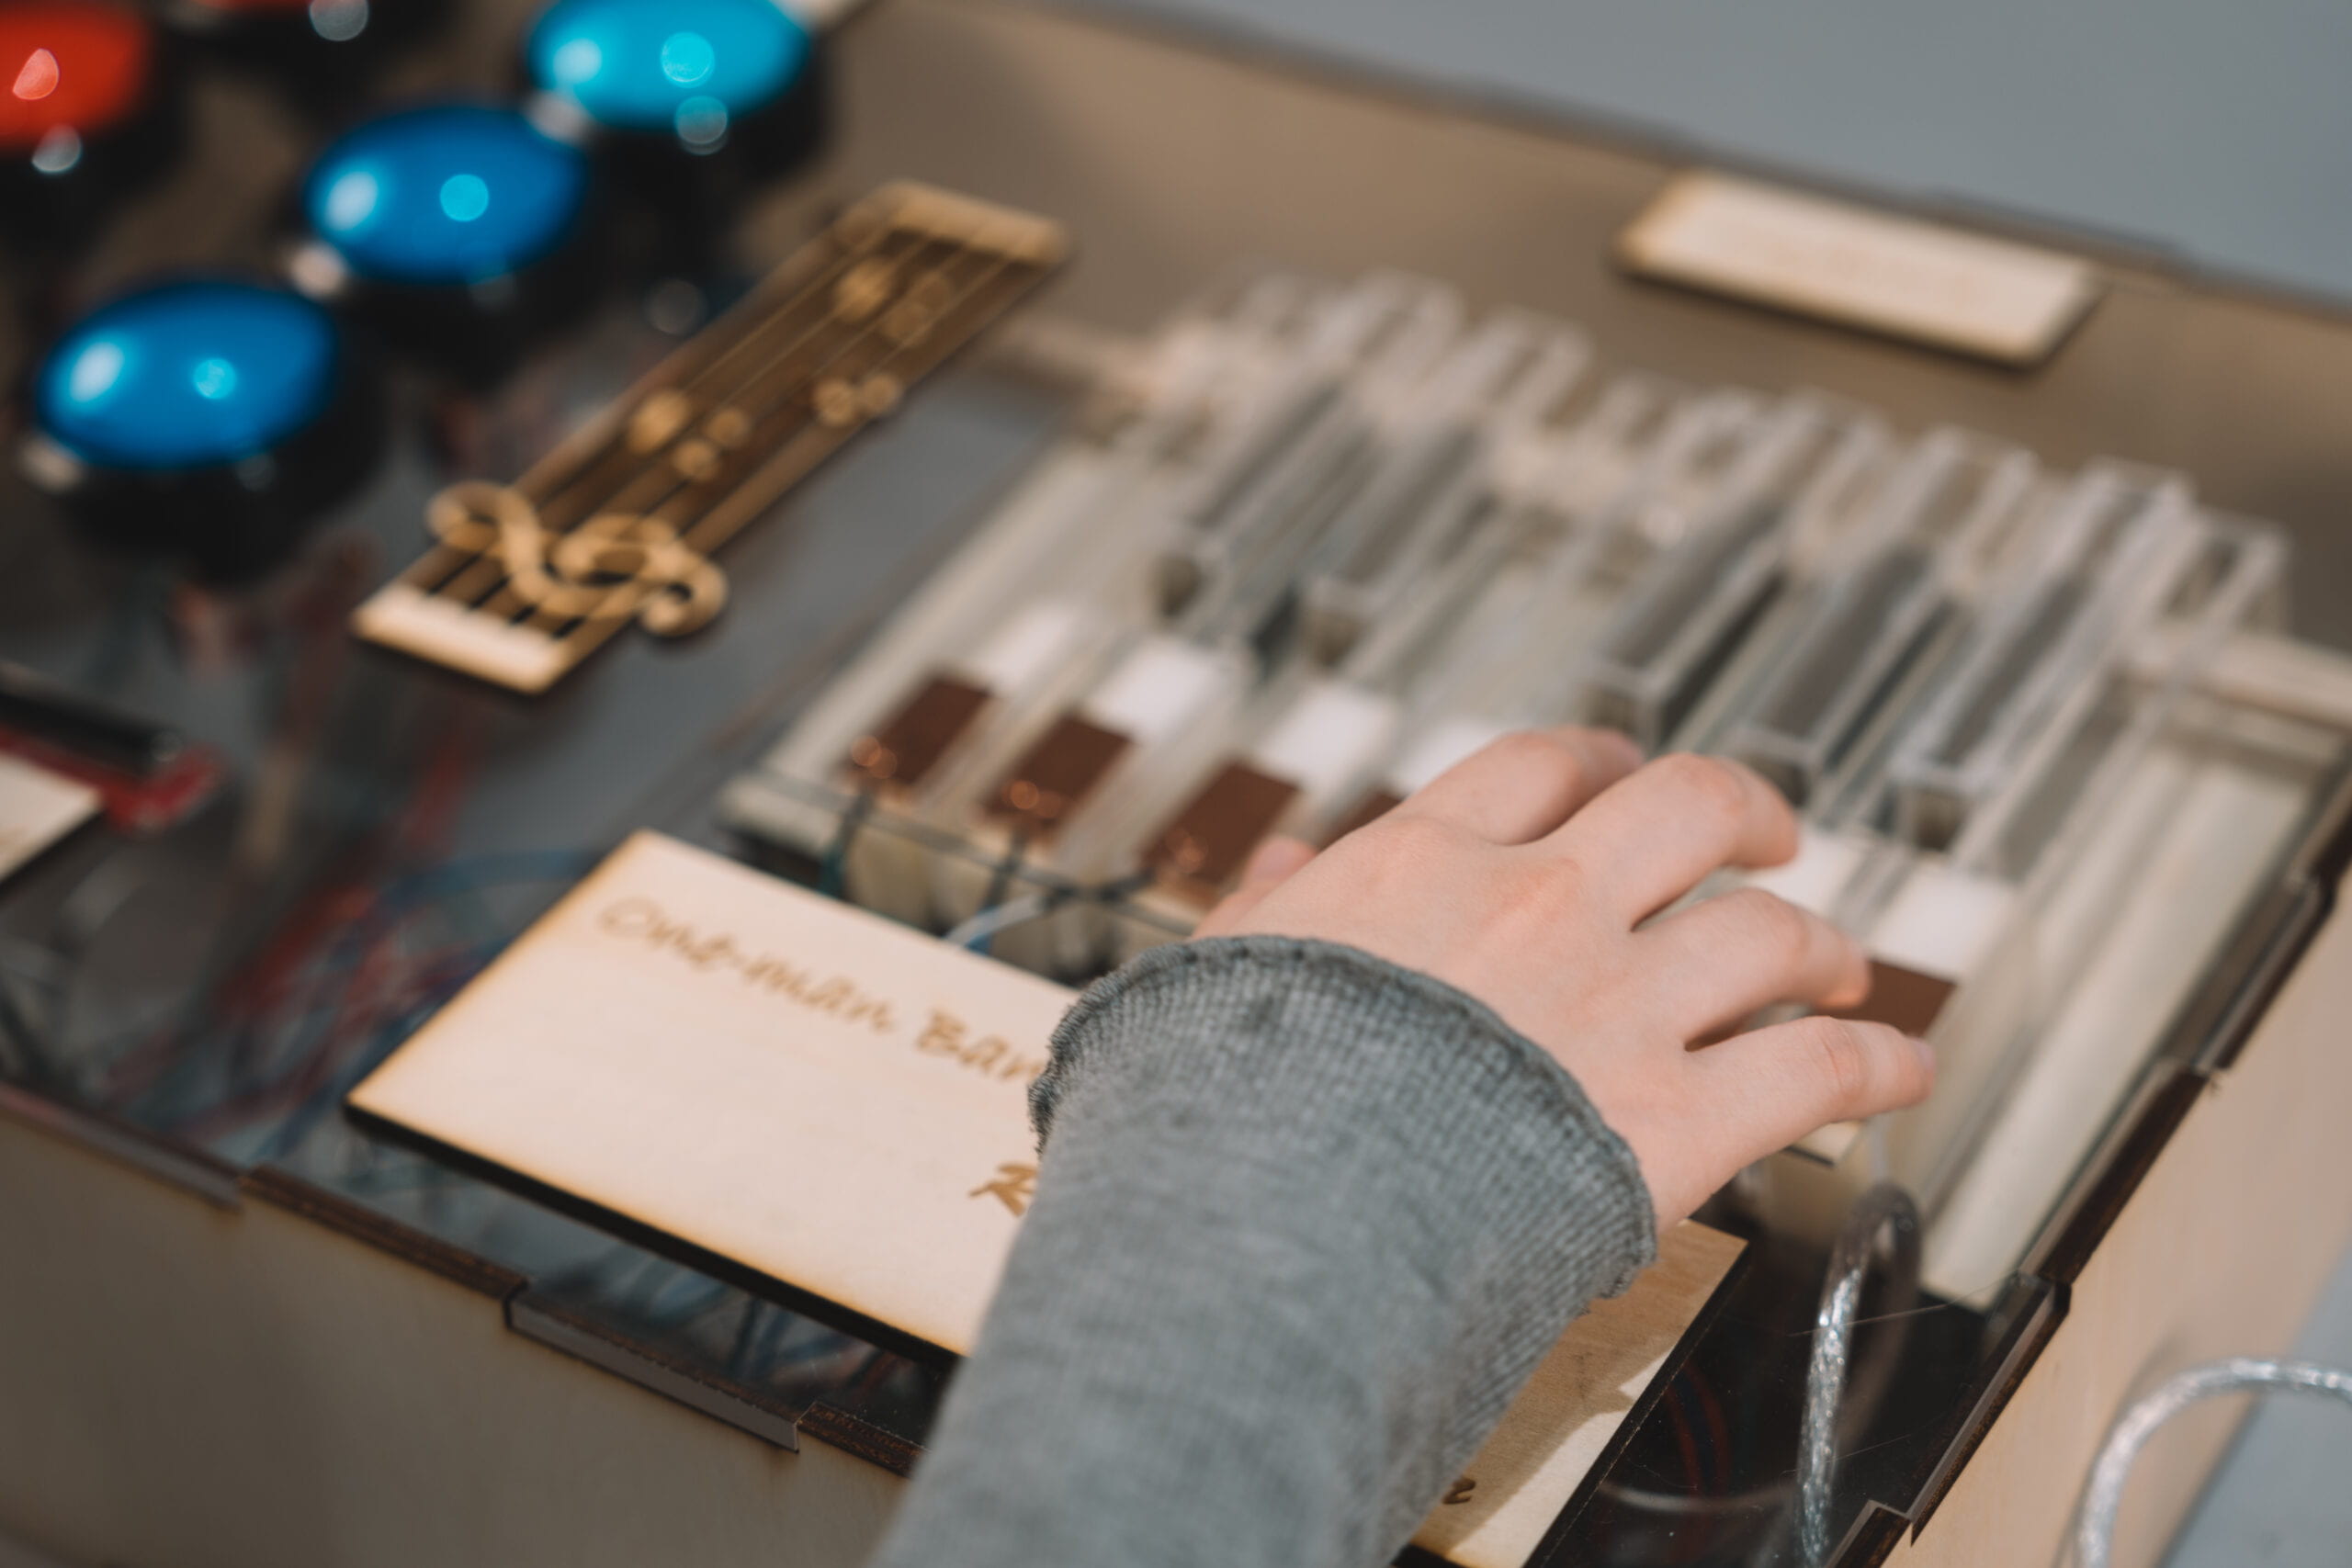
In user testing, we only did two areas, the drums and the keyboard, and we received a lot of feedback. The first was about the use of sensors. We started out using a capacitive sensor for the drums area to make sounds in the form of presses. However, this method is very unstable and not aesthetically pleasing, and some users suggested that we replace it with buttons to increase its stability. For the keyboard, we were going to use a light sensor to sense the laser, but our professor reminded us of the large error, and suggested that we could prepare a planB and use a touch sensor instead. Also he suggested us to use sponges to make the keys turn back to their original place. A lot of users mentioned making recording function. And the recording function itself is also within our design, which makes us even more sure that the first priority after the main part is completed is to make the recording function. So after user testing, we we modified these places in a timely manner. These suggestions proved to be very effective.
II. FABRICATION AND PRODUCTION
In terms of the project that we ended up completing, there were some failures in that it was a bit of a departure from what we had initially set out to do. The functionality of the different areas we didn’t do all that we initially envisioned, due to lack of time. But we kept as many of the main features as possible to make our project run smoothly, such as the keyboard, drums, and volume areas, and we listened to some of the suggestions from user testing and added background music and recording instead of the originally envisioned recording loop to make our project more of an experiential type of instrument.
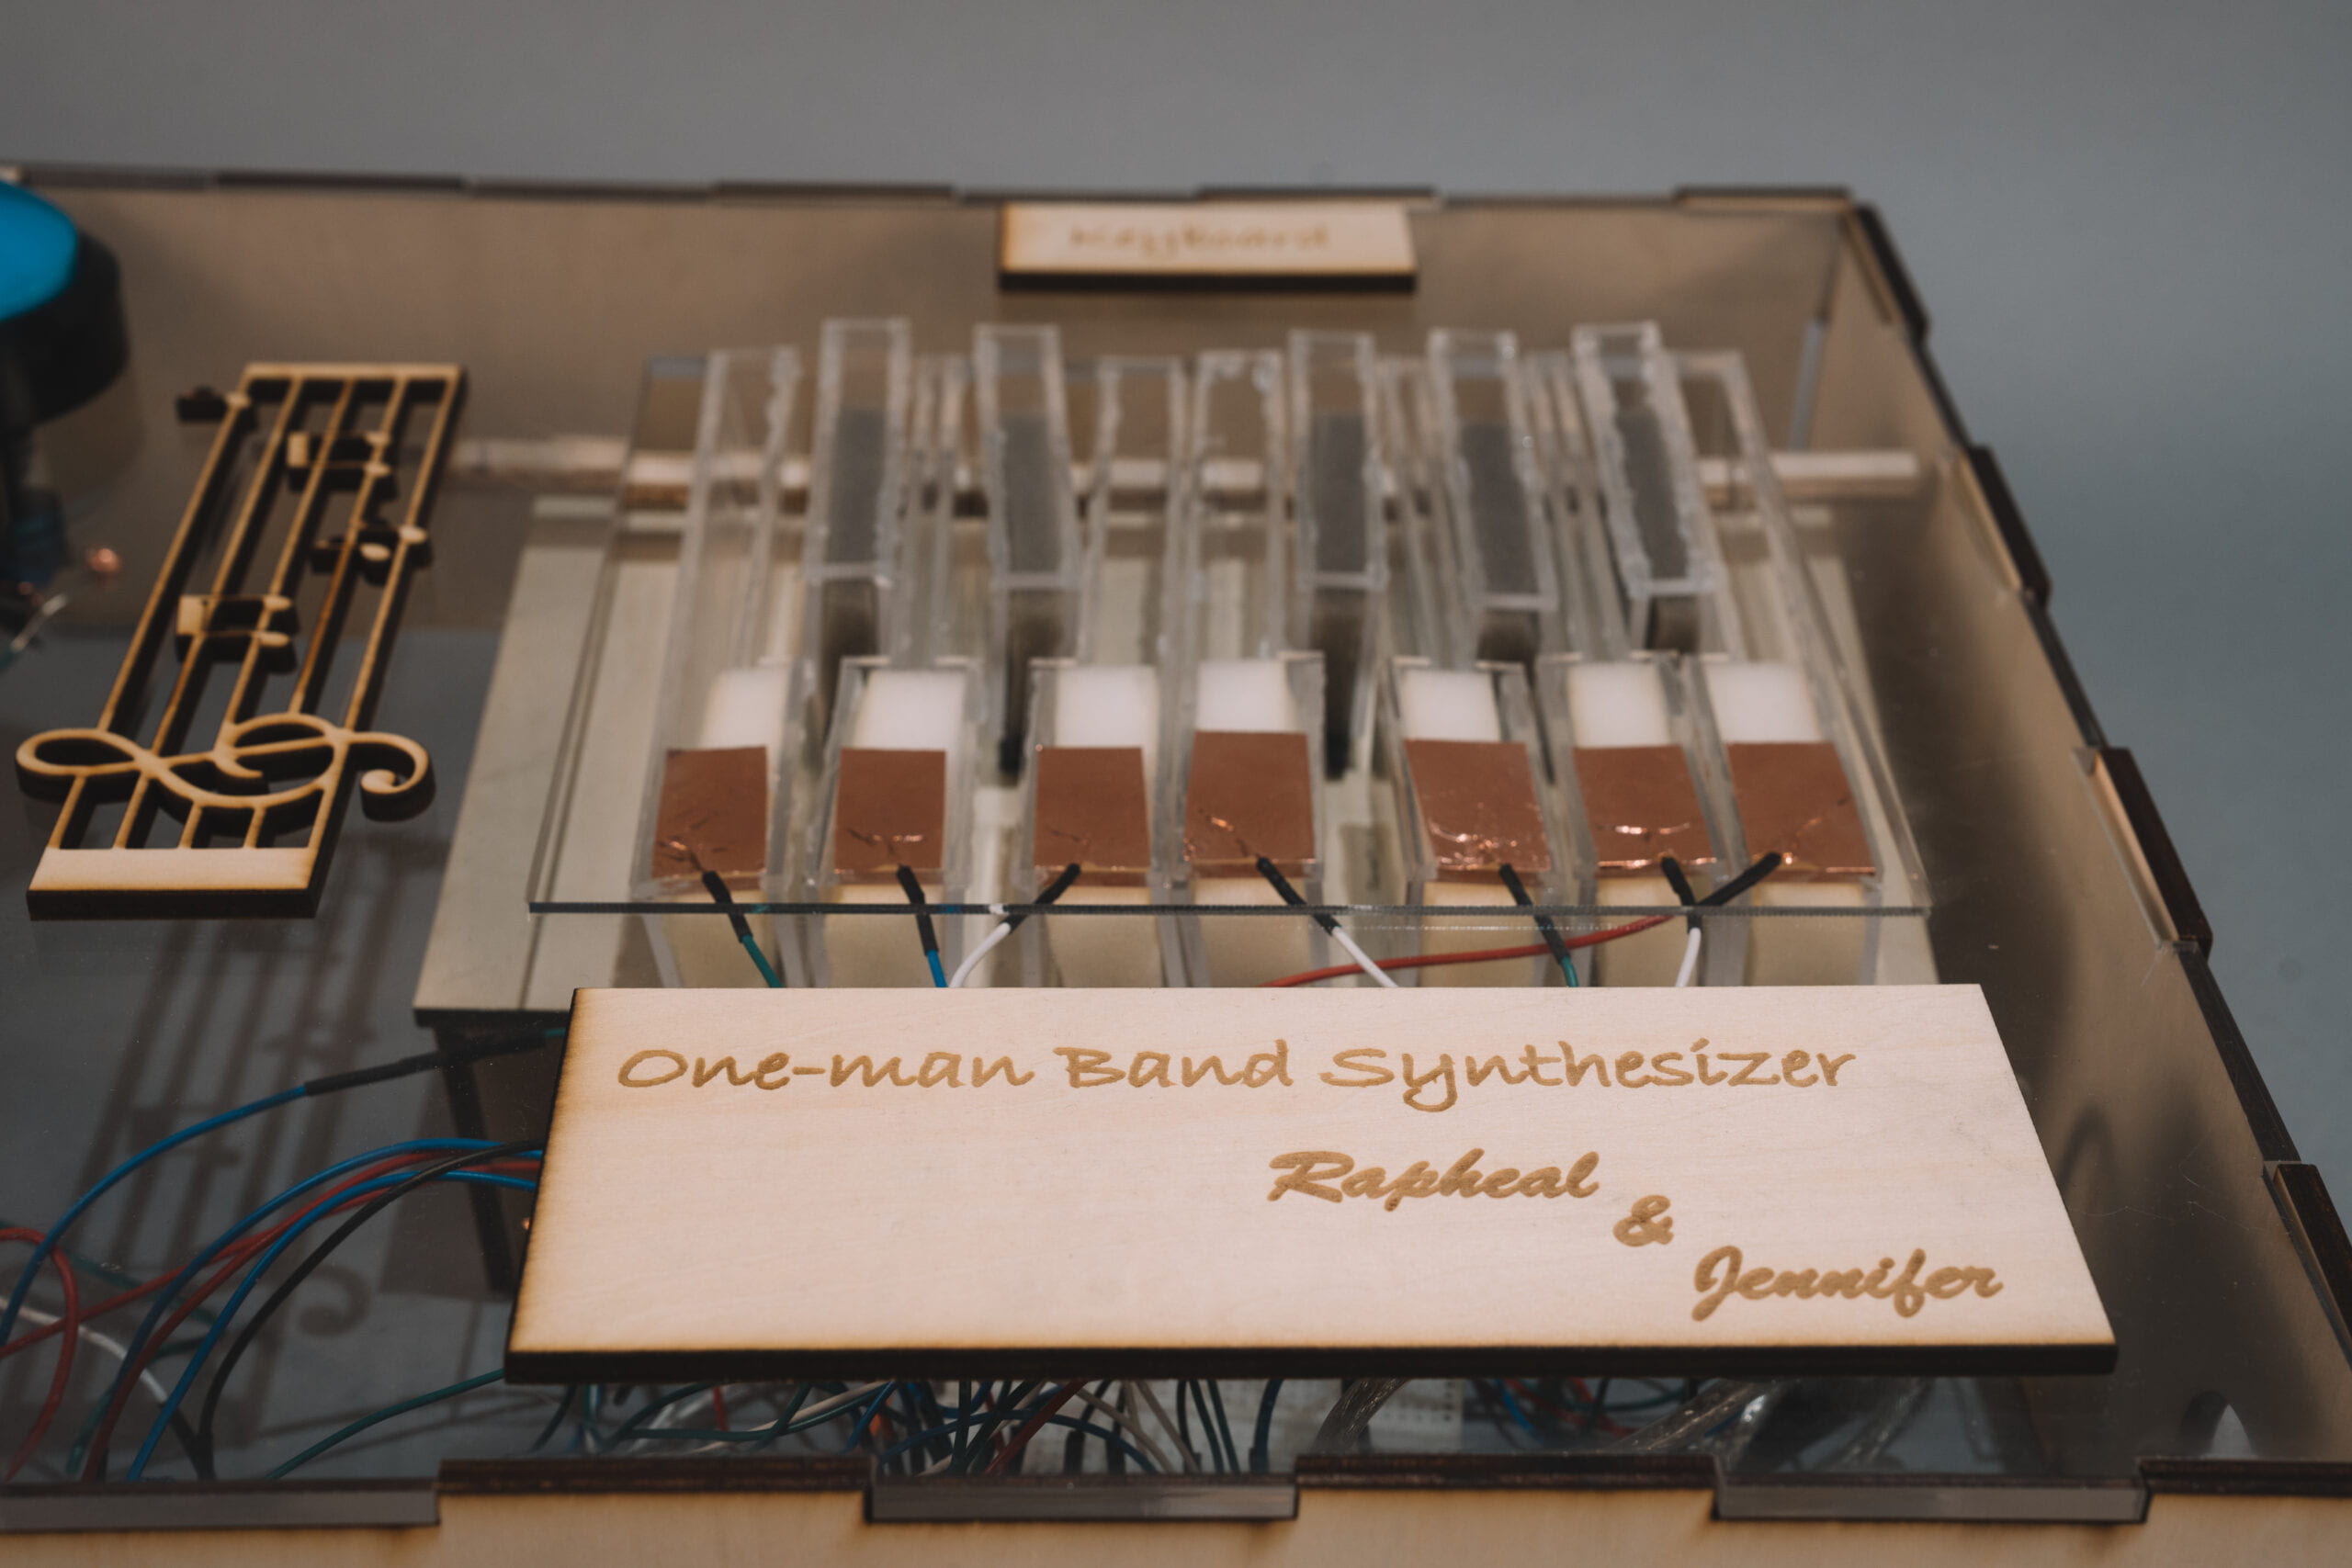
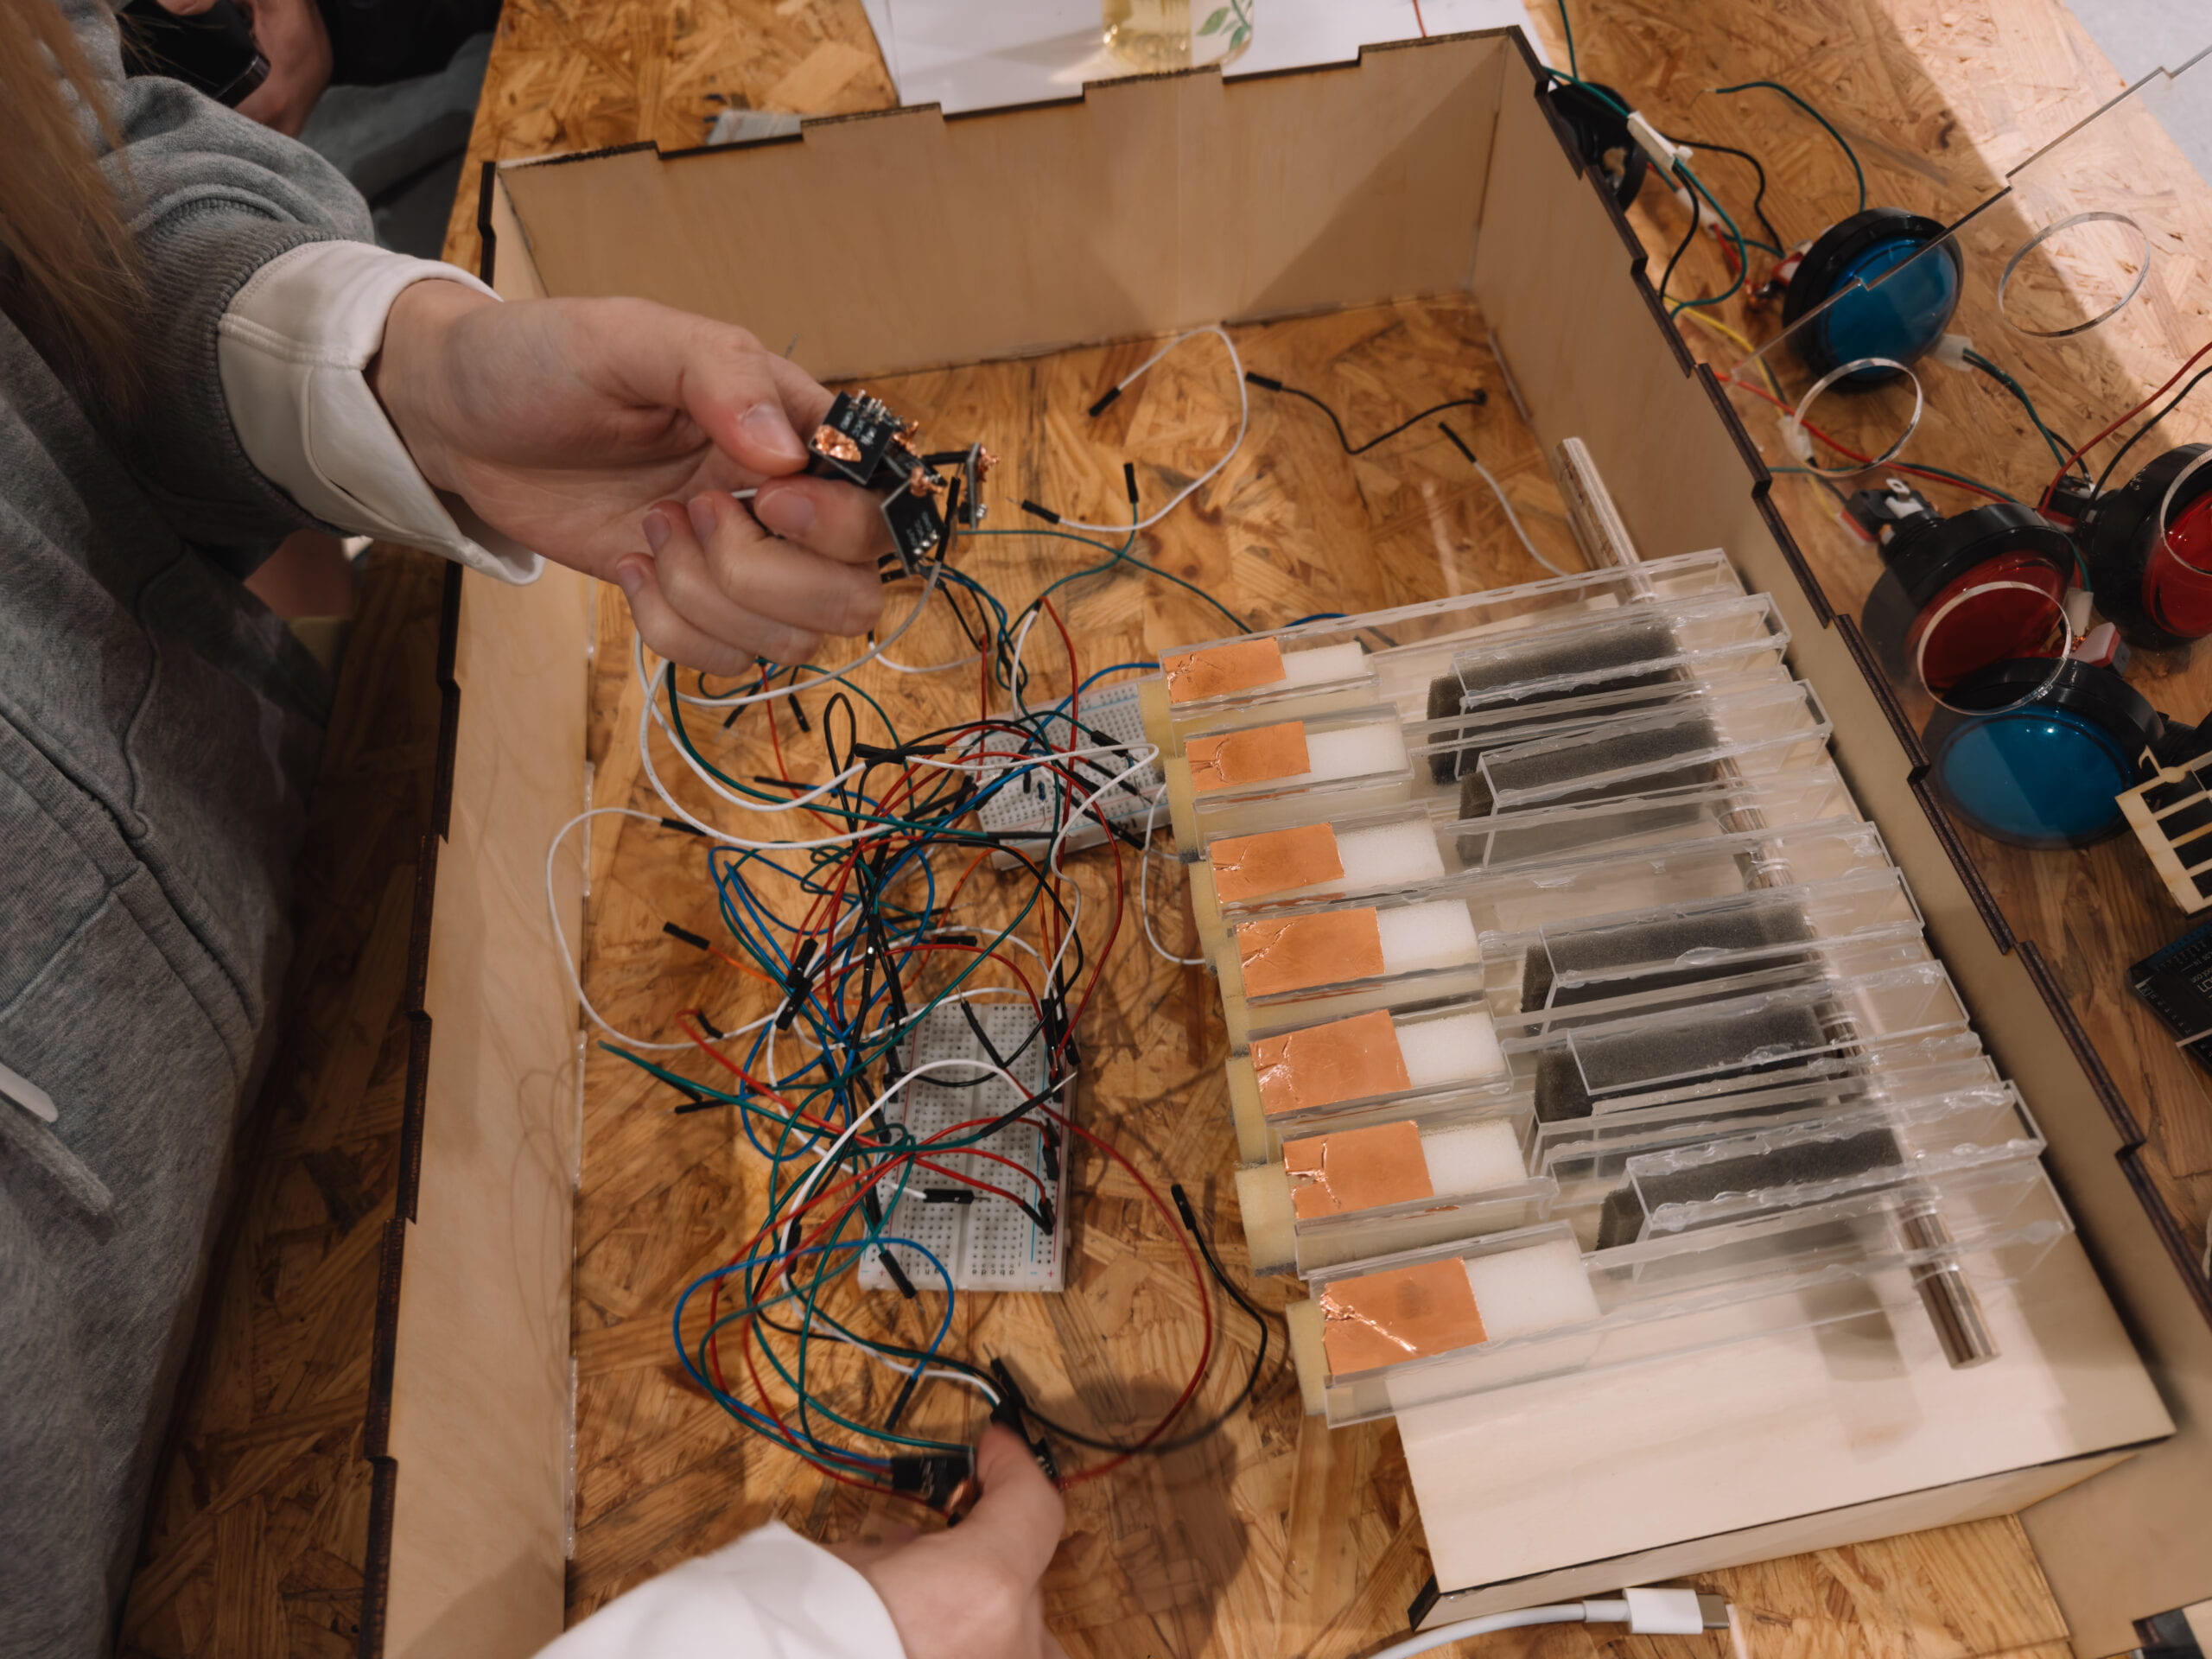
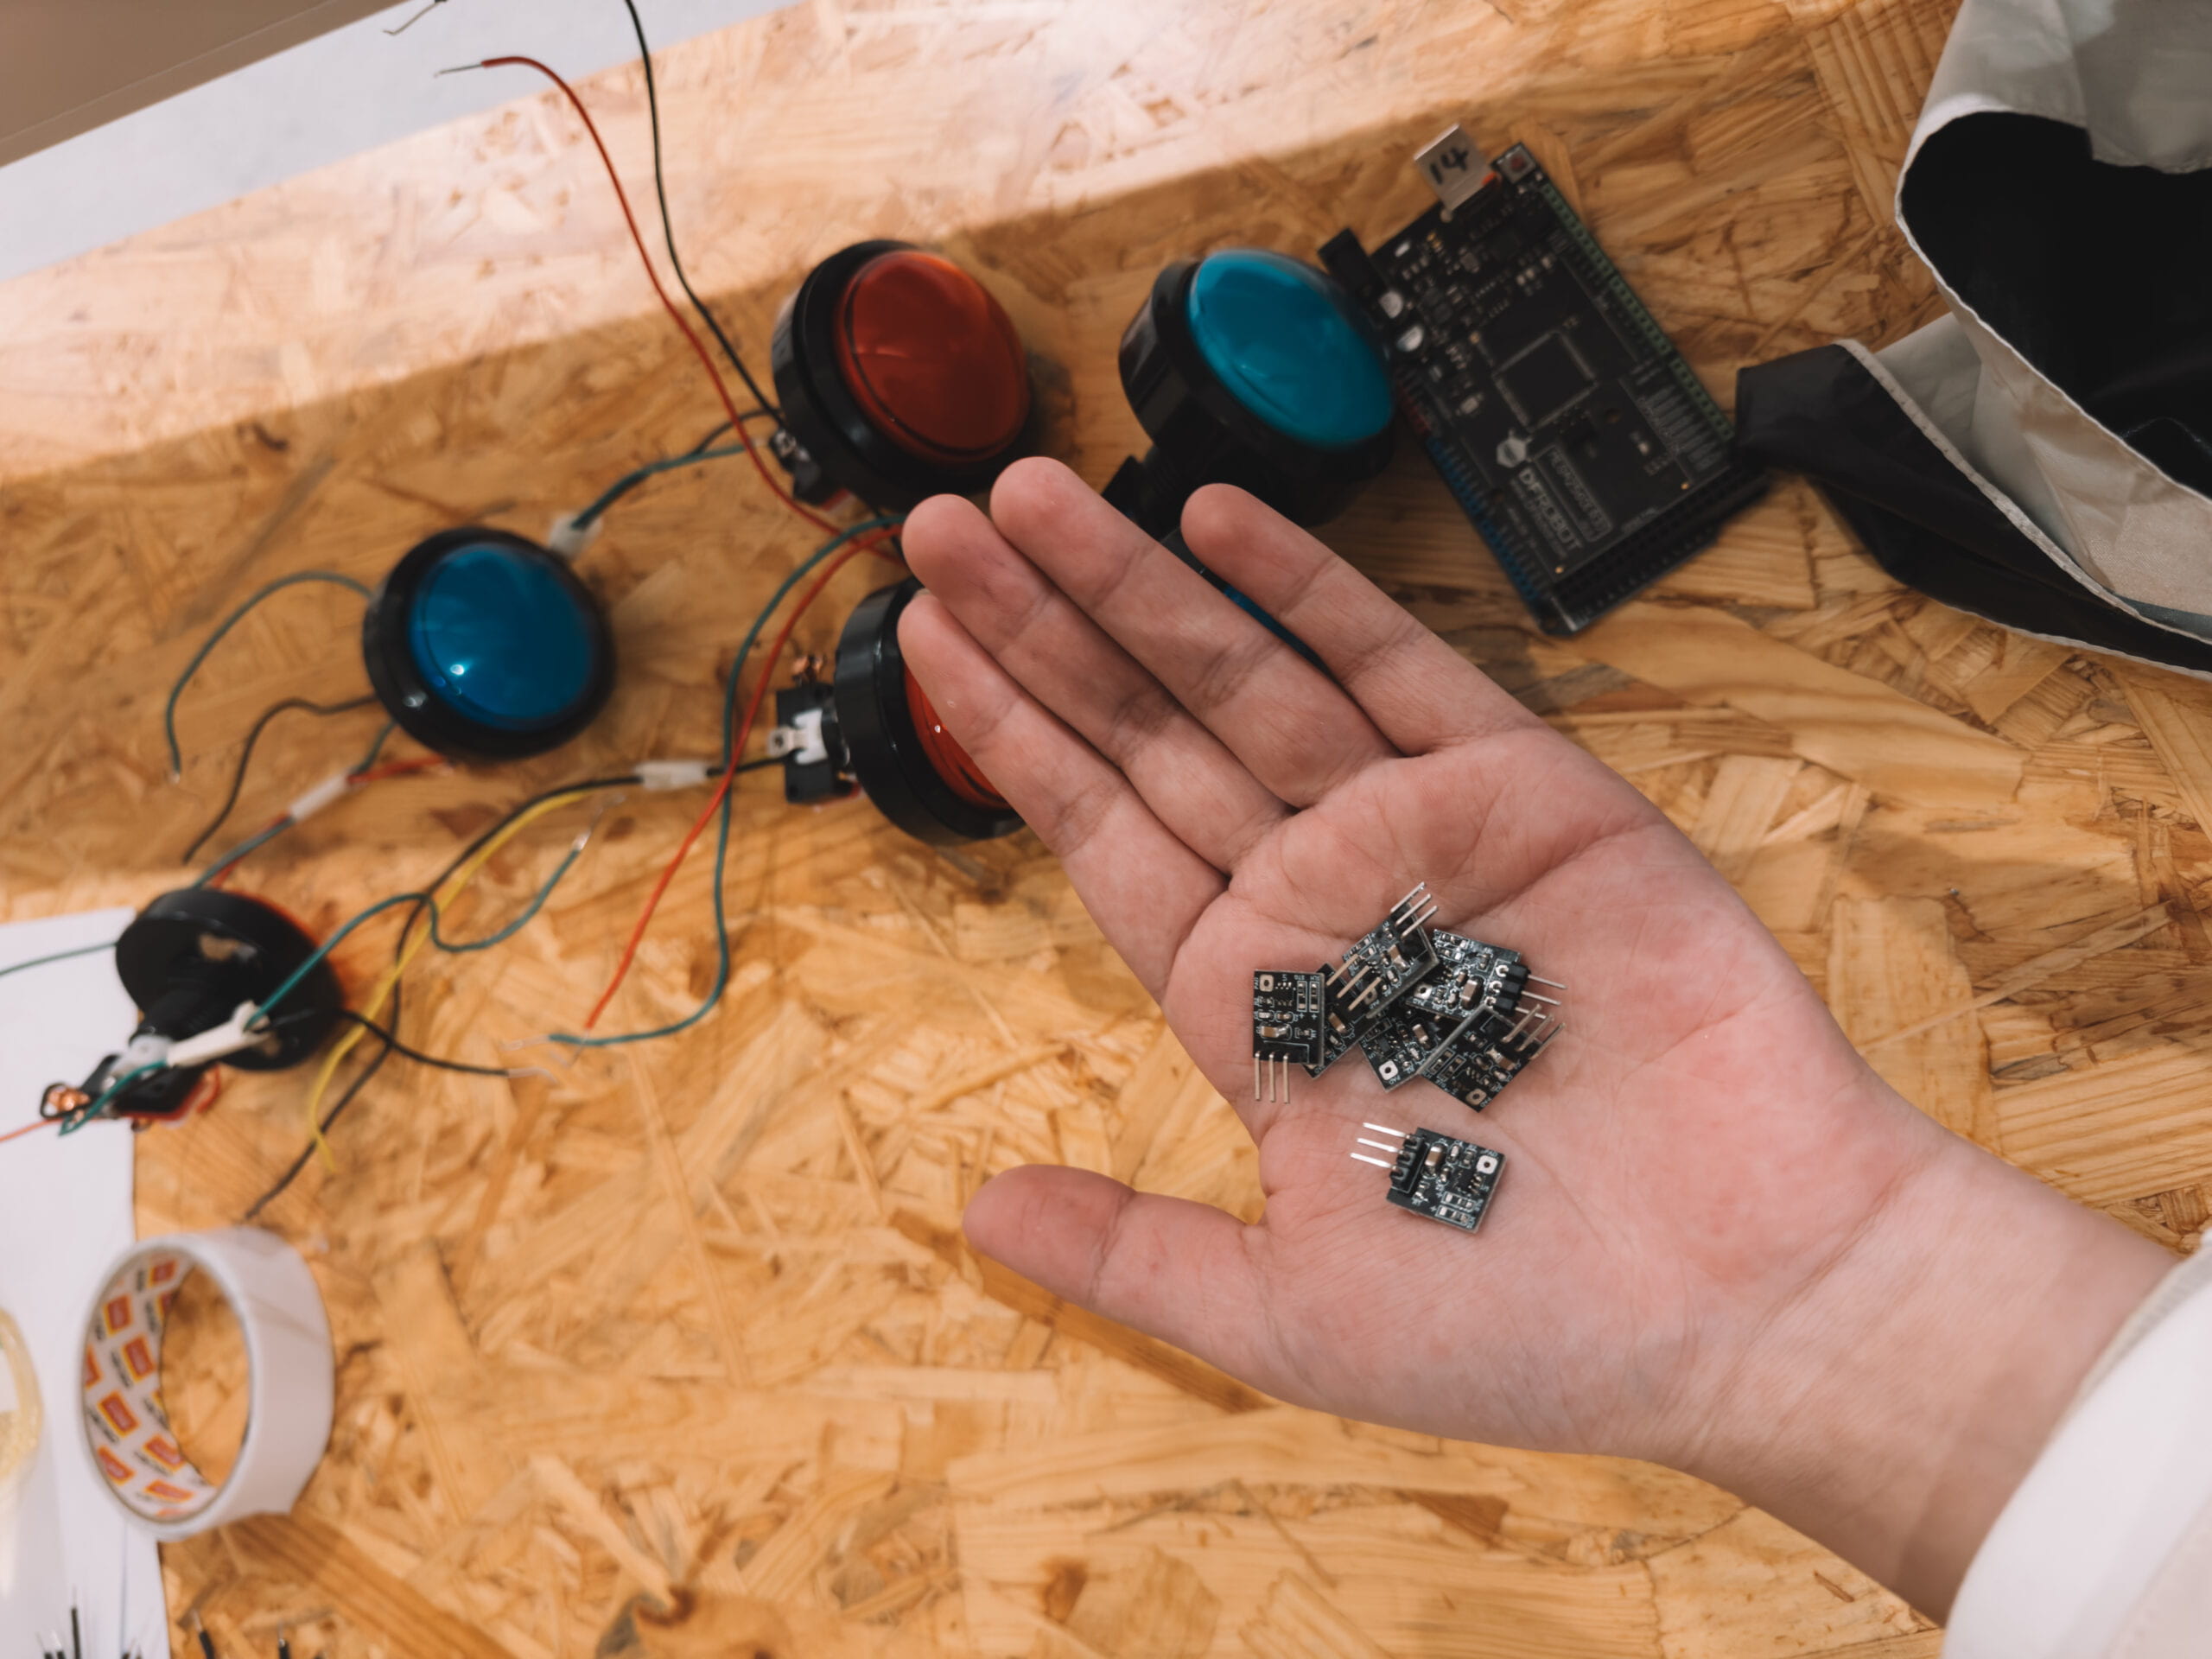
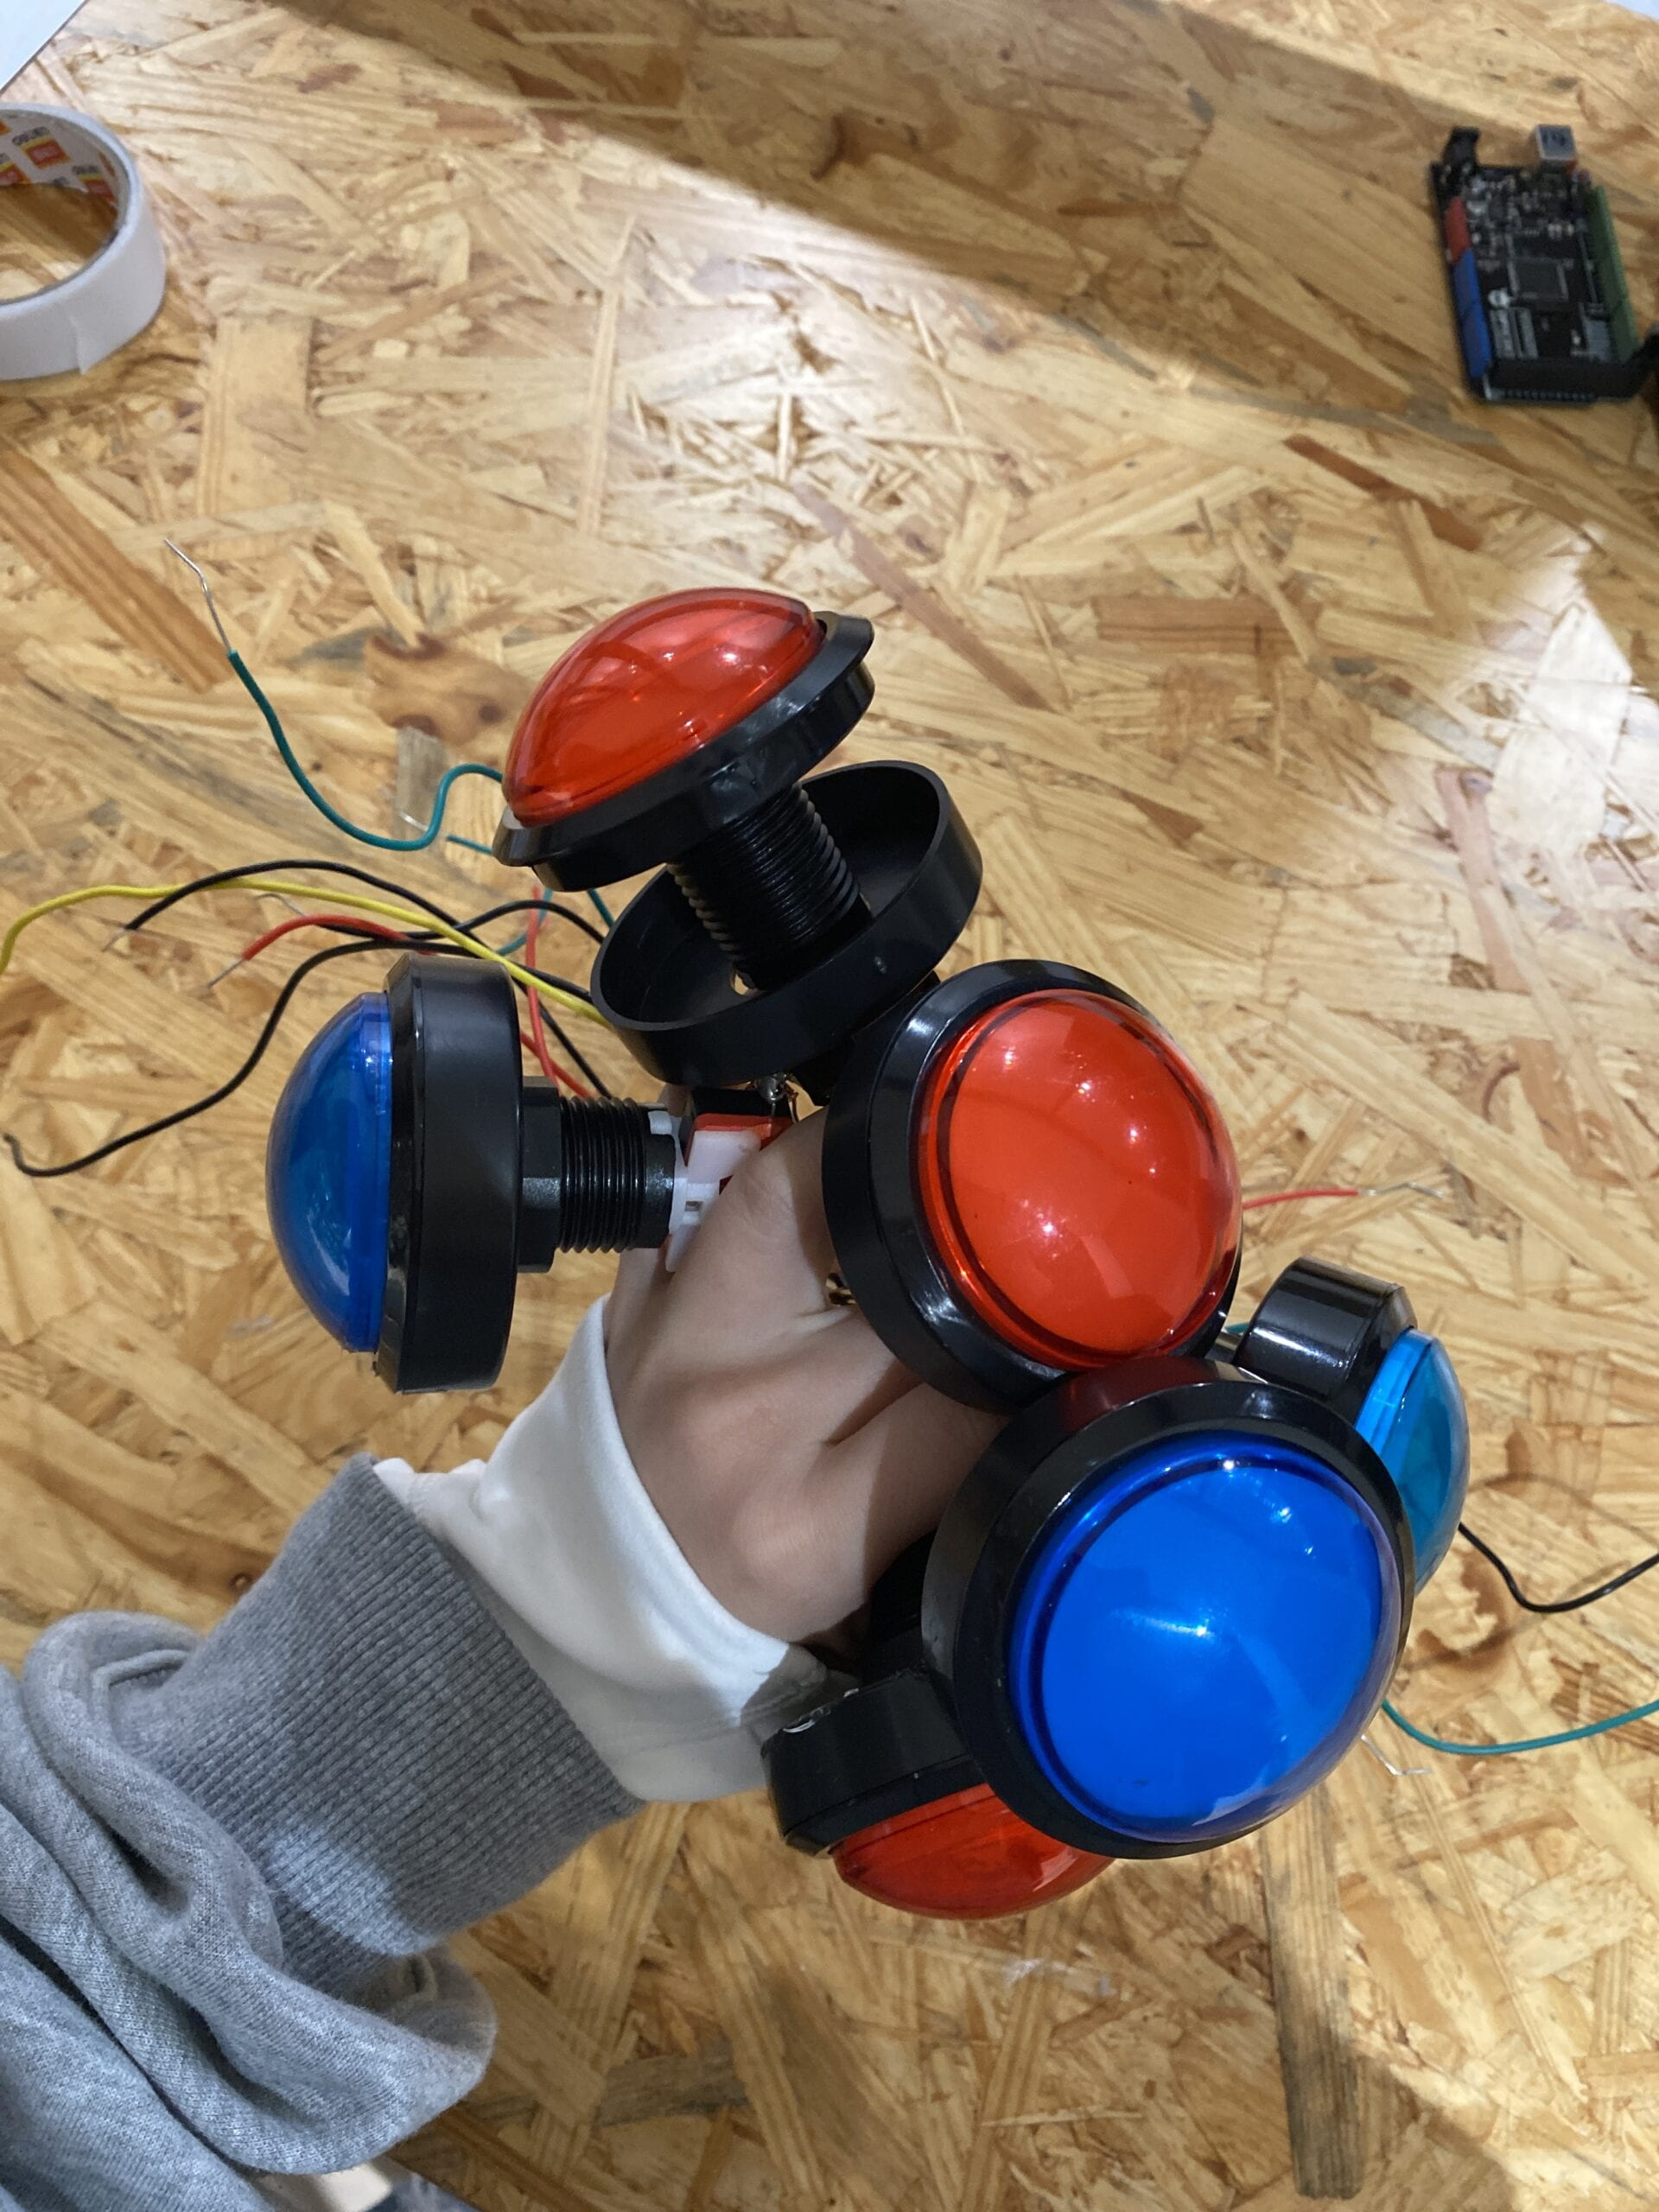
In terms of sensor selection, we overrode almost all of the sensors that most of us had chosen when we envisioned it. In the case of the drums, the capacitive sensor we originally chose made us switch to a button due to contact issues. For the keyboard, we originally wanted to do it with lasers and photoreceptors, but we didn’t succeed in borrowing enough laser emitters and did have some difficulty fixing them, so we retreated to touch sensors instead.
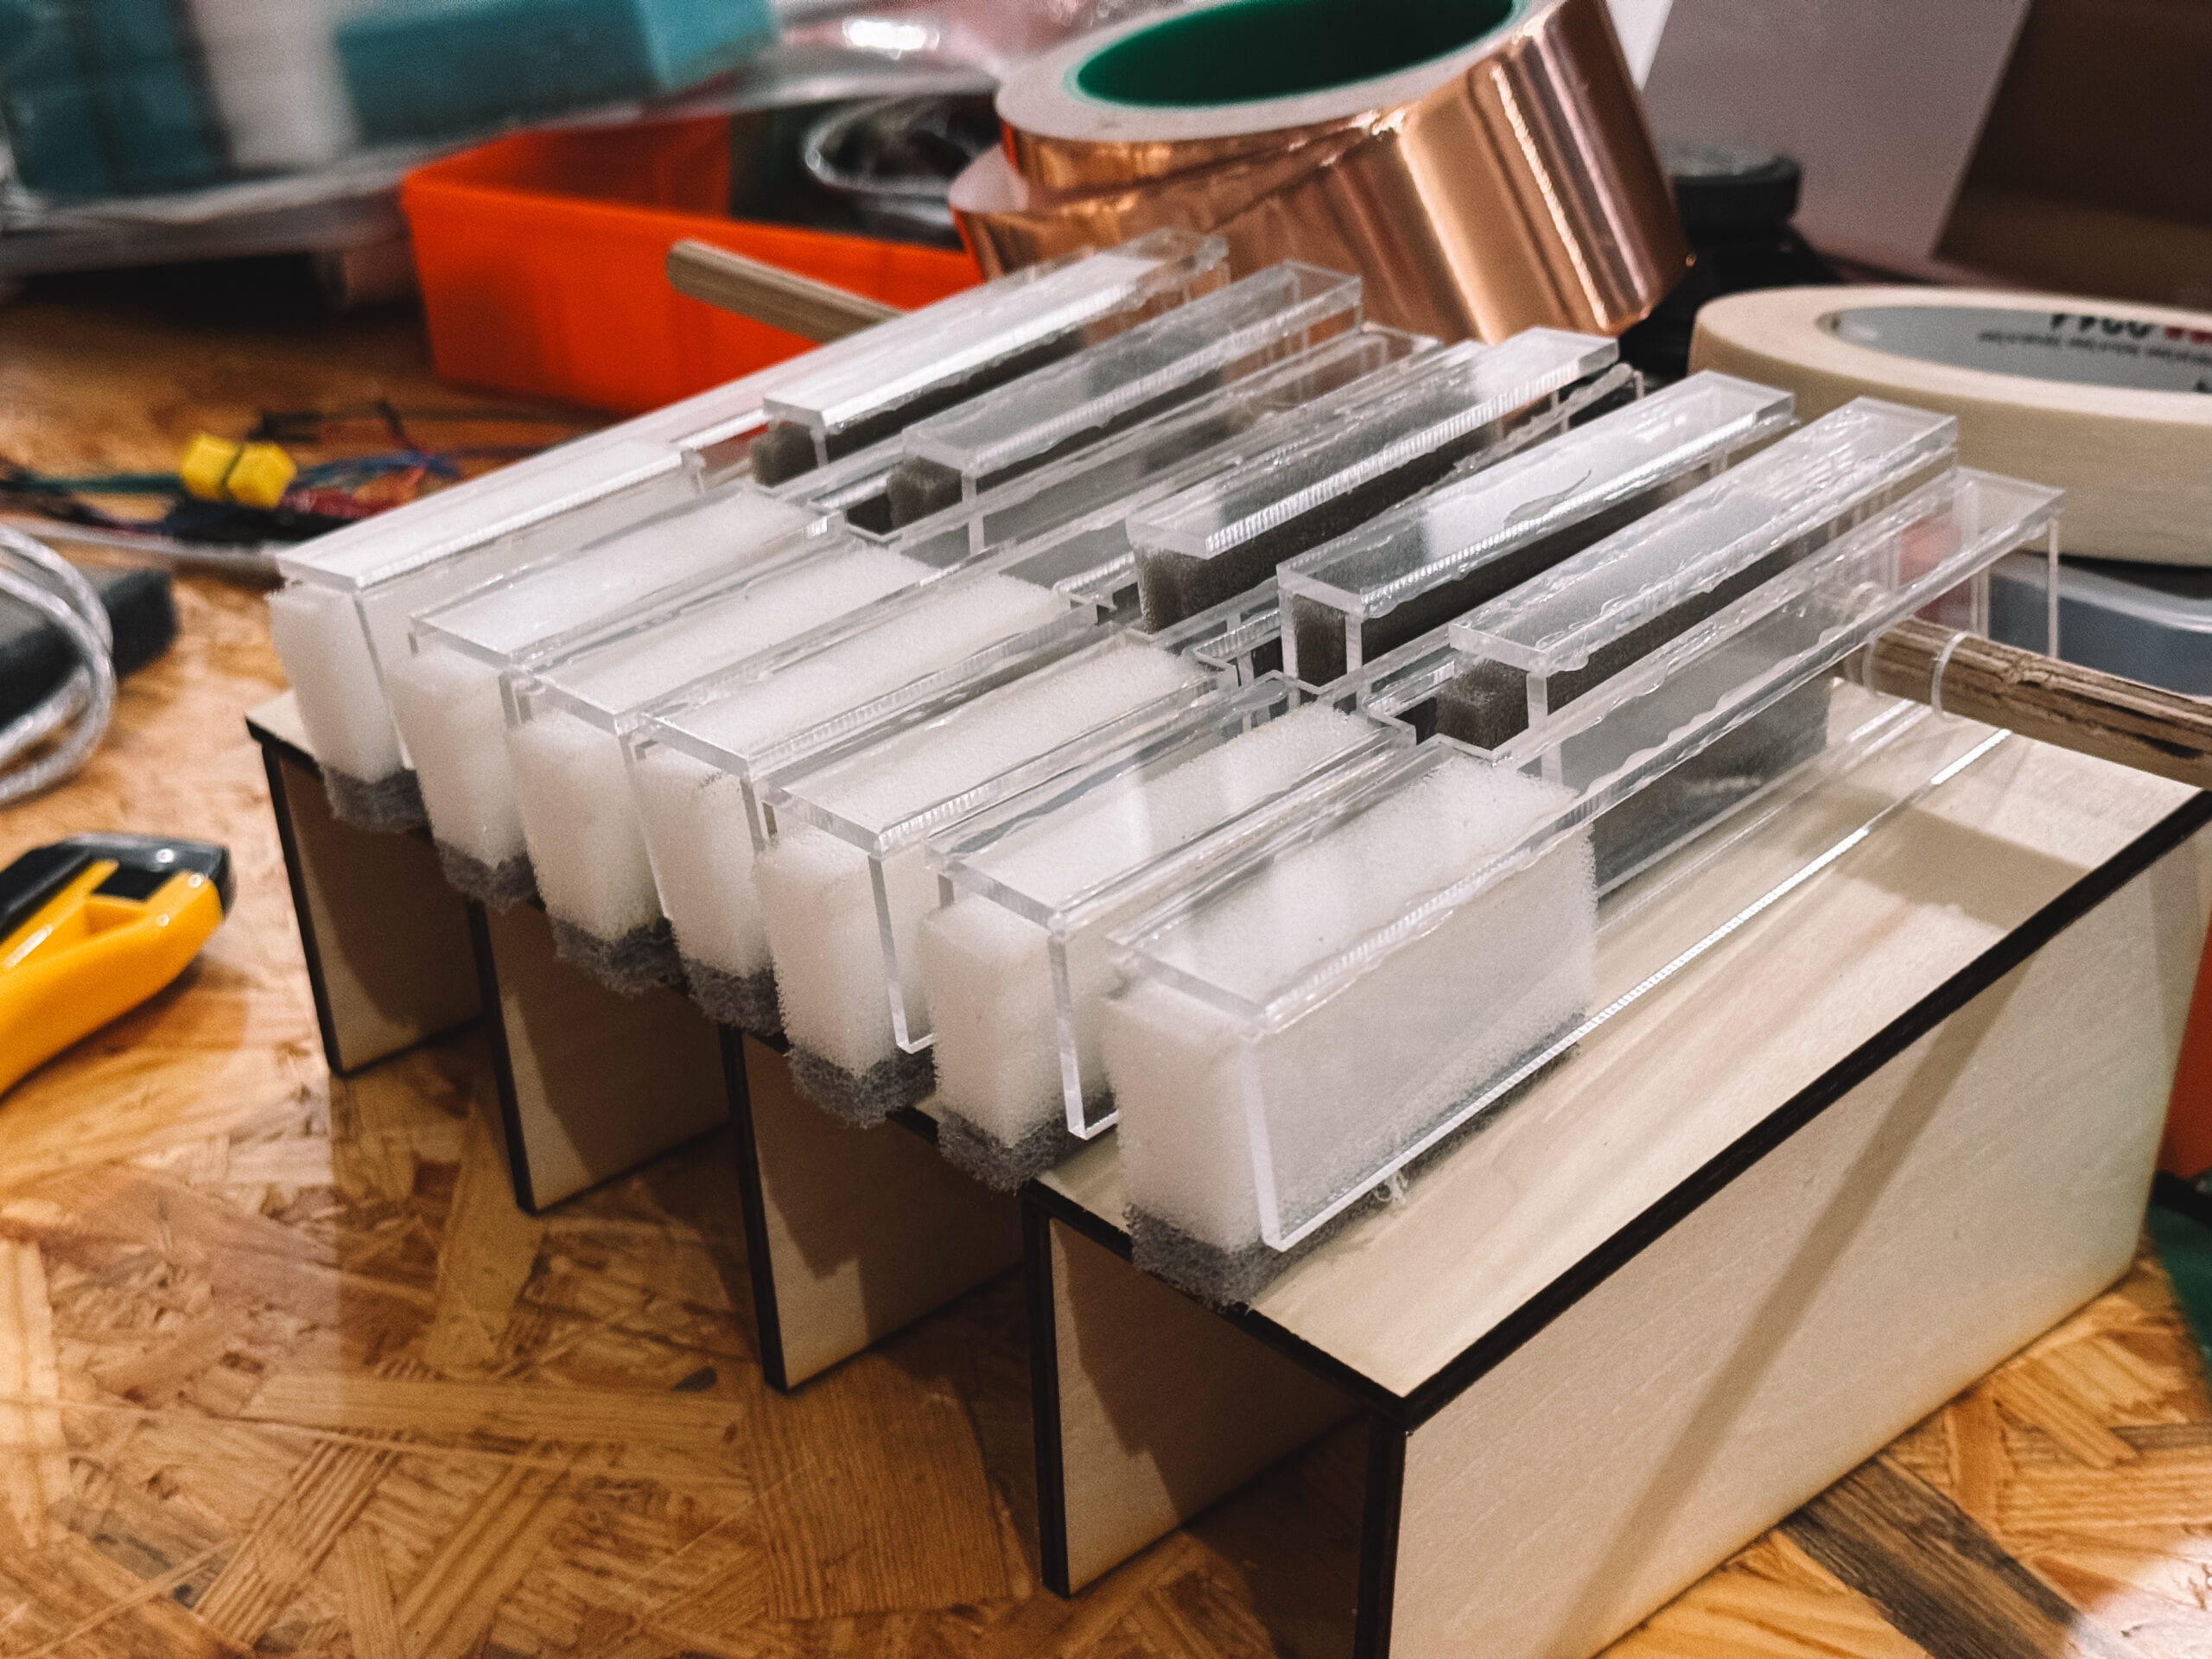
Keyboard prototype
In terms of materials, we initially wanted to use wooden boards because we wanted to try to hide the messy wires inside, but we found that they are very susceptible to moisture and can warp very badly, and are very difficult to fix without using woodworking adhesive, especially for the larger two boards. So we ended up printing the top and bottom boards in acrylic, which is much less likely to warp.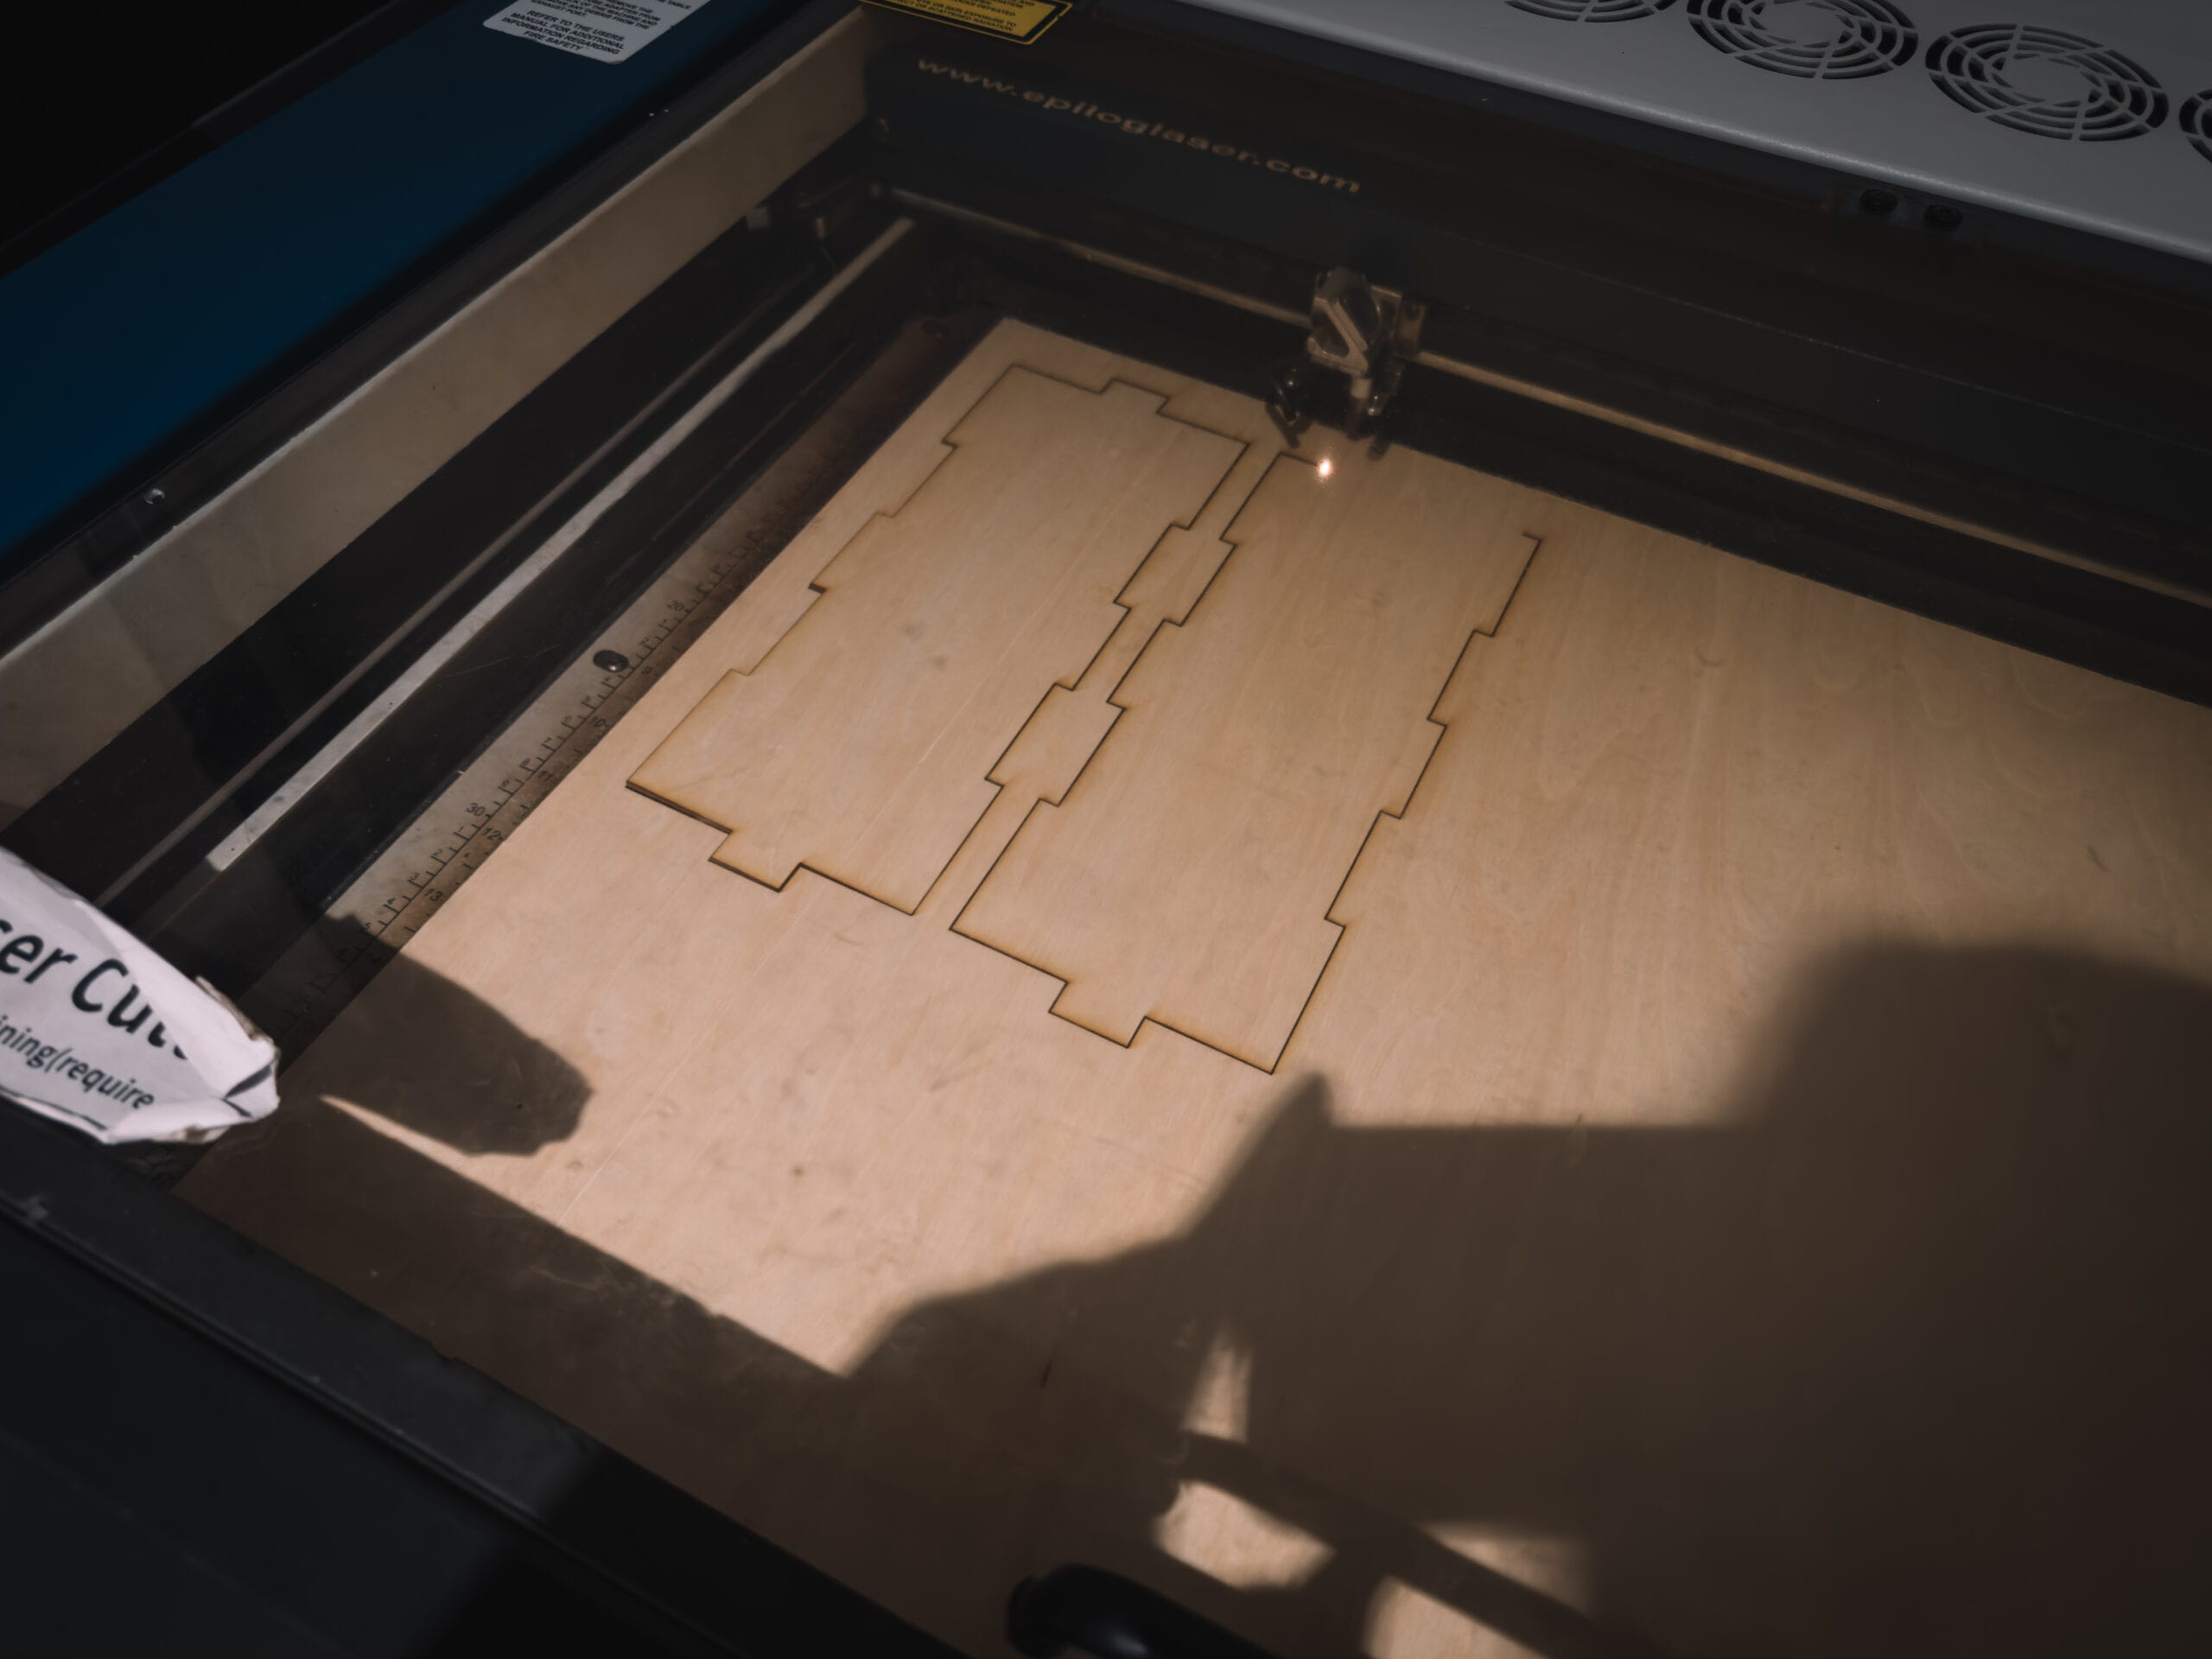
Laser cutting
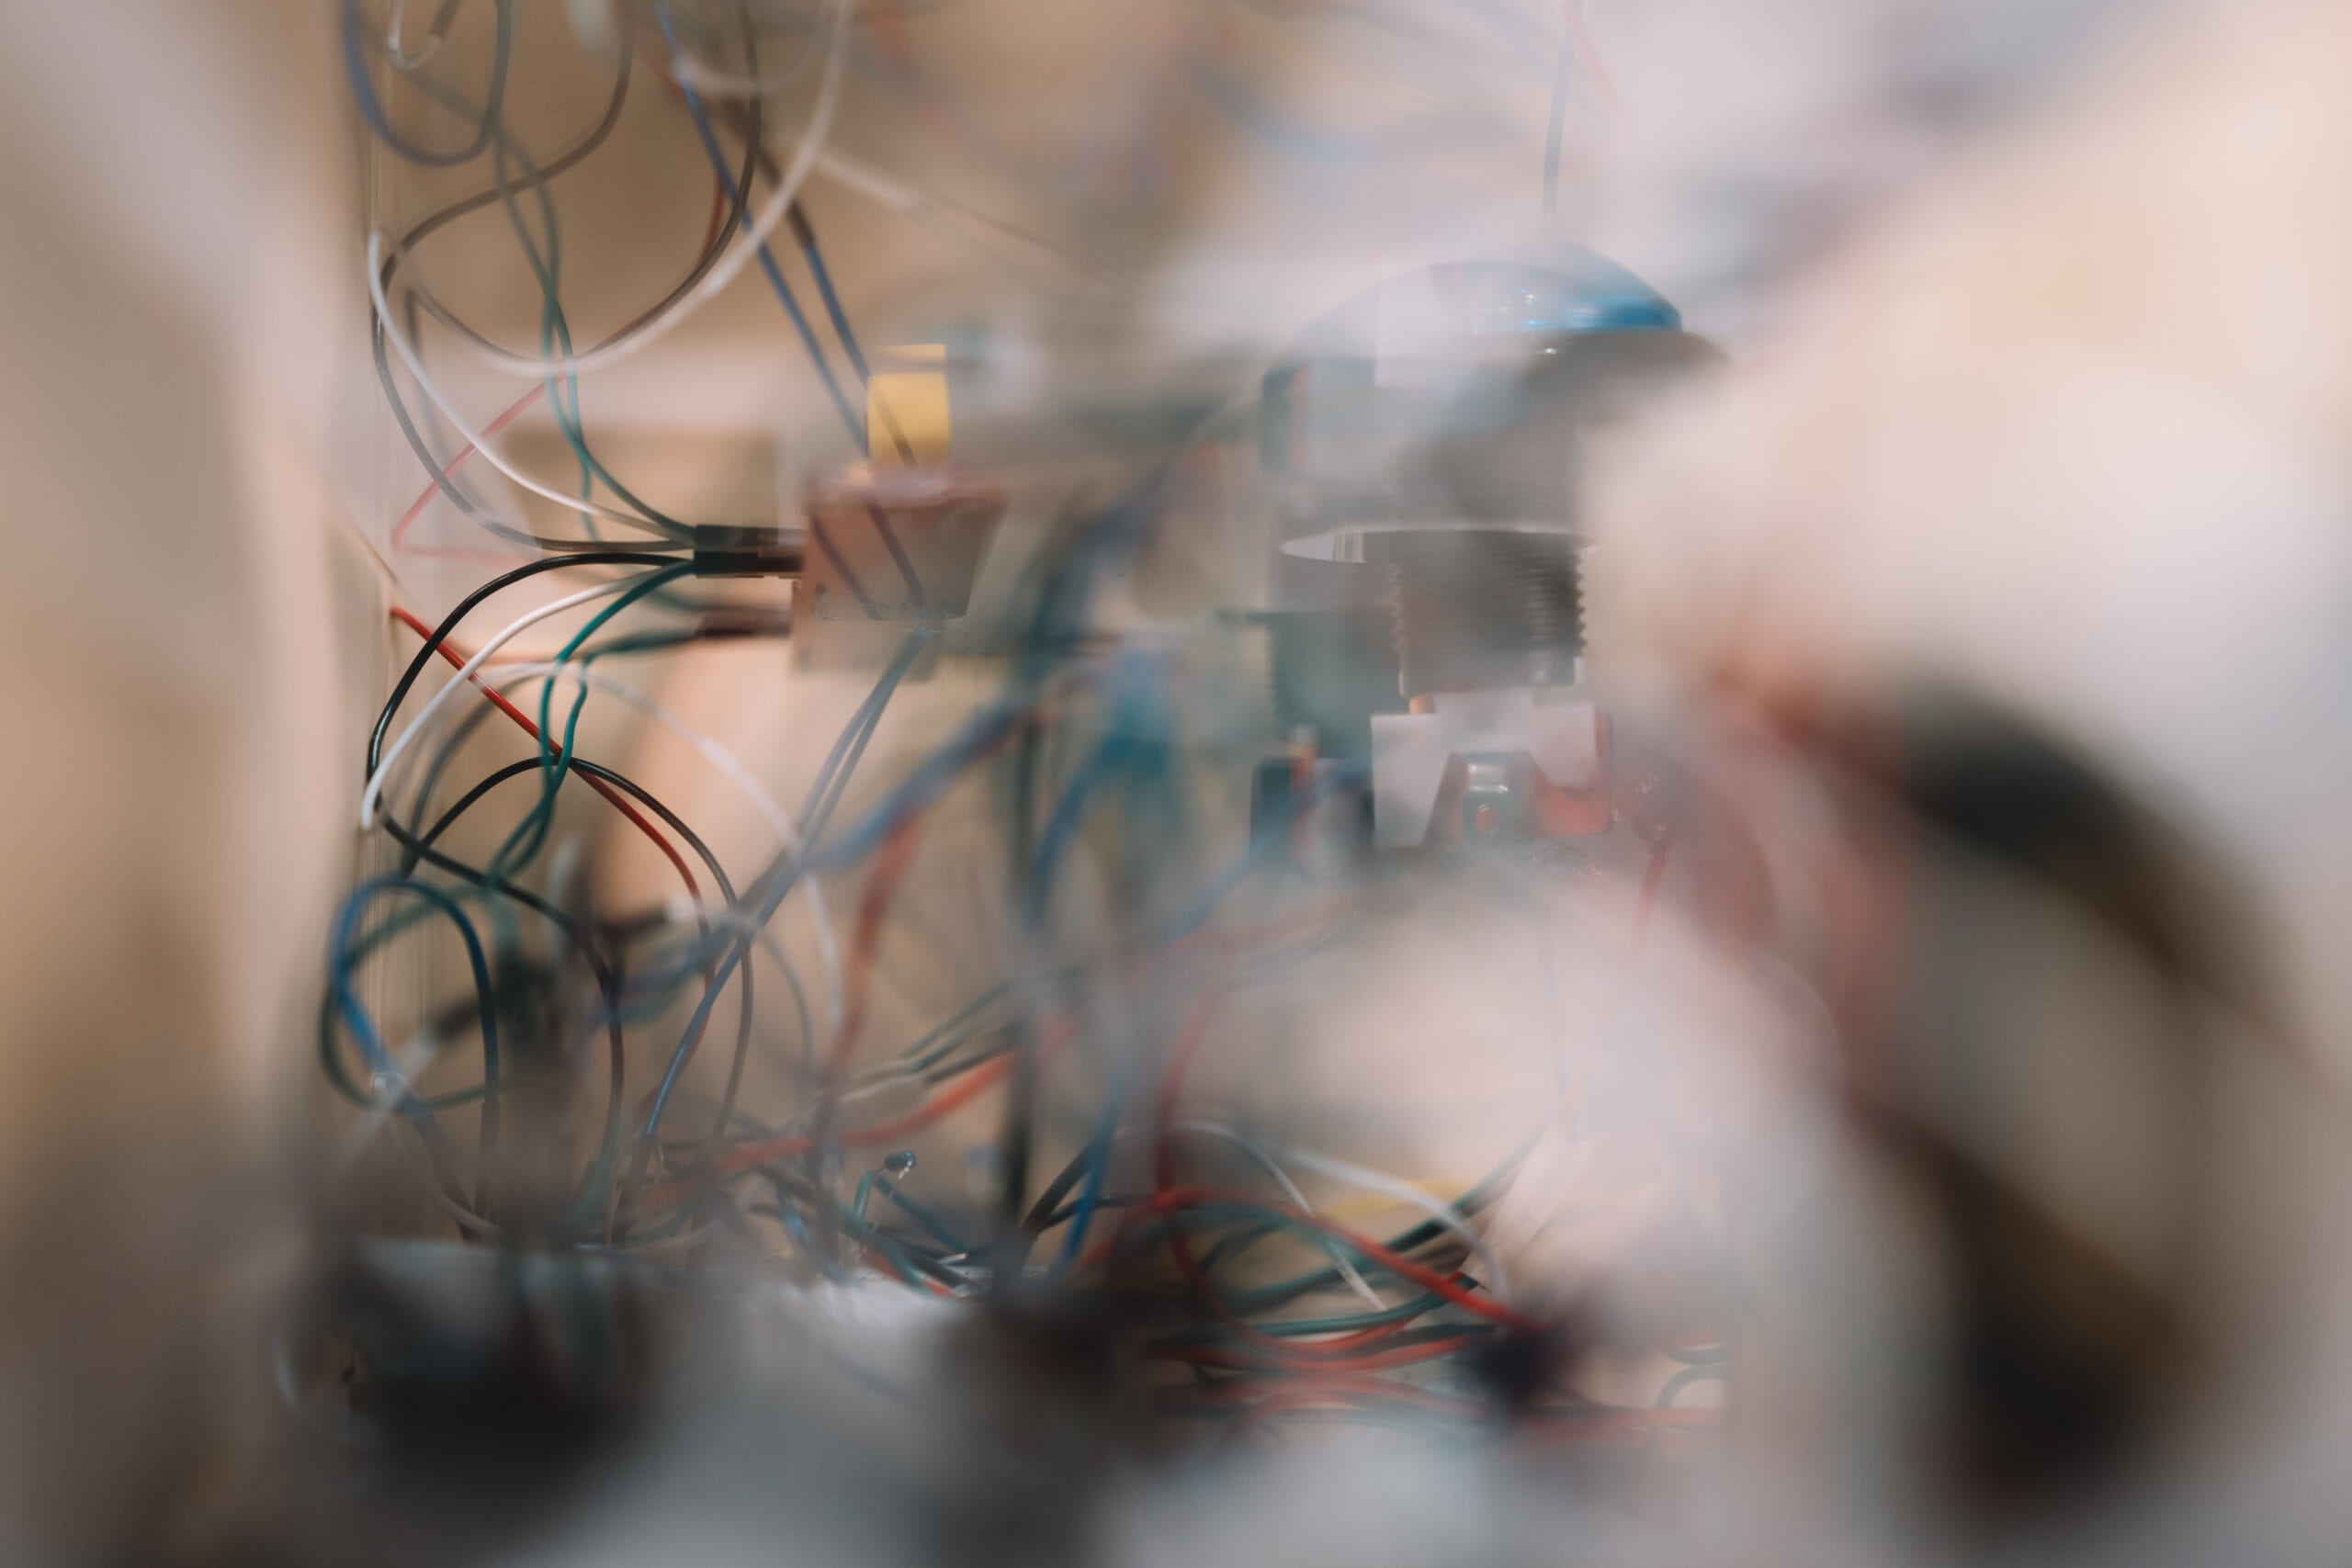
Inside wiring
In terms of code, this time I also participated in a lot of parts of the writing, relatively speaking, our code is not particularly complex, just need to connect the sensor is more, with a lot of if loop. we have thought of doing plus led strip, but we found that plus led after the code will be very lagging, but the code itself can not see what the problem is, so we finally removed this design! So we ended up removing this design.
III. CONCLUSIONS
The original purpose of our project was to dare more people who don’t know that much about music to try their hand at arranging and one-person music production and so on. Overall, our project fulfills the purpose of letting people who don’t know so much about music try to make some music, and it can roughly do the effect of a one-man band, only the function of recording and looping is not realized.
Our program ended up looking very good in terms of totality. Both in appearance and use, it’s a project that is pretty strong in integrity and has a certain amount of playability.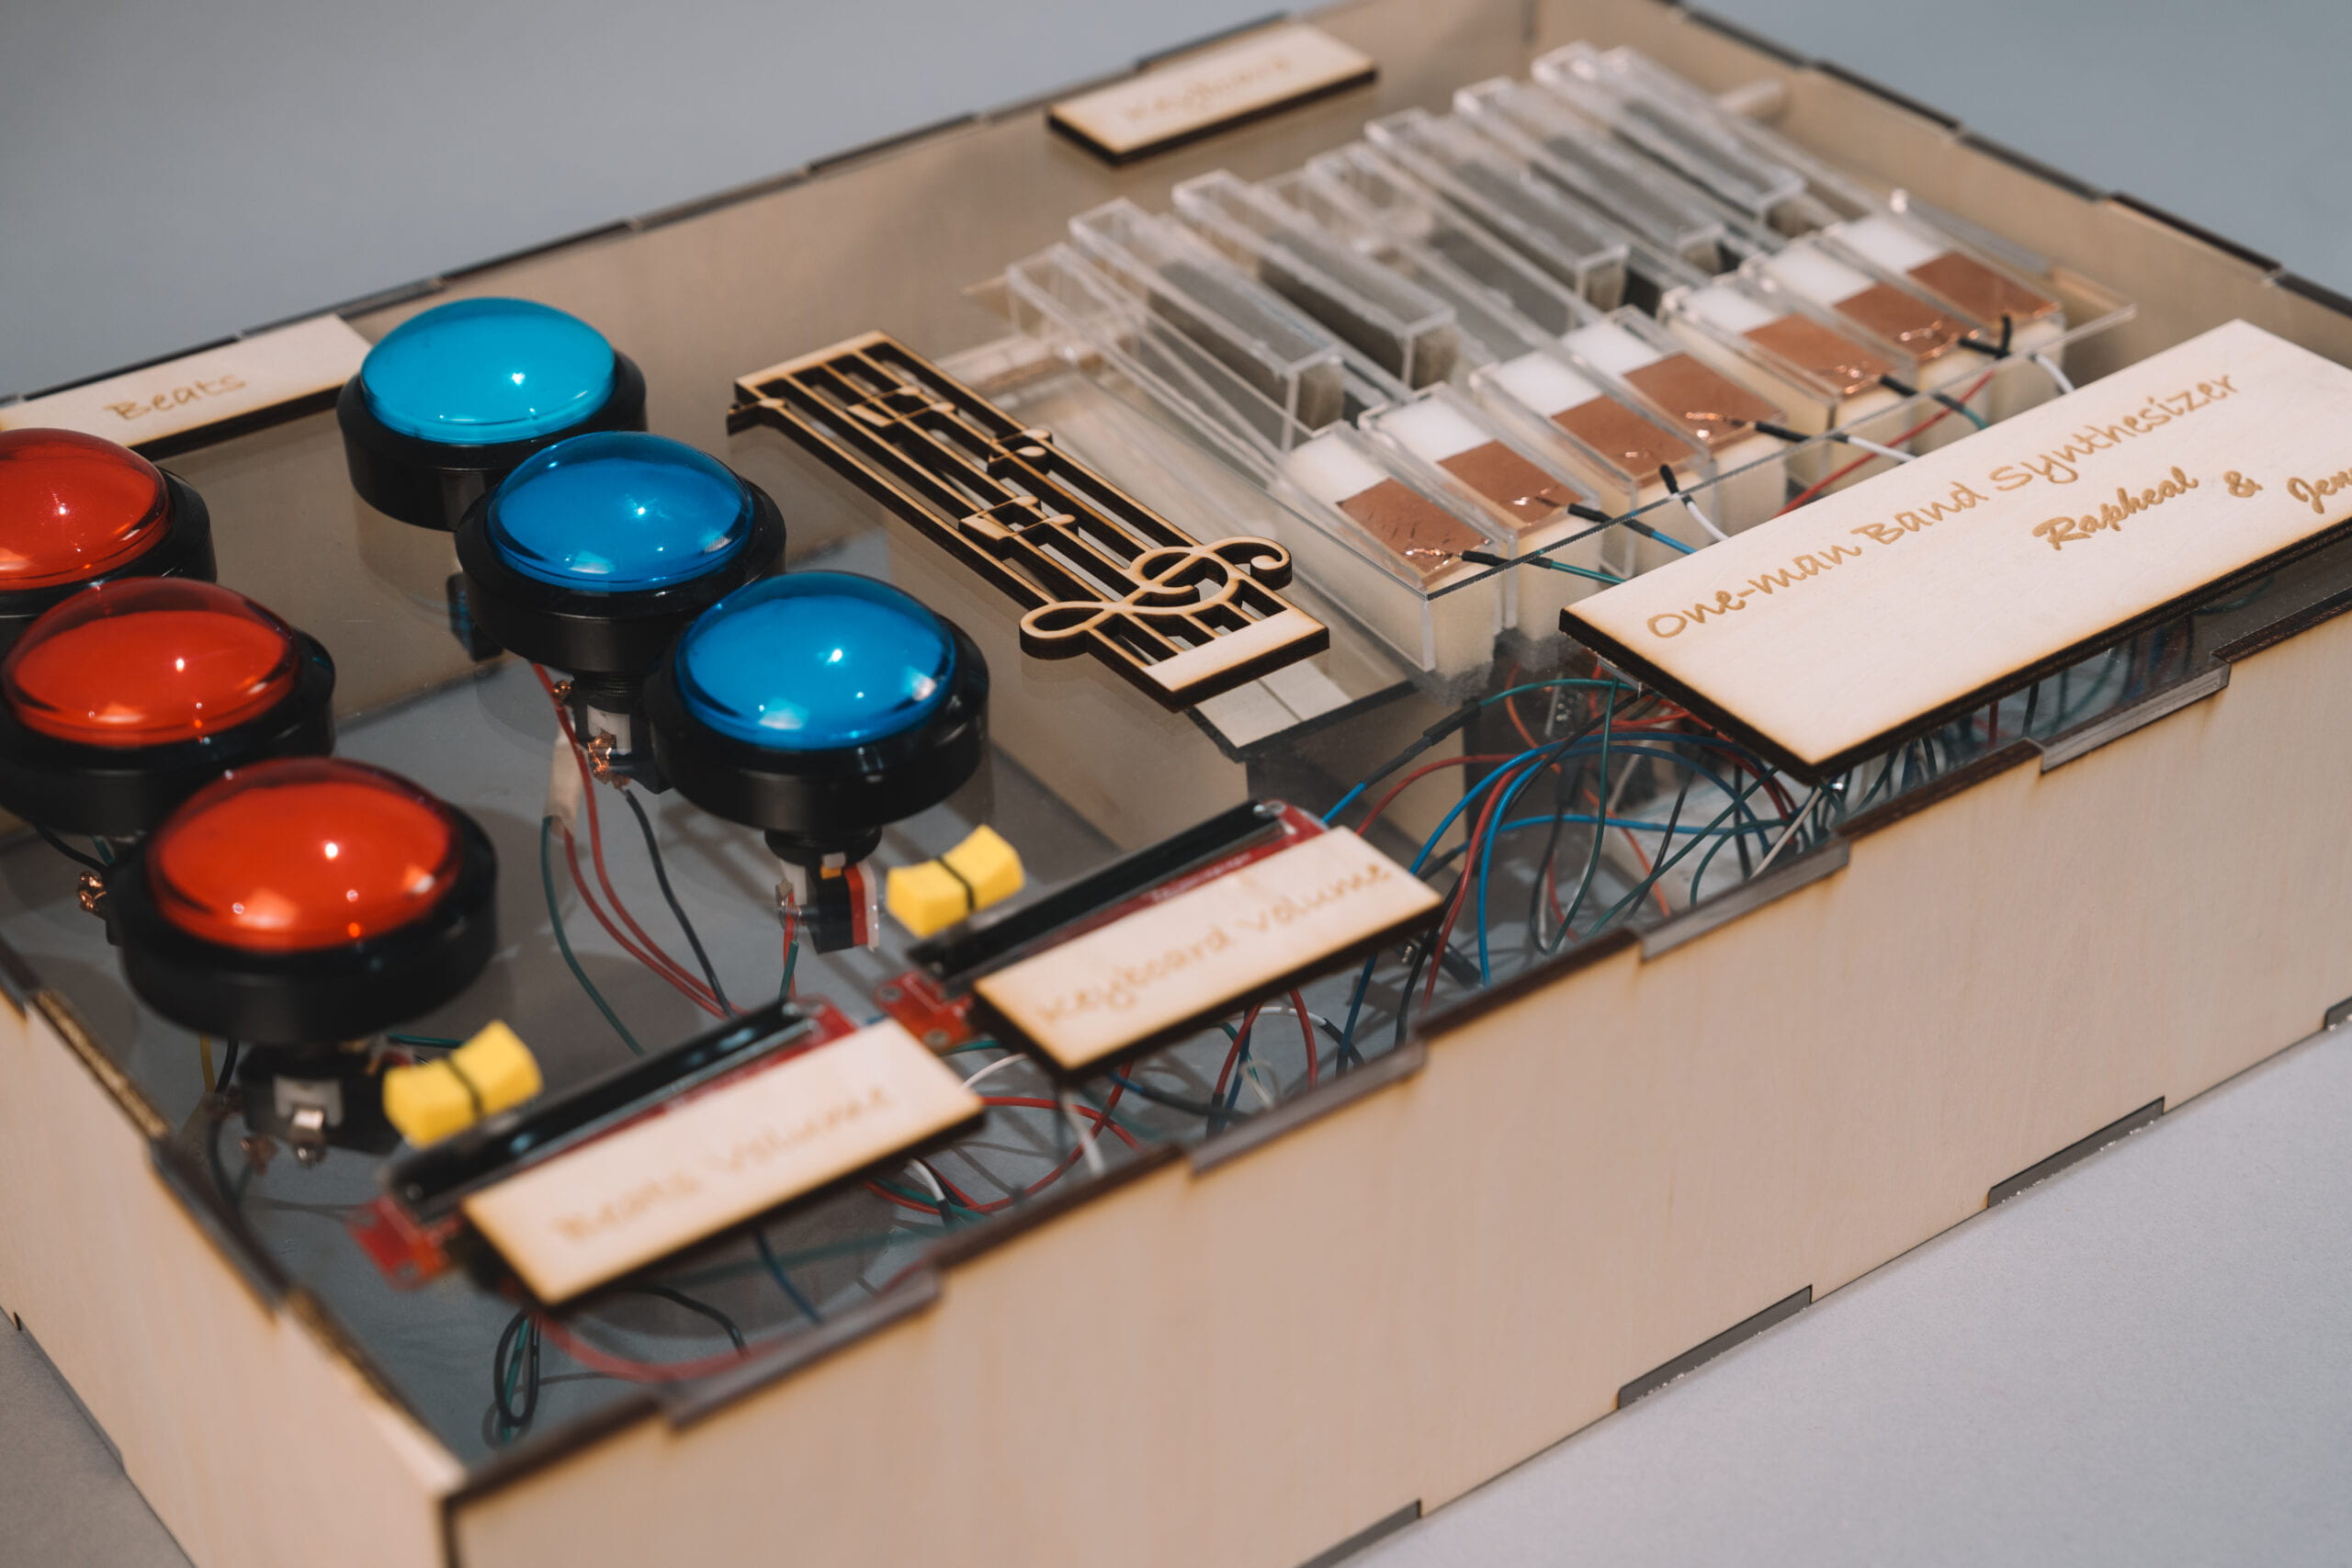
Outlook
Details
User showcase
Details
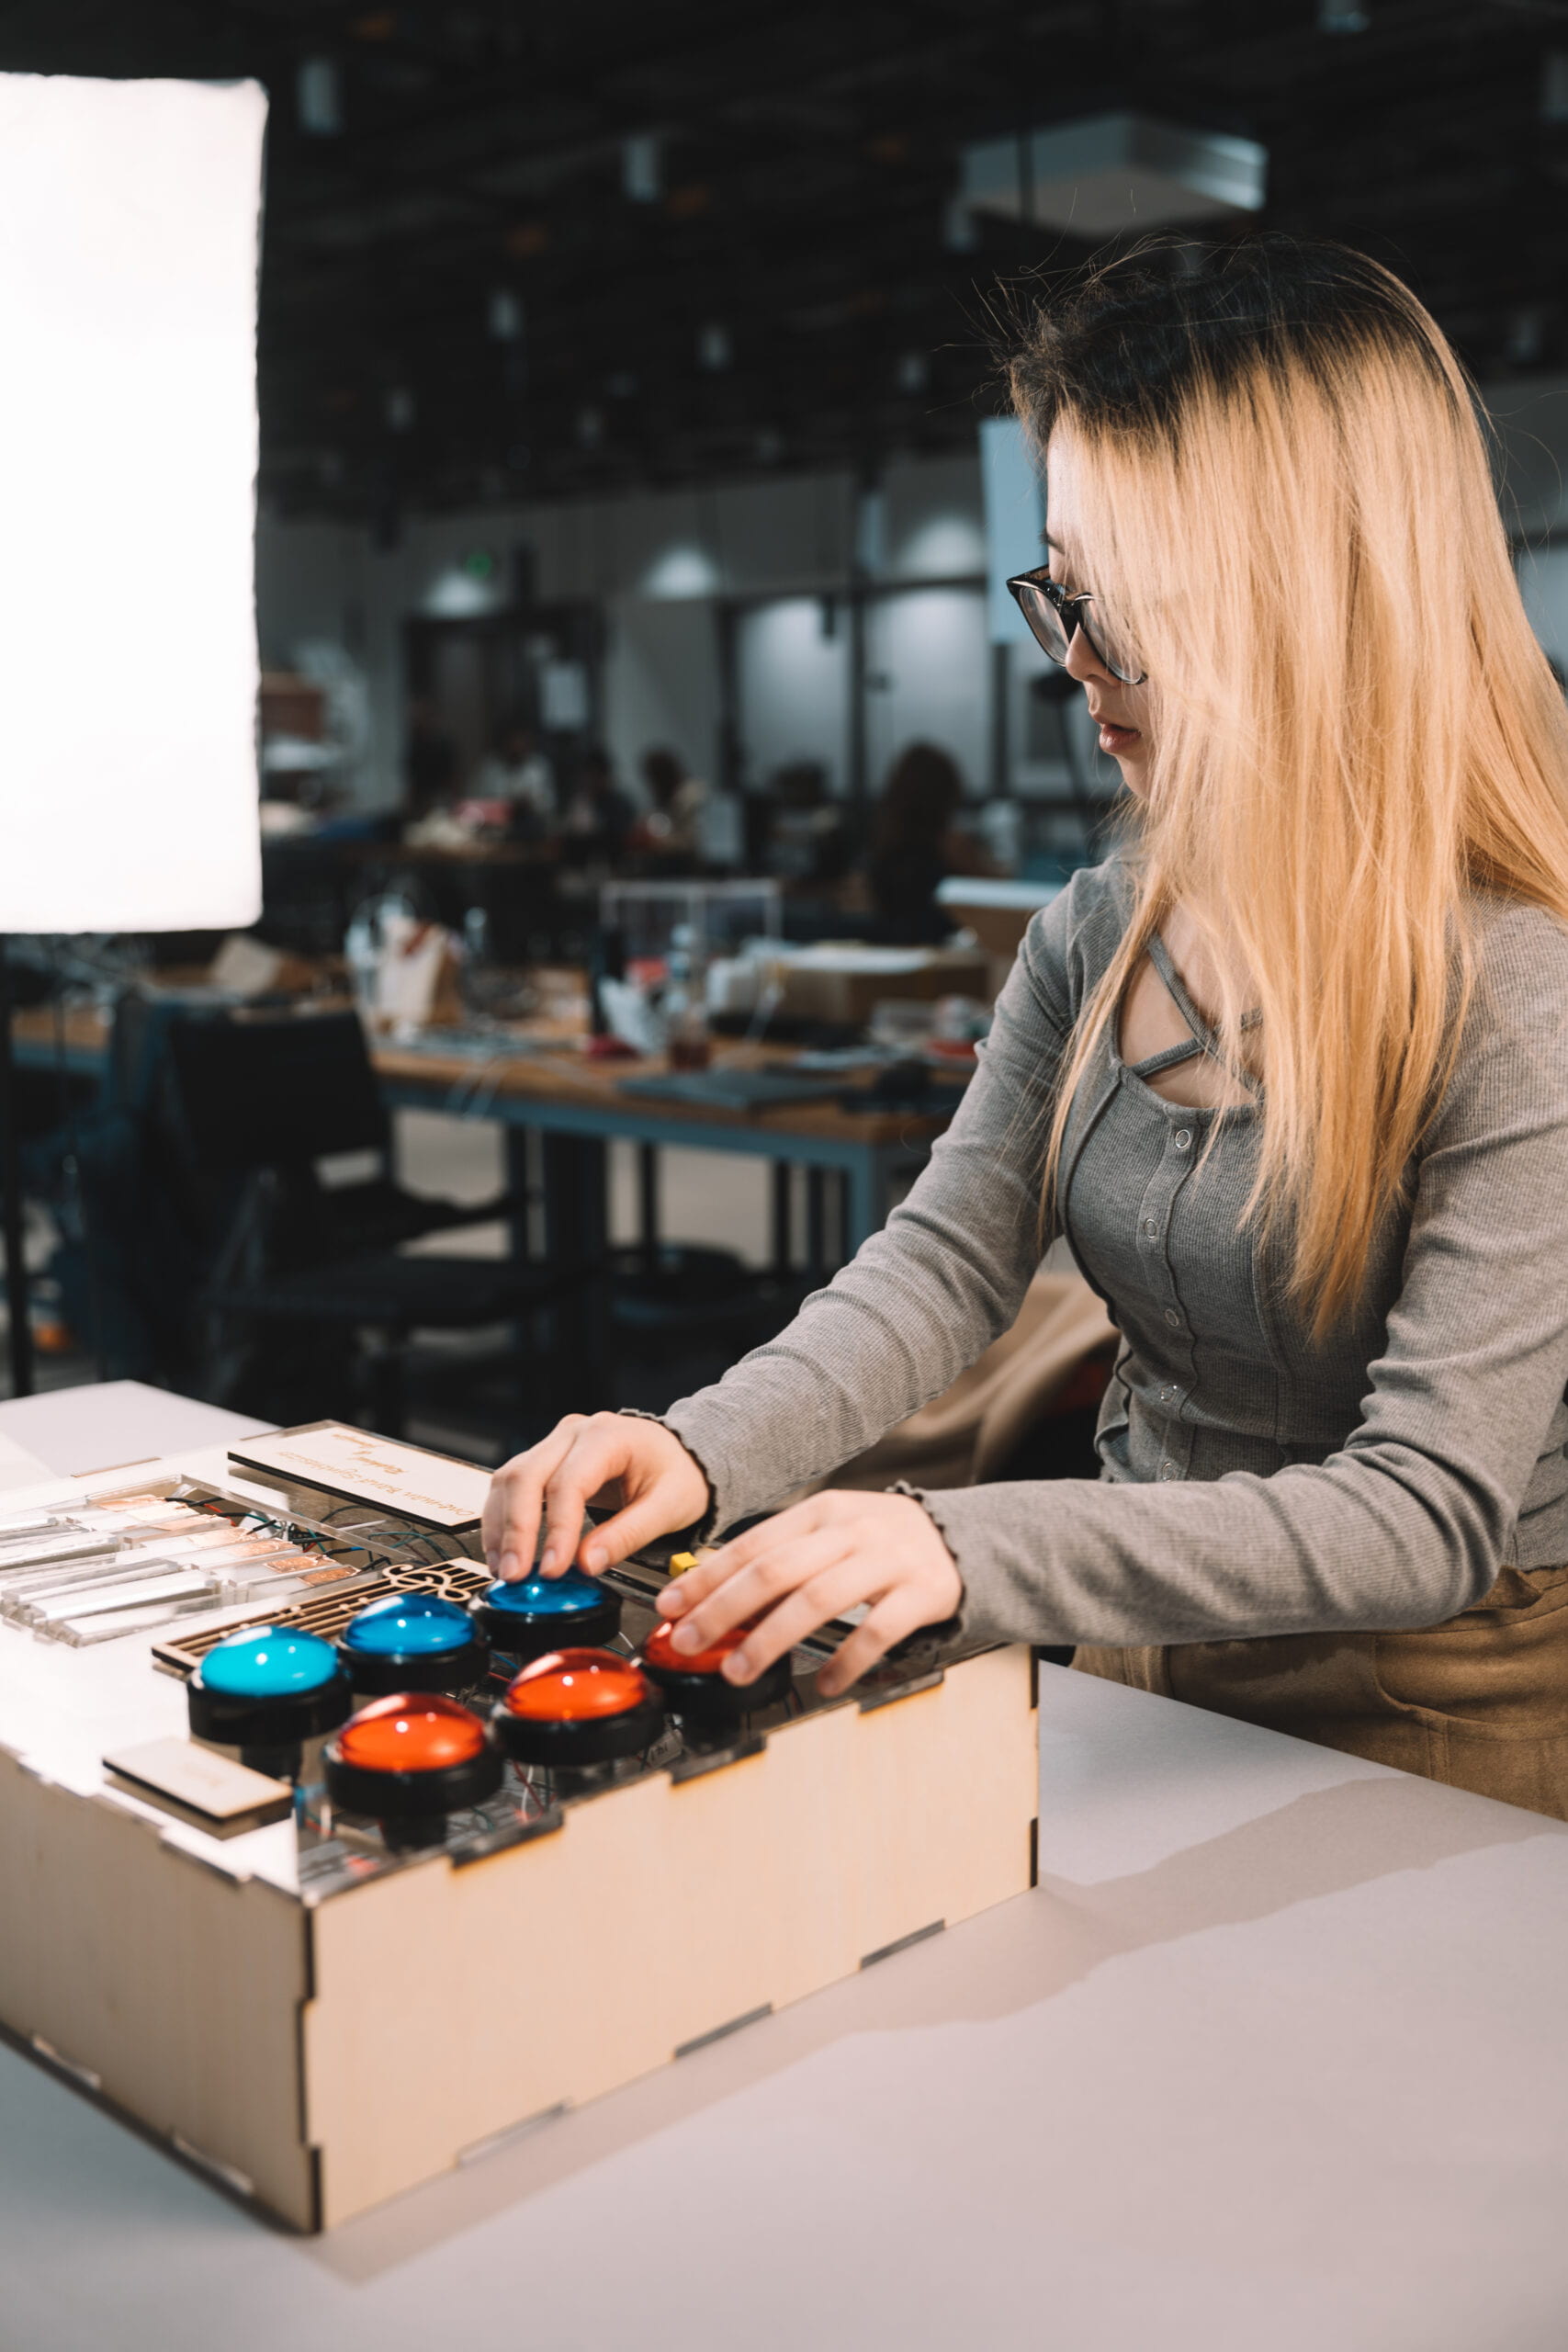
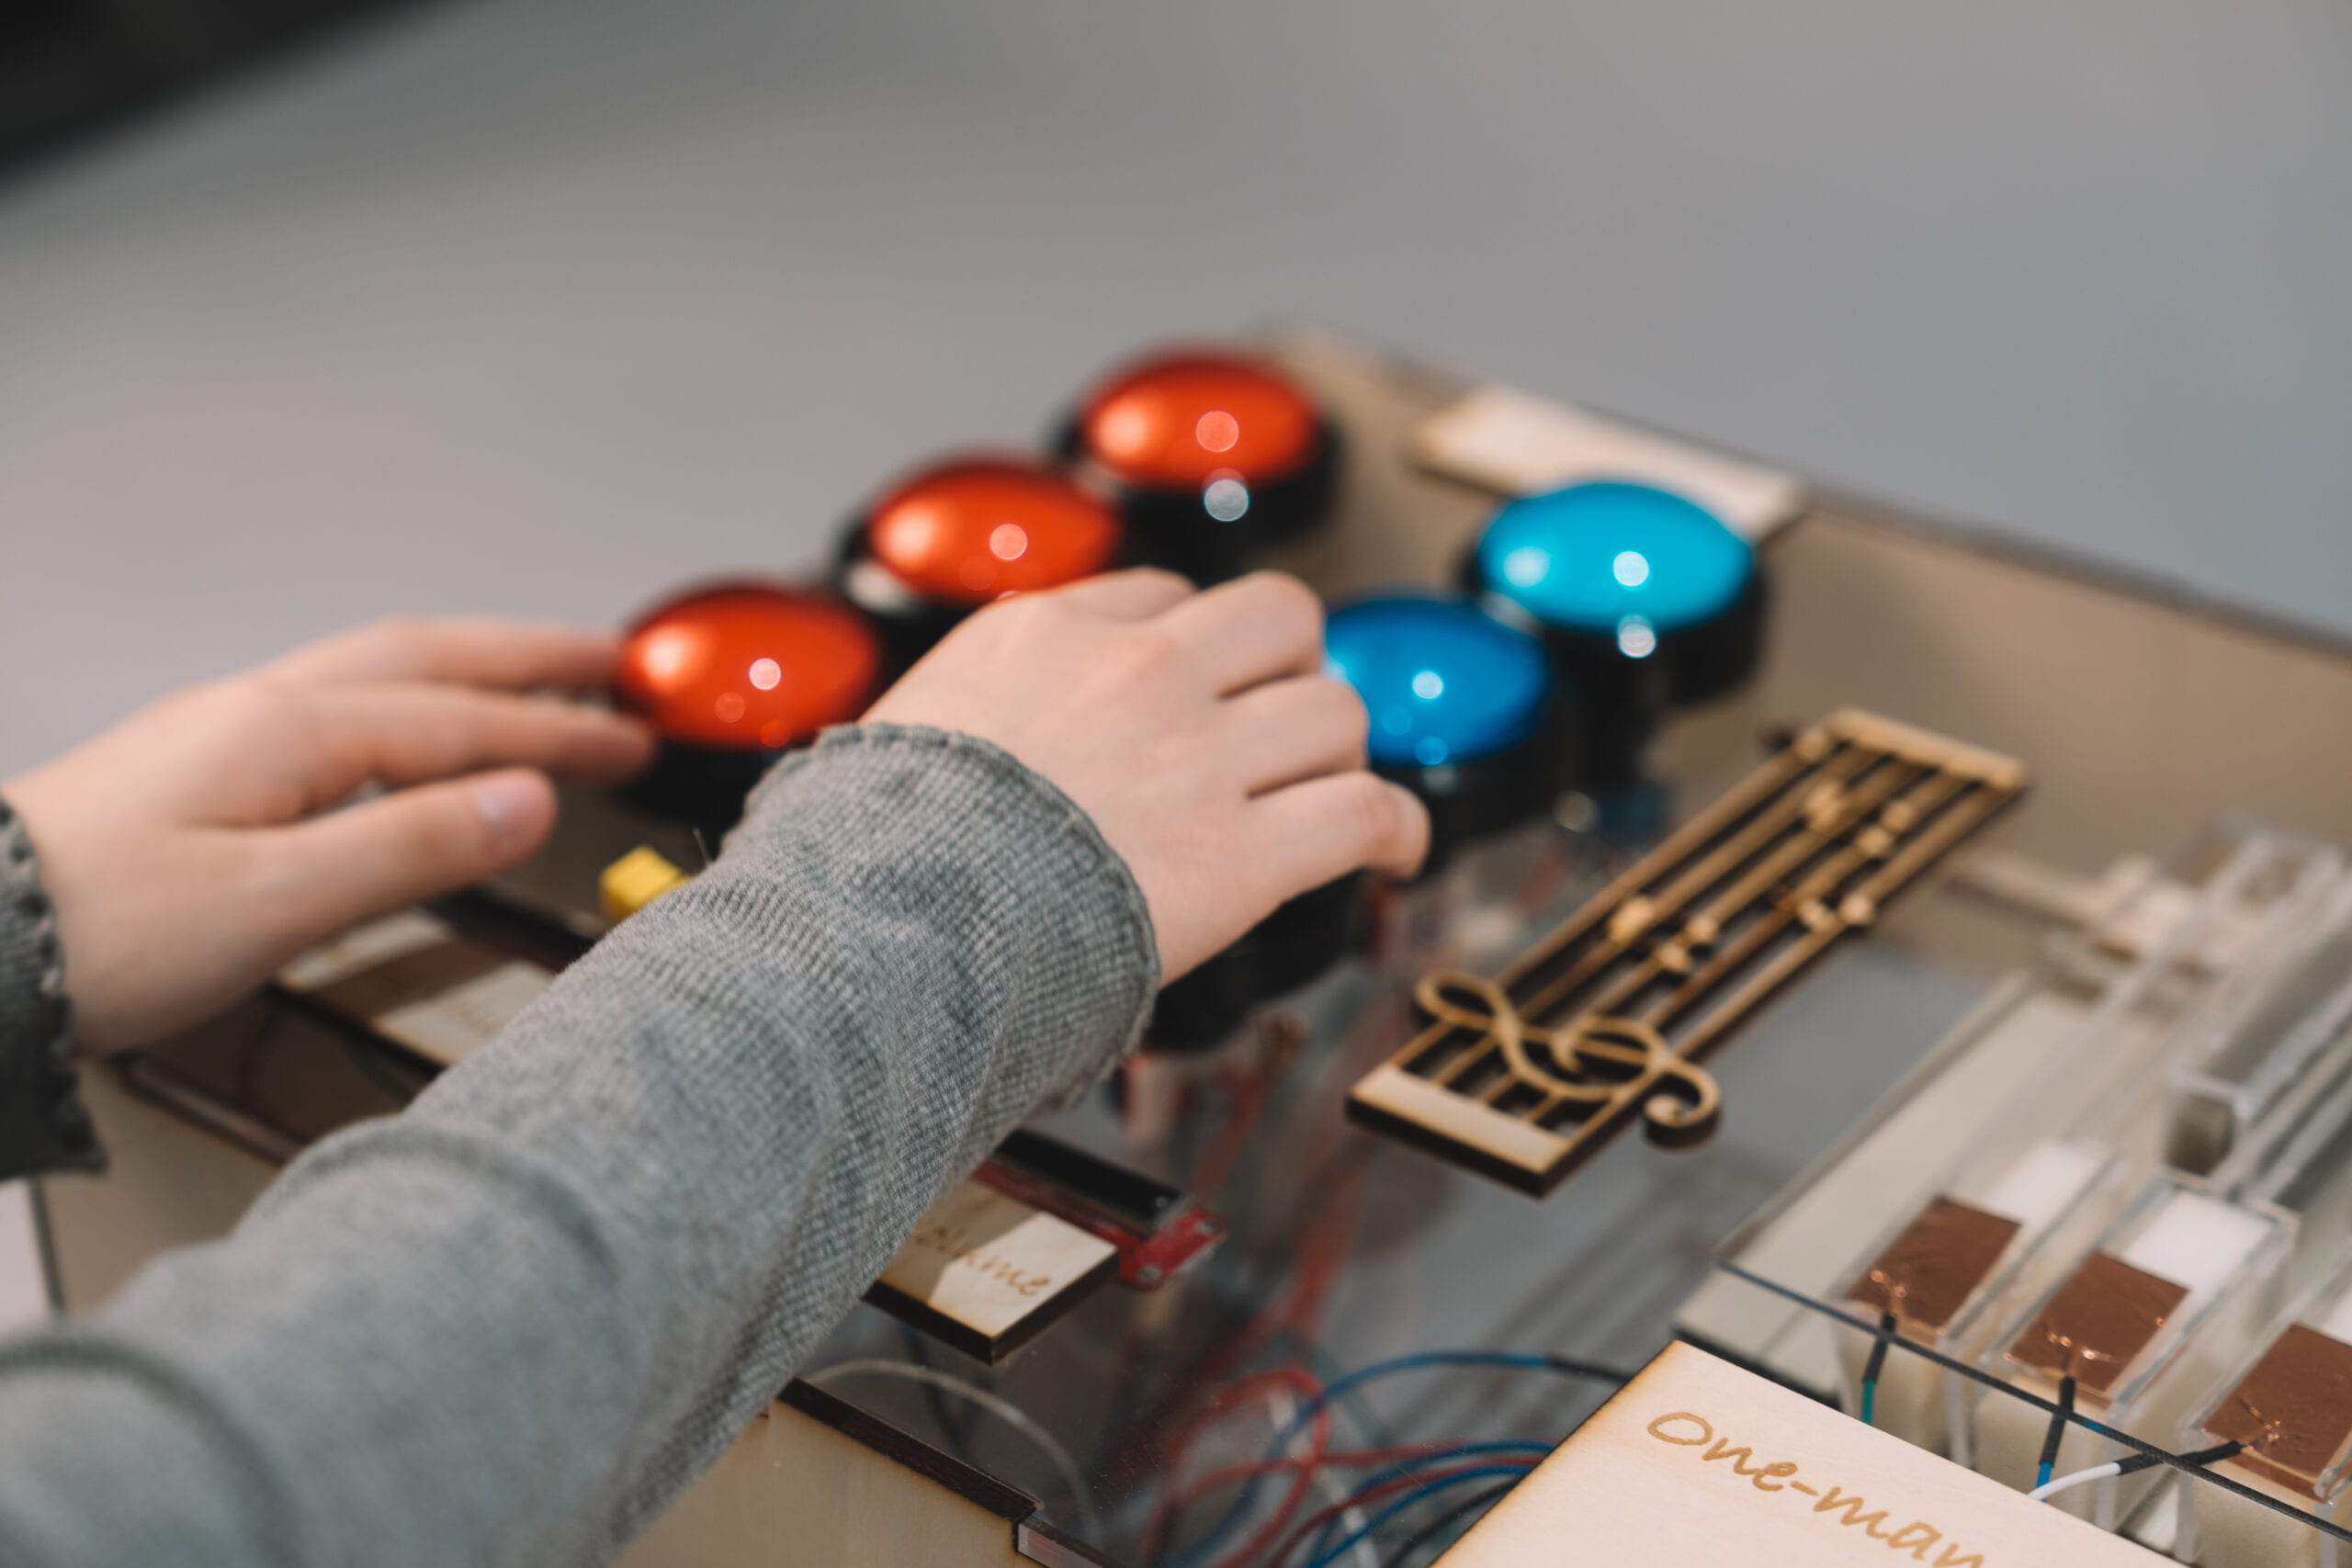
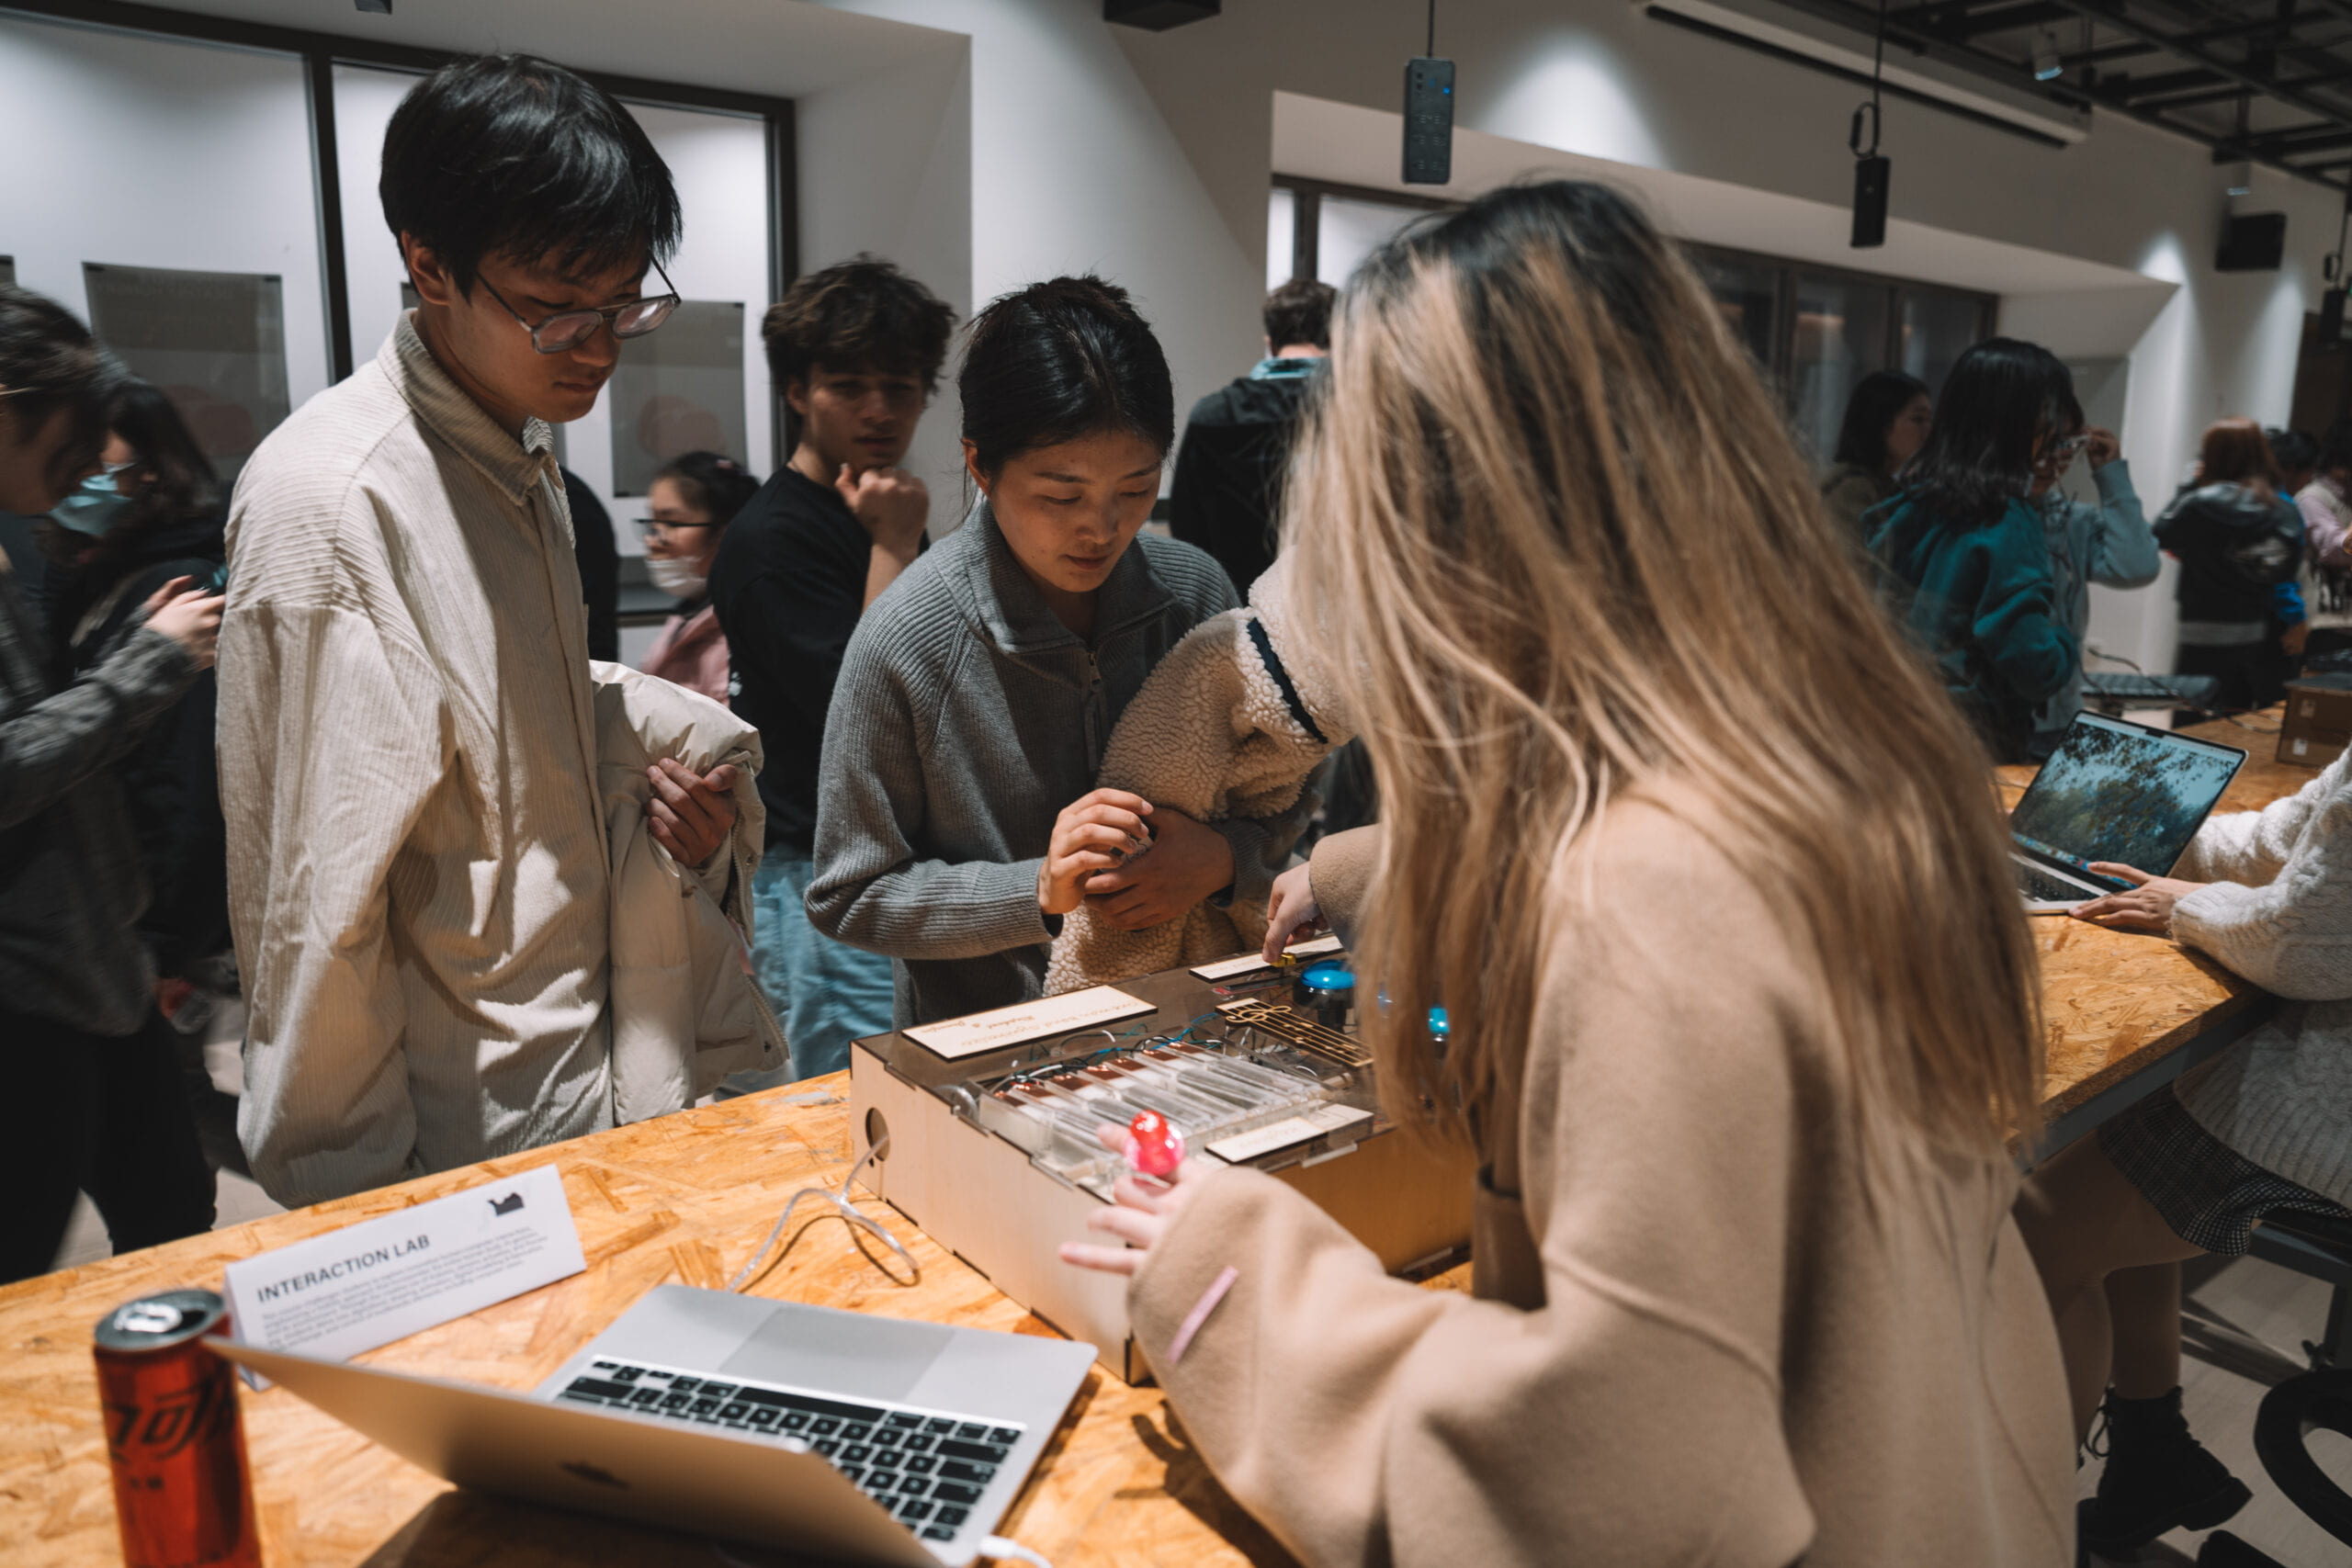
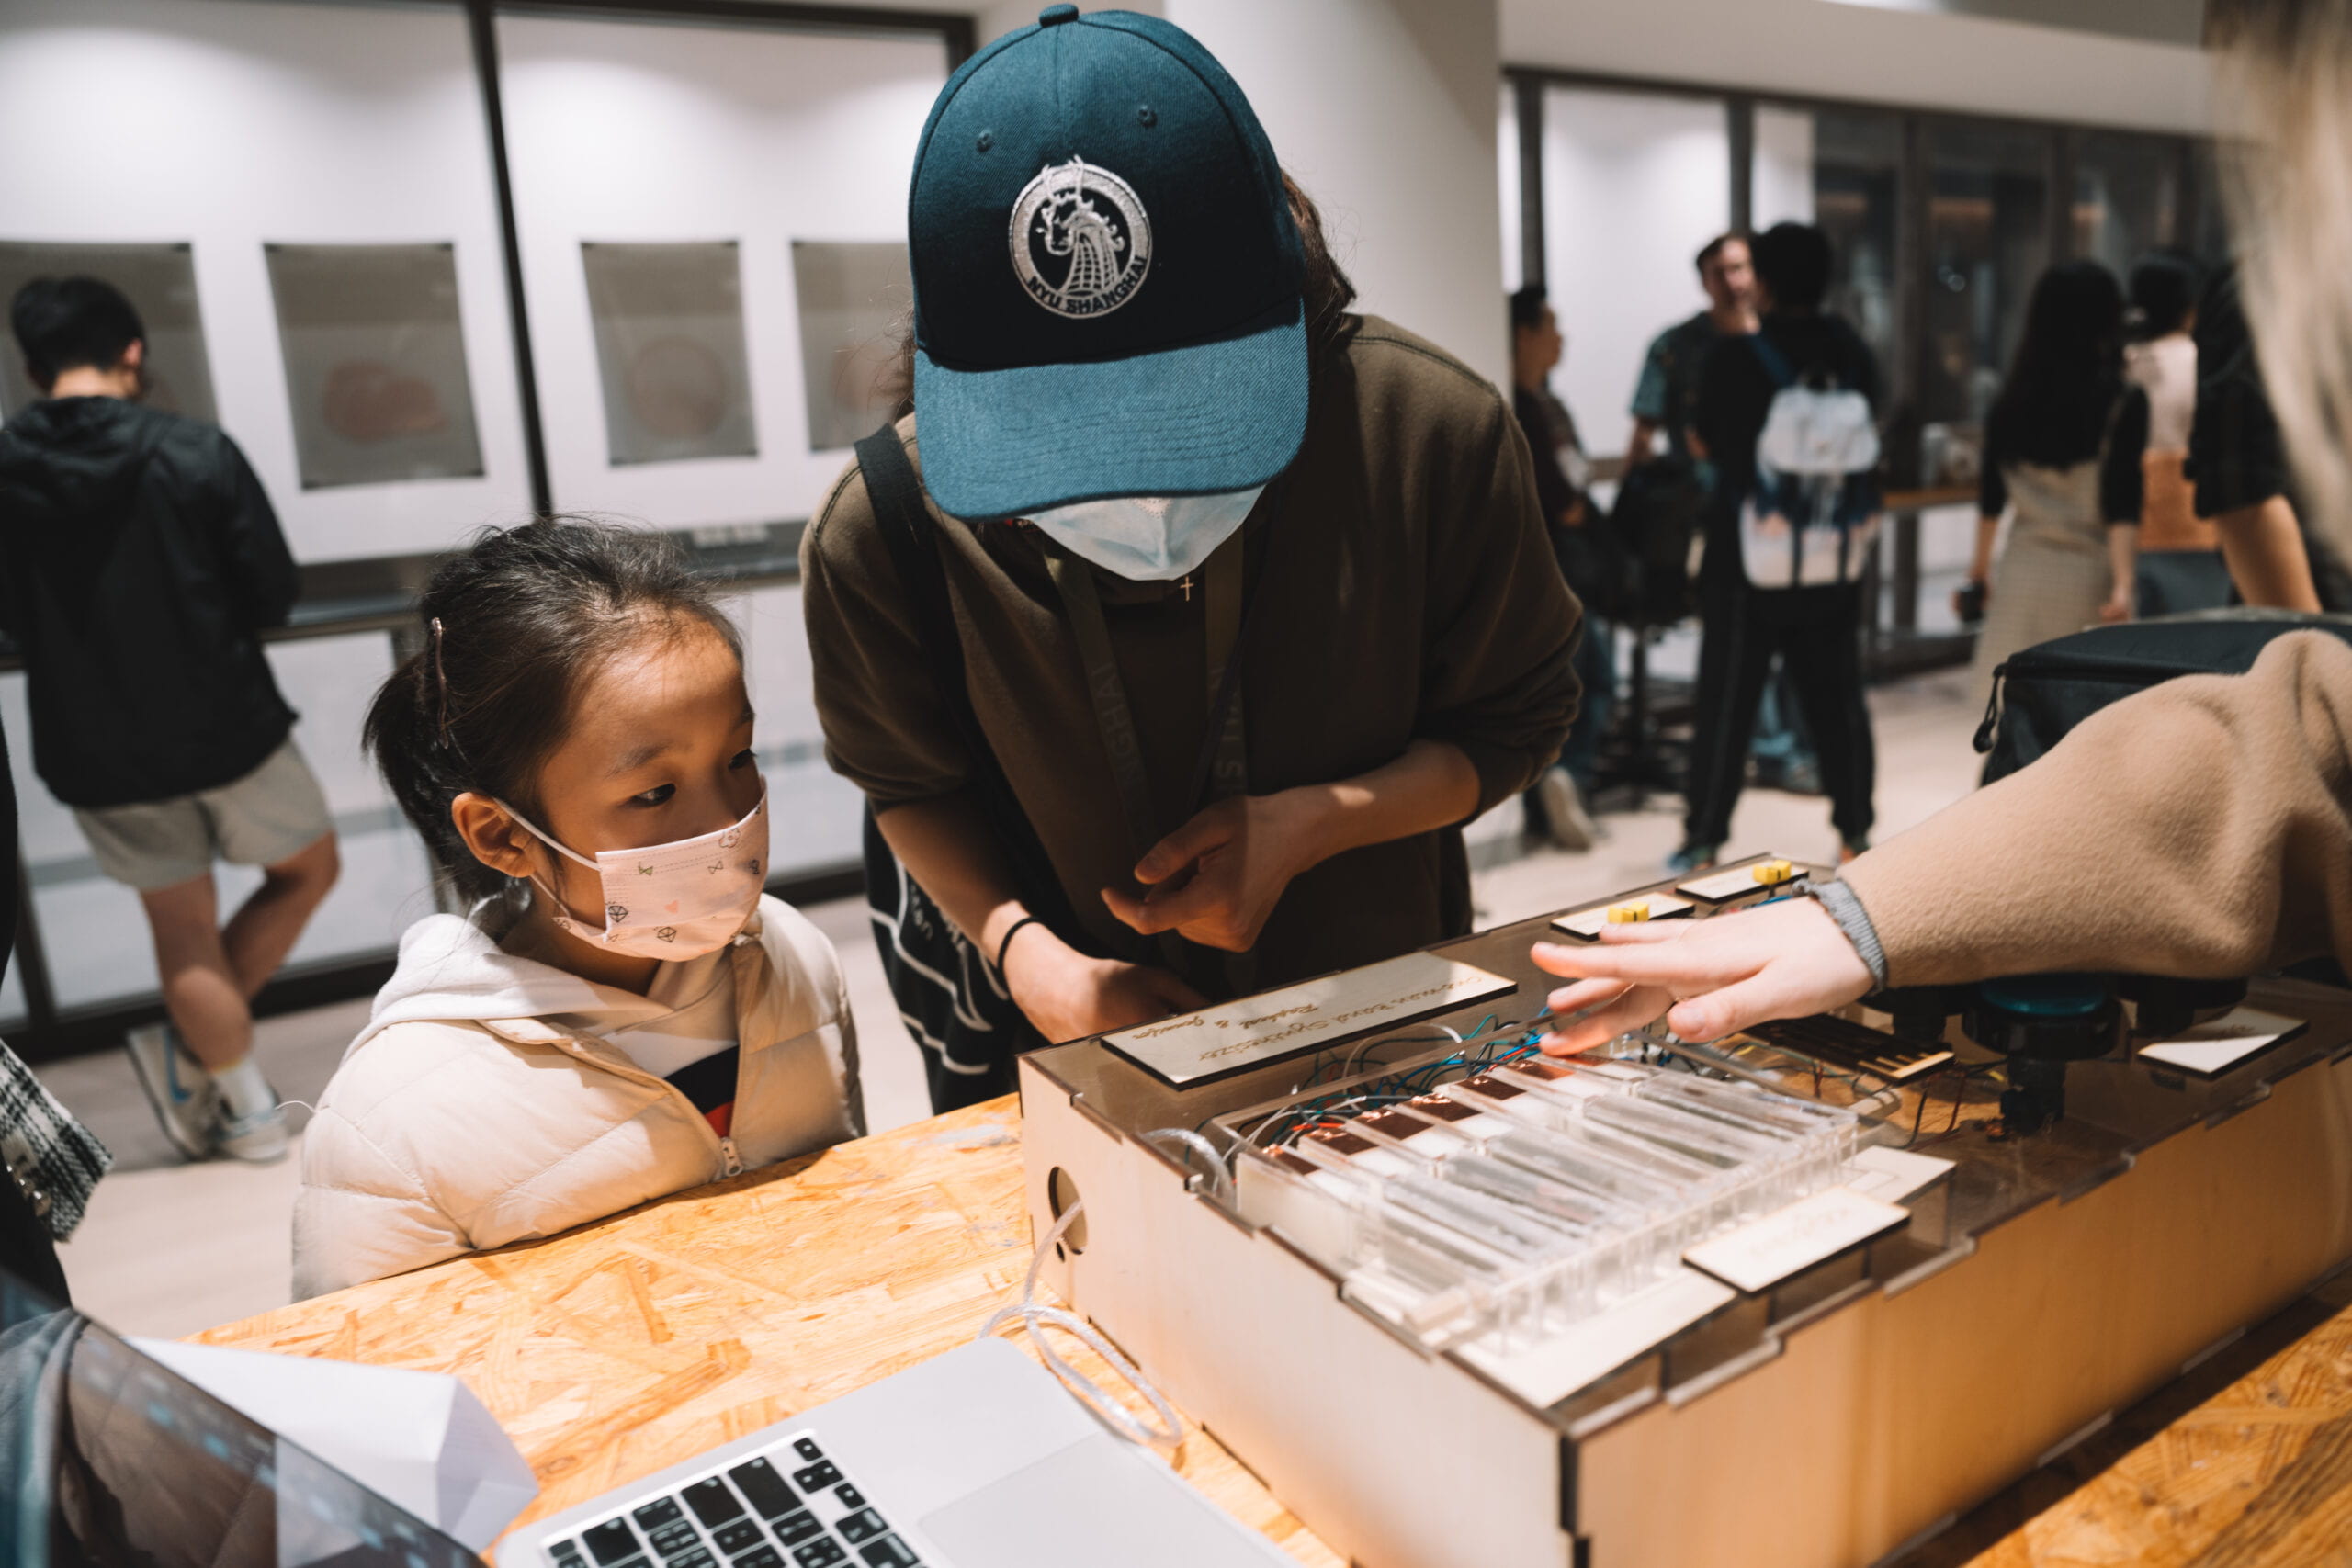
Through the demonstration in the classroom and the IMA show in the back, we saw that everyone was very curious about our project and wanted to make an effort to try to use this instrument. Everyone was constantly trying to hear different feedback by pressing different buttons. There is a constant flow of information between the user and the program, and the feedback is different for each user.
IMA Show
If there is enough time, I would first want to improve the existing code. We tried to make each sound effect sound only once when the sensor is triggered, instead of the current tendency to loop over and over, but that didn’t work. I’d like to continue refining this piece of code. In the meantime I’d still love to add this idea of recording and looping to make it a machine that can actually be used to program music.
Next is the production part. Our current keyboard uses a touch sensor, but it’s not very stable, sometimes it triggers itself, and instead of pressing down on it to make a sound like a traditional piano, it triggers whenever it’s touched. And during the presentation, the professor suggested that the keyboard we are making now is too common, so that people can tell it is a piano at a glance. We should try to make it in different forms, for example, in the video we saw in the previous class, we used the degree of curvature of the shoes to make music and so on. We did think about it but didn’t come up with the right materials. If we had more time we would have thought about how to present it in other ways.
Through our project, I feel that we have grown a lot more than before. In midterm we didn’t set a good plan B for ourselves, so we dead-ended a lot of things that could be replaced by other methods, while this time we chose plan B more when we encountered difficulties that couldn’t be crossed over. meanwhile, it reminded me that we can’t see things with too normal eyes, and we have to go out of the box of things themselves a lot of the time, for example, our presentation. Our thinking is confined in the framework of such a popular perspective, which leads us to make a project that is not low in playability, but does not give people a very bright feeling. But at least we succeeded in completing the project, which is very gratifying.
IV. DISASSEMBLY
It’s heartbreaking. 🥺
V. APPENDIX
1: Processing code
import processing.serial.*;
import processing.sound.*;

Serial serialPort;


FFT freqAnalysis;
// declare a variable for the amount of frequencies to analyze
// should be a multiple of 64 for best results
int frequencies = 1024;
// Define the frequencies wanted for our visualization.  Above that treshold frequencies are rarely atteigned and stay flat.
int freqWanted = 128;
// declare an array to store the frequency anlysis results in
float[] spectrum = new float[freqWanted];
float circleWidth;


// declare three SoundFile objects
SoundFile kick;
SoundFile snare;
SoundFile hihat;
SoundFile finger;
SoundFile subkick;
SoundFile gong;

SoundFile c;
SoundFile d;
SoundFile e;
SoundFile f;
SoundFile g;
SoundFile a;
SoundFile b;

SoundFile beat;

import ddf.minim.*;
import ddf.minim.ugens.*;

Minim minim;

// for recording
AudioInput in;
AudioRecorder recorder;
boolean recorded;

// for playing back
AudioOutput out;
FilePlayer player;


int NUM_OF_VALUES_FROM_ARDUINO = 15;  /* CHANGE THIS ACCORDING TO YOUR PROJECT */

/* This array stores values from Arduino */
int arduino_values[] = new int[NUM_OF_VALUES_FROM_ARDUINO];


void setup() {
  size(1000, 800);
  background(0);
  kick = new SoundFile(this, "kick.wav");
  snare = new SoundFile(this, "snare.wav");
  hihat = new SoundFile(this, "hihat.aif");
  finger = new SoundFile(this, "finger.wav");
  gong = new SoundFile(this, "gong.aif");
  subkick = new SoundFile(this, "subkick.aif");

  c = new SoundFile(this, "c.wav");
  d = new SoundFile(this, "d.wav");
  e = new SoundFile(this, "e.wav");
  f = new SoundFile(this, "f.wav");
  g = new SoundFile(this, "g.wav");
  a = new SoundFile(this, "a.wav");
  b = new SoundFile(this, "b.wav");

  beat = new SoundFile(this, "beat.wav");

  minim = new Minim(this);

  // get a stereo line-in: sample buffer length of 2048
  // default sample rate is 44100, default bit depth is 16
  in = minim.getLineIn(Minim.STEREO, 2048);

  // create an AudioRecorder that will record from in to the filename specified.
  // the file will be located in the sketch's main folder.
  recorder = minim.createRecorder(in, "myrecording.wav");

  // get an output we can playback the recording on
  out = minim.getLineOut( Minim.STEREO );

  circleWidth = width/float(freqWanted);
  // create the Frequency analysis object and tell it how many frequencies to analyze
  freqAnalysis = new FFT(this, frequencies);
  // use the soundfile as the input for the analysis
  freqAnalysis.input(beat);


  // put the name of the serial port your Arduino is connected
  // to in the line below - this should be the same as you're
  // using in the "Port" menu in the Arduino IDE
  serialPort = new Serial(this, "/dev/cu.usbmodem101", 9600);
}

void draw() {

  freqAnalysis.analyze(spectrum);
  background(0);
  noStroke();


  // draw circles based on the values stored in the spectrum array
  // adjust the scale variable as needed
  float scale = 600;
  for (int i=0; i<freqWanted; i++) {
    color from = color(200, 0, 100);
    color to = color(107, 160, 204);
    color interB = lerpColor(from, to, 0.015*i);
    fill(interB,80);
   circle(i*circleWidth, height/2, spectrum[i]*scale);
  }


  float x = map(arduino_values[13],0,1023,0,1);
  float y = map(arduino_values[14],0,1023,0,1);

  // receive the values from Arduino
  getSerialData();

  // use the values like this:
  if(arduino_values[7] == 1){
    kick.amp(x);
    kick.play();
    delay(100);
  }
  else if(arduino_values[8] == 1){
    snare.amp(x);
    snare.play();
    delay(100);
  }
  else if(arduino_values[9] == 1){
    hihat.amp(x);
    hihat.play();
    delay(100);
  }
  else if(arduino_values[10] == 1){
    finger.amp(x);
    finger.play();
    delay(100);
  }
  else if(arduino_values[11] == 1){
    gong.amp(x);
    gong.play();
    delay(100);
  }
  else if (arduino_values[12] == 1){
    subkick.amp(x);
    subkick.play();
    delay(100);
  }
  else if (arduino_values[0] == 1){
    c.amp(y);
    c.play();
    delay(100);
  }
  else if (arduino_values[1] == 1){
    d.amp(y);
    d.play();
    delay(100);
  }
  else if (arduino_values[2] == 1){
    e.amp(y);
    e.play();
    delay(100);
  }else if (arduino_values[3] == 1){
    f.amp(y);
    f.play();
    delay(100);
  }
  else if (arduino_values[4] == 1){
    g.amp(y);
    g.play();
    delay(100);
  }
  else if (arduino_values[5] == 1){
    a.amp(y);
    a.play();
    delay(100);
  }
  else if (arduino_values[6] == 1){
    b.amp(y);
    b.play();
    delay(100);
  }
}


void keyReleased()
{
  if ( !recorded && key == 'r' )
  {
    // to indicate that you want to start or stop capturing audio data,
    // you must callstartRecording() and stopRecording() on the AudioRecorder object.
    // You can start and stop as many times as you like, the audio data will
    // be appended to the end of to the end of the file.
    if ( recorder.isRecording() )
    {
      recorder.endRecord();
      recorded = true;
    }
    else
    {
      recorder.beginRecord();
    }
  }
  if ( recorded && key == 's' )
  {
    if ( player != null )
    {
        player.unpatch( out );
        player.close();
    }
    player = new FilePlayer( recorder.save() );
    player.patch( out );
    player.play();
  }
  if(key == 'z'){
    beat.play();
    beat.loop();
  }
  if(key == 'p'){
    beat.stop();
  }
}

// the helper function below receives the values from Arduino
// in the "arduino_values" array from a connected Arduino
// running the "serial_AtoP_arduino" sketch
// (You won't need to change this code.)


void getSerialData() {
  while (serialPort.available() > 0) {
    String in = serialPort.readStringUntil( 10 );  // 10 = '\n'  Linefeed in ASCII
    if (in != null) {
      print("From Arduino: " + in);
      String[] serialInArray = split(trim(in), ",");
      if (serialInArray.length == NUM_OF_VALUES_FROM_ARDUINO) {
        for (int i=0; i<serialInArray.length; i++) {
          arduino_values[i] = int(serialInArray[i]);
        }
      }
    }
  }
}
2: Arduino code