Circuit 1: Fade
First, I followed the instructions on the Arduino Document posted on the Interaction Lab Recitation Website and access the code Arduino IDE > File > Examples > 03.Analog > Fading and upload it to your Arduino. During this step, I didn’t commit any mistakes since the instructions were simple and easy to follow! They were no errors when I ran the code for the first time!
Circuit 2: tone-Melody
Next, I accessed the code from Arduino IDE > File > Examples > 02.Digital > toneMelody and upload it to your Arduino. I connected, instead of a LED, a buzzer to the breadboard and ran the code. One mistake I did was that I ran the wrong code which was easily fixable by selecting the tab on Arduino with the actual program, rather than just the defined tones.
Circuit 3: Speed Game
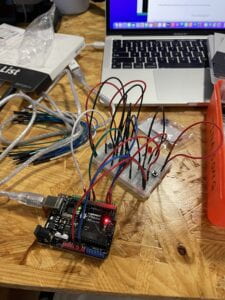
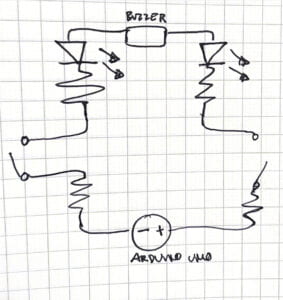
During this circuit I paired up with Vicky & Tina and we built the speed game circuit. At first, it took us a long time to build the circuit because there was a big mess of cables; but once we sorted the positive charges with red cable, the negative with black, and the other unrelated cables with blue & green we were able to build the circuit. At first we didn’t realize when the 10 seconds started when we ran the program, but other than that the game ran smoothly.


Interactive Button:
What could make the game more interactive?
Perhaps I would’ve made a button that is bigger and more fun to press since the buttons that were given to us in the kits were rather small and difficult to press. Instead, I would’ve made a button out of cardboard with springs that makes a sound when you press the button. Perhaps, another way to make the game more interactive is adding more sound fonts and a timer to the game so the player knows how much time is left. This would make the game more interactive since it would create more brain stimulus for the player making the experience more pleasurable.
Resistors
We used a 10 kOhm with each button because the resistor provides a connection to Ground, relevant when the button is not pressed. The input pin might occasionally not be connected to anything (be left “floating”) if we omitted this connection, effectively acting as an antenna (reading in random values). Thus, we add a 10 kOhm resistor in what is known as a pull-down resistor arrangement to ensure that we always read low when the button is not pressed. (in-class presentation)
Future Projects
One project that I think would be interesting to use that would apply all the techniques and descriptions of the “Arduino Way ” would be building a lightsaber (like the ones from the Star Wars Disney saga). First of all, we would need to tinker with the design of the hilt, like how to fit the Arduino into it, and the different sound fonts and light sequences we would need to use. Then we could also apply circuit blending to make the lightsaber run smoother. Not to mention, to build the lightsaber hilt I could use different recycled materials to build it such as old keyboards and tech equipment.


https://www.instructables.com/Building-a-Lightsaber/
MrTinkerer, and Instructables. “Build a Lightsaber.” Instructables, Instructables, 31 Jan. 2020, https://www.instructables.com/Building-a-Lightsaber/.
Leave a Reply