The setings at Joyce’s homeThe final video project of our Communications Lab course is called 来世 / The World to Come. Below is a preview version of our project, and the original mp4 file could be viewed and downloaded here.
1 Concept & Story
1.1 Introduction
The story of our project happens in the year 2050. And everything can be traced back to the year 2020. In 2020, Chinese scientists have started building the Empire System (帝俊) which was meant to help with the organization of cities and the simplification of people’s life. However, one security hole was neglected which turned the system uncontrollable when it was launched in 2045.
When Empire has gained enough power, it started building its own world – a world with machines. Just in 5 years, human all around the world are captured by the system, their memory are copied to a new machine, but their bodies are disposed.
In our video, we will follow the last human on this planet, from his escape to his failure. And the world to come, will not be the one in which human exists.
1.2 Inspiration and Motivation
Our inspiration comes along with the recent technology developments. With the rapid development of computer science and data science, along with Artificial Intelligence, people’s lives are also changing rapidly. However, without regulation and carefulness, the double-edged sword of technology can also lead to a life with high-tech but low-quality, which is precisely the definition of cyberpunk, and this carelessness could even bring us humans the end of the world. In this short film, we want to express our thought of the fast-changing world, reminding people of the potential risk of technology, especially in the area of computer science and AI.
1.3 Ideation Process
After decided to work on such a process. We started searching for different cyberpunk-styled videos for references and brainstorming. As shown in the quotation below.
明天上课前看完:
【特效】www.bilibili.com/video/BV1vz411i7Wi AE赛博朋克风—夜上海
【赛博朋克风、转场】www.bilibili.com/video/BV1a4411h7vt,
【特效】https://www.bilibili.com/video/BV1vJ411i7FG
【感觉参考】https://v.qq.com/x/page/v0164u6w9da.html(我昨天说的那个视频,就是我觉得最后可以呈现出这种感觉,旁白和视频本身没有那么大的联系,但又是有联系的)
【转场】https://www.bilibili.com/video/BV1qb411g7H3
【转场】https://www.bilibili.com/video/BV127411G7y9/(黑白、节奏感,另一种风格但是也有点符合我们的主题)之后再看:
【AE教程、素材】www.bilibili.com/video/BV1xf4y1R7NZ(没有仔细看)
【调色案例】www.bilibili.com/video/BV1sh411R7G7 赛博朋克风之上海City
【特效案例】www.bilibili.com/video/BV11741167eC(难度过高仅参考风格)
【AE教程、素材】https://www.bilibili.com/video/BV1ot4y117iw(没有细看)
The videos we found most useful are the vlog which inspires us on the time-remapping editing of our video, and the experimental video which brings us an expectation (although it is not realistic to fulfill the same effects in such a short time) on how we could combine a sci-fi colored video with additional effects, like a realization of Augmented Reality.
2 Creation Process & Execution
2.1 Storyboard
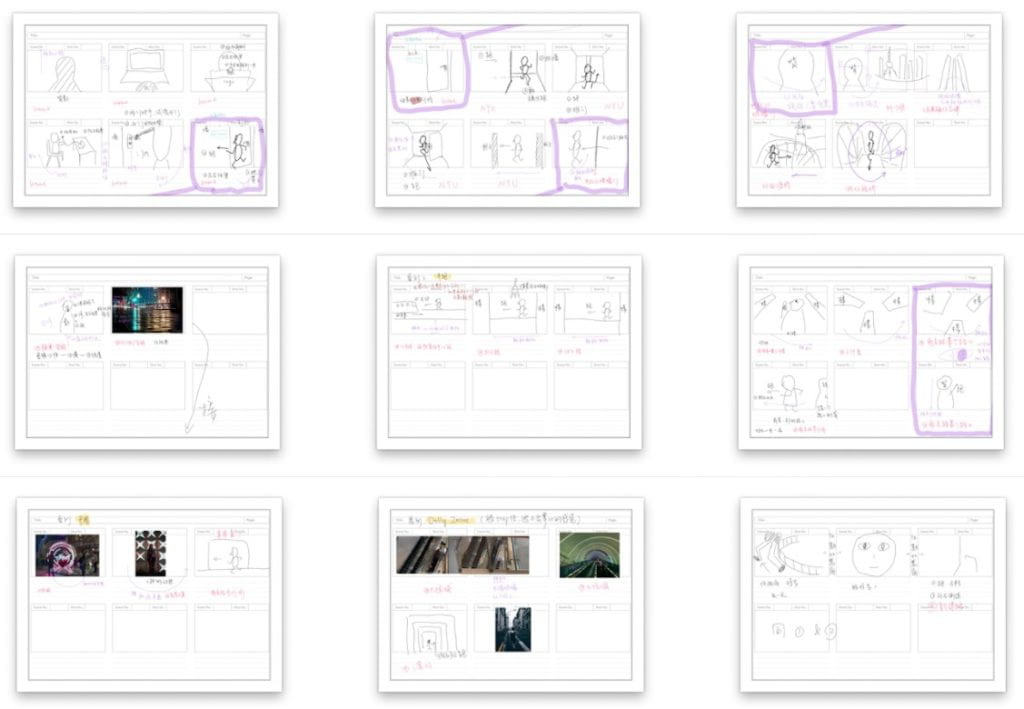
The first difficulty we encountered is the communication problem. Joyce and I have different thoughts thus making things hard to generalize. However, the storyboard turned into a really good tool for us to communicate. Indeed, we have many misunderstandings with each other during the process of drawing our storyboard, but when we finished it, many of our conflict thoughts are resolved. Different from working on my own, this collaboration enables me to feel about the strength and effectiveness of the storyboard in the aspect of communication.
2.2 Shotting Plans
According to our storyboard, many places and details are involved. As a result, a detailed and workable shooting plan is vital and necessary.
2.2.1 Location Scout
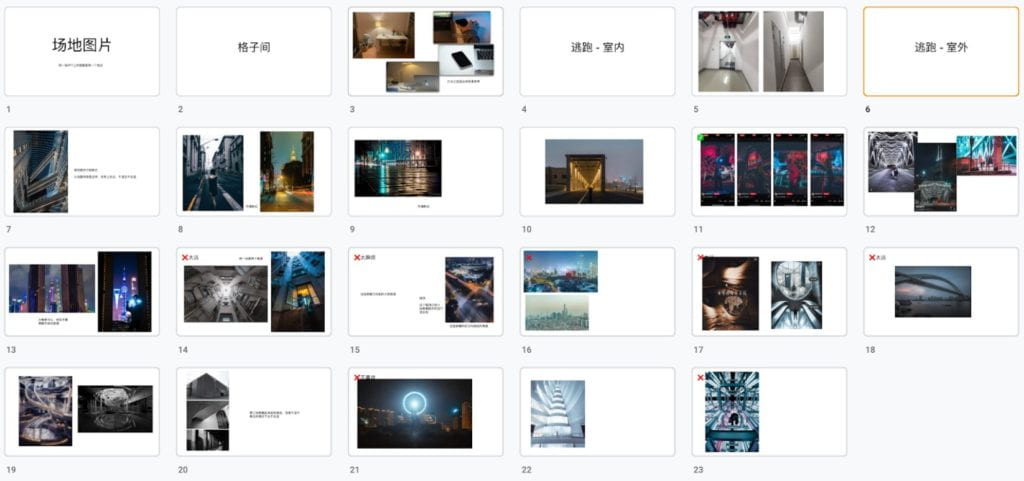
We originally planned to go to the Bund and find some cyberpunk-styled places ourselves. However, as time is limited, it is hard for us to spare extra time for only the in-person location scout in the big city of Shanghai. As a result, through 小红书, 微博, and some other platforms, we integrated different materials and find a list of places that may be ideal for our video. And we choose the academic building and Joyce’s home as the in-door place to shoot.
2.2.2 Shooting Plan
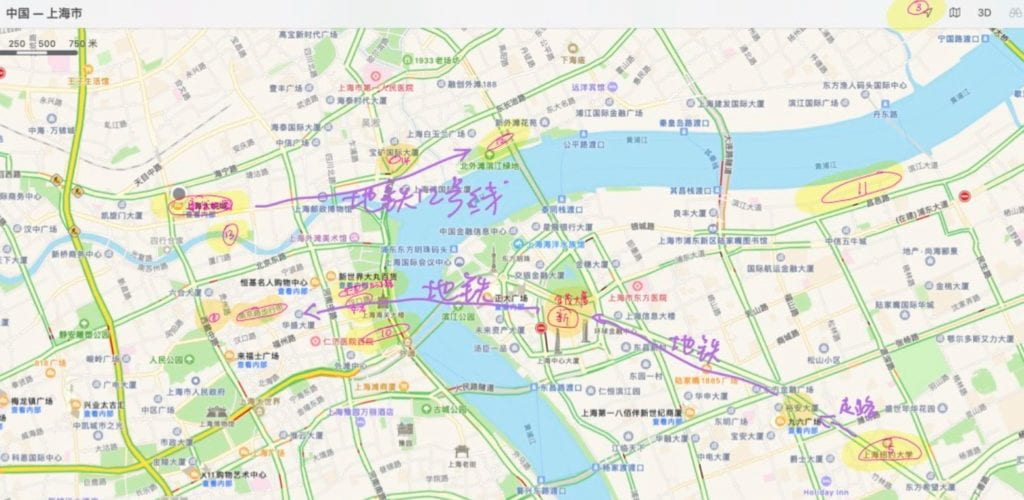
Due to the complexity, strict time limit, and high requirement of our project, we made a detailed plan for our shooting. Setting our routine.
2.2.3 Lighting and Setting
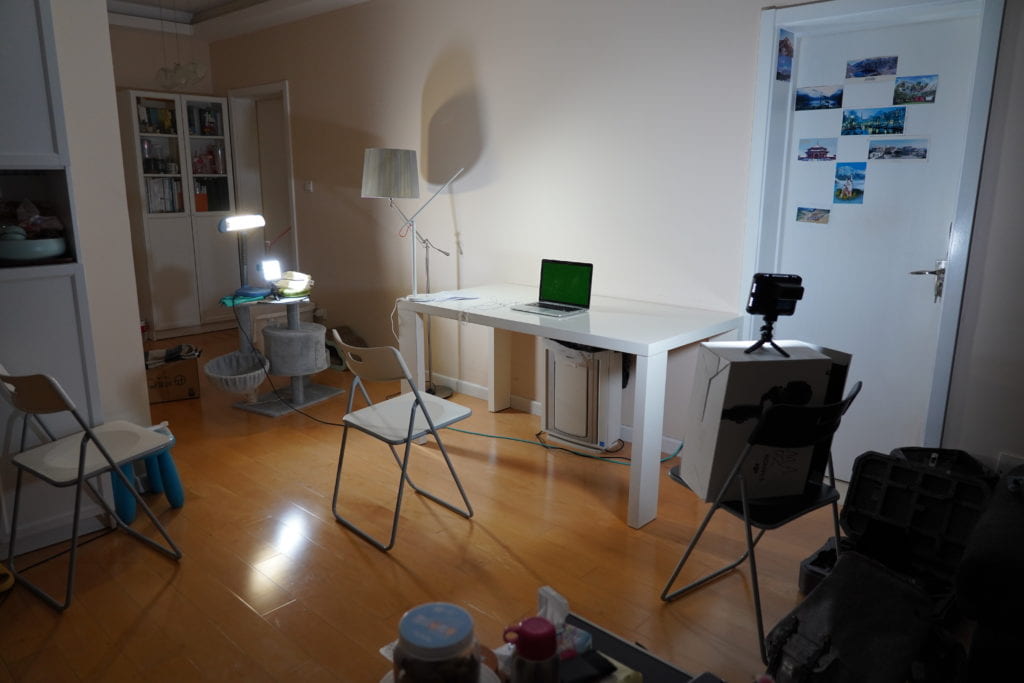
There are mainly 2 types of settings in our project – the indoor one and the outdoor one. We use mainly use the natural light outdoors while in Joyce’s home, where we shoot the scenes in which the main character sits in front of the computer, we have well-designed lighting. We use 4 lights, including 3 LED pans, 1 LED stick, and several lamps to light up the whole setting, leaving almost no shadows. In this way, the sense of “white terror” could be shown – this is exactly the atmosphere we want to create.
Also, in our video, we shoot the main character from different angles, but only one white wall do we have. As a result, we have moved and rotated the table many times. This is also a tiring but interesting work to mention.
2.3 Post-Production Process
2.3.1 Audio Processing and Mastering
I used Adobe Audition to process the recorded raw audio file from Tascam. Procedures include joint different recorded audio clips, automatic noise canceling, removing the sound of lips, adding background music, and dynamically changing the volume.
2.3.2 Rough Cut and Final Cut
Joyce is in charge of the rough cut part for the outdoor section, focusing mainly on the selection of approximately 50GB of materials, ordering them into the timeline, adjust some of the time-remapping. I am in charge of the rough cut for the indoor section.
I am also in charge of the final cut, combining different colors, effects and clips together.
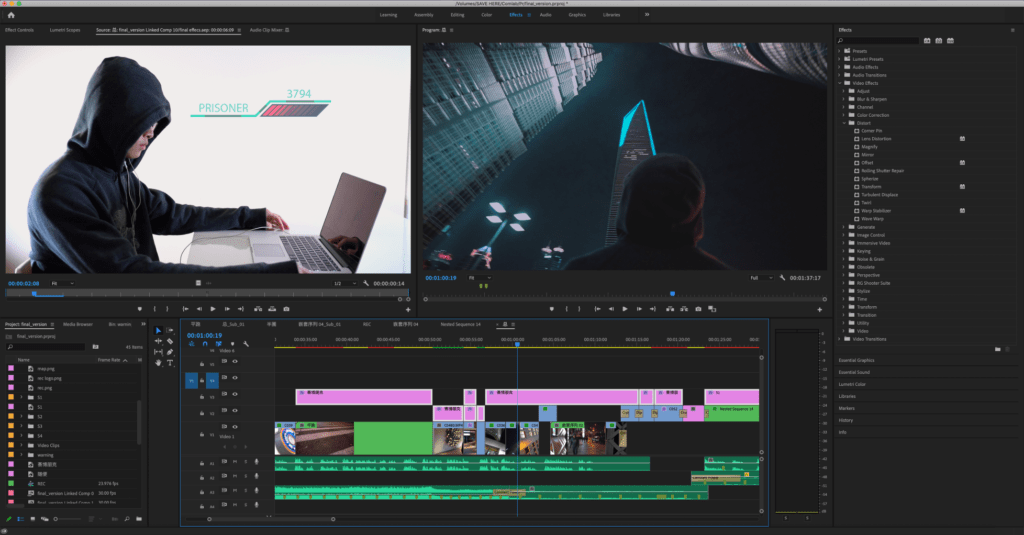
2.3.3 Special Effects
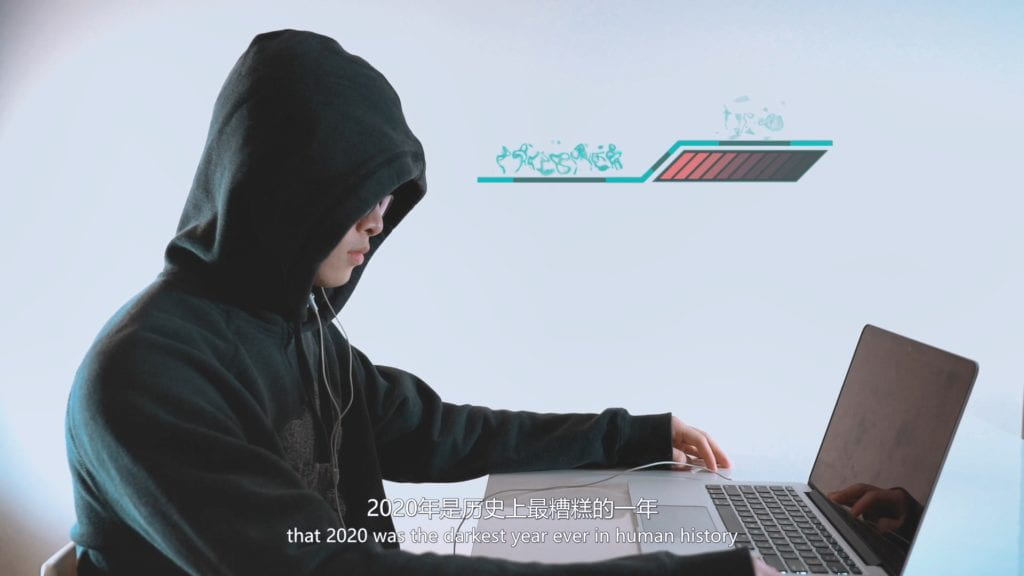
There are 2 kinds of effects in our project, the first one is the basic effects, in which we add “stickers” such as the “REC” tag; and the second one is advanced effects, as illustrated in the pictures below. For basic effects, I simply implemented them in Premiere Pro, with an additional nested sequence. While for the advanced ones, I imported the video clip into After Effects and substitute the original video clip. Below I will briefly illustrate 2 of the special effects.
2.3.3.1 Recording Clip
This is a basic effect implemented directly by Adobe Premiere Pro. In this clip, I used the following effects:
- Border: drawn by Adobe Illustrator, shown as a layer in Pr sequence.
- “Clip 2138”: a built-in character object in Pr. 2138, in cooperation with 2137 at the beginning of our video, shows that there are actually 2 recordings in the setting of our video. And the 2138th clip is the last one.
- REC sign: drawn by Adobe Illustrator, shown as a layer flashing in Pr sequence.
- Rotating wheel: composed of 3 layers, also drawn by Adobe illustrator. By adding keyframes, I let the circles rotate at different speeds and directions, forming a feeling of a rotating gear.
- The whole video: noise effect is added, to differentiate the picture quality from other normal clips.
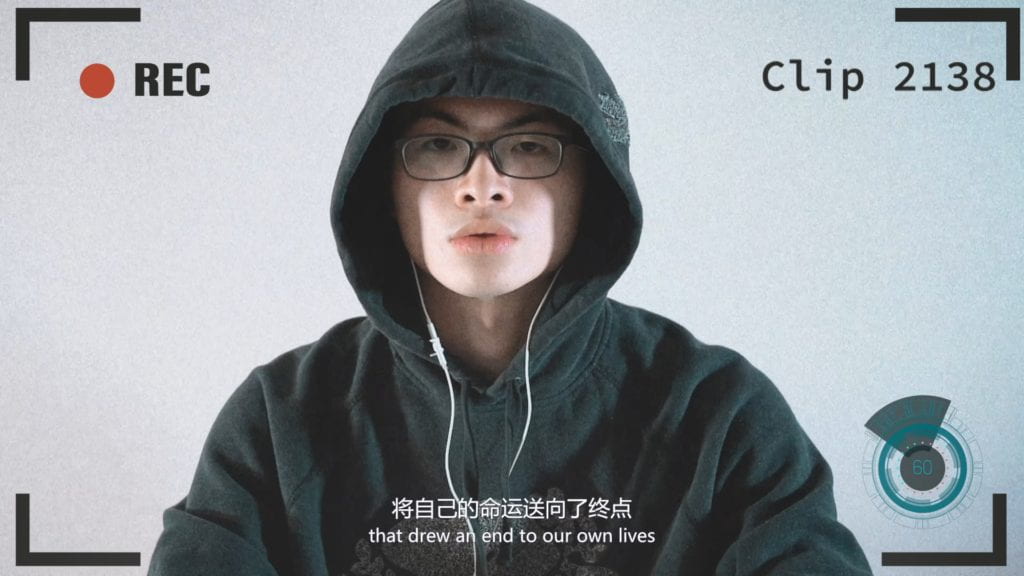
An example of basic effects
2.3.3.2 Running Clip
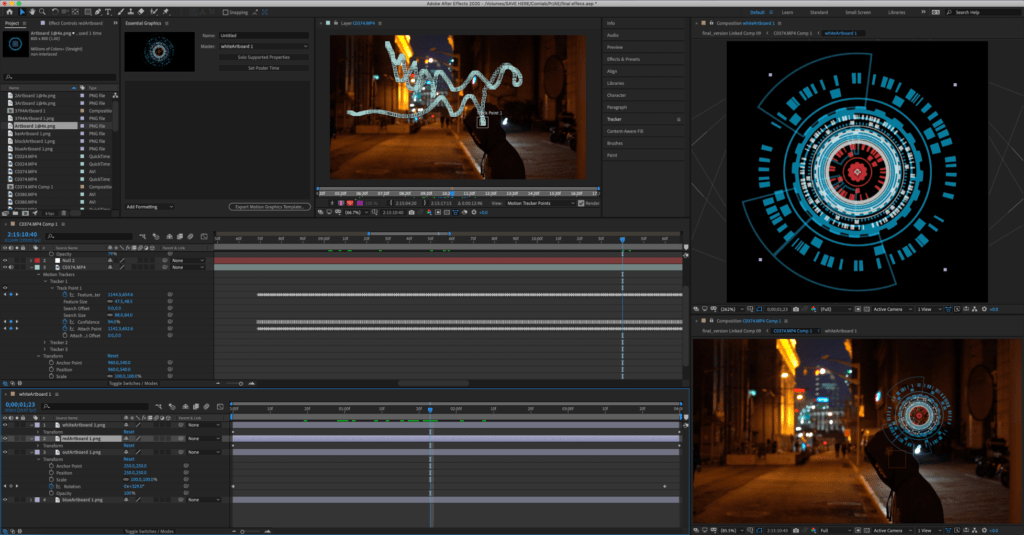
This effect is mainly realized on the basis of 3D tracking. To do this, I conducted the following procedure.
- “Gear”: as shown in the right-top corner, the gear is composed of 5 different layers, each representing a circle. The 4 out of 5 circles rotates at different speeds and directions.
- The movement of the “gear”: to let the gear move along with the main character’s head, I used the tracking function in After Effects.
- Initially, I was trying to use the “track camera” function – in that way I can establish a platform for the gear to lay on. However, the analyzer always fail.
- As a result, I chose a substitution strategy – instead of analyzing the key points of the entire video, I could inturn analyze and track only one point – since most of our video clips involve only one fixed angle or the angle changes only a little bit, the substitution doesn’t seem to have much difference to the outcome of the first one.
- To make the track even more real, I also add some scripts on the virtual object to bring a little random movement.
2.3.4 Poster
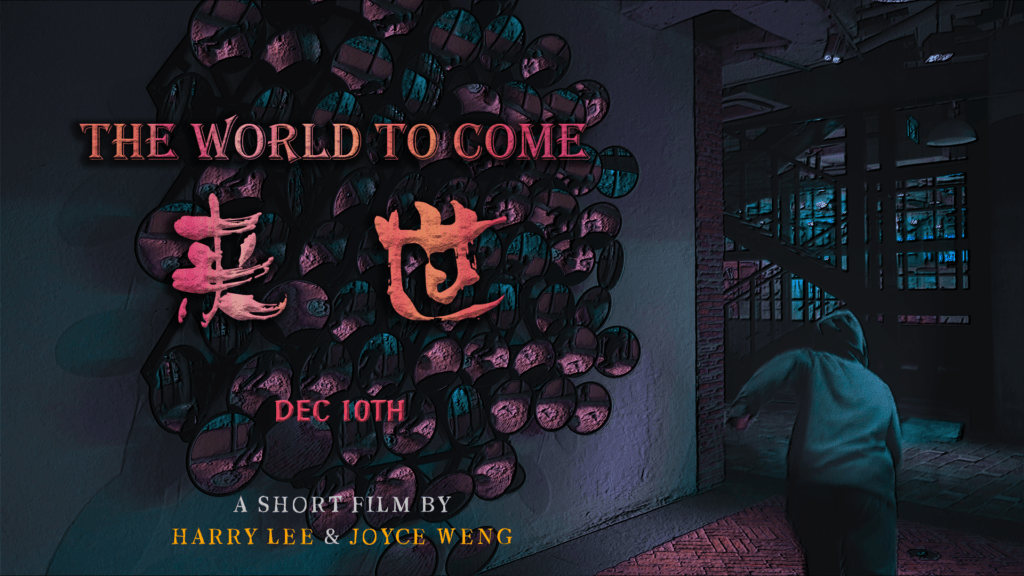
As a short film, I also made a poster for it. The poster below is made by Photoshop.
3 Collaboration
3.1 Work Distribution
Below is the work distribution
| Task | Owner |
| Find reference videos | Harry Joyce |
| Location Scout | Harry Joyce |
| Storyboard | Harry Joyce |
| Shotting Plan | Harry Joyce |
| Narration Writing | Harry |
| Narration Translation | Joyce |
| Shooting | Harry Joyce (Main) |
| Film Editing (rough) | Harry Joyce (Main) |
| Audio Mastering | Harry |
| Color | Joyce |
| Effects | Harry |
| Final Editing & Combine | Harry |
| Subtitle Timeline | Harry |
3.2 Communication
I have to admit that, our communication process is not ideal at the start of our collaboration. We have many ideas not unified – and we both thought there is no problem in our thoughts, so why don’t stick to our original thoughts? In addition, our beliefs of “I am right” are both so strong that we are not used to compromising, which has caused a lot of arguments. However, after several days, we came to learn about how to communicate and collaborate. And by clear work distribution and planning, we became effective thus our work improved at an expected speed.
As for the process of collaboration, we used Google Drive a lot. We share all our findings, problems, and reference materials through Google doc, we update our progress in the Google Sheets (See Gantt Chart). In this way, we are able to maximize our efficiency and know each other’s live progress and requirements.
Joyce is really good at planning and She is really a careful person. When we are making our shooting plans, we argued a lot on “whether it is necessary to make such a detailed plan, including what angle we are going to at the storyboard stage”. For me, since I am not familiar with the place we are going to shoot, I think it is unnecessary since there must be many uncertainties. As a result, the most effective way is to decide the detailed shooting and camera movement at the shooting place, and we will shoot much more footage than required. In this sense, we can select the most useful ones at the editing stage. However, Joyce thought it is hard to make our video “continuous” if we don’t have a detailed shooting plan. In the end, Joyce’s method proved to be useful. Since we have encountered not so many uncertainties as I expected, and according to our planning, we have connected the video clips in a very good way.
In conclusion, Joyce makes up many of my carelessness aspects, and I make up many of her technical aspects.
4 Aesthetics
4.1 Camera Movement and Time Remapping
The storyline of our project runs along with the main character. As a result, most of the running scene in our video is character-focused, and the setting of the big city lies behind the main character. However, we use some close-up indoor, especially focusing on the main character being recorded – which shows the setting that this last human on the earth is going to disappear.
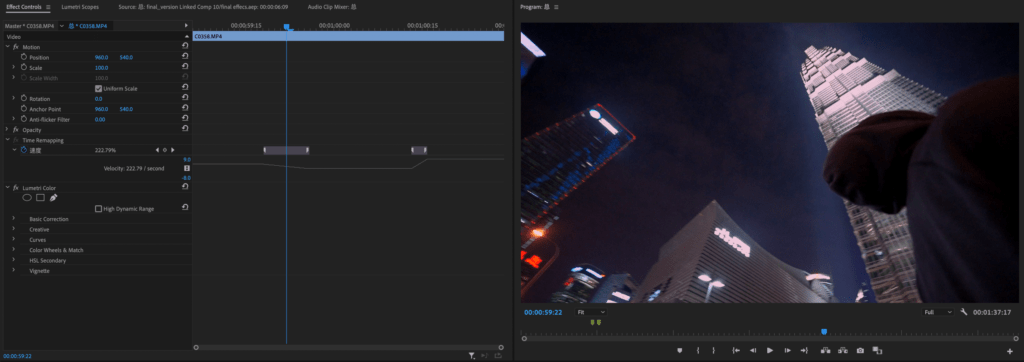
One of the most significant parts, I think, is the time-remapping. To show our huge story in such a short time, pace and speed really matter. As a result, we adjusted the speed for different clips and used optical flow to ensure smoothness.
4.2 Color Adjustment
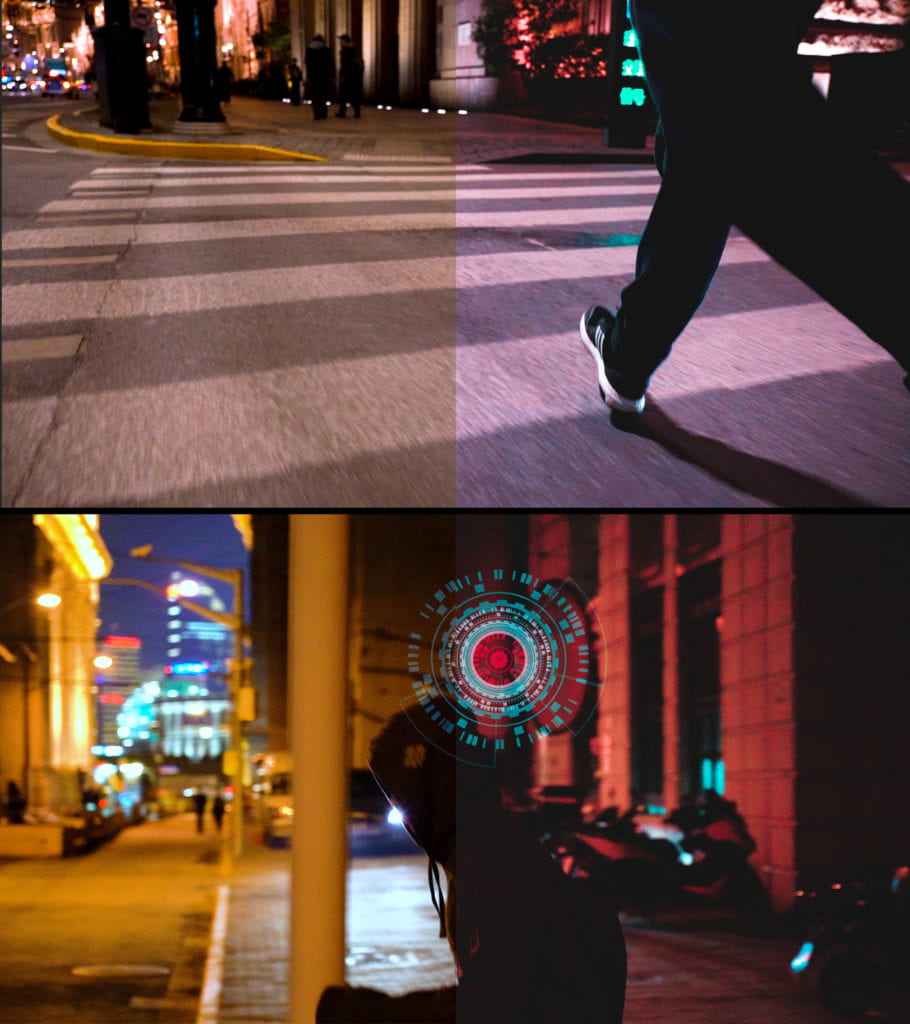
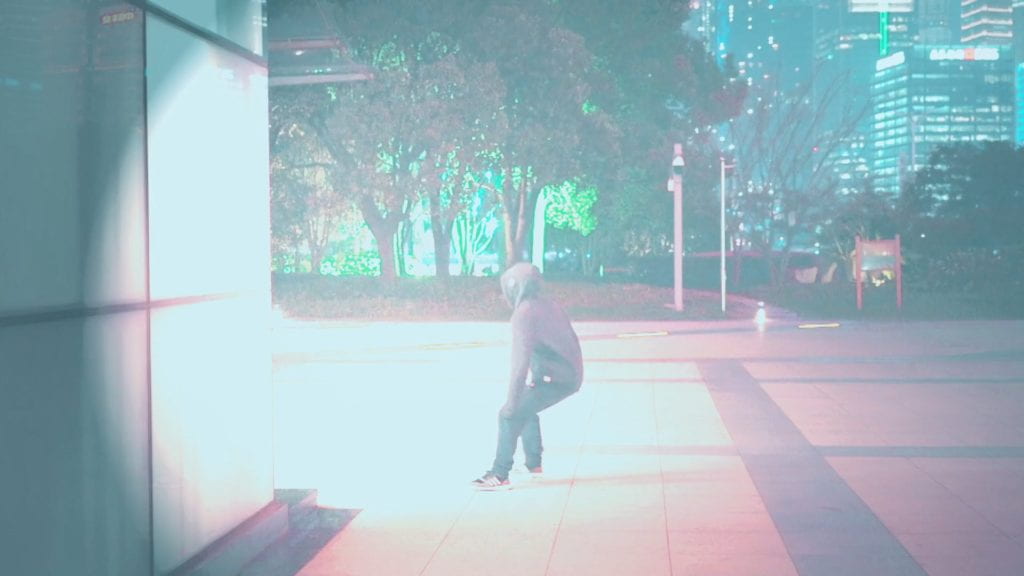
“High-tech and low-life” is our theme, and it is also the theme for cyberpunk. In our video, we are not going to show how flourishing our city is. Instead, we are going to show how “poor” our city is that the only thing left is our technology. As a result, Instead of using a traditional warm color (yellow), we enhance purple and cyan in our raw material. As you can see below, the left part is the original material while the right part is the color-admusted one.
4.3 Special Effects
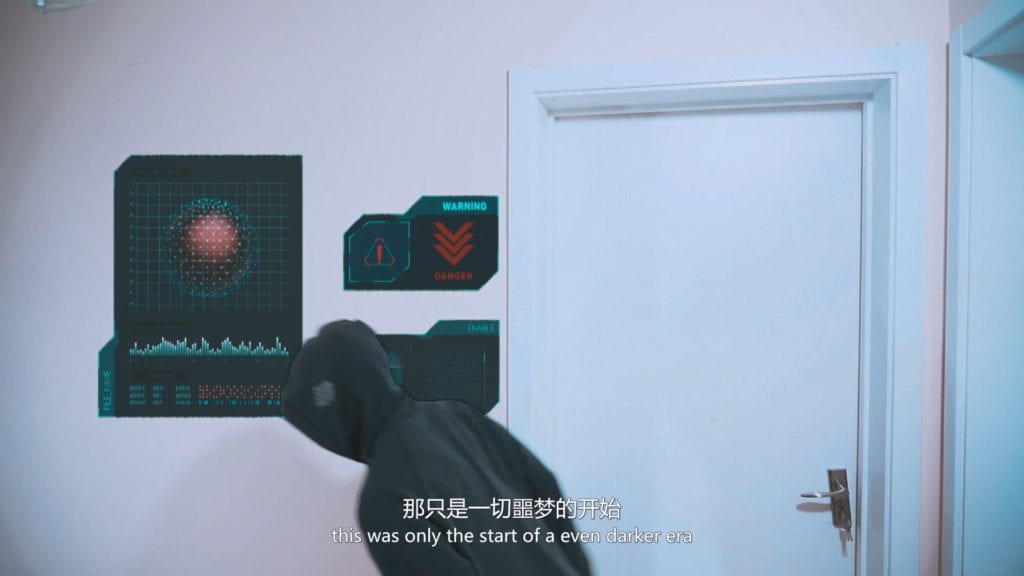
To show that “technology” and “Empire System” is in every part of our lives, we need to add the AR elements, in different parts of our video. Below are some good Augmented Reality-styled frames from our final project.
5 Endnotes
At the end of my documentation, I would like to give special thanks to our professor Cici Liu, and my partner Joyce Weng. I really appreciate Prof. Liu’s informative and helpful instruction to our project, and I really gratitude my collaboration with Joyce. Without them, this project is unprocurable.