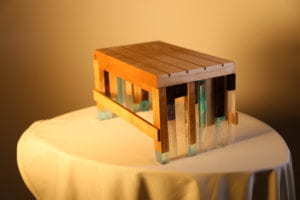
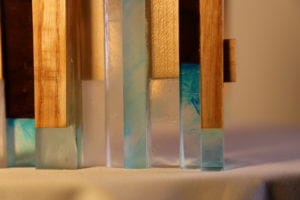
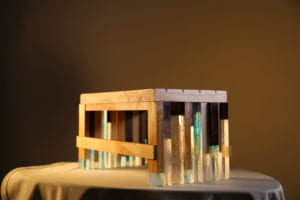
Design:
Since I’m going to move to a new house this summer and the new house has a higher ceiling than the one I’m living in now, so the cabinets will also be higher. In order to get the things in the high cabinets more easily, I want a stool that I can both step on and occasionally sit on. Secondly, I like to read books near the bookshelves, and this kind of stool with small size gives me a feeling of reading books in the library. In addition, I would like to make wooden furniture which I hadn’t tried before in my previous projects.
These are two motivation projects:
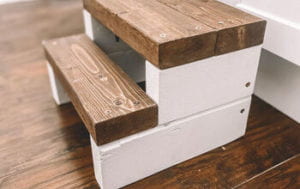
This is a wood step stool designed for small children and used in the bathroom, the maker used screws and glue to fix it. I really like the contrast of colors, I think the structure of this piece is simple, which is what I appreciate, and the color matching makes it very comfortable.
https://www.hometalk.com/44302046/diy-wood-step-stool
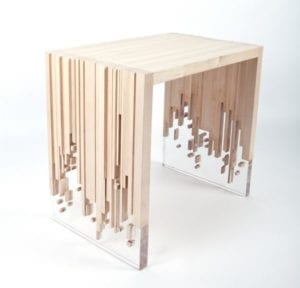
This is a simple structure stool with beautiful sides. “The legs are deceptively carved and embedded in a transparent material in order to achieve this illusion.” I am not sure if this is made of plastic, epoxy, or other materials.
https://www.trendhunter.com/trends/weightlessness-by-eugene-tomsky
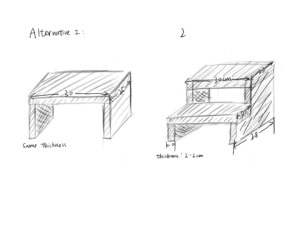
Finally, I’m going to base on the second inspiration to create my own work. I want to make a simple structure, modern style stool, in the two sides of which I want to do some artistic treatment, such as some abstract hollow shape. Second, the size of this stool should be slightly small because it is not usually used for daily sitting, but in the need to take a higher height of the items in the cabinets designed.
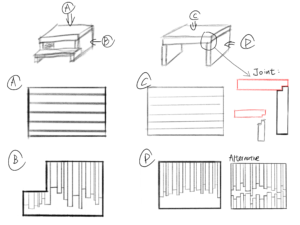
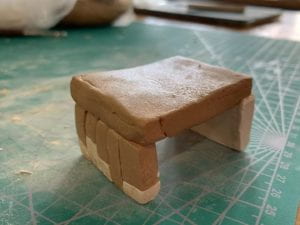
So after designing and thinking about it, I sketched and provided alternative designs, and made clay models in the class.
Each step:
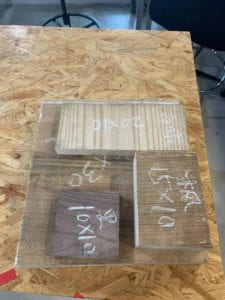
(The wood I ordered)
- Top board
I started with the top board. According to my design, the size of the top board is 30*20*3cm, so I ordered a 30*20*5cm piece of maple (because the thinnest maple from the seller is only 5cm). To my surprise, unlike the wood used in previous projects, the surface of the wood directly from the storage yard was very rough and not very flat.
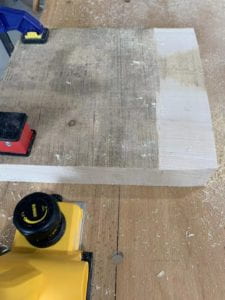
Since I didn’t need such a thick board, I used a band saw to cut it into a board of about 3cm thickness. Since the board itself was uneven and the surface cut by the band saw was also uneven, I put the maple into the plane machine to make the surface smooth and flat. Since the wood that arrived did not precisely match the size I ordered and was slightly larger than I wanted, I did not cut the long side, but cut the slightly shorter side to about 20cm.
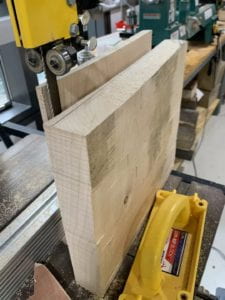
Since in my design, the sideboards are made up of long strips of wood of varying thickness, after discussing with Oliver, I decided to design the top board with strips of wood of the same thickness and as different as possible from the width of most of the side boards to prevent the gaps of the top boards from being paired with the gaps of the sideboards. Once the gaps are paired, it will potentially get weird.
Then I found the problem, as my design was to cut the wood of the top board into some long strips and glue them together afterwards, in order to match the style of the sideboard design. However, the grain of the wood did not allow me to do so, and I showed the problem I encountered in the picture below.
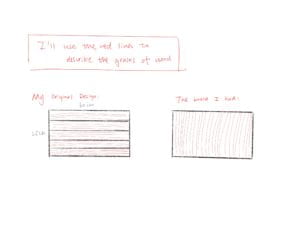
If I cut the boards into strips as I originally designed, the strips would be less strong due to the direction of the grain. I also have a solution is to use the 20cm side as a long side and shorten the 30cm side. But I tested and found that if a person’s both feet need to be comfortably stepped on the stool, the length needed to be greater than 20cm, so after a discussion with Oliver, I found that I don’t need to cut through the board, so as to ensure that there are gaps, and also to ensure that the board is hard enough.
I chose to use the table saw for both the not-cut-through and the straight lines, and I first chose a test piece of about the same thickness and performed several operations, first to practice using the table saw for this not-cut-through cut, and second to test the final result after the cut. After cutting the test piece, I felt that the gap cut with the table saw was wider than I expected and that the not-quite-smooth surface might hurt the user, or at least make the user uncomfortable, so I tried pouring epoxy into the gap. The next day, I found that the epoxy did not stay in the gap, most of it flowed to the sides of the board, or underneath. After observing and guessing, the epoxy should have flowed along with the paper tape to other places.
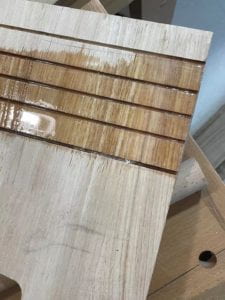

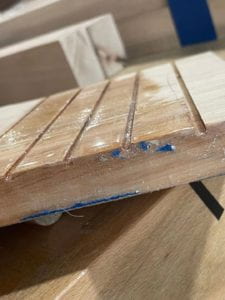
So there are two alternatives, one is changing to a different kind of tape, Oliver suggested that I can use packing tapes to try, but the disadvantage of this method is that epoxy needs 24 hours to solidify, if this method fails, I need a new test, and each time it will take 24 hours, which may cause me to end up too late to finish it. And, since there was still some epoxy left in the gap, I observed the effect and found that the color contrast between the gap and the board was not as obvious as I expected when using epoxy. So, I chose the second alternative, which is to cut some strips of wood as thick as the gap and stuff them into the gap to make the color contrast.
After this project, to my surprise, I found that the test piece is really important for a relatively successful or satisfying project. First of all, the test piece can help me get familiar with similar machine operations, and secondly, I don’t have to worry about any failure on the test piece. What’s more, some effects need to be made to judge whether they look good or whether they match my design, so using a test piece will not destroy the wood used as final project, but also allow me to see the final result.
Next, I used the table saw to cut out the gaps in my board. This step was very easy because the table saw is great for cutting straight lines, and since I didn’t need to cut through, I could safely use the tool to press the board.
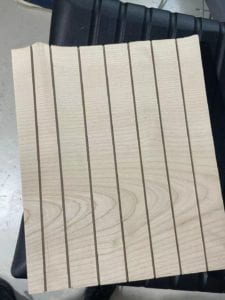
The next step is to make the strips of wood that need to be tucked into the gaps. Since I had made similar strips in the bandsaw box, I used to put them on the inside of the drawer of the bandsaw box to prevent the drawer from shaking. But this time the strip is longer than the previous production, and more stringent requirements for the width. Because if it is too thin, in the board gaps, there will still be gaps, not very beautiful. I chose beech wood, which is not so different from the maple color, but still has a contrast, to make these strips. After that, I first cut the beechwood into thin planks with a table saw. Cutting the very thin wood with the table saw I thought was difficult because I couldn’t find the right tool to press the thinner part. So I put the thinner part on the left side of the blade and pressed it down as much as possible. Then after using the belt sanding machine, file and sandpaper, I sanded them to just the right coarseness to fill the gap of the board.
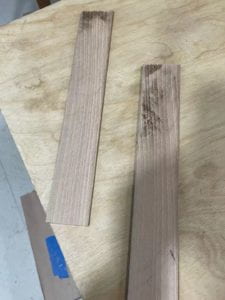
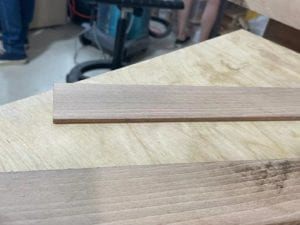
Then I squeezed glue into the gap, tucked these strips into the gap in the board, and used clamps to hold them in place.
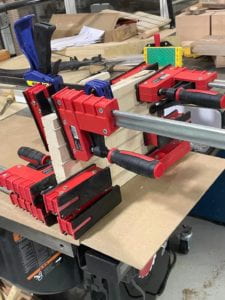
Since the strips were of different widths, the board had bumps after being stuffed into it, and some glue ran onto the surface of the board, so I used the plane machine again to turn it into a smooth and level board with no glue left on it.
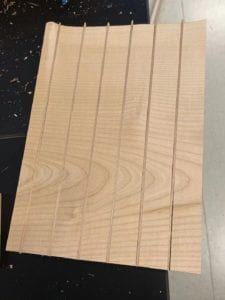
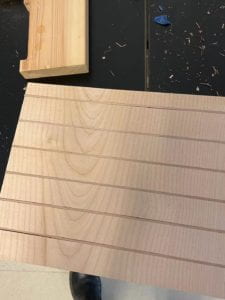
2. Combine the epoxy and the wood
This was the most important part of my project and the one that I found the most difficult and time-consuming.
The first and biggest problem was the mold. According to my sketch, you can see that my original design was to put the strips of wood into a large mold after gluing them together and then pouring epoxy. So I first tried to make my own mold from acrylic sheets. I first used a knife to cut several pieces of acrylic sheets, and then used a glue gun to assemble these acrylics into a mold. I encountered several problems, first of all, the acrylic plate is very difficult to cut with tools, it takes a long time to cut a piece; secondly, the mold attached with the glue gun is not very strong and sealed, epoxy will leak out a little; finally, because I should avoid the glue gun stick on the wood, because it will be very difficult to clean, so I had to make a very large mold, which leads to a lot of epoxy waste.
So I decided to change the design to combine wood and epoxy first, then cut into the shape of stick, and then glued together.
Since I don’t think the acrylic sheets are easy to make molds or the results are good, but there is no suitable mold in the lab, so I decided to buy molds from Taobao. However, it was hard to find a mold on Taobao that matched the size of my piece because I wanted a mold that was at least the same length as the length of my side panels, i.e. at least 15cm in length and at least 3cm taller in the height.
Epoxy is different from wood, if two pieces of wood belong to the same type of wood, and the thickness is the same, while the joint surfaces are smooth, after gluing and then sanding, in the end it is difficult to even see that they were once two pieces of wood. My bandsaw box tells me this. But epoxy is different, because of the fluidity and instability of epoxy, it is impossible to join two pieces of epoxy together nicely and without marks. So I had to finish the epoxy in one go. Finally, I chose a 10*15*5cm mold.
The first wood I used was maple, which I cut to a width of 10cm to allow it to fit into the mold. I then cut a random length of less than 15cm. Since 15cm was the total length I designed the sides to be, I had to make sure that when I took it out of the mold, this piece of wood and the epoxy bonding board could be cut straight away and then re-glued.
I then placed a small block of wood in the mold and started to mix the epoxy. I poured the A glue on the scale first, then according to the 1:3 ratio, I poured the corresponding B glue according to the weight of the A glue I poured in. However, by the time I poured in the epoxy, all the wood floated, which I did not anticipate.
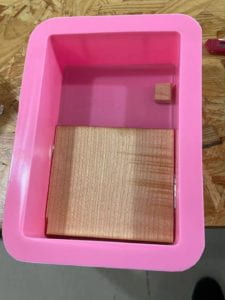
I looked for a piece of wood that was the right size and a little heavier, and pressed it on top of the maple, but it was hard for me to both press it and keep the small block where I wanted it to be, so I discarded the small block.
What surprised me most about using epoxy was actually that the wood would float, even though I already knew the result in the video, but when they floated, it would not stay in its original position and would have shifted in position, which I think is more skillful to adjust. In addition, what kind of wood should be chosen to press it? How deep should I pour the epoxy after pressing it, and should I press the block first or pour the epoxy first? All these problems bothered me when I was operating.
This time, I chose to use the epoxy with the horizontal surface slightly below the junction of the two blocks of wood, however, when it dried, I found that the thickness of the wood-epoxy was a bit small, so my later epoxy improved my method.
My final choice was to use a piece of wood that would cover the largest area of the surface of the wood placed in the epoxy and try not to let the top piece of wood touch the epoxy. However, this was difficult. Because of the surface tension of the epoxy, as shown in the picture, if you keep the epoxy and the wood at the same level, the surface of the epoxy will be curved.
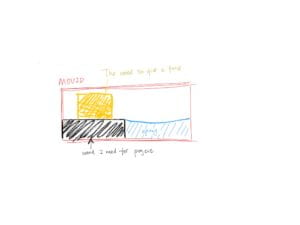
The final measure I took was to use the pressed block first, then pour in the epoxy, and let the level of the epoxy exceed the junction of the two blocks a little.

Then after the maple-epoxy was dry, I used the bandsaw to cut off the attached pieces of wood. Since using the band saw does not cut straight lines very well, and in order not to damage the surface of the epoxy, I covered the surface of the epoxy with tapes, and then put the wood on the belt sanding machine to sand, in order to remove the residual non-maple wood.
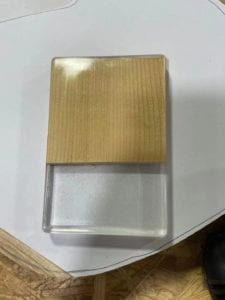
Then I found that the junction of wood and epoxy is easy to appear in relatively large bubbles. At the same time, I compared my sketch design and found that due to the limitation of the mold length, if I don’t want all the wood parts of the side boards to be about the same length, I have to cut the length of the wood before putting it into the mold.
So I first sanded the walnut I purchased with a belt sanding machine, then drew the length I wanted on it with a pencil, then used a table saw to cut the longer lines and a band saw to cut the shorter lines.
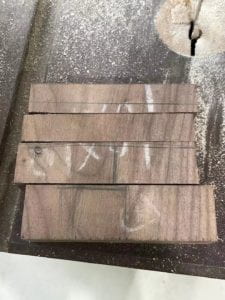
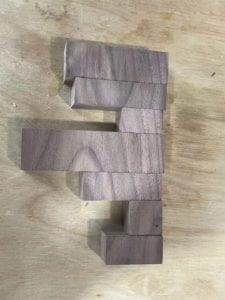
After that, I arranged them in the mold and then used a modified method of pouring epoxy. I added some coloring this time. To my surprise, the coloring would flow on its own (although this may be common knowledge, I learned it through my own experiments). So no matter how good a pattern I started with the stirring stick, I probably ended up with something different from the original.
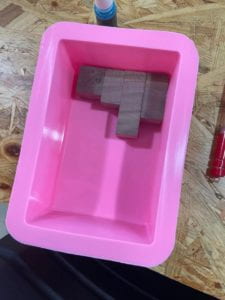
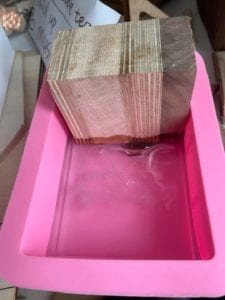
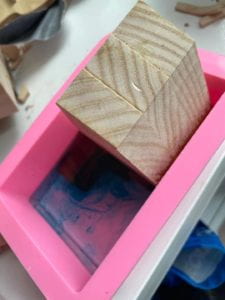
After the epoxy dried, I repeated the previous steps and used the band saw to cut off the excess wood. I paid special attention to the large air bubbles where the wood and epoxy meet this time, I used a stirring rod to poke off some of them, but there were still some left.
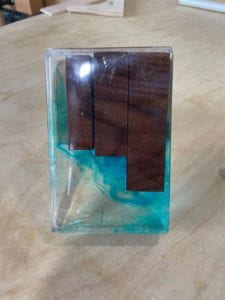
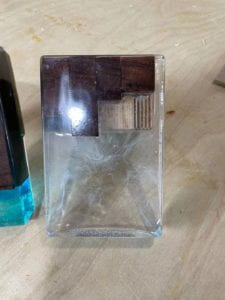
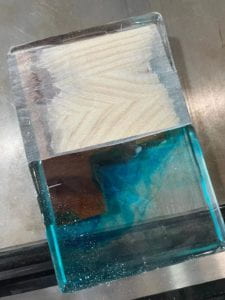
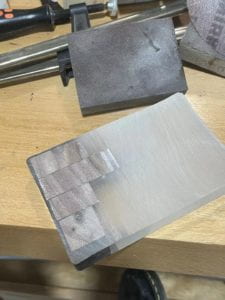
However, the improved height of the epoxy caused me to have to cut into the epoxy when removing the excess wood, which made the epoxy surface cloudy. Due to the special transparency of the epoxy, any slight unevenness (caused by the band saw) was noticeable. So I first used a belt sanding machine to sand the surface until it was smooth, and then started sanding with 180, 240, 320, 400, 600, 800, 1000, 2500, 3000, 5000, 7000 sandpaper in that order.
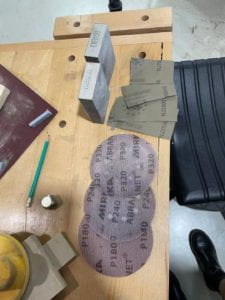
To my surprise, the epoxy became much clearer after reaching 2000 and above. After the final sanding with 7000, the result was very good, the surface felt very smooth and fine, but it was still impossible to be the same as the one taken directly from the mold. I guess the reason one is that the density of sandpaper for sanding is not high enough, and secondly since sandpaper will leave some scratches on the surface, these scratches are hard to disappear completely. I compared them to the unsanded maple-epoxy.
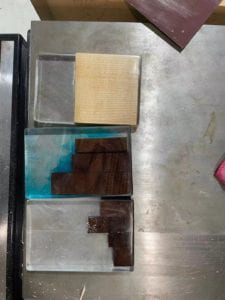
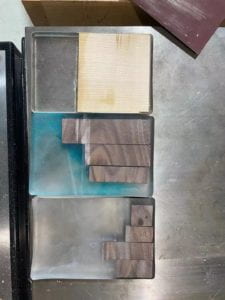
Then, I repeated the steps above using ash wood for the operation.
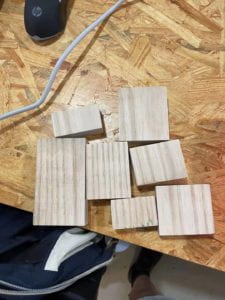
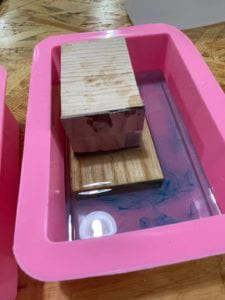
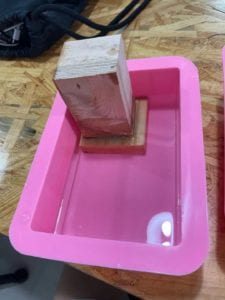
Ran into some interesting problems this time. After about 22 hours of pouring in the epoxy which is a new brand of epoxy, Andy and Oliver noticed that my epoxy was a little soft and thought that maybe this epoxy would never harden. We guessed that may be caused by I didn’t mix the epoxy well when I stirred it, or I had a problem with the ratio. But I was doing exactly the same thing with the previous epoxy, and the previous brand of epoxy had definitely hardened after 22 hours. I checked the instructions in the Taobao store as well as the instructions that came with it, neither of which identified the problem, and I did not rule out the cause of this epoxy’s own quality problems. I did an experiment, I used the hand saw to cut open the transparent piece of epoxy, found that the middle did not dry, sticky still. But since it takes at least 24 hours to wait for a piece of epoxy to dry, and the deadline for this project is approaching, I was hesitant to continue trying to use epoxy, because if I use epoxy and it fails again, I will have wasted 48 hours without having any process on my project.
So I started to design plan B, while I put the blue epoxy in the lab to continue waiting. My plan B was to replace the failed epoxy wood with some 100% wood strips. then I cut all the wood-epoxy boards I made with a table saw in the meantime. meanwhile, I cut some 100% wood strips in the lab from some discarded wood of different colors.
To my surprise, the next day my blue wood-epoxy had become very hard, so this epoxy is supposed to adhere to a strict 24-hour time limit. And I was also surprised that it could change so fast in the last few short hours. So I continued to repeat the previous steps, using the band saw to remove the excess wood, sanding it on the belt sanding machine, sanding it with up to 7000 sandpaper, and finally cutting it into strips with the table saw and putting it together with the previous strips.
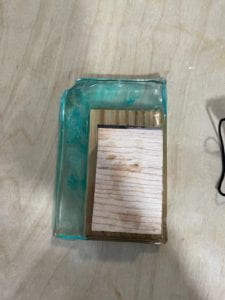
This tells me that I should always be prepared to plan a project, even if I repeat something I have done many times before, or even when I repeat a step that I have done many times before and even think I can’t go wrong for sure.
After that I arranged the strips and did some processing, for example, some parts I thought would look better if they were cloudy, so I sanded them with a belt sanding machine to make the surface cloudy, but after observation, I found that since some strips were still very smooth, it would not look good if the surface clarity was very different. So I sanded these strips again with the belt sanding machine to 3000 or 5000 if I wanted it to be more cloudy, and to 7000 if I wanted it to be smoother.
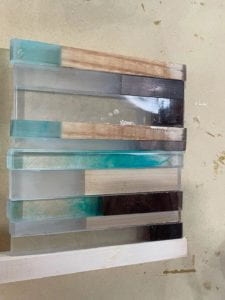
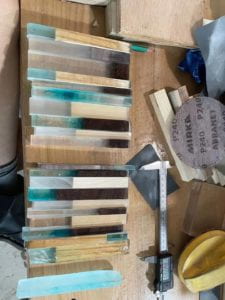
Then I found that there were some gaps between the strips of wood, which might cause them not to be glued together well. So I sanded with a belt sanding machine, although there is no way to make every piece fit tightly, this step I think is essential, otherwise, glue might do nothing on holding them together.
Since they are not wood, I used epoxy glue to join them together afterward. To use epoxy glue I need to squeeze the glue on a small discarded board first and then stir it with a small wooden stick because this glue is mixed 1:1. After stirring, quickly apply it to the epoxy surface with a small wooden stick and only on one side. The operation should be quick, because the glue dries up in five minutes, so squeeze out as little as possible. After applying the glue, I pressed the two strips of wood with my hand and it didn’t even take five minutes to dry. But there were a few places where I didn’t press hard enough, and then they broke off and I had to reapply the glue. This epoxy glue is really strong after dry. To my surprise, this glue was very difficult to remove after it had set. If it was wood glue running onto the wood, I could have gotten rid of it by sanding, but because of the material of the epoxy and the fact that my side panels are not horizontal, I couldn’t repeat the sanding multiple times. I ended up using high-density sandpaper to remove as much of the glue as I could.
3. Joint
I compared the width of the two side panels to the width of my top panel, and I used a table saw to reduce the width of the top panel so that they would match. Then I used the table saw to cut all sides of the side panels into straight lines.
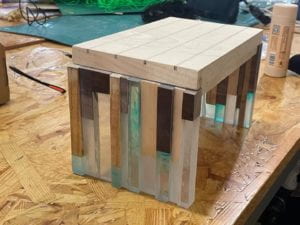
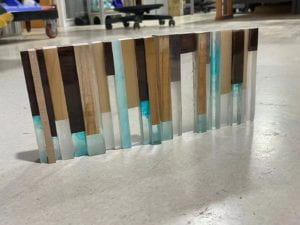
After learning about the various methods of joint skill at 90 degrees and comparing firmness, I decided to use the first method in the picture below because my side plates are thin.

I was torn between using a router or some other tool to cut the top plate when Oliver told me that using the table saw is the easiest way. I first experimented on the test piece and to my surprise, it was indeed very convenient. Just be careful to move the board a very short distance at a time, and even if you move too far, you can go back to the place where you didn’t cut. And the advantage of the table saw is that the depth of the grooves on both sides can be kept the same without measuring, as long as the height of the table saw is not adjusted.
Due to the shape of the table saw blade, the surface of the wood is not too smooth after cutting. Due to the limitation of the shape, I can’t use the belt sanding machine, so I use sandpaper for sanding. Finally, I sanded the edges of the top board to prevent too sharp to scratch the user.
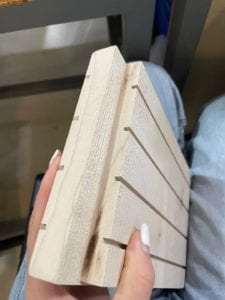
After that, I sanded all four exposed sides of the side panels once again. Since the top surfaces where it joins the top plate were not very horizontal, I cut it again with the table saw. Then I glued the top and side panels together with epoxy glue. And since the stool may rock from side to side, which will make the stool ruined, in order to make it stronger, I cut two thin pieces of maples and glued them to the stool with epoxy glue according to Oliver’s suggestion. I didn’t choose plywood is because Oliver said it may seem cheap if I use plywood but my whole project is high-quality. How to combine the joint or the parts which designed later to the original design is also what I have learned from this project.
This also surprised me because I was only thinking of reinforcing my piece by joint skill, but there are times when this would make joint skill limited due to size, so it is also possible to reinforce the piece by adding a piece of wood.
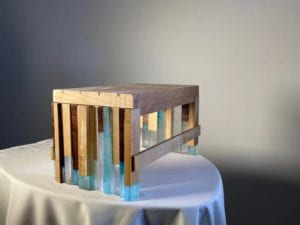
4. oil
To make it waterproof, I ended up using oil. I covered the epoxy parts with tape to prevent them from getting stuck with oil. But it’s really easy to mass by using the oil, so the oil gets covered onto the epoxy, however, nothing happens.
Final thoughts:
If I were to do it all over again, I would think of a few more design options at the beginning of the design, because each step is likely to face failure, especially when using a very uncertain material like epoxy. And the test piece is also important, for the reasons I have stated above. Also, I will make more wood-epoxy boards to give myself more options when arranging combinations.
If I were to build a similar project, I would make a table with the same design, or a higher chair. Because I think this design is difficult to buy similar ones online, if I want to further use this style, I may still need to make it myself. In the new production, I will definitely thicken the side panels because it is stronger, and I will also try more and stronger joint skills.
