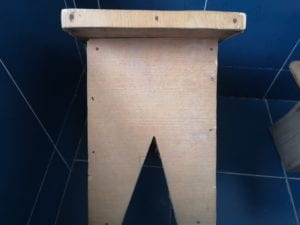
- Design
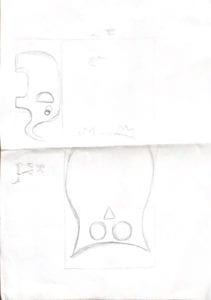
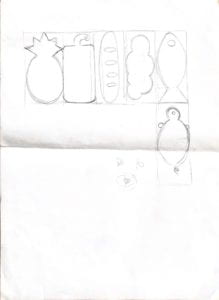
In the design stage, limited by the size of the wood board, I searched some woodwork shapes on the Internet. I found that the shape of the fish was very attractive to me (it’s also in my design paper showed following), so I decided to make the final project into the shape of an animal. However, I wanted to make an asymmetrical work, because it’s more challenging than a symmetrical one, and the fish is symmetrical, so I designed owl, turtle, elephant, and so on. Finally, I found that because the length of the elephant is longer than the others, it can make better use of this board, so I decided to adopt the shape of an elephant.
- Process
- Draw sketch
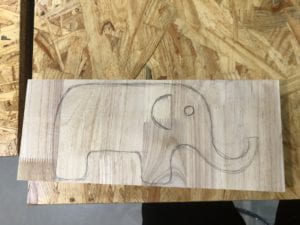
First of all, before using the machine, I first use a pencil to draw the shape of the work I want on the wooden board.
- Band saw to cut shape
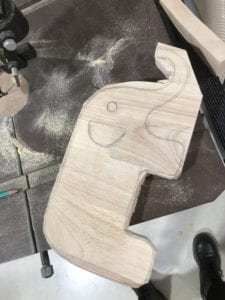
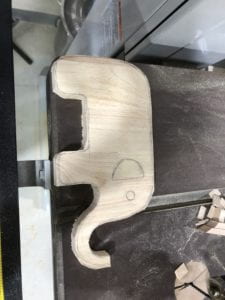
After that, I used the band saw, in order to cut the plank into the shape I wanted, the shape of an elephant. This step is my first time using the machine, so I am very careful. I first remove the extra small wooden blocks on the machine platform and make sure that there is nothing on it except my wooden boards before starting the machine. In the beginning, I chose to cut a straight line, so I started from the hind legs of the elephant. Because I am afraid that I can’t control the band saw machine well, and I am afraid that sanding will wear off afterward, when I cut with the band saw, I leave a gap of about one millimeter with the edge of the pencil drawing.
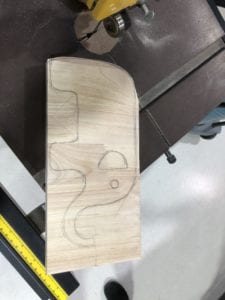
Next, I cut the part between the elephant’s legs. I first cut several lines parallel to the legs in this area. It is worth mentioning that before cutting these lines, I used a pencil to draw a draft on the board. I think this is a good way to prevent mistakes.
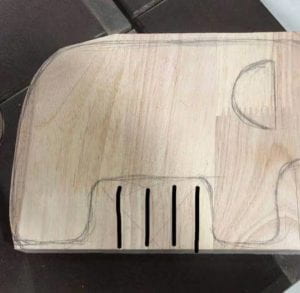
However, when I cut to a corner of nearly 90 degrees, I found that even though I have been turning the board slowly before, the band saw cannot bend at such a large angle. This was unexpected to me, and I was very surprised. The angle at which the band saw can turn is very small, so when cutting the curve, I should divide the curve into several areas and cut them one by one.
Then I listened to Andy’s suggestion and prepared to use a band saw to cut two diagonal lines in this area to form a cross.
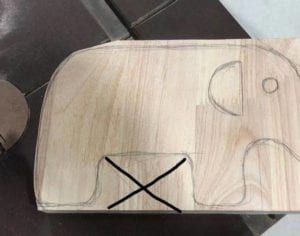
It worked and I found that as long as I can cut into the shape I want, whether it is to cut a flat line or a diagonal line in the middle, it is discussed due to the situation. In fact, every work and every cut is not fixed. The methods of, as long as they can achieve the effect and purpose, are all possible.
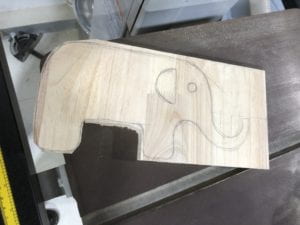
The same steps were used for the next cutting. It is worth mentioning that when cutting the curve under the elephant’s eye, I wanted to try without auxiliary cutting. So, I slowly turn the board so I could use the band saw to cut out the curve directly. Then, to my surprise, the blade of the band saw got stuck in the wood because of the large turning angle. Here I also realized that the auxiliary cutting is very useful, it can leave more room for the blade to turn. Finally, after stopping the machine, I pulled the blade out with my hand, with the help of Andy.
- Drill press to make holes
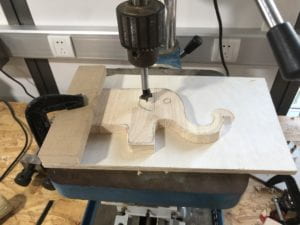
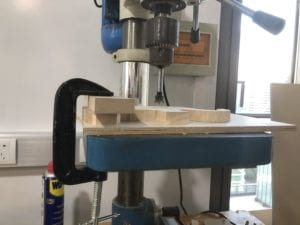
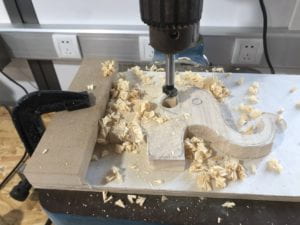
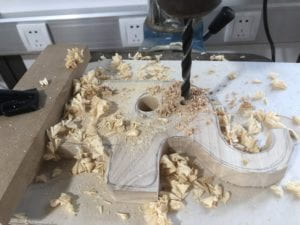
Then I used the drill press to make holes in the ear and eye. After designing this shape, I have been worried and wondering how to cut out ears, which are not circular holes. Here, I first choose a reamer with a diameter that matches the diameter of the elephant’s ear. In this step, I only need to take out the reamers one by one and place them above the board for comparison. Then I replace the original one on the machine with the reamer I selected. It’s worth mentioning that you need to use a fixer to fix your plank first. I have always wondered why I need to cover a small plank on top of my plank. After this step, I realized that it was to prevent my plank from being pressed down and the force is too strong and then damage occurs. Before punching the eye hole, because the hole I designed was relatively small, it was difficult to align the direction between the reamer and my designed hole. To my surprise, there was a very useful tool, a wooden hammer. I’m not able to move the position of the plank on the machine platform by hand, but with this wooden hammer, I only need to tap it slightly, and the plank will move slightly.
- Scroll saw to cut the inside shape
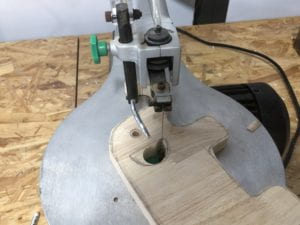
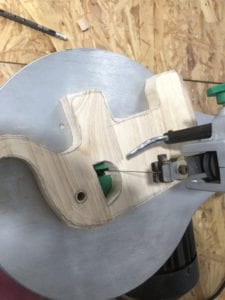
Since the ears are inside the board and are not circular, I use the scroll saw to cut the shape. First, pass the blade of the scroll saw through the hole made in the middle of the ear, and then follow the same process as the band saw. The difference is that the scroll saw moves up and down, and the speed is relatively slow, so you must press the board hard when cutting, otherwise, the board will shake up and down violently. In addition, the scroll saw blade is relatively soft, so the angle that can be cut is larger. However, unexpectedly, during this process, my blade was also stuck in the wood. Because the scroll saw blade was very thin, I removed it from the wood by cutting the wood in the opposite direction (cut in the direction where the blade has no serrations).
- Sanding belt machine
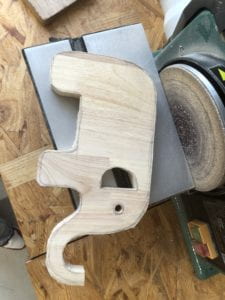
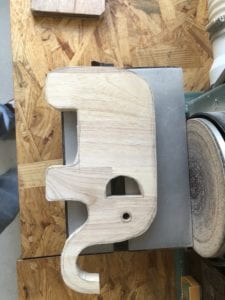
After the previous step, the rough shape is cut, and the next part is the sanding part. I first used the sanding belt machine, but I think this step is difficult because the belt speed of this machine is very fast, and I have to hold the wooden board very tightly. I couldn’t sand a place for too long, since I was worried that the final result would not match the edges of my drafts. Of course, today I find out that there was nothing. This machine can sand most of the edges of my work, but there are also many places where there is no way to sand, such as the curve on the trunk (the nose).
- Oscillating spindle sander
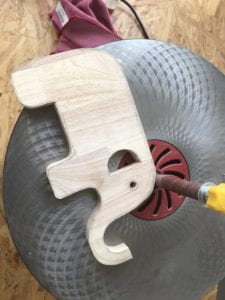
For the above curves that cannot be used with the sanding belt machine, it can be completed by oscillating spindle sander. First select the size of the sand tube according to the curve size I want to sand, then start the machine and start sanding. With this machine, I sand completed the curve on the nose, the curve in the ear, and the curve under the eye. I tried to use this machine to sand a nearly 90-degree curve at the junction of the leg and the body, but I found it not feasible.
- Hand sanding
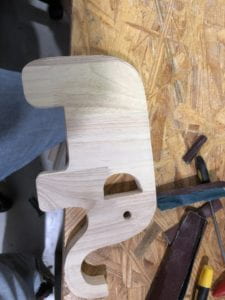
Therefore, these places where machines cannot be sanded can be sanded with manual sanding tools. To my surprise, I always thought that the hand-made sanding tool was only sandpapering, but I found that there are various files of different shapes, and there are some files of the same shape with different sanding densities. In this step, I choose suitable files to sand and polish, especially in narrow places. Then I first used 120mm sandpaper and then used 180mm sandpaper to polish the whole. However, I did not carefully polish the upper and lower sides, which I later found to be very important. This step is not difficult, but it is very tiring because the hands have to be hardened all the time.
- Router
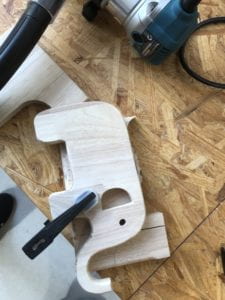
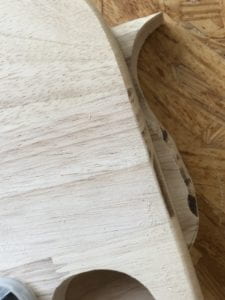
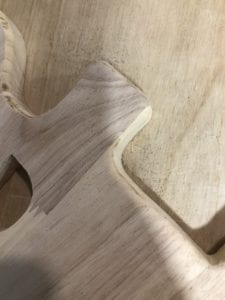
The role of the router is to break the edge, although in my original design, there was no design to make the edges be fillet. However, out of curiosity and the reason that the fillet edges feel comfortable to the touch, I used a router with a roundover bit. I was surprised because I think this machine looks the easiest to operate, but it is actually very difficult. As Andy reminded us, if the router height is relatively low, then it is very likely that some thinner parts will be cut off. I am worried about the nose part, so I first tried the angle size of the edge cut by the router with a board with the same height as mine. I increased the height so that fewer parts are cut off, which can prevent the nose from being damaged. Before using the router, I think it is small and exquisite, and can directly hold the machine to control the direction. But when using it, I found that it is difficult to ensure that it is perpendicular to the plank. If it is not perpendicular, the curvature of the edge will be different, which is very unsightly. The solution is that I stay in the router for a longer time in each place. However, there is a new problem, that is, routers can easily scorch the wooden boards. Not only will there be an unpleasant smell after scorching, but the scorched area will turn black. Another area where the operation is very difficult is that it is not easy to control the direction after starting, so it is not easy to turn at the curves. And after using it for a long time, the router will feel heavy to hold.
- Sanding
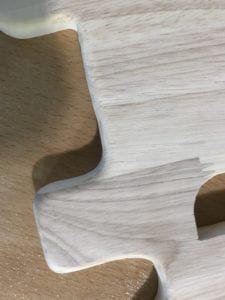
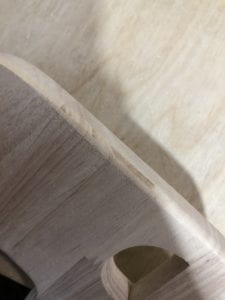
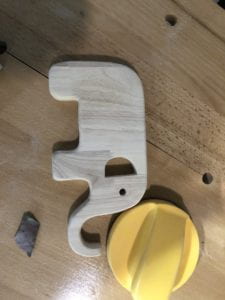
This is the second time to do manual sanding. I used 120mm sandpaper to sand the edges that I just cut with the router. Then I used 180mm and 240mm sanding. where there are some relatively narrow holes, such as the eyes, I rolled the sandpaper into a tube and rubbed it back and forth. But the downside is that I think the upper and lower sides of the work are still not polished very smoothly.
- Oil and wax
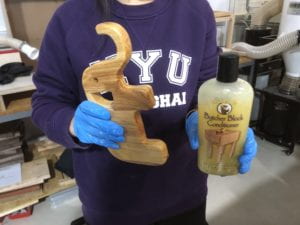
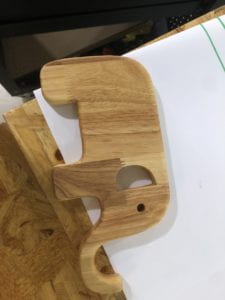
The last step is oiling and waxing. I think this step is very simple, just pay attention to apply oil and wax to every corner of the work, then dry it and wipe it with a rag. The purpose of this step is to make the work smoother and waterproof. After this step, the color of the wood board becomes much darker.
- Questions
Knowing what you know now, if you were to start over again, would you make any changes to your original design? What is advice that you would send to your former self? (how would you have done *this project differently*)
If I still use an elephant as the shape of this work, I think that when redesigning the shape, I will draw the thinner parts of the nose a bit thicker, and draw the eyes a bit larger, because this will prevent the nose part from being cut badly, and the hole of the eye will be easier to sand, oil, and wax.
If I re-make, I won’t be too entangled in the cutting marks and whether there is a certain gap between the edges of the sketch, because as long as it is not in a small and narrow part, whether the edge of this kind of work is strictly in line with the sketch edge is not very important.
Also, I will use more machine sanding instead of focusing on sanding with files.
I will be more cautious in the handling of the curve. First of all, when using a band saw, I will pay special attention to whether there is an auxiliary cutting line to prevent the saw from being stuck in the wood. Secondly, the curve edges are usually not smooth, so I will pay special attention to it when sanding, and remember that using the sandpaper from small to large density.
I will not polish it very smoothly before using the router, because I still need to polish it after using the router.
When using a router, pay attention not to stay in the same place for too long, otherwise, it will scorch the board and leave black marks, even if it can be polished off.
In the final sanding, be sure to sand the upper and lower sides of the plank many times, and not only focus on sanding the edges. I think that 400mm density sandpaper is enough. My work is only polished to 240mm, so if I redo it, I hope it will be smoother.
If you were to build a similar project, what would you keep the same from this project? What would be different? (if you could keep this project, and do *another project too*, what would you do to expand your portfolio and refine your craft.)
If make another food tray, I think the overall process sequence is the same as this work first. But I will change the shape and make a different shape of the food tray to match this work. Then, I hope to make it like a plate so that the food on it will not fall off.

