This post combines week 8’s project update along with week 9’s final project posting.
For preliminary documentation, please see week 7’s post here.
All the code, both P5 and Arduino, are located here in the P5.js sketch.
As a refresher, the goal of my project was to create a plush game controller utilizing a button and 2 variable resistors. In the last update, I showed the game (P5.js) sketch which was mostly complete. I did fix a few items but it mostly stayed that same; get the ball in the box then a new ball and box appear for you to try again. I next began with testing combinations of steel and sheep’s wool.
Variable Resistor Tests:
I created 5 different versions of the resistor which all had varying results. The first was a combination of cotton and steel wool as I had not yet received the sheep’s wool. This particular combination had very little connectivity when tested. I was not able to felt it properly either which could have had a effect.
The next 4 were all steel and natural wool. Each offered promising qualities but ultimately they did not offer enough of a variable in regards to their resistance. The final two (felted balls) had 0 resistance but they were nicely felted and I do hope use them for something in the future.
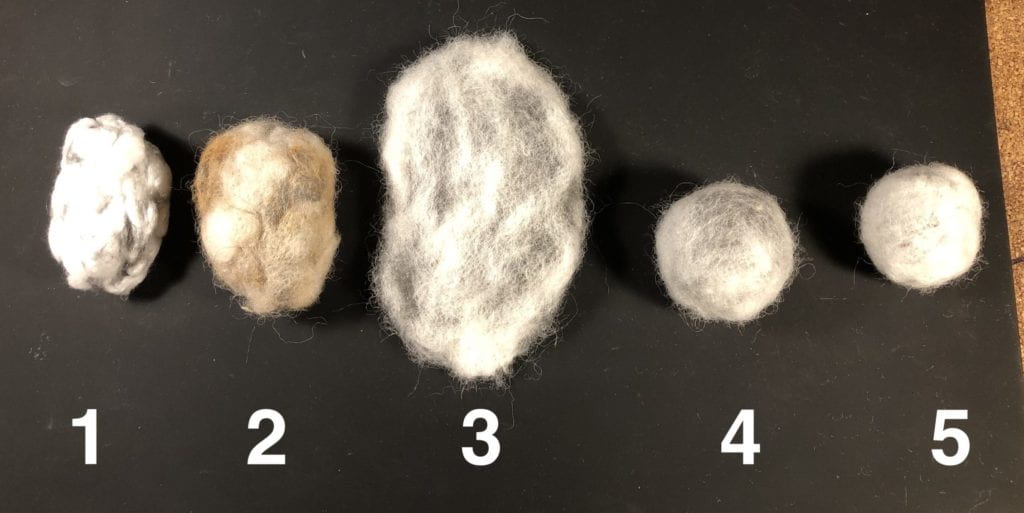
All 5 tests use Homax Extra Fine #000.
- Cotton and steel wool.
- Ratio: 4-1 Cotton to Steel Wool
- Process: hand felted (compacted and worked by hand).
- Resistance Range: 0 or 1. Depending on where the alligator clips were placed I received either no resistance or 100% resistance.
- Sheep’s wool and steel wool.
- Ratio: 4-1 Sheep’s Wool to Steel Wool
- Process: hand felted (compacted and worked by hand).
- Resistance Range: 0-500
- Comments: See video below for resister demo. Since this one was washed, it did rust. This caused the rust to come off as you squeezed it.
- Sheep’s wool and steel wool (Flat)
- Ratio: 8 thin layers of Sheep’s wool to 7 layers of thin steel wool.
- Process: Started with very thin layers of each. Felted each layer to the other to create the shape.
- Resistance Range: 0 resistance
- Comments: I might try washing/drying this test to see how that might change it.
- Sheep’s wool and steel wool. (Loose Ball)
- Ratio: 1 to 1 (3 layers of each)
- Process: started with ball of steel wool in the middle then added layer of sheep’s wool followed by steel wool, etc. Felting each time.
- Resistance Range: 0 resistance
- Sheep’s wool and steel wool. (Denser Ball)
- Ratio: 2 to 1 Sheep’s to steel wool
- Process: started with ball of steel wool in the middle then added layer of sheep’s wool followed by steel wool, etc.
- Resistance Range: 0 Resistance
- Comments: I used thicker layers of sheep’s wool to steel wool but did a tighter felting.
Here is a video of my second test which did provide the variable resistance but it was not consistent throughout the ball.
Before switching to a different sensor, I was able to test this same wool resister with the P5.js sketch. I found that there was no resistance; x of ball stayed stable but once added resistance the input of the x was extreme.
At the recommendation of ITP Resident August Luhrs, I was able to get some advise from former ITP graduate Hannah Tardie. Hannah offered a wealth of recommendations and resources for creating soft interfaces. I am grateful to both August and Hannah for their help.
After a few more test with the steel and natural wool, I decided to switch to a different material. I decided that this method was the most sustainably in regards to it’s fiber content. In order to cut down on any unnecessary waste, I chose to utilize a recommendation of Hannah, neoprene fabric pressure sensor. The new pressure sensors were based on this tutorial from KOBAKANT. I will find a use for those items at a later date though.
I used scrap fabrics (felt, conductive fabric, neoprene and Velostat) that I had on hand.
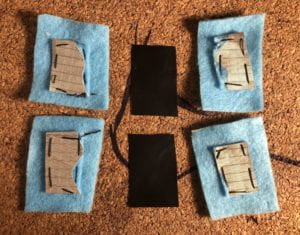
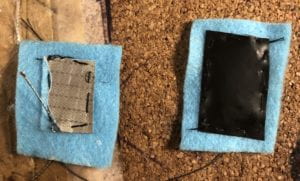
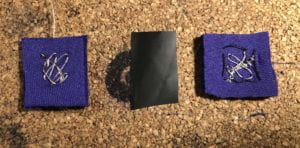
I created two versions of these sensors:
1 – Conductive fabric bonded to felt (left over from ITP Camp 2018 workshop), Adafruit medium conductive 3 ply thread and Kelostat. This combination kept getting reading on the Arduino of 1019-1023. (It took me awhile to figure out but these readings were incorrect. There was an error with the construction as well as with the Gemma that effected the readings. In the end I used this set.)
2 – neoprene (bonded to leather), steel thread (confirm exact type) and Velostat. Meter readings from 0-150. This set was successful in combination with the P5 sketch.
Code: Nano to Gemma
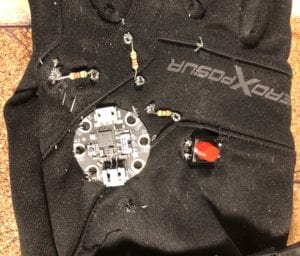
Since the Nano 33 IoT needed to be in a breadboard, I chose to switch to one of the Adafruit Gemma MO’s that I had around. August was able to offer assistance figuring out the necessary code changes for setup for Adafruit GemmaMO. In the end all I needed to add was pinMode(buttonPin, INPUT) in order for the Gemma to read the digital pin. In the code for the Nano, this wasn’t needed.
Schematic (Nano 33 IoT and Adafruit Gemmo MO)
INSERT
Schematic of circuit
Nano and Gemma MO
Finish Line:
Once the components were all attached to the glove, it was time to test it with P5.js. The first test resulted in a few errors. There were a few short circuits happening due to the ends of the conductive threads touching in a few spots. Resolving those issues took some time but I finally got them worked out.
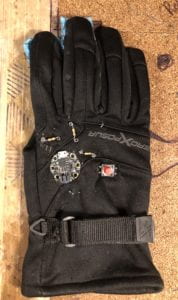
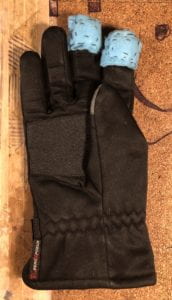
How to play:
- Goal: Get the ball into the box.
- Controls:
- Press your pointer finger on the table to control the the ball along the X-axis.
- Press your middle finger on the table to control the ball along the Y-axis.
- After the ball has disappeared and the box is red, press the button to try again.
Challenge:
The biggest challenge that I had and did not plan on, was figuring out the path tracing for the conductive threads. Since I was not using wires, I needed to make sure that I did not short circuit any of my connections. Unfortunately, this was a problem for a bit but I was able to figure it out eventually.
Reflection:
I would like to fix/upgrade the following when I chose to take this project further:
- The game needs to be developed more to include a score keeper as well as a redesign of the look.
- I would still like to try creating the plushy variable resistor as originally planned.
- If P5 can support this, utilizing Blu-tooth, as well as a compatible micro controller, I would like to be able to have the device be remote.