The LED we are going to use here is a “WS2812B Individual Addressable RGB LED Strip Light”. The benefit of this kind of Strip is that you can daisy chain them, just search for the arrow that shows you in which direction do things flow and solder strips together.
I am using this site as a reference.
Connections:
The LED strip should have 3 wires for power, data and ground. power will generally be red, ground, black and the center cable will have a color. This is the data pin and should have a 330 ohm resistor between the data pin in the strip and the pin in the Arduino. We will use pin 7 in the Arduino.
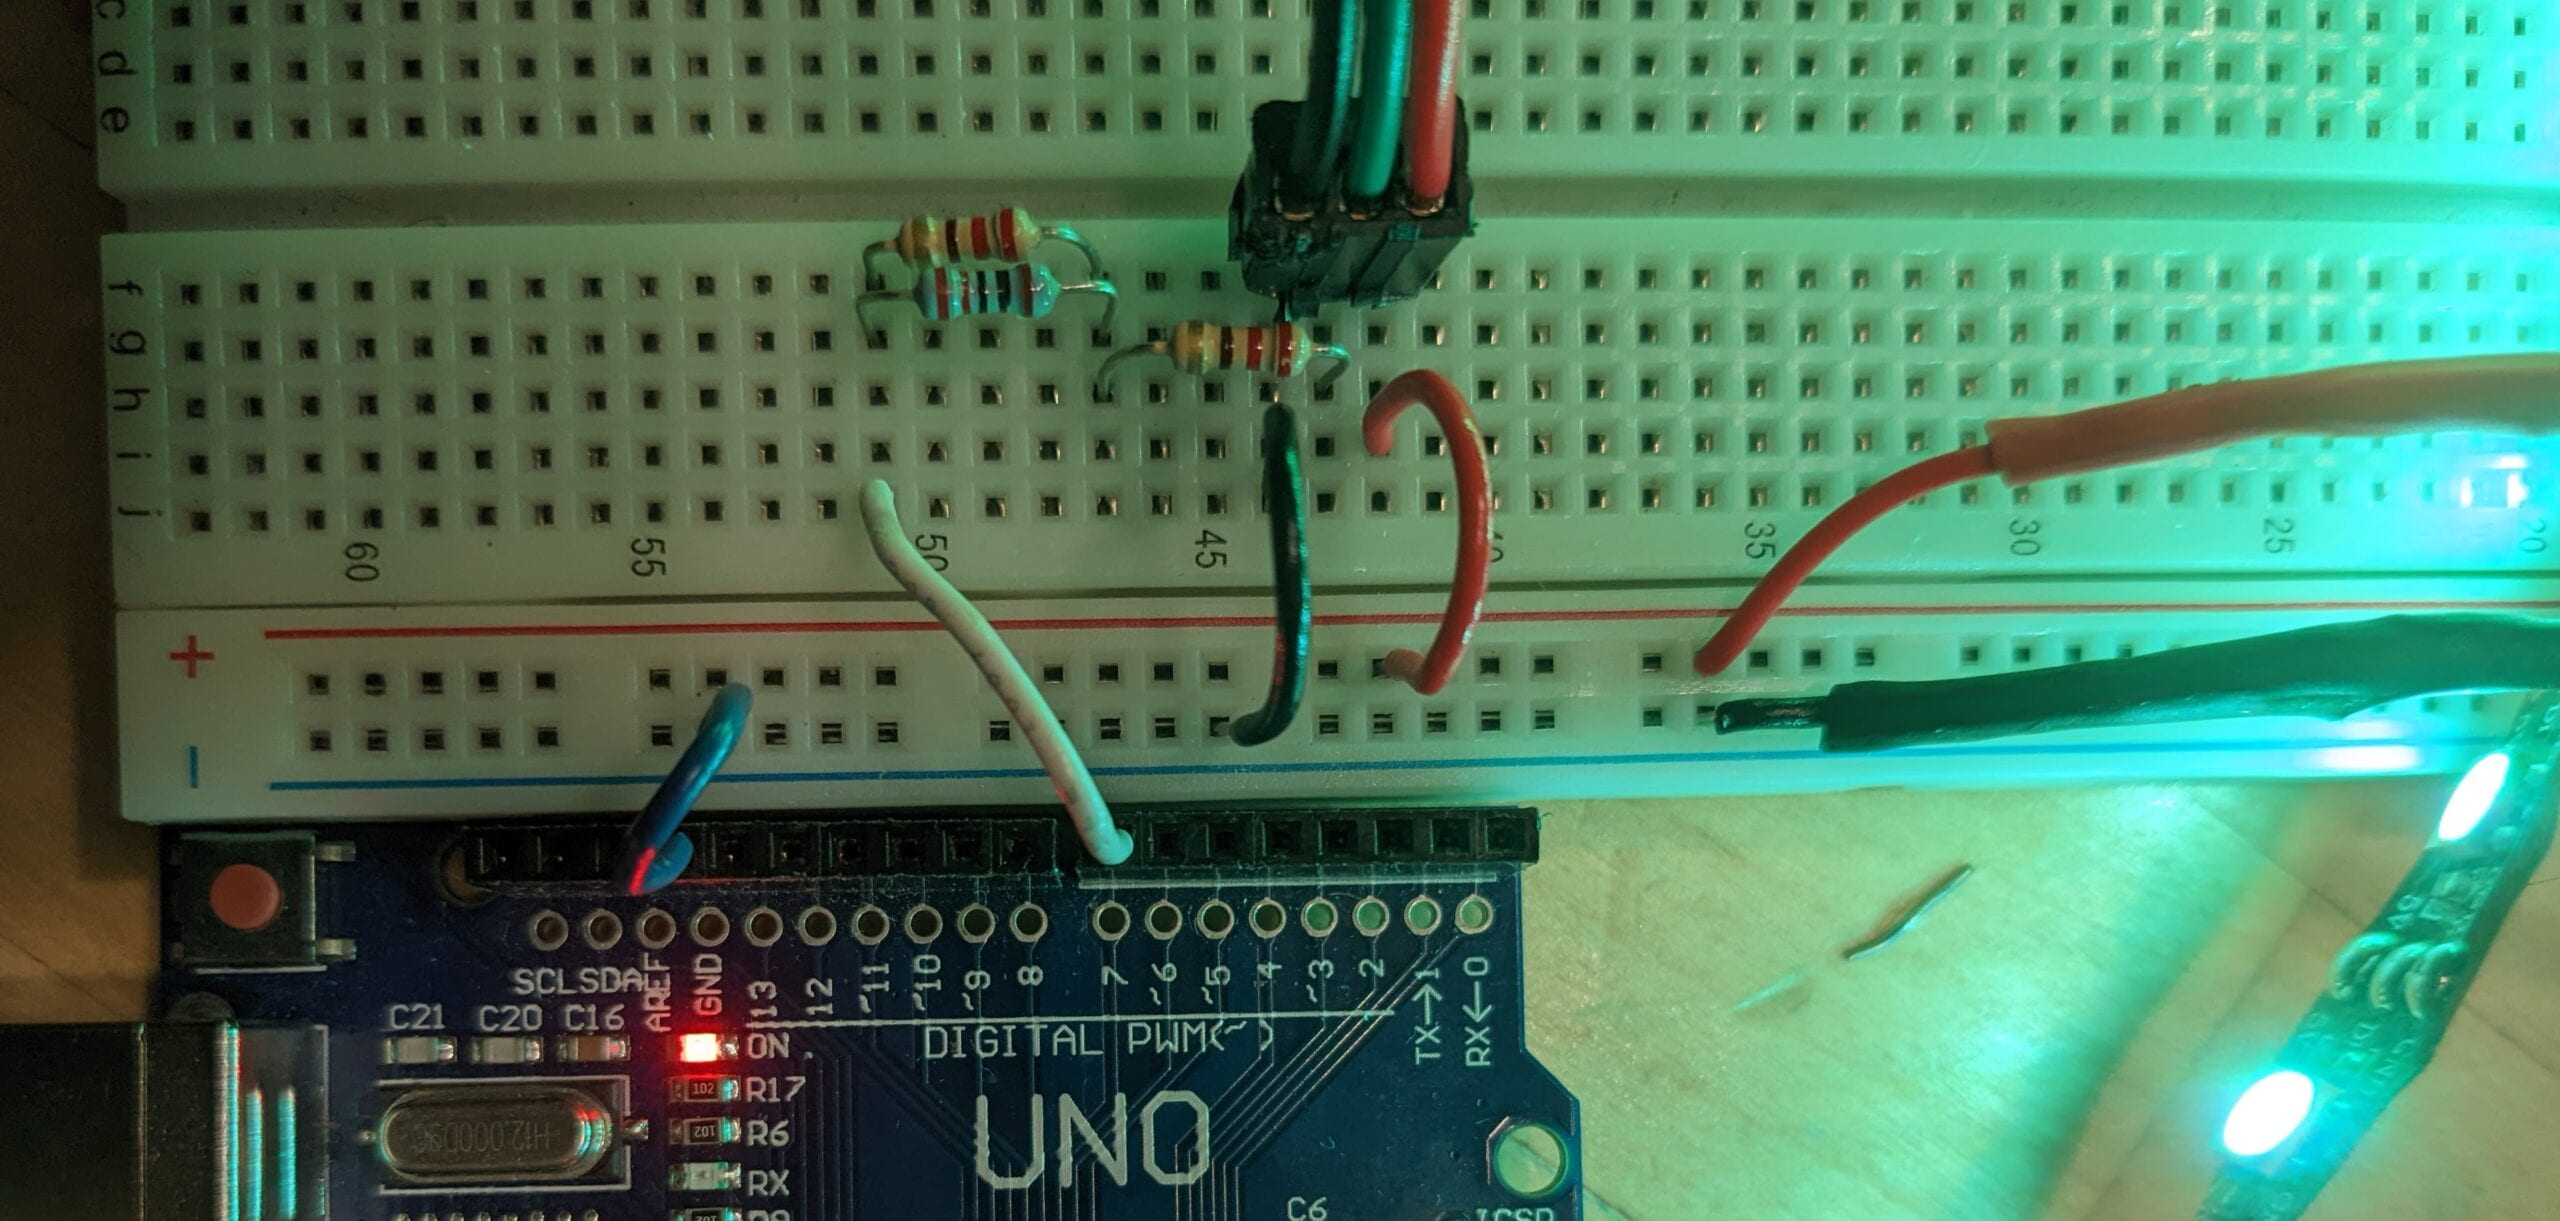
The setup should look something like this:

note that instead of the single 330 ohm resistor I had to use three 220 ohm resistors, two in parallel and one more in series to make the 330 resistance. also notice that the two power wires coming from the right side of the picture are coming from an external power supply, which is why there is a connection from ground in the Arduino to the ground rail in the protoboard.
Power supply:
LED strips require about 90 miliAmps per LED, so 10 LEDs are 0.9Amps, 100 9Amps and so on. The strip works with a 5V supply, so you need to make sure you are providing enough power for the amount of LEDs you are using.
The code:
For this software we will require an external software library. To install it go to the menu “Tools/Manage Libraries”, search for “FastLED”, and click install.
You can download the Arduino code from this folder.
The first example “LED-Strip_1” will let you set the color for each individual LED. An important thing to know is that color is the resultant from the combination of three basic colors: Red, Green, and Blue (RGB); also, colors are specified in a resolution of 256 (0 through 255). Thus CRGB(255, 0, 0) would result in blue; 0,255,0 is green, 0,0,255 is blue. Combinations of numbers will create color mixes where 255,255,255 is white, 0,0,0 is black, and then the usual combinations.
The second and third examples “LED-Strip_2” and “LED-Strip_3” use for statements to move through the LEDs and set their values.