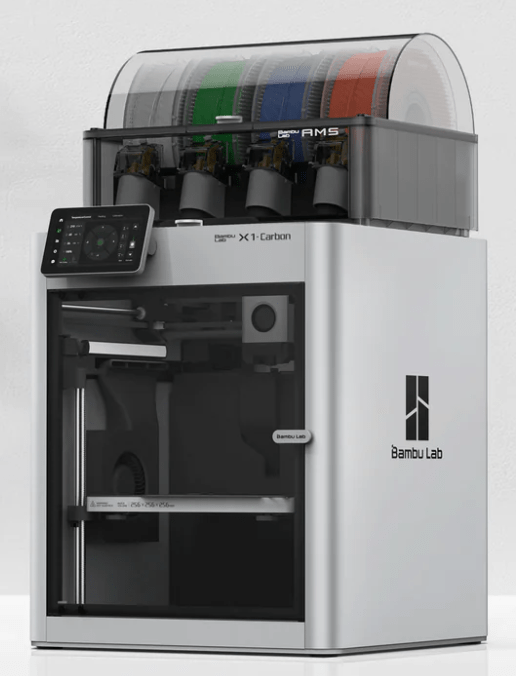
Our fastest 3D Printer is the Bambu X1 Carbon Combo. This printer can print with up to 4 different colors in one model. Print filament colors can be applied to the 3D model in the slicer program, Bambu Studio.
You can either download this program and set it up for our printer or use the computer workstation in the art studio.
If you are downloading Bambu Studio for yourself, you may want to reference the guide below to set up the slicer correctly.
In the slicer, you can choose different settings like print resolution, infill, support, scale, rotation, and if you want to make multiple copies of your print. To transfer the file to the printer you will need to use one of our microSD cards and an card reader to attach to your computer.
Step by Step Instructions
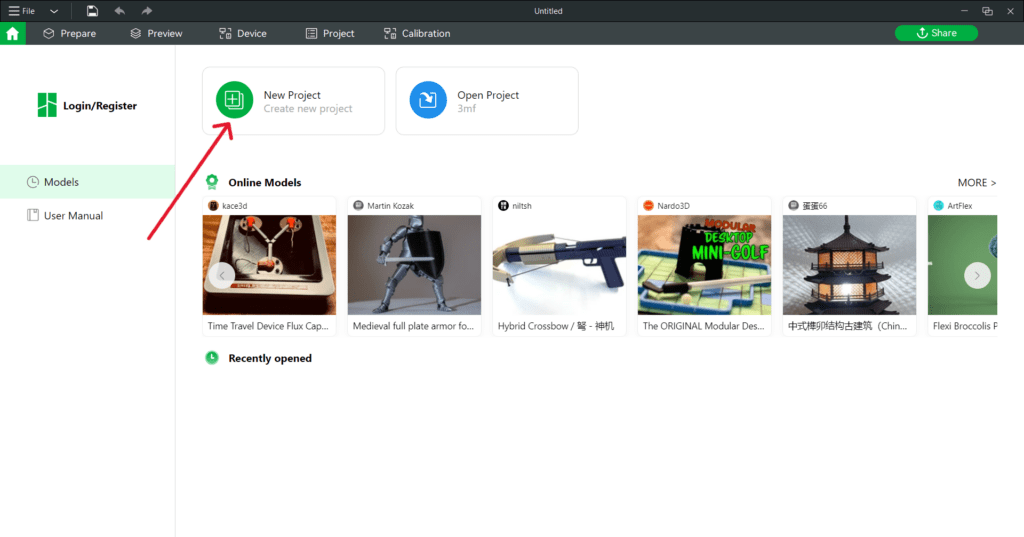
| Open Bambu Studio and select “New Project” |
 |
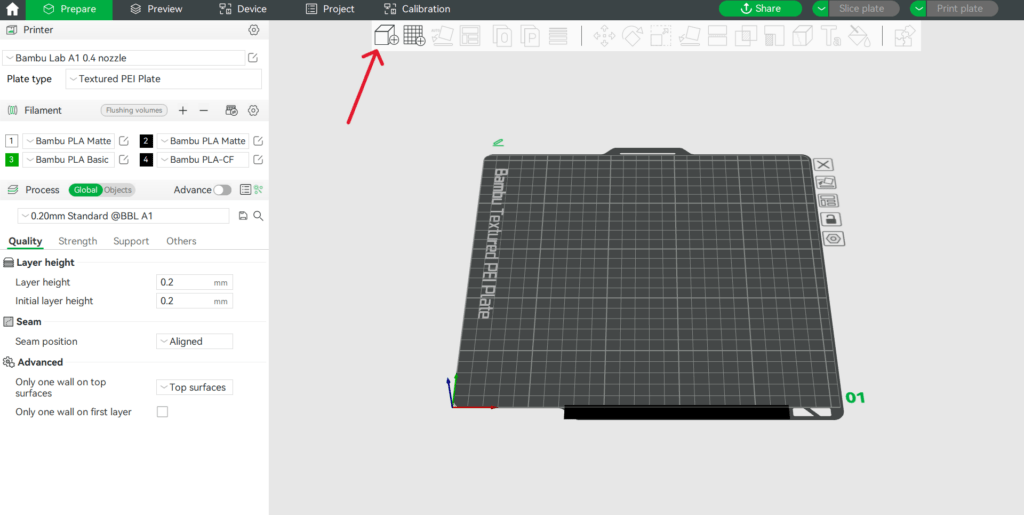
| You can either drag and drop your file into Bambu Studio or click the add cube. |
 |
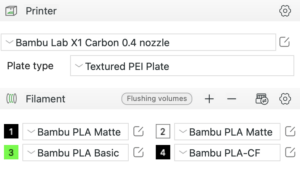
| If you are setting up your file on your own computer, make sure it is set up for our printer with the correct filament types in the correct filament holder places. This is the current set up as of 2/13/24. |
 |
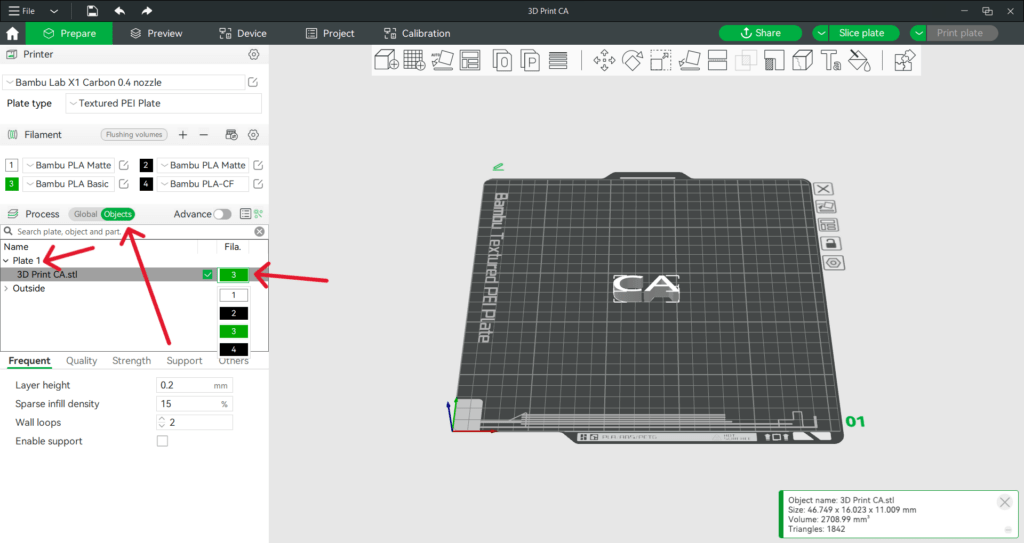
| After inserting your 3D model, select which filament you would like to use. If you want the entire model to be one color, select the objects button, then under plate 1 select your file and slowly double click on the number of the filament to select the correct spool. |
 |
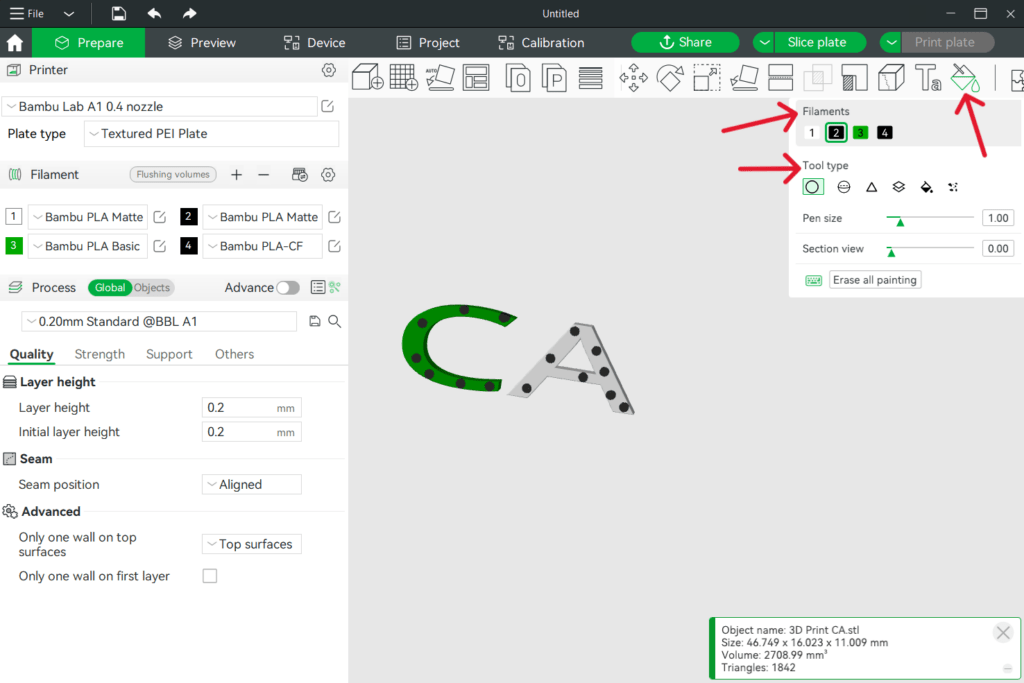
| If you would like to paint different colors onto different parts of your file, select the color painting or paint bucket tool. You can either apply larger areas of color to your whole model with the paint bucket icon or use the brush tools to color your model, as shown below. |
 |
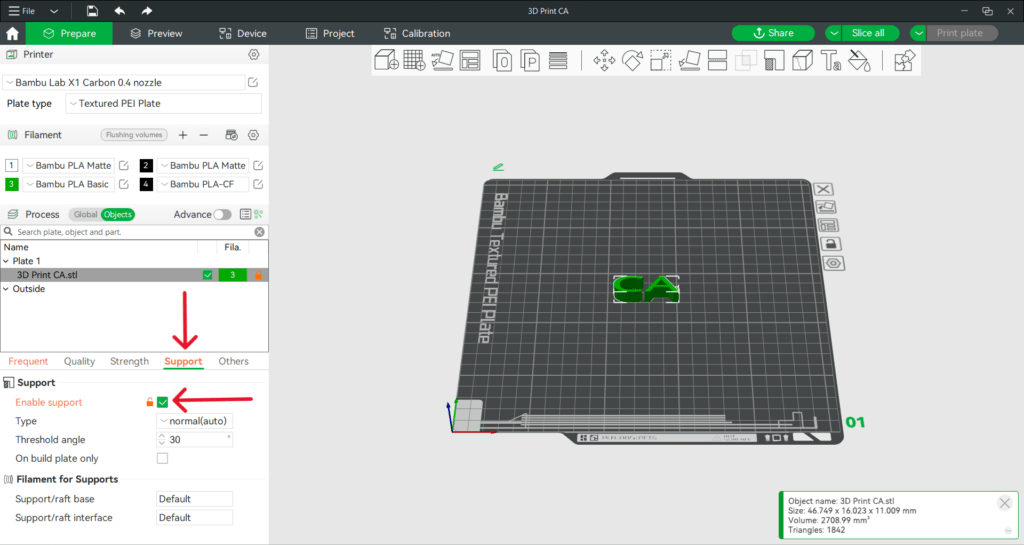
| If your model has overhanging pieces or a base that is not flat, you may need to add support. Under the Support tab, check Enable support |
 |
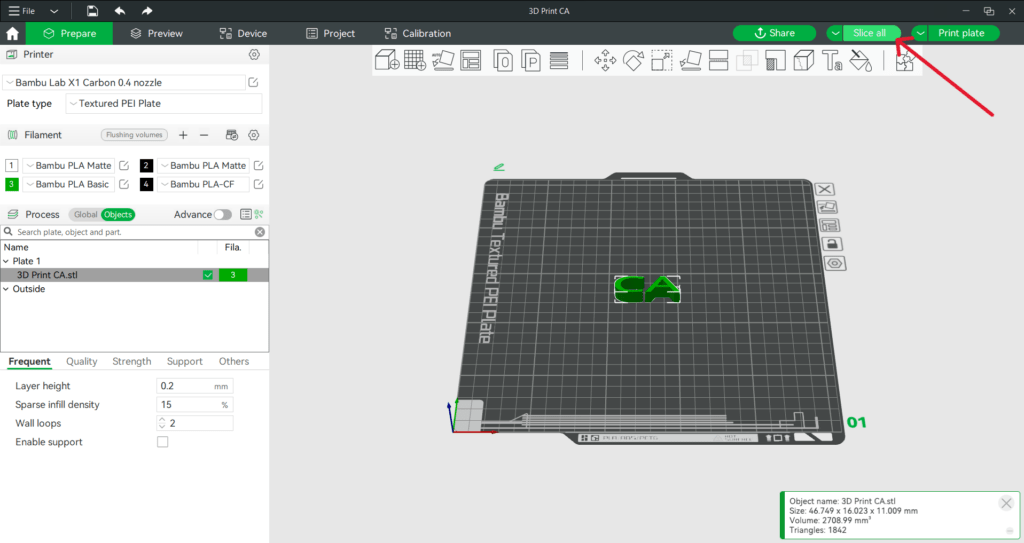
| Once you are happy with your settings. Click the Slice all button. |
 |
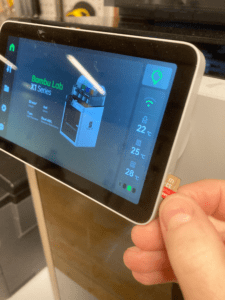
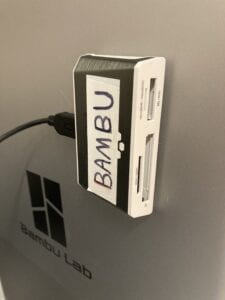
| You will need to save your file to the micro SD card. Remove the card from the slot on the front of the machine by pushing it in and it will pop out. You will need to use a card reader to connect the micro SD card to your computer to save the file. The card reader is stored on a velcro strip on the side of the 3D printer. |
  |
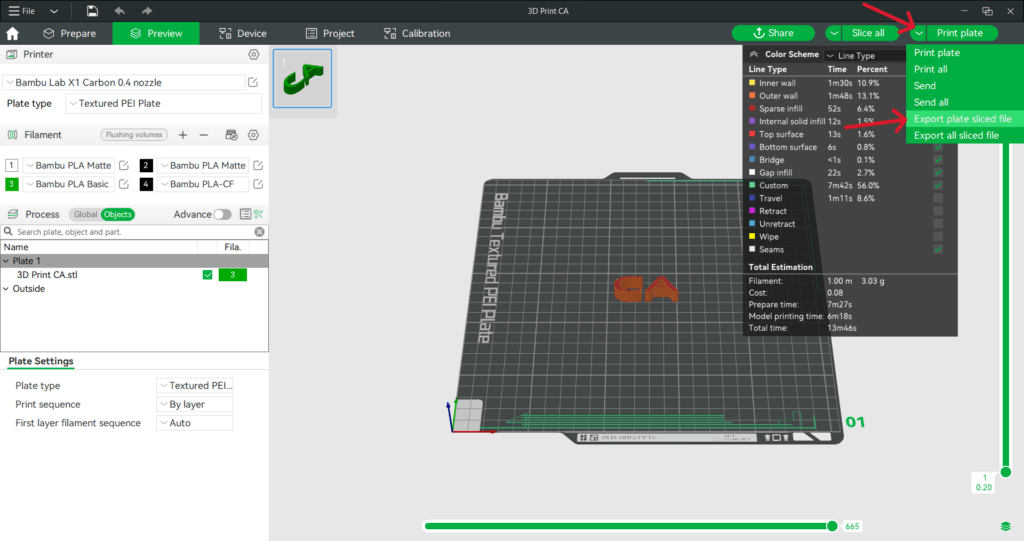
| Click the dropdown menu next to the Print Plate button and select Export plate sliced file. Then make sure you have the microSD card inserted into the card reader plugged into your computer and save the file to the microSD card. |
 |
| Turn on the printer by flipping the switch on the back right of the machine. Insert the microSD card into the 3D printer in the small slot on the side. Push it in until it clicks into place. |
 |
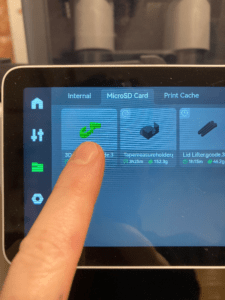
| Select the folder icon and the microSD Card tab at the top to access your files.
The printer will take a couple minutes to calibrate and start printing. Because it’s possible for 3D prints to fail, it’s always a good idea to watch your print for the first layers to make sure that the first layer has adhered to the print bed and everything looks ok. |
 |
| Once the print has finished, you can remove it from the build plate. If it is stuck you can use the plastic scraper or remove the whole build plate for easier access. Make sure to also remove all of the prime test pattern pieces as well. |
 |
| Troubleshooting |
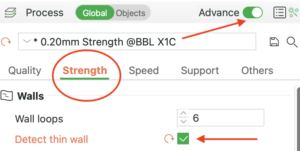
| Sometimes the printer does not detect fine lines that would make thin walls. To turn this setting on manually, toggle on the Advance button and then under the strength tab, check the box for Detect thin wall. Re-slice your file and the problem should be solved. |
 |