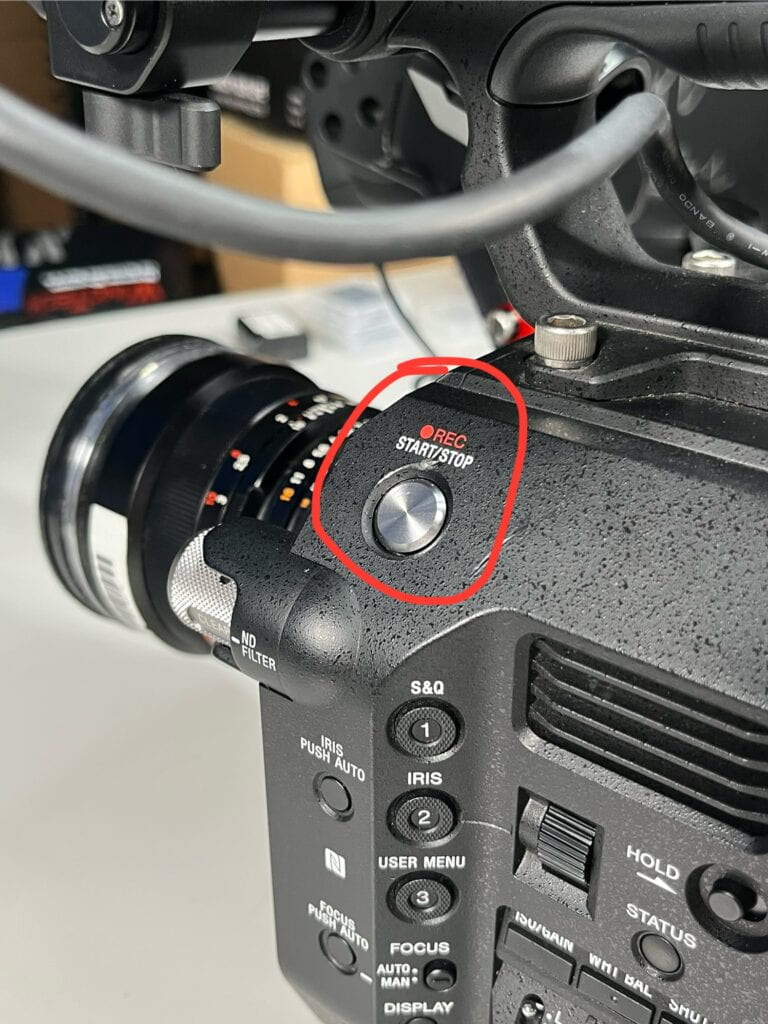
Here’s everything you need to know about getting started with the Sony Fs7. This is the largest and most complicated camera we have in the equipment room. The Fs7 might seem intimidating to photographers accustomed to shooting with DSLRs, but don’t worry—all the functions are the same; the buttons are just located in different places. (there are also extra buttons, but we’re just going to go over the essentials)

Attaching the Control Arm
-
- Screw the arm into the body of the camera in the location pictured below.

Once attached, press the red button inwards to adjust the position of the control arm to an appropriate location.

Attach the cable to the camera body where labeled “remote” (pictured below)


Inserting the Battery
-
- Slide the battery into the back of the camera body, and slide it downwards into position until it locks into place (you’ll hear a *click* sound if you’ve inserted it correctly)

 *CLICK*
Inserting a Memory Card
- Locate the memory card slot situated to the left side of the battery.
- Open the cover by pushing in on the button circled below in red.
- Insert a XQD Memory Card (this camera shoots at such a high image quality that it is incompatible with regular SD cards)

 *CLICK*
Attaching a Lens:
- This process is the same as with any other camera, align the lens’s dot with the camera’s dot.
- Rotate the lens clockwise until it clicks into place.
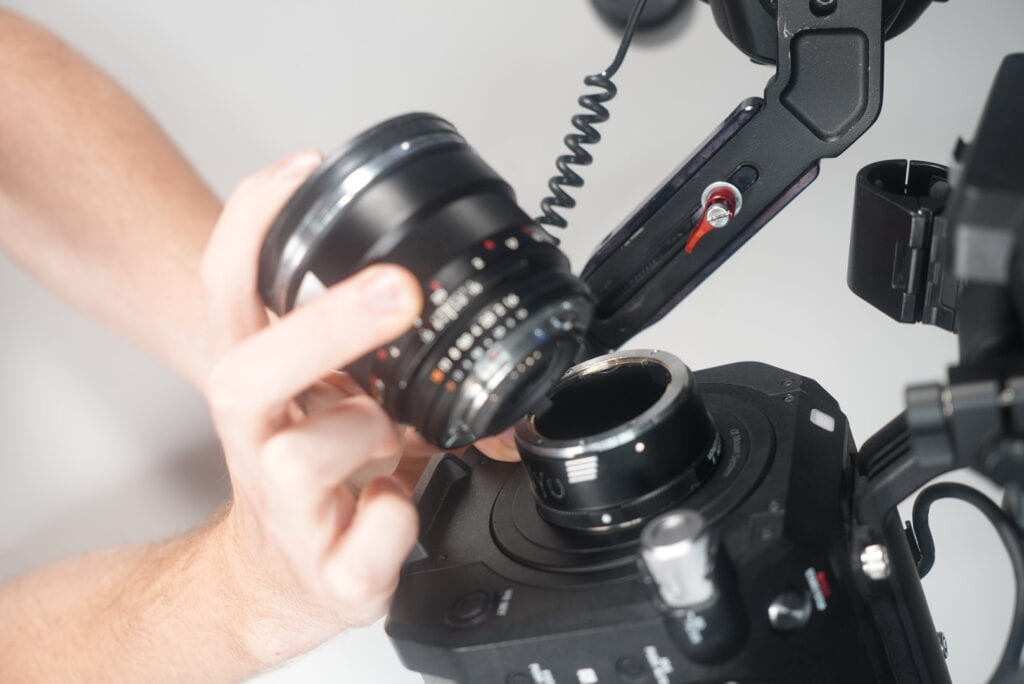
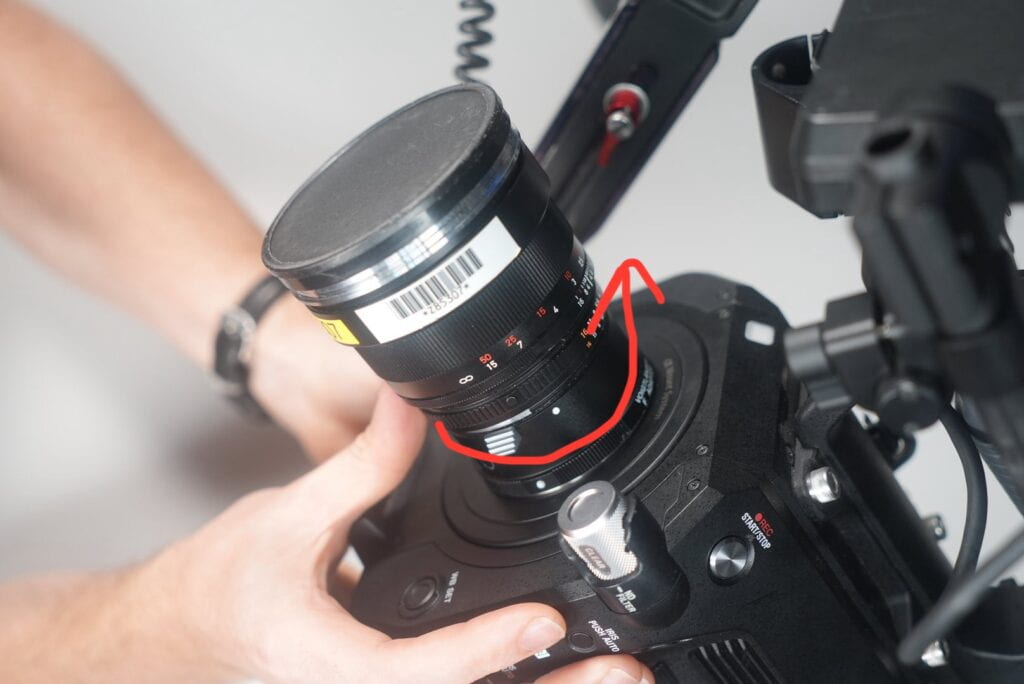 *CLICK*
Worth mentioning is that our Sony Fs7 kits come with a beautiful set of vintage Carl Zeiss Primes. A “prime” lens is a lens with a fixed focal length. This means that instead of using the optical zoom feature, you’ll have to switch your lens, but the image quality is well worth the hassle.
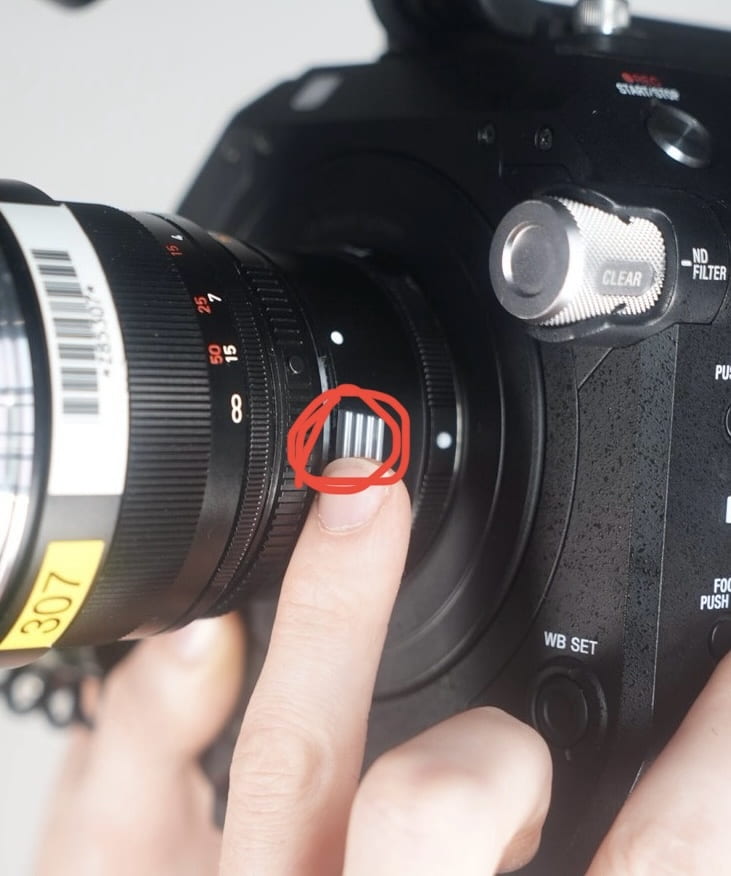
To remove the lens, depress the tab pictured above, and turn the lens counter-clockwise. *make sure that you are holding onto it tightly, these lenses are extremely valuable.*
Powering On:
-
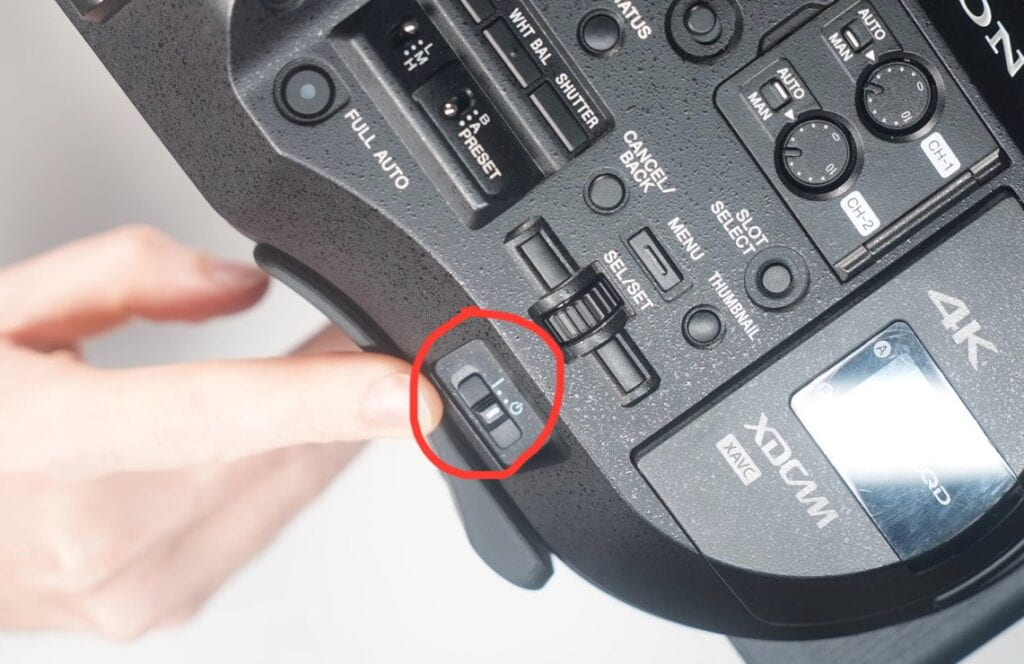
- Move the switch to the “on” position located on the left-hand side of the camera beneath the control panel. (pictured below)
Adjust the Monitor to an Appropriate Position:
-
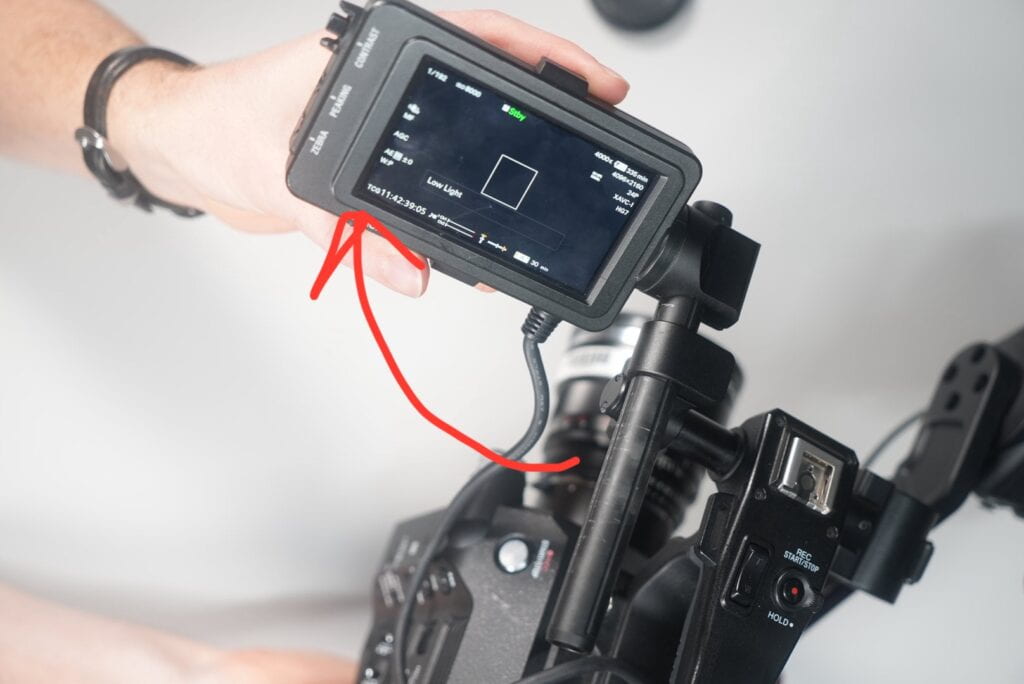
- Gently adjust the camera’s monitor to face in your direction. Never use excess force to make the apparatus move, they are delicate and are prone to damage.
Choosing a Shooting Mode:
-
- This camera is only used to record video, so there are no modes to choose from — instead lets go over the two most important functions in the Menu.
Opening the Menu:
-
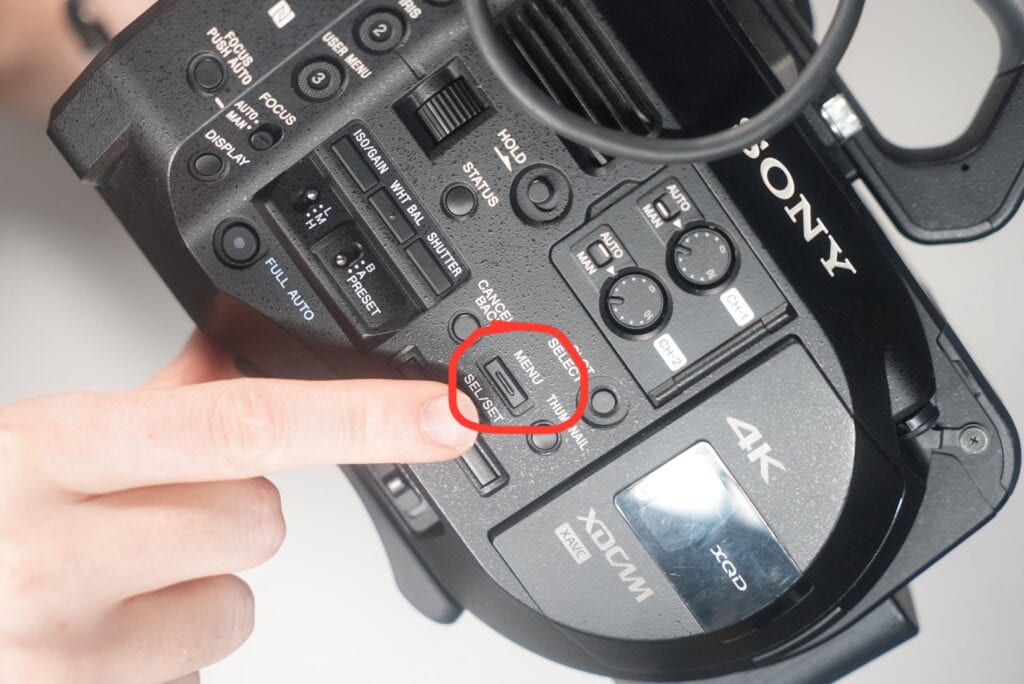
- Press the Menu button once to open the menu. The button is located on the left-hand control panel of the camera body. (Exact location pictured below)
Choose Your File Format, and Video Resolution:
- Use the control wheel to navigate to the USER menu.
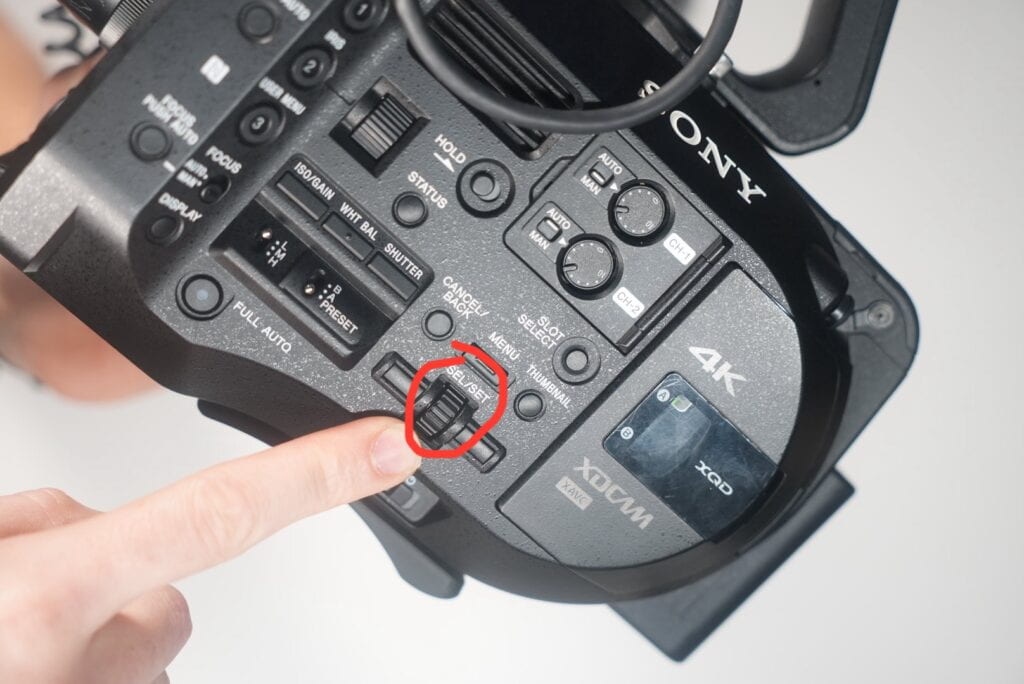
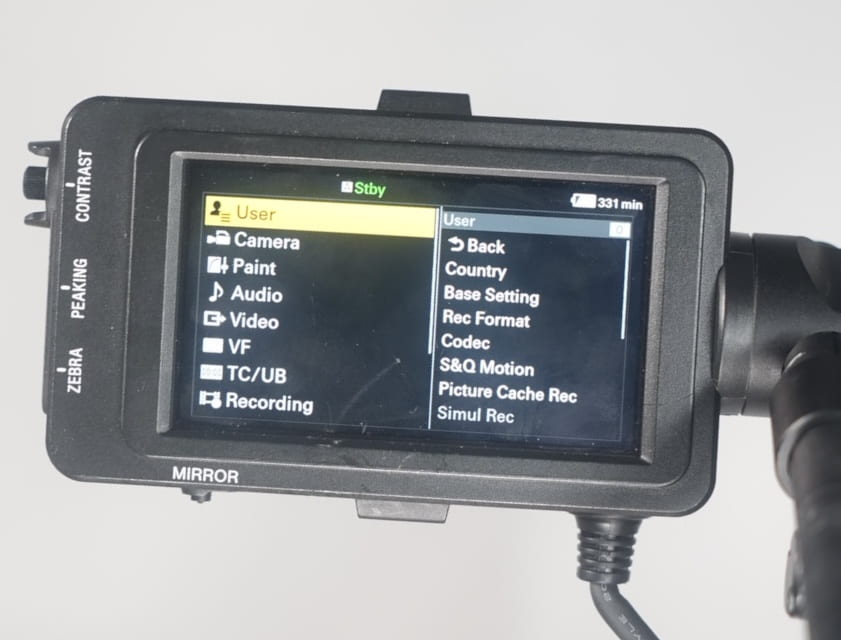
- Press inwards one time on the scroll wheel to select the User menu, then scroll to Rec Format
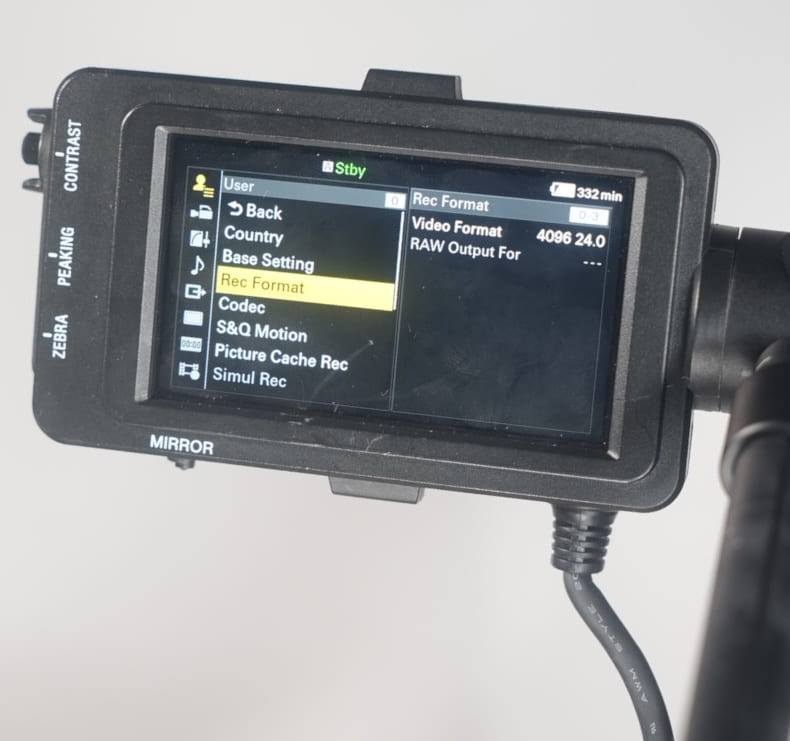
- Press inwards once more to select “REC FORMAT“
- On this menu (pictured below) choose a resolution and format appropriate for your project.
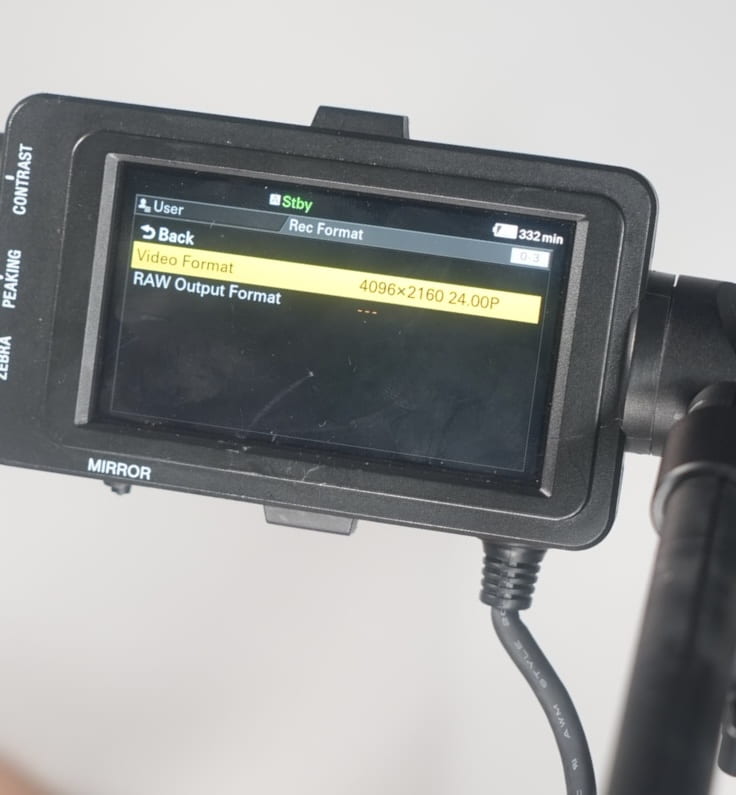
This is what the menu will look like if you are in the right place.
Navigate to Format:
- Once you choose a resolution to record in, it’s time to format your SD card.
- Use the control wheel to navigate to the Media (XQD Card Icon) menu.
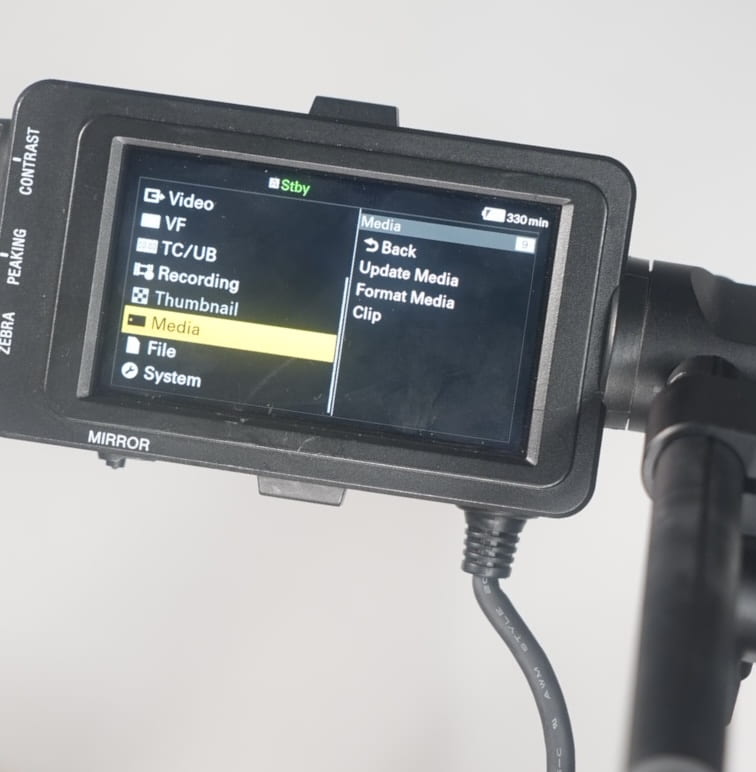
- Press inwards one time on the scroll wheel to select the Media menu.
- Scroll down to, and select Format Media.
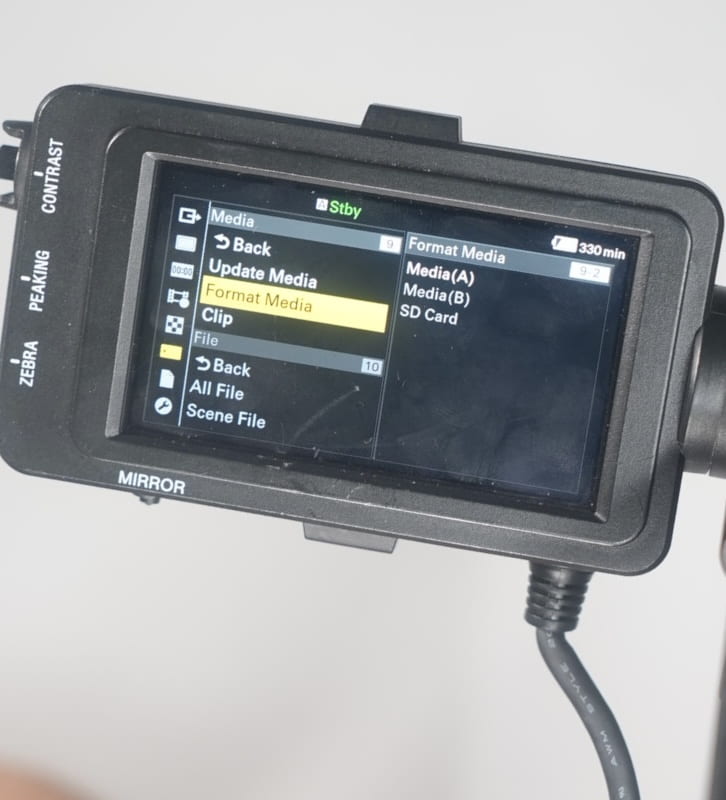
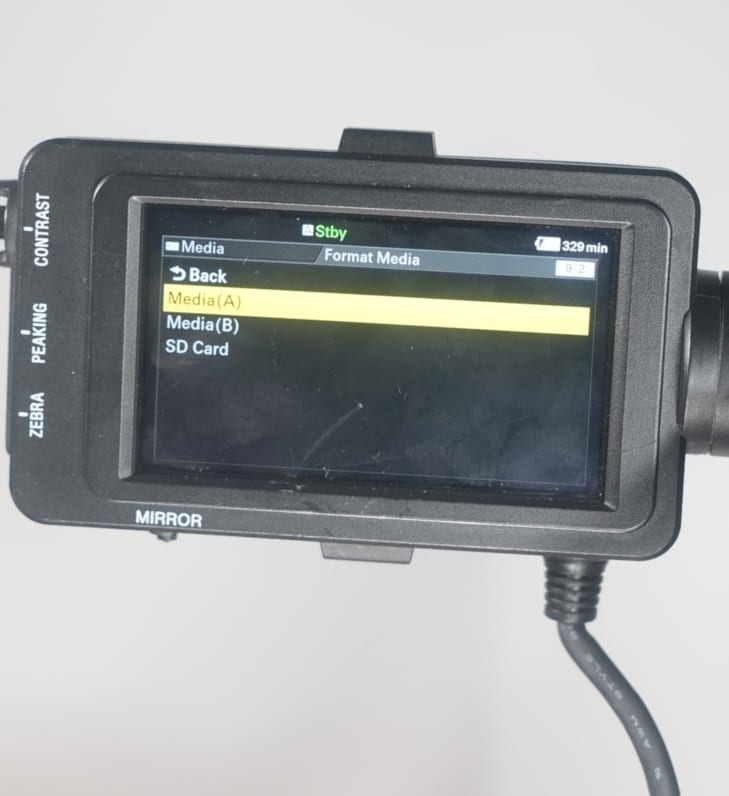
- Select the appropriate XQD Card in the Menu.
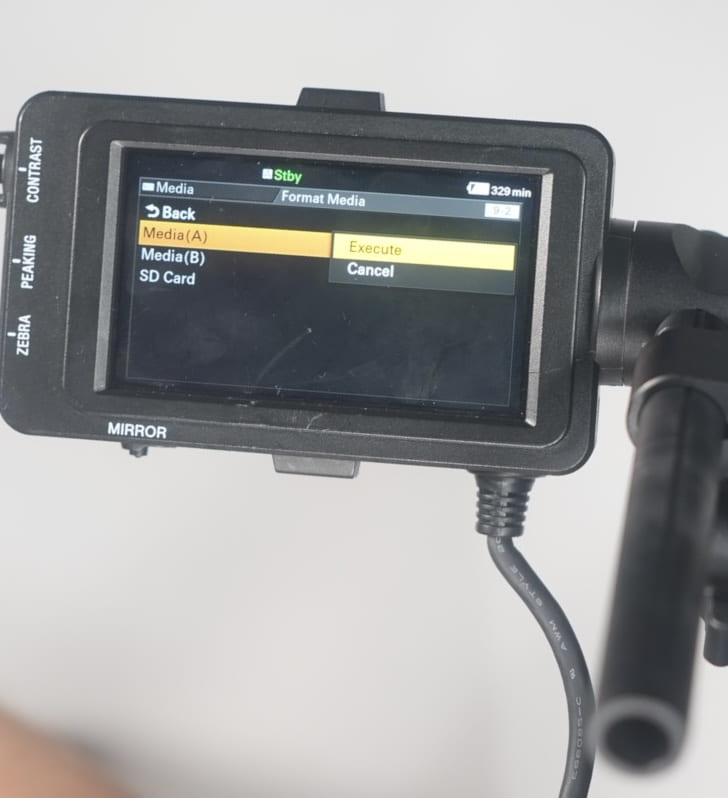
- Hit “execute.” (this is erase all existing files on the XQD card, so make sure it’s backed up.)
now that’s out the way, lets talk about how to operate the camera settings
Choosing Your Focus Mode:
-
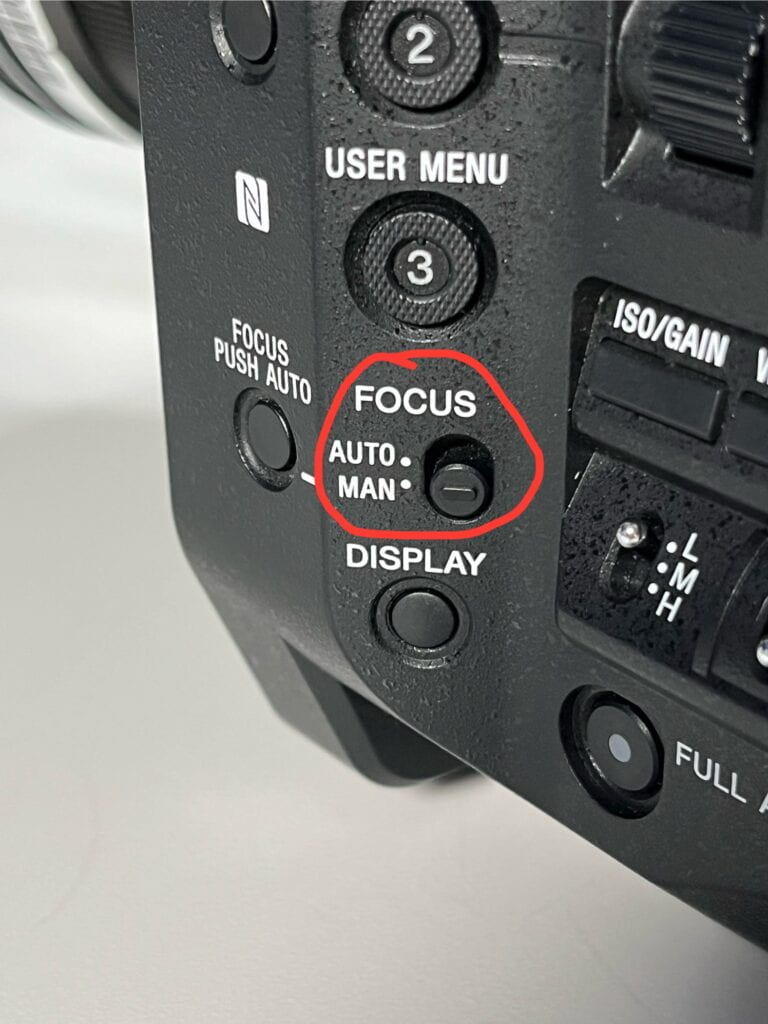
- You’ll learn that this camera has a switch for everything, the toggle between manual and auto-focus is on the left-hand control panel (pictured below)
Adjusting Your Focus:
-
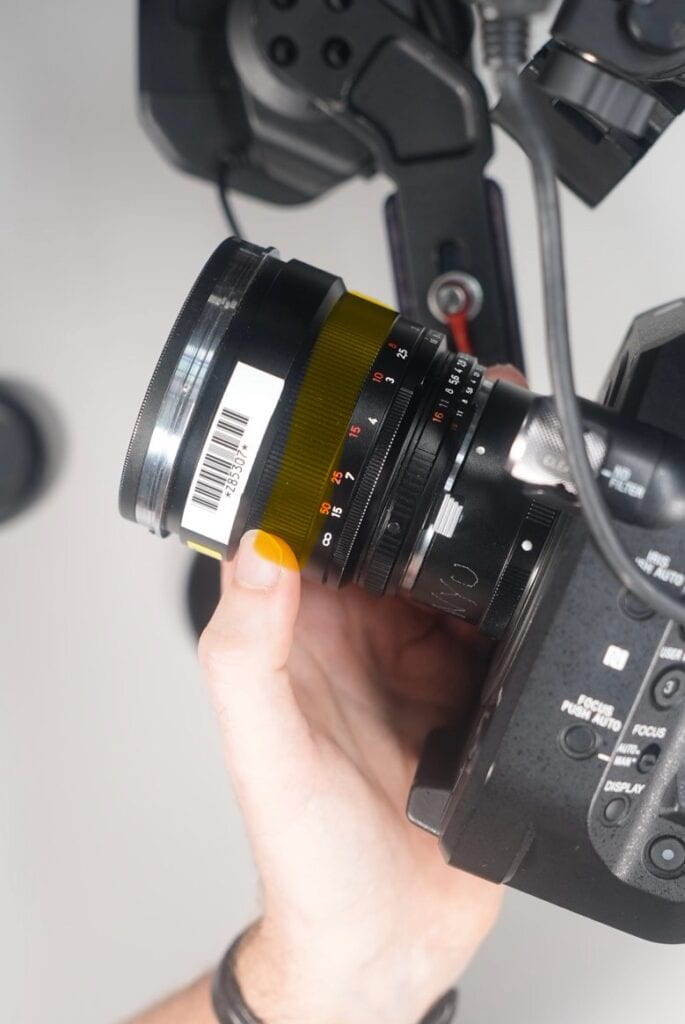
- When in manual focus mode, use the outermost ring on the lens to adjust the focus of your image.
Adjusting the Shutter Speed:
-
- To change the shutter speed, first press the “shutter” button located on the left-hand side of the camera body. (pictured below, highlighted in yellow.)
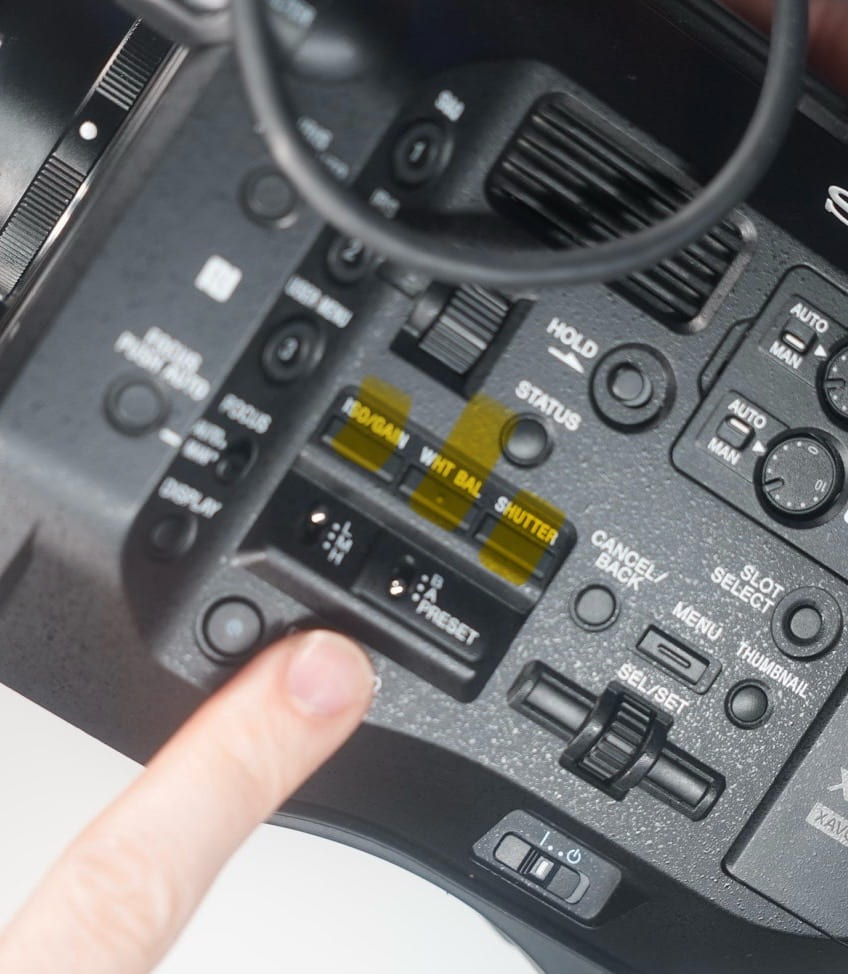
then, use the scroll wheel to set your desired shutter speed. You’ll notice that the shutter speed is in degrees. The wider the angle, the brighter the image.

Adjusting the Aperture/Iris:
-
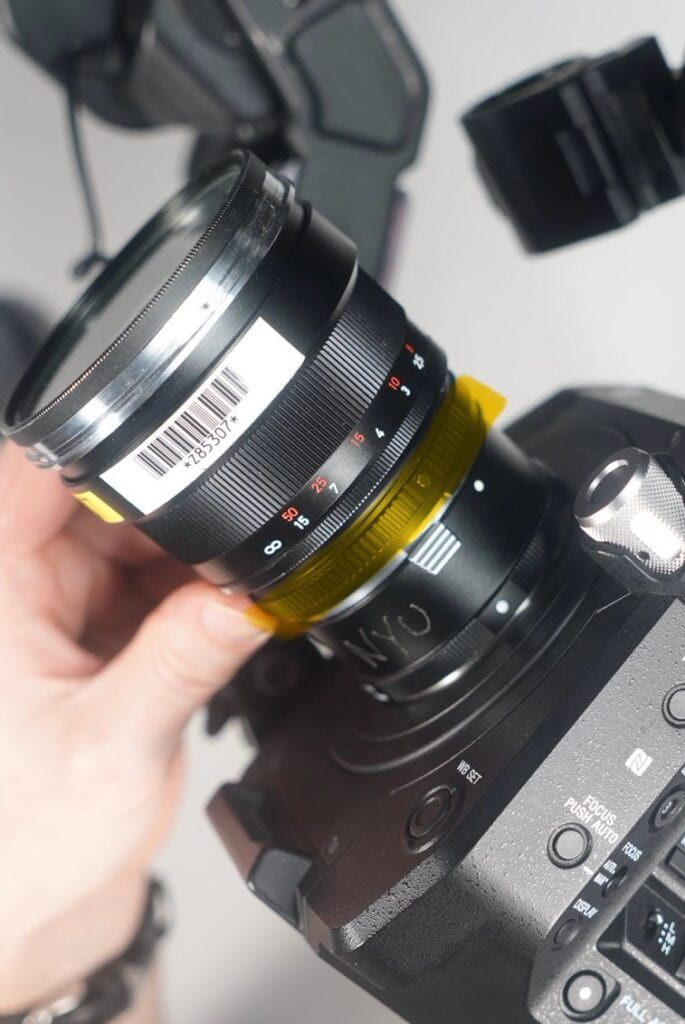
- When using a Carl Zeiss Prime, use the ring closer to the body of the camera on the lens to adjust your Aperture/Iris (highlighted in yellow below.)
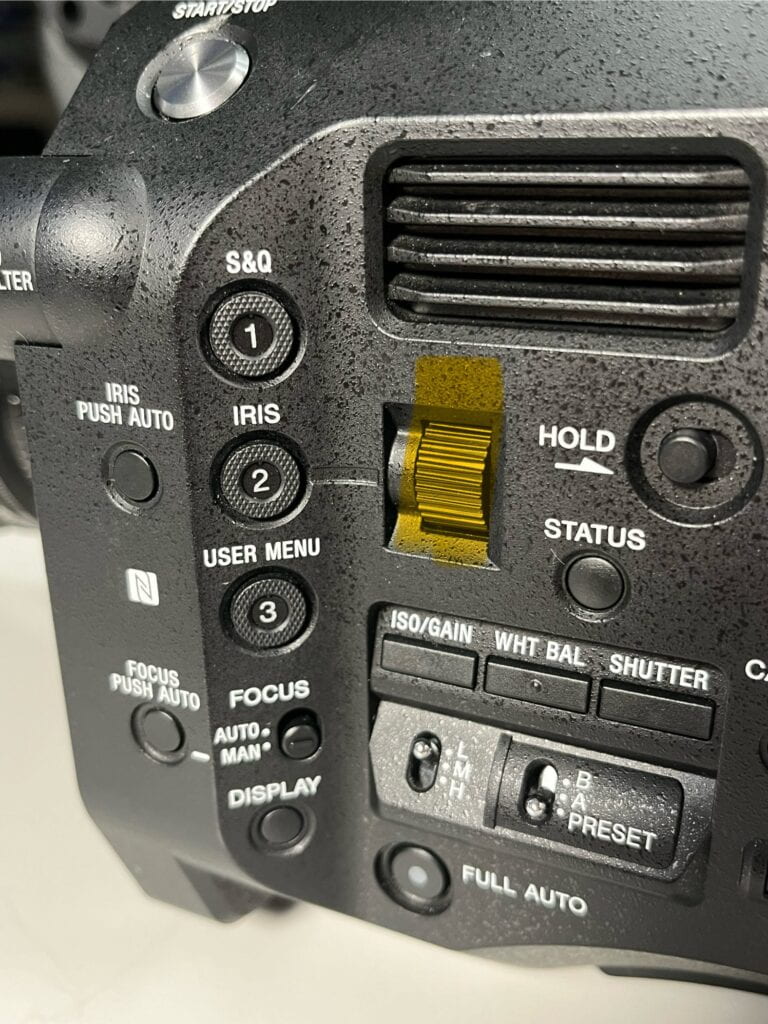
When using a newer, electronic lens, use the scroll wheel closer to the front of the camera body (pictured below) to adjust the Aperture/Iris.
Adjusting the ISO:
-
- In the same section of the control panel as the Shutter, select the “ISO/GAIN” function to adjust the amount of digital brightness applied to your image. The switch beneath it will toggle between user-preset amounts which can be adjusted in the Menu.
- *Warning* ISO is useful in low-light scenarios, but will make your image grainy if too much is applied.

Using the built-in Neutral Density Filter:
-
- Conveniently, the Sony Fs5 has a built in array of ND filters, which make it very convenient to shoot in bright, outdoor scenarios. They should almost never be used inside, in a controlled studio environment.
- Rotate the knob pictured below to adjust your ND filter setting.
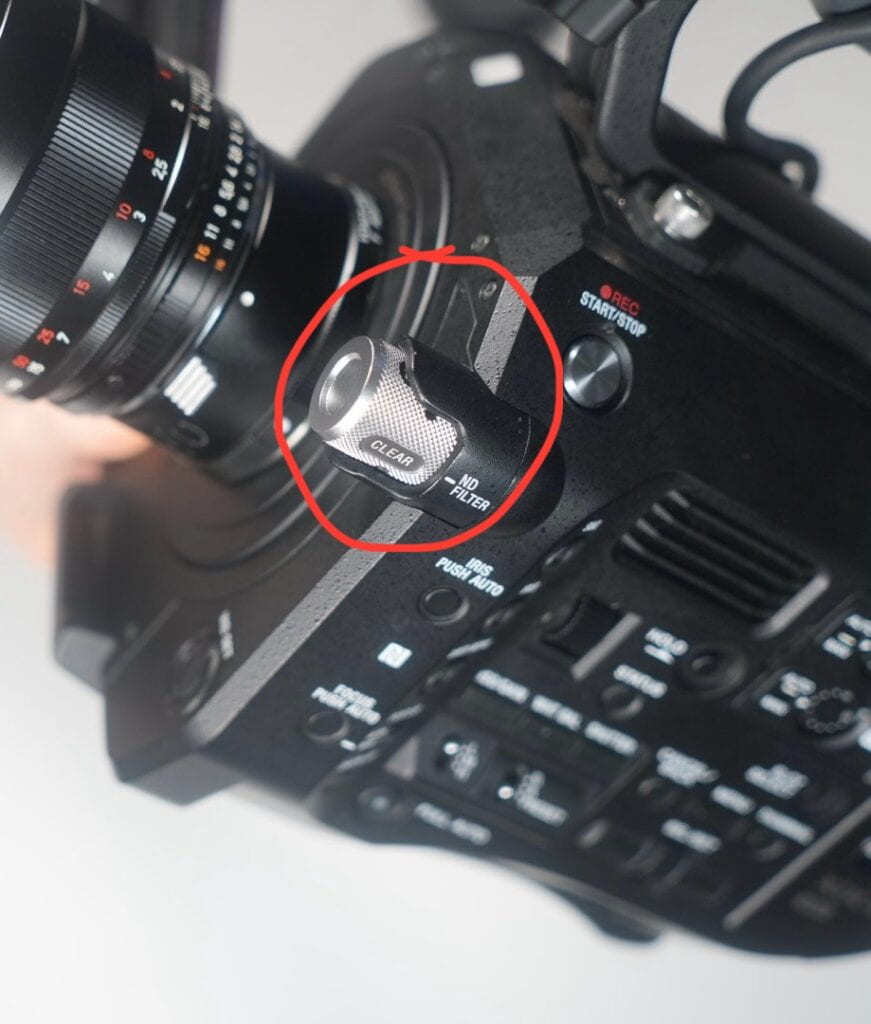
If you ever are thinking “wow! my exposure is just so dark no matter what I do!” The ND filter is probably on, it’s often overlooked.
Recording Audio:
-
- The Sony Fs7 has two XLR inputs for recording two distinct sources of audio directly to your camera body (this means you can record two LAV mics in separate channels (left and right) without an external recorder, or a LAV and a Boom, at the same time.)
- The inputs are located below.
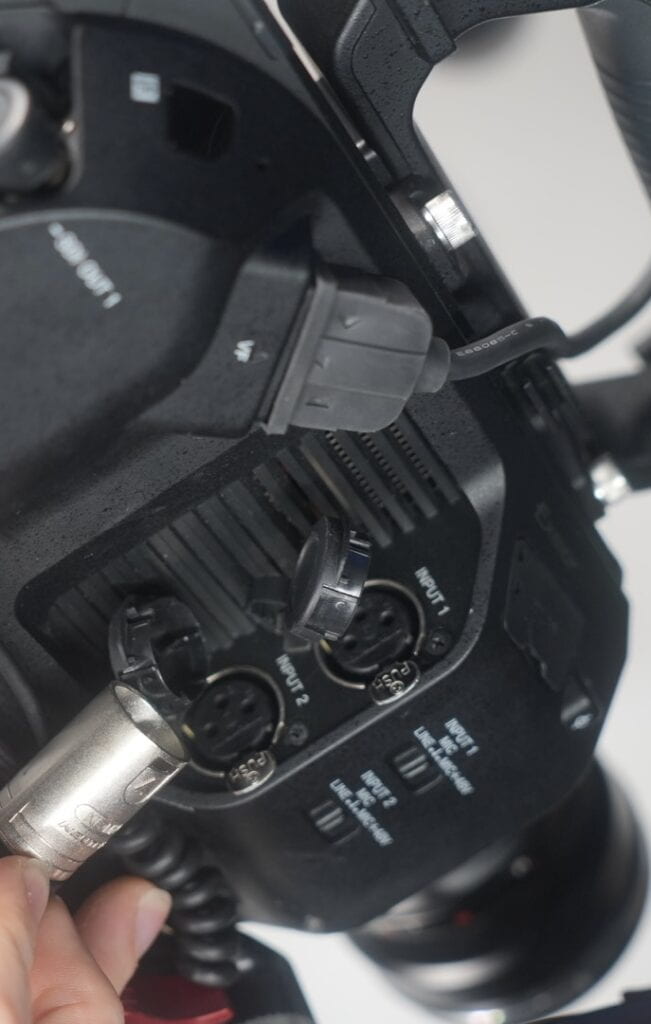
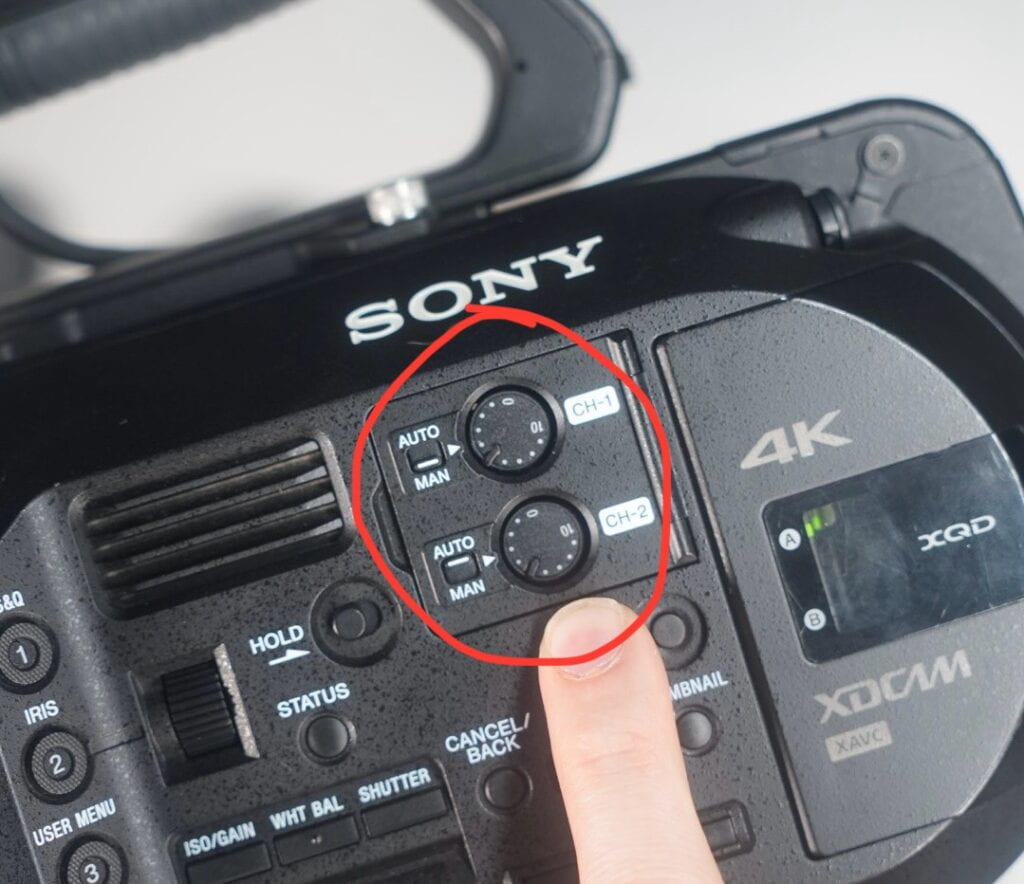
The levels of each input are controlled independently on the left-hand side of the camera by turning these wheels (pictured below)
Recording a Video:
-
- Frame your shot using the monitor or electronic viewfinder.
- Press the “record” button situated on the left-hand side of the camera to start recording. Press it again to stop.
