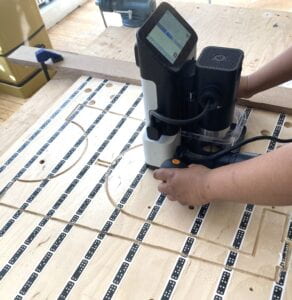
| Shaper Origin is a hybrid CNC/hand-held router that uses vector files to create cutting paths on wood. SVG files are preferred.
A CNC router automates the cutting process by carving material into a specified shape by following coded instructions without a manual operator directly controlling the machining operation. The Shaper Origin is different in that you are manually following on screen prompts to guide the tool with color-coded shading and arrows to follow vector paths and accomplish the same result.
Below is a tutorial including information about file preparation, types of cuts the Shaper can make, and how to set up your workspace. |
| Machine Tutorial
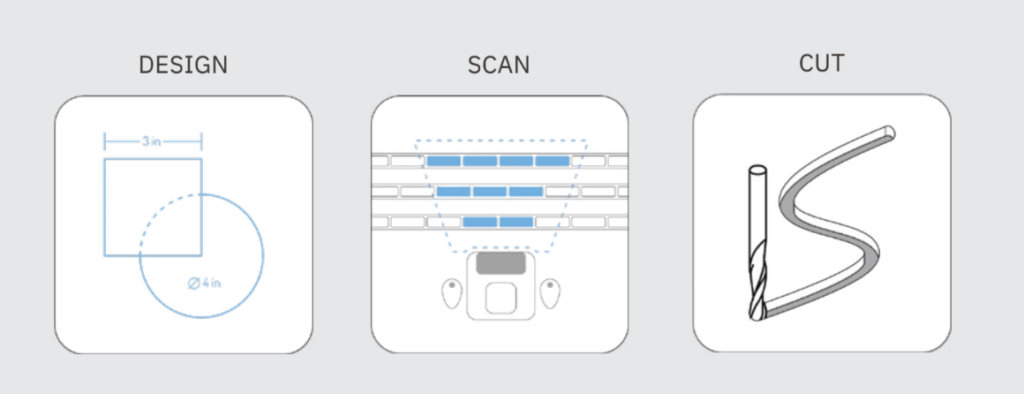
For more complicated designs, you must create a correctly formatted vector file on the computer. For simple shapes, you may be able to use the design features built into the machine. This is the process: |
 |
| Cut Types
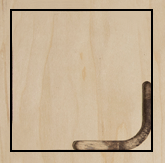
The Shaper origin uses router bits to cut into material. We generally have a ¼” up spiral bit installed. For finer cuts or engraving you could change to an ⅛” bit or the engraving bit which has a V shaped tip. The bit size is it’s diameter. This will determine the amount of material that will be removed on each cutting pass, meaning a ¼” bit will cut with a ¼” kerf. Kerf is the width of the cut that is removed by the cutting tool. It’s important to note that because the bits are round, they cannot cut into inside corners, but will instead round them. Below is an example of what would happen if you tried to cut inside a square corner. |
 |
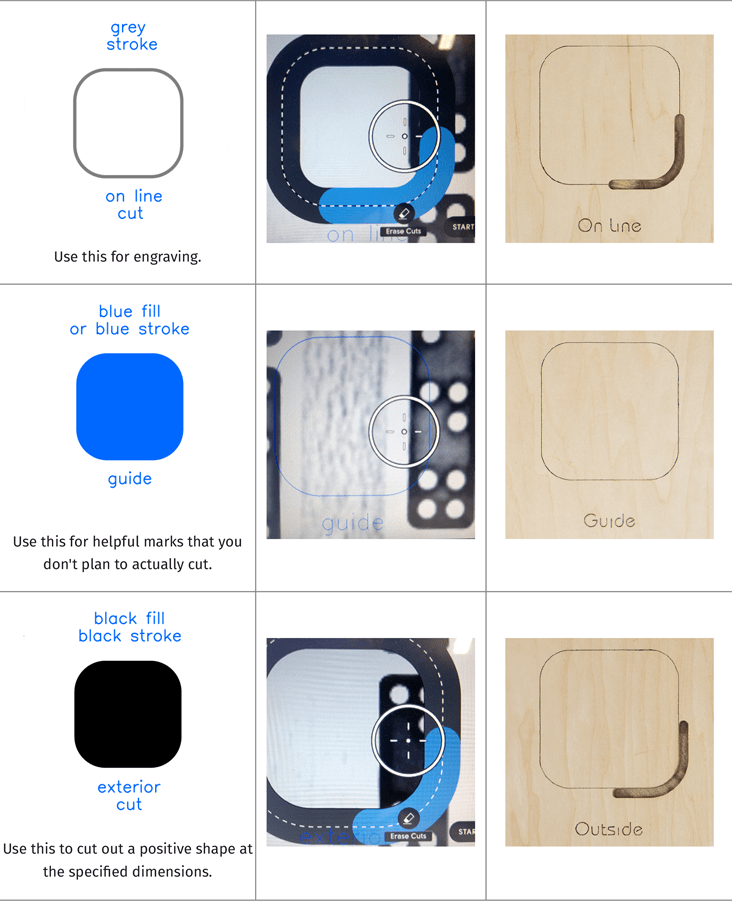
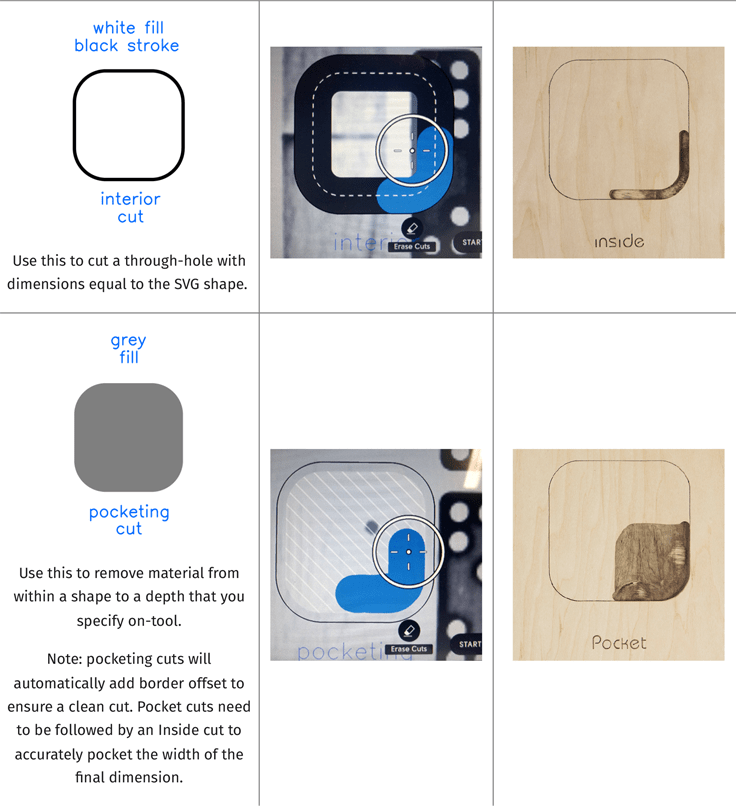
| Below are examples of the different types of cuts that the Shaper can produce and how to color code your file. |
 |
 |
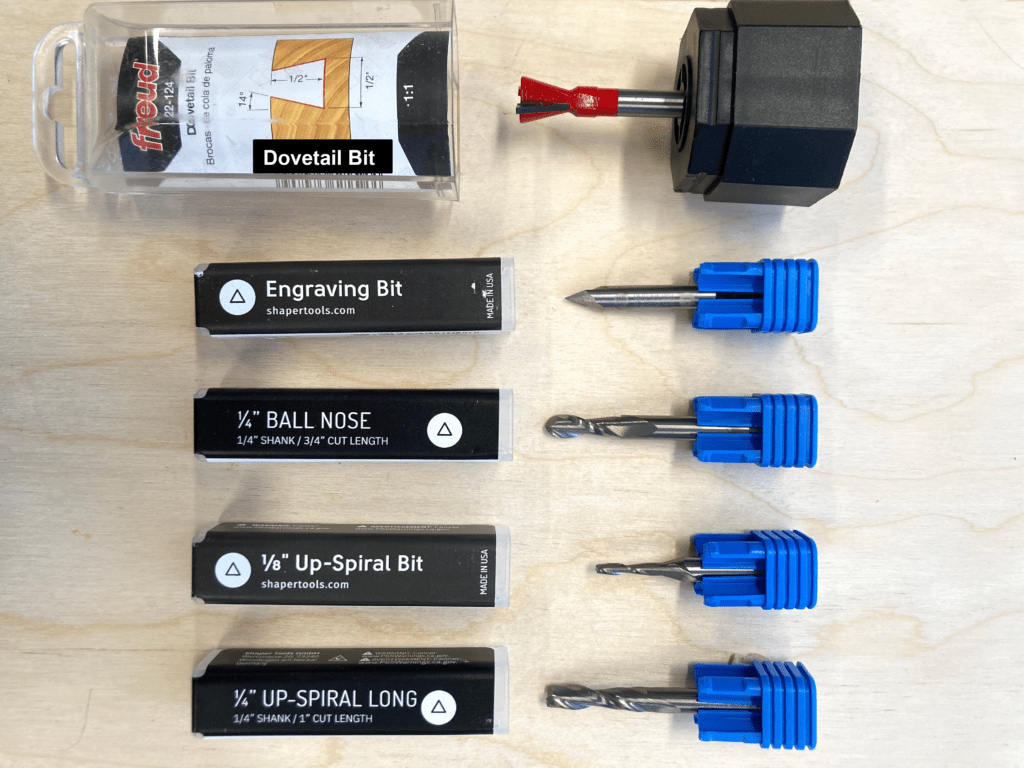
| Router Bits The shaper can use different bits to engrave or cut. The engraving bit and Ball Nose bit are for engraving only. The dovetail bit is used for a specific type of joinery, for more information on how to use this bit with the shaper and workstation, check out this video. Lastly, we have 2 types of bits that can either cut or engrave: 1/8″ Up-Spiral and 1/4″ Up-Spiral Bit. |
 |
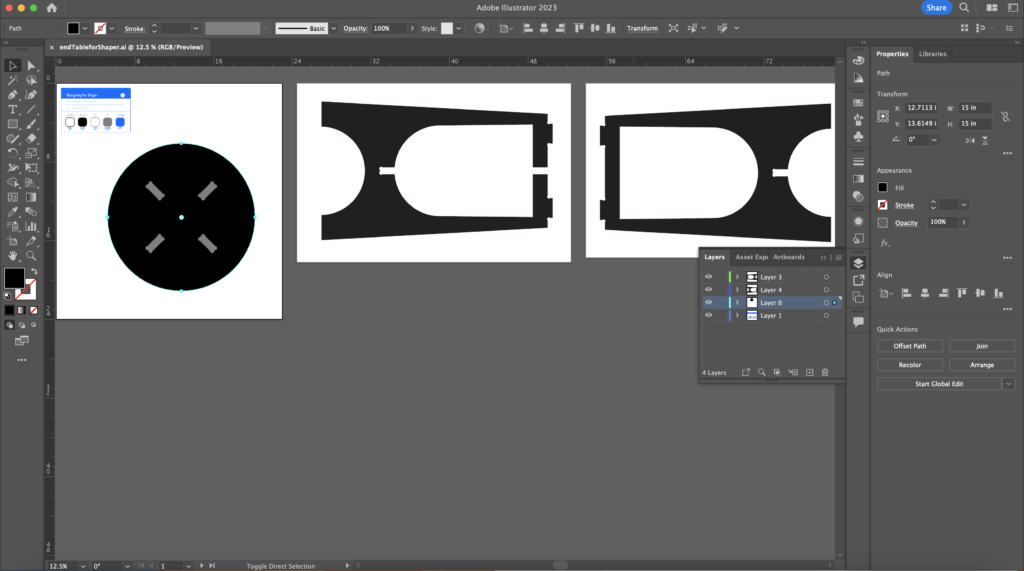
| File Preparation You can create a vector file in Adobe Illustrator in RGB color mode that uses color coding to identify different cuts that can be made with the Shaper. Set up your artboard to be larger than the piece you are looking to cut, or the same size as the piece of wood you will be cutting from. Make sure none of your shapes are touching the edge of the artboard. In this tutorial, we are going to cut out this end table, which is made from 3 pieces of wood slotted together. The top fits into pocket cuts that are sized to the piece of wood. |
 |
| Here is a link to the vector file of the color guide that you can use to open to create your document.
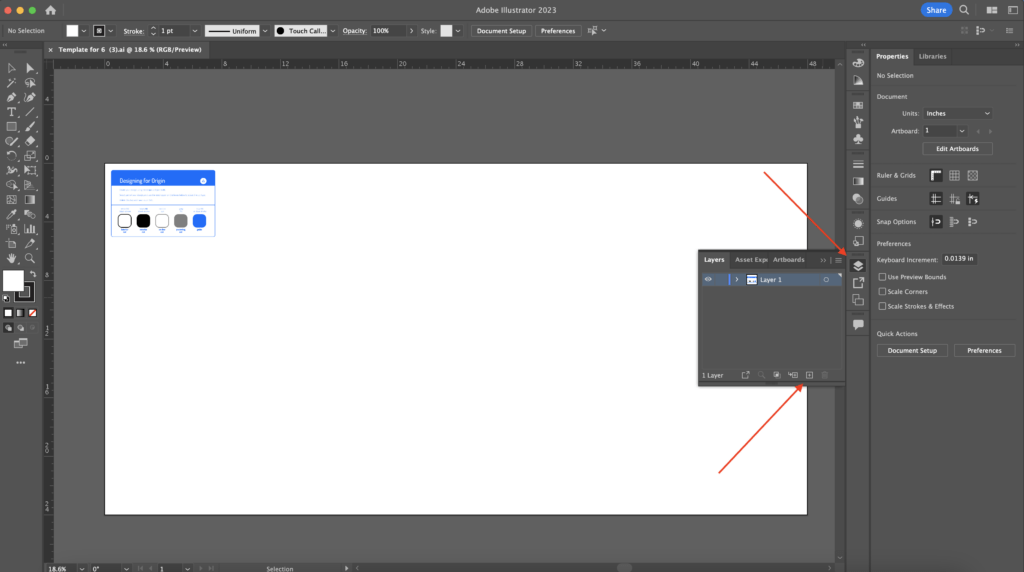
Place the template on a separate layer that you can delete when you are ready to save the file. Do this by creating a new layer as shown below and creating your design on this new layer. |
 |
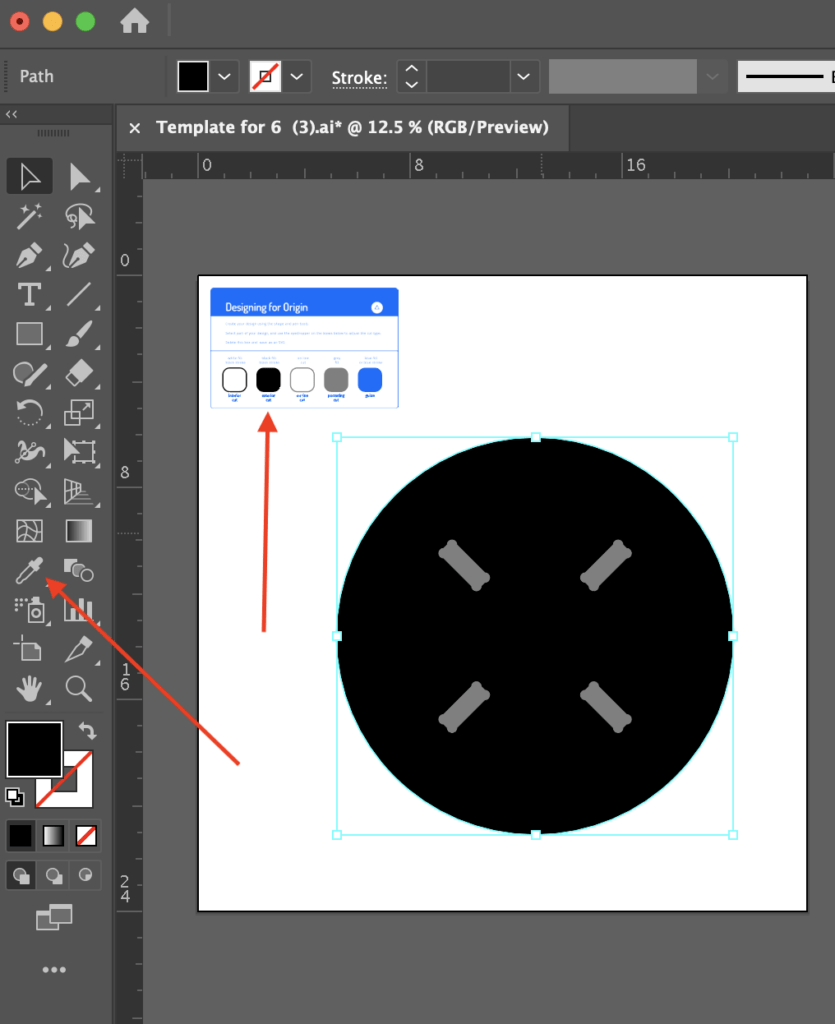
| Select the closed shape you want to color, then select the eyedropper tool and click on the color palette guide to assign colors representing cut types to your design. |
 |
| For this file, because I was using scrap material I placed each piece on a separate artboard and then exported them separately. |
 |
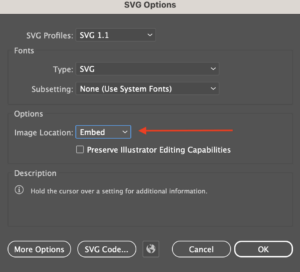
| Save your file as a .SVG by selecting File, Save As, and under the format drop-down select SVG. Under Options, select Embed under the Image Location menu, and then select OK. Now, you can transfer this file to the flash drive that is plugged into the machine. Make sure to safely eject the flash drive from your computer before removing it. |
 |
| Set up your workspace
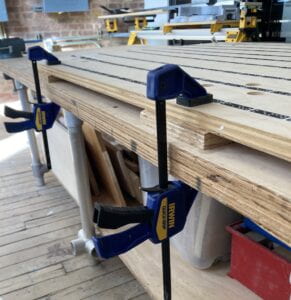
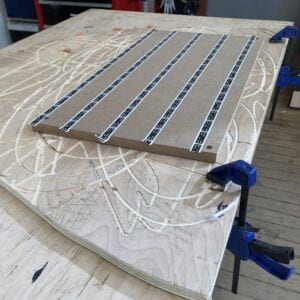
First, find our spoil board or another piece of material that can fit under the wood you are cutting so you don’t cut into the table. Secure your piece of wood on top with screws or clamps. In the box with the Shaper there is domino printed tape called shaper tape. Place strips of the tape printed about 3″ apart on the material to be cut and about 12″ outside of the cutting area. For larger pieces you can use multiple smaller pieces of wood as a spoilboard to space the wood apart from the table. Make sure to support the area under where you are cutting. Both options for larger and smaller pieces are shown below. |
  |
| Plug the Shaper Origin into a wall outlet or extension cord and the Festool vacuum to the tool. You may need to remove the vacuum from the miter saw by twisting to the left and pulling away. |
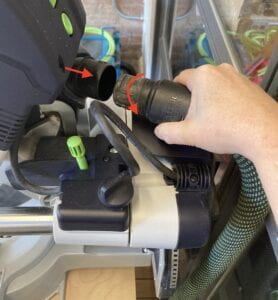 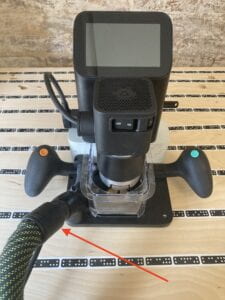 |
| Move the shaper on the area with your shaper tape. Press the green button on the right handle and slide it around to scan your workspace. Once all of the dominos in your workspace are blue, you are done scanning. Press the green button again to Finish. |
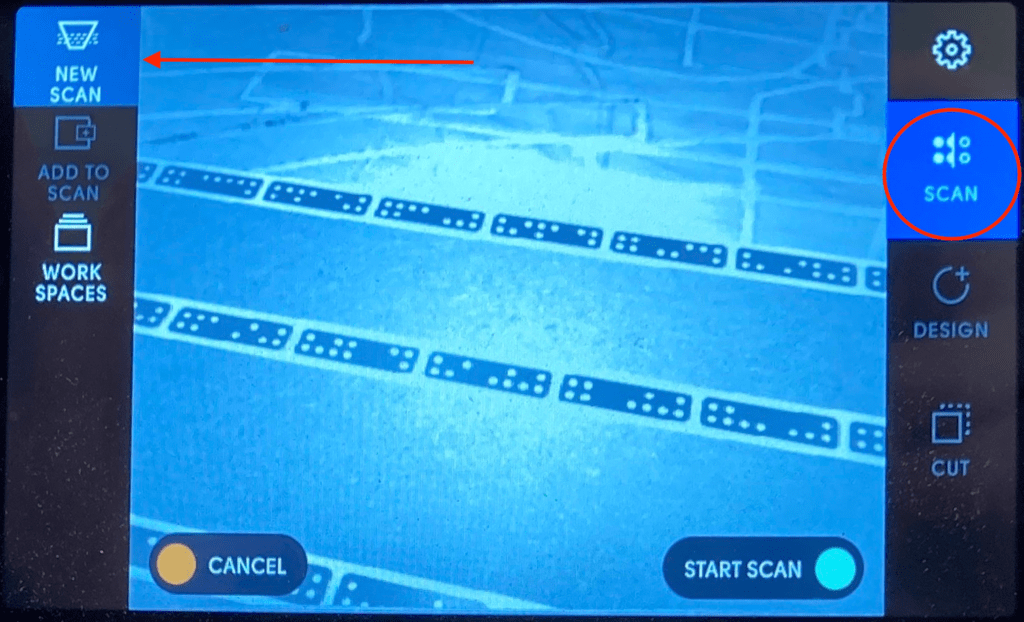 |
| Next, navigate to the design tab and click import. Find your file on the flash drive. Place your design on your material in an area that still gives you ample space to slide the tool around the perimeter and still see shaper tape. 12 inches of scanned and taped workspace around your shape is recommended. |
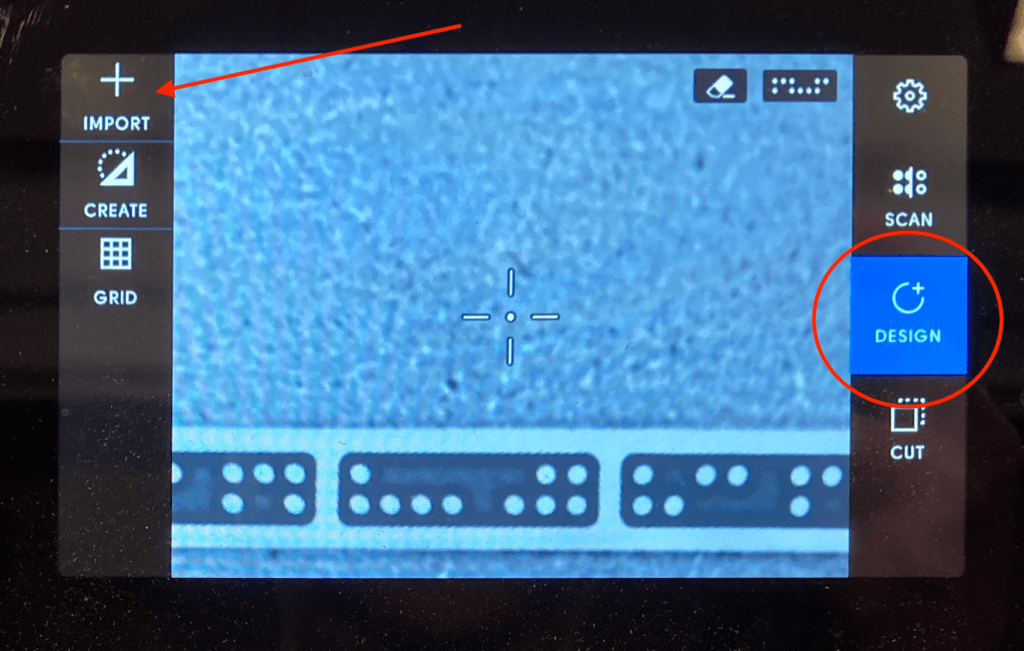 |
| Next, navigate to the CUT tab.
You should cut at a depth of no more than the diameter of the cutting tool per pass. Our machine has a .25″ bit meaning you should not cut more than .25″ depth at a time. You will have to make 3 passes with the cutting tool to cut through .75″ wood. So, set the first cut depth to .25″ Set up the bit depth using the Z TOUCH button on the left side. |
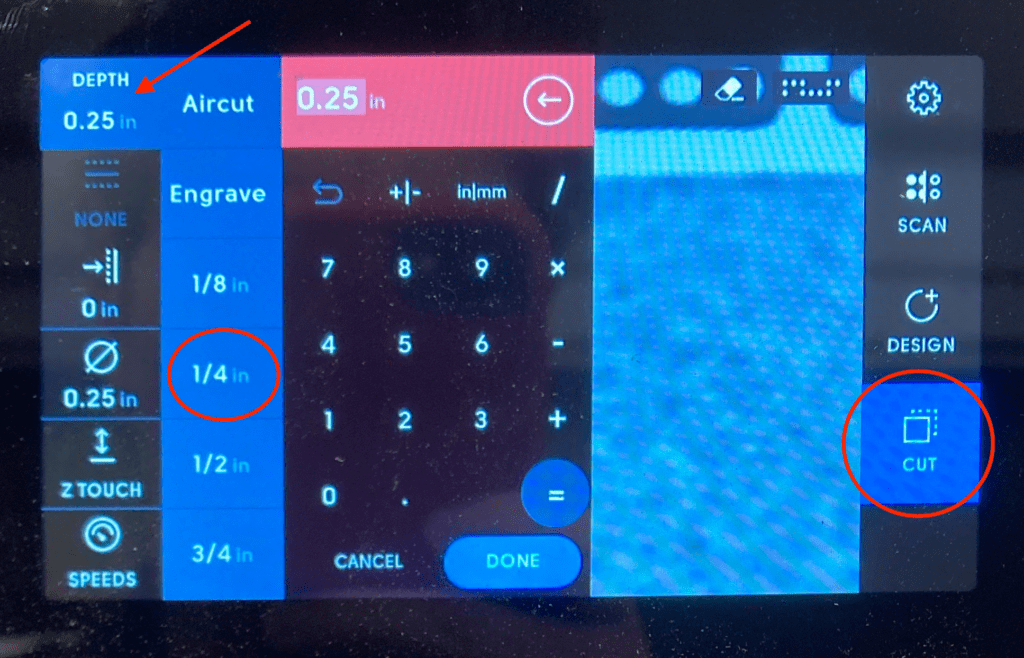 |
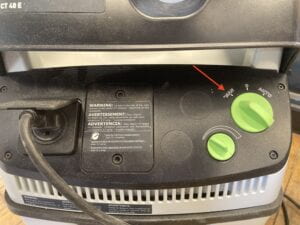
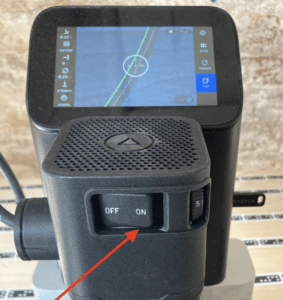
| Now, you are ready to start cutting! You must wear eye and ear protection while using this tool. Turn the vacuum to MAN and flip the switch on the front of the shaper to ON. Follow the on-screen prompts and hold the tool over your first cutting path. Press the green button on the right handle to start cutting. |
  |
| A blue line on the screen will show where you have already cut when you have the router bit aligned with the cut . Once you finish cutting at your first depth, you can navigate back to the depth screen and increase the depth ¼” to ½.” If you are cutting throught ¾” plywood or MDF you will need to do a third pass. These cuts will be represented by a darker shades of blue on the screen. |
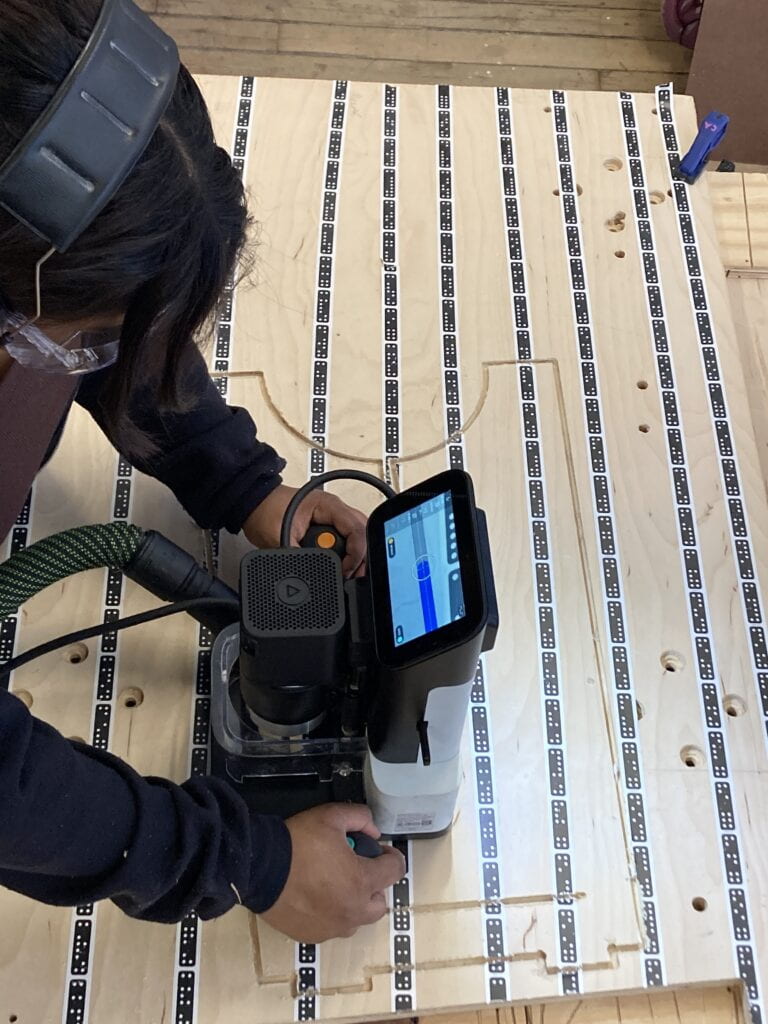 |
| Clean up
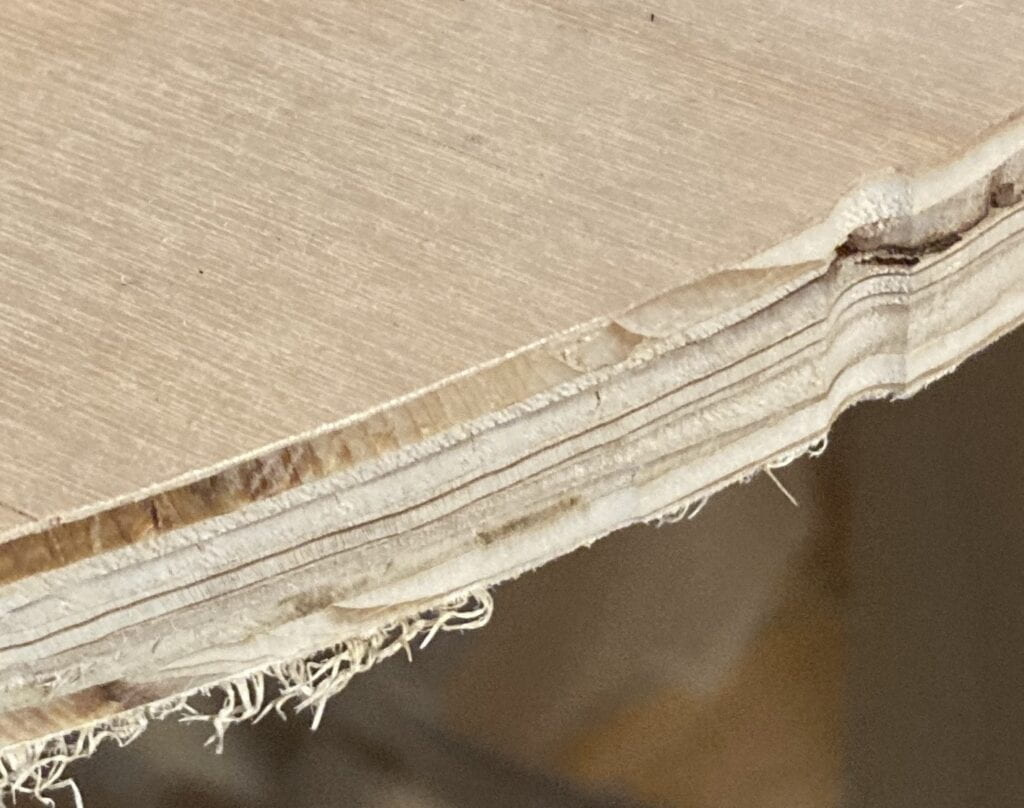
After cutting, you may find some imperfections in the cut and edged that need to be sanded, as shown below. This often happens when the shaper has to retract because it cannot “see” enough shaper tape. To make these smoother you may want to sand them with the belt sander or random orbital sander. Or, you can use wood filler to resculpt the edge. |
 |
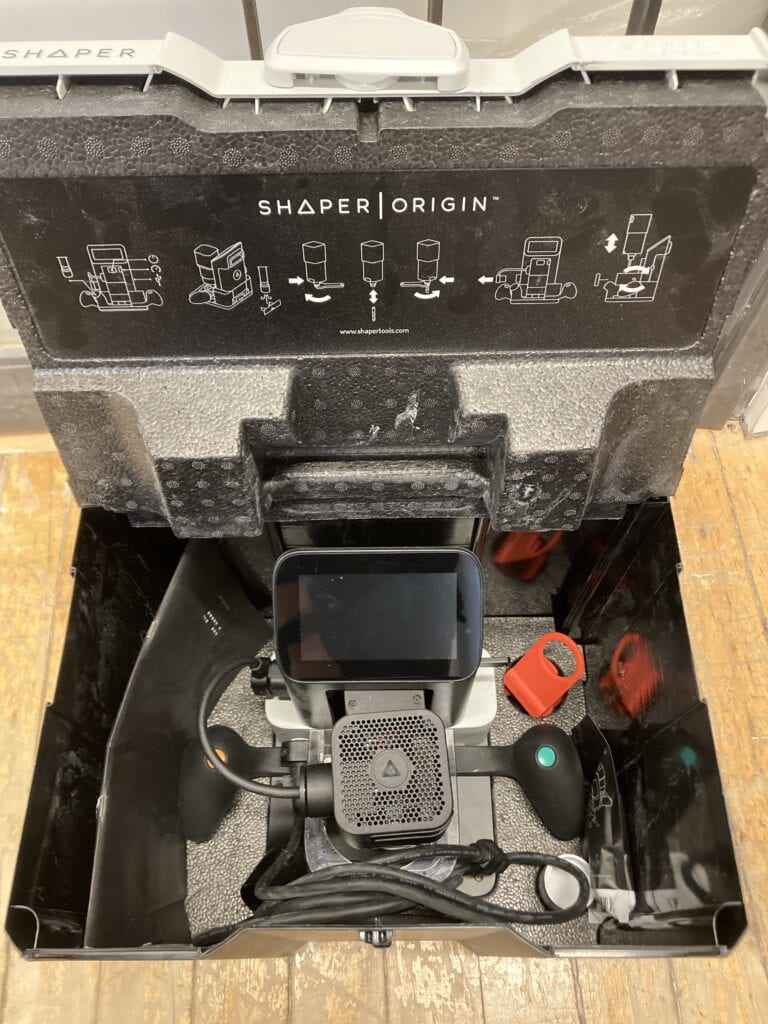
| Lastly, once you are finished sweep up any dust on the table, floor, and clean off the Shaper. Return the vacuum to the miter saw. Shown below is how the Shaper fits in the case into grooves in the foam. |
 |
