A. Message from the past — Cissy Xie — Gottfried

B. CONCEPTION AND DESIGN
The biggest influence on my choice of project is the article written by Ernest Edmonds, in which he stresses that a good project needs to be influencing, communicating, varying, and influencing. So, I decided to make a project that can be fun-sustaining (people will want to re-visit) and influence people’s feelings and maybe change their lives in some way.
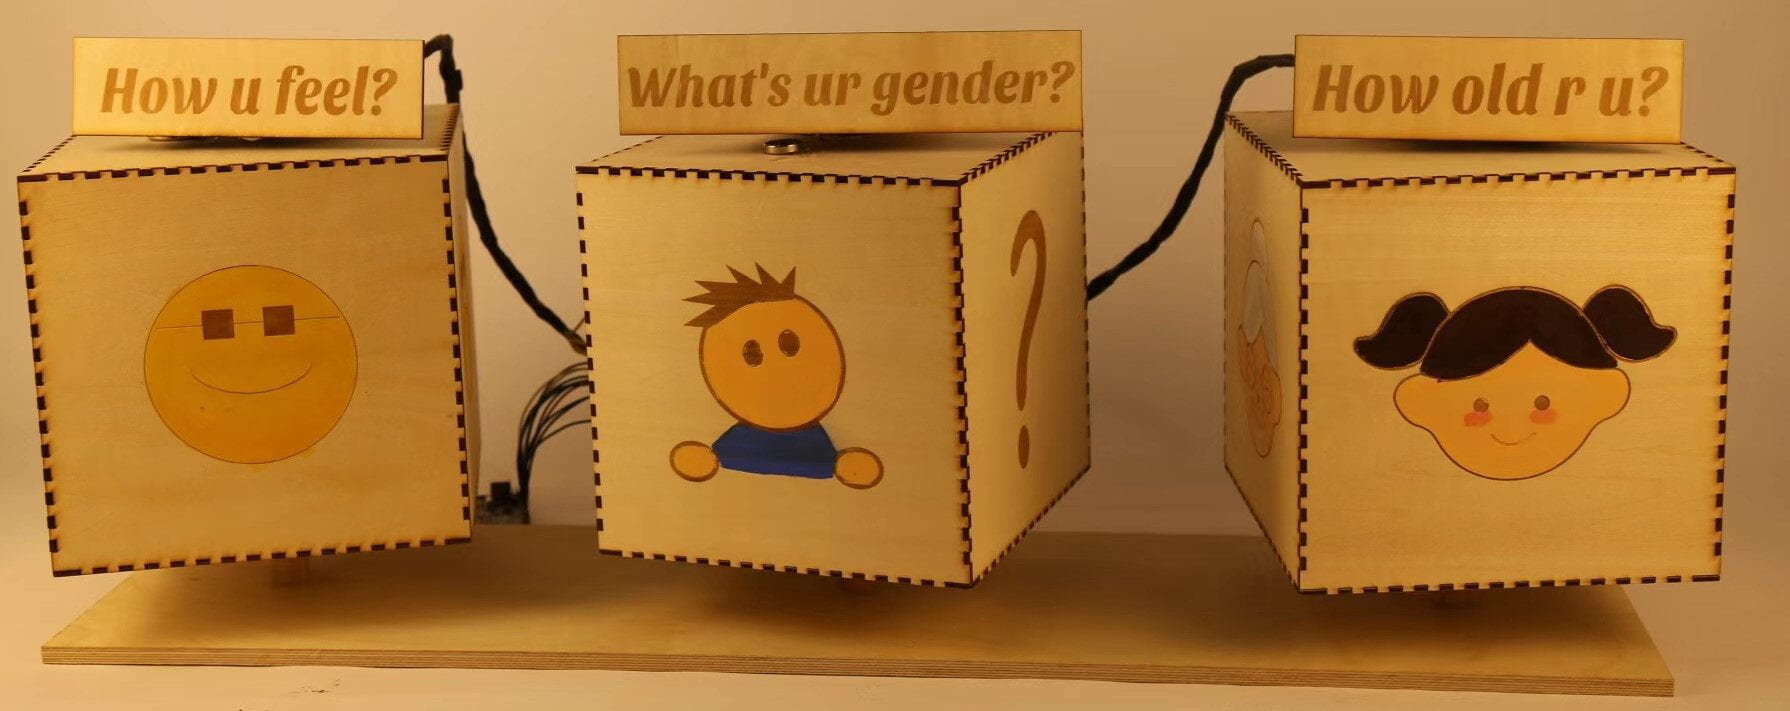
The basic idea of this project is that people rotate the cube to choose according to 3 question prompts, then the computer will generate a message that is left for you by a person who has the same 3 choices, at last, the computer will ask you whether you want to leave a message.
After the user testing, I think the biggest problem is that it is too complicated people don’t know what to do. And there is a lack of indicators for people to follow. So, some adaptations I made are:
1. Instead of rotating the cubes twice (one is for choosing their own states, and the other is for choosing the states of the future message receiver), I simplify the process by only letting the user choose once and the message will be sent to the person of the same states.
2.”Indicators” on the computer. In order to make the steps clear, I use text on the computer to tell the user what to do.
3. Some adjustments to the textbox, so it will only appear when I want it to.
C. FABRICATION AND PRODUCTION
1. First, hand out the online questionnaire to gather the message.
Below is a picture of the online questionnaire:

2. Second, choose a sensor that will tell me which side of the cube the user chooses. Some possible choices are rotary encoder rings and reed switches. I settled with reed switches for it has a reasonable price. My biggest concern is the sensitivity of the reed switches, so I have to buy a lot of magnets in different sizes. And after testing them, I finally found the perfect size.
This is a picture showing how I fixed the sensors onto the plate with insulation tape, different-color wires, and initials suggesting which sensor is connected to which wires. (though later found out it will be better if I put the initials on the other side of the plate)

3. Third, build the cubes. I first drew a rough sketch of the cube, the pole, and the plate (the actual length is 20cm and the actual diameter of the pole is 2cm)

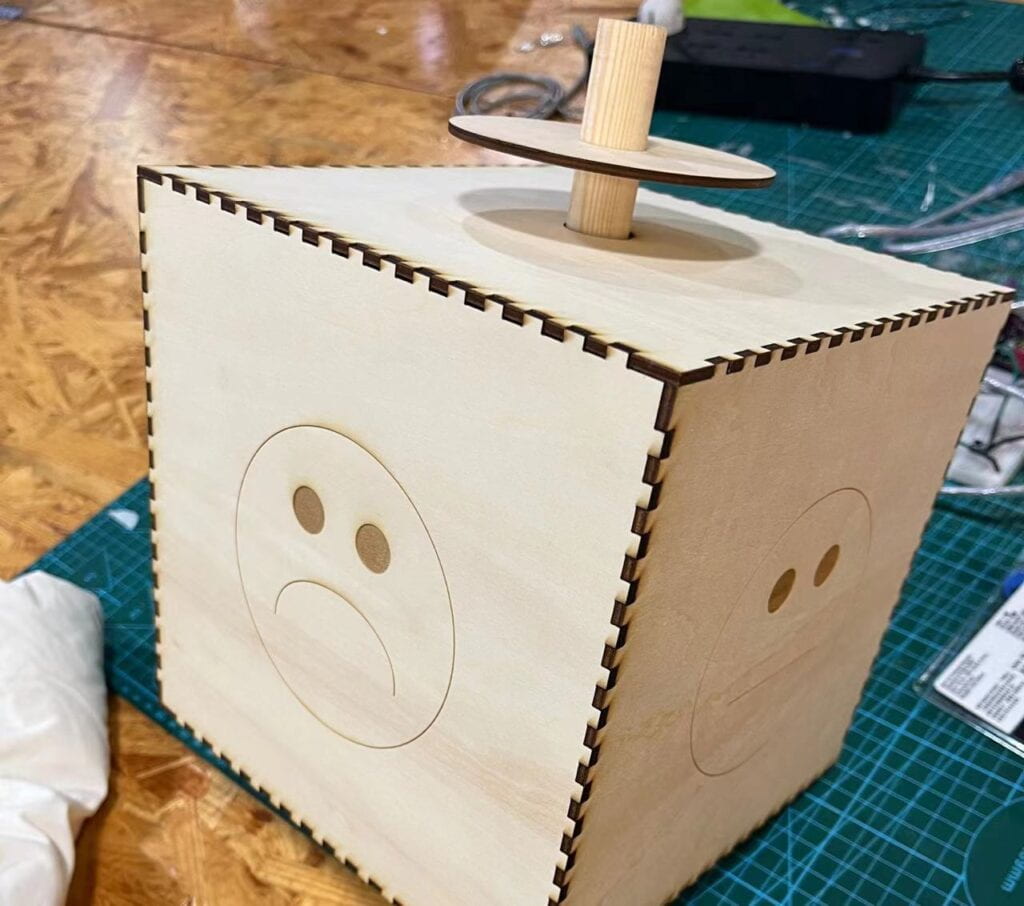
below is the first cube I made:

I used the template on the website boxes and downloaded free SVG from the internet to be carved onto the cubes. Below is a video of me using the laser cutting machine:
4. Fourth, put the magnet on top of the box and put it on the top plate with the sensors on. This is what the final sensor part looks like:

Then I ran a few tests to figure out which size of the magnet works the best.
5. Fifth, assemble two more cubes and put paint on the pictures. And here is what it looks like:

Here I made a short video to illustrate how my project works:
D. CONCLUSIONS:
My goal for this project focuses more on the meaningfulness and influence that a project may have.
ups: The “message from the past” is “communicating“, “influencing“, “varying” because the project enables people from different times to communicate, the message they received may influence them and the different messages are the variable.
downs: Despite the meaningfulness, the project only utilizes texts as the varying results, which can be boring and less fun, and the size of the texts and the size of the cubes are very discordant.
possible improvements:
1. I may use a big screen to display the texts
2. I may change the message from text on the computer to a hand-written message, and use a machine that is similar to a vending machine to spit out the touchable message so that the user can experience the project and walk away with a souvenir.
3. I may also add photo taking function, so the user may not only get a message with texts but a message with a friendly face. (of course, it is optional)
4. I may use some audio to read out loud the instructions so that the user doesn’t need to read texts.
something learned from coding:
1. How to trigger something only once:
if the button is being pressed for longer than 5 seconds, do something, the wrong way to do it is like this, because it is inside the loop(), so the t1 will be reset every loop.
if (bottonstate4 == HIGH) {
    t1 = millis();
  }

  if (millis() - t1 > 5000) {
do something
  }
the right way is to use prestate:
 if (bottonstate4 != prebottonstate4) {
t4 = millis();
}
  if (millis() - t4 > 5000 && bottonstate4 == LOW) {
do something
}
  bottonstate4 == prebottonstate4;
2. “Serial.println” & “serial.record” do not exist at the same time
3. the writer will remain 1 unless adding “else”
if (bottonstate4 != prebottonstate4) {
t4 = millis();
}
  if (millis() - t4 > 2000 && bottonstate4 == LOW) {
writer[0] = 1;
} else{
writer[0] = 0;
}
4. two values for one writer
wrong way:
if (millis() - t4 > 200 && bottonstate4 == LOW) {
writer[0] = 1;
} else{
writer[0] = 0;
}
  if (bottonstate5 != prebottonstate5) {
t5 = millis();
}
  if (millis() - t5 > 200 && bottonstate5 == LOW) {
writer[0] = 2;
}else{
writer[0] = 0;
}
right way:
if (millis() - t4 > 200 && bottonstate4 == LOW) {
writer[0] = 1;
} else if (millis() - t5 > 200 && bottonstate5 == LOW) {
writer[0] = 2;
}else{
writer[0] = 0;
}
5. don’t use delay in Processing, do this instead:
int startTime=0;
if (startTime == 0) {
      startTime = millis();
    } else if (millis()- startTime > 2000) {
      ...
      startTime = 0;
    }
6. a shallow understanding of the library: interfascia.*
E. ANNEX
code on Arduino:
https://gist.github.com/LafouCC/2886c54f31dbb00688a3343885710f77
code on Processing:
https://gist.github.com/LafouCC/0579cb32d0165ef923edb262a6c35953
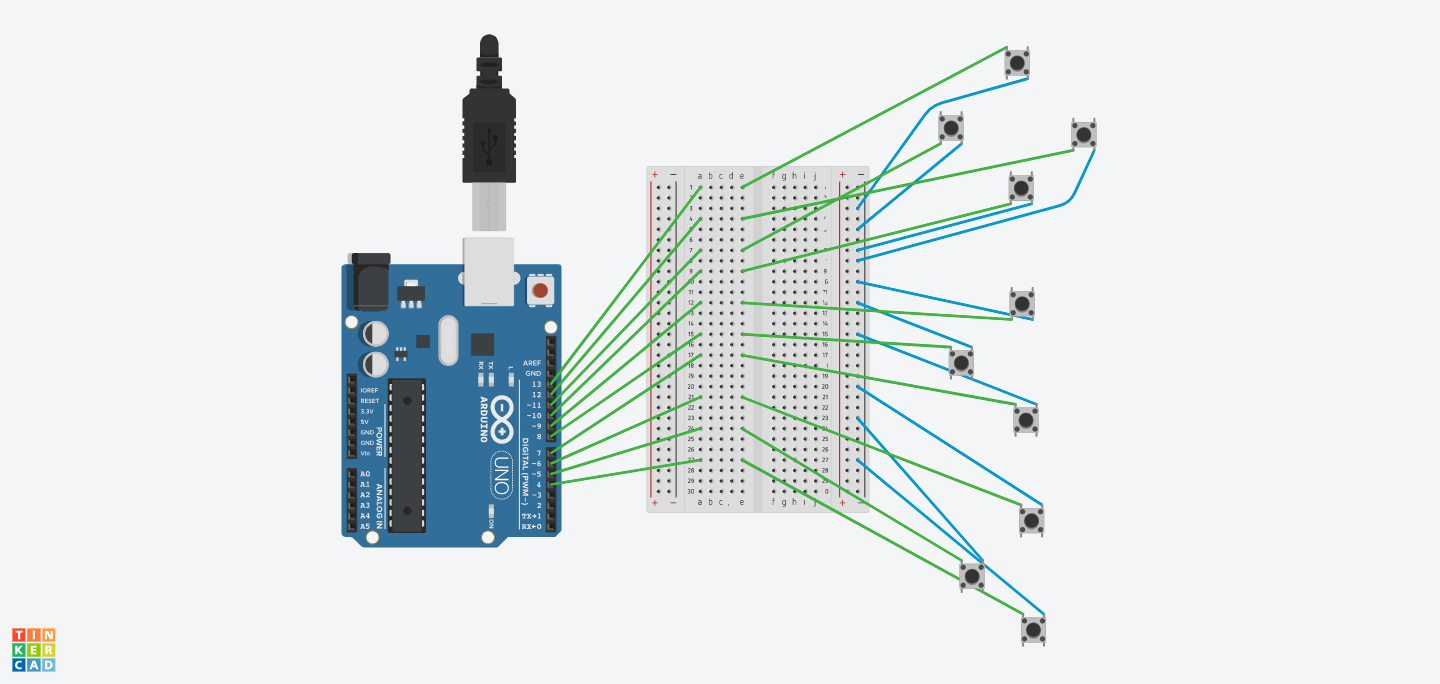
Here is the diagram, the a reed switch is basically a button:

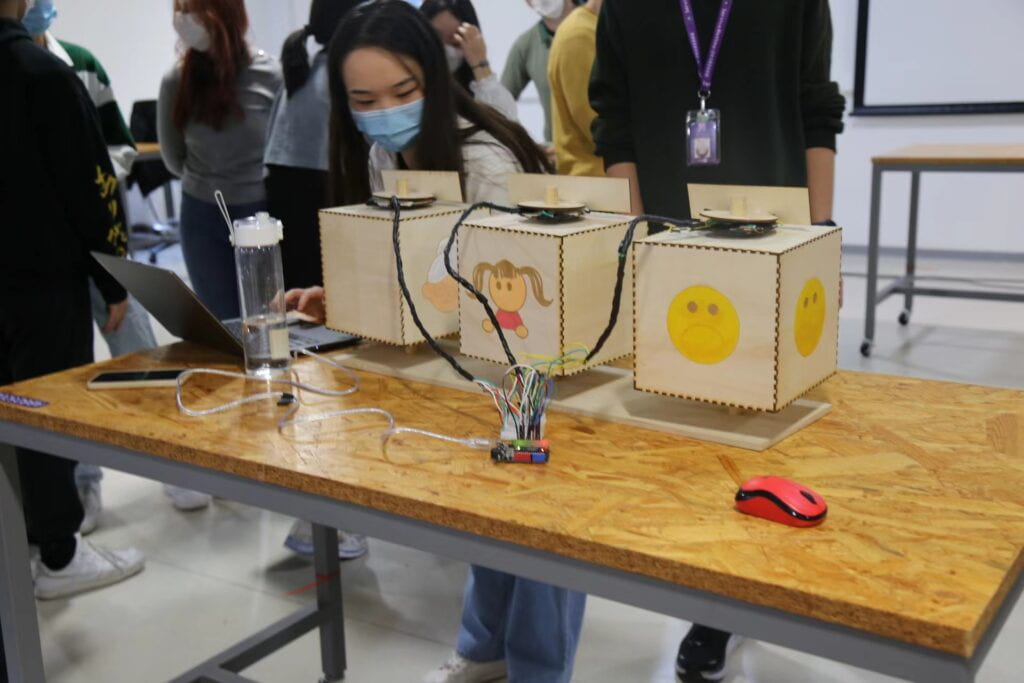
Some photos:


