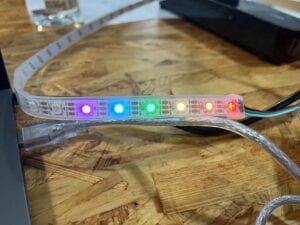
TASK 1: Check
In order to test the NeoPixels to make sure they are working correctly, I used the example FastLED/Blink in the library.
Here is a video of the process:
TASK 2: Use Arduino
By inputting four parameters into the serial monitor(the pixel number red, green, blue), I can light up the LED according to my desired colors. So, I made a small l line of rainbow:

TASK 3: Combine Arduino and Processing
I add some light effects to the music I love-Wildest Dream. By using millis(), the Neopixel will show different light effects according to the rhythm, and at the same time, Processing will show different images accordingly. See as below:
Here is my code for the Processing:
https://gist.github.com/LafouCC/b74acd3bc256289ef6a96b5a943613a4
Reflections:
(1) How to void using delay inside the for loop:
  if (t>17000&&t<30000) {
    for (int i=0; i < 16; i = i+1) {
      fill(255, 0, 0, 100);
      circle(width/2, height/2, diameter);
      serialRecord.values[0] = i;
      serialRecord.values[1] = 255;
      serialRecord.values[2] = 0;
      serialRecord.values[3] = 0;
      serialRecord.send();
      delay(850);
    }}
The circle can’t show because Processing doesn’t finish painting to the screen when I use delay.
So, in order to avoid using delay while still maintaining the effect of lighting up the Neopixel one by one, we can use Map function.
if(t>17000&&t<30000){
      int i = floor(map(t, 17000, 30000, 0, 16));
      fill(255,0,0,100);
      serialRecord.values[0] = i;
      serialRecord.values[1] = 255;
      serialRecord.values[2] = 0;
      serialRecord.values[3] = 0;
      serialRecord.send();
      circle(width/2, height/2,diameter);}
So, the value of t and the value of i can be connected. When t increases, i increases at the same time.