Exercise 1: Make a Processing Etch-A-Sketch
code:
Arduino
// IMA NYU Shanghai
// Interaction Lab
// For sending multiple values from Arduino to Processing
void setup() {
Serial.begin(9600);
}
void loop() {
// to send values to Processing assign the values you want to send
//this is an example
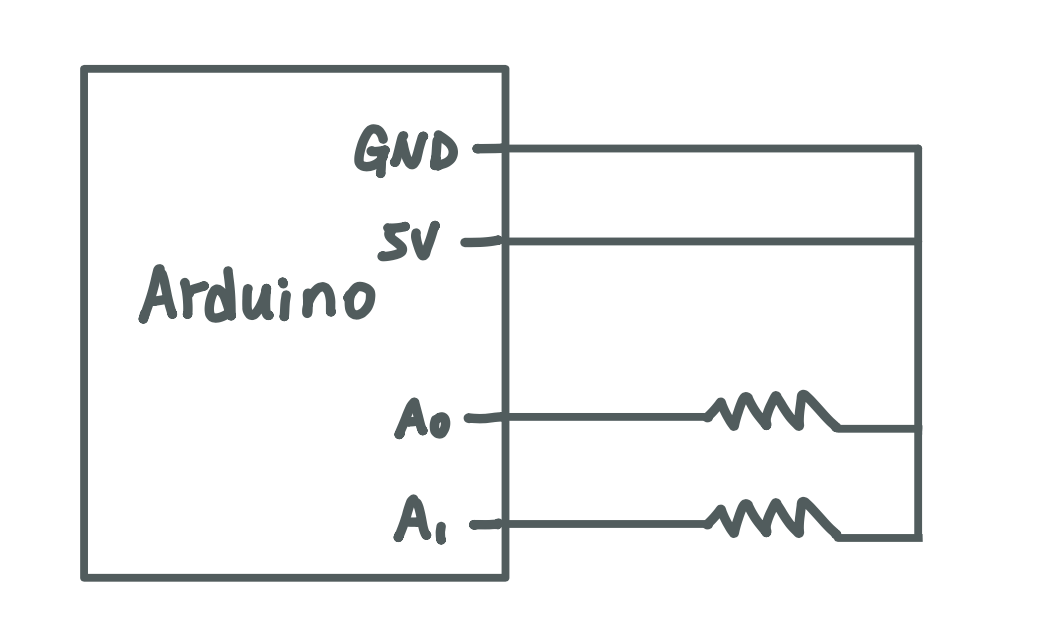
int sensor1 = analogRead(A0);
int sensor2 = analogRead(A1);
// int sensor3 = analogRead(A2);
// send the values keeping this format
Serial.print(sensor1);
Serial.print(","); // put comma between sensor values
Serial.print(sensor2);
Serial.println(); // add linefeed after sending the last sensor value
// too fast communication might cause some latency in Processing
// this delay resolves the issue.
delay(100);
// end of example sending values
}
Processing
// IMA NYU Shanghai
// Interaction Lab
// For receiving multiple values from Arduino to Processing

/*
 * Based on the readStringUntil() example by Tom Igoe
 * https://processing.org/reference/libraries/serial/Serial_readStringUntil_.html
 */

import processing.serial.*;


int NUM_OF_VALUES_FROM_ARDUINO = 2;   /** YOU MUST CHANGE THIS ACCORDING TO YOUR PROJECT **/
int sensorValues[];      /** this array stores values from Arduino **/

String myString = null;
Serial myPort;

void setup() {
  size(500, 500);
  setupSerial();
}

void draw() {
  background(229,187,129);
  getSerialData();
  printArray(sensorValues);
  noStroke();
  fill(161,23,21);

 float val1 = sensorValues[0];
 float val2 = sensorValues[1];
 circle(val1, val2, 100);
}

void setupSerial() {
  //printArray(Serial.list());
  myPort = new Serial(this, Serial.list()[ 1 ], 9600);
  // WARNING!
  // You will definitely get an error here.
  // Change the PORT_INDEX to 0 and try running it again.
  // And then, check the list of the ports,
  // find the port "/dev/cu.usbmodem----" or "/dev/tty.usbmodem----"
  // and replace PORT_INDEX above with the index number of the port.

  myPort.clear();
  // Throw out the first reading,
  // in case we started reading in the middle of a string from the sender.
  myString = myPort.readStringUntil( 10 );  // 10 = '\n'  Linefeed in ASCII
  myString = null;

    sensorValues = new int[NUM_OF_VALUES_FROM_ARDUINO];
}

void getSerialData() {
  while (myPort.available() > 0) {
    myString = myPort.readStringUntil( 10 ); // 10 = '\n'  Linefeed in ASCII
    if (myString != null) {
      String[] serialInArray = split(trim(myString), ",");
      if (serialInArray.length == NUM_OF_VALUES_FROM_ARDUINO) {
        for (int i=0; i<serialInArray.length; i++) {
          sensorValues[i] = int(serialInArray[i]);
        }
      }
    }
  }
}
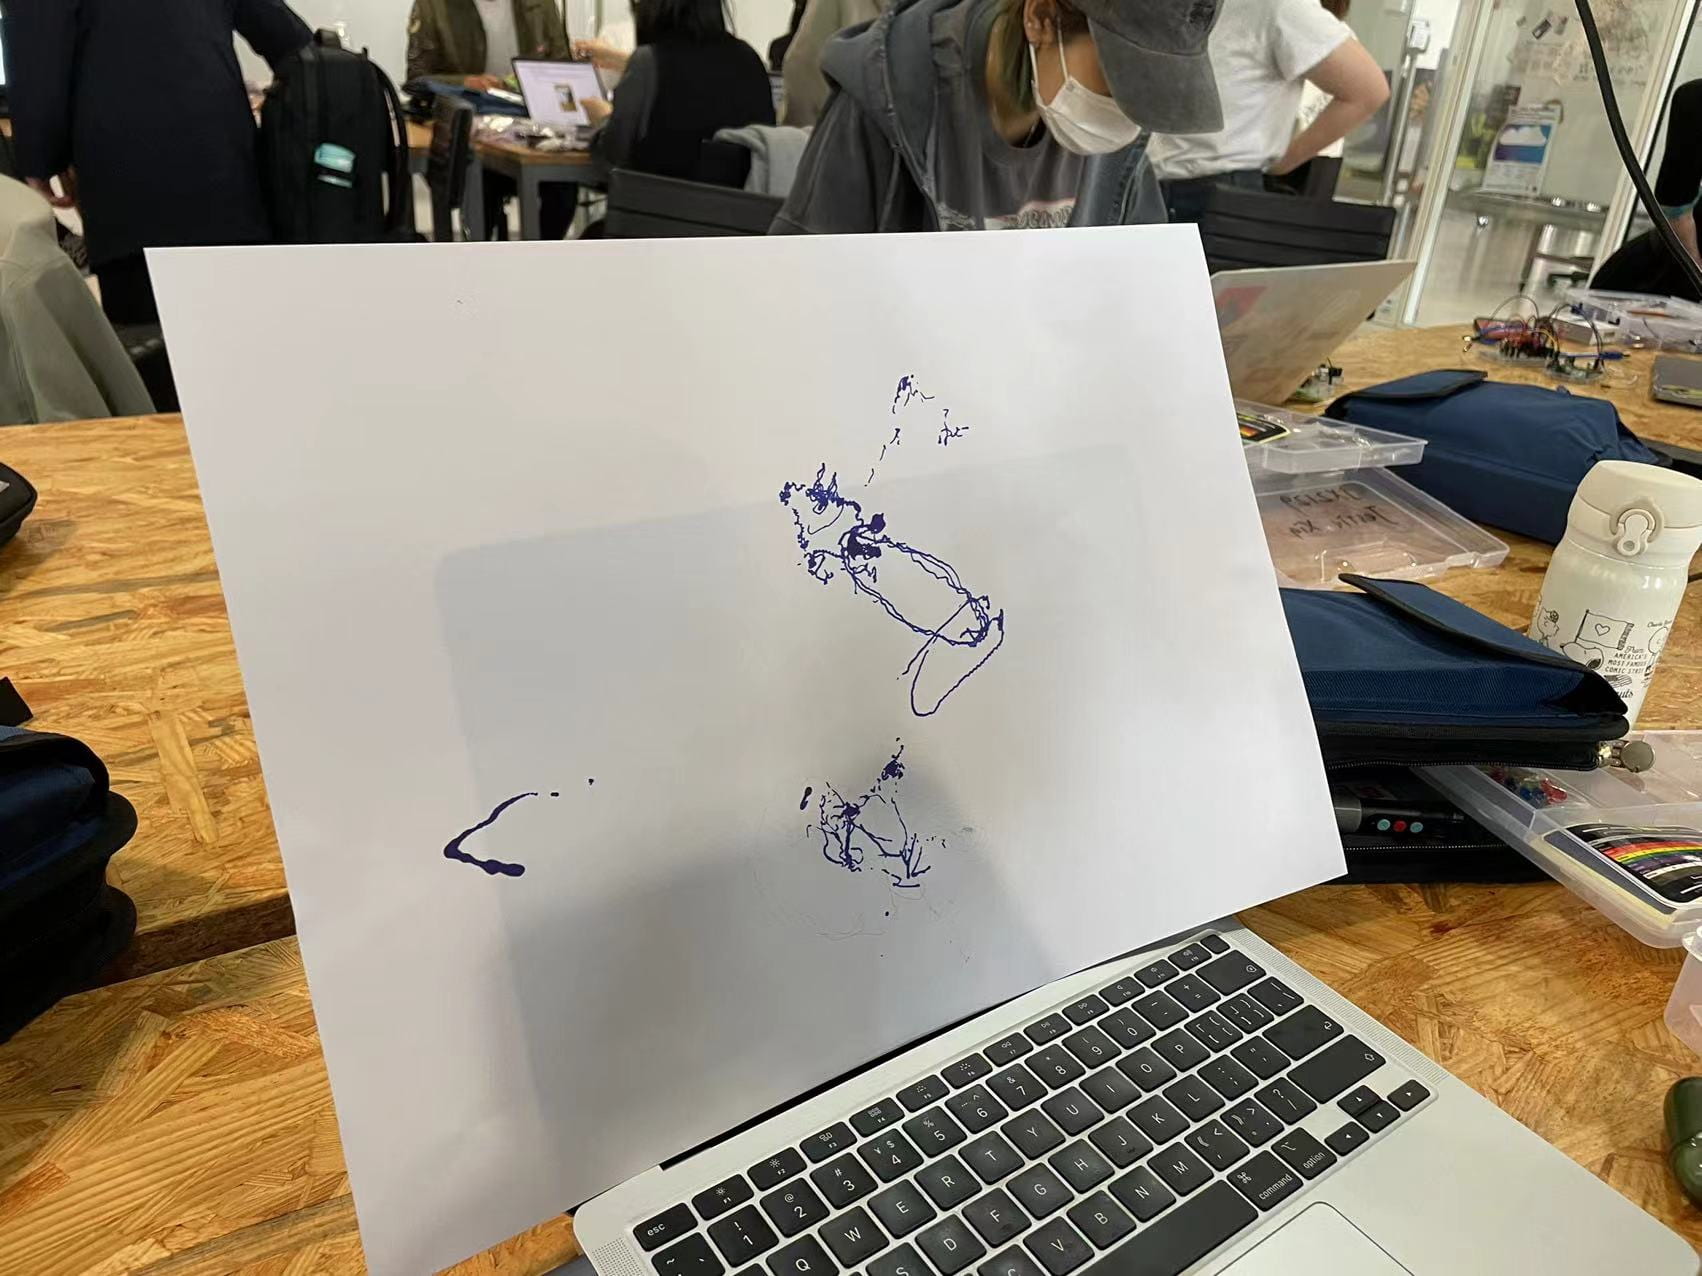
I didn’t get into trouble when I let the ball move. But when I change it into a line, the problem of background happened again. I didn’t find this problem and tried to modify other elements. Finally, I found that I need to delete the background() in the void draw to let the line appear on the screen.
code
Processing
// IMA NYU Shanghai
// Interaction Lab
// For receiving multiple values from Arduino to Processing

/*
 * Based on the readStringUntil() example by Tom Igoe
 * https://processing.org/reference/libraries/serial/Serial_readStringUntil_.html
 */

import processing.serial.*;


int NUM_OF_VALUES_FROM_ARDUINO = 2;   /** YOU MUST CHANGE THIS ACCORDING TO YOUR PROJECT **/
int sensorValues[]; /** this array stores values from Arduino **/
String myString = null;
Serial myPort;
float x = random (width);
float y = random (height);

void setup() {
  size(500, 500);
  setupSerial();
   background(229,187,129);
}

void draw() {

  getSerialData();
  printArray(sensorValues);

 float lx = map ( sensorValues[0],0,1023,0,500);
 float ly = map ( sensorValues[1],0,1023,0,500);
 stroke(161,23,21);
 strokeWeight(3);
 line (lx,ly, x, y);

 x = lx;
 y = ly;


}

void setupSerial() {
  //printArray(Serial.list());
  myPort = new Serial(this, Serial.list()[ 1 ], 9600);
  // WARNING!
  // You will definitely get an error here.
  // Change the PORT_INDEX to 0 and try running it again.
  // And then, check the list of the ports,
  // find the port "/dev/cu.usbmodem----" or "/dev/tty.usbmodem----"
  // and replace PORT_INDEX above with the index number of the port.

  myPort.clear();
  // Throw out the first reading,
  // in case we started reading in the middle of a string from the sender.
  myString = myPort.readStringUntil( 10 );  // 10 = '\n'  Linefeed in ASCII
  myString = null;

    sensorValues = new int[NUM_OF_VALUES_FROM_ARDUINO];
}

void getSerialData() {
  while (myPort.available() > 0) {
    myString = myPort.readStringUntil( 10 ); // 10 = '\n'  Linefeed in ASCII
    if (myString != null) {
      String[] serialInArray = split(trim(myString), ",");
      if (serialInArray.length == NUM_OF_VALUES_FROM_ARDUINO) {
        for (int i=0; i<serialInArray.length; i++) {
          sensorValues[i] = int(serialInArray[i]);
        }
      }
    }
  }
}
Exercise 2
Code
Arduino
#include <Servo.h>
#define NUM_OF_VALUES_FROM_PROCESSING 3 /** YOU MUST CHANGE THIS ACCORDING TO YOUR PROJECT **/
Servo myservo;
/** DO NOT REMOVE THESE **/
int tempValue = 0;
int valueIndex = 0;
/* This is the array of values storing the data from Processing. */
int processing_values[NUM_OF_VALUES_FROM_PROCESSING];
void setup() {
Serial.begin(9600);
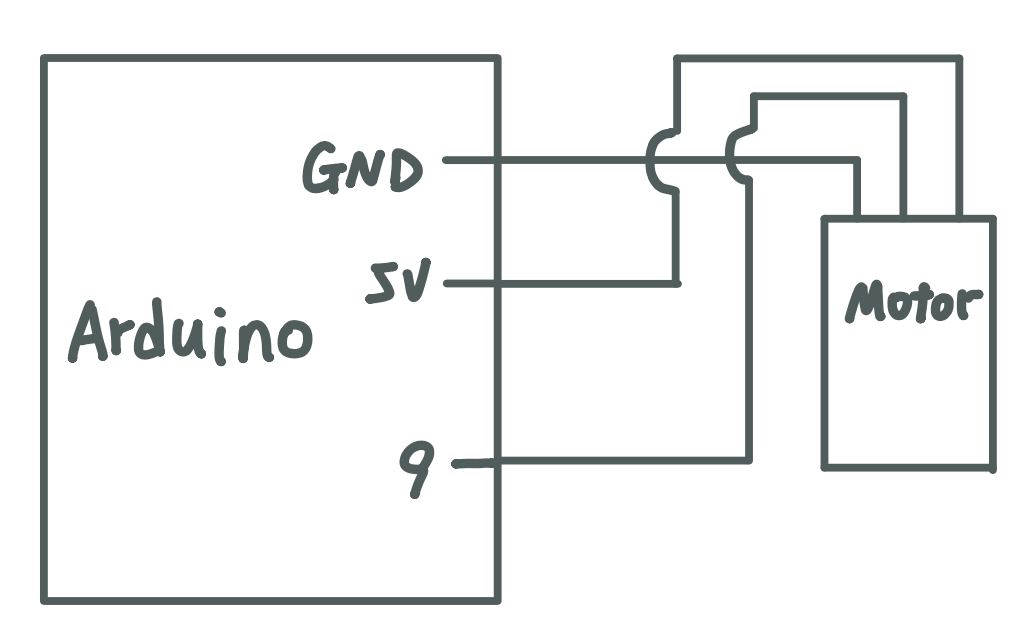
myservo.attach(9);
}
void loop() {
getSerialData();
if (processing_values[0] == 1){
myservo.write(180);
delay(100);
}else{
myservo.write(0);
}
}
//receive serial data from Processing
void getSerialData() {
while (Serial.available()) {
char c = Serial.read();
//switch - case checks the value of the variable in the switch function
//in this case, the char c, then runs one of the cases that fit the value of the variable
//for more information, visit the reference page: https://www.arduino.cc/en/Reference/SwitchCase
switch (c) {
//if the char c from Processing is a number between 0 and 9
case '0'...'9':
//save the value of char c to tempValue
//but simultaneously rearrange the existing values saved in tempValue
//for the digits received through char c to remain coherent
//if this does not make sense and would like to know more, send an email to me!
tempValue = tempValue * 10 + c - '0';
break;
//if the char c from Processing is a comma
//indicating that the following values of char c is for the next element in the values array
case ',':
processing_values[valueIndex] = tempValue;
//reset tempValue value
tempValue = 0;
//increment valuesIndex by 1
valueIndex++;
break;
//if the char c from Processing is character 'n'
//which signals that it is the end of data
case '\n':
//save the tempValue
//this will b the last element in the values array
processing_values[valueIndex] = tempValue;
//reset tempValue and valueIndex values
//to clear out the values array for the next round of readings from Processing
tempValue = 0;
valueIndex = 0;
break;
}
}
}
Processing
import processing.serial.*;
int NUM_OF_VALUES_FROM_PROCESSING = 1;
int processing_values[] = new int[NUM_OF_VALUES_FROM_PROCESSING];
Serial myPort;
String myString;

float x;
float speedX;
float s;

void setup() {
  fullScreen();


  background(0);
  speedX = 5 ;

  setupSerial();
}
void draw() {
  background(147,224,255);
  noStroke();
  fill(255,66,93);
  circle (x, 350, 100);
  x= x+speedX;
  if (x > width || x < 0) {
    speedX = -speedX;
  }
   if (x > width) {// hit the left wall
    processing_values[0] = 1;
  } else  {
    processing_values[0] = 0;
}
  sendSerialData();
}
void setupSerial() {
  printArray(Serial.list());
  myPort = new Serial(this, Serial.list()[1], 9600);
  myPort.clear();
  myString = myPort.readStringUntil( 10 );  // 10 = '\n'  Linefeed in ASCII
  myString = null;
}
void sendSerialData() {
  String data = "";
  for (int i=0; i<processing_values.length; i++) {
    data += processing_values[i];

    if (i < processing_values.length-1) {
      data += ","; // add splitter character "," between each values element
    }
    else {
      data += "\n"; // add the end of data character linefeed "\n"
    }
  }
  myPort.write(data);
  print(data); // this prints to the console the values going to arduin0
}
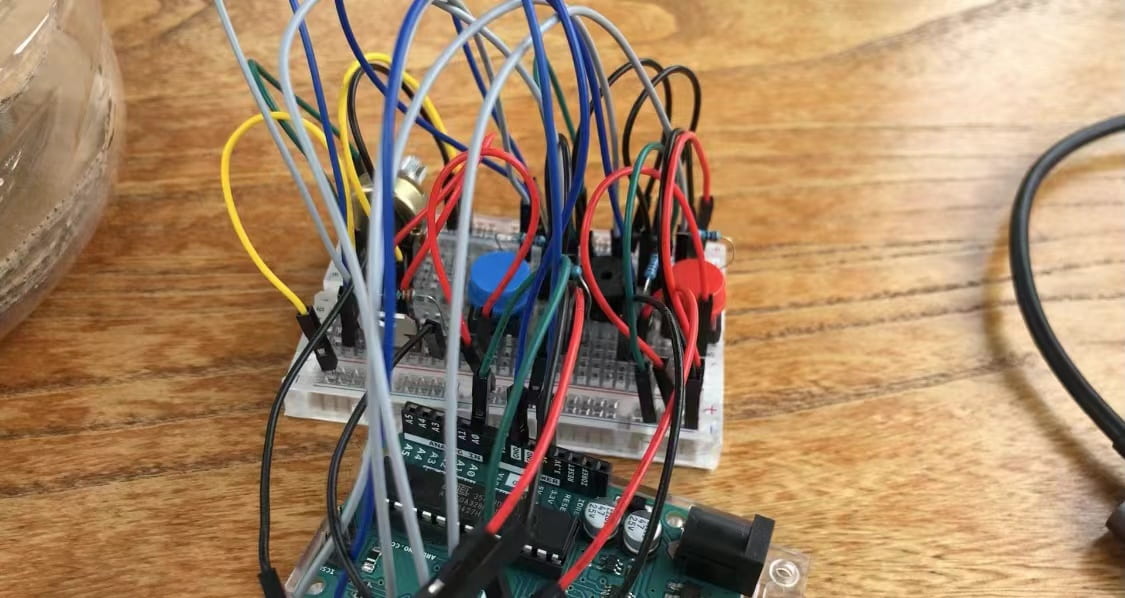
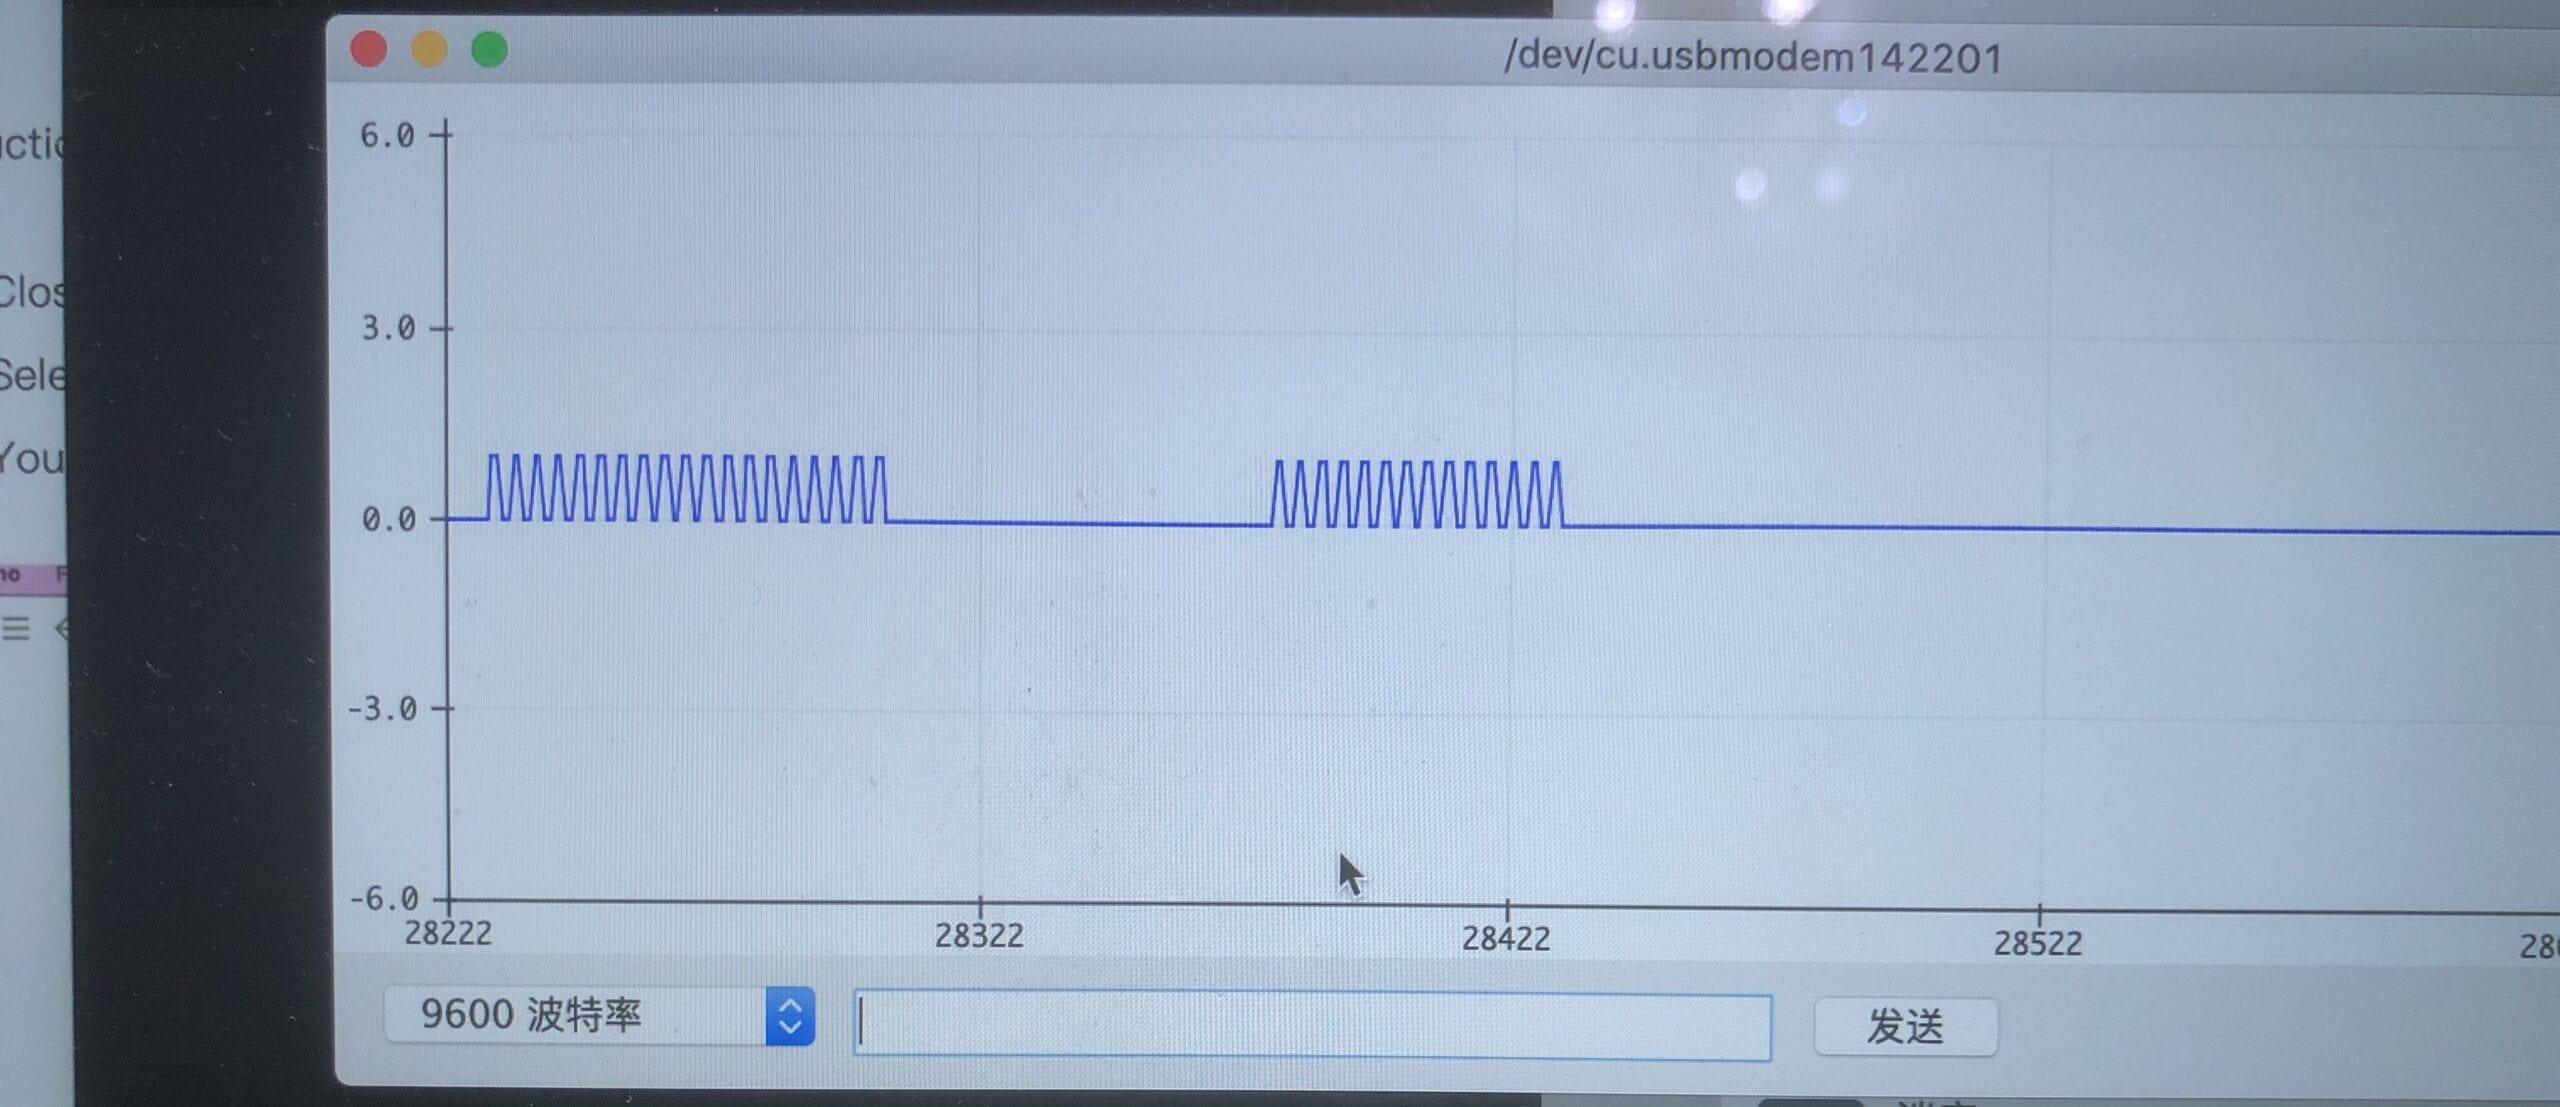
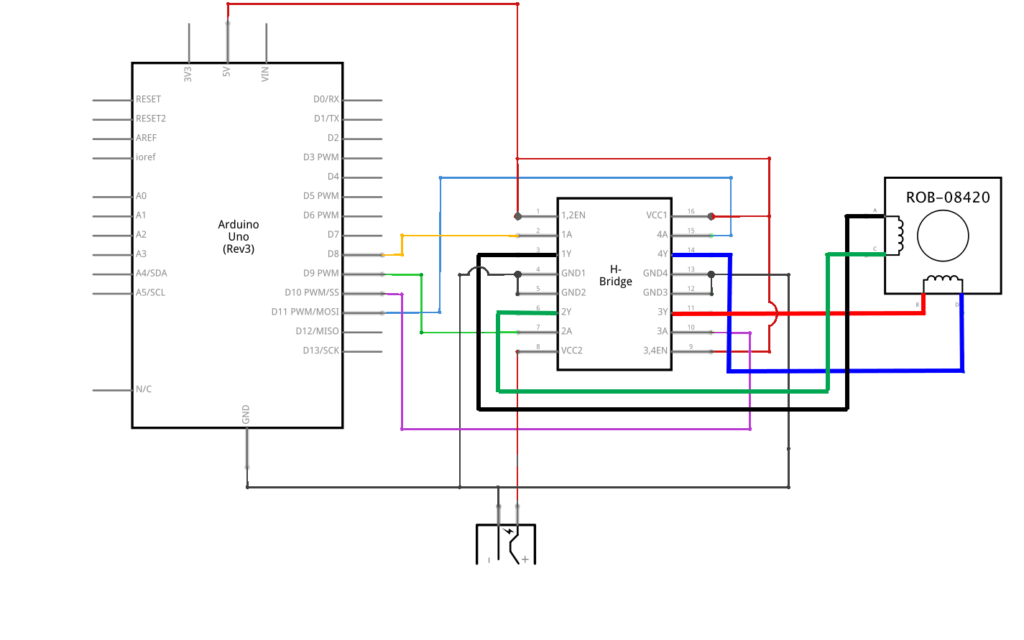
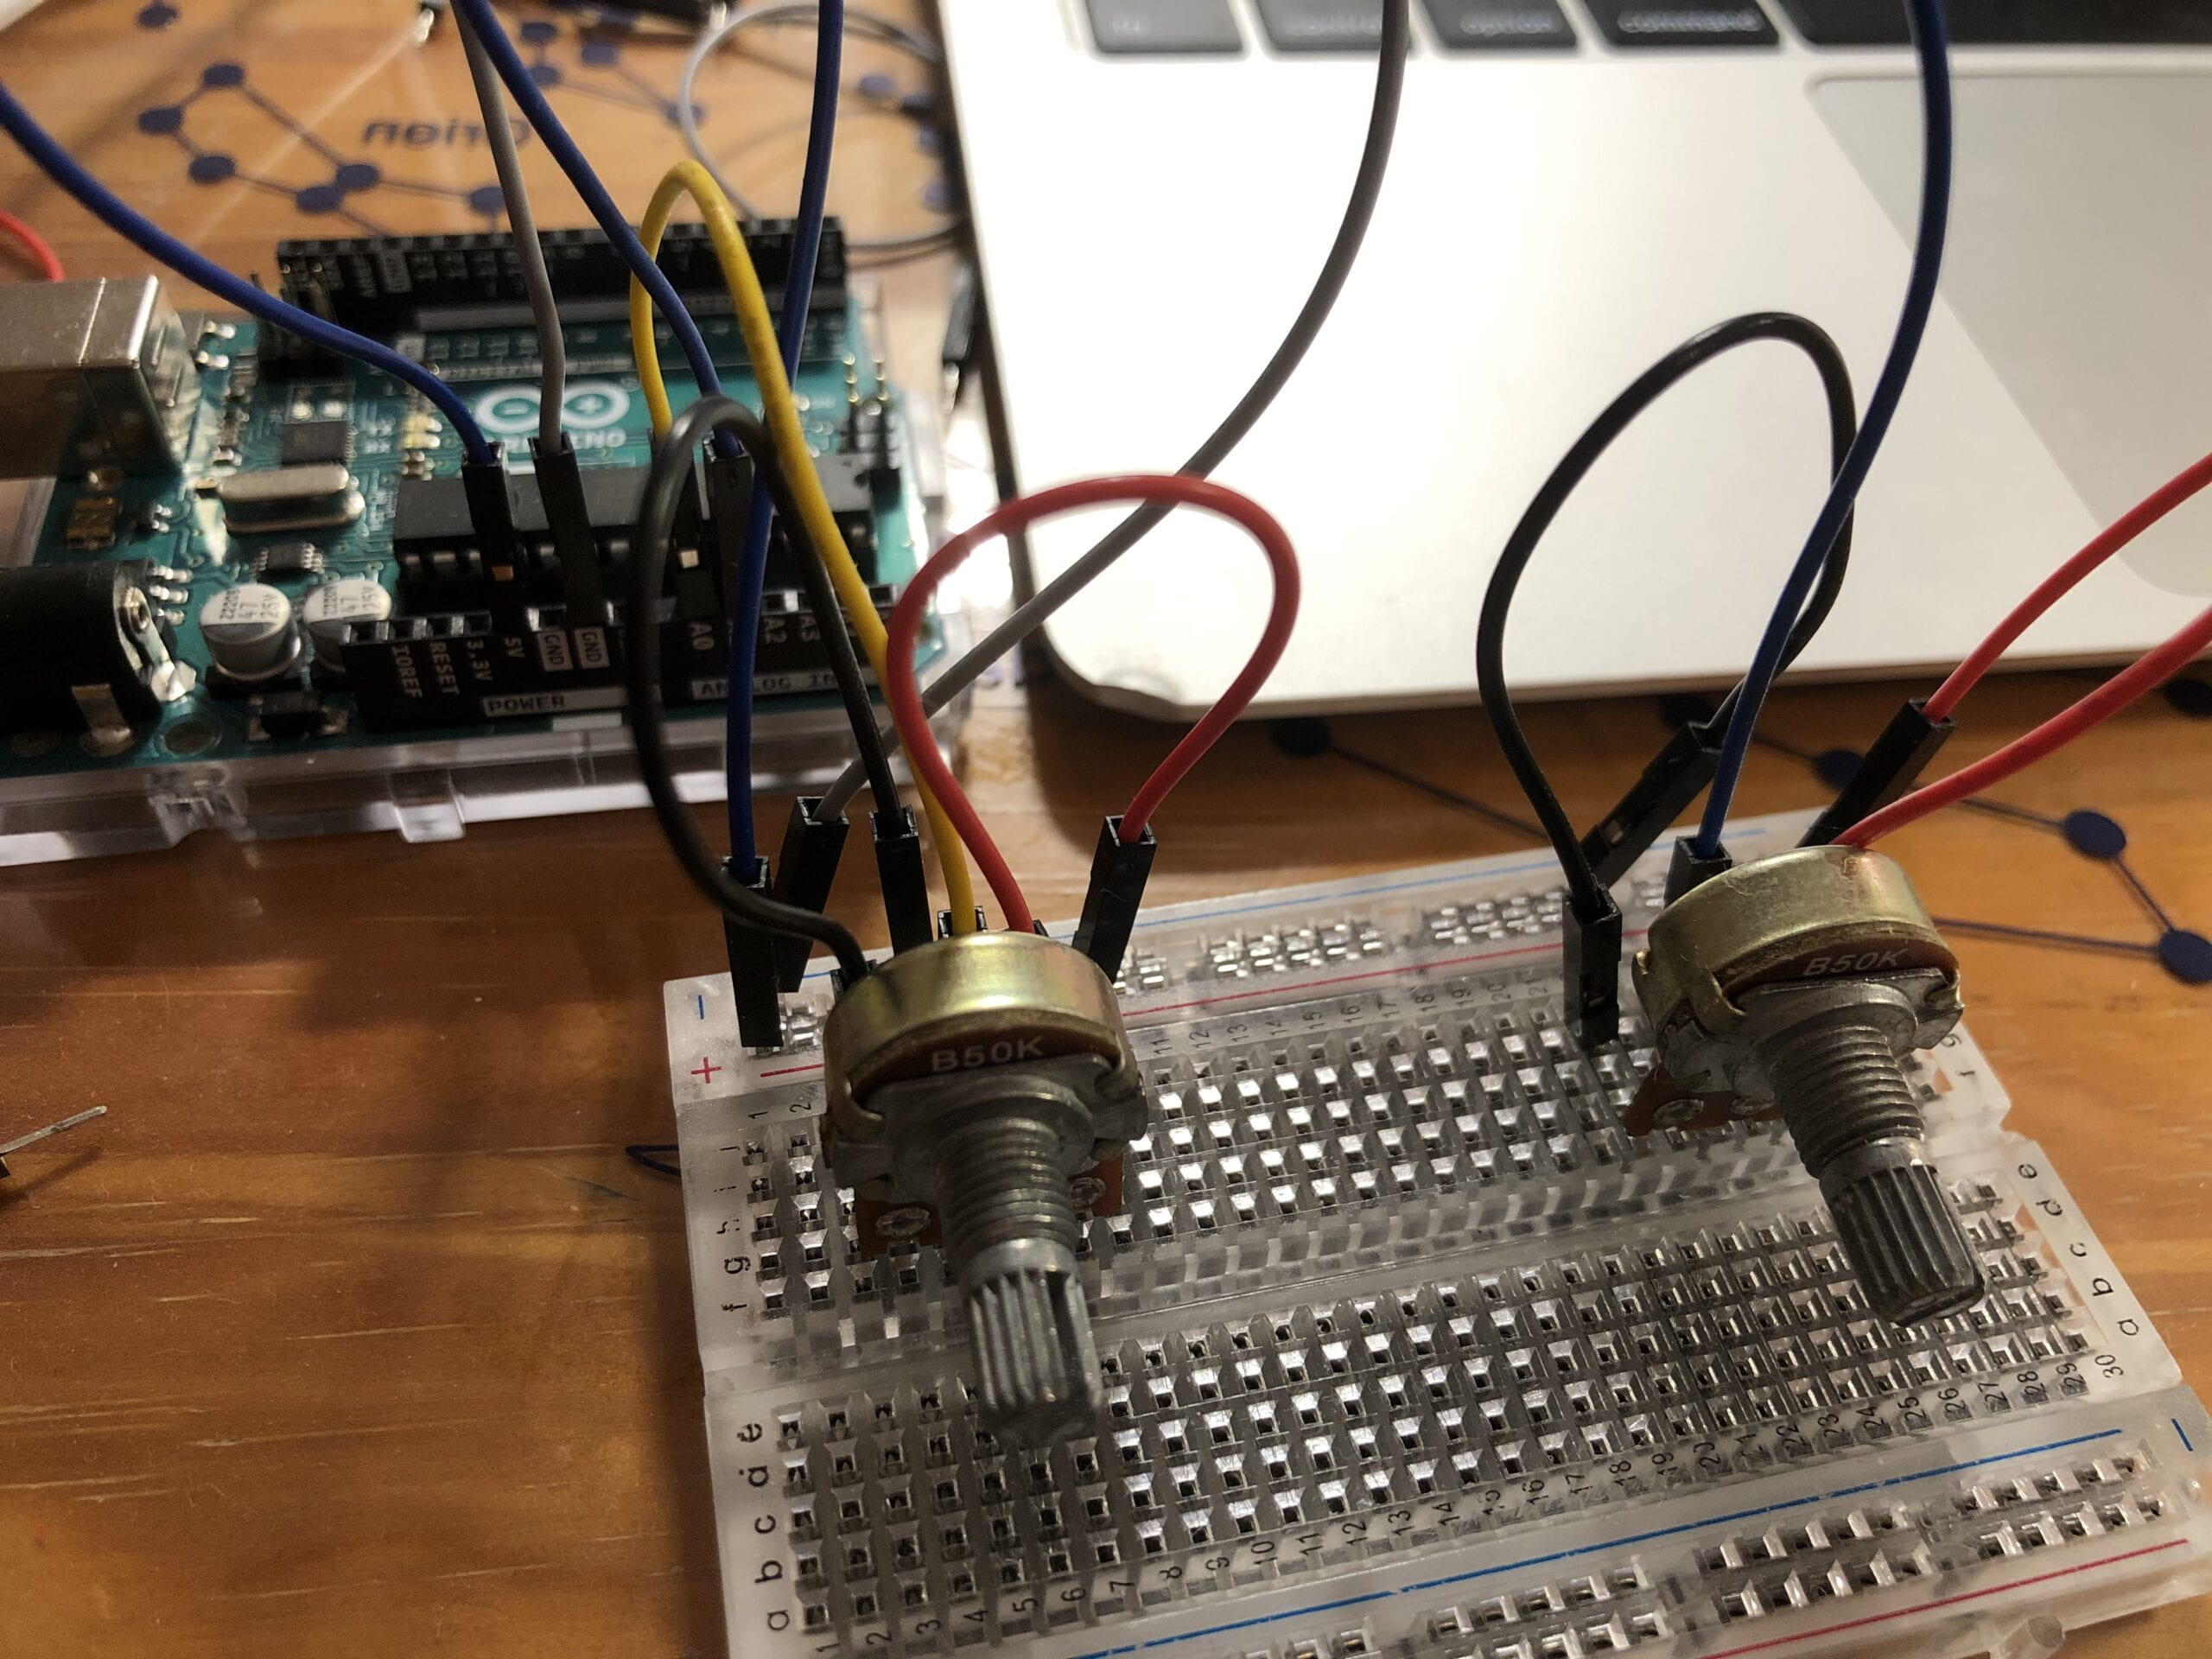
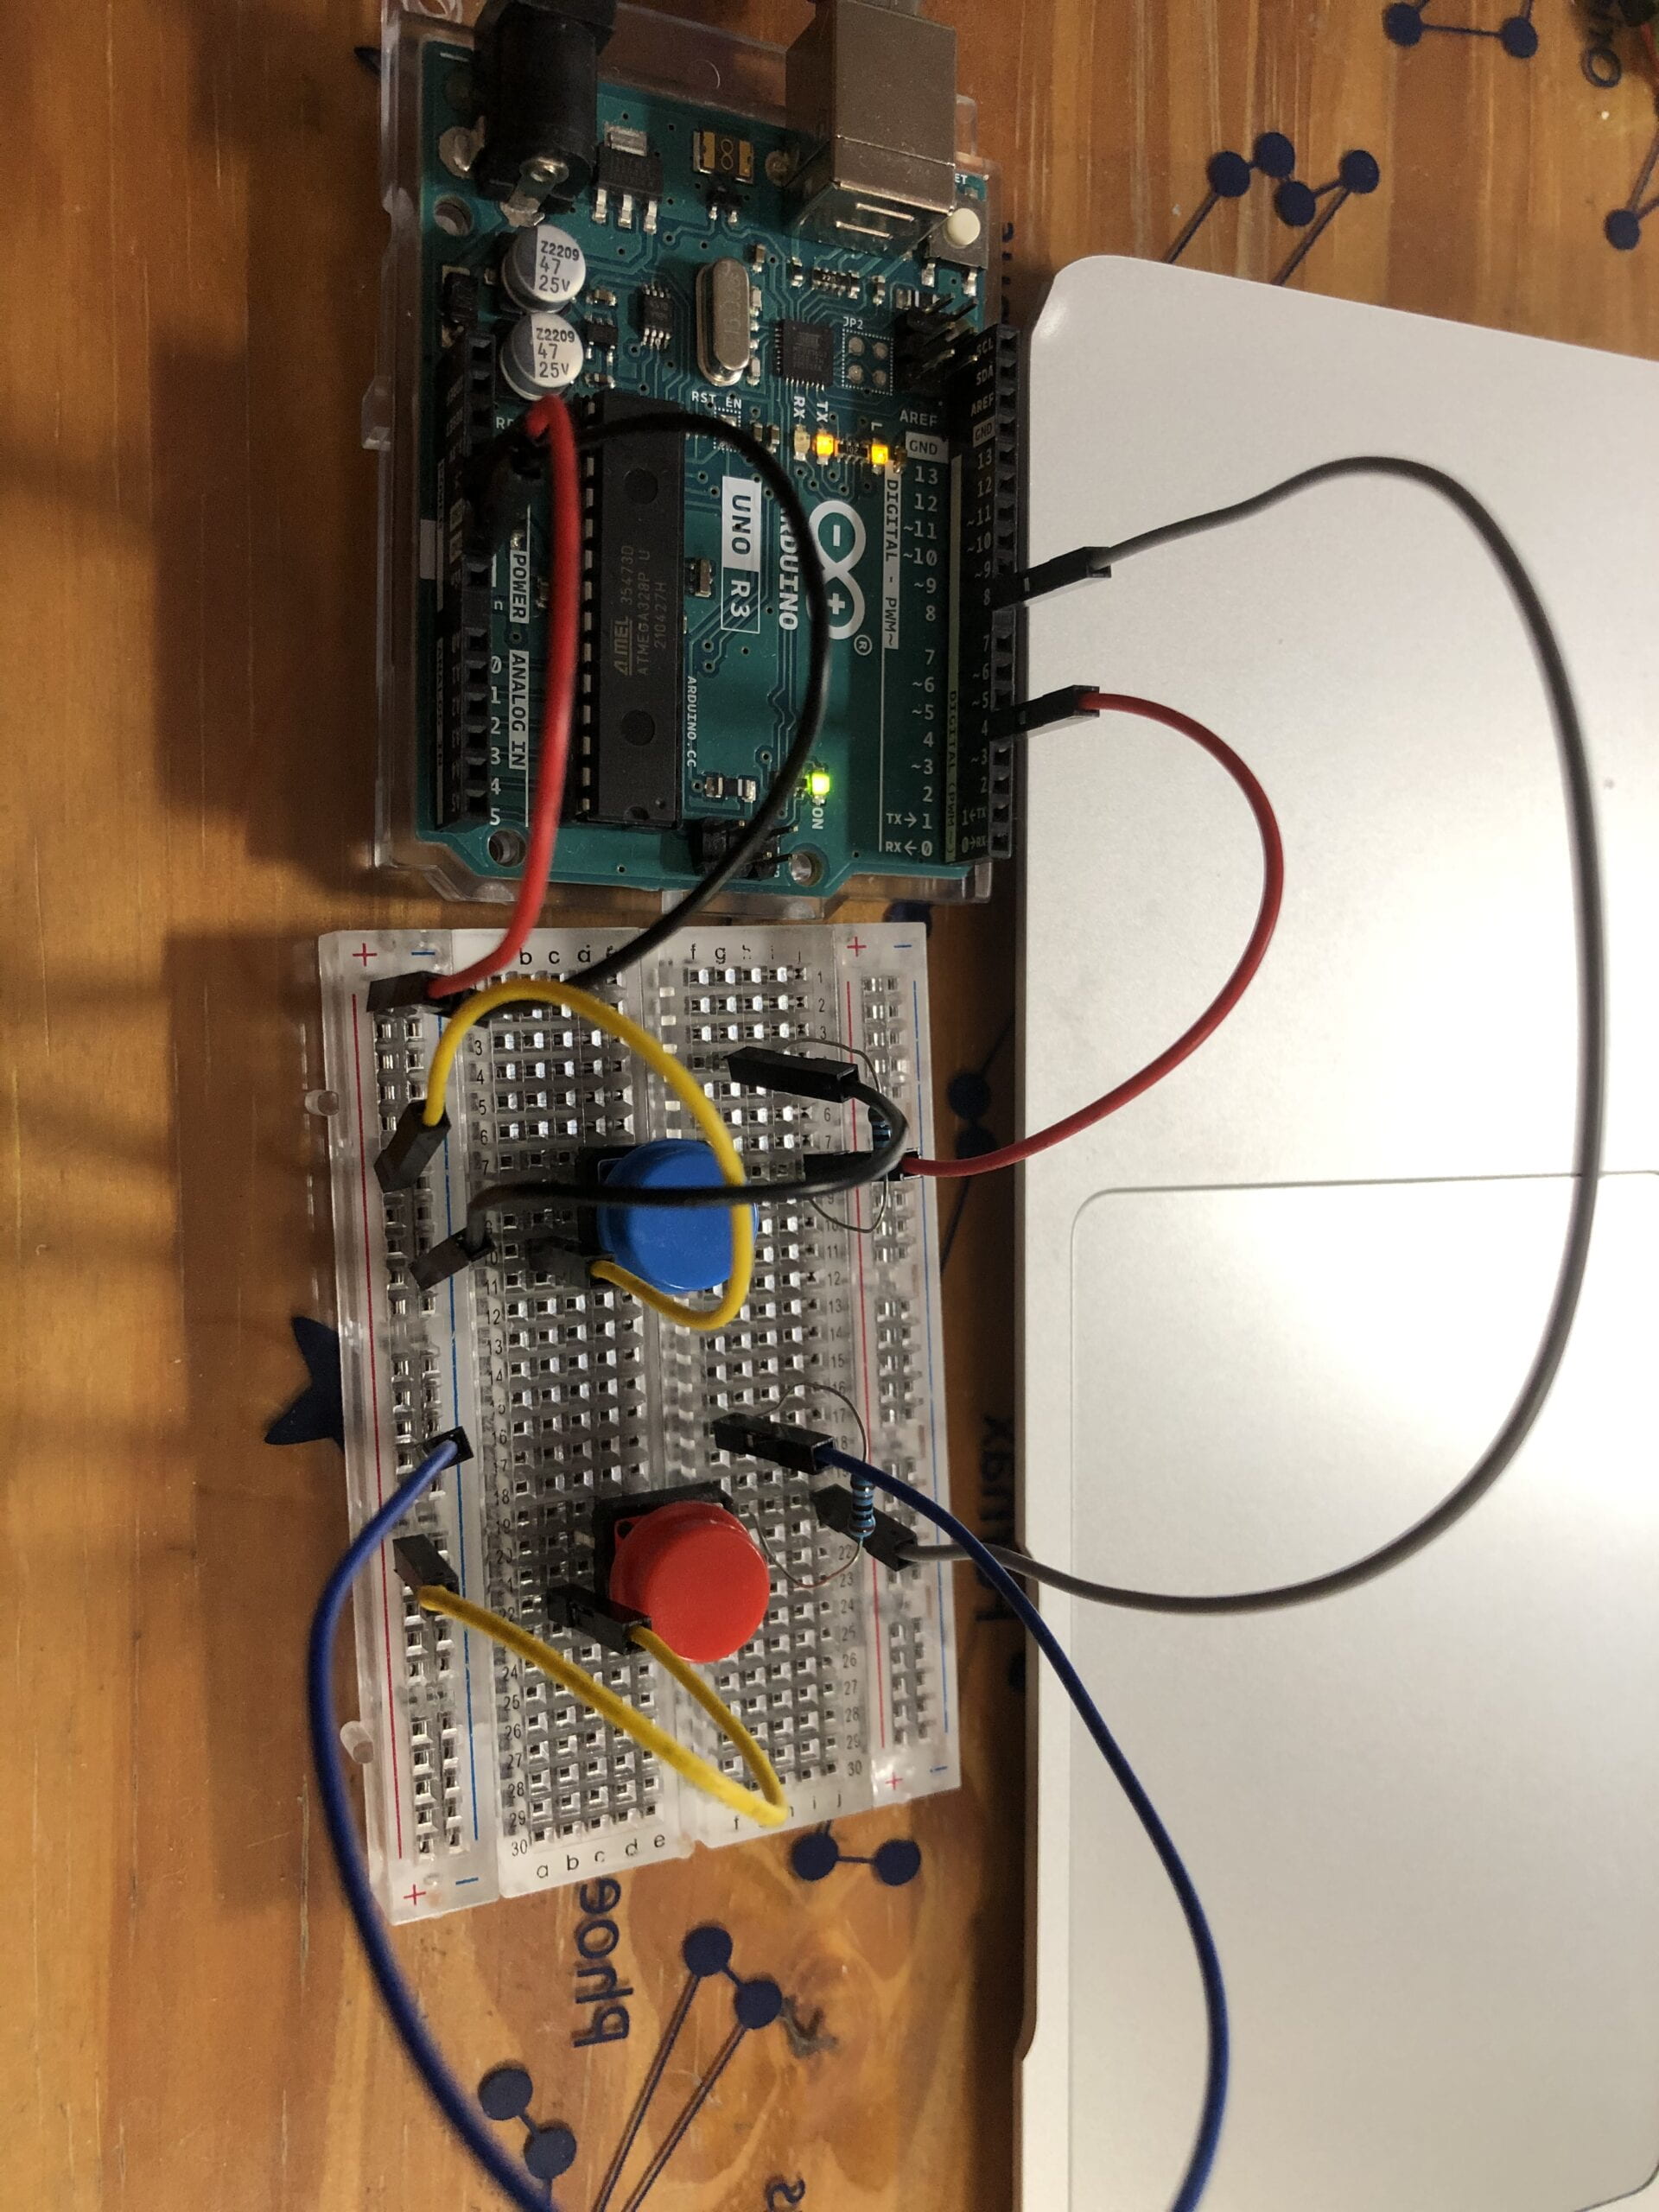
When I made the Processing code, I found my motor didn’t move and only the bouncing ball worked. In addition, the number in the console of Processing is always 0. I asked Professor Godoy for help and she solved the coding problem by changing the “if (x > width-s/2)” into “if (x > width)” so that it represents 1 when the ball touches the side of the screen. And we also found I connect the circuit in the wrong way and it stopped the motor. (The right order is brown is ground, red is 5V and orange is special pin)
Homework
Code
Arduino
// IMA NYU Shanghai
// Interaction Lab
// For sending multiple values from Arduino to Processing
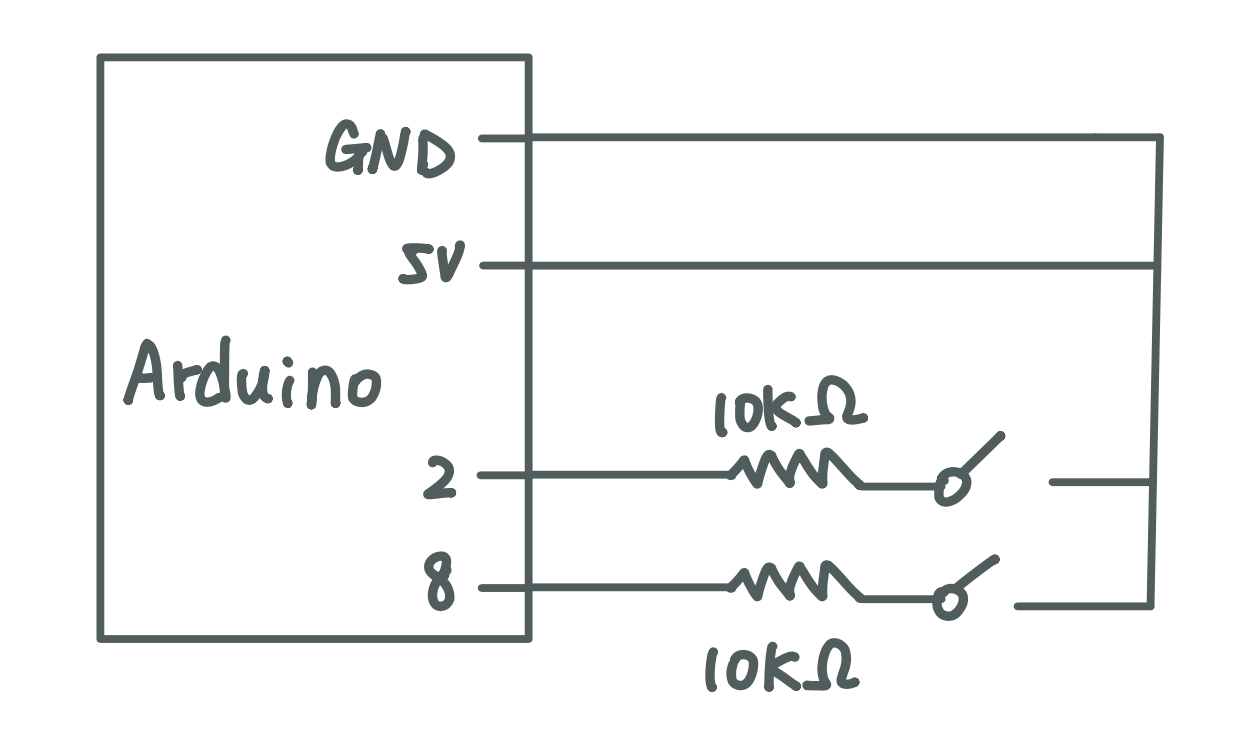
int button1 = 4;
int button2 = 8;
int count1;
int count2;
void setup() {
Serial.begin(9600);
}
void loop() {
if (digitalRead(button1) == HIGH){
count1 = count1 +1;
}
if (digitalRead(button2) == HIGH){
count2 = count2 +1;
}
Serial.print(count1);
Serial.print(","); // put comma between sensor values
Serial.print(count2);
Serial.println(); // add linefeed after sending the last sensor value
// too fast communication might cause some latency in Processing
// this delay resolves the issue.
delay(100);
// end of example sending values
}
Processing
// IMA NYU Shanghai
// Interaction Lab
// For receiving multiple values from Arduino to Processing

/*
 * Based on the readStringUntil() example by Tom Igoe
 * https://processing.org/reference/libraries/serial/Serial_readStringUntil_.html
 */

import processing.serial.*;


int NUM_OF_VALUES_FROM_ARDUINO = 2;   /** YOU MUST CHANGE THIS ACCORDING TO YOUR PROJECT **/
int sensorValues[];      /** this array stores values from Arduino **/

String myString = null;
Serial myPort;

void setup() {
  size(600, 600);

  setupSerial();

}

void draw() {
    background(0);
  getSerialData();
  printArray(sensorValues);
 if (sensorValues[0] % 2 == 1) {
    pushMatrix();
    translate(width*0.3, height*0.3);
    rotate(frameCount / 200.0);
    star(0, 0, 30, 70, 5);
    popMatrix();
  }
  if (sensorValues[1] % 2 == 1) {
    pushMatrix();
    translate(width*0.7, height*0.7);
    rotate(frameCount / 200.0);
    star(0, 0, 80, 100, 40);
    popMatrix();
  }

}

void star(float x, float y, float radius1, float radius2, int npoints) {
  float angle = TWO_PI / npoints;
  float halfAngle = angle/2.0;
  beginShape();
  for (float a = 0; a < TWO_PI; a += angle) {
    float sx = x + cos(a) * radius2;
    float sy = y + sin(a) * radius2;
    vertex(sx, sy);
    sx = x + cos(a+halfAngle) * radius1;
    sy = y + sin(a+halfAngle) * radius1;
    vertex(sx, sy);
  }
  endShape(CLOSE);
}
void setupSerial() {
  printArray(Serial.list());
  myPort = new Serial(this, Serial.list()[3], 9600);
  // WARNING!
  // You will definitely get an error here.
  // Change the PORT_INDEX to 0 and try running it again.
  // And then, check the list of the ports,
  // find the port "/dev/cu.usbmodem----" or "/dev/tty.usbmodem----"
  // and replace PORT_INDEX above with the index number of the port.

  myPort.clear();
  // Throw out the first reading,
  // in case we started reading in the middle of a string from the sender.
  myString = myPort.readStringUntil( 10 );  // 10 = '\n'  Linefeed in ASCII
  myString = null;

  sensorValues = new int[NUM_OF_VALUES_FROM_ARDUINO];
}

void getSerialData() {
  while (myPort.available() > 0) {
    myString = myPort.readStringUntil( 10 ); // 10 = '\n'  Linefeed in ASCII
    if (myString != null) {
      String[] serialInArray = split(trim(myString), ",");
      if (serialInArray.length == NUM_OF_VALUES_FROM_ARDUINO) {
        for (int i=0; i<serialInArray.length; i++) {
          sensorValues[i] = int(serialInArray[i]);
        }
      }
    }
  }
}
At first, I write this Arduino code.
// Interaction Lab
// For sending multiple values from Arduino to Processing
int button1 = 4;
int button2 = 8;


void setup() {
  Serial.begin(9600);
}

void loop() {
  // to send values to Processing assign the values you want to send
  //this is an example
  int sensor1 = digitalRead(4);
  int sensor2 = digitalRead(8);
  Serial.print(sensor1);
  Serial.print(",");  // put comma between sensor values
  Serial.print(sensor2);
//  Serial.print(",");  // put comma between sensor values
//  Serial.print(sensor3);
  Serial.println(); // add linefeed after sending the last sensor value

  // too fast communication might cause some latency in Processing
  // this delay resolves the issue.
  delay(100);

  // end of example sending values
}
And I found only when I press the button, the star appears. The requirement is “when you press button 1 once, star 1 will appear on the canvas, and when you press button 1 once again, star 1 will disappear.”
So I decided to use count to solve this problem and when the number of pressing times is odd, the stars appear and the number is even, the stars disappear.
I research that sound can work as input and generate creative outputs. Music can draw be shown on the screen and let it become more visible.
Here is the example I have found. https://processing.org/tutorials/sound/#example-5-6-audio-analysis
/**
 * Processing Sound Library, Example 5
 *
 * This sketch shows how to use the FFT class to analyze a stream
 * of sound. Change the number of bands to get more spectral bands
 * (at the expense of more coarse-grained time resolution of the spectrum).
 *
 * Load this example with included sound files from the Processing Editor:
 * Examples > Libraries > Sound > Analysis > FFTSpectrum
 */

import processing.sound.*;

// Declare the sound source and FFT analyzer variables
SoundFile sample;
FFT fft;

// Define how many FFT bands to use (this needs to be a power of two)
int bands = 128;

// Define a smoothing factor which determines how much the spectrums of consecutive
// points in time should be combined to create a smoother visualisation of the spectrum.
// A smoothing factor of 1.0 means no smoothing (only the data from the newest analysis
// is rendered), decrease the factor down towards 0.0 to have the visualisation update
// more slowly, which is easier on the eye.
float smoothingFactor = 0.2;

// Create a vector to store the smoothed spectrum data in
float[] sum = new float[bands];

// Variables for drawing the spectrum:
// Declare a scaling factor for adjusting the height of the rectangles
int scale = 5;
// Declare a drawing variable for calculating the width of the
float barWidth;

public void setup() {
  size(640, 360);
  background(255);

  // Calculate the width of the rects depending on how many bands we have
  barWidth = width/float(bands);

  // Load and play a soundfile and loop it.
  sample = new SoundFile(this, "beat.aiff");
  sample.loop();

  // Create the FFT analyzer and connect the playing soundfile to it.
  fft = new FFT(this, bands);
  fft.input(sample);
}

public void draw() {
  // Set background color, noStroke and fill color
  background(125, 255, 125);
  fill(255, 0, 150);
  noStroke();

  // Perform the analysis
  fft.analyze();

  for (int i = 0; i < bands; i++) {
    // Smooth the FFT spectrum data by smoothing factor
    sum[i] += (fft.spectrum[i] - sum[i]) * smoothingFactor;

    // Draw the rectangles, adjust their height using the scale factor
    rect(i*barWidth, height, barWidth, -sum[i]*height*scale);
  }
}


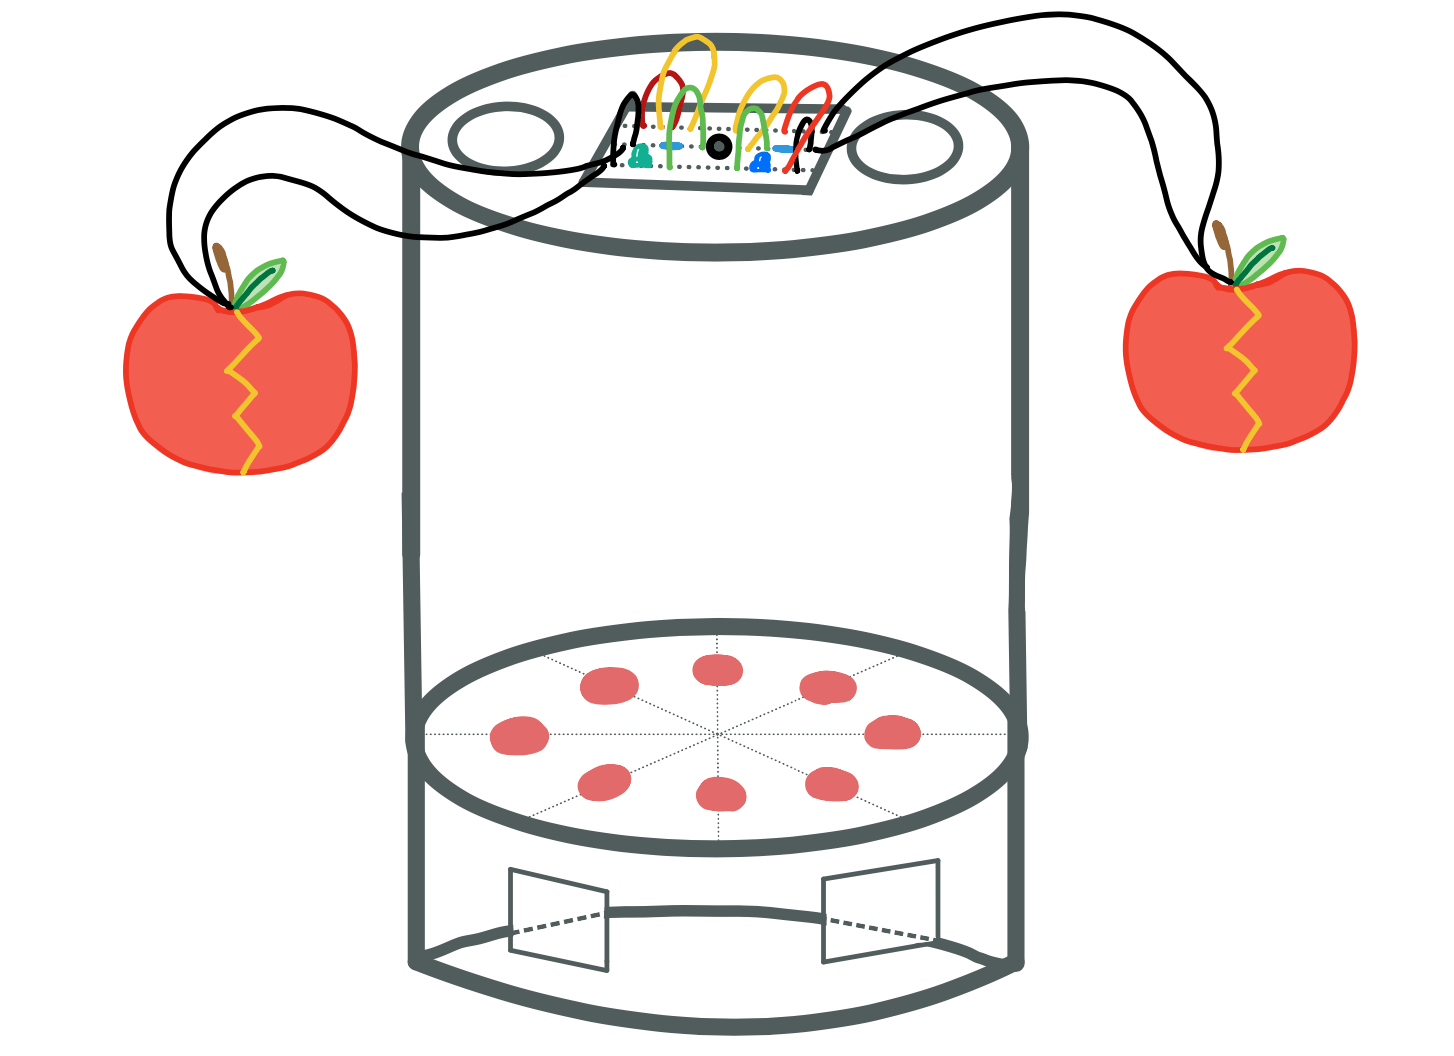
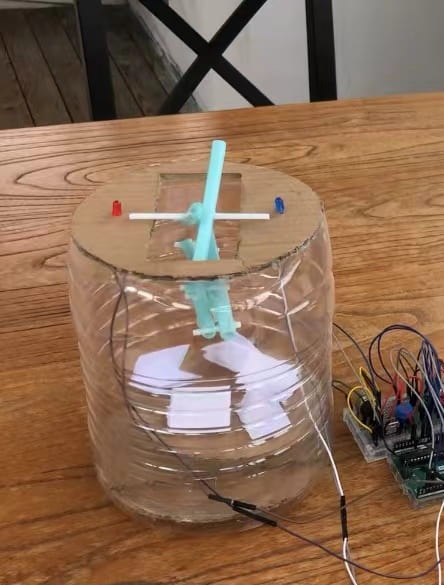
 Conception and Design