Recitation 1: Electronics & Soldering
Materials and their function:
- 1 * Breadboard: a tool for holding the components of the circuit, and connecting them together
- 1 * Buzzer: make sounds (“Bi Bi”)
- 1 * Push-Button Switch: a control that can be used to interrupt the flow of current through a circuit
- 1 * 220-ohm Resistor: a tool to control the flow of current and protect the LEDs
- 1 * 10K ohm Resistor: a tool to control the flow of current and protect the LEDs
- 1 * 10K ohm Variable Resistor (Potentiometer): output an adjustable voltage
- 2 * LED: lighting
- 1 * 5-volt power supply: supply power
- 1 * Barrel Jack: adapter connector (to change the 220V to the voltage that fits for the circuit)
- 1 * Multimeter: an electronic device with the ability to measure the electrical properties of voltage, current, and resistance, among other things.
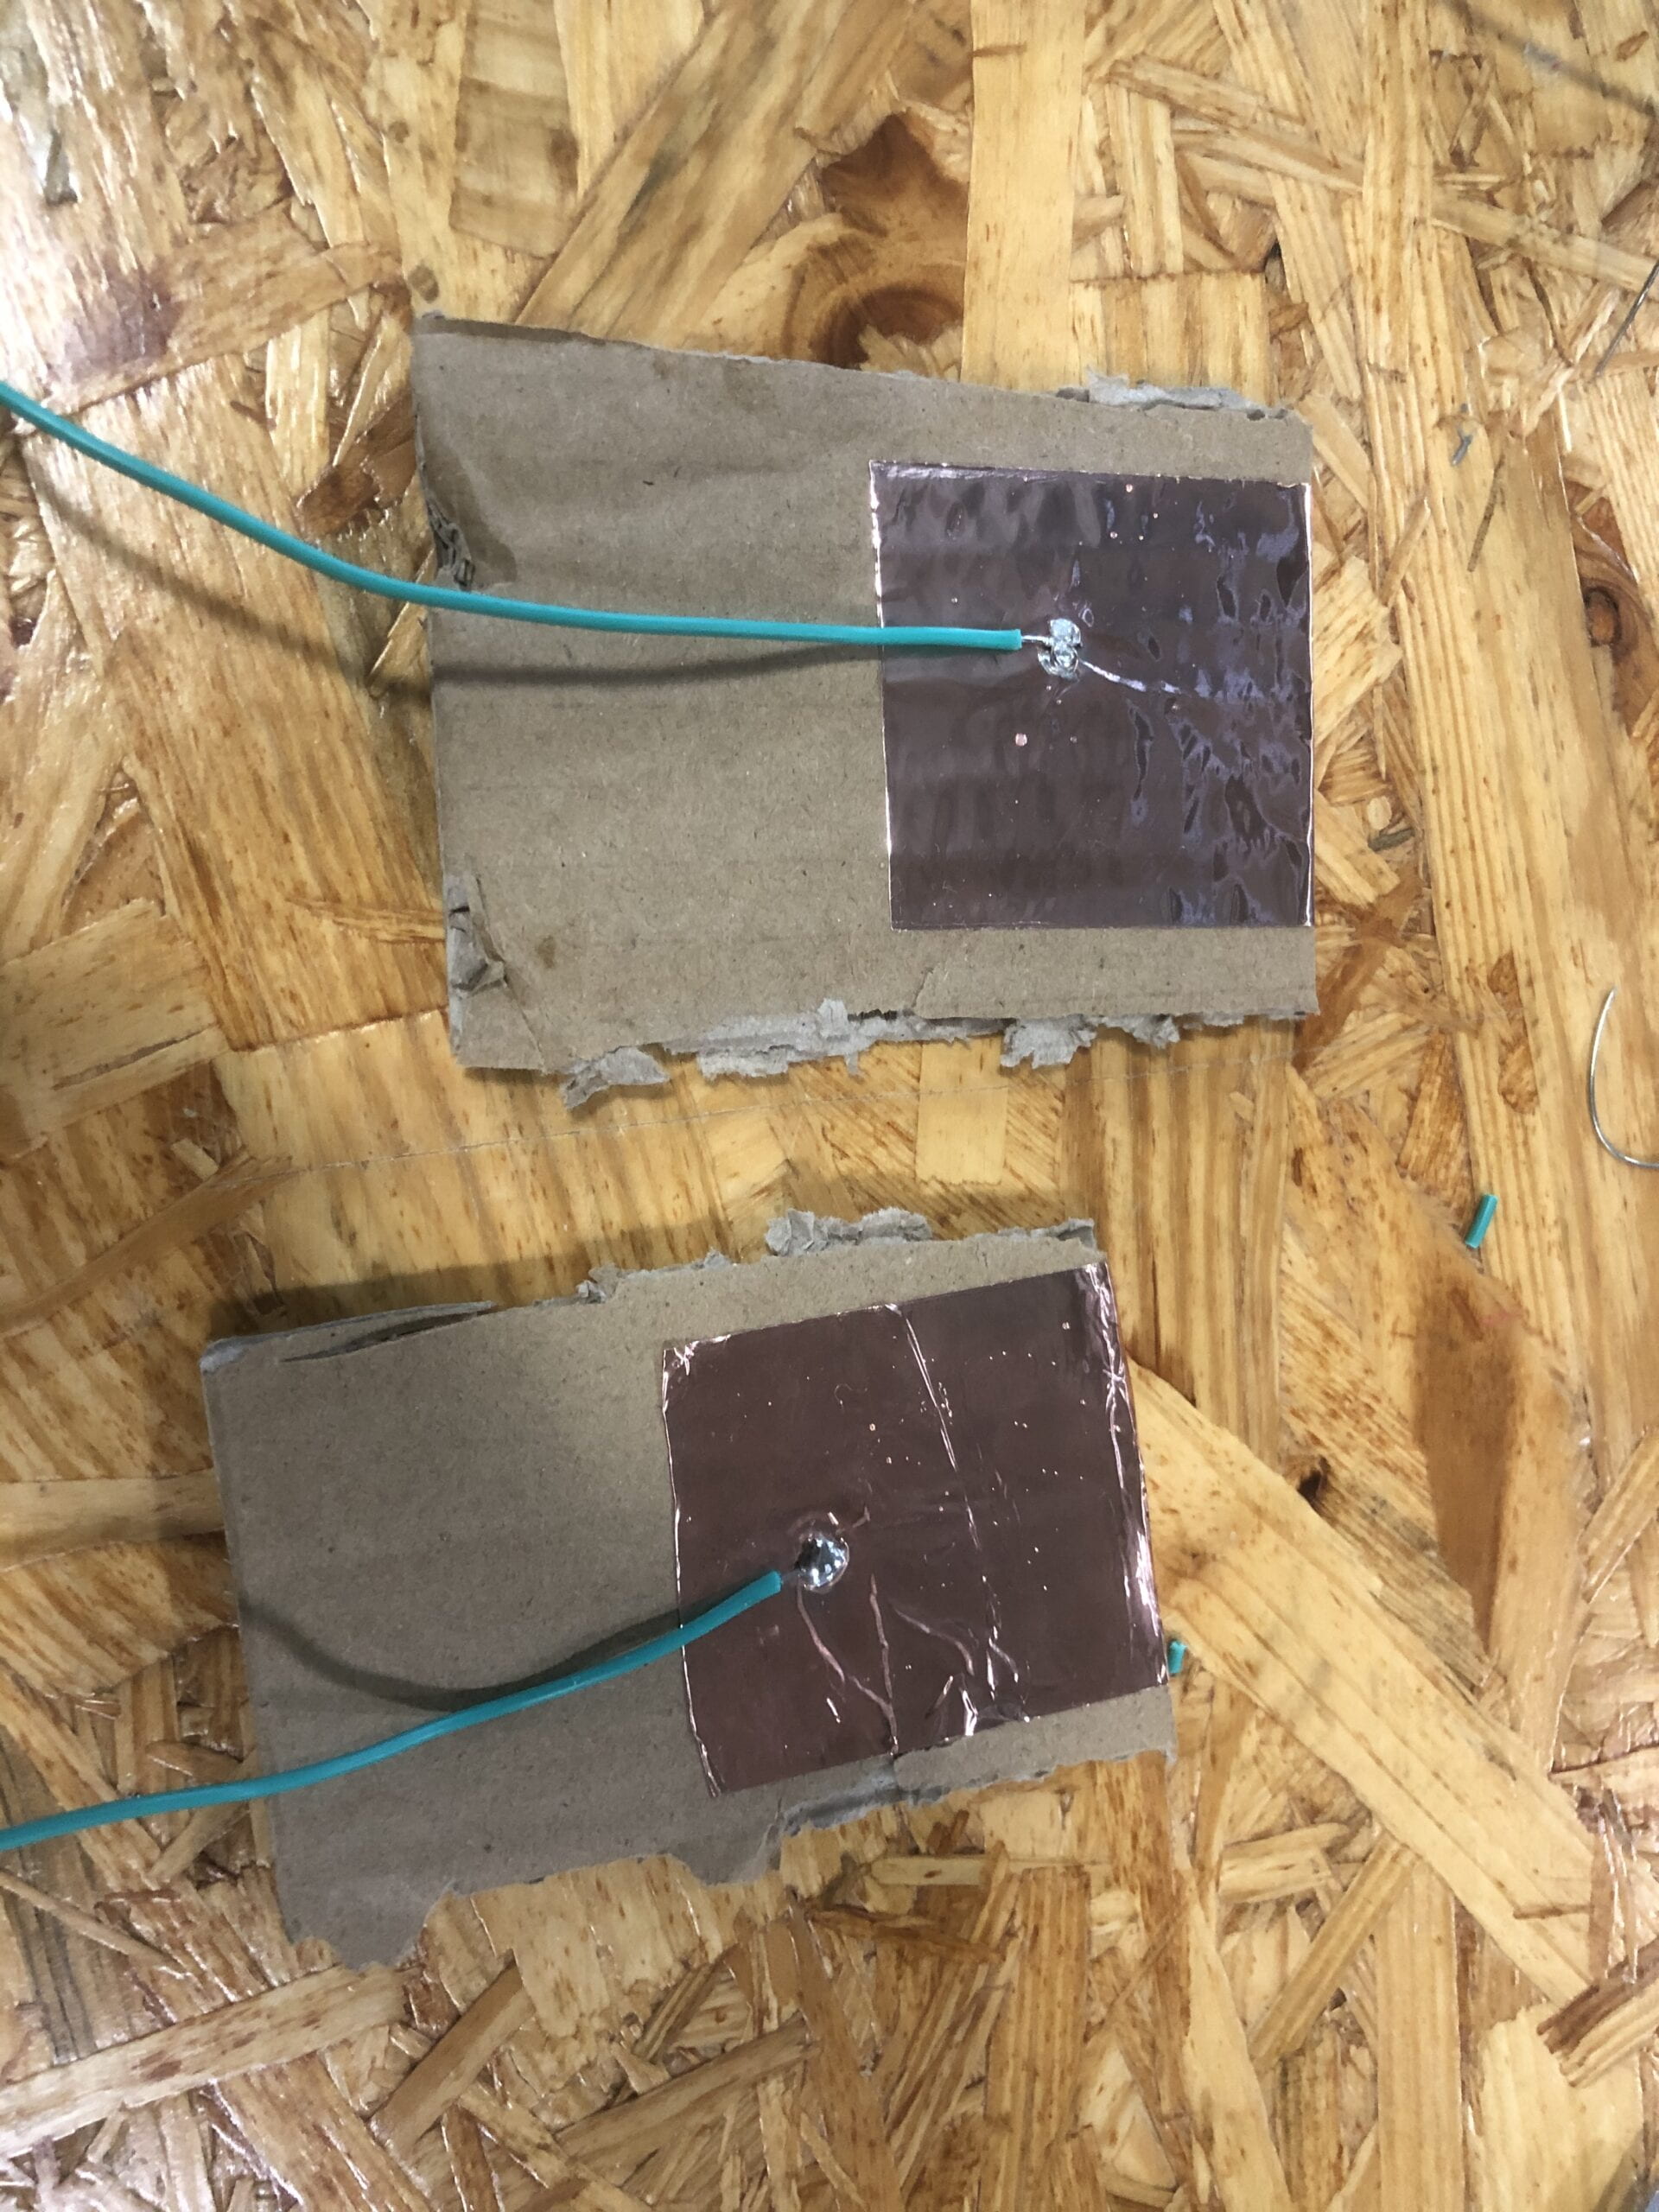
- 1 * DIY Paddle Button: a control that can be used to interrupt the flow of current through a circuit ( work as a change for the switch)
- Several Jumper Cables (M/M Wires): connect the circuit
Completed Circuit Working
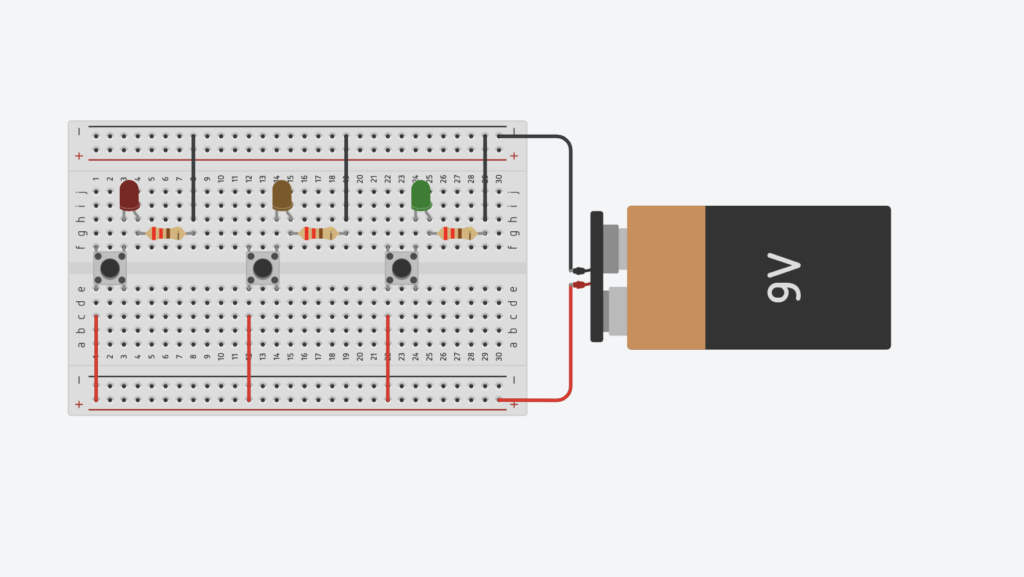
Task 1: Build the circuit
Step 1:
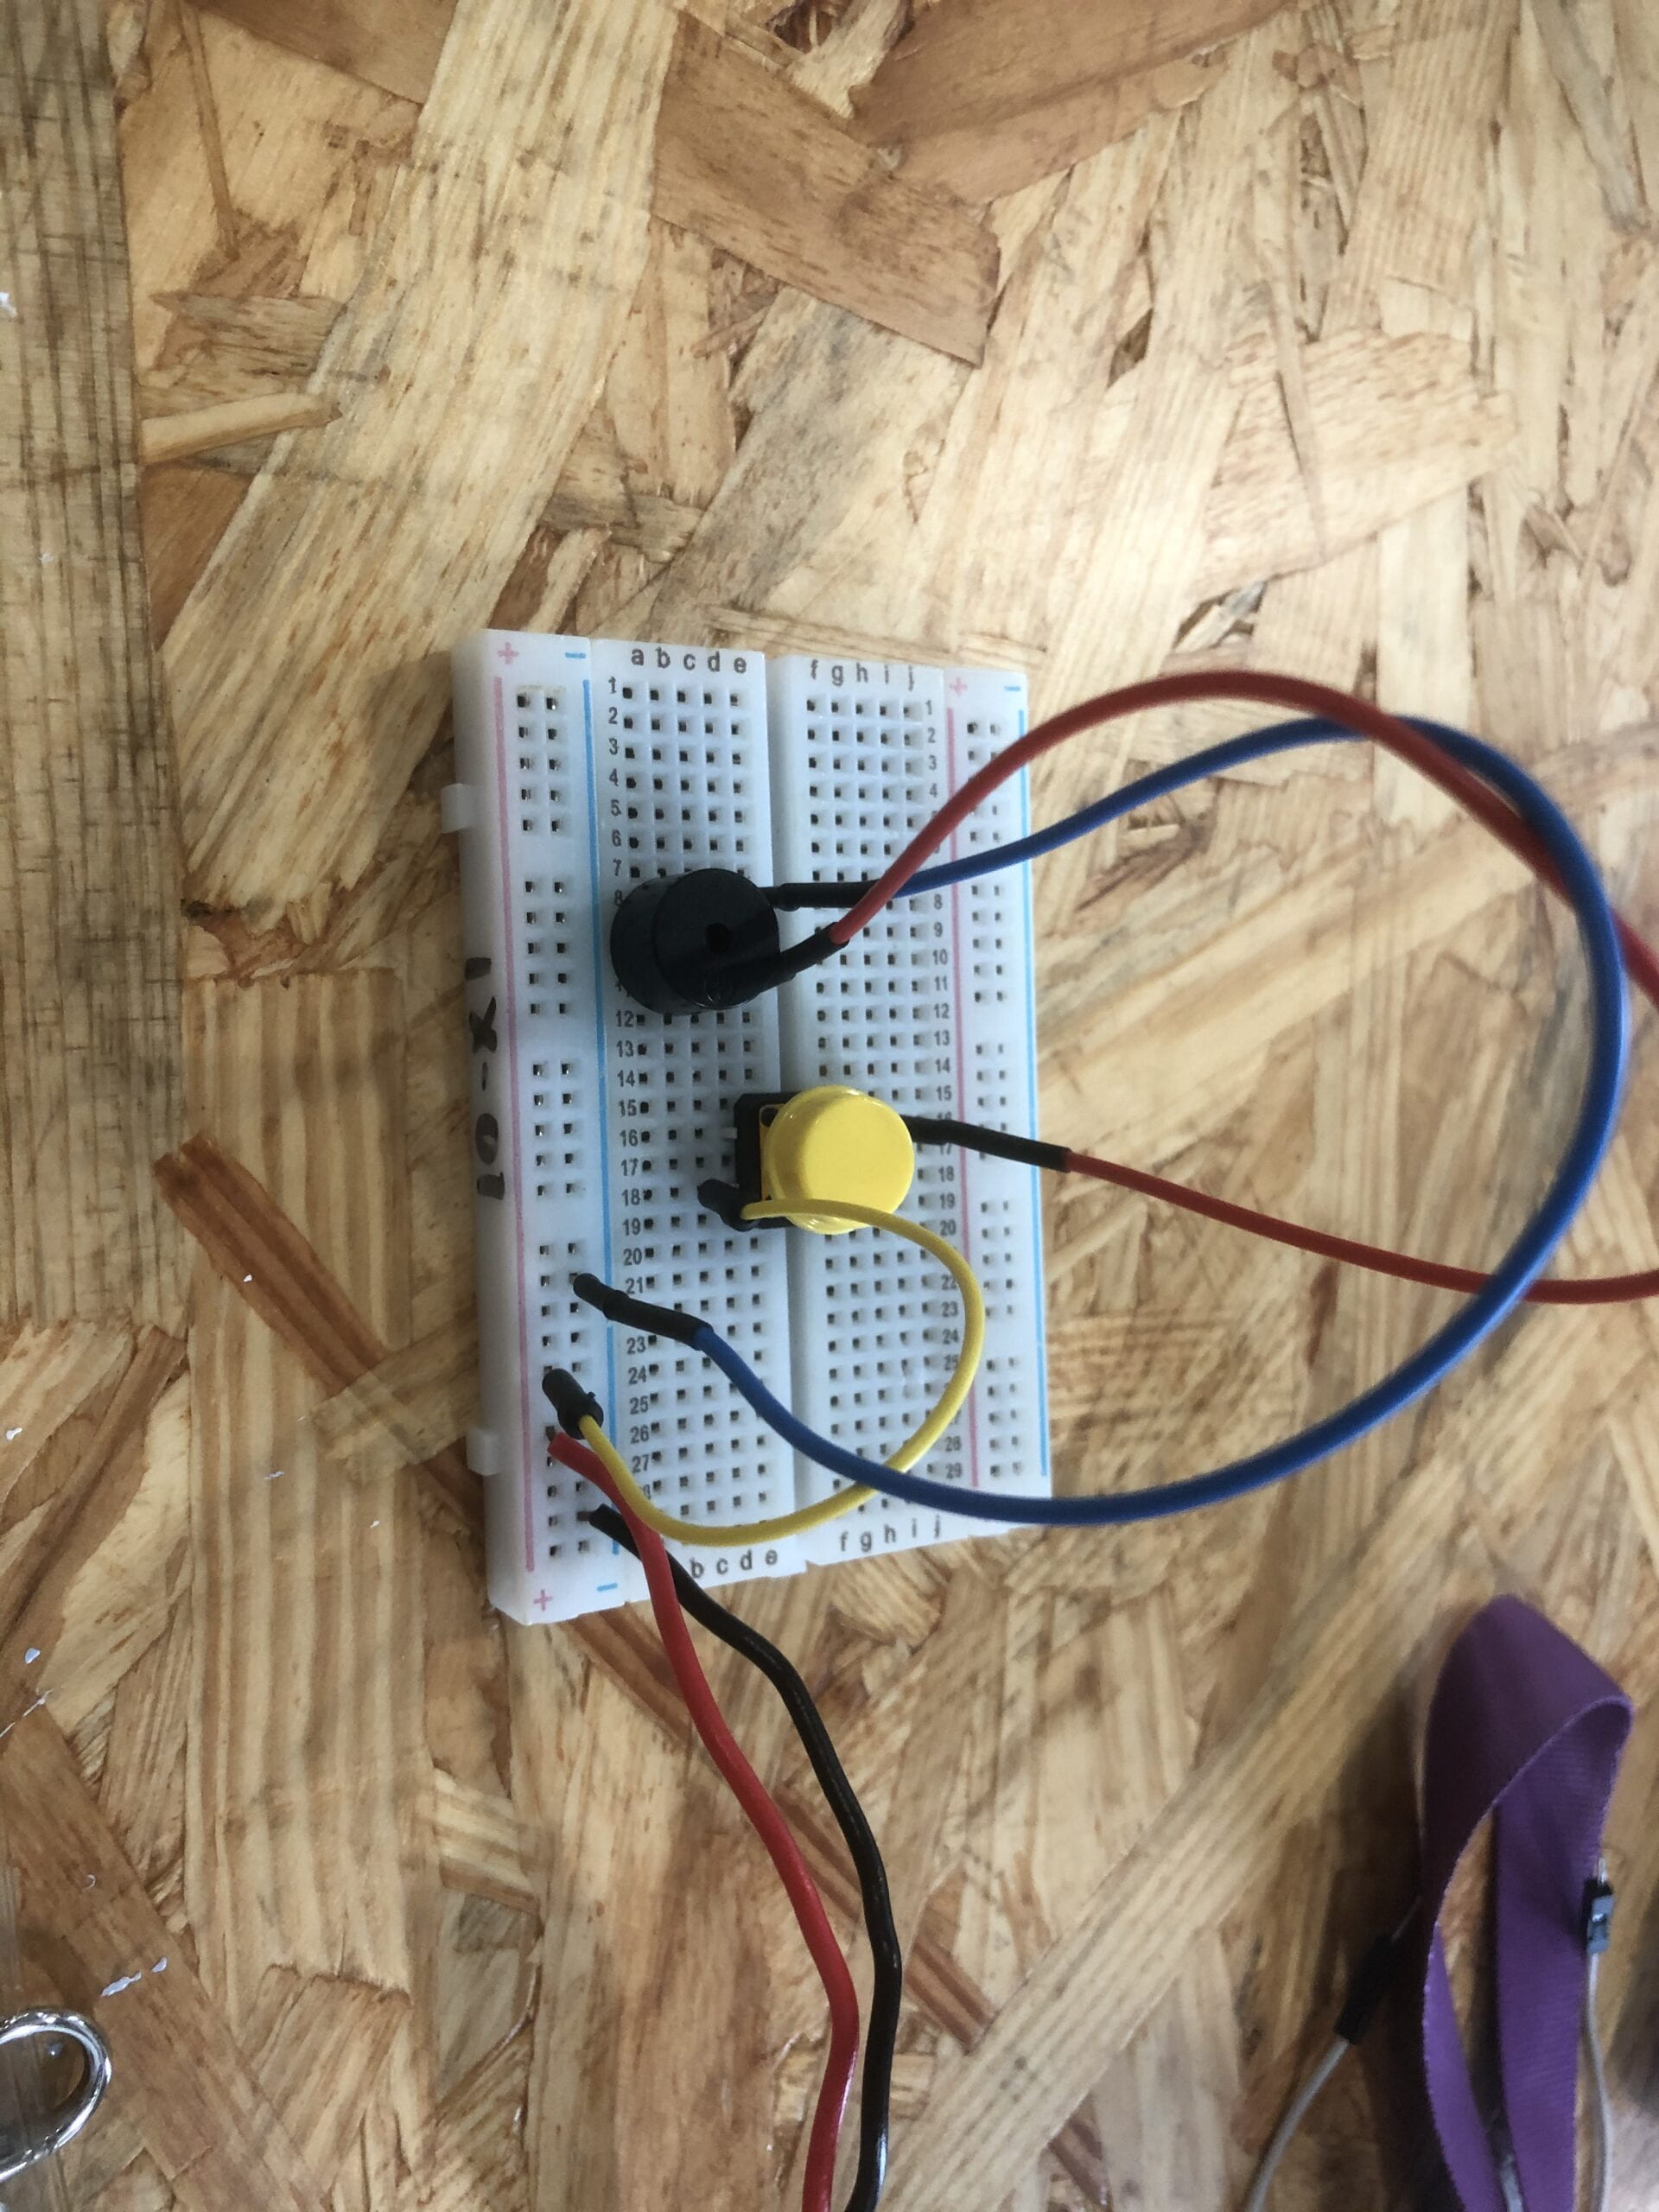
Step 2:
![]()
Step 3:
Task 2: build a switch
Task 3: Switch the switches and send a message
Description of the process
At first, my partner Christine and I don’t know how the breadboard worked. We spent some time learning how to make the current flow smoothly. When we tried to use the switch to control the LED and the buzzer, we found it didn’t work and the LED was on and the buzzer kept ringing. We tried to change the position of the switch to another side but it still didn’t work. So we asked the assistant for help and learned that the switch needs to be put in the middle of the breadboard to work as a bridge so that it can have the function of controlling. At last, the circuit worked.
Questions
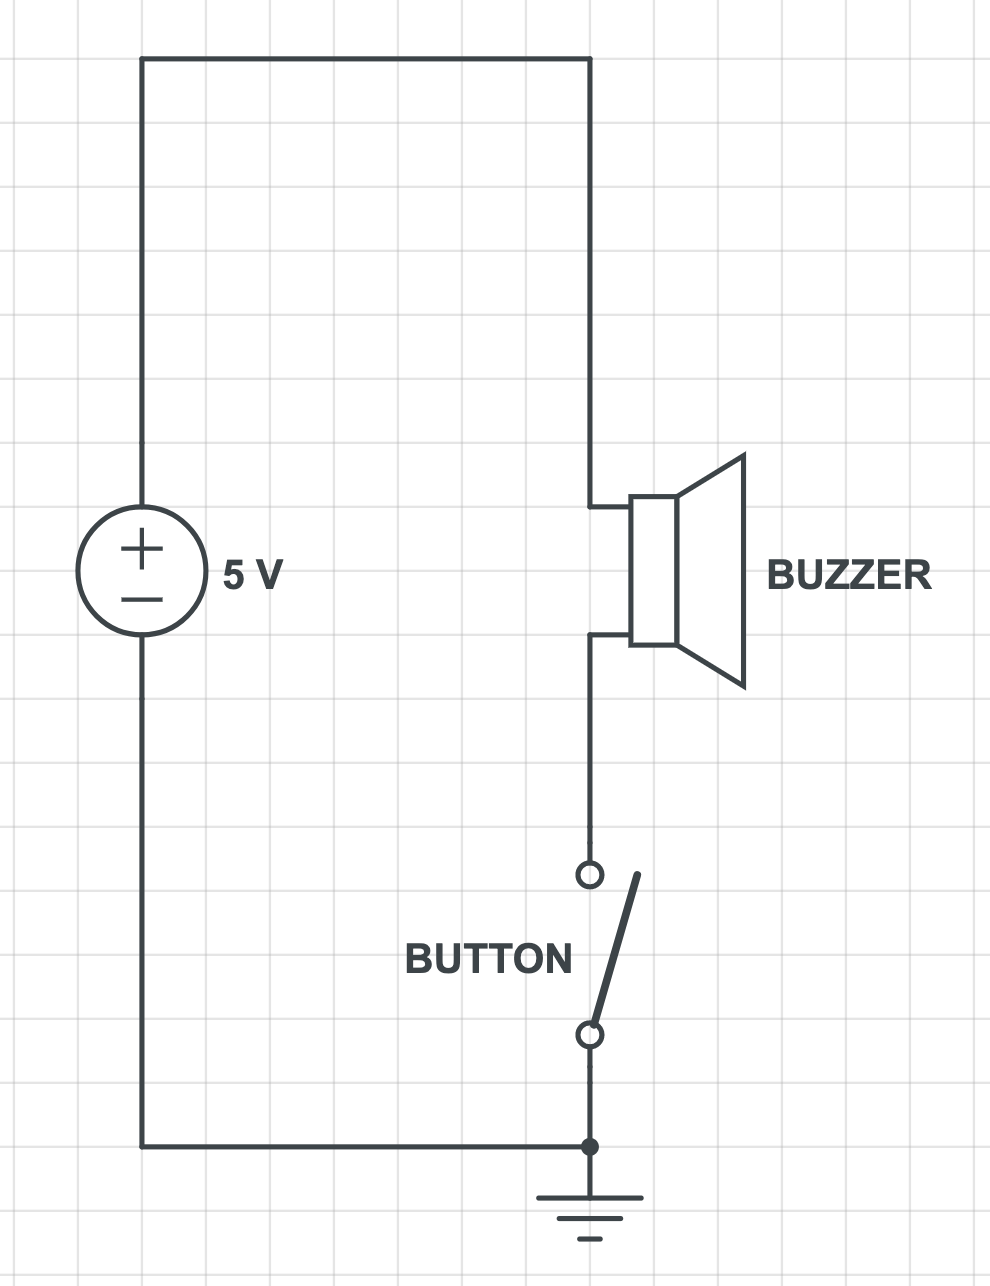
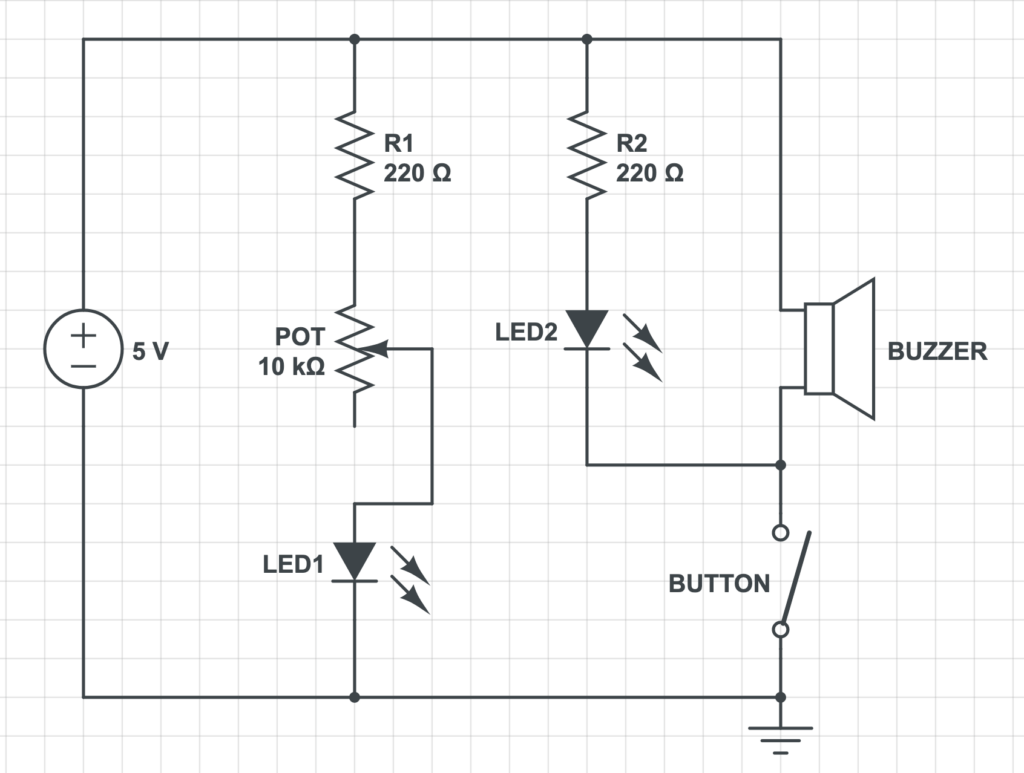
Question 1: What is the function of the resistor R1?
The function of the resistor R1 is to limit the current that passes through the LED1 so that the current can be below the maximum allowable current of LED1 and LED1 is safe.
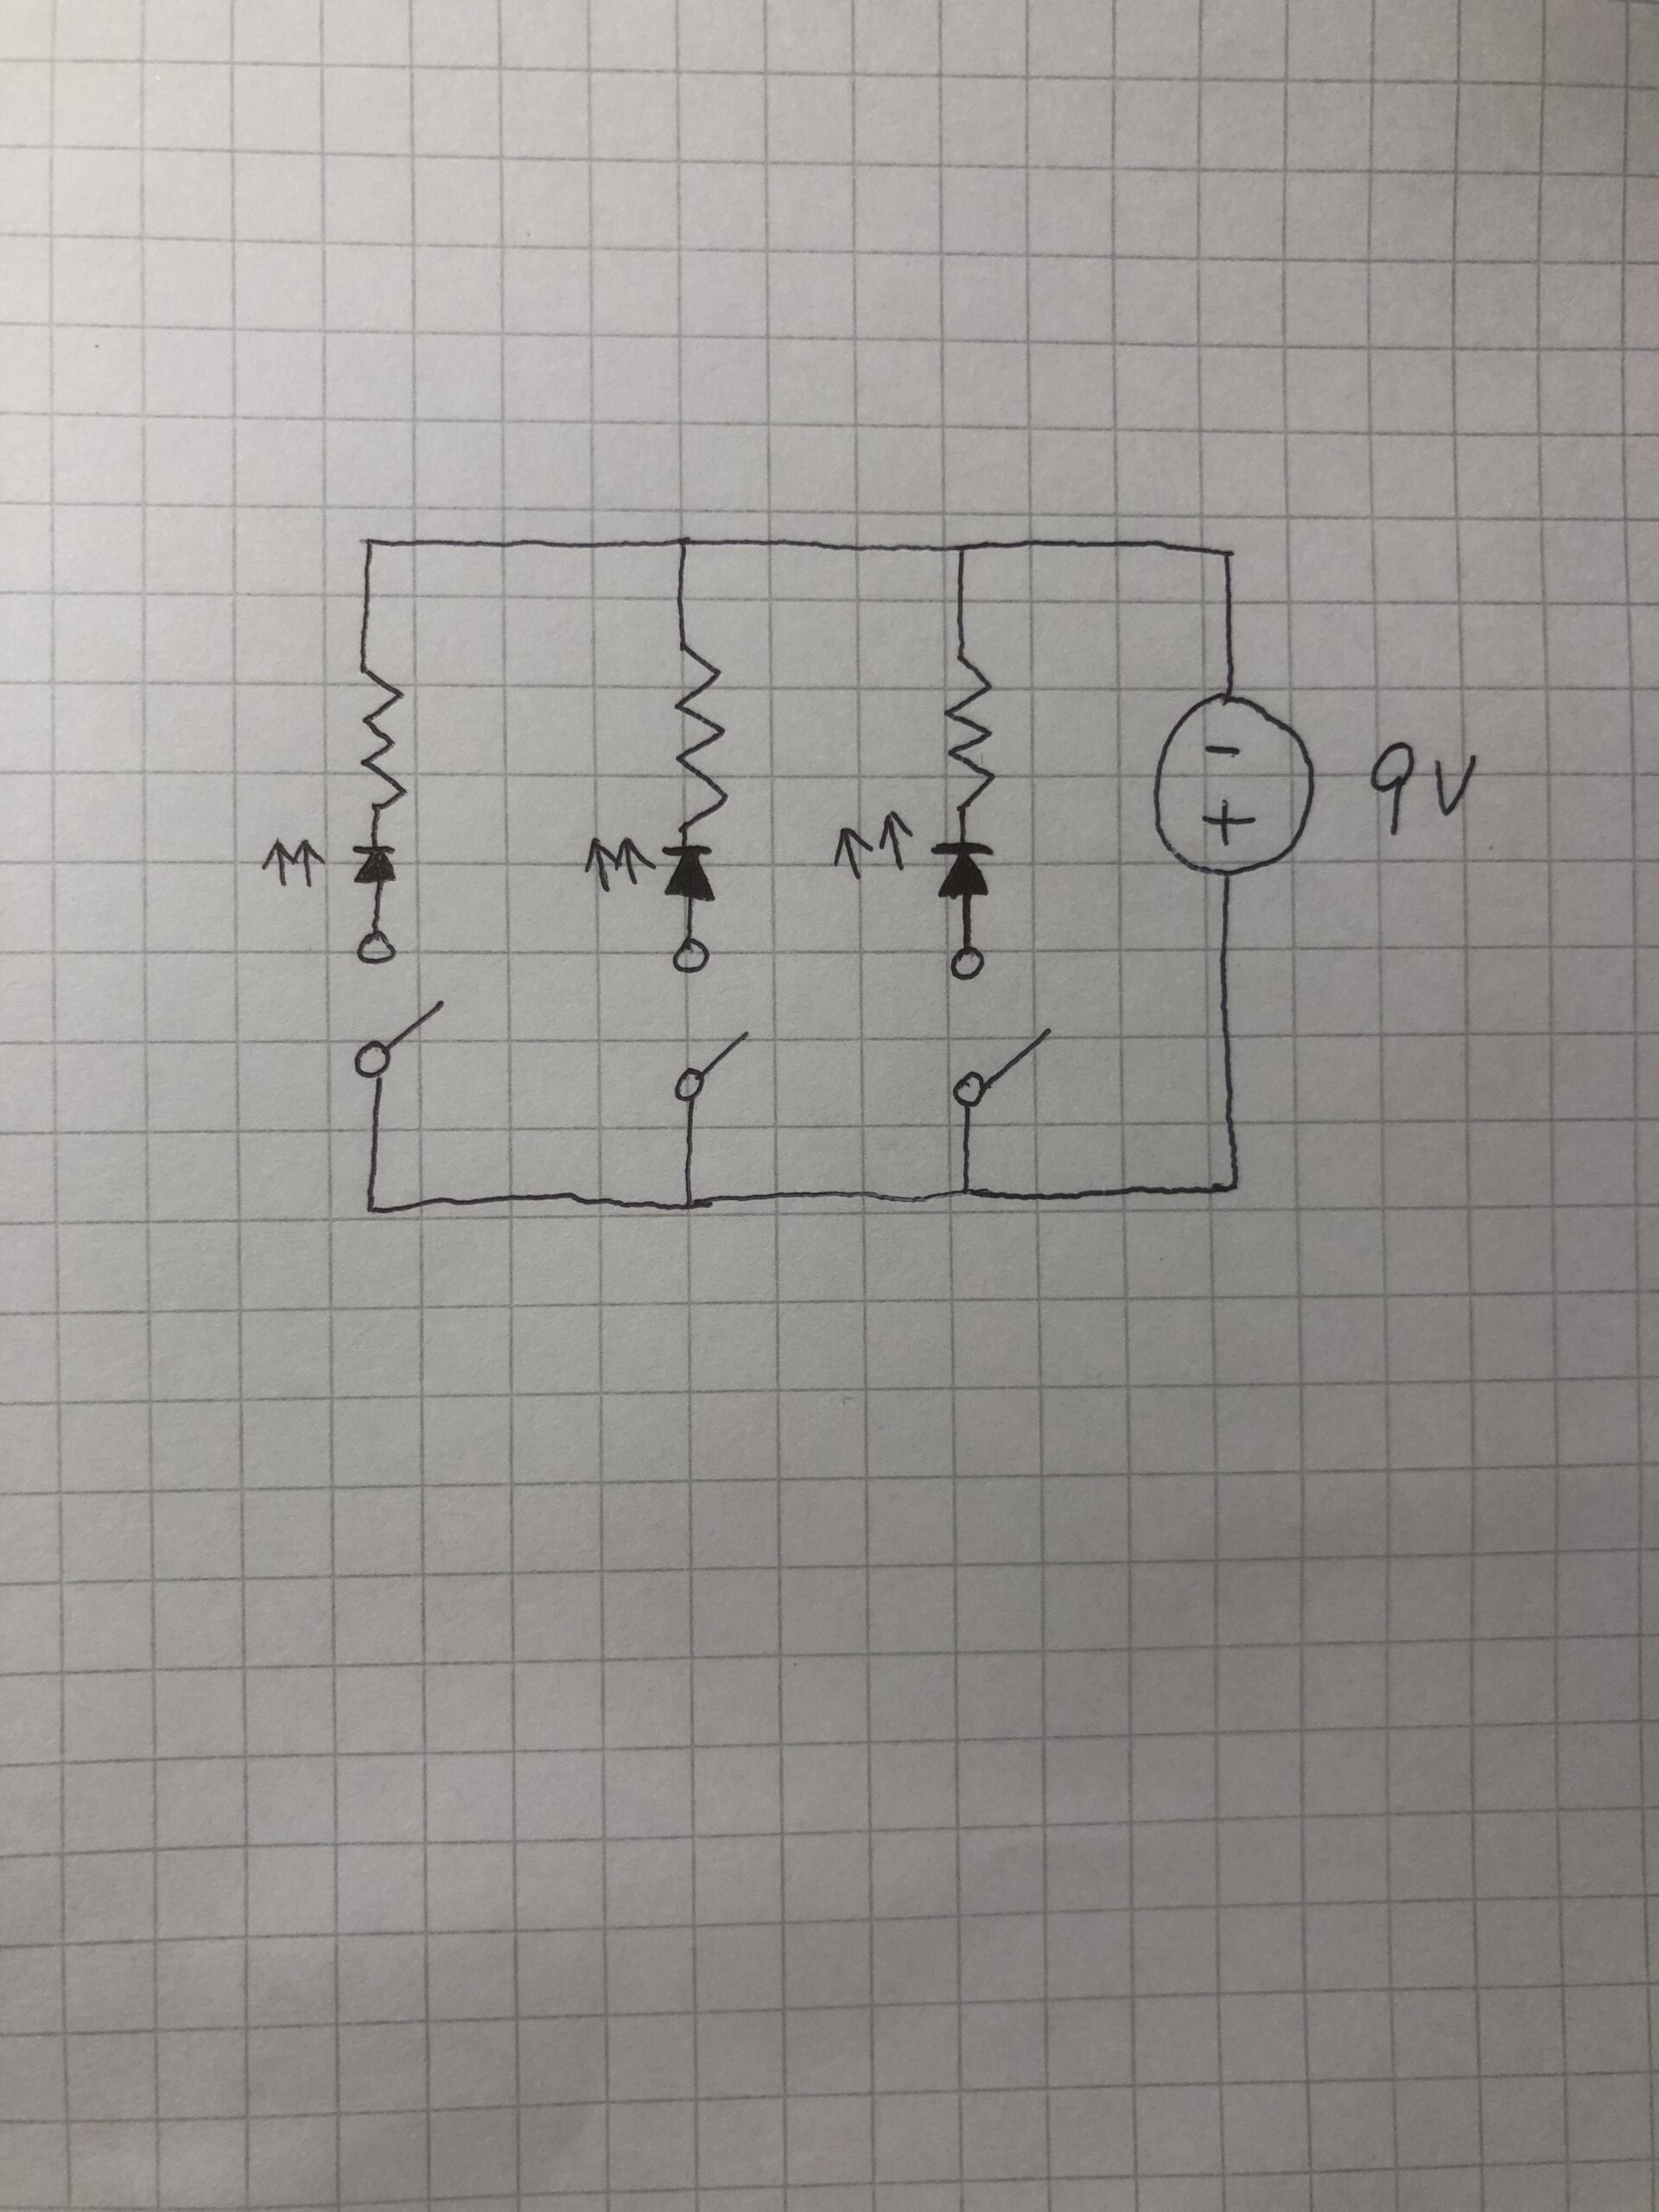
Question 2: Looking at the following circuit, draw its diagram by yourself.
Question 3 :
After reading The Art of Interactive Design, in what way do you think that the circuit you built today includes interactivity? Which degree of interactivity does it possess? Please explain your answer.
I think the link between our DIY paddle switch, LED1, LED2, and the buzzer includes interactivity because when I press the switch, the lights are on and the buzzer rings. It is a process which each participant (the circuit and me) in turn listen (I listen to the reaction of the circuit and the circuit listen to my order), think (I think about using a switch to control the circuit and circuit think about how to obey my order) and speak ( I press the switch to connect the circuit and the circuit gives me reaction), which is just interaction in The Art of Interactive Design (Crawford, 5)
And since this process is very simple, it is a low degree of interactivity.
Question 4:
How can Interaction Design and Physical Computing be used to create Interactive Art? You can reference Zack Lieberman’s video or any other artists that you know.
In Zack Liberman’s interactive artwork Drawn, the audience can draw their own sketch rather than just watch existing paintings. This part includes Interaction Design. And Through Physical Computing, the sketch can react to visitors’ touch.