Project Overview
Project Title: Remains of Tomorrow
Material: gelatin, water, glycerin, wood, wire, copper wire, PCB board, borax
Size: 40cm x 40cm x 35cm
“Remains of Tomorrow” envisions a speculative future where the Earth is plunged into a new Ice Age—a consequence of humanity’s environmental failures. Inside the installation, fragments of wood and circuit boards are covered with crystal, lying frozen and forgotten, encased in time. The cube serves as both a boundary and a protective shell, preserving the remains of the past while separating them from the world outside. Outside the shell, biomaterial-powered lights illuminate not only the surrounding space but also the failures encased within, like a signal pleading for reflection and change. This juxtaposition of decay and light invites viewers to consider the tension between the technological mistakes of the past and the possibilities of a regenerative, sustainable future
Recipe:
Gelatin:
180ml water
36g gelatin
25g glycerin (almost double the amount of the glycerin to create the same texture as using 15g glycerin in summer)
Borax:
80g borax
200ml water
Tips: The solution is reusable. Crystals produced by reused solutions will differ from those produced by using the solution only once. The crystals will slowly turn white and then yellow after several reuses. But the effect is still acceptable.
Process:
This week, we continuously worked on building circuits on the gelatin piece. We plan to try conductive bio-fabrics, conductive inks, double conductive copper cymbal tape, and copper wires.
The conductive biomaterial based on agar-agar and salt (2g agar-agar, 1g glycerin, 5g salt, and 210 ml water) does not work well. It forms the shape but is not conductive at all. Based on the course lecture, I find that the activated carbon may work but the piece would become black, which is not very ideal for the appearance (The one on the left I made before used carbon powder to create the black color) 
After that, I test the conductive ink. The ink can work on paper but does not work on the gelatin (The ink can not be attached to the surface of the gelatin piece) So we decided not to use that 
The double conductive copper cymbal tape can work to some extent but it looks terrible when the track of the tape overlaps with the circuit pattern. So at last, under the instruction of Marcela, we turn to use the copper wire. (Thank you, Marcela!)

Since we gonna use the battery of 3.7v 300mah, we made some calculations and decided to connect one battery to 12 LEDs that are connected in parallel. I made different designs for the circuit and at last, we found that it would be relatively ideal to follow the shape of the pattern to arrange the LEDs. I made use of the property of gelatin to melt when exposed to heat and used a soldering pen to melt part of the gelatin piece and stick the copper wires in. This allows the two materials to be joined together without the need for additional glue.


Because of the material limitation (the size of the material is limited to the size of the ovenware we have) and the time consideration, I have to give up the idea of building wearables and start to think about other ways of combining biomaterial and other natural materials I have. I found that the broken and less-than-perfect crystals and the smooth and stable gelatin-based material formed an interesting dialog: the electronics covered by the crystals very naturally gave a sense of abandoned brokenness. And when the LED circuitry is freely extended on the gelatin-based material, it reveals a sense of technology and futurism that often does not belong to natural materials. This hints at the future direction of electronic materials (it gonna be replaced by biomaterial one day), and this is also what I want to express: the “natural” represented by biomaterials is not the same as the primitive. In the course of continuous experimentation and trial and error, people will find ways to collaborate with them. They will also replace non-biodegradable, toxic and harmful electronic parts and show their possibilities.
We choose to use the cube to present the conversation between the past and the future. In the interior area, the circuits are covered with crystal that shows the abandoned past and the outside area is lightened by the biomaterial-powered light. Moreover, like a cry for introspection and reform, biomaterial-powered lights outside the shell illuminate both the surrounding area and the inside failings. Viewers are encouraged to think about the conflict between the potential for a sustainable, regenerative future and the technological limitations of the past by this contrast of light and decay.
We experiment on both of the branches we find on the road (we collect them around theschool) and the wood. We find that it is a little bit difficult to build a stable frame with the branches, so we use wood instead.


We originally planned to make 3 frames of different sizes and arrange them in order of size and hang them with waxed wire that mimics electrical wires. However, we found that after gluing on the engraved gelatin material, the arrangement would become too crowded and it would be difficult to see what the contents were. So we decided to leave the two larger frames that were conducive to displaying the pattern.


In order to make the wood frame and crystal-PCB combine more naturally, we tried to grow crystals on the wood as well.


But as said before, I found that this relatively small frame is not good for displaying patterns, and also crystal-PCB is not suitable to be placed in it for display. So in the end I decided to take away this frame and keep the other two.


The crystal-LED works well but it does not really match the concept that we want to elaborate. So we decided to disconnect it in the end. (The blinking effect may be better but it means that we need to connect the Arduino and another battery. We don’t want the electronic part to be visually disturbing)


On the show


Questions
- What were some of the challenges you faced and how did you resolve them?
I think the main challenge is still in the materials. The first material we wanted to use was wax. We thought it would be very controllable, but it wasn’t at all. Wax oil is much more fluid than we thought. We tried to cover the wood with it to create that natural melting effect, but it didn’t really work. It also doesn’t blend well with other materials (we tried to soak it in crystal solution, but because of the hot solution required for the formation of the crystal, it actually melts very quickly into the solution) If we need to build a model with it, it can only be used in conjunction with silicone molds: this also means that we need to build the molds for the silicone first, and then inject the wax into them. This defeats the very first idea of creating the model of the hand and the arm. So at last, we decide to use crystal to create the texture.
There’s also the uncertainty of biomaterial that makes us need to repeat and keep testing. The recipe for gelatin varies a lot from season to season, but I didn’t realize that at first (I didn’t realize that winter was already here in Shanghai…) But the good thing is that soon we adjusted the recipe (mainly by increasing the percentage of glycerin). Cutting the pattern on the gelatin sheet was in fact not as stable as I thought it would be. The cutting parameters that worked the first time didn’t work on every piece (sometimes it needs repeated engraving to get the pattern appear)
- Who/what were some of your influences/references and how is that apparent in the project?
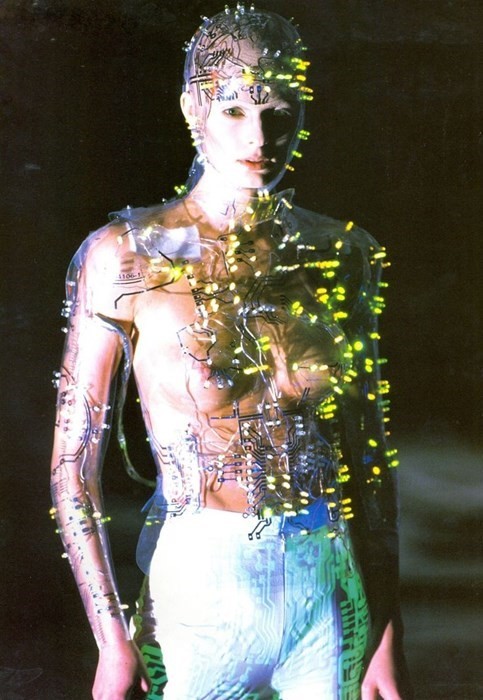
The idea of combining circuit with biomaterial cames from the collection “Android Couture” by Alexander McQueen for Givenchy in 1999. I was impressed by the design and found that the plastic and wire he is using may be possible to be replaced by biomaterial.
The idea of the crystal-covered design mainly comes from the artist Roger Hiorns (introduced by Wenwen in class)


- What aspects of the project can you apply to the course/other areas of your work moving forward?
I think exploring the reversible or reusable qualities of bio-fabrics will be something that I can continue to extend in my subsequent work. For example, crystal solutions as well as wax oil can actually be reused. This actually facilitates experimentation with new formulas, or material driven design, because understanding the nature of a material takes time and constant experimentation. Changes in the nature of materials in reuse may also create new textures.
- What would you do differently (materials, process, structure, installation, etc.) or how would you further develop the piece
I personally still prefer wearables… I would like to further develop it into a wearable design that elaborates on the same theme. I feel it would be fun to create a conversation about the currently used non-biodegradable material and the supposed future of biomaterial and bio-electronics.
- Was there specific feedback that offered you new insights or was particularly intriguing?
During the show, I received feedback about making the luminous biomaterial. I feel it would be fun to combine it with the biomaterial circuit since it can not only enhance the visual impact but also deepen the conceptual connection between nature and technology. By combining luminous properties with the biomaterial circuit, it would blur the boundaries between the organic and the synthetic even further, creating a material that both generates and emits light.
- Are there aspects of the collaborative process that stand out for you?
Jacenia and I stay up late for several days for different material tests and the project itself. Thanks for her in this project and this semester!


 cook the tea
 add all the ingredients into the pot
 mix everything together


 melt the biomaterial to connect them with the wire


 In order to guide my walk, I choose the dice as my parameter: I decide the number of steps based on the number that I rolled and look around for possible materials. But soon I realize that this setting is not very reasonable to find suitable material, so I modify it to walking ten times the number rolled.


 One of the Suggested Route