Author Archives: Cassie

Mini Project 4: Patterns

Project Link and Brief Description

Here is the p5 link: https://editor.p5js.org/CassieHuang/sketches/YPrShsIQy 

In the first set of three images (Shown in Visual Output), I delved into geometric shapes, utilizing circles, rectangles, and lines. By randomizing some of the variables while adjusting key variables, I carefully controlled the position and size of these shapes.

In a subsequent set of three images, I moved into the realm of rotation. I chose a shape from the initial set and applied three different rotations: an even rotation with a fixed angle, an incremental rotation with an increased angle, and a reverse rotation with a negative angle.

For the final three sketches, I utilized loops and mathematical functions like sin() and cos() to arrange the shapes into circular patterns. By changing the order of these loops, the shapes in the circles were able to be filled with different sets of colors. These images focus on a synthesis of code, symmetry, and mathematical elegance, providing a visually cohesive yet diverse set of patterns.

All in all, this project embodies the essence of exploratory programming, where variables and functionality blend seamlessly together to create nine static images, each proving a delicate balance between repetition and surprise.

Visual Output

01

02

03

04

05

06

07

08

09


Coding Snippet

The first screenshot below shows how I did the angle accumulation. 
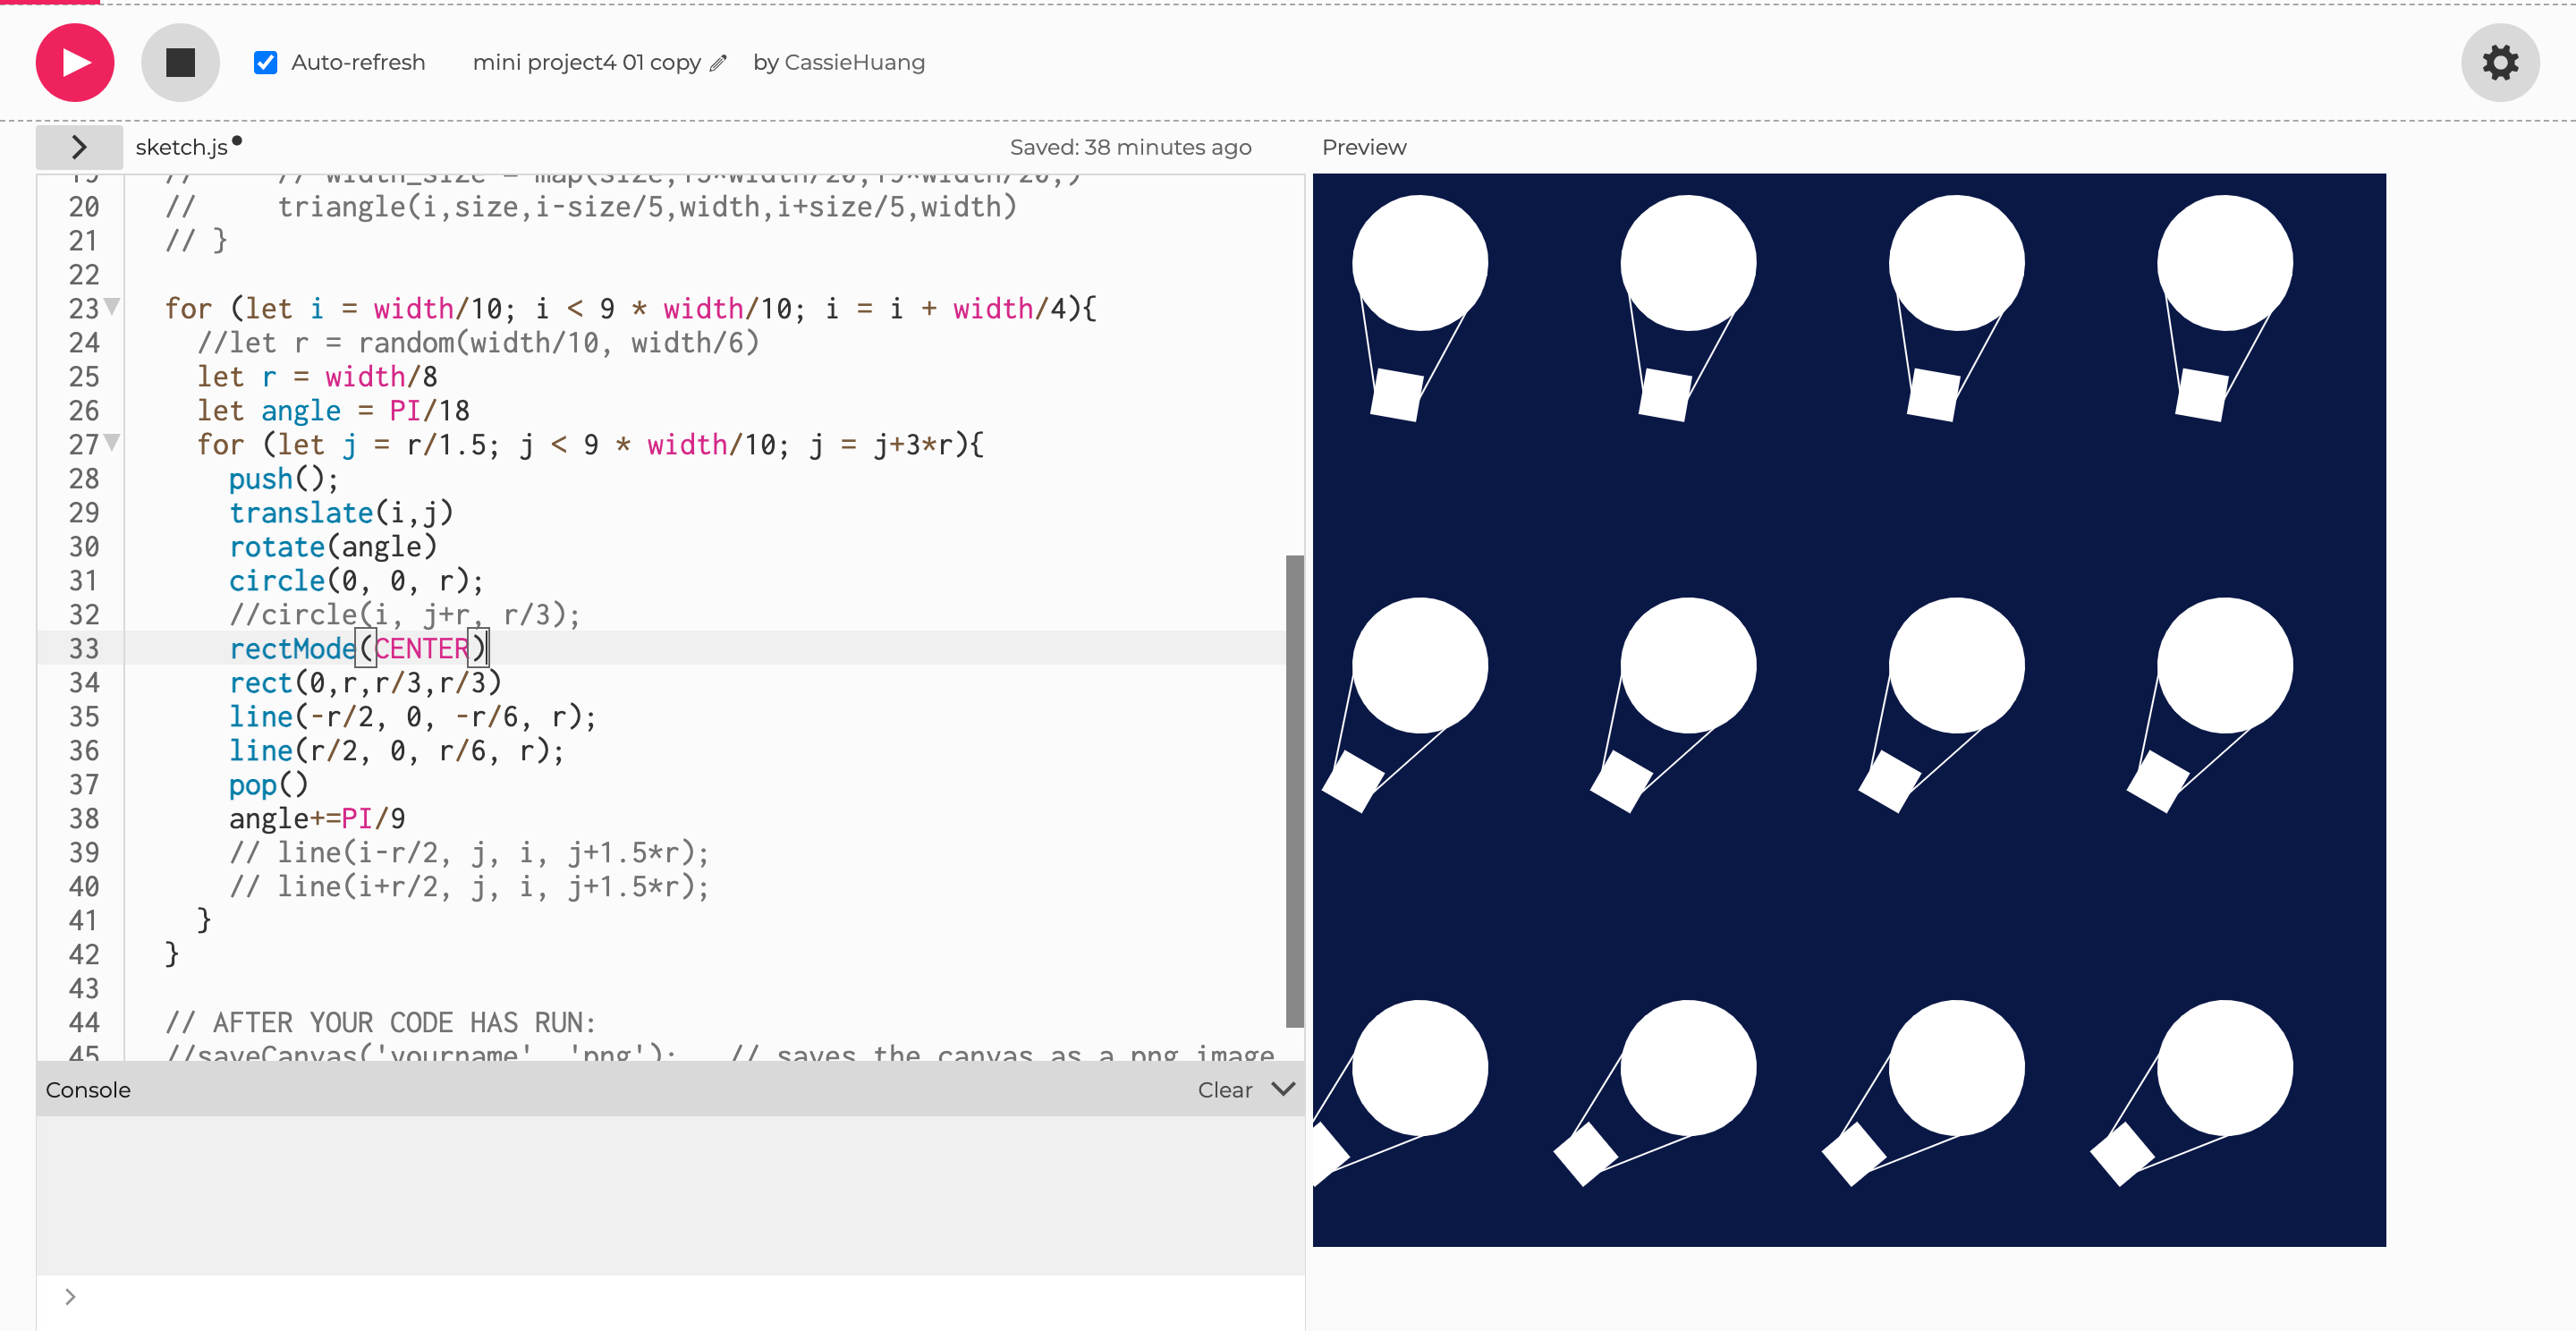
angle accumulation                                                                                                 

This screenshot below shows how I used nested loop to arrange such a pattern. At first, I knew that I needed to change the radius of the circle arranged to get such a visual output, so I tried to add j to both x and y. It turned out, however, that the newly formed circle was not larger, but merely a translation of the original circle. Thus, I kept experimenting and figured the following code out at the end.
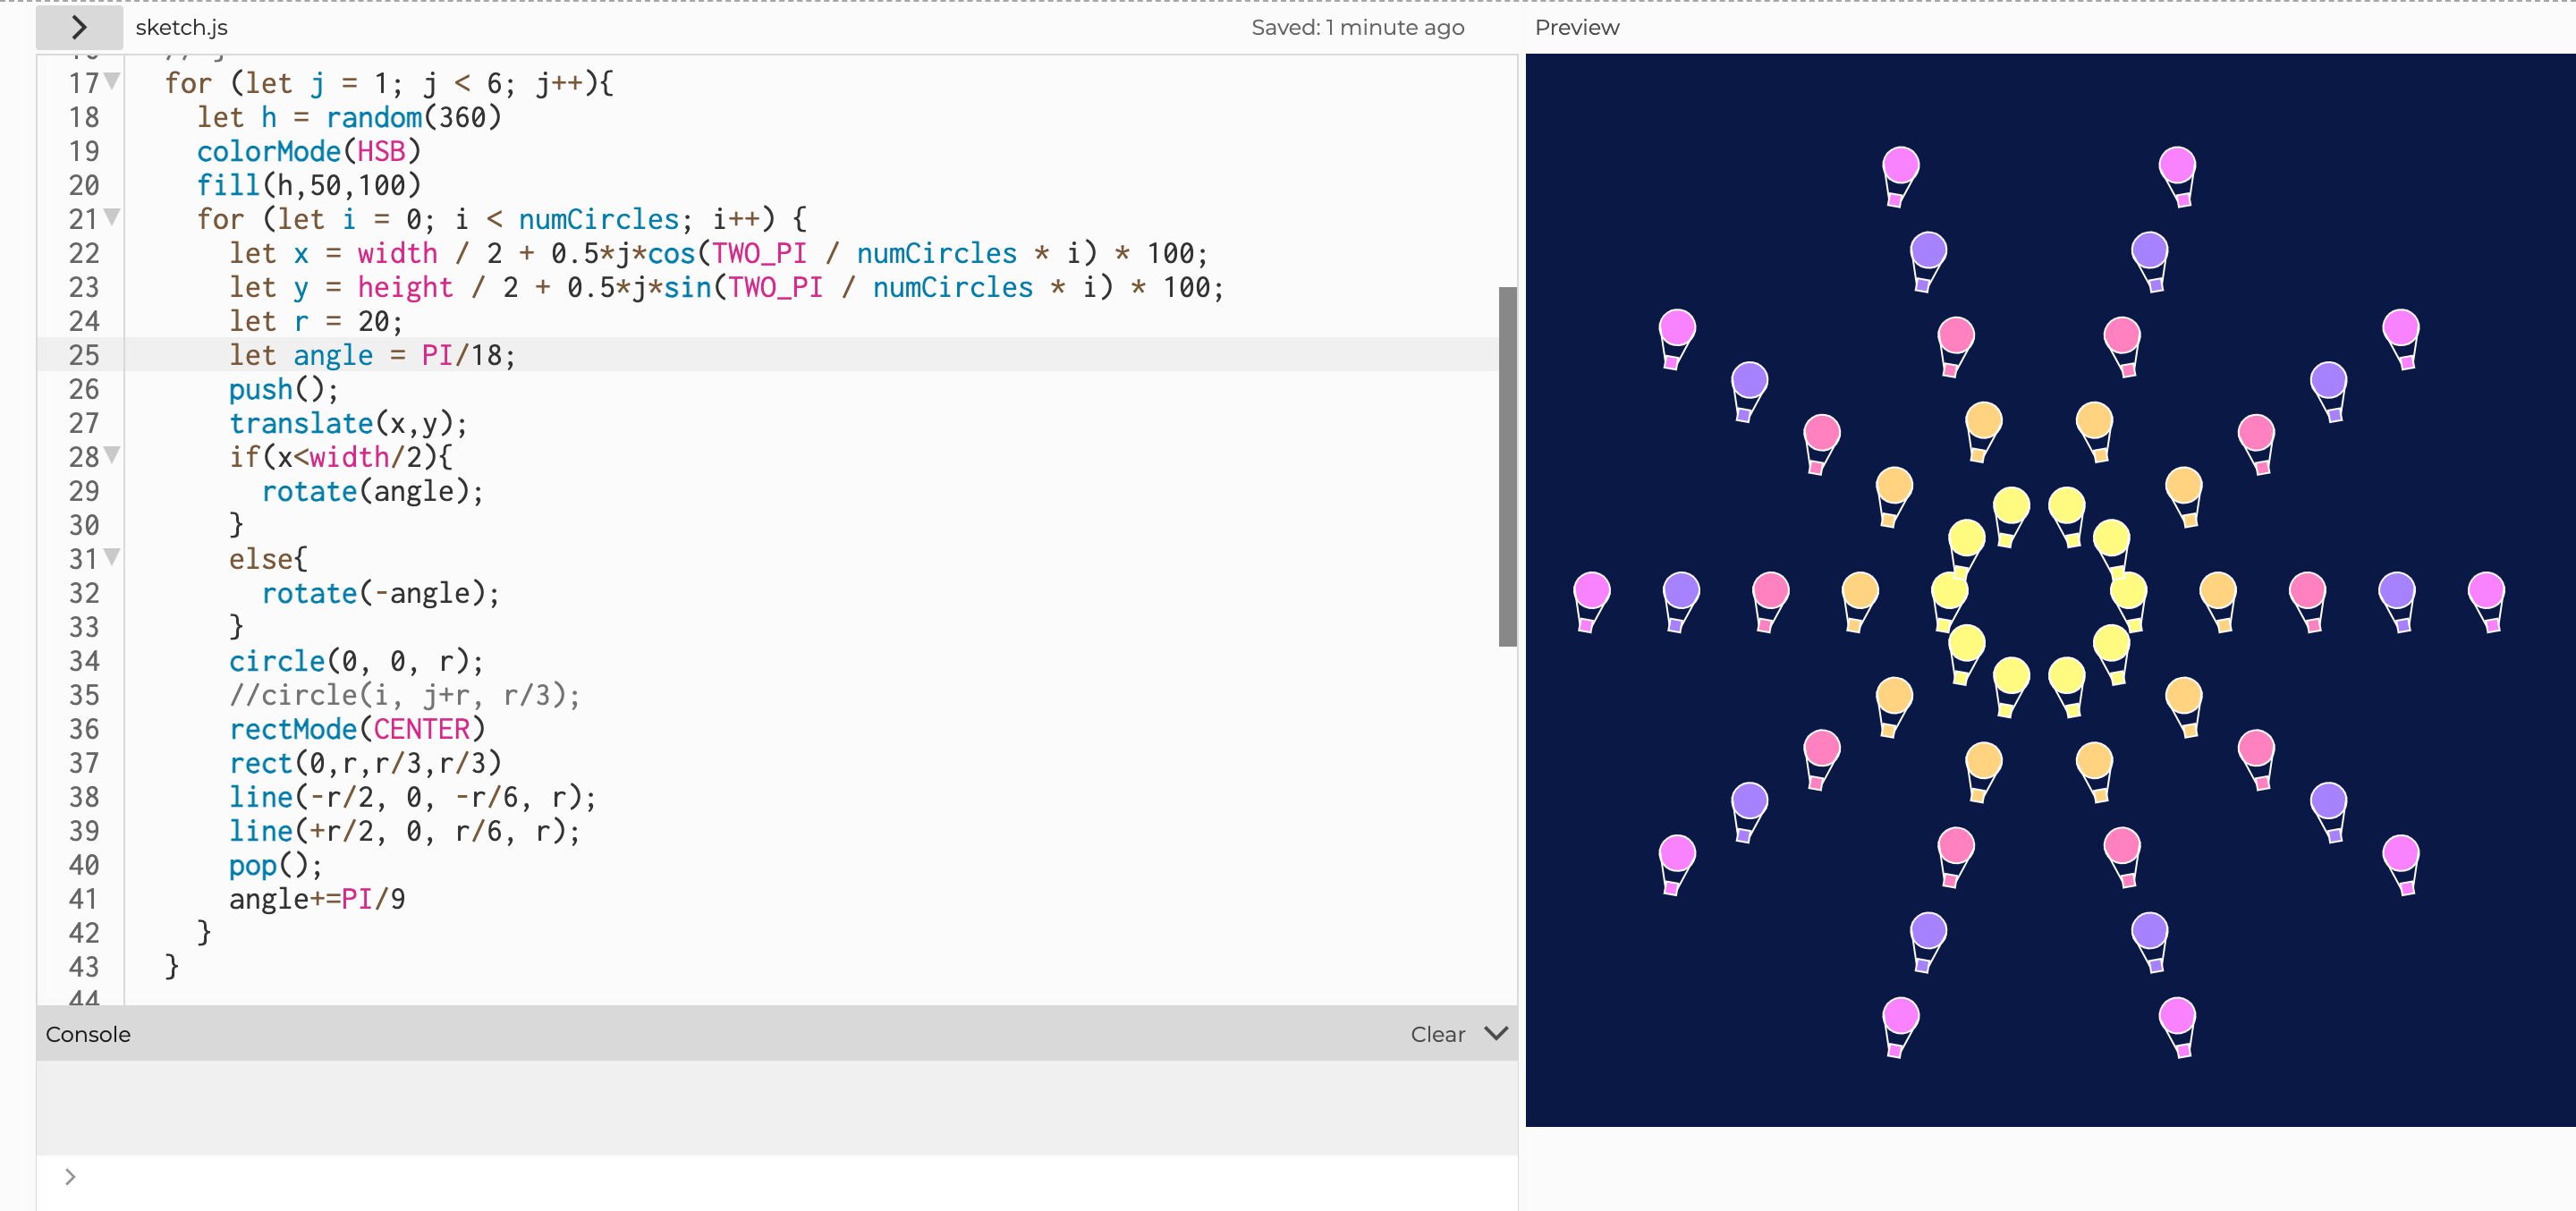
math functions and loop application

Reflection

  • Drawing by hand through observation and writing computer programs to draw are two distinct but interrelated creative processes. When drawing by hand, I am in direct contact with the physical medium, relying on my sensory perceptions and manual skills to bring my imagination to the paper. In contrast, drawing with computer programming introduces an abstract medium. I provide precise instructions in the form of code that defines shapes, patterns, and behaviors. While computerized execution lacks the inherent human touch, it provides a unique ability to create complex, scalable art. At the same time, because of the indirect nature of programming, I can sometimes get unexpected surprises.
  • Throughout the project, I experimented with a range of attributes in repetition, resulting in interesting visual effects. By manipulating variables that control shape type, position, size, and color, I observed how each adjustment produced a different image. Changing the position variable resulted in changes in spatial arrangement, sometimes symmetrical, sometimes asymmetrical. Modifying the size parameter introduced changes in scale, allowing me to play with depth and perspective. My exploration of color brought about different palettes and moods, effectively changing the emotional impact of the pattern. These observations emphasize the subtle and profound impact that parametric manipulation can have on the interplay between repetition and novelty, offering rich possibilities for creative expression.
  • In reflecting on what makes a good generative pattern, I came to appreciate a few basic characteristics. First, the pattern should skillfully combine repetition and novelty to ensure that it remains visually appealing. Second, it usually benefits from a sense of order or symmetry, providing the basis for visual coherence and appeal. Third, a clear and understandable structure is essential to allow the viewer to understand the pattern. This structure may derive from mathematical relationships, systematic variations, or well-defined rules. Finally, variations in color, scale, and shape should be used purposefully to add complexity and depth while maintaining visual harmony. In essence, a compelling generative pattern skillfully balances predictability and the element of surprise, allowing the viewer to delve into its complexity and beauty.
Project A Proposal: The Birth and Life of “BerlinCritter”

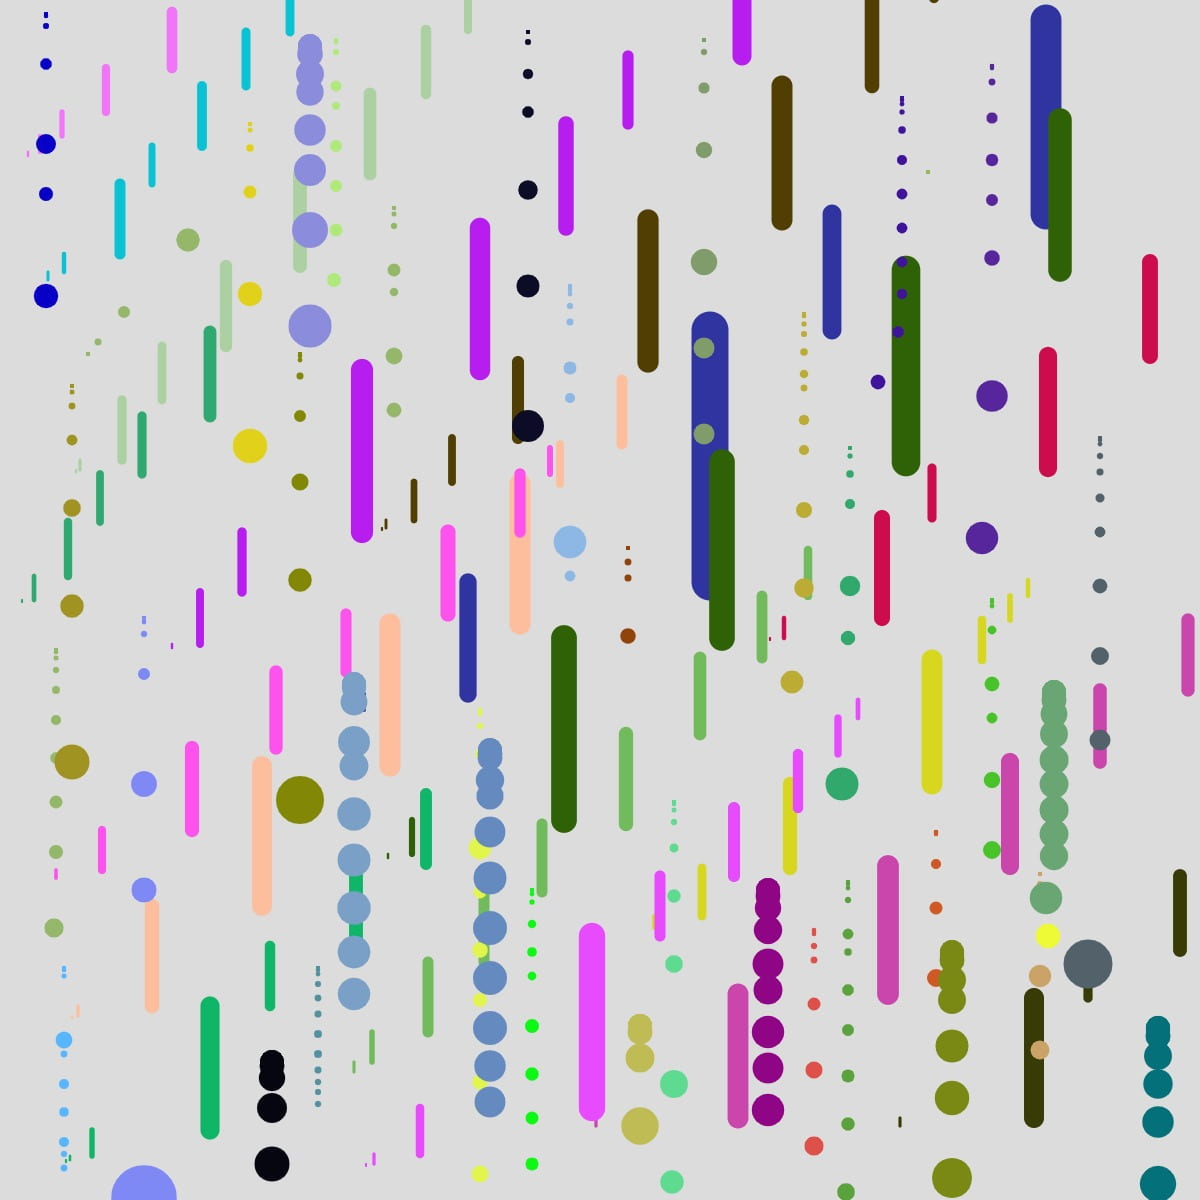
For Mini Project #3, I tried a fascinating concept: a ball moving gracefully across the canvas, using Berlin noise. This movement, a mixture of randomness and smoothness, gave me a sense of life and made me choose it as a starting point for my project A. Therefore, I want to delve deeper into this motion and turn it into a digital creature, perhaps called “BerlinCritter”. And here is the link to the presentation: https://docs.google.com/presentation/d/1yPQSb8w_dWoVvUA-ClOTed9kEBS8Ga8joDvnOJkrUQ8/edit#slide=id.g282be32b004_0_1.

Meet the PerlinCritter

The initial stage of a BerlinCritter is one that consists of two circles – a large one and a smaller one. The co-existence and movement of these two circles symbolizes the complete existence of one such creature. The life of this BerlinCritter is divided into two main stages.

In the first stage, the two circles move together harmoniously in the same direction, and they keep a certain distance between them. At the same time, the size of the smaller circle will gradually become larger.

When the circles are equal in size, the second stage begins. During this phase, the originally smaller circle will change its direction of motion so that the two move in opposite paths. This moment symbolizes the emergence of this creature’s personality and the different paths they take in life.

The Motion and What It Symbolizes

The movement of the implemented Perlin Critter will be controlled by a few key variables such as xNoiseOffset and yNoiseOffset for the movement of the larger circle and xMovement2 and yMovement2 for the distance between the circles in the first phase.

When Perlin Critter moves, it leaves an elegant trail, similar to the path of snail slime. This trail is a metaphor for its existence in abstract space. The canvas itself serves as a symbol of the enclosed environment necessary for its survival, reminiscent of a fish tank. In order to confine the Perlin Critter to the canvas, I will use the “constraint” function.

Narrative and Imaginary Creatures

PerlinCritter’s story will revolve around growth, unity, individuality and adaptation, a digital reflection of life’s journey. It embodies the beauty of divergence and the traces we leave behind in our raw goods.

In my project A, my goal was to expand on the story and visual representation of BerlinCritter I aspire to create an engaging experience that not only showcases its life cycle, but also prompts the viewer to reflect on the parallels between its digital existence and our own life journeys.

 Additional Features

In addition to the core actions and narratives, my project may contain several other features:

  • Interactive elements: Users will be able to interact with the PerlinCritter to influence their movements or change their environment. This will add an element of user-driven creativity and engagement to the experience, allowing viewers to become part of PerlinCritter’s digital world.
  • Dynamic color palette: To enhance the visual experience, the PerlinCritter’s appearance and surroundings will dynamically change color to reflect its emotional state and the passage of time. This feature can add depth to the narrative and visually enhances the journey, creating a more immersive experience.

Mini-Project 2 Interactive Drawing: Control and Unpredictability

Project Link and Brief Description

https://editor.p5js.org/CassieHuang/sketches/qrfwThnh7

This sketch allows users to draw on the canvas using the mouse while controlling the stroke color, thickness, and drawing shape (line or ellipse) with keyboard interactions.

Visual Output

Cassie's Drawing

Cassie’s Drawing

Coding

Here is my code:

let r, g, b, thickness, boo, backGroundColor, d, temp
function setup() {
  createCanvas(600, 600);
  backGroundColor = 220
  background(backGroundColor)
  r = random(255)
  g = random(255)
  b = random(255)
  thickness = 1
  temp = 1
  boo = true
}

function draw() {
  if (keyIsPressed){
      r = random(255)
      g = random(255)
      b = random(255)
    if (keyCode == ENTER){
      background(backGroundColor)
    }
    if (key == " "){
      r=g=b=0;
    }
    if (keyCode == UP_ARROW){
      temp += 1
    }
    else if (keyCode == DOWN_ARROW){
      temp -= 1
    } 
    if (keyCode == LEFT_ARROW || keyCode == RIGHT_ARROW){
        boo = !boo
      }
  }
  if (mouseIsPressed){
    stroke(r,g,b)
    let d = dist(pmouseX, pmouseY, mouseX, mouseY);
    thickness = temp + map(d, 10, 50, 1, 5);      
    strokeWeight(thickness)
    if (boo){
      line(mouseX,pmouseY,mouseX,mouseY)
    }
    else{
      fill(r,g,b)
      ellipse(mouseX,mouseY,thickness)
    }
  }
} 

Control and Unpredictability

I had initially envisioned that every time a user pressed the Left-Arrow or Right-Arrow keys, the shape they were about to draw would transition between a line and a circle. To implement this, I utilized a conditional statement: “If (keyIsPressed){ if (keyCode == LEFT_ARROW || keyCode == RIGHT_ARROW){}}.” My intention was to toggle a Boolean value to achieve this transition seamlessly. However, the results diverged from my expectations. Occasionally, even when I pressed the left or right arrow keys, the primitive shape did not change as anticipated. Upon conducting a thorough exploration and engaging in discussions with a fellow, we discovered that the “If (keyIsPressed)” statement did not consistently execute only once when the key was pressed, contributing to the unexpected behavior. 

Reflections

How I use variables and conditions in the project:

  • Initialization: The setup() function is used to set up the canvas and initializes various variables like backGroundColor, r, g, b, thickness, temp, and boo.
  • Interaction with the Keyboard:
    • If the ENTER key is pressed, it resets the canvas to its original background.
    • If the spacebar is pressed, it sets the stroke color to black.
    • If UP_ARROW or DOWN_ARROW is pressed, it changes the temp variable by 1, and thus changing the strokeWeight.
    • If LEFT_ARROW or RIGHT_ARROW is pressed, it toggles the boolean variable boo, and thus the shape users were about to draw would transition between a line and a circle.
  • When the mouse is pressed:
    • It sets the stroke color to the current values of r, g, and b.
    • It calculates the thickness of the stroke based on the velocity of the movement of mouse. The velocity is determined by the distance between the current mouse position and the previous mouse position.
    • The temp variable also affects the thickness of strokeWeight.
    • Depending on the value of boo, it either draws a line or an ellipse at the current mouse position.

Differences between key and keycode:

  • Key variable is the actual character representation of the stored key. This variable is often used when you need to respond to specific character input, such as typing text or creating  keyboard-controlled games.
  • keyCode variable stores the numeric code of the key that was pressed or released. It is is useful for handling non-character keys, such as arrow keys (e.g. UP_ARROW, DOWN_ARROW) and special keys (e.g. ENTER, SHIFT).

Exploring Generative Art: A Reflective Response to “What is Generative Art?”

In my understanding of the examples and reading material, generative art is a form of artistic expression without direct human control and encompasses a variety of methods, mainly randomness, rules and natural systems. For example, in both of my projects, it was the computational processes and codes that I utilized to create artworks with elements of autonomy or randomness. In this way, generative art allows creators to explore the balance between control and unpredictability, often leading to unexpected and unique artistic outcomes. In the Mini Project 1, where I converted real-life photographs into sketches on paper and then recreated the shapes on the canvas using JavaScript, I primarily used a rule-based approach in the latter process. I followed specific rules to convert the sketch into code, and the result was predictable and controllable. The work I created here is more aligned with controlled creativity than the unpredictability associated with generative art. In Mini Project 2, the focus shifted to incorporating randomness. The interactive canvas allowed the user to draw lines or circles, with the color of the drawing changing randomly each time a key is pressed. This introduced an element of pseudorandomness and unpredictability into the artwork, tying in more closely with the concept of generative art discussed in the readings.

Throughout the creative process, I intentionally refrained from envisioning a predetermined final image, opting instead to allow a set of rules to control the artwork’s development. I will illustrate this approach using Mini Project 2 as an example. It’s important to note that in this project, attaining a fixed final image was impractical due to the unique and diverse drawing tracks generated by each user. Additionally, the colors and stroke weights of the drawings exhibited considerable variation every time. To navigate this inherent unpredictability, I devised a set of rules that would provide guidance to the canvas while avoiding rigid constraints. These rules in my mind were translated into instructions comprehensible to the computer, allowing it to execute them.

During this process, an unexpected outcome emerged despite my carefully established rules. I had initially envisioned that every time a user pressed the Left-Arrow or Right-Arrow keys, the shape they were about to draw would transition between a line and a circle. To implement this, I utilized a conditional statement: “If (keyIsPressed){ if (keyCode == LEFT_ARROW || keyCode == RIGHT_ARROW){}}.” My intention was to toggle a Boolean value to achieve this transition seamlessly. However, the results diverged from my expectations. Occasionally, even when I pressed the left or right arrow keys, the primitive shape did not change as anticipated. Upon conducting a thorough exploration and engaging in discussions with a fellow student, we discovered that the “If (keyIsPressed)” statement did not consistently execute only once when the key was pressed, contributing to the unexpected behavior. This experience underscored the dynamic and adaptive nature of generative art, where artists collaborate with computational systems, embracing both the framework of rules and the unpredictability inherent in the medium.


Mini-Project 1 Drawing with Code: Cabinet Sketch

Project Link

https://editor.p5js.org/CassieHuang/sketches/5lPqsPppl

Brief Description

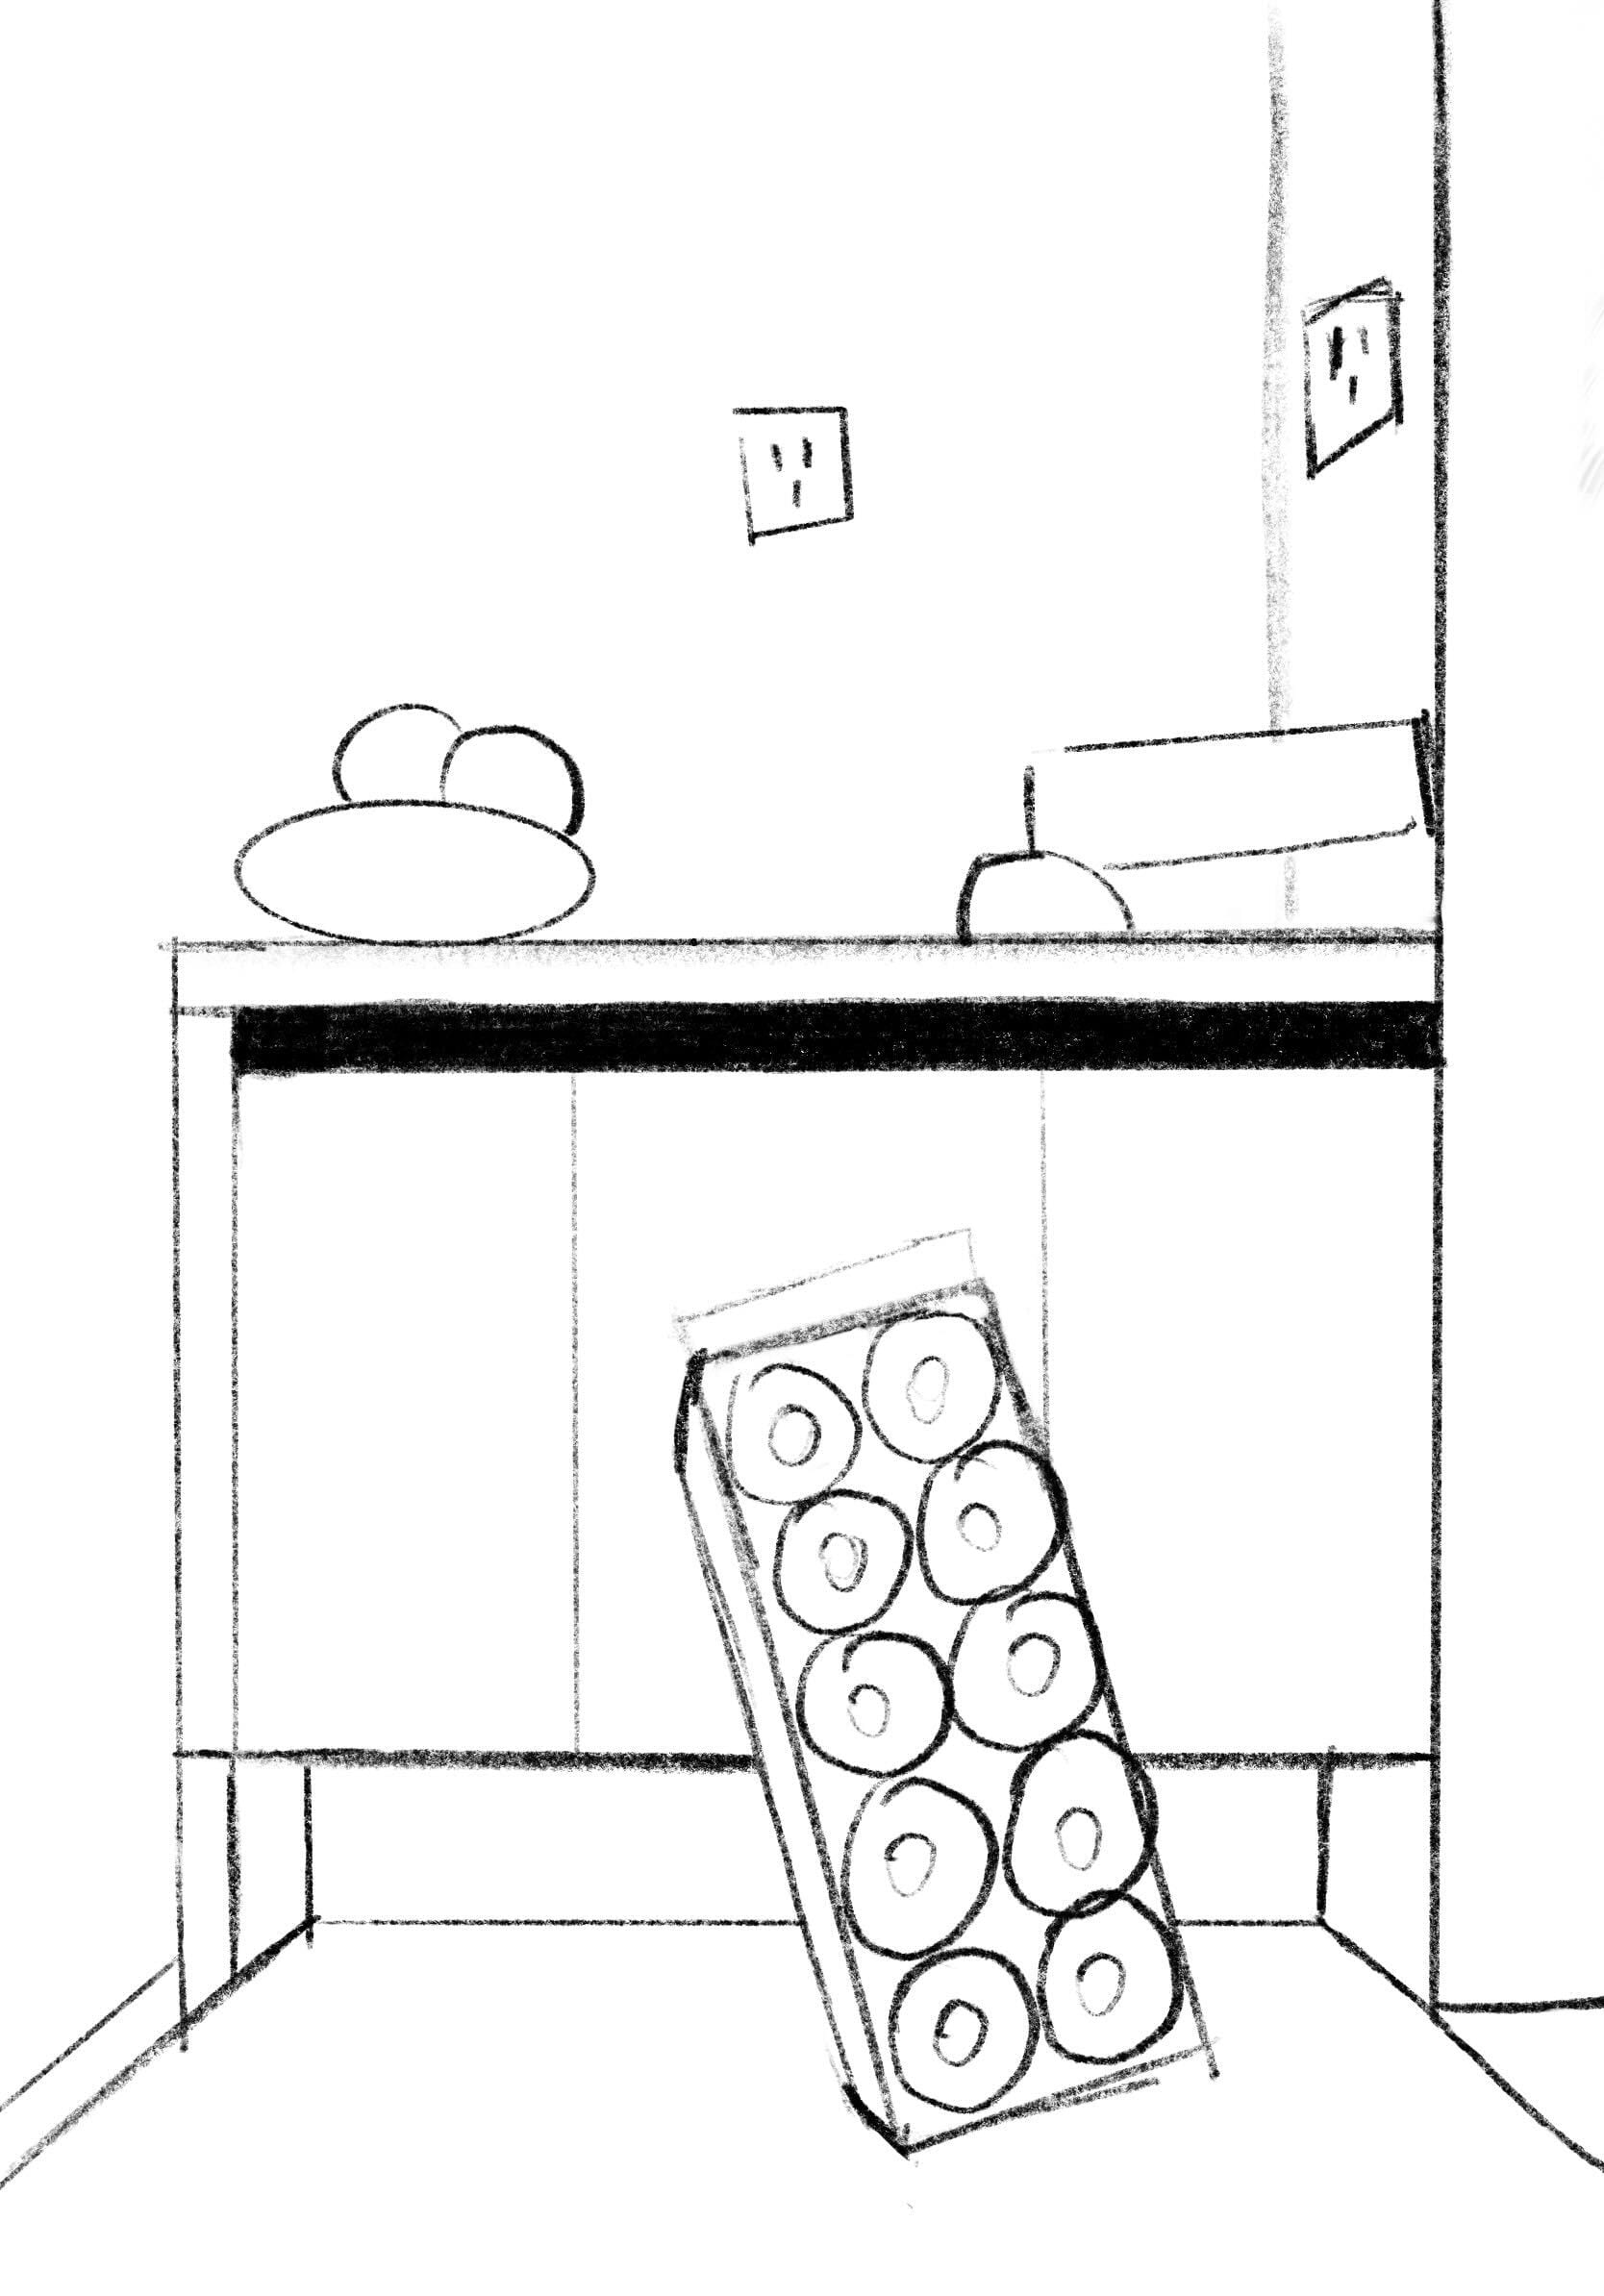
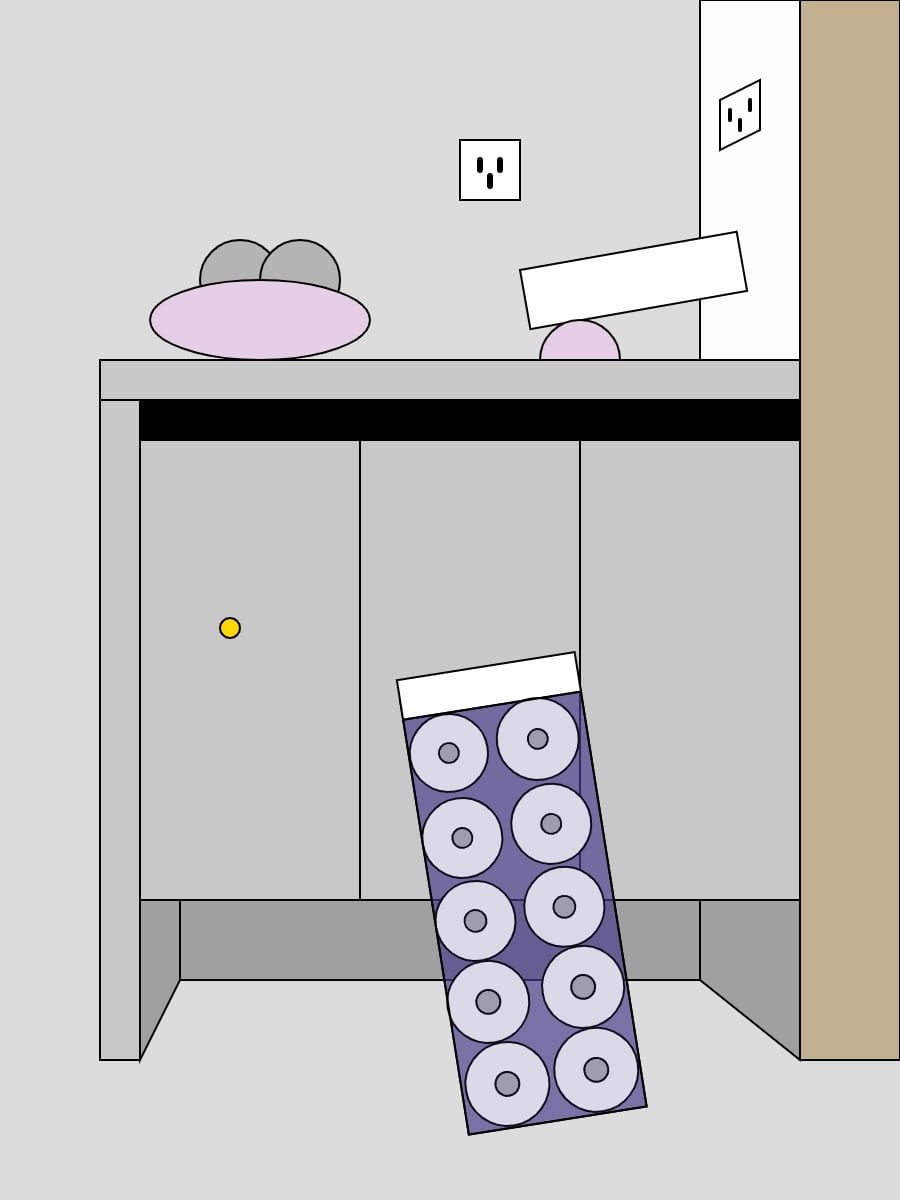
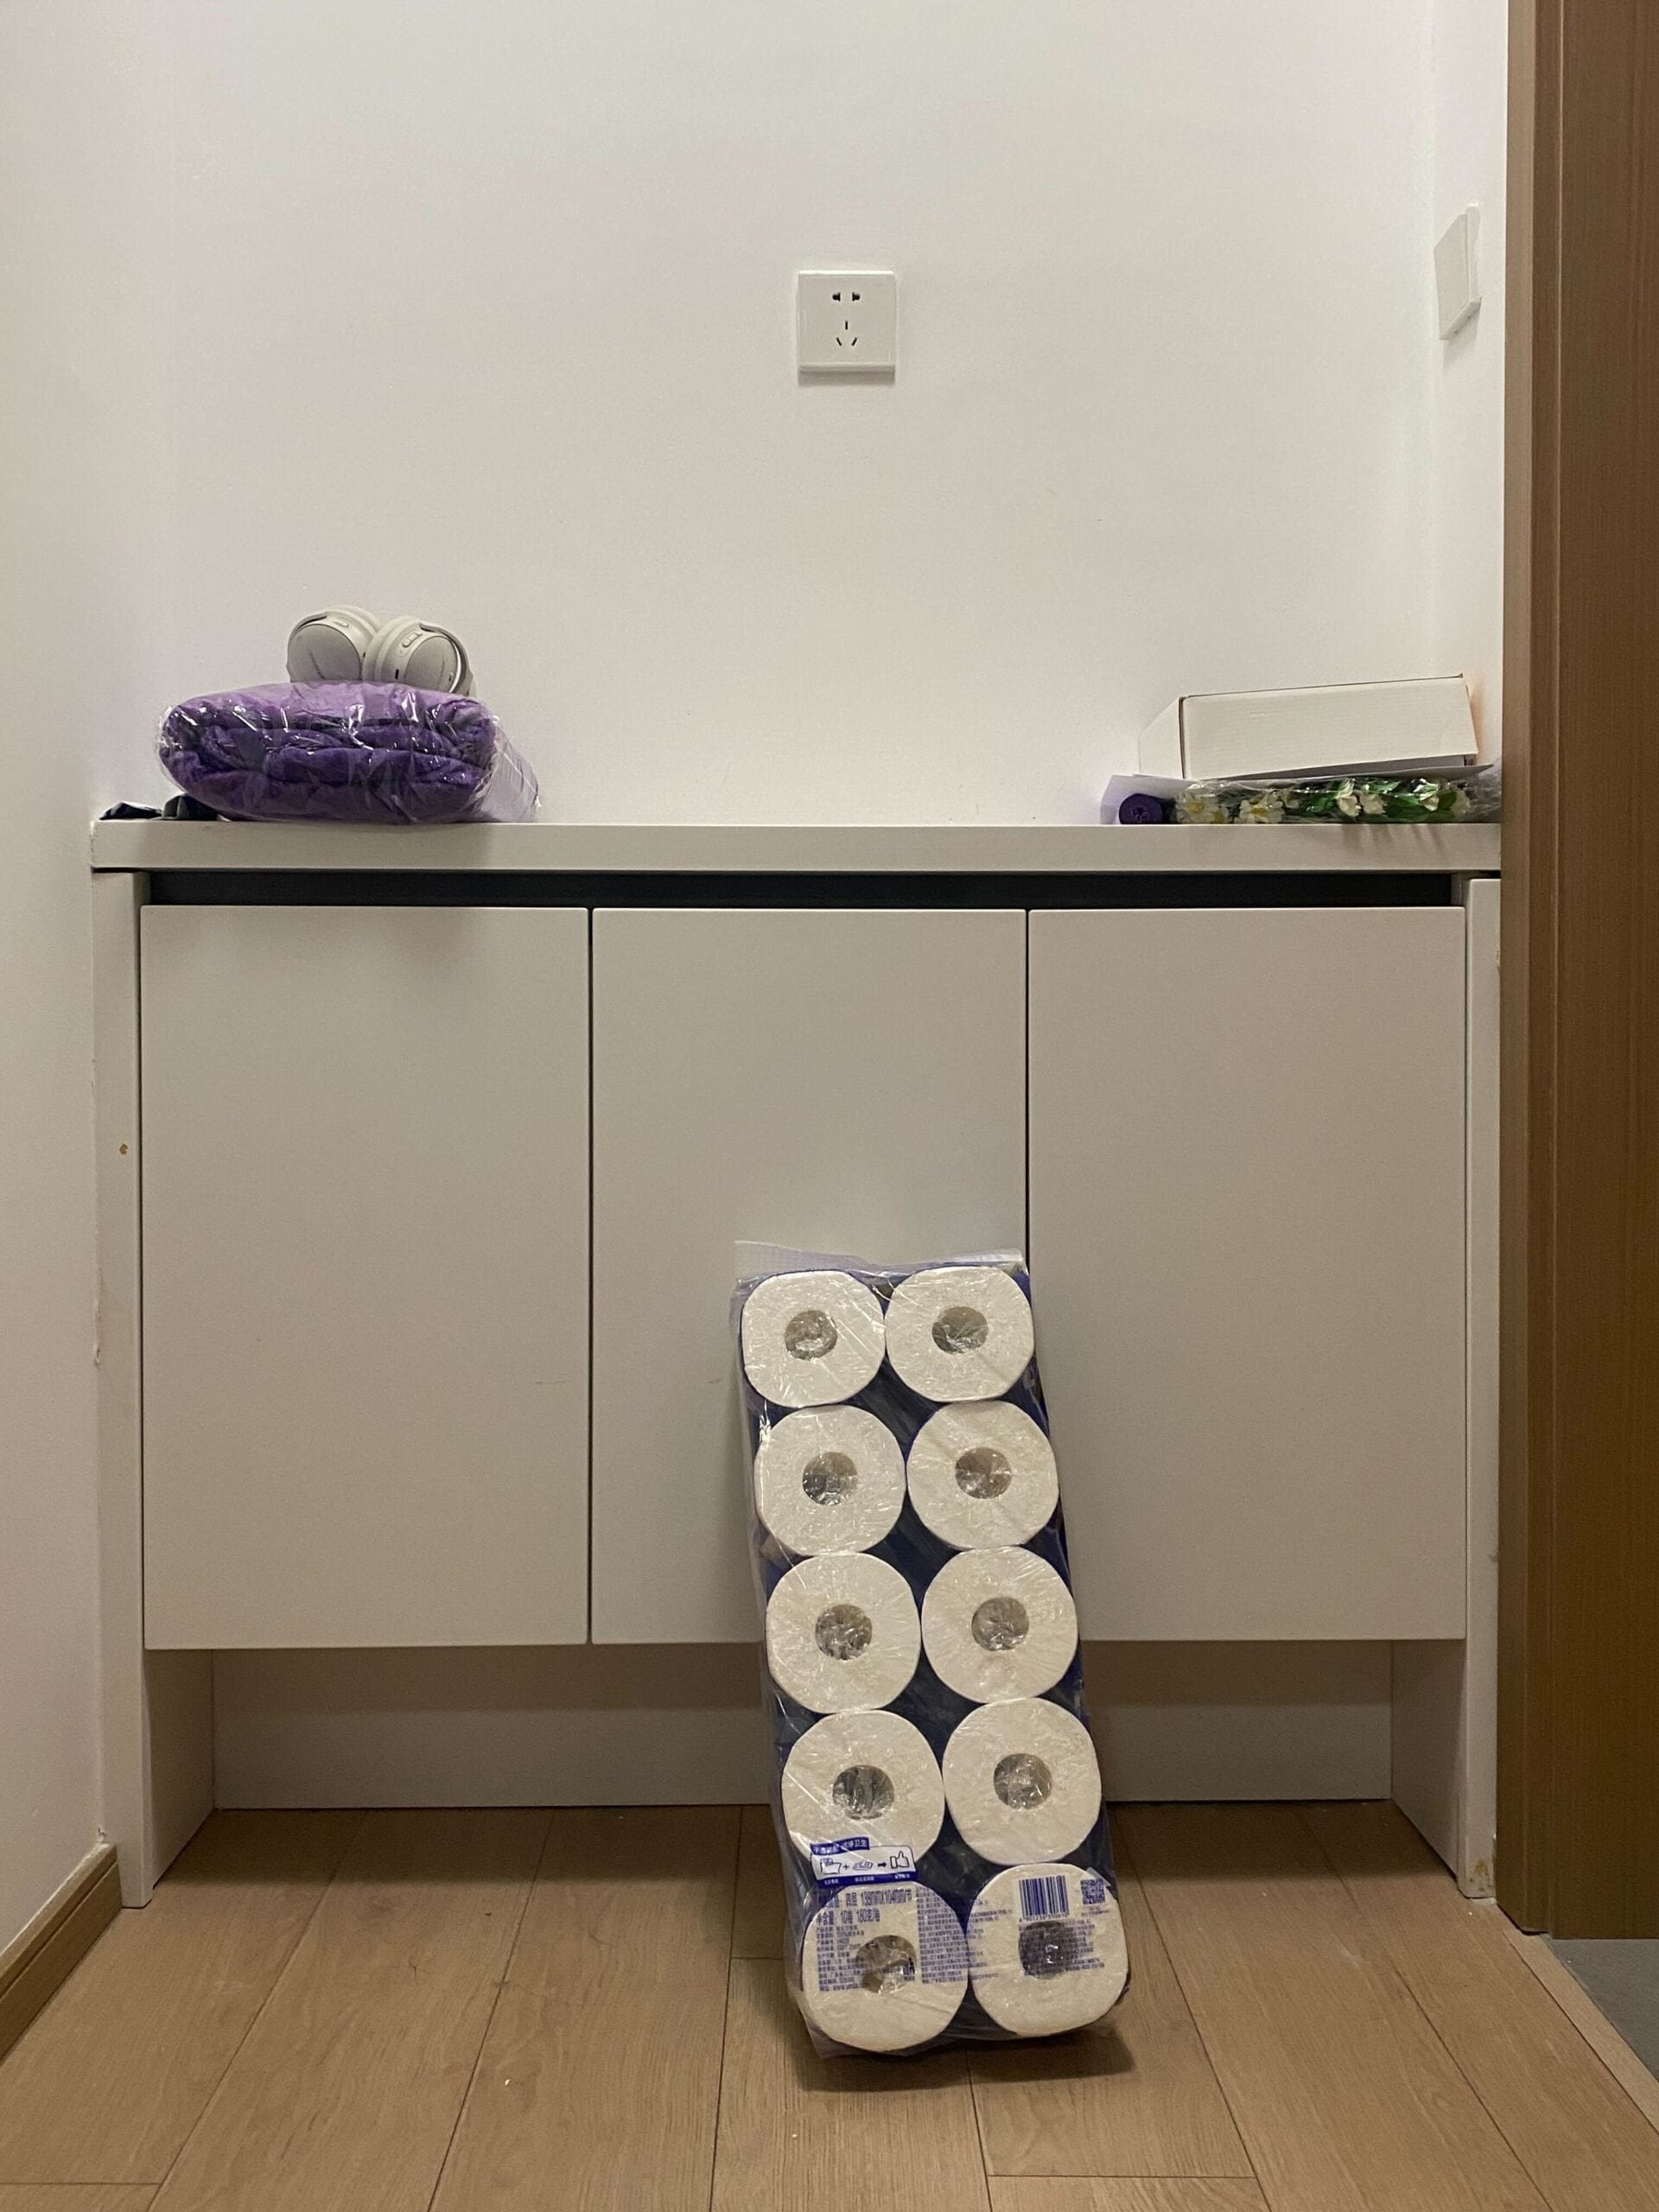
In this mini-project, I explore the intriguing contrasts and parallels between traditional paper-based drawing and code-based art. The journey unfolds in three steps: first, I took a photograph of a dorm cabinet. Then, I translated this image into a hand-drawn sketch on paper, using geometric shapes for a unique interpretation. And finally, I recreated the hand-drawn sketch on a digital canvas using p5.js.

Visual Documentation

Original Photo

Original Photo of A Cabinet

Paper Sketch

Hand-Drawn Sketch

code-based sketch

Code-Based Sketch

Coding

Here is my code.

function setup() {
  createCanvas(450, 600);
}

function draw() {
  background(220);
  strokeWeight(1);
  
  //right wall
  fill(253);
  rect(350,0,50,180);
  quad(360,75,360,50,380,40,380,65);
  strokeWeight(2);
  line(370,65,370,60);
  line(365,60,365,55);
  line(375,50,375,55);
  strokeWeight(1);
  fill(195, 176, 145);
  rect(400,0,50,530);

  
  //staff on the boxes
  fill(255);
  push();
  translate(260,135);
  rotate(-PI/18);
  rect(0,0,110,30);
  pop();
  fill(180);
  ellipse(120,140,40,40);
  ellipse(150,140,40,40);
  fill(230,207,230);
  ellipse(130,160,110,40);
  ellipse(290,180,40,40);
  
  //overall rect
  fill(200);
  rect(50,200,350,270);
  rect(50,180,350,20);
  rect(50,200,20,330);
  
  //black rect
  fill(0);
  rect(70,200,330,20);
  
  //three boxes
  fill(200);
  rect(70,220,110,230);
  rect(180,220,110,230);
  rect(290,220,110,230);

  //rect on the wall
  fill(255);
  rect(230,70,30);
  strokeWeight(3);
  line(240,80,240,85);
  line(250,80,250,85);
  line(245,88,245,93);
  strokeWeight(1);
  
  //bottom
  fill(160);
  quad(350,450,350,490,400,530,400,450);
  rect(90,450,260,40);
  quad(70,530,70,450,90,450,90,490);
  
  //big rect in front of all
  push();
  translate(200,350);
  rotate(-PI/20);
  fill(72,61,139,150);
  rect(0,0,90,220);
  fill(255);
  rect(0,-10,90,20);
  circle(20,30,39);
  circle(65,30,41);
  circle(20,73,40);
  circle(65,73,40);
  circle(20,115,40);
  circle(65,115,40);
  circle(20,156,41);
  circle(68,156,41);
  circle(23,198,42);
  circle(68,198,42);

  fill(180);
  circle(20,30,10);
  circle(65,30,10);
  circle(20,73,10);
  circle(65,73,10);
  circle(20,115,11);
  circle(65,115,11);
  circle(20,156,12);
  circle(68,156,12);
  circle(23,198,12);
  circle(68,198,12);
  
  fill(72,61,139,50);
  rect(0,10,90,210);
  pop();
  
  //interaction
  fill(255,215,0);
  circle(mouseX-5,mouseY-5,10);
  stroke(0);
} 

Challenges

  • To rotate an object, I used the rotate() and translate() functions. 
  • To rotate only a few objects without affecting the whole canvas, I learned to use push() and pop() functions together with the help of the IMA fellow Carrot.

Fun

  • Add the user interaction using mouseX, mouseY.

Reflection

Exploratory Programming vs. Reference

I found both exploratory programming and using a reference to be valuable approaches, each with its own benefits. Personally, I tend to lean towards exploratory programming as my preferred approach. Exploratory programming, in particular, allowed me to dive into the task with passion and interest. I could experiment with various values and functions to manipulate object positions and orientations. This approach encouraged a dynamic exploration of possibilities, which frequently produced unexpected and gratifying results. However, there were moments when I needed to refer to function references to fully understand their descriptions and specific usage, such as ‘rotate()’ and ‘translate()’ functions. In this project, I basically combined the two techniques, which significantly improved my drawing speed.

Drawing on Paper vs. Writing Code

On the one hand, when it came to drawing on paper, the process felt more intuitive and less focused on precise positioning. My primary task was to observe a photo and abstract the objects into 2D shapes. This approach allowed me to concentrate on the essence of the objects rather than getting bogged down in coordinate data and calculations. It was a more natural and free-flowing process, enabling me to capture the details of the scene without the need for complex mathematical considerations.

On the other hand, I also noticed that when writing code, especially for visual projects, achieving the desired adjustments was often more straightforward. I could directly manipulate values like the x-axis, y-axis, width, height, or color (RGB) to fine-tune the appearance and positioning of objects. This immediate feedback facilitated quick iterations and experimentation. In contrast, when sketching on paper, making adjustments sometimes required erasing and redrawing parts of the scene multiple times to achieve the desired composition.

Conclusion

Generally speaking, I think the paper-based sketching and p5.js-based programming serve as complementary tools in the creative process, each excelling in distinct areas. I’ve learned that my preference often depends on the project’s nature and my objectives.