Project
The Rickroll Timer – Bryan Feng – Inmi Lee
CONTEXT AND SIGNIFICANCE
This project is influenced by the two-player button-pressing speed game we did in a previous recitation. Pressing a button is a fairly straightforward and easy interaction, and the feedback of playing music after a certain number of presses gives the user some kind of satisfaction. What if instead of playing music after pressing the button several times, the device plays music automatically after a certain amount of time has passed? After learning in class about using millis() to measure elapsed time, I decided to create a timer-like device that plays music and blinks LEDs after the pre-set time period.
In this case, the interaction between the project and the user is achieved by button pushing, and the project responds to the user’s action by starting counting time and then playing music and blinking. It’s not necessarily a communication process between two different actors involved, as discussed in Crawford (2002) about the nature of interaction, because my project is designed to be used by people for its practical purposes. However, it still responds to people’s actions and “communicates” by giving positive feedback (music playing and LED blinking).
My project is intended mostly for students but also for other people who want to stay focused for a period of time to do tasks. Not only does it give the user a timer that’s easy to use without having to switch on the phone (everyone knows that when you switch on your phone what you were going to do with it doesn’t matter anymore), but it also provides positive emotional value by playing Never Gonna Give You Up, which provides further encouragement to get on with the job after a short break.
CONCEPTION AND DESIGN
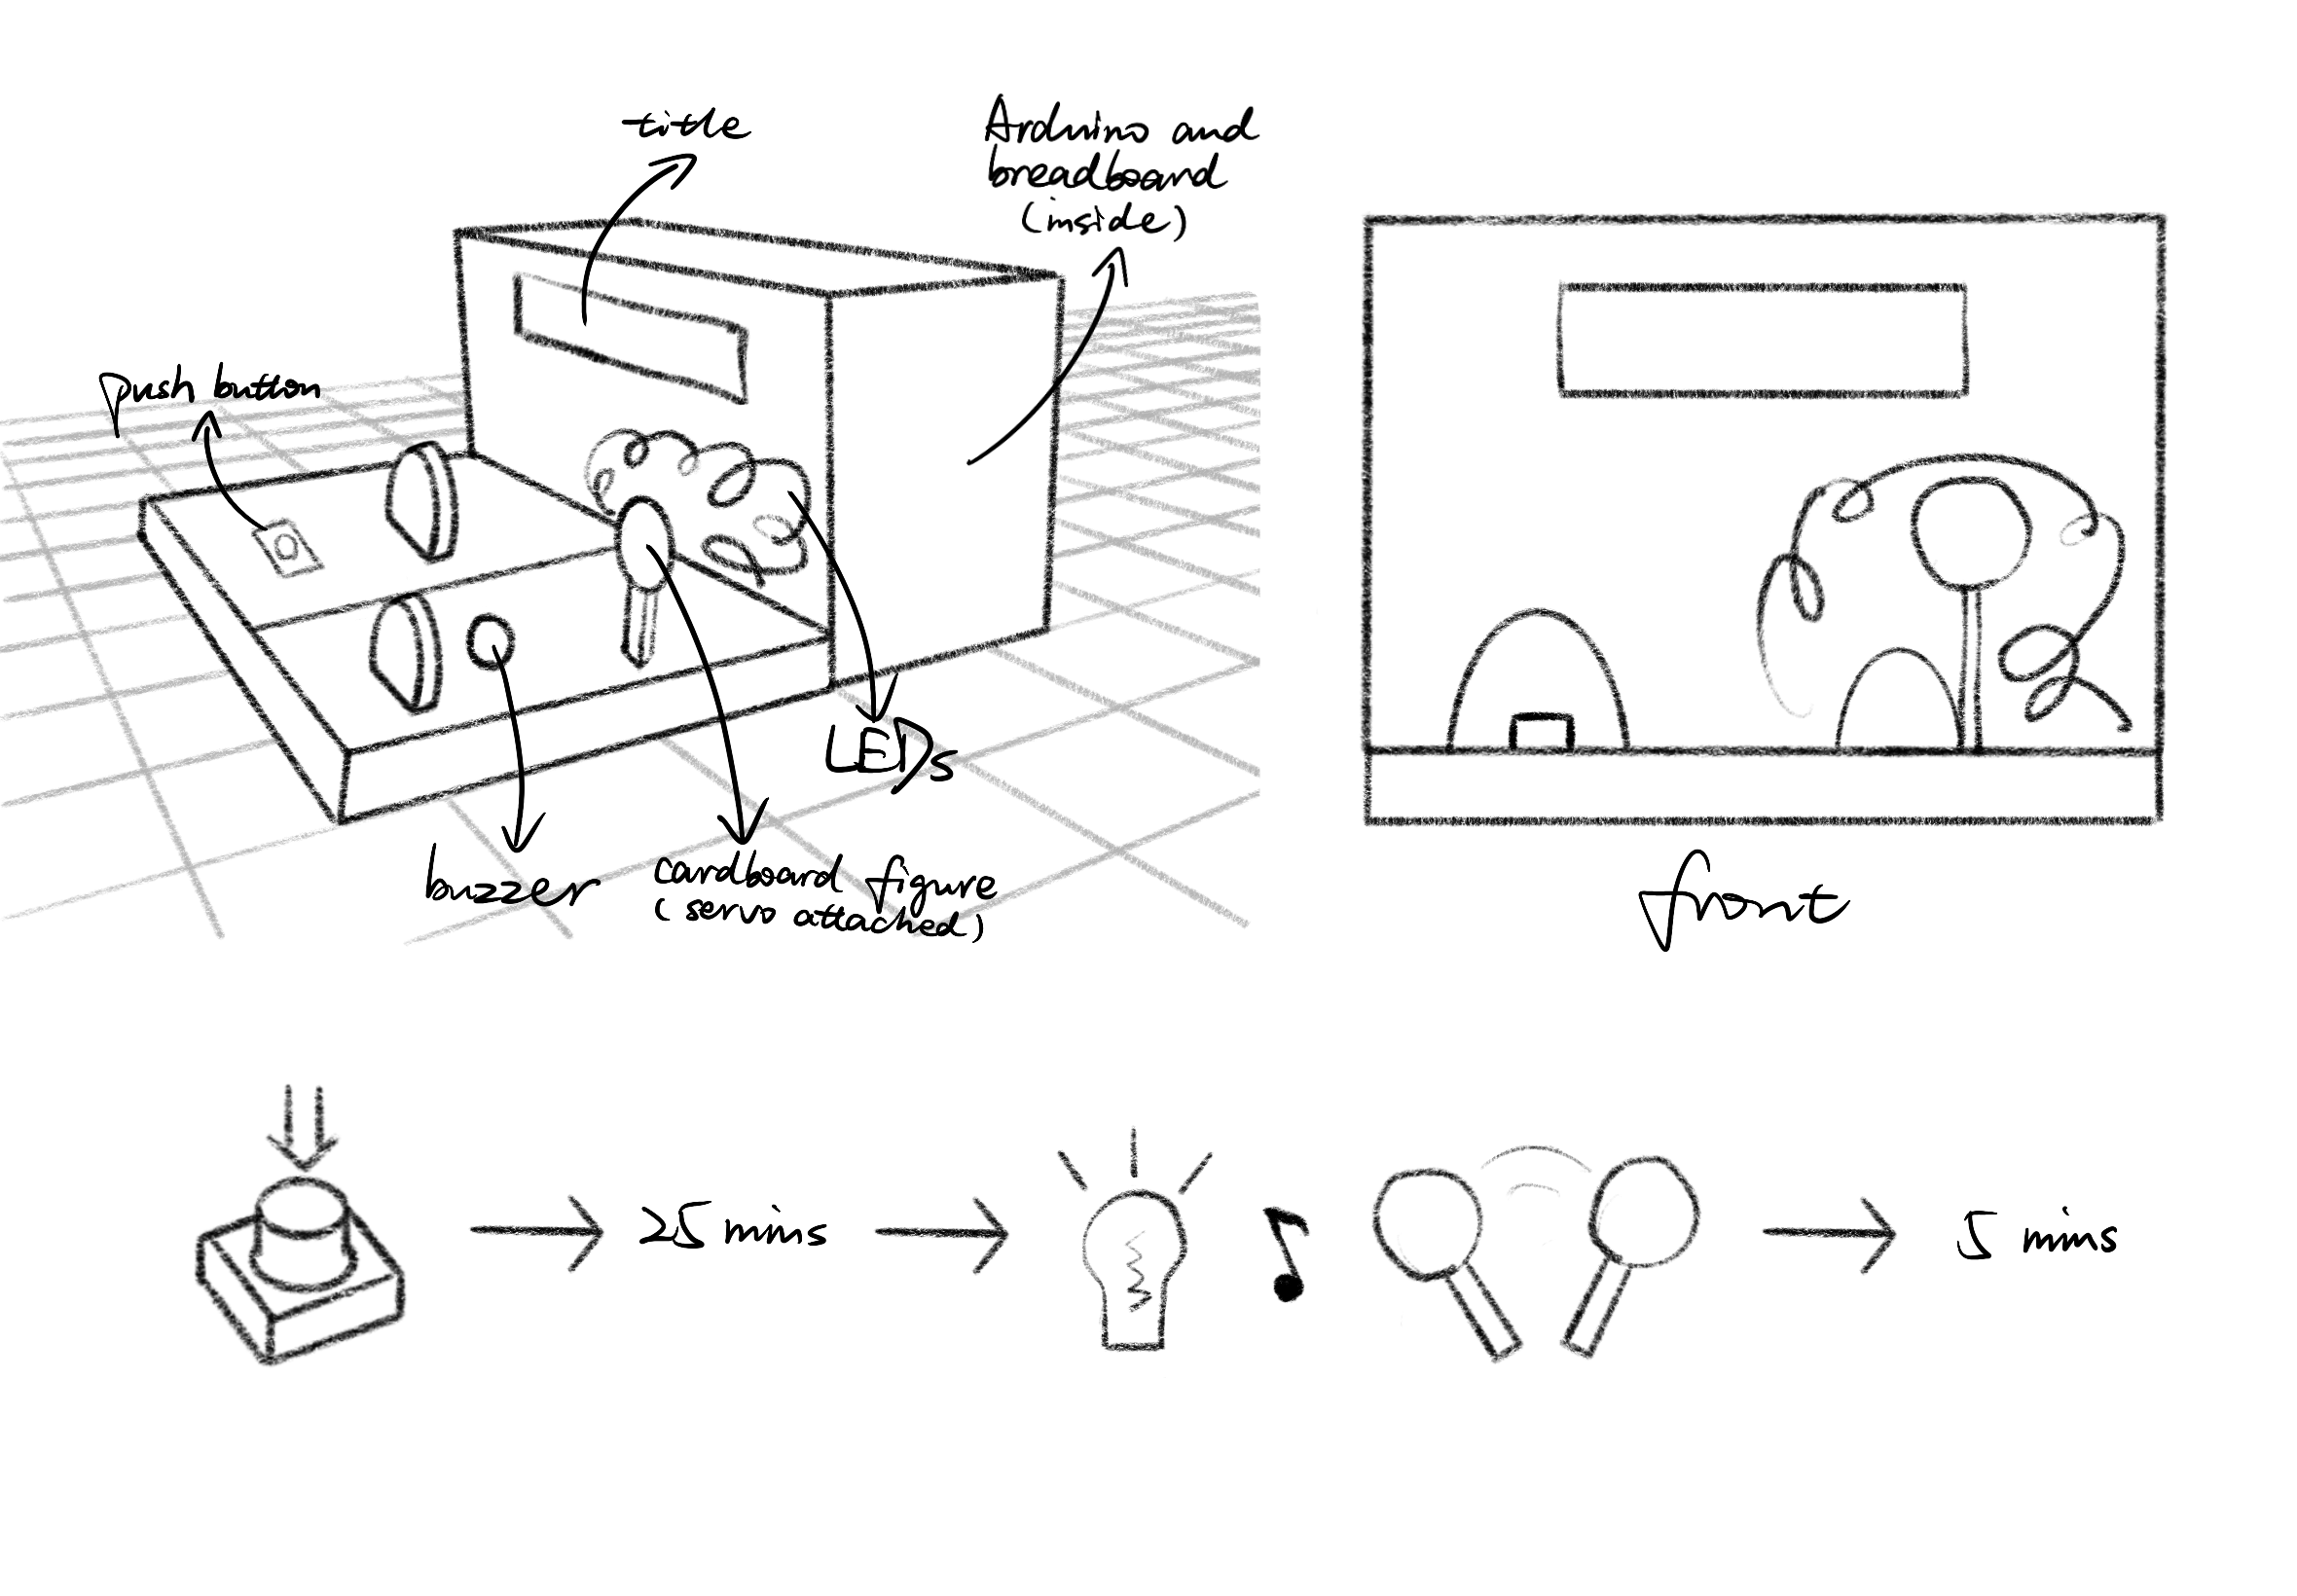
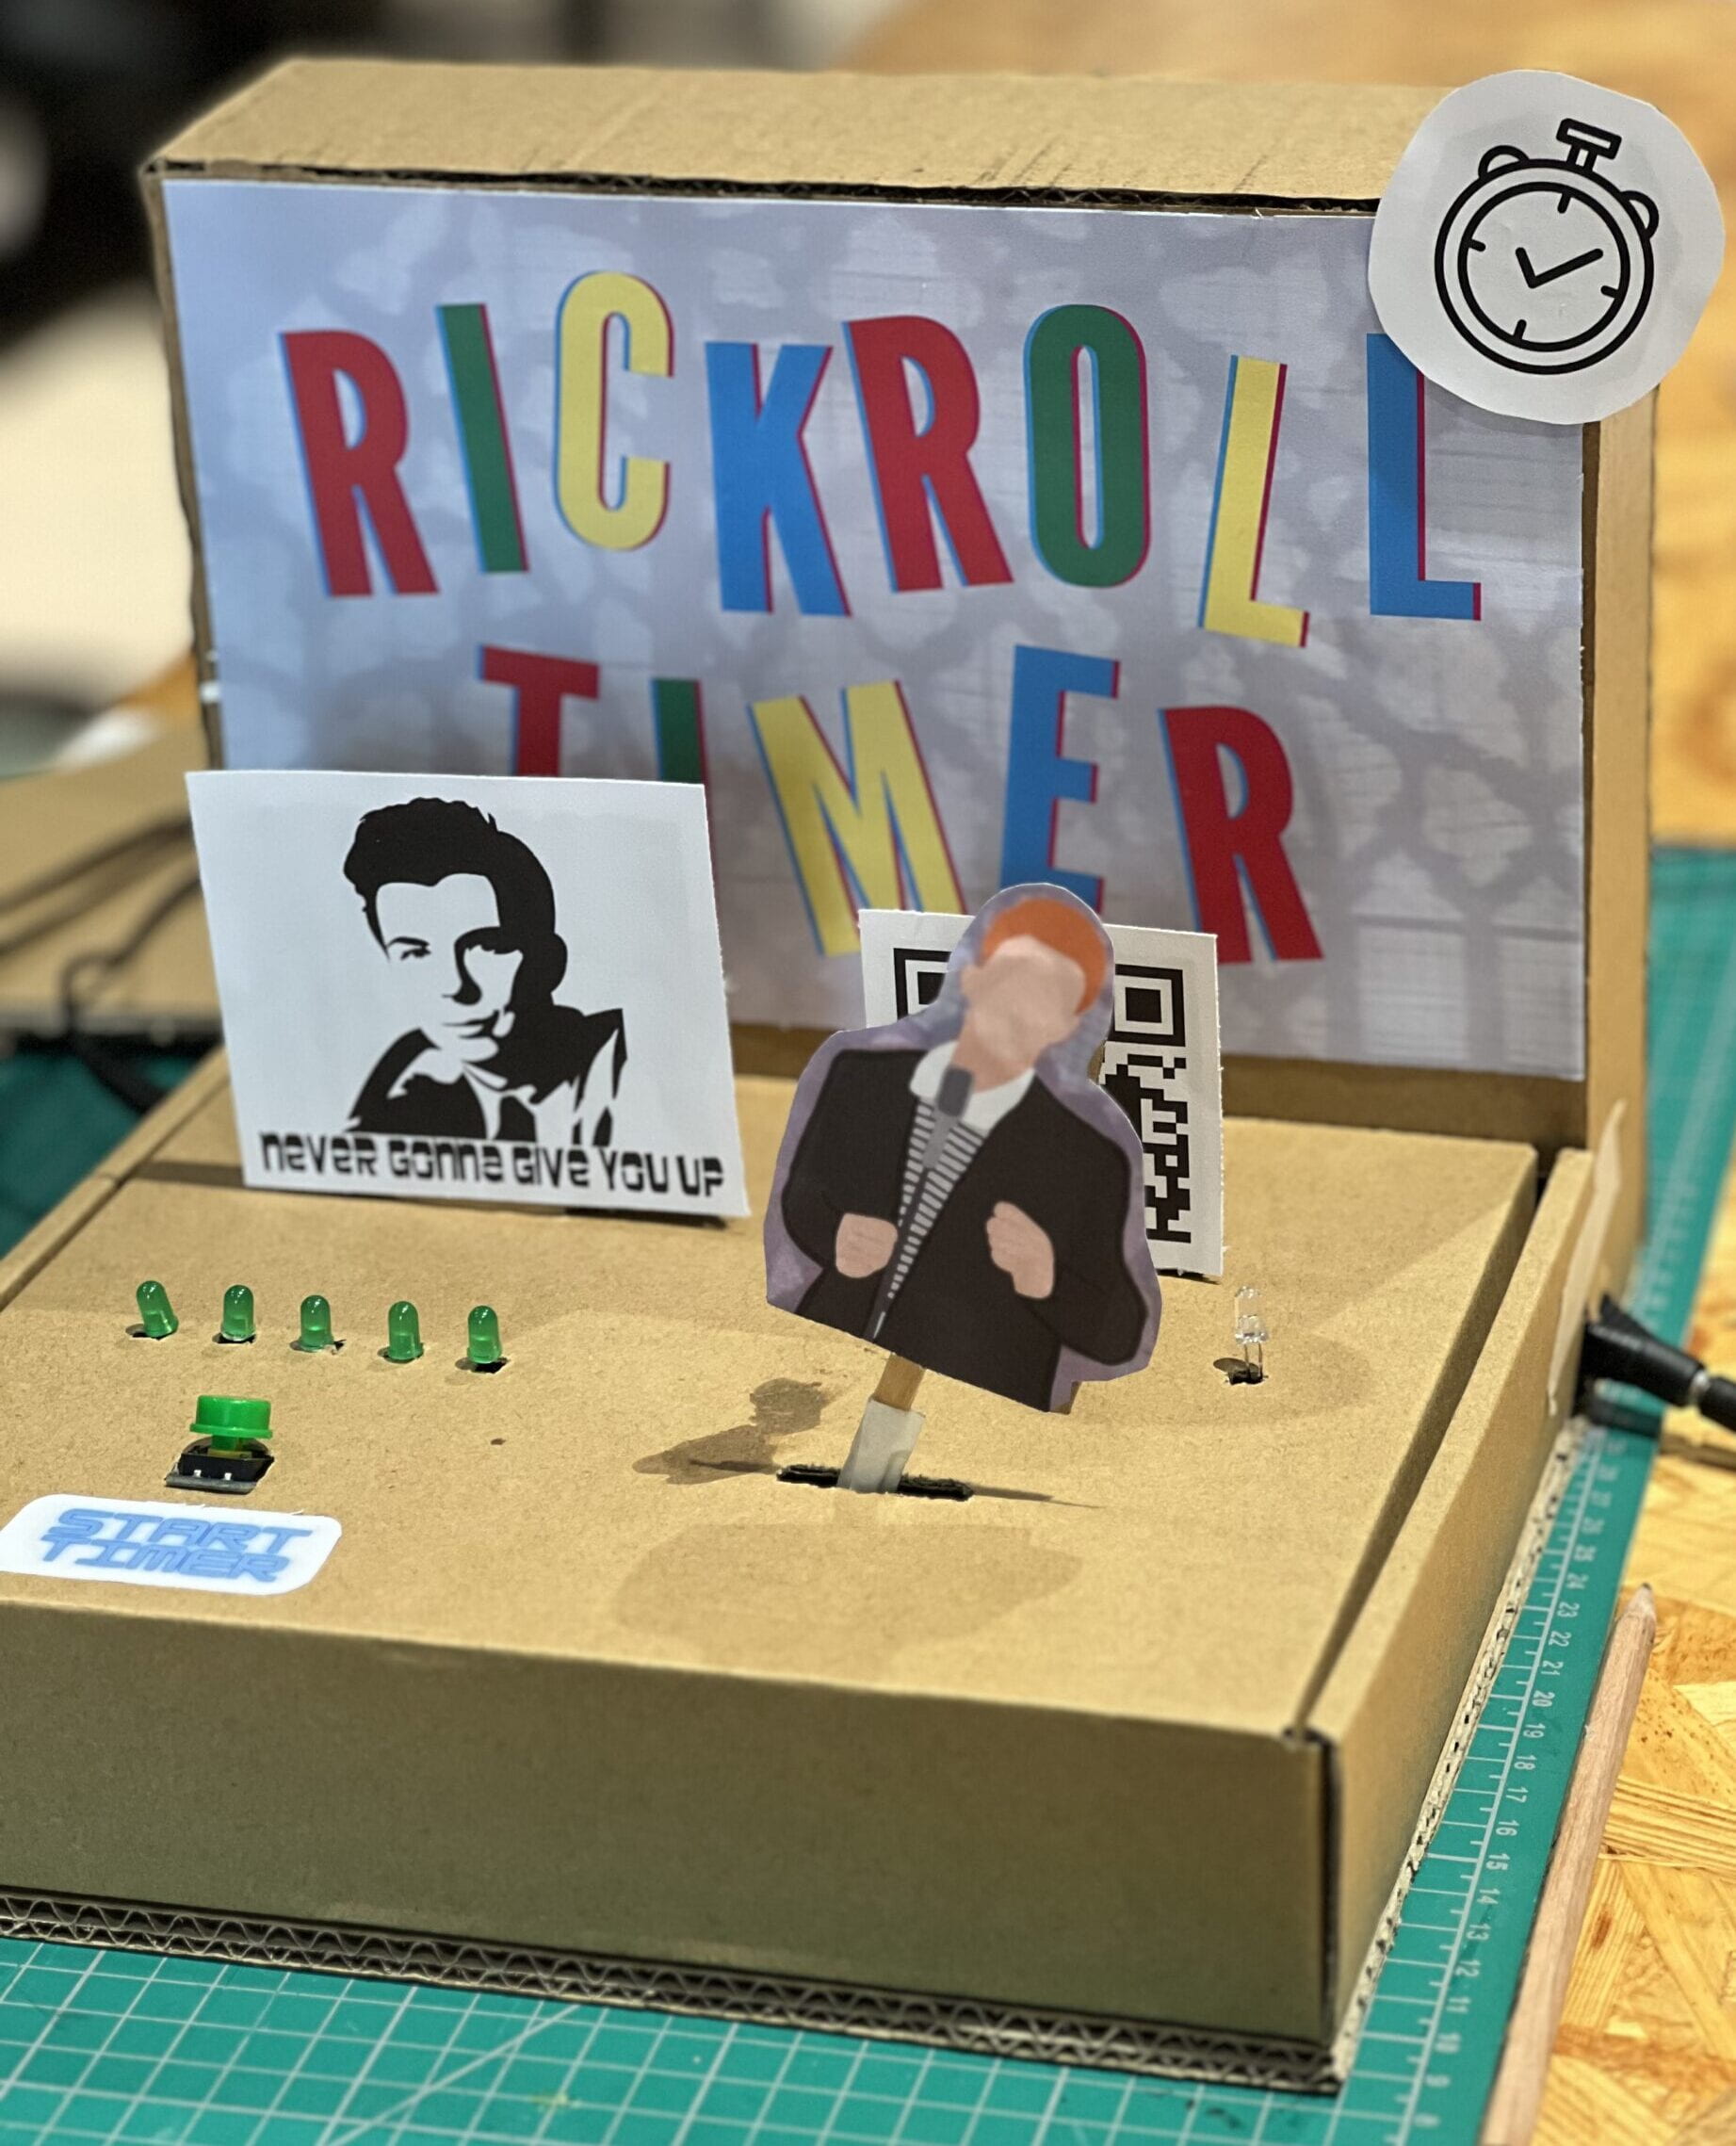
After deciding to build a timer-like device, first I needed a starting point for the user to start the timing. Based on the existing timer devices’ design, I quickly decided to use a push button, as it’s easy to use and familiar enough for the users from their previous experience in daily life. I thought about using sensors to make the interaction more innovative and interesting, but after considering the unreliability of some sensors and the practicality of the project, I decided to stick to my original idea. I got a folding box in really good shape from delivery, so I planned to use thin cardboard for most part of the project. In previous recitations I learned that jumper cables can be a hassle when trying to keep the project neat, so I designed the device to have a stage-like platform and boxed backstage so that I can hide the wires and Arduino and breadboards inside. I thought about using LED strips for decoration purposes, but they seemed too flashy and distracting for a timer, so I gave them up and just used a white LED. For the cardboard figure, I chose to use a servo motor with a wood stick as an extension to connect to the figure.
FABRICATION AND PRODUCTION
I applied for an individual group, so I did all the work from coding to electronics to physical mechanism building. I started with the coding part, and I adapted part of the codes from Arduino built-in example sketches Blink and How to Wire and Program a Button. When trying to find a melody to play at the end of the project, I ran into the codes for Never Gonna Give You Up written by Robson Couto on Github, and quickly decided to make my project RickRoll themed. The original sketch was for the whole song but I didn’t need that long, so I picked out the most important two lines of music notes and adapted it into my code so that it’s controlled by the push-button. After finishing writing the code, I wired up the Arduino to the breadboard and connected the LEDs, button, and buzzer.
However, problems arose when I tried to run the code. After I pressed the button, the music didn’t play, and the LED didn’t blink. After I asked LA Amelia and instructor Andy for help, we troubleshot different sections of the code and figured out that a boolean variable “isPlaying” was needed to control the music playing. After we changed the code, the music played on its own regardless of whether the user pushed the button, and Andy proposed to add “startTime = -1” to make sure the program didn’t automatically start until the button’s pressed. After making sure that the music part played as intended (and listening to way too much Rick Astley), I noticed that the white LED didn’t blink when the music was played using if function. I asked fellow Shengli for help, and she pointed out that it could be the delay() function in the music codes that disabled the if function, then we used the isPlaying boolean to control the LED and adjusted the codes, and it worked out fine. When I tried to connect the servo motor to the circuit and make it move synchronously with the music, I noticed that the delay function in the melody code part caused the problem, and replacing it with millis() would only cause more problems. After some consideration, I decided to wire the servo to an alternative Arduino to make it move individually from the main parts of the project.
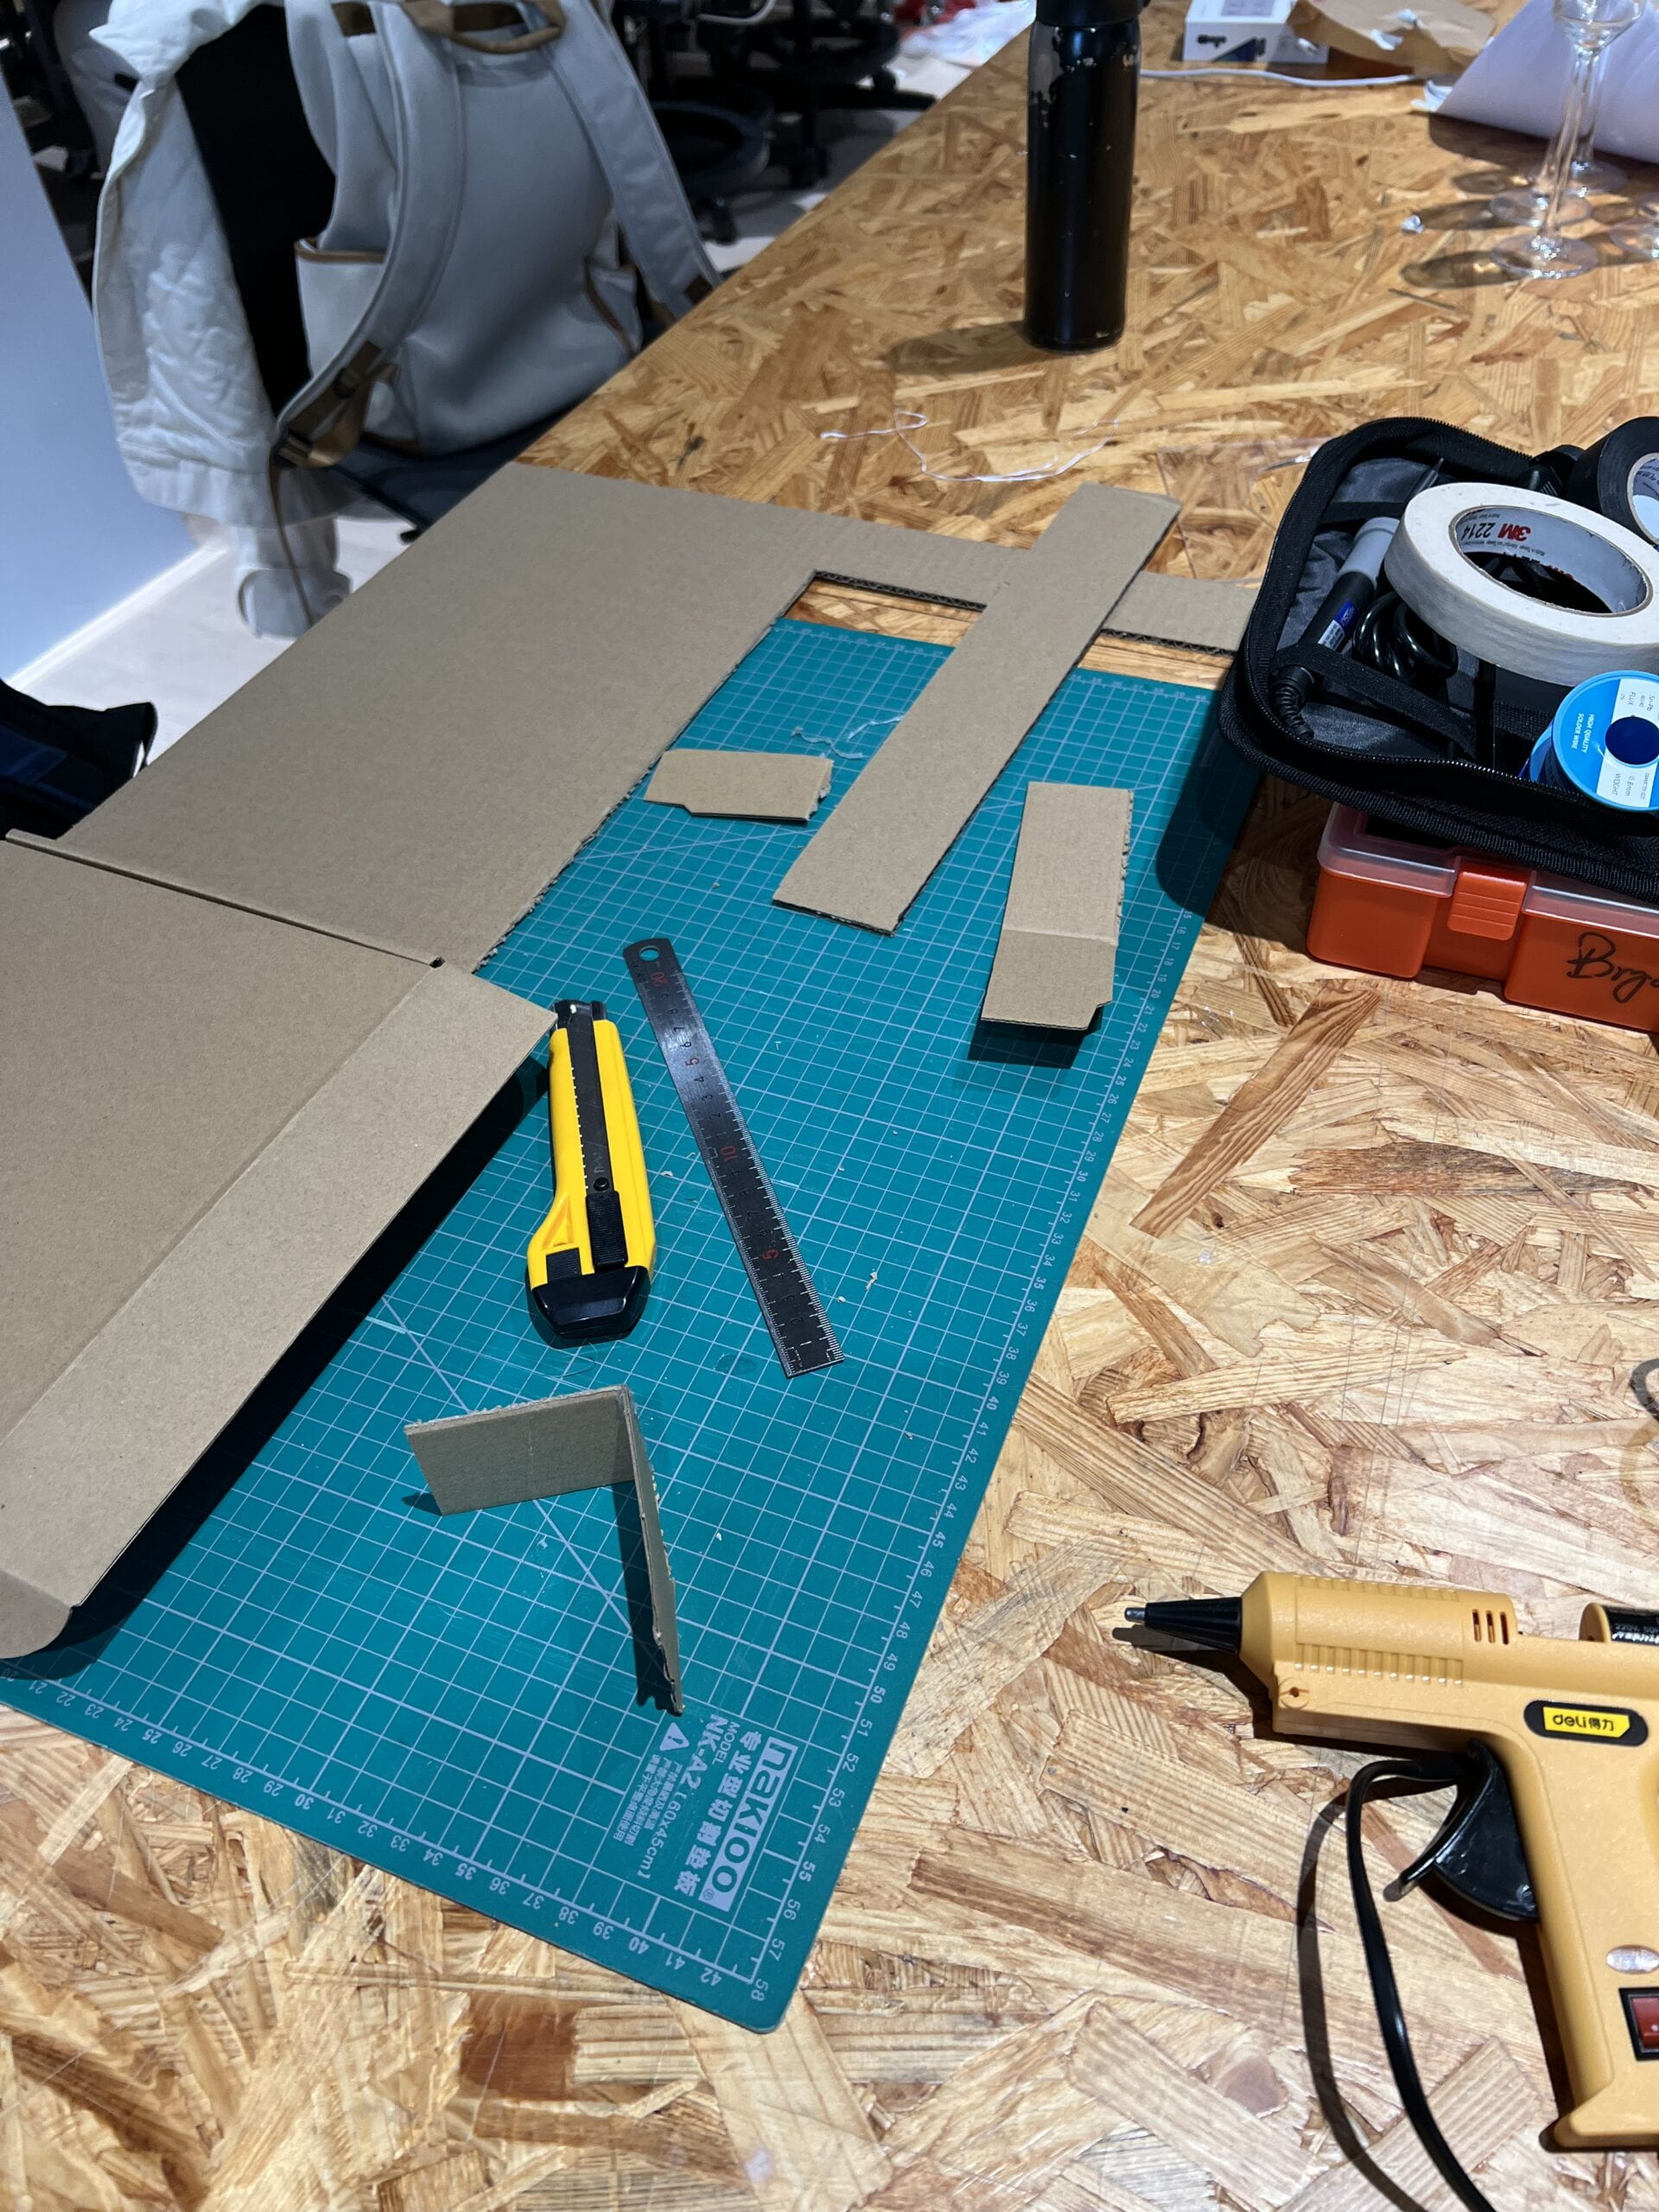
For the physical mechanism building, I cut out several cardboard pieces to form the box-like structure. I made the effort to cut the additional groove to make the joint part more stable and look better by consulting the techniques in 90 DEGREE JOINT in Cardboard [Tips] [Design Modelling] by Jude Pullen. I tried to use the hot glue gun first, but I found that the joints kept coming off and the glue kept spilling out, so I used super glue to hold cardboard together. I then cut out small rectangular holes on the surface for the button, LEDs, servo, and decorative cardboard figures (I color-printed pictures to stick into the cardboard, and the sources for the pictures are Rickroll art and Never Gonna Give You Up). My OCD got the better of me so I spent way too much time on the cardboard cutting and trimming, but the result seemed satisfying.
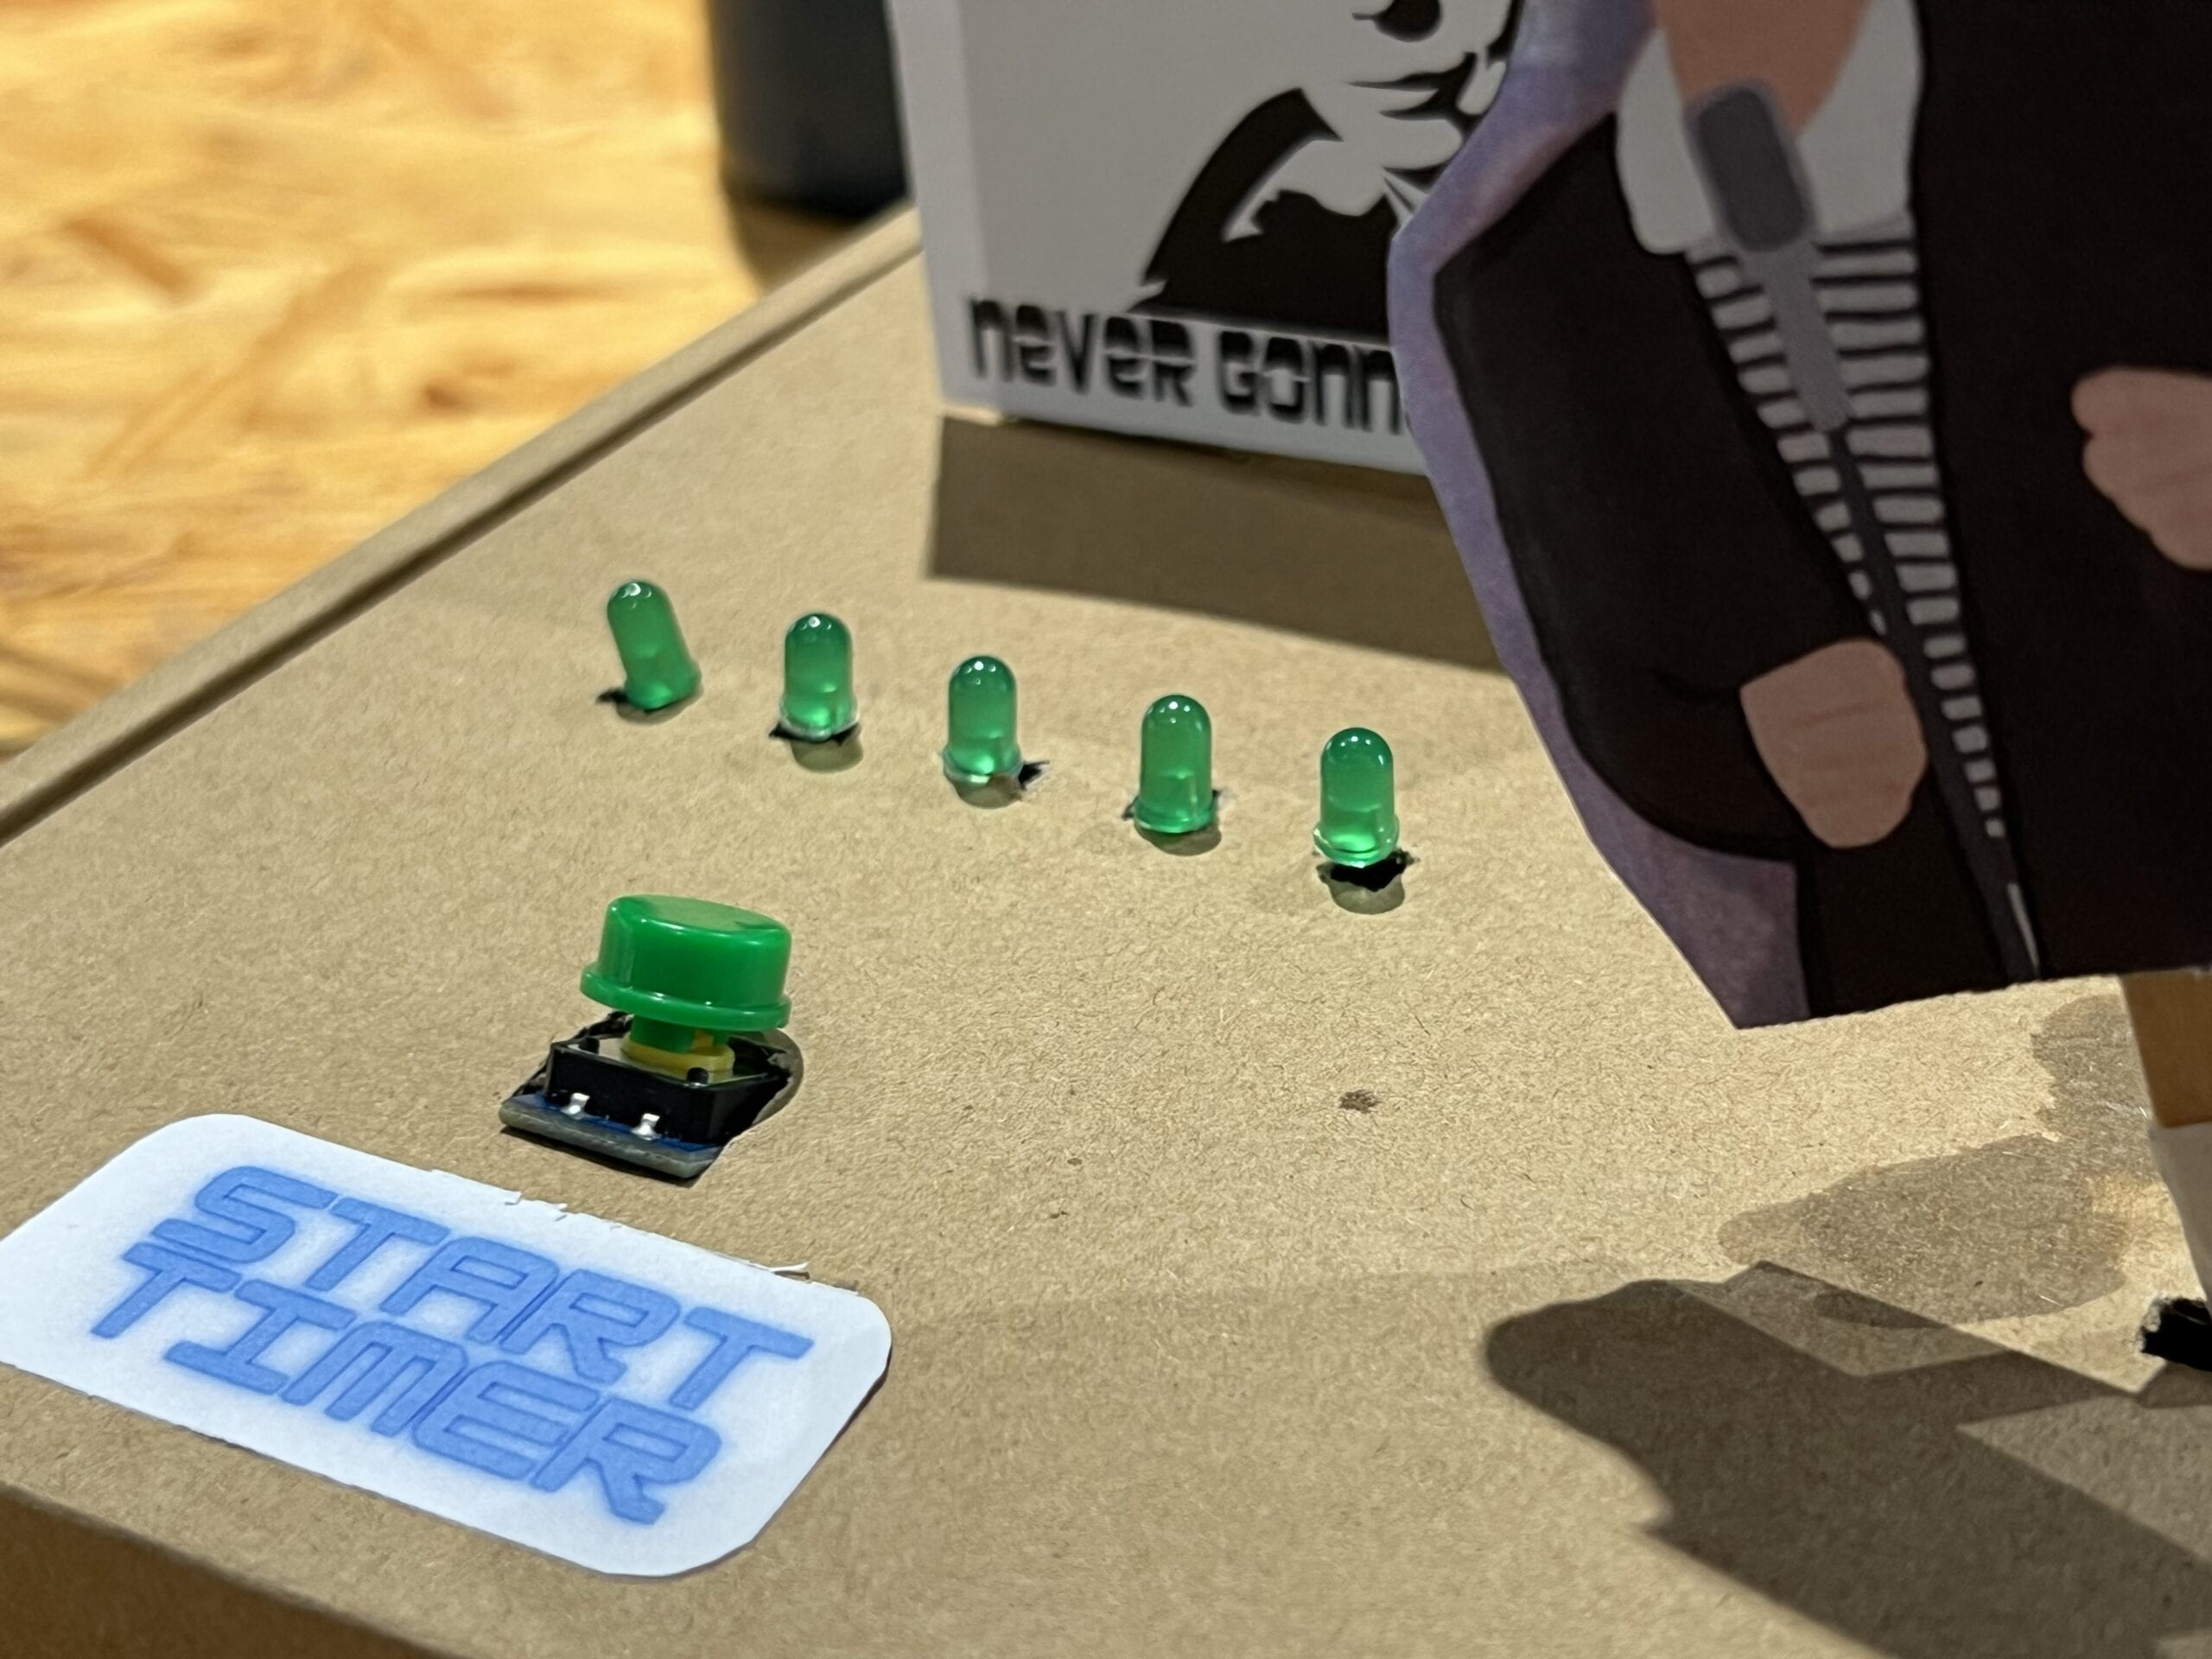
During the user-testing session, I noticed two major problems: most testers weren’t sure what the button was supposed to do (i.e. whether to press it, press how long, and press how many times), and they got confused during the 5-second timer waiting period. I added a printed sign saying “start timer” next to the button to indicate its usage, added four more green LEDs in addition to the original one, and rewrote the code so that the LEDs lit up from left to right one by one during the 5-second interval to show the passage of time after instructor Inmi’s suggestion. These adaptations made the usage of the device clearer for the user, thus adding the practicality of the project.
Here’s the sketch to run the project.
// define valuables
int buttonVal;
int buzzerVal;
int prevVal;
long startTime = -1;
long totalTime;
long musicTime;
int thisNote = 0;
int ledState = LOW;

// assign pins
const int button = 2;
const int buzzer = 8;
const int ledMusic = 11;
const int led1 = 12;
const int led2 = 4;
const int led3 = 5;
const int led4 = 6;
const int led5 = 7;

// servo
#include
Servo servo;

// music part
#include "pitches.h"
int tempo = 114;
int melody[] = {
  // Never Gonna Give You Up - Rick Astley
  // Score available at https://musescore.com/chlorondria_5/never-gonna-give-you-up_alto-sax
  // Arranged by Chlorondria
  NOTE_A4,16, NOTE_B4,16, NOTE_D5,16, NOTE_B4,16,
  NOTE_FS5,-8, NOTE_FS5,-8, NOTE_E5,-4, NOTE_A4,16, NOTE_B4,16, NOTE_D5,16, NOTE_B4,16,

  NOTE_E5,-8, NOTE_E5,-8, NOTE_D5,-8, NOTE_CS5,16, NOTE_B4,-8, NOTE_A4,16, NOTE_B4,16, NOTE_D5,16, NOTE_B4,16, //18
  NOTE_D5,4, NOTE_E5,8, NOTE_CS5,-8, NOTE_B4,16, NOTE_A4,8, NOTE_A4,8, NOTE_A4,8,
  NOTE_E5,4, NOTE_D5,2, NOTE_A4,16, NOTE_B4,16, NOTE_D5,16, NOTE_B4,16,
  NOTE_FS5,-8, NOTE_FS5,-8, NOTE_E5,-4, NOTE_A4,16, NOTE_B4,16, NOTE_D5,16, NOTE_B4,16,
  NOTE_A5,4, NOTE_CS5,8, NOTE_D5,-8, NOTE_CS5,16, NOTE_B4,8, NOTE_A4,16, NOTE_B4,16, NOTE_D5,16, NOTE_B4,16,

  NOTE_D5,4, NOTE_E5,8, NOTE_CS5,-8, NOTE_B4,16, NOTE_A4,4, NOTE_A4,8,  //23
  NOTE_E5,4, NOTE_D5,2, REST,4,

};
int notes = sizeof(melody) / sizeof(melody[0]) / 2;
int wholenote = (60000 * 4) / tempo;
int divider = 0, noteDuration = 0;
bool isPlaying = false;


void setup() {
  Serial.begin(9600);
  pinMode(button, INPUT);
  pinMode(buzzer, OUTPUT);
  pinMode(ledMusic, OUTPUT);
  pinMode(led1, OUTPUT);
  pinMode(led2, OUTPUT);
  pinMode(led3, OUTPUT);
  pinMode(led4, OUTPUT);
  pinMode(led5, OUTPUT);
  servo.attach(9);
}

void loop() {

  buttonVal = digitalRead(button);

  //push button
  if (buttonVal == HIGH && prevVal == LOW) {
    Serial.println("Pressed");
    digitalWrite(led1, HIGH);
    startTime = millis();
    thisNote = 0;
  }
  totalTime = millis() - startTime;
  musicTime = millis() - totalTime;
  Serial.println(totalTime);

  //lighting up leds
  if (startTime != -1 && totalTime >= 1000) {
    digitalWrite(led2, HIGH);
  }
  if (startTime != -1 && totalTime >= 2000) {
    digitalWrite(led3, HIGH);
  }
  if (startTime != -1 && totalTime >= 3000) {
    digitalWrite(led4, HIGH);
  }
  if (startTime != -1 && totalTime >= 4000) {
    digitalWrite(led5, HIGH);
  }

  // after 5 seconds
  if (startTime != -1 && totalTime >= 5000 && isPlaying == false) {
    isPlaying = true;
    digitalWrite(led1, LOW);
    digitalWrite(led2, LOW);
    digitalWrite(led3, LOW);
    digitalWrite(led4, LOW);
    digitalWrite(led5, LOW);
    // play music
    for (int thisNote = 0; thisNote < notes * 2; thisNote = thisNote + 2) { divider = melody[thisNote + 1]; if (divider > 0) {
        noteDuration = (wholenote) / divider;
      } else if (divider < 0) {
        noteDuration = (wholenote) / abs(divider);
        noteDuration *= 1.5;
      }
      tone(buzzer, melody[thisNote], noteDuration * 0.9);
      delay(noteDuration);

      if (isPlaying == true) {
        // blink led constantly
        digitalWrite(ledMusic, HIGH);
        delay(10);
        digitalWrite(ledMusic, LOW);
        delay(10);

      }

      noTone(buzzer);
    }

    isPlaying = false;
    startTime = -1;

    digitalWrite(ledMusic, LOW);
    servo.write(0);

    }

  prevVal = buttonVal;

  delay(10);
}
CONCLUSIONS
My project is a practical timer device that could be used in people’s daily lives. The results showed that the device did interact with the user by providing positive feedback (music and lighting), but there’s not much for the user to do to interact with the device itself (other than push a button), so this project didn’t show the communication between two involved parties. However, from my perspective, this is not so much a failure to reach the expectations of the interaction as it is an inevitable consequence of its status as a practical and usable device; after all, a person shouldn’t need to be distracted by frequent interactions with their tools when they’re serious about completing the job at hand. In the end, after some adaptations, the audience interacted with my project in the way I intended, and they reacted to some of the little (maybe unnecessary) pranks I put into the design as I expected.
There are many aspects that can be improved, such as sticking to my original plan and making the servo move only after the music starts playing, replacing the push-button with something more interactive for the user, using stepper motors to control different parts of cardboard figure so that Rick looks more like dancing, and decorating the cardboard box and using woodbox to make it more attractive and sturdy. I’m a fairly anxiety-prone person, and the frustration caused by unfamiliarity with Arduino coding during the making of the prototype did cause me stress, but the LAs and fellows in the Lab helped me a lot. Asking for help whenever I need it is not something I’m used to doing, as a social science major I’ve spent the vast majority of my time working everything out on my own, but I realized that this was essential in completing IMA projects, and it felt really good to get help from others.
Here’s the video recording of me interacting with the project.
DISASSEMBLY
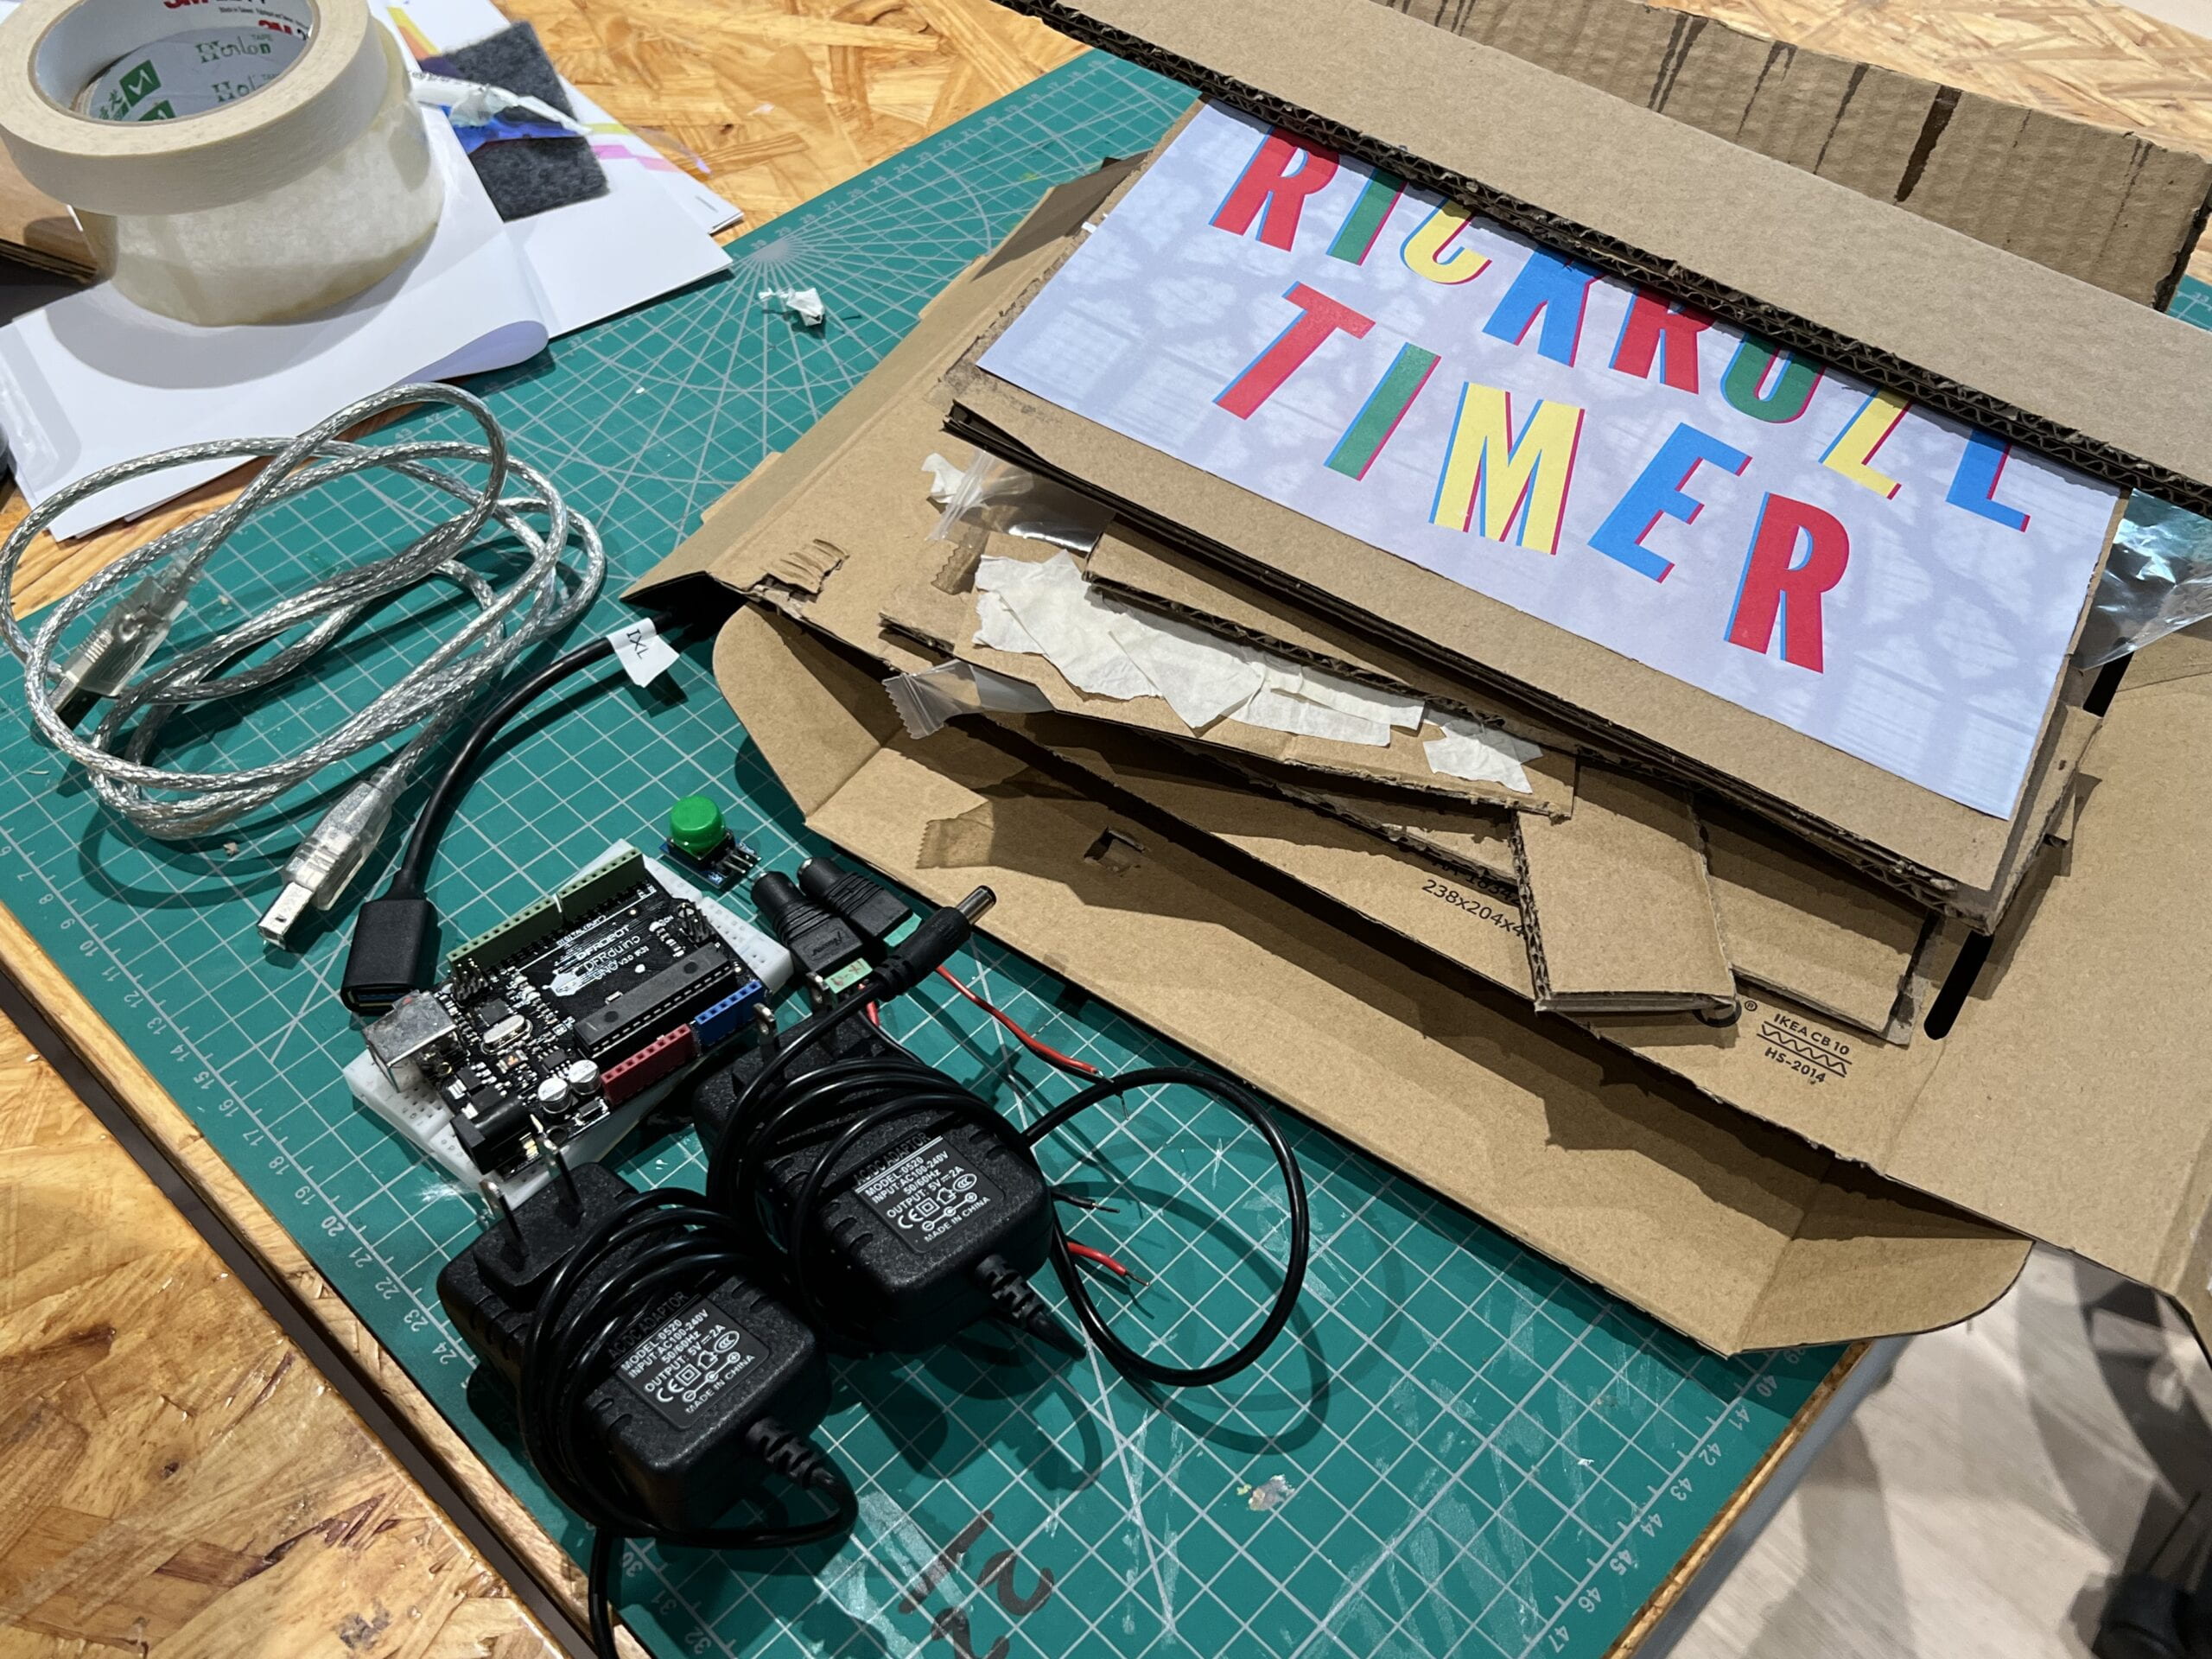
So long RickRoll, you had a good run.
APPENDIX
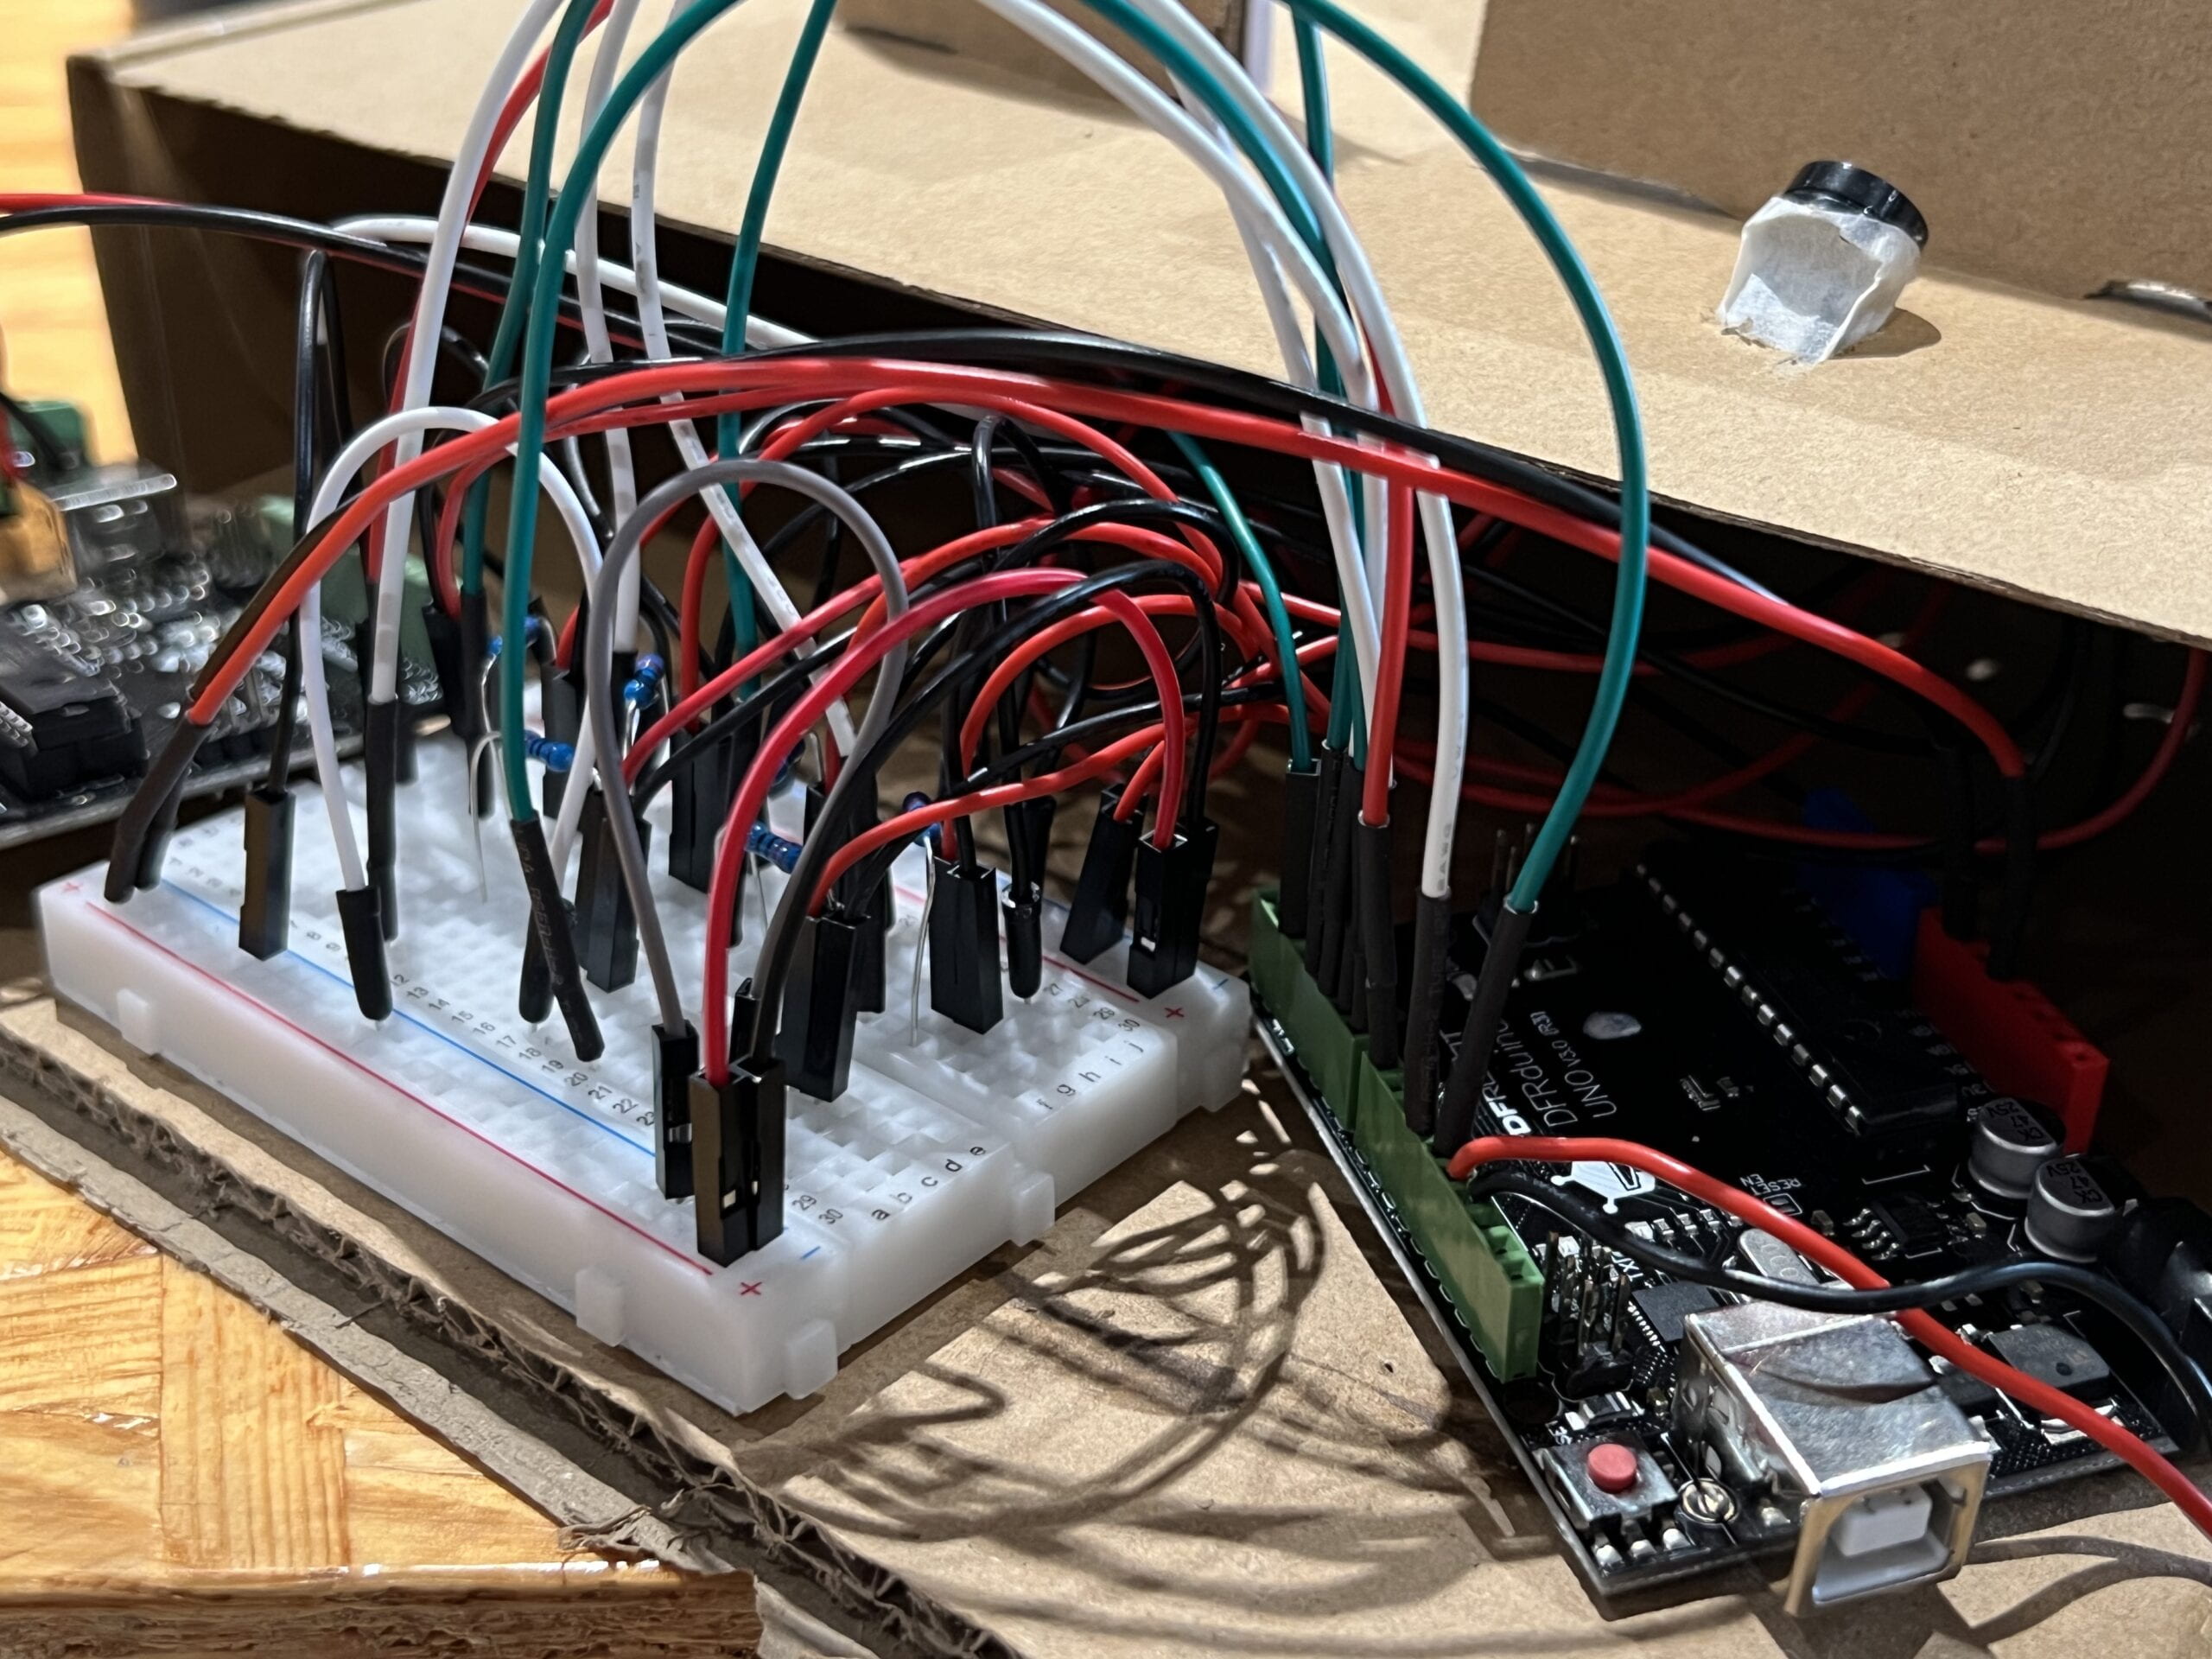
Nothing special, just got jumpscared by the wires when opening the box, thought I might take a picture.
