This guide is also available as a printable pdf.
- Load and set up the vinyl cutter.
- On the computer, open Roland CutStudio (it’s the grey icon with the R on it)
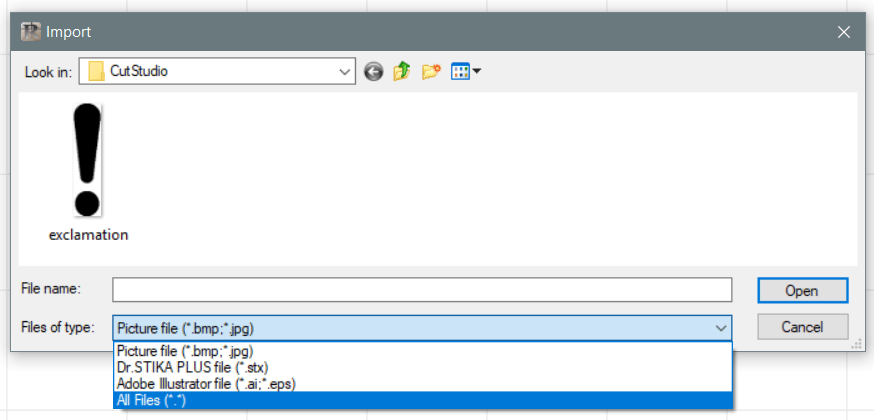
- Go to “Import” and select your file.

Note, the software defaults to looking for .jpg/.bmp. Choose “All Files” From the drop down menu to find your .eps file.

- If you need to rotate or scale your file, go to “Properties” (on the right side of the top bar)

- Before cutting, go to File → Cutting Set Up. In the new window, click “Properties”. If necessary, change the length (any number is fine, as long as it’s bigger than the size of your design).
- In the new Properties window, click “Get From Machine” to set the width — this will set the canvas to be the actual size of the cutting area, determined by the wheel placement on the machine.

After hitting “OK” (in both windows), the canvas size will be redrawn to match the settings you’ve entered.
- Select and drag your design to position it, or hit “Move” in the top bar to snap it to the bottom corner. Make sure that the entire design fits into the canvas (the white area with the grid over it). Anything outside this area will not cut. To preserve material, place your design at the bottom edge of the canvas.
- Go to “Cutting” and hit OK. The vinyl cutter should start cutting.

Note: the vinyl cutter must already be loaded before a job can be sent.
FINAL STEPS
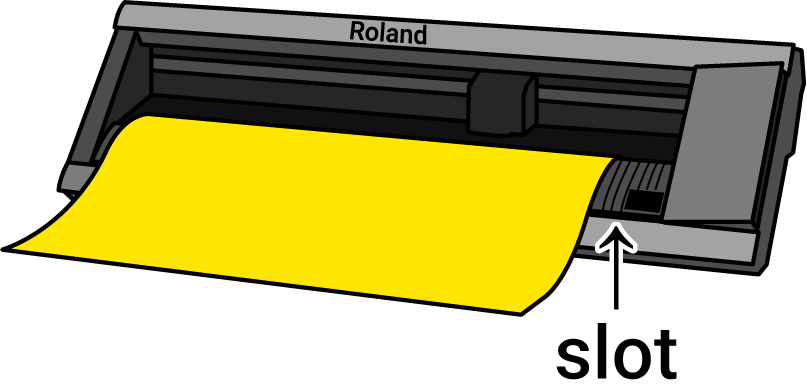
- Back at the machine, use the up/down arrows to roll out your vinyl until the top of your design passes the slot below the plastic ridges. Use this slot as a guide for a box cutter to cut in a straight line.

- To unload the machine, raise the wheels and pull the vinyl out. If using a roll, roll the excess vinyl back and return it to the storage rack.