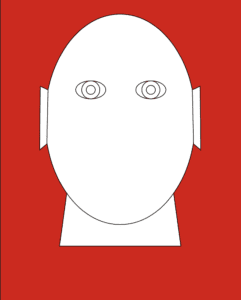
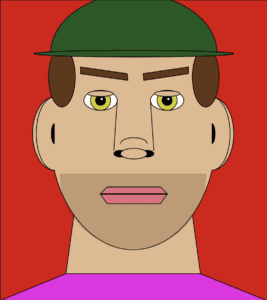
Being completely new to coding, I was unsure how to start my first assignment, making a sketch using primitive shapes and color tools. After watching the tutorials and reading all the documentation, I knew I had to jump in, make a ton of mistakes, and learn by trial and error. The p5js reference documentation quickly became my friend.
The first problem I encountered was understanding how the X-axis and Y-axis worked. Frustrated on how to lock down locations, I started to research online. Eventually, I stumbled upon a former ITP student blog post on this very assignment.
Vidia spoke about how she found an Image Map Generator site that would plot the drawing’s edge coordinates. I played around on this site for a while but couldn’t get it to work; I would like to explore it more once I have more experience under my belt.
Back to my sketch, I started placing shapes and moving them around to get a better grasp of coordinates. Since I was drawing a face and wanted symmetry, the second feature fell into place much quicker.
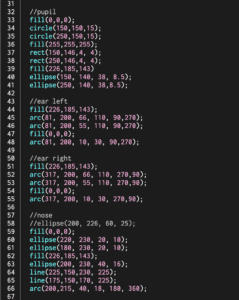
The next problem I struggled with for a long time was producing an arc. I couldn’t wrap my head around how to specify the angles in radians. With a little research, I found if I placed. angleMode(DEGREES); at the beginning of my sketch, I could work in degrees instead of radians, which made a lot more sense to me.
The final problem I encountered was working in the proper order. I originally drew the entire sketch and waited to color and remove strokes at the end. Quickly finding out that color was applied to everything below.
Final Note: I found that organization and notes are essential. I ended up breaking each section of the face-up with comments so I could go back later and make corrections.
Rough Draft Sketch:

Final Sketch:

Code Example:

My final code: Assignment 1
This exercise has got me thinking about the types of projects I would like to work on this term. I have been working as a photographer during my entire career and have always been drawn to public art and interactive art. The two main reasons I like this style of work is because, for one, I find public art more disarming and accessible. Two, I find that interactive work gets a level of engagement, both active and passive, that static art doesn’t.
In the past, I would have to hire developers to help me achieve my vision. Eventually, this would work, but it came with a host of problems, including:
1) I would have to secure more grant funding to cover the costs of bringing on help.
2) Without proper training, I only had a basic understanding of the technologies available and how to work with them. This left me feeling that I wasn’t pushing my work as far as I could.
This term, I am looking forward to grasping the necessary computation skills to make me a better teammate and explore new techniques to create more dynamic public art.
My work has been focused primarily on putting visuals to scientific research. I would like to continue down this track but also make purely visual pieces this term. For these reasons, I think I’m particularly drawn to these three pieces:
HintFM : Wind Map
Jill Hubley: NYC Trees
TeamLab: Universe of Water Particles Falling from the Sky
