Go Pinball! – Avril – Professor Gottfried Haider
CONTEXT AND SIGNIFICANCE
Address how your previous research (Group Project) impacts or inspires your midterm project.
For the idea-proposing process, I learned a lot from my previous group research project. Mainly about effective methods for developing practical and innovative ideas.
Firstly, it is important to start the proposal stage early so there is ample time to brainstorm various concepts and determine the best option. In the initial phases, it’s good to keep an open mind rather than focusing on just one proposal, as the first few ideas may have impractical aspects or others could emerge that are even stronger.
Secondly, discussing proposals and ideas extensively with others is valuable, as it prevents being limited by your perspective. Engaging others provides a better understanding of how different audiences might view your project. In a way, this acts as a form of early user testing. Bringing additional perspectives into the process can help strengthen the final proposal.
Getting input from your team and potentially end users should help identify issues proactively. This iterative approach will also help determine which ideas have the most potential before significant time and resources are invested into any one proposal.
Analyze previous projects and interactions that you have researched. Point to what specifically in those projects triggered your understanding of interaction, and then your definition of it.
For our group project, we designed a decision-making machine that analyzes and detects patterns in data. However, this concept was quite abstract, and difficult to demonstrate how users would interact with it. This got me thinking about other interactive experiences I’ve enjoyed, like the tower defense game Bloons TD Battles. Games are almost always highly engaging and interactive. Some research defines interaction as facilitating high-quality conversations, which I think captures the essence well. Based on these ideas, I would define interaction as facilitating effective communication between two or more entities. The experience should allow for a meaningful exchange of information that is easy for users to understand and participate in. This revised definition encompasses both abstract systems and digital products by focusing on how they enable communication and conversation.
What is unique and/or significant about your project? If you re-create something that already exists, explain what your take is on that existing project and what your contribution is to its development.
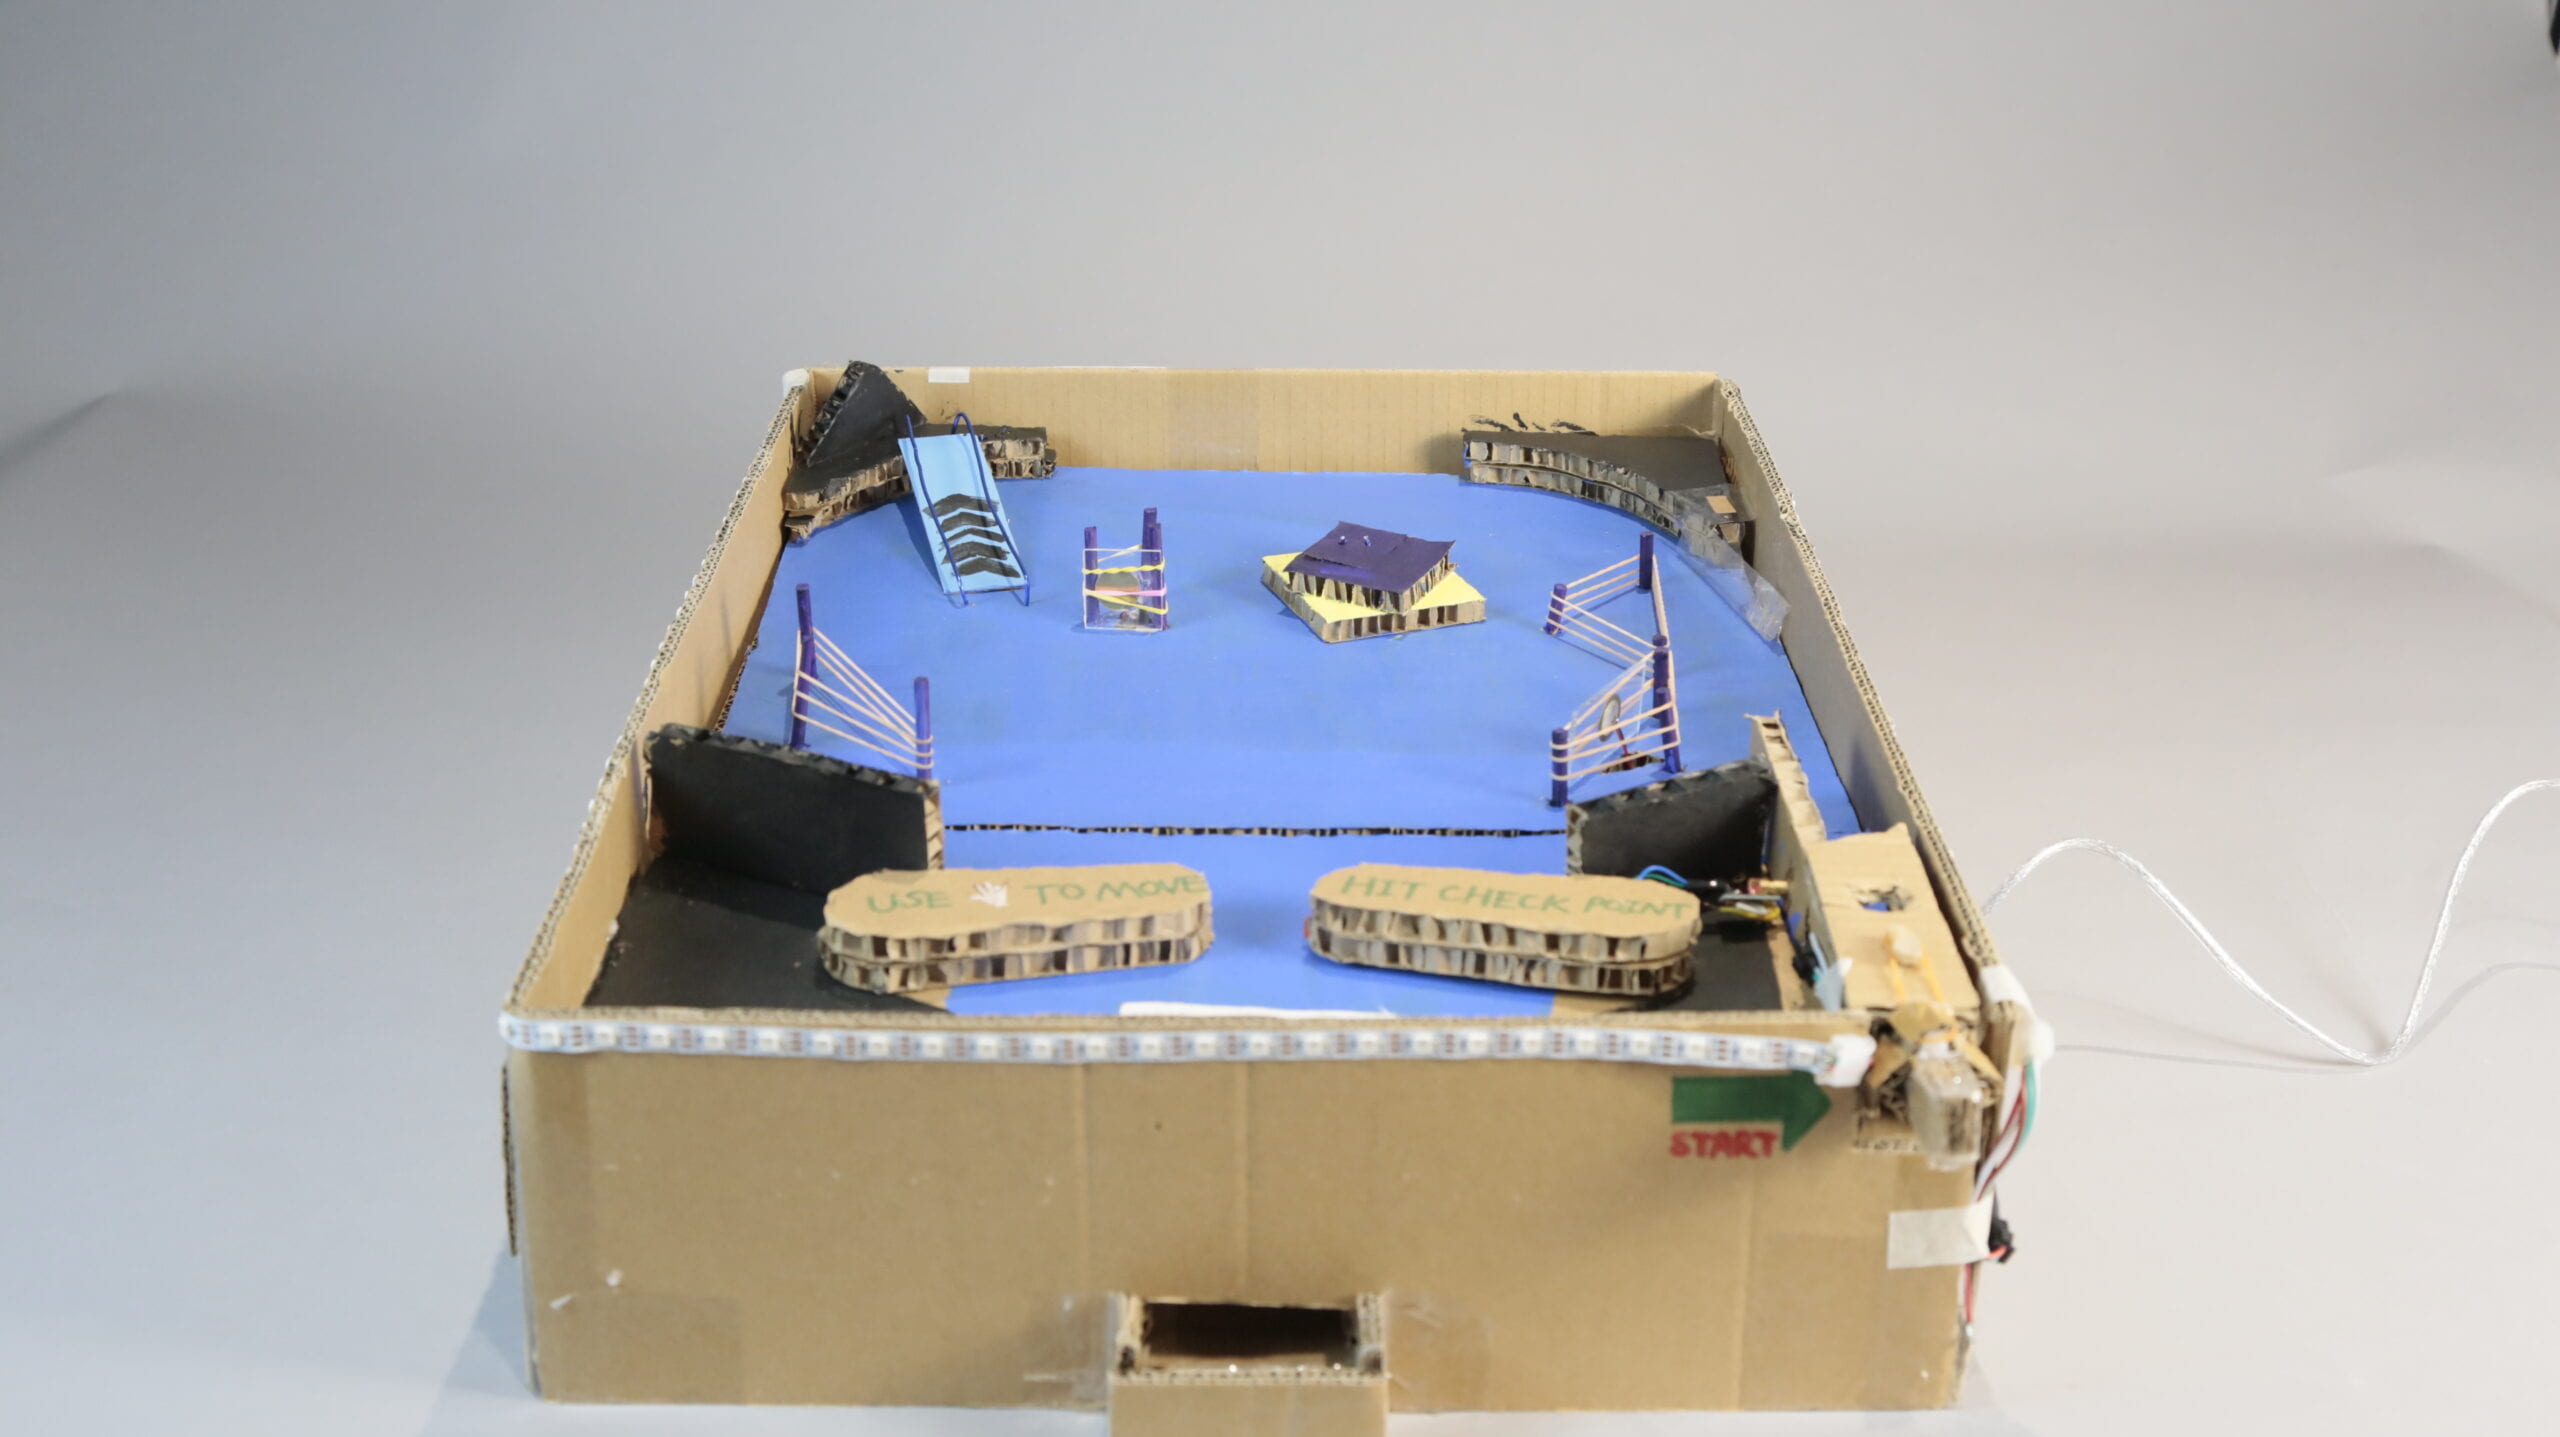
While cardboard pinball games have been created before, our project aims to advance the concept through digital interactivity and custom design. In researching existing examples online, we saw that past efforts focused solely on the physical structure and gameplay mechanics. However, we sought to push the boundaries of cardboard construction by developing sensors, LEDs, and coding to digitally track and respond to the pinball in real-time.
Rather than simply recreating past designs, we dedicated significant time and effort into engineering our own custom pinball machine structure optimized for our vision. Through iterative prototyping and testing over the course of a week( Yes, A WEEK!), we were able to create a sturdy yet flexible frame that could withstand the force of ball collisions.
By incorporating circuitry and programming, our project will offer a more immersive playing experience than previous cardboard pinball games. Players will be able to see visualized data about the pinball’s movements and collisions displayed through lights. Additionally, digital detection of the ball’s location could enable adaptive gameplay features that respond in real-time.
Overall, our cardboard pinball machine pushes the limits of what has been done before by integrating physical craftsmanship with interactivity powered by circuits and code. This unique approach has the potential to advance the genre of homemade pinball games through technological innovation.
For whom is your project intended and why is it of special value to its targeted audience?
Our project is intended for two key audiences.
First, those who have an interest in pinball machines. By incorporating digital interactivity, our design allows players to view real-time ball data, providing a more immersed experience compared to traditional physical pinball. This lowers the barrier to entry and makes the classic game more accessible.
Additionally, our pinball machine is aimed at students who experience stress or pressure around midterm exams. The engaging and interactive gameplay acts as a form of relaxation therapy. Studies have shown that games can distract from worries and release endorphins. By providing an entertaining distraction, our pinball project offers valuable stress relief for students during that intense period of exams.
Rather than a passive activity, our digitally-enhanced pinball machine actively engages both the mind and body. Players must strategize their shots while their heart rate rises during close games. This interaction promotes wellness by exercising both cognitive function and physical reaction times.
Overall, our project brings the nostalgic fun of pinball into the digital age through custom engineering. This makes the experience more immersive and therapeutic for its intended audiences dealing with exam stress or seeking interactive entertainment. The added interactivity and data visualization features give our pinball machine unique value compared to existing physical versions.
CONCEPTION AND DESIGN
In what ways did your understanding of how your users were going to interact with your project inform certain design decisions you made? Account for several such decisions.
We conducted user testing early on to understand how people would naturally want to interact with the pinball machine. From this, several design decisions were informed:
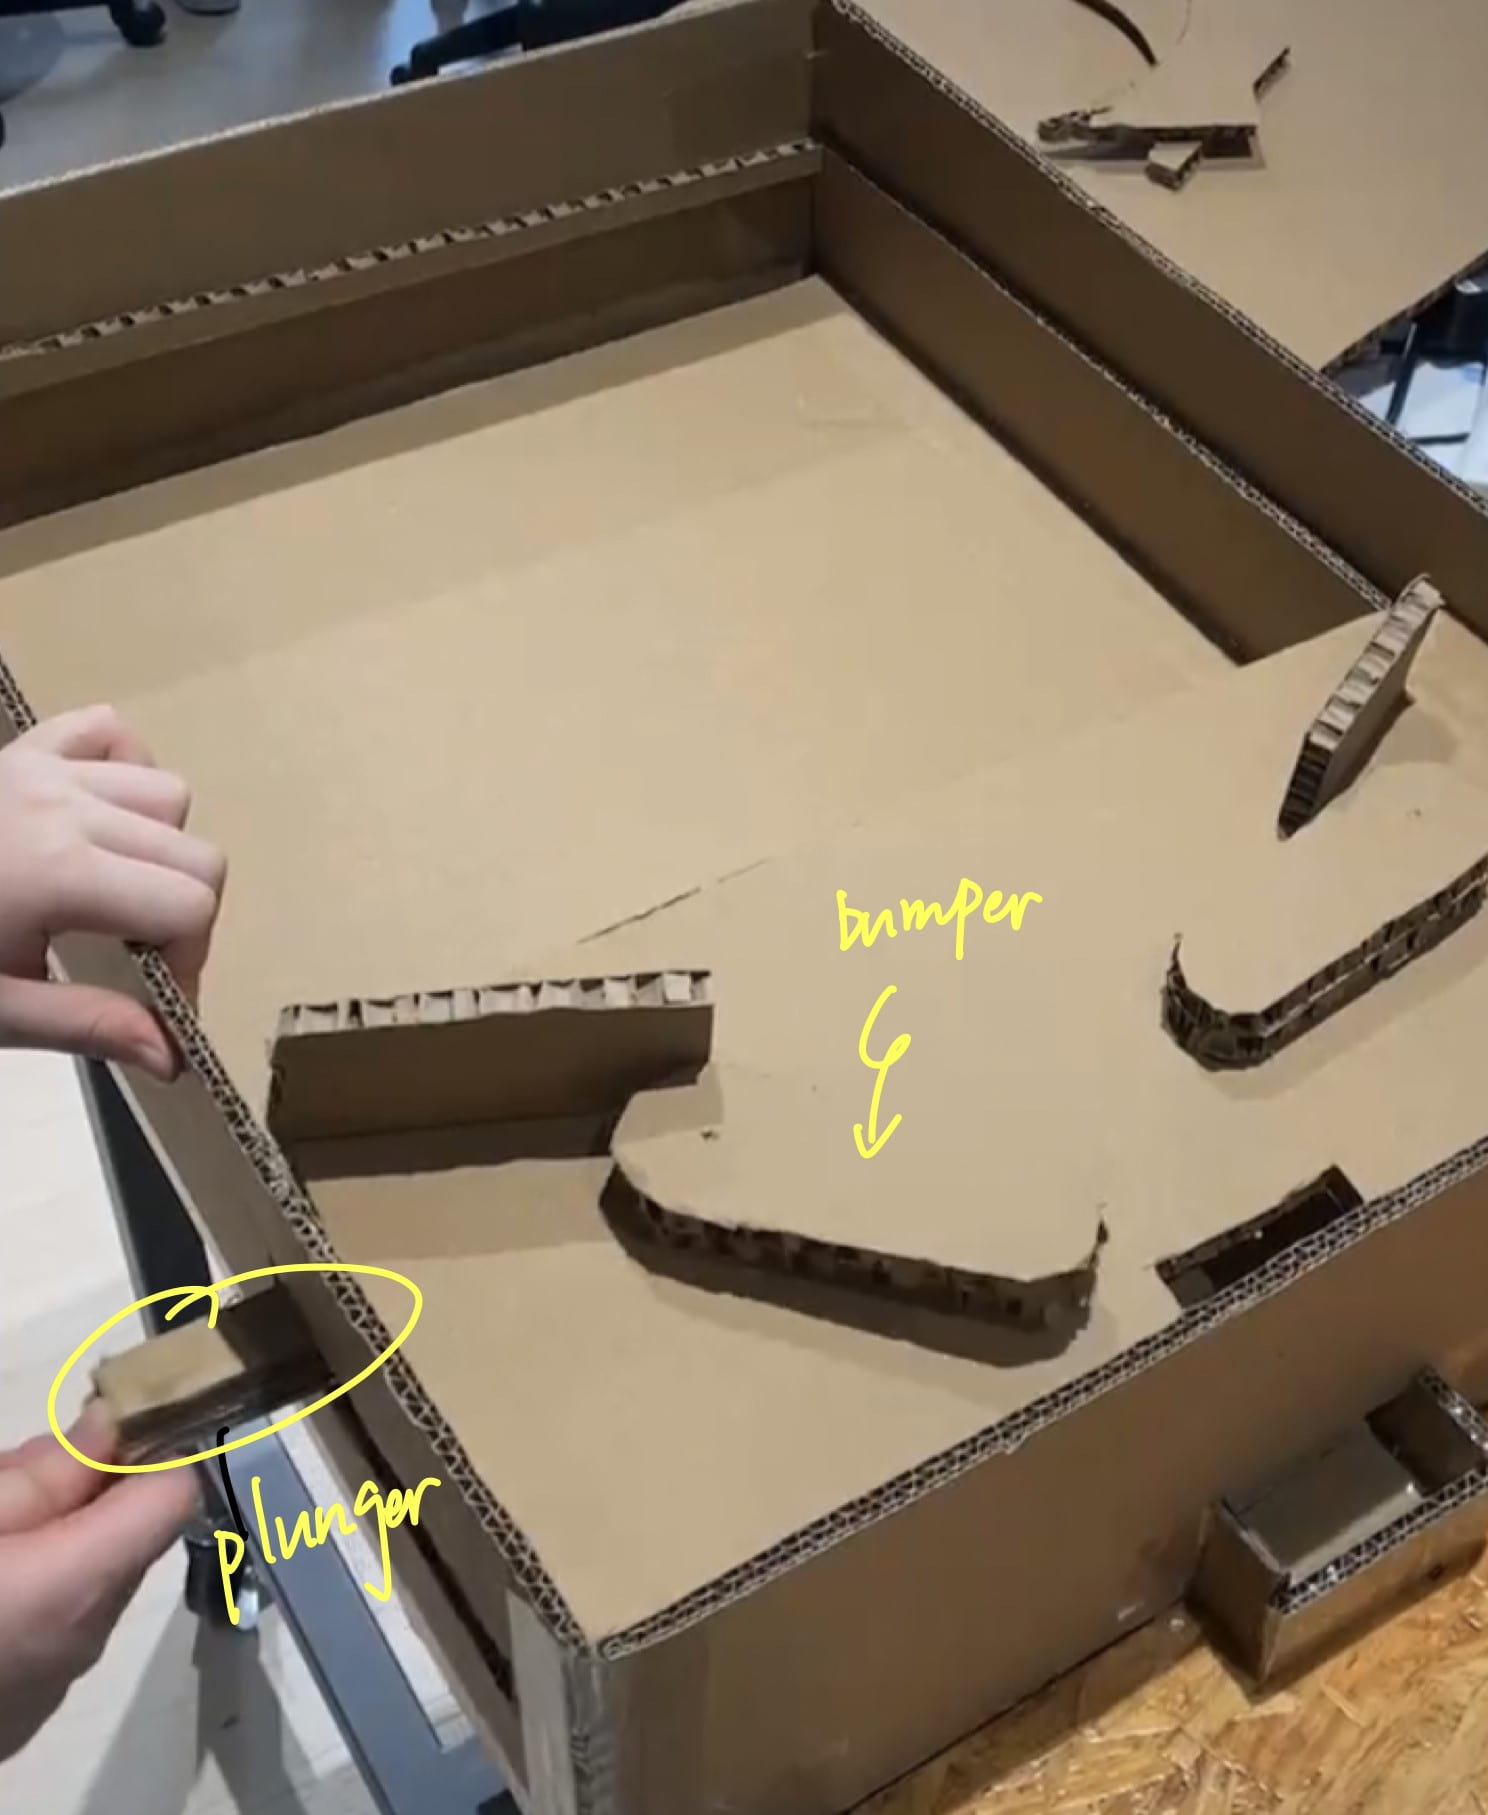
- Controls – Based on feedback that direct hand interaction was more intuitive than a plunger/rubber band, we opted to design movable bumpers that could be pushed/pulled by hand. This allowed for a more immediate reaction-based gameplay experience.
- Onboarding Experience – Observing users try to figure out how to start a game, we added visual instructions directly onto the cardboard. Arrows and text now clearly indicate push/pull interactions to onboard new players quickly.
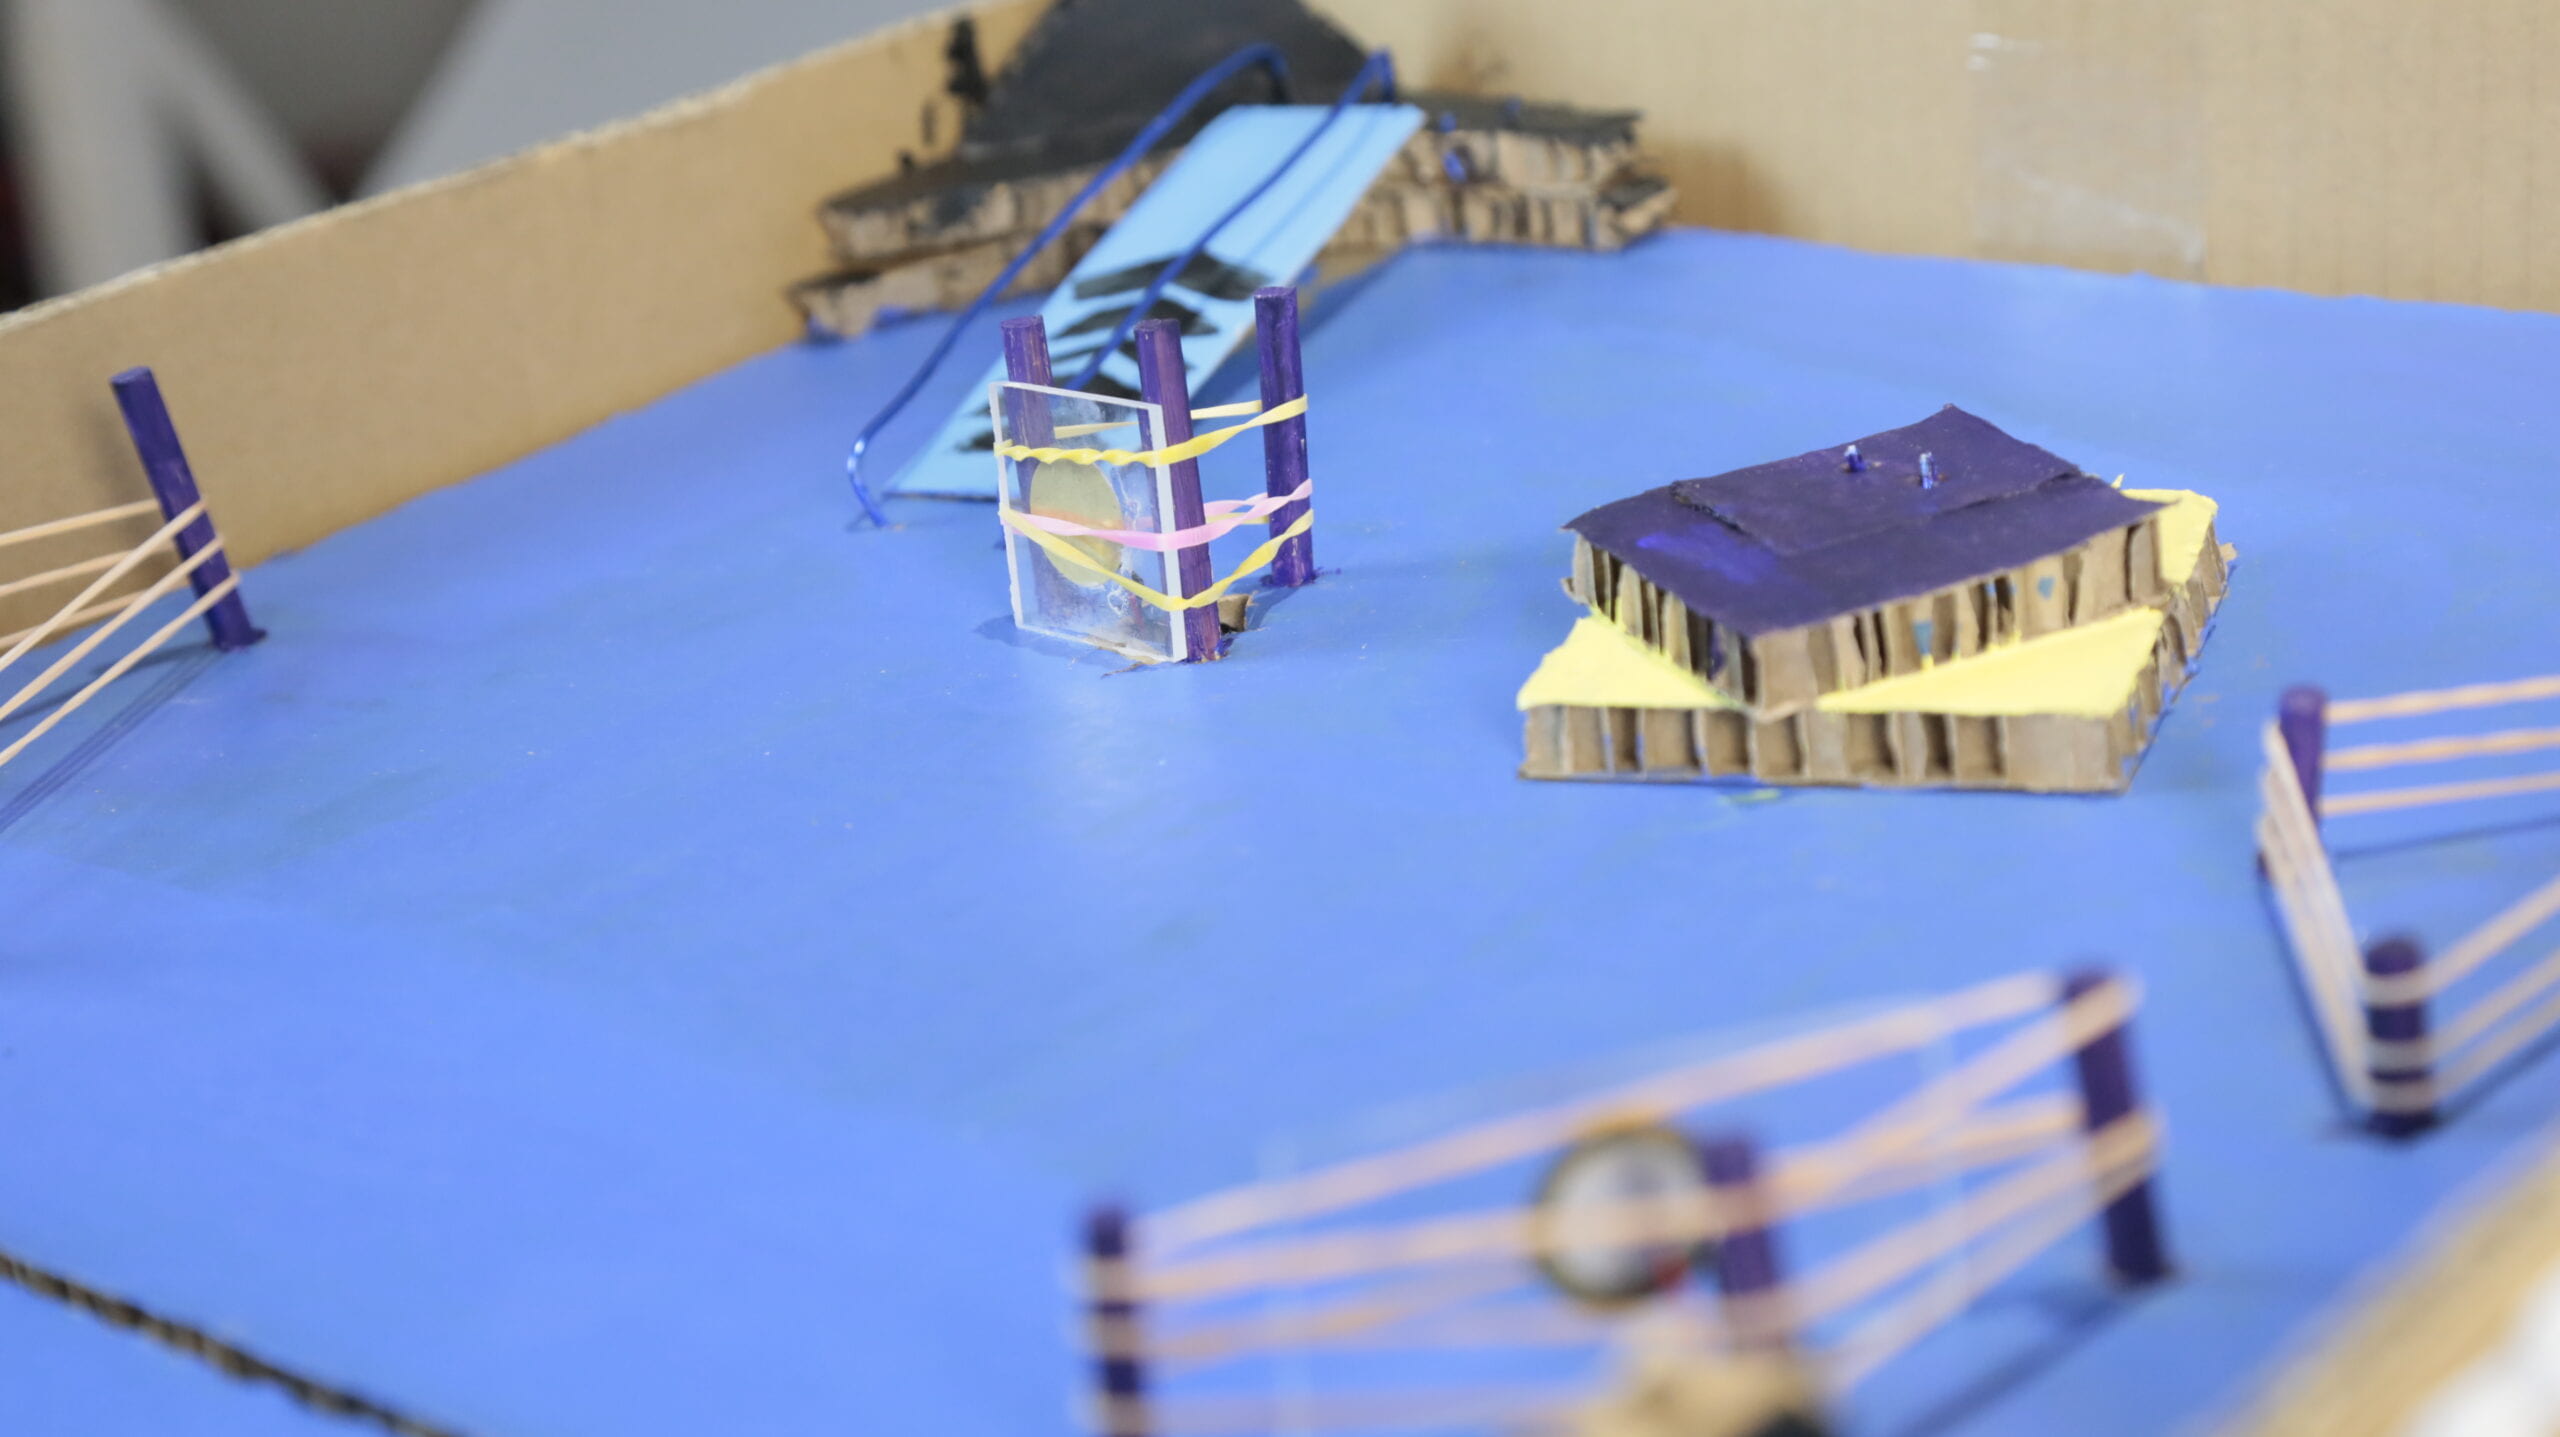
- Visual Feedback – Noting that users wanted to see the effects of their actions, we incorporated lighting elements that illuminate in response to bumper presses or ball movement. Color cues and flashes link cause and effect to player interactions
In addition, what form, material, or elements did you use?What criteria did you use to select those materials? Why was it/were they best suited to your project purpose, more than any other one/s? What might have been another option? But you rejected it—why?
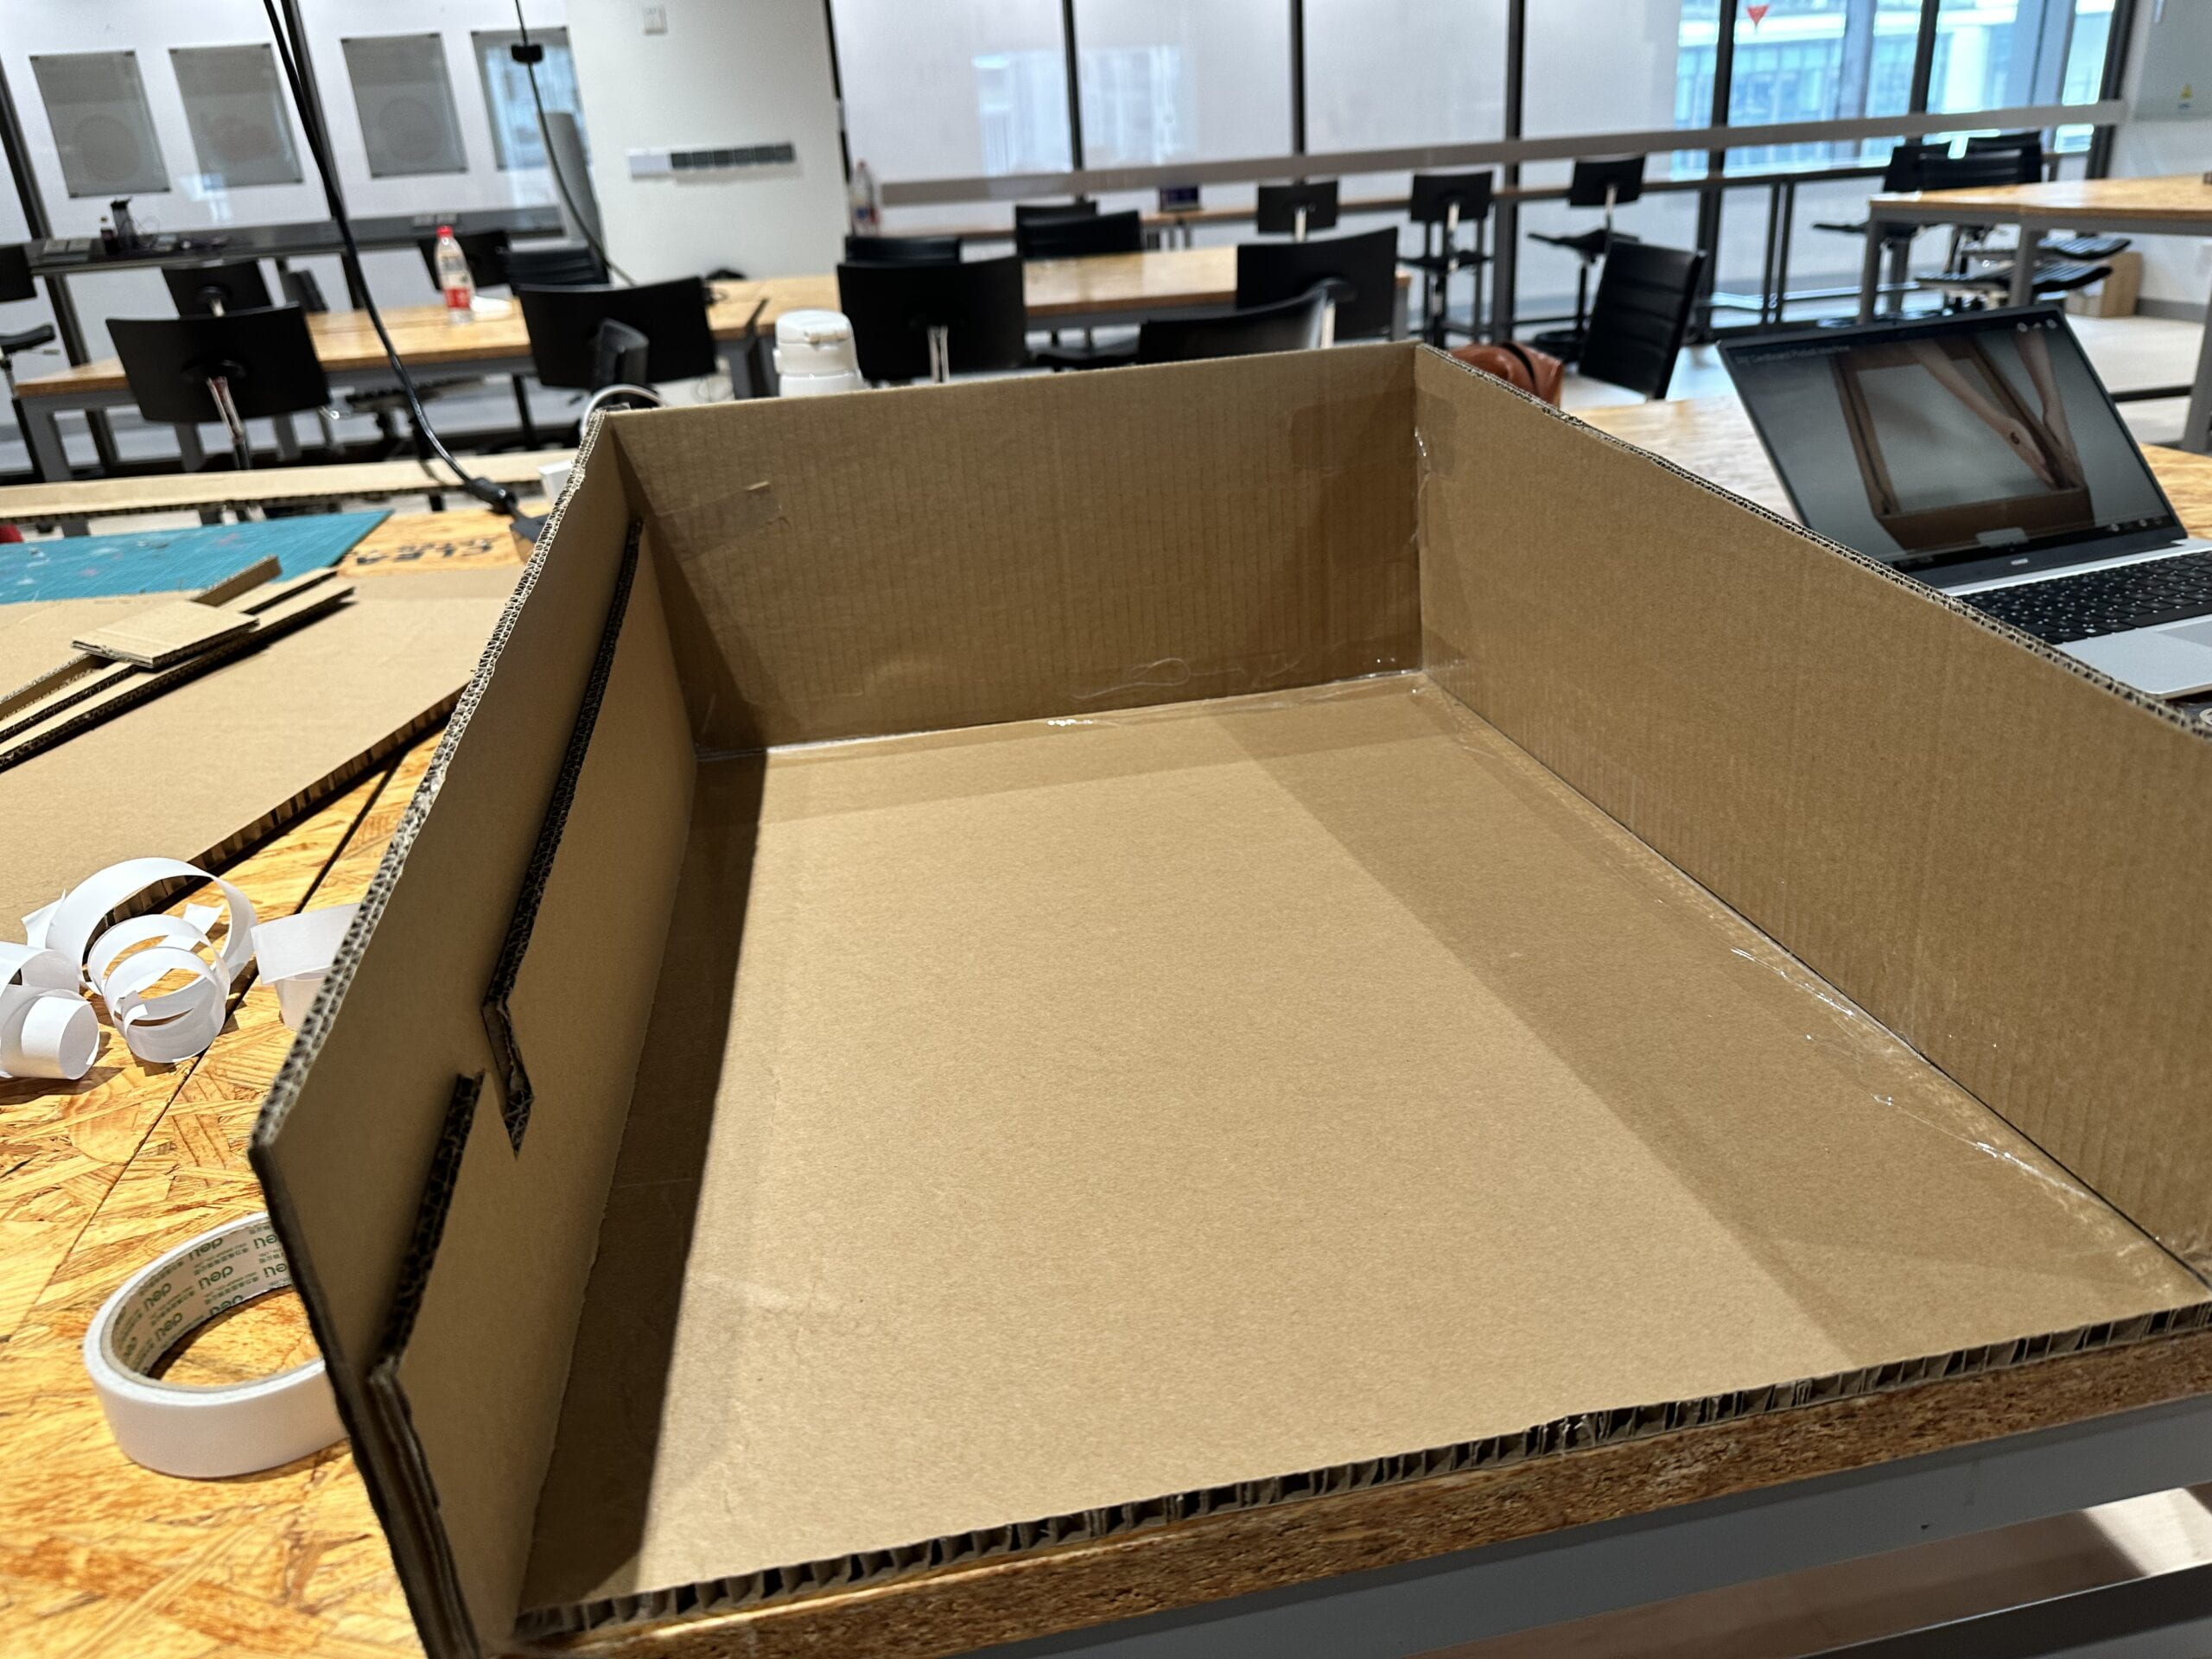
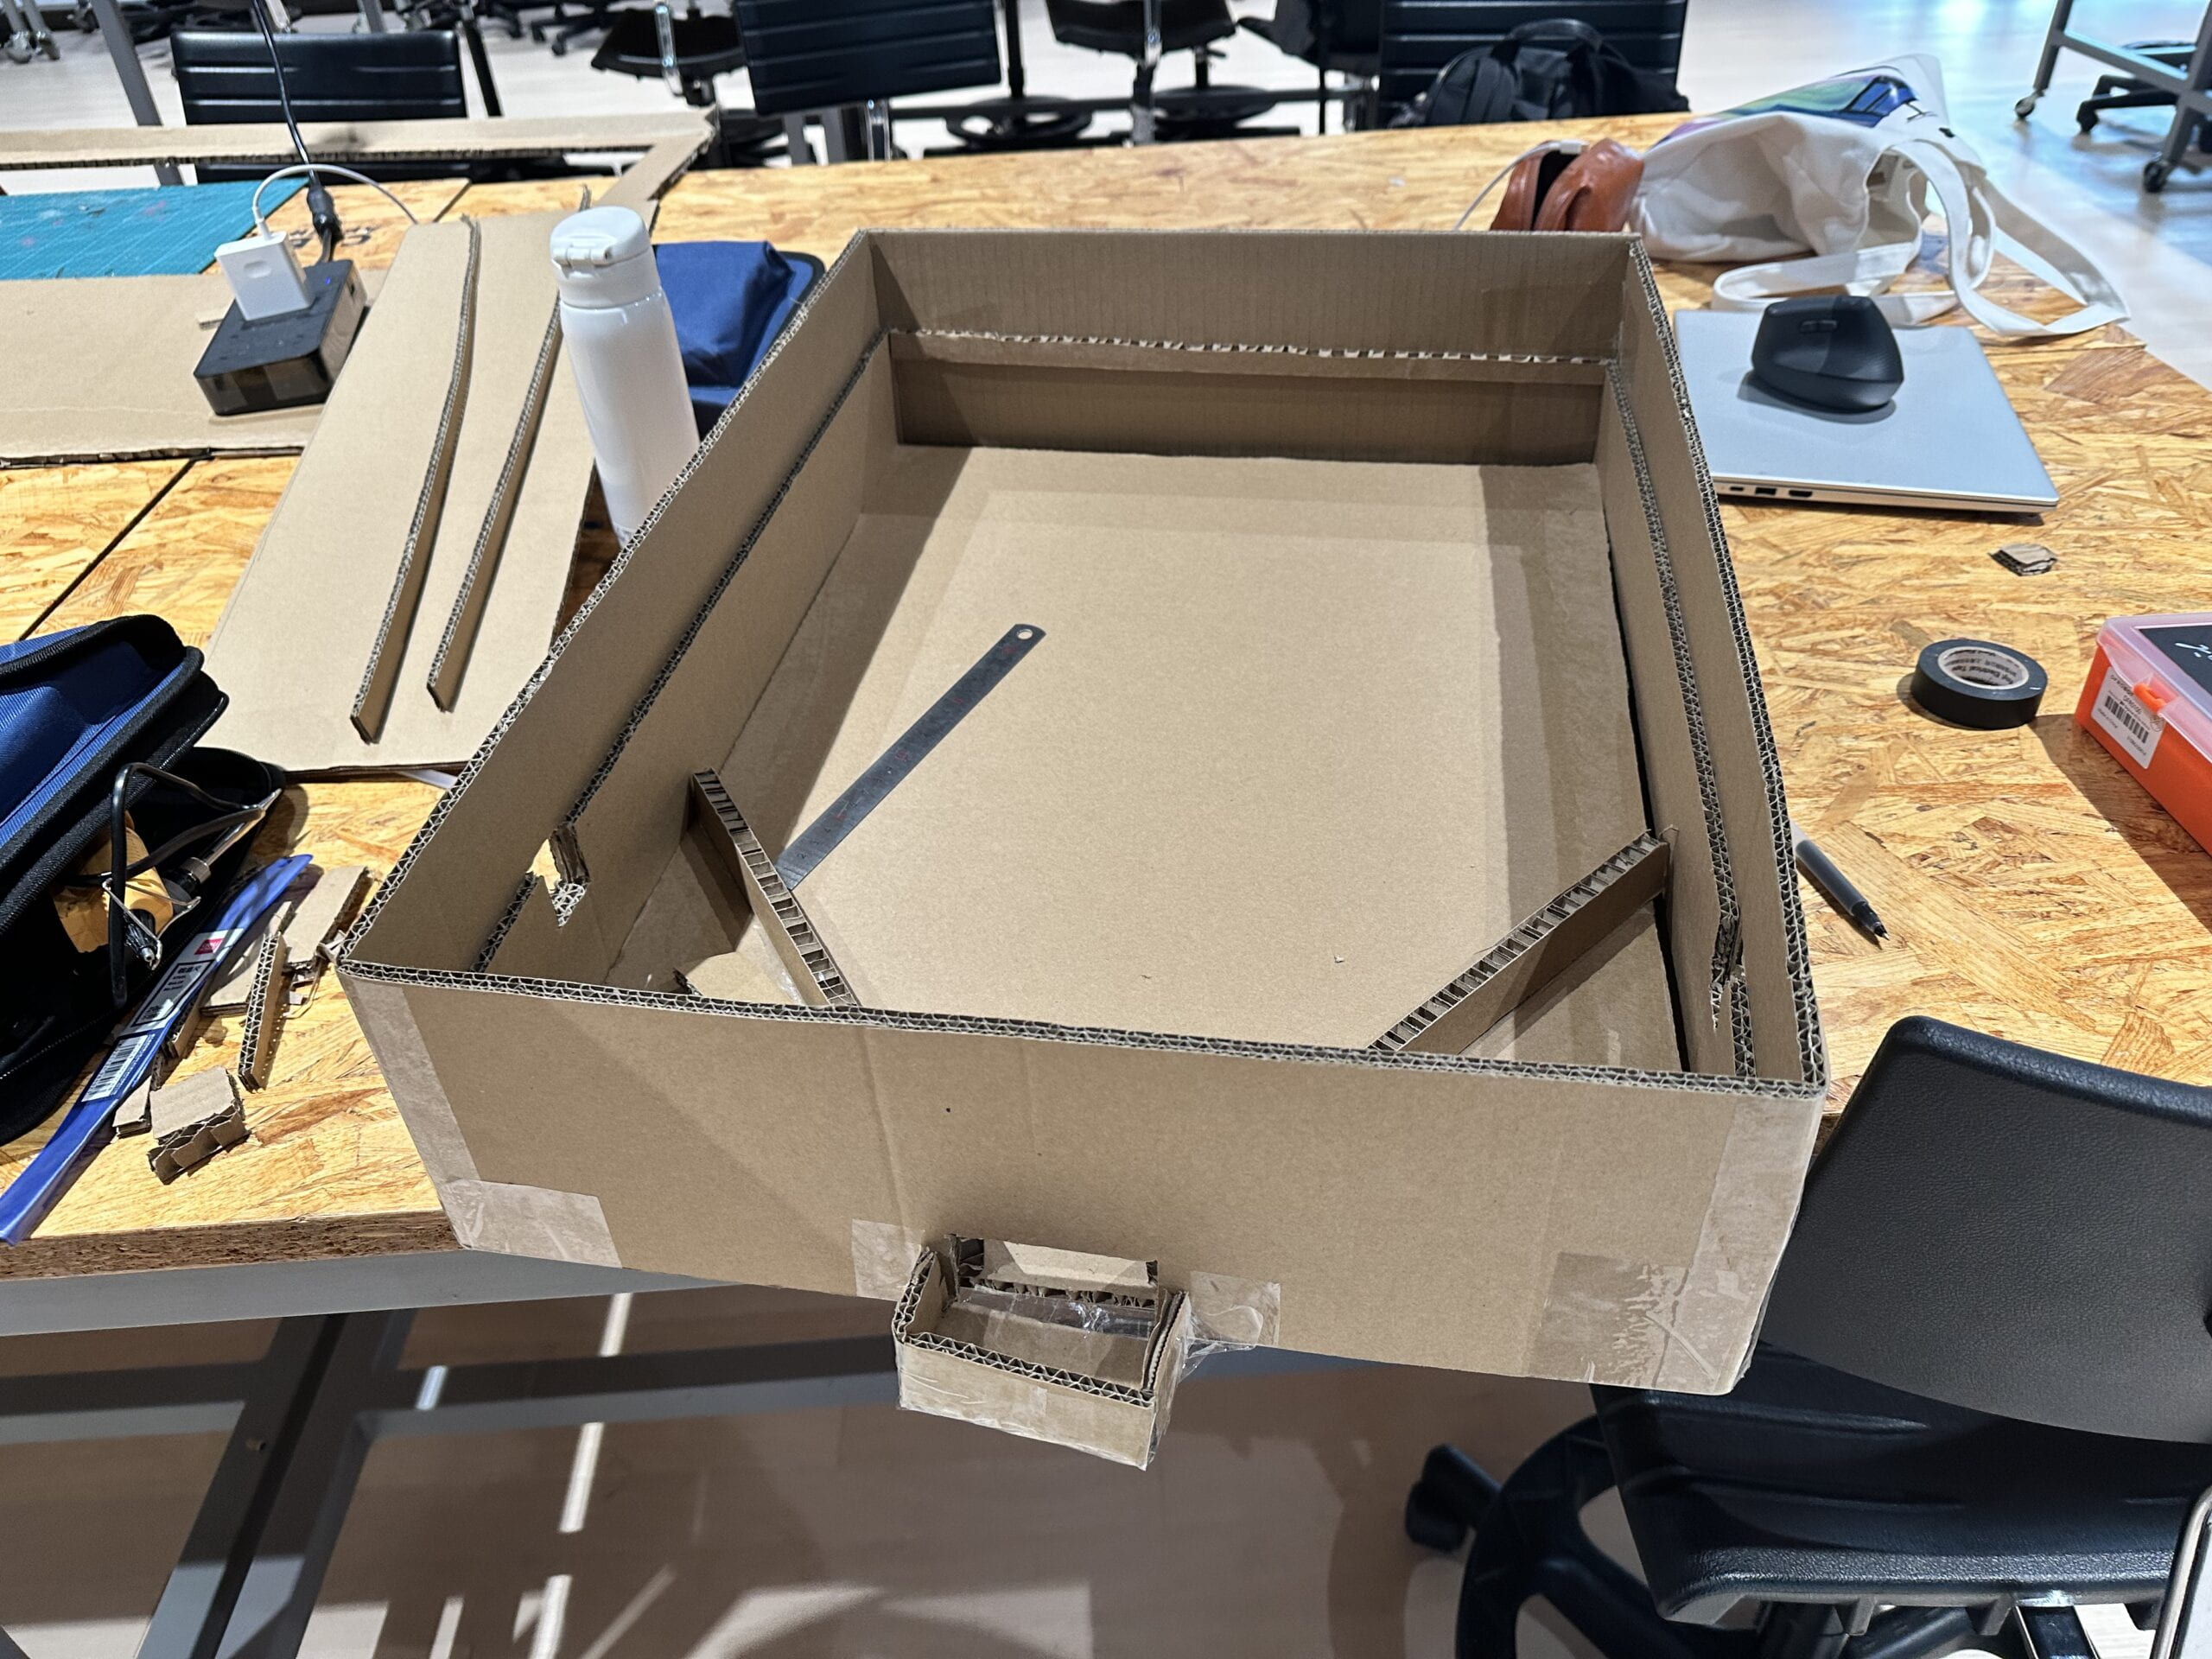
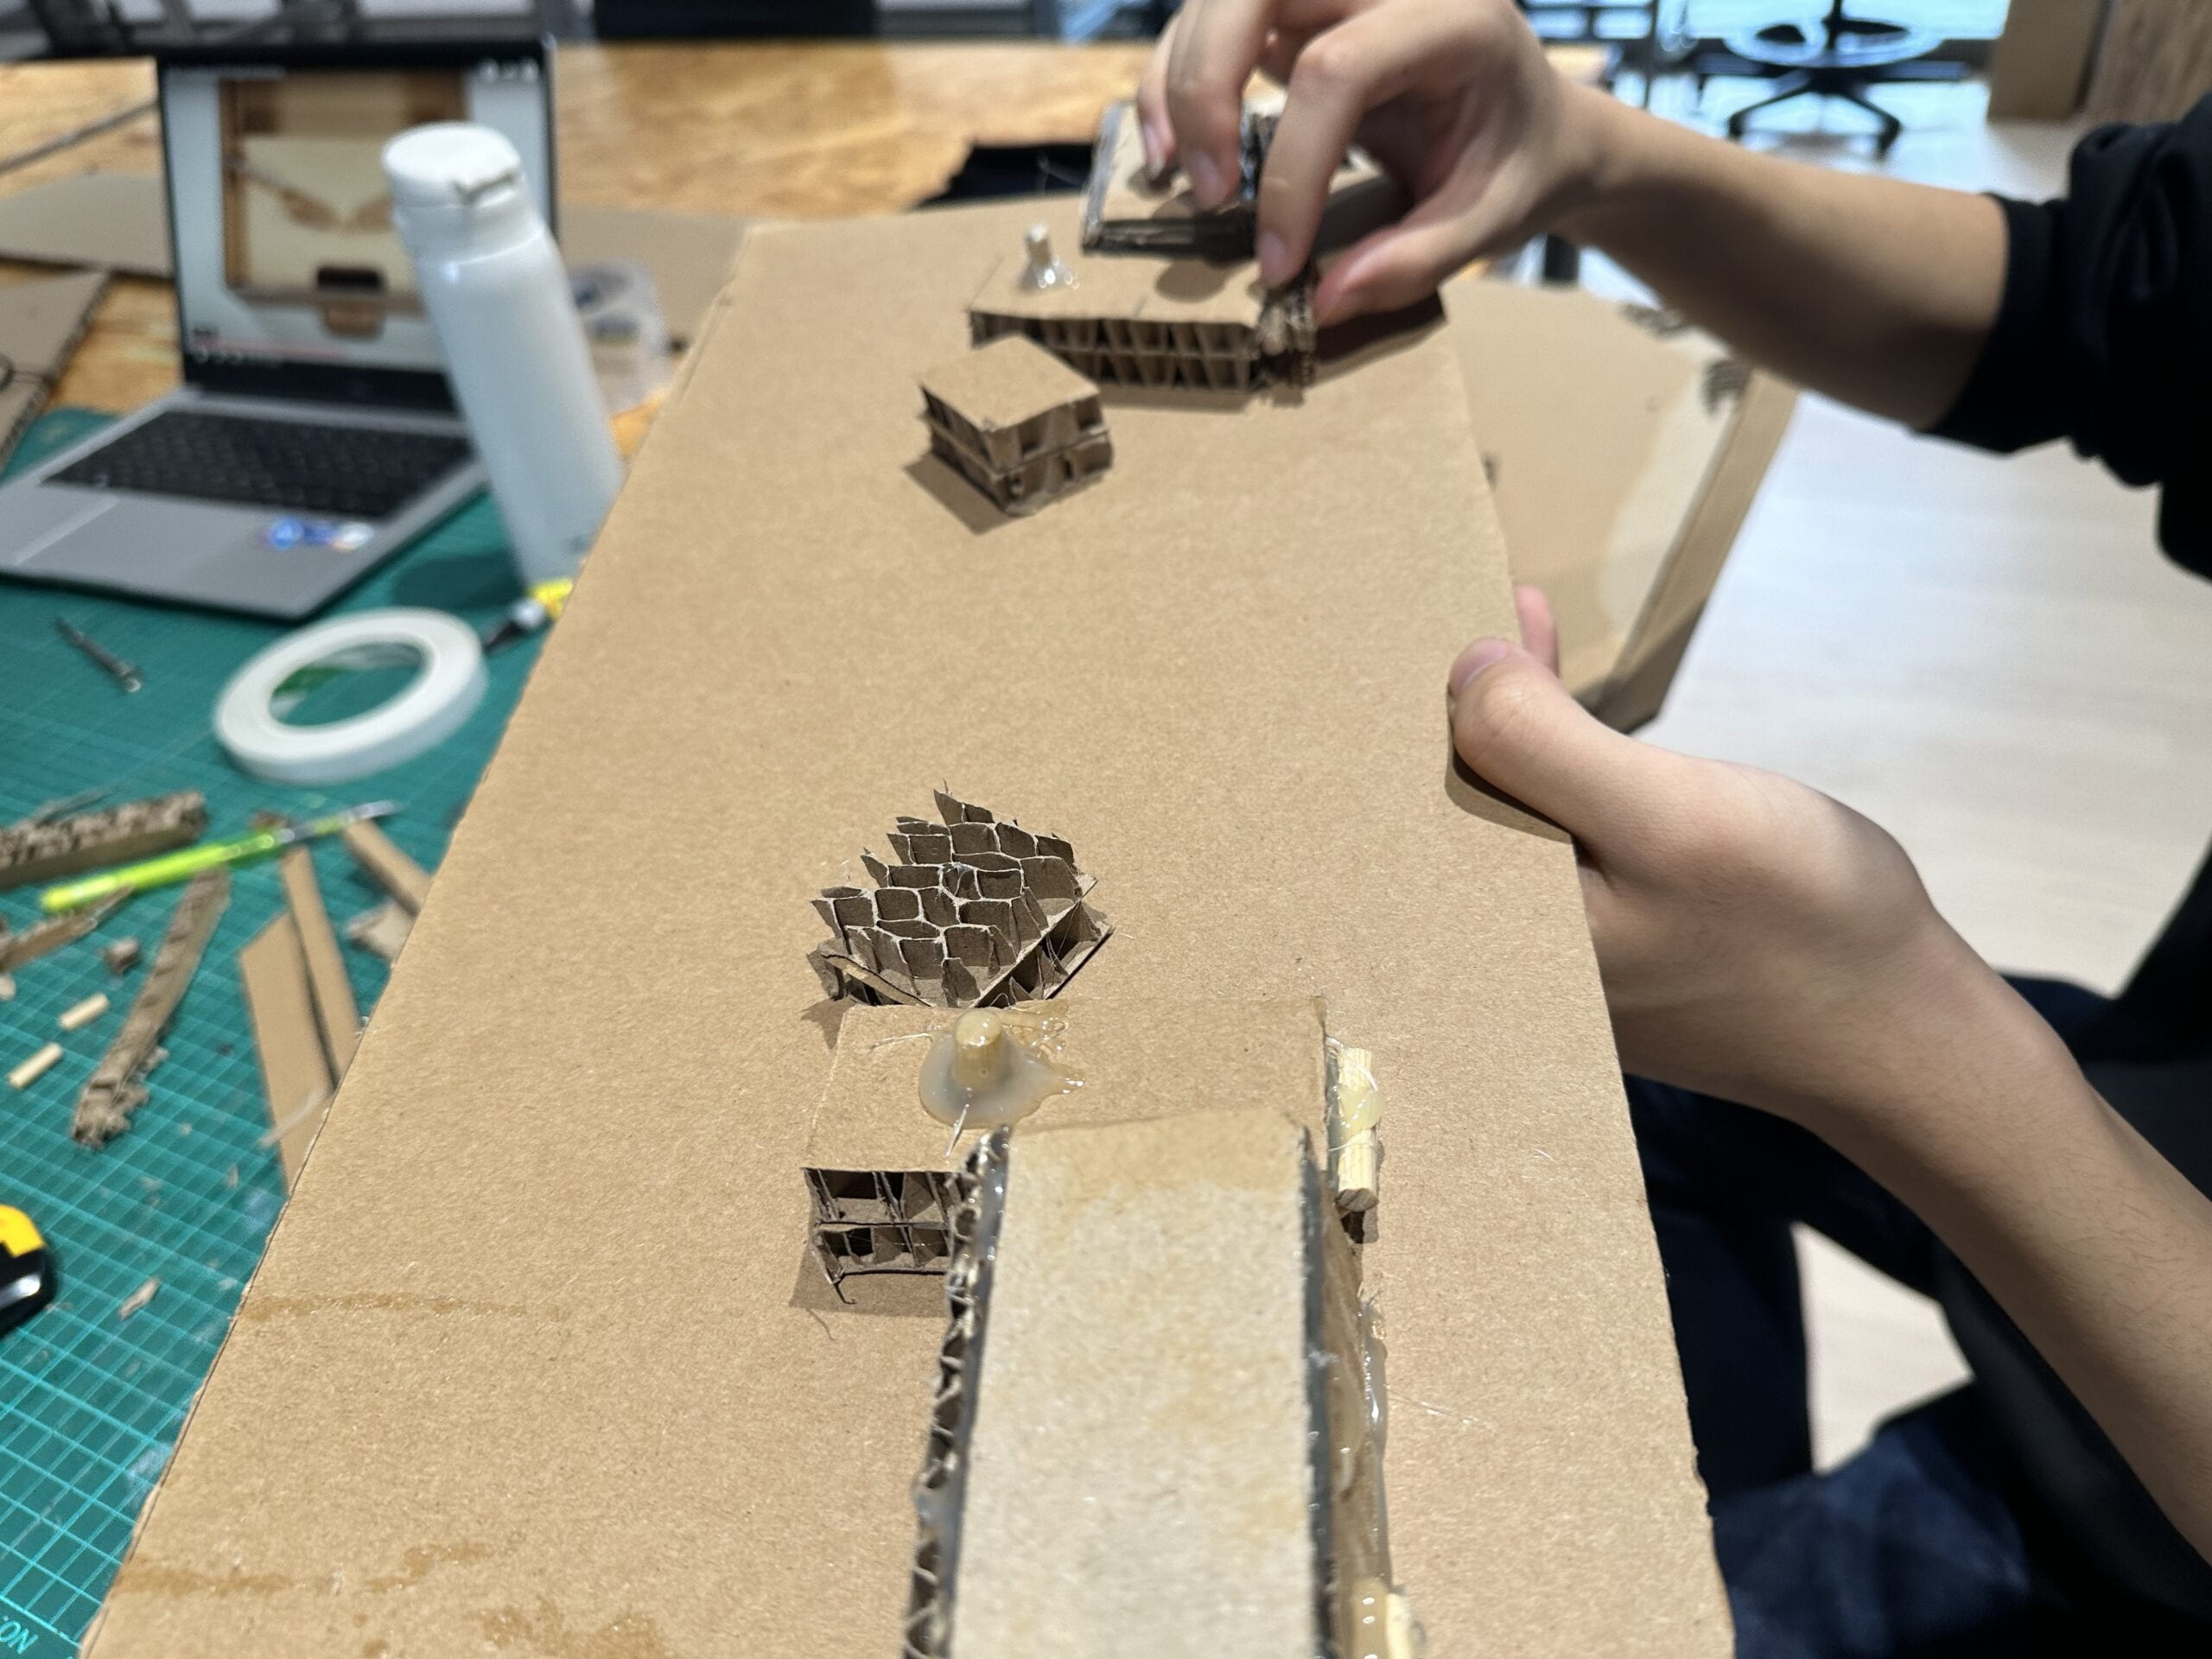
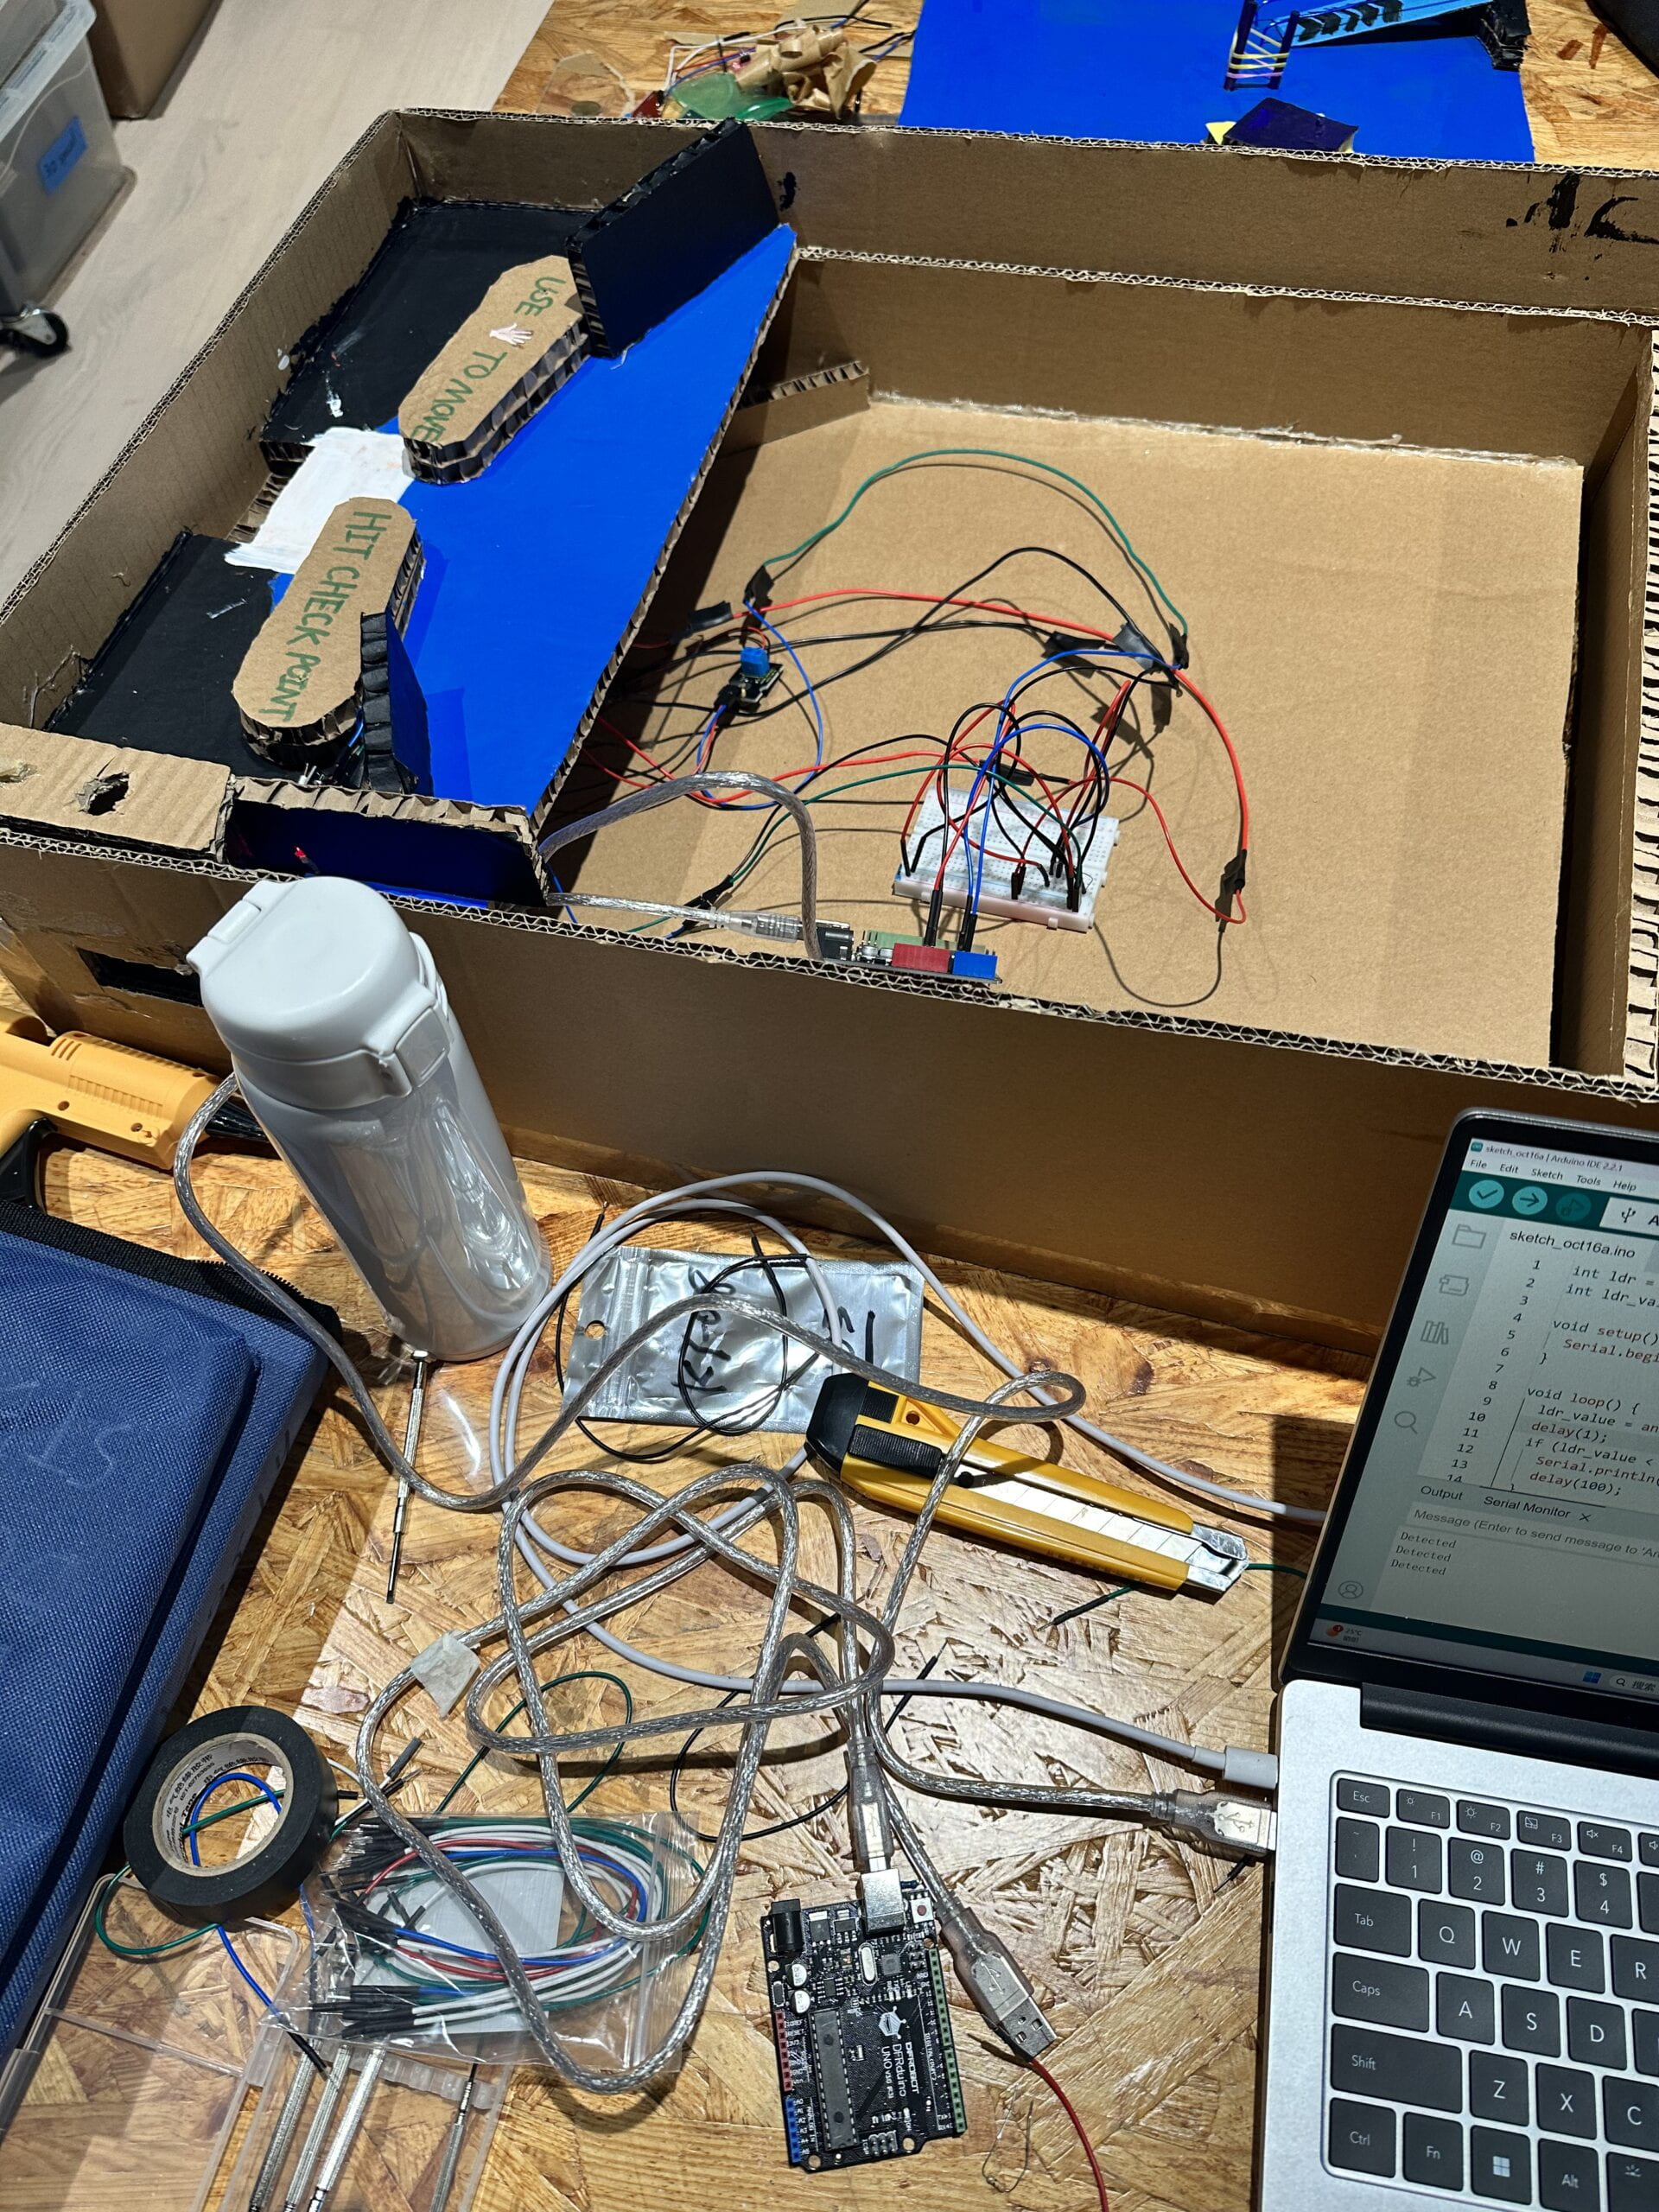
Main Structure – Cardboard was selected for its low cost, wide availability on campus, and ease of crafting complex shapes through assembly. Being lightweight yet sturdy made it well-suited to rapid prototyping.
Moving Parts and Fixed Tools – Chopsticks were chosen as axles and structural reinforcements. Their dimensional stability, strength and accessibility from campus dining halls made them well-suited for these load-bearing roles. Toothpicks were considered but rejected for being less robust under repeated stresses.
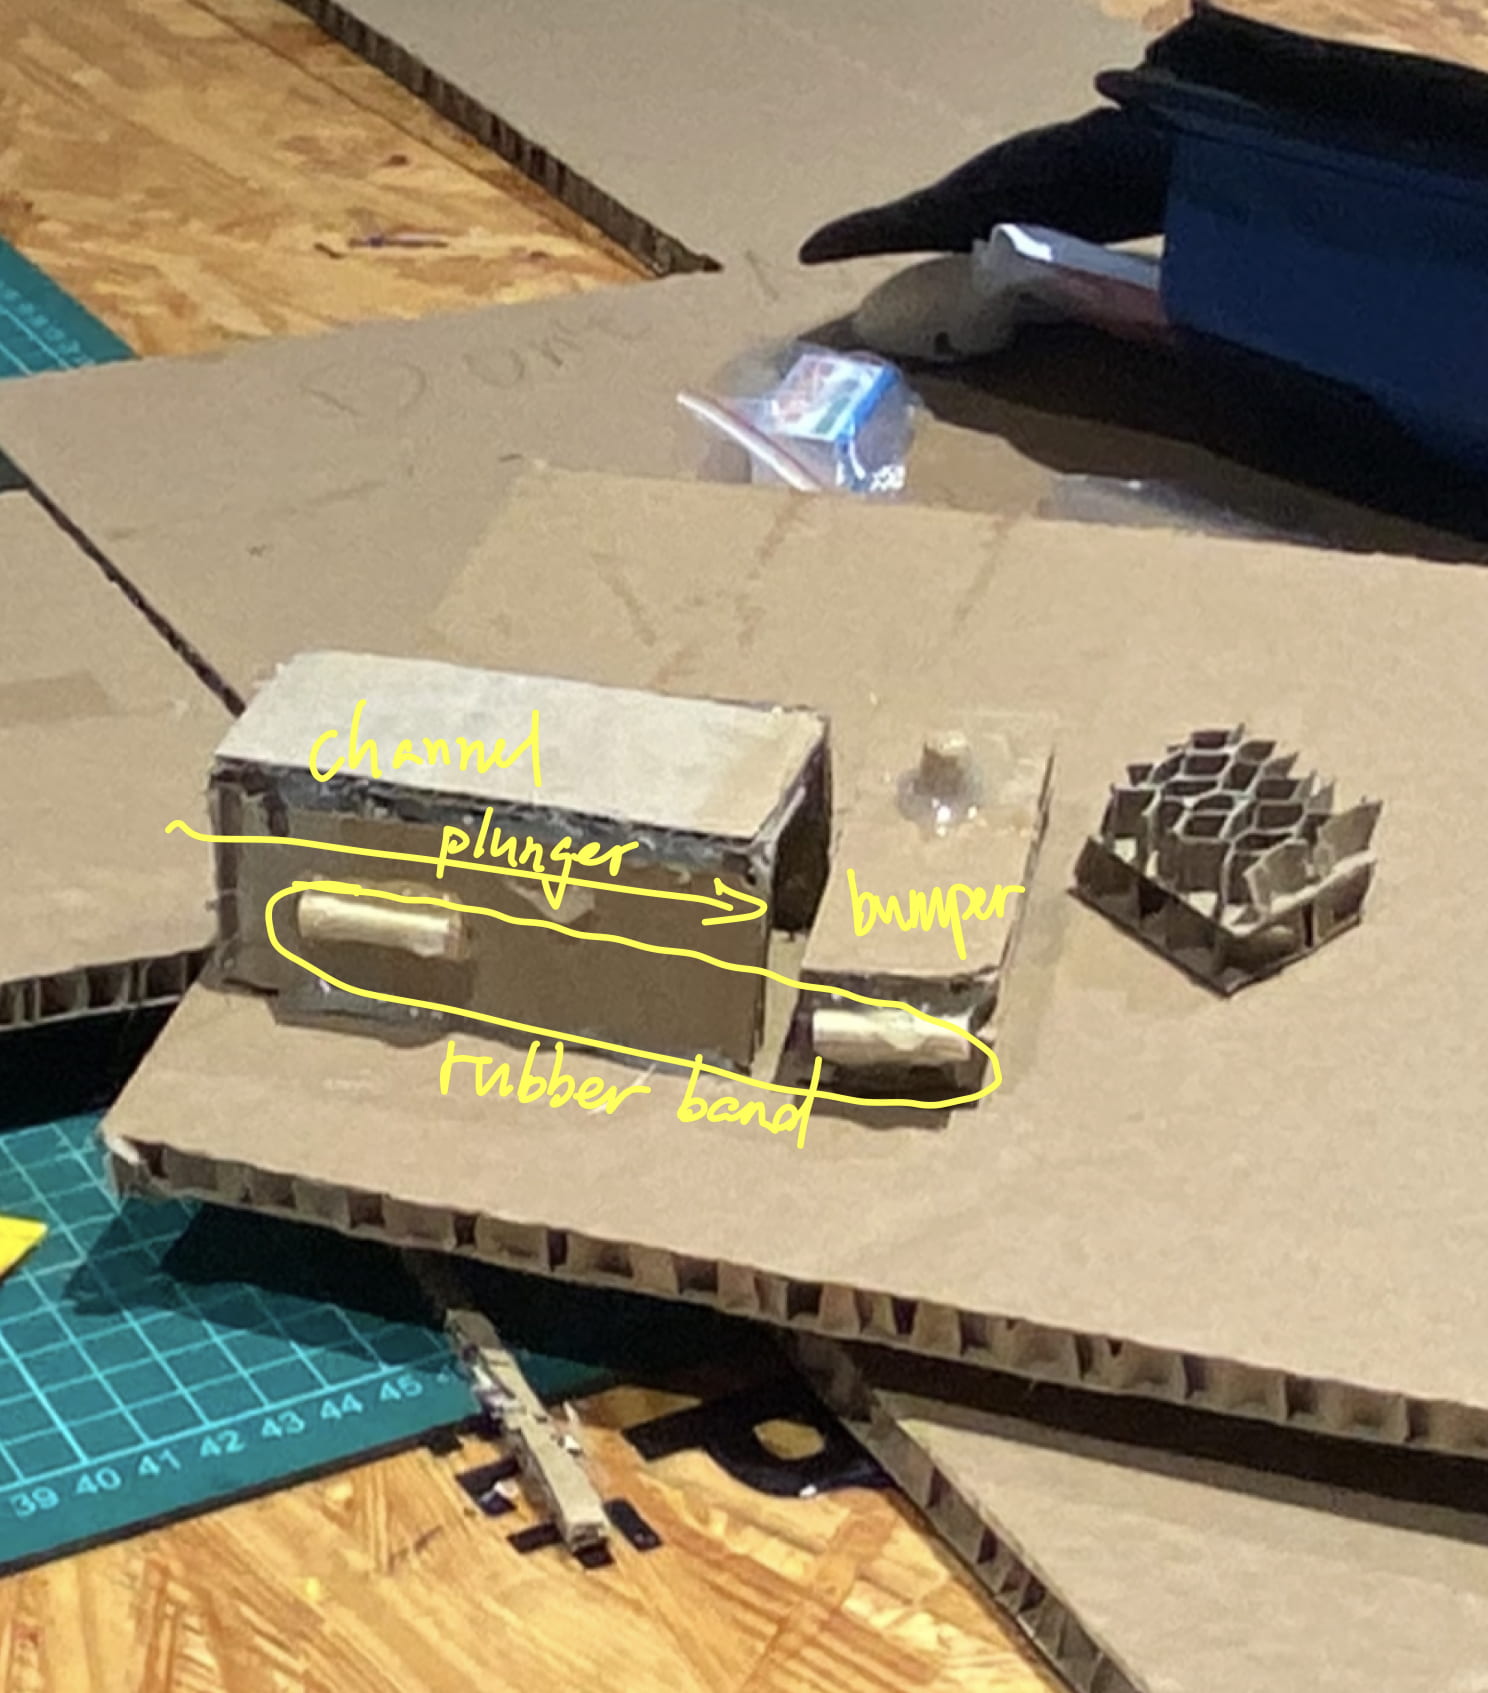
Launch Mechanism – Rubber bands enabled simulated “plunger launches” of the ball in a simple yet effective manner. They were also affixed to various points on the board using chopsticks, creating bounce-back zones to ricochet the marble along different paths. Their elastic rebound energy imparted proper launching force, and bouncing dynamics during play, without requiring complex hardware.
Ball – Marbles provided the ideal weight, size and circular shape for navigating the board pathways. Their inertia and response to impacts could be feasibly tested during development.
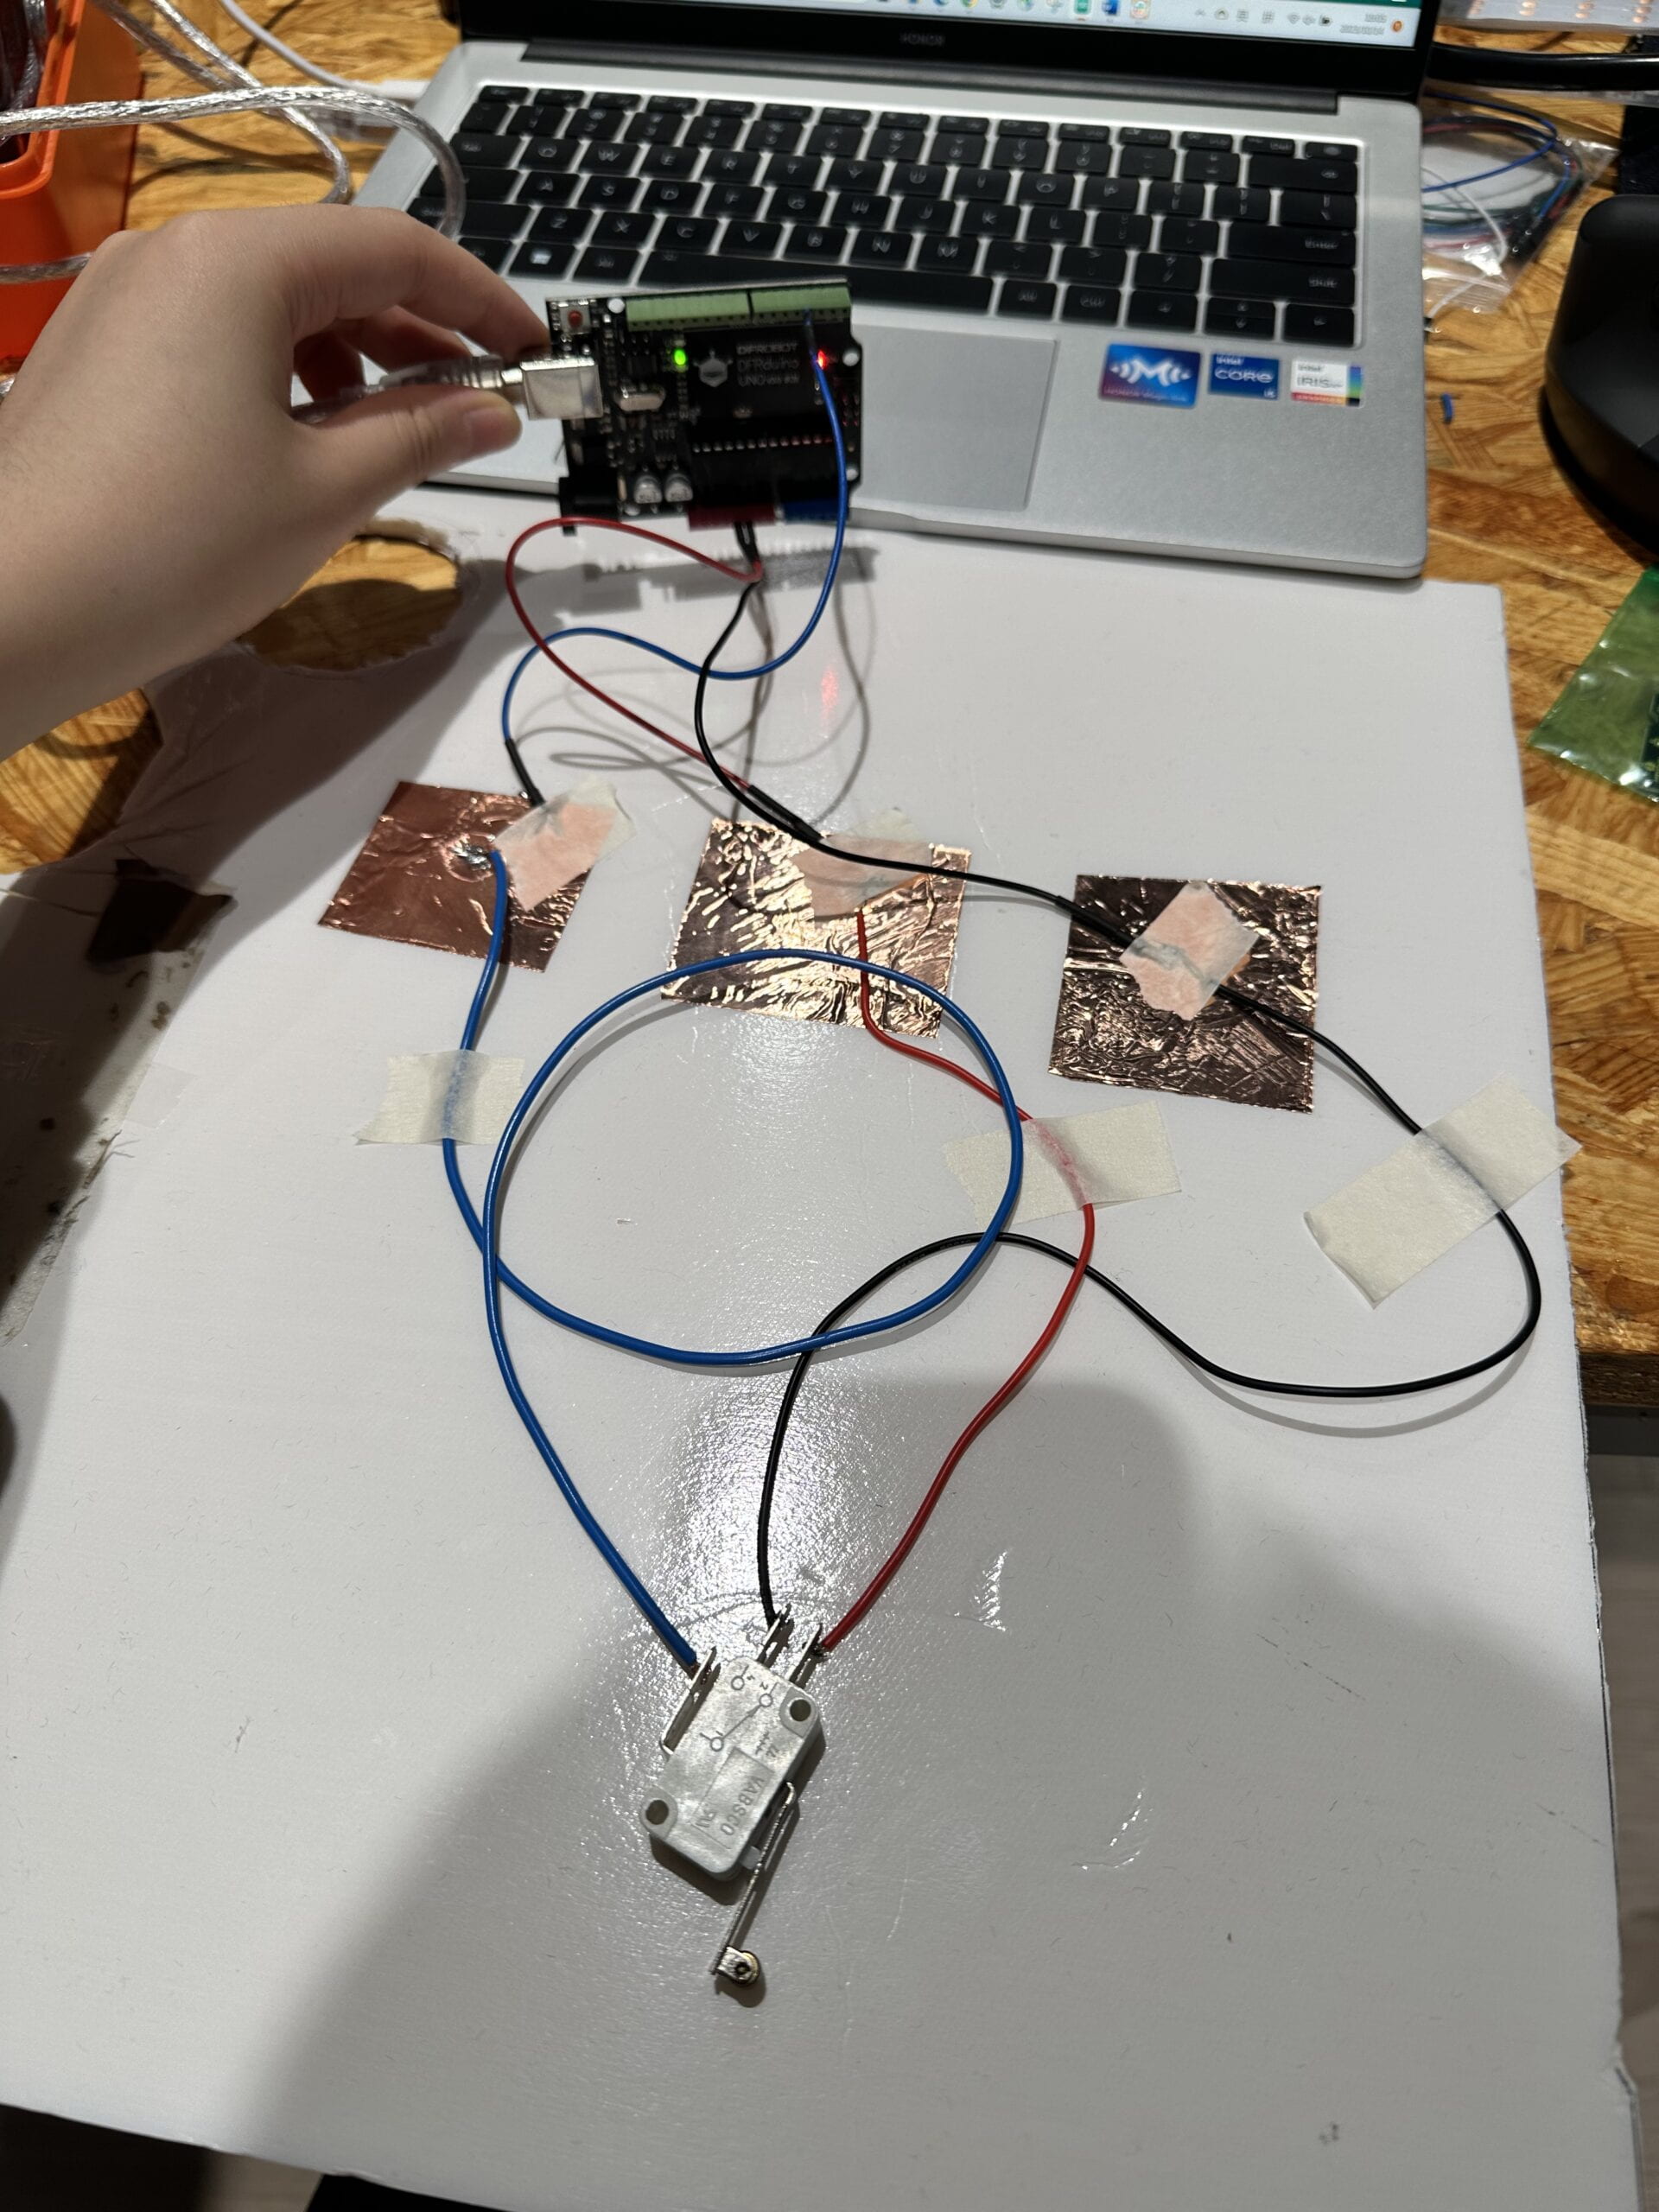
Sensors – Piezo discs were selected through experimentation with alternatives (button, flex, sound) for their sensitivity, rapid signal output. This ensured collision detection ability.
Emitter/Receiver – A laser emitter with LDR allowed non-contact sensing of ball launches through an invisible light beam, avoiding mechanical wear risks.
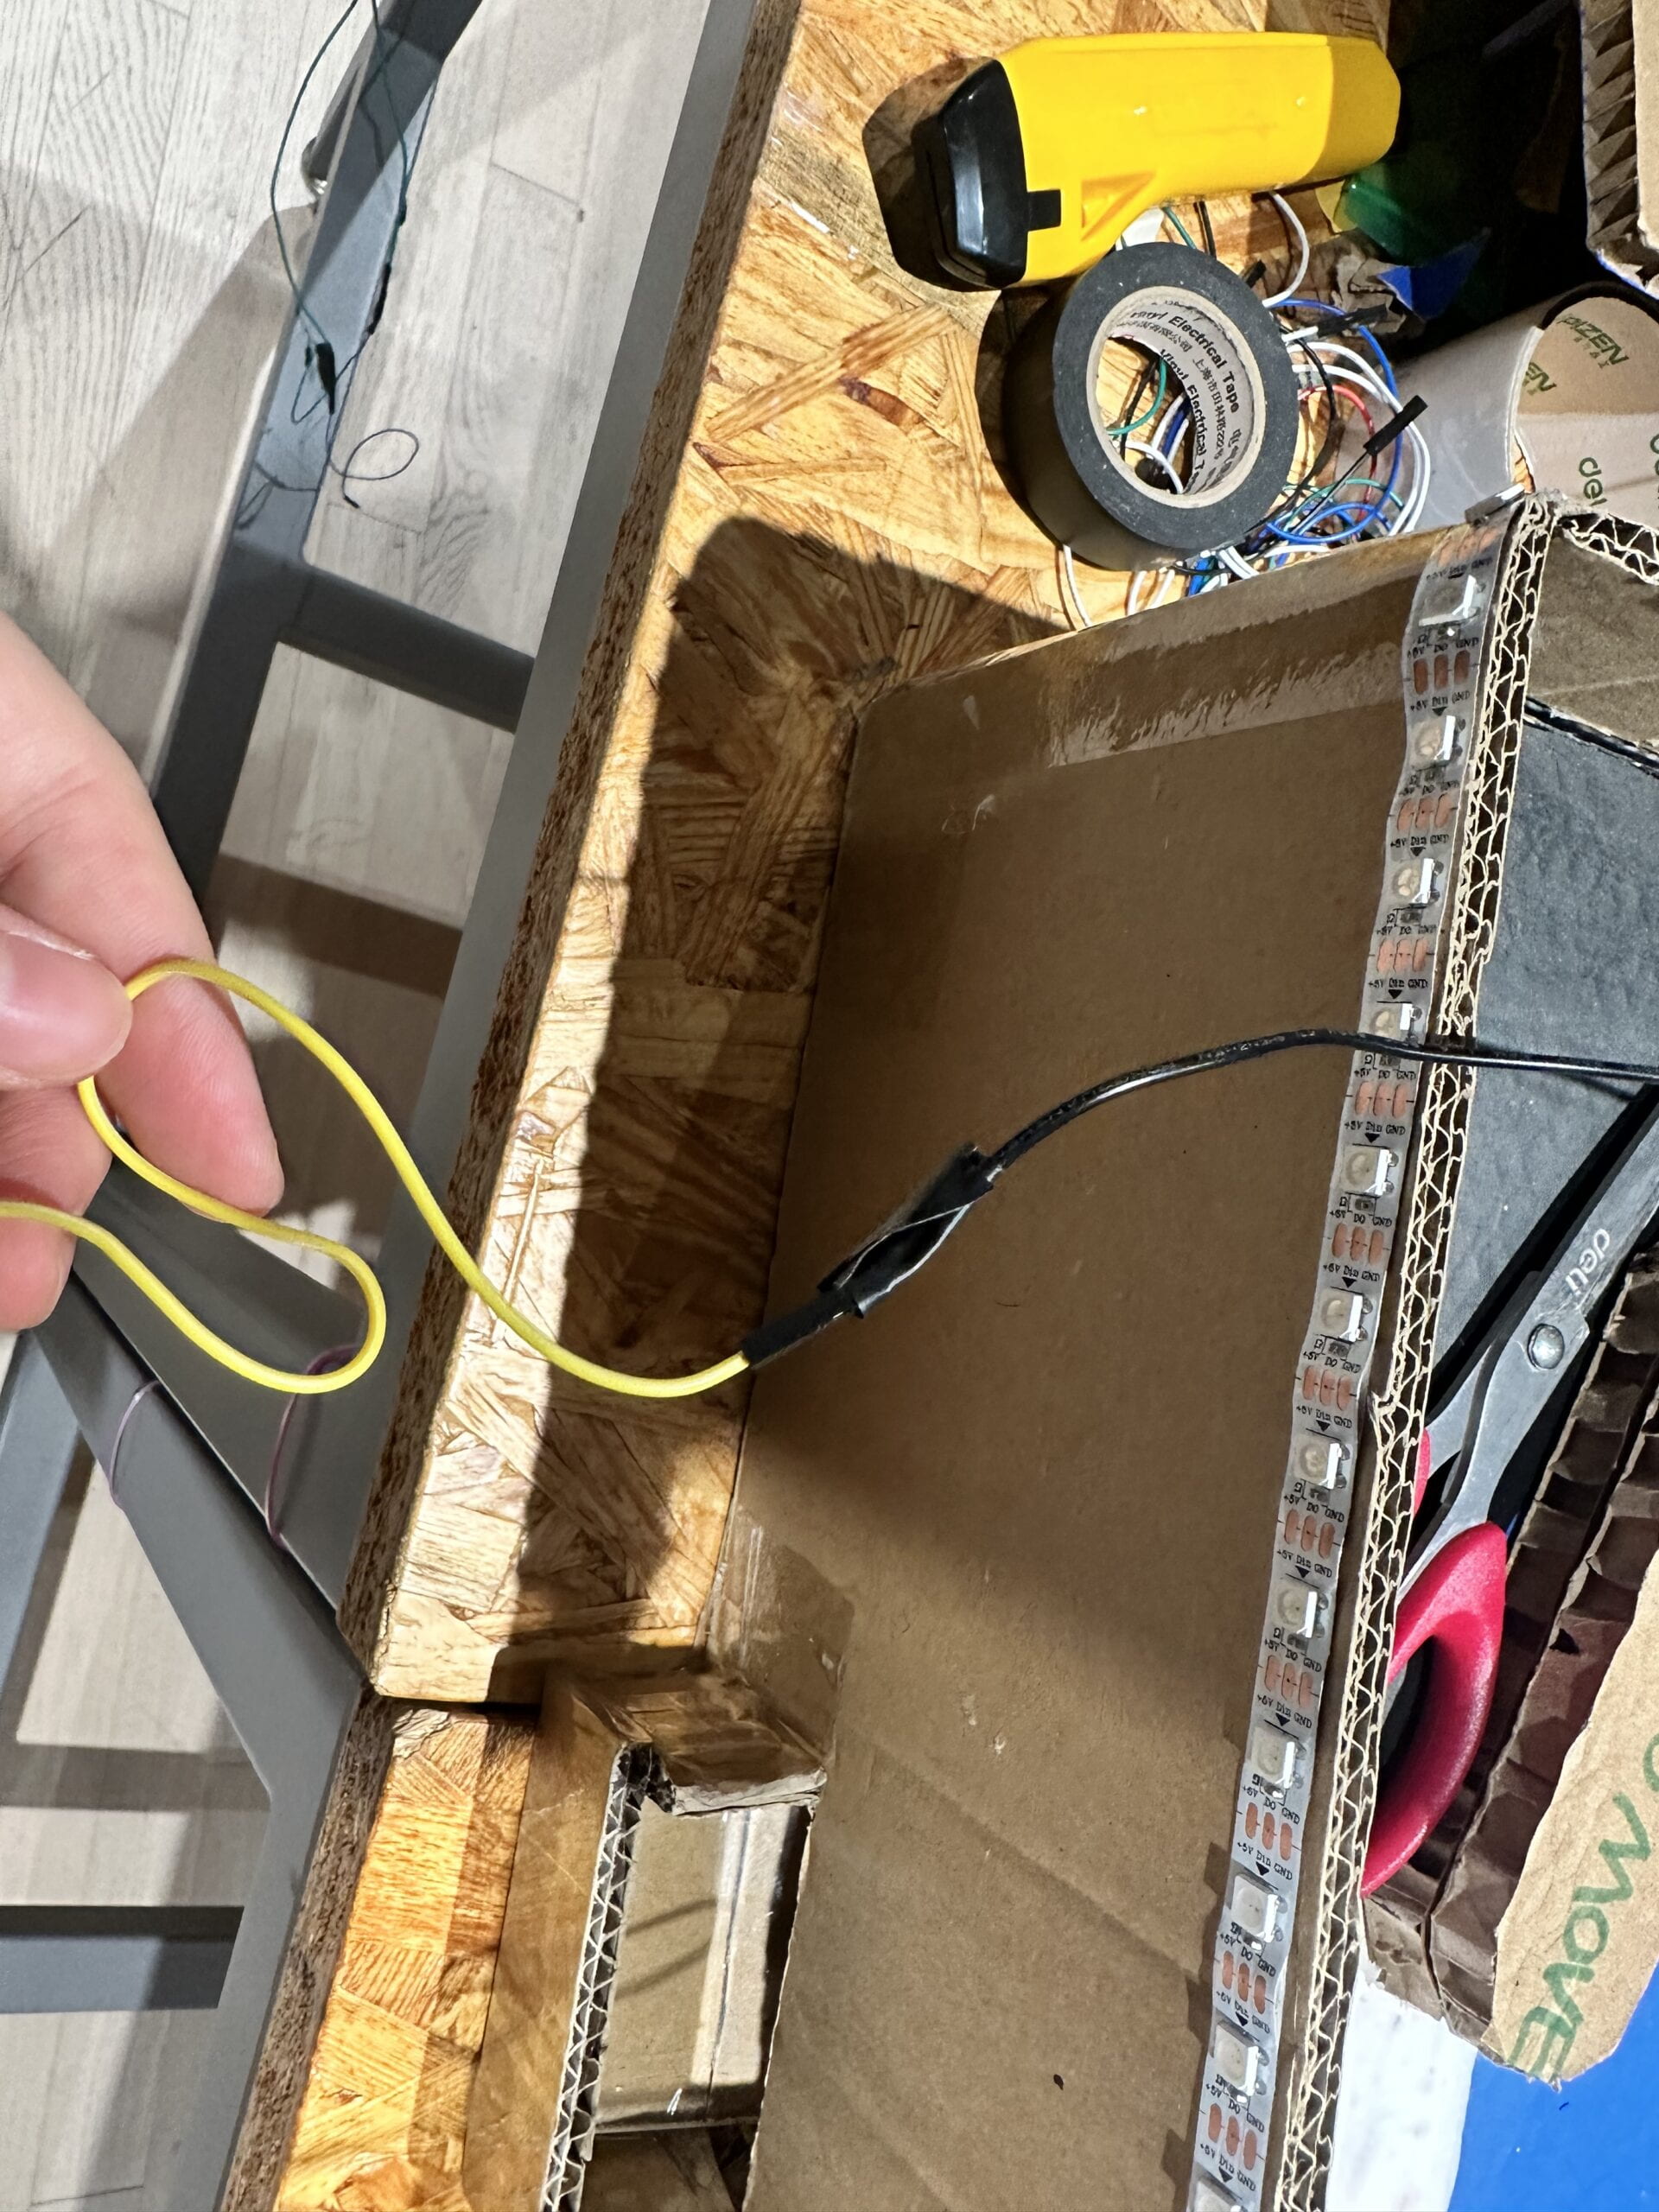
Output – LED strips and a buzzer were employed to provide both auditory and visual feedback. The strips allowed dynamic lighting effects to indicate interactions, while the buzzer created an immersive audio experience. Together these create a rich multi-sensory output.
FABRICATION AND PRODUCTION
In this section, describe and assess the most significant steps in your production process, both in terms of failures and successes. Please clarify exactly what contributions and roles you made to the process and project along the way, and describe the process your group used to work together.
In the initial brainstorming phase, our group generated several project ideas ranging from an MBTI personality analyzer to a Rubik’s Cube solving robot. However, we realized these concepts may be too complex given the time constraints.
We reached out to Professor Gohai for guidance, and he provided thoughtful feedback even during the fall break period, for which we were very grateful. Based on his suggestion to focus on something hands-on and experiential, we began seriously considering a pinball machine.
To further validate this direction, I conducted online research and found many inspiring examples of cardboard pinball creations on platforms like Instructables and YouTube. This affirmed the project’s feasibility within our skillset and using accessible materials like cardboard.
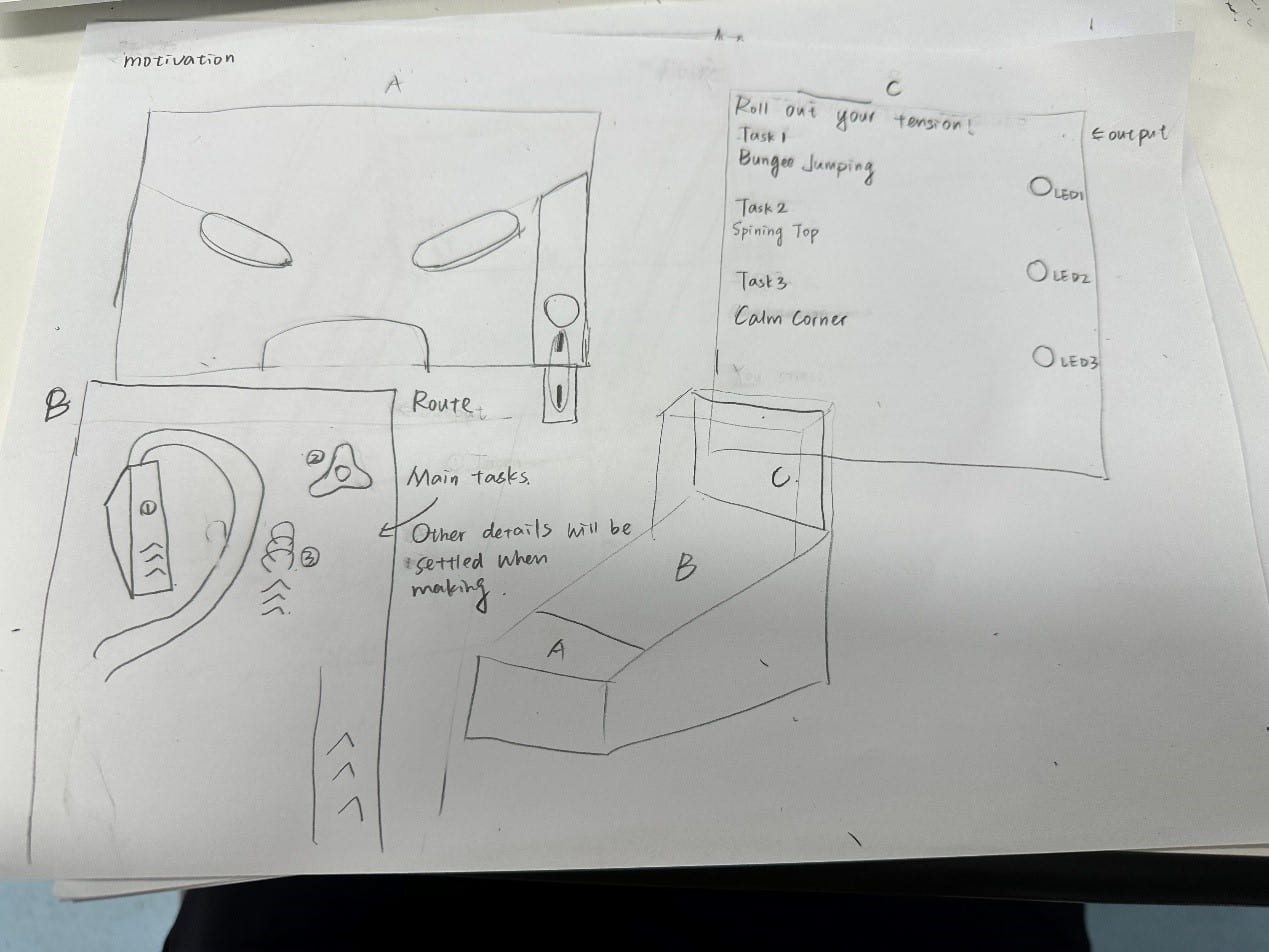
Armed with this market research, I drafted initial sketches showing what forms and interactions our pinball machine could incorporate, such as movable bumpers, and an Arduino control system.
We presented these sketches and findings to the team and Professor Gohai, who both endorsed the concept. His questions helped uncover additional dimensions like sensors, lights and sounds to make the gameplay truly interactive.
This feedback and prototyping of ideas in the proposal stage helped galvanize our vision. It established pinball as the approach with the best balance of scope, learning potential and audience appeal to make for a successful project.
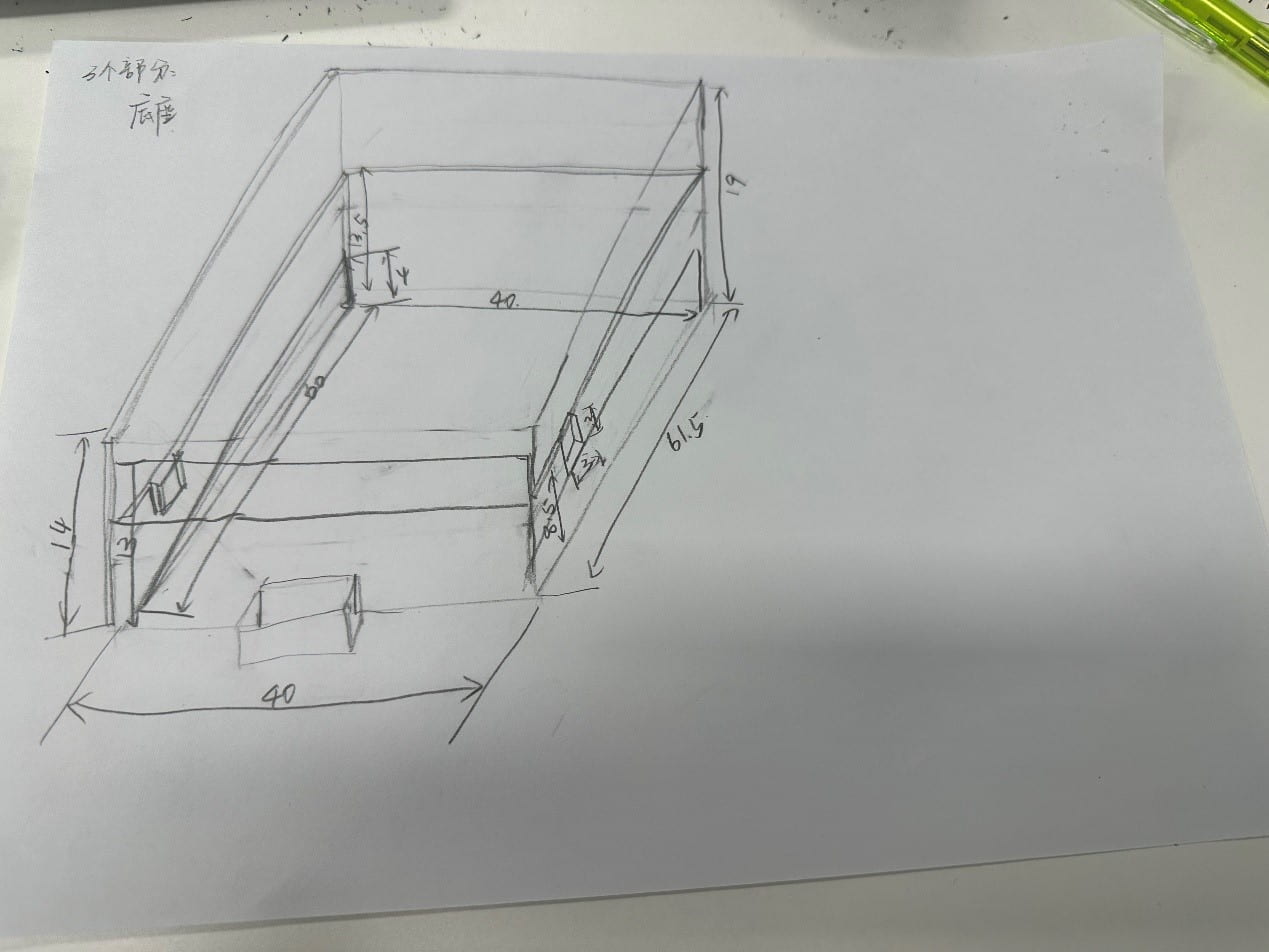
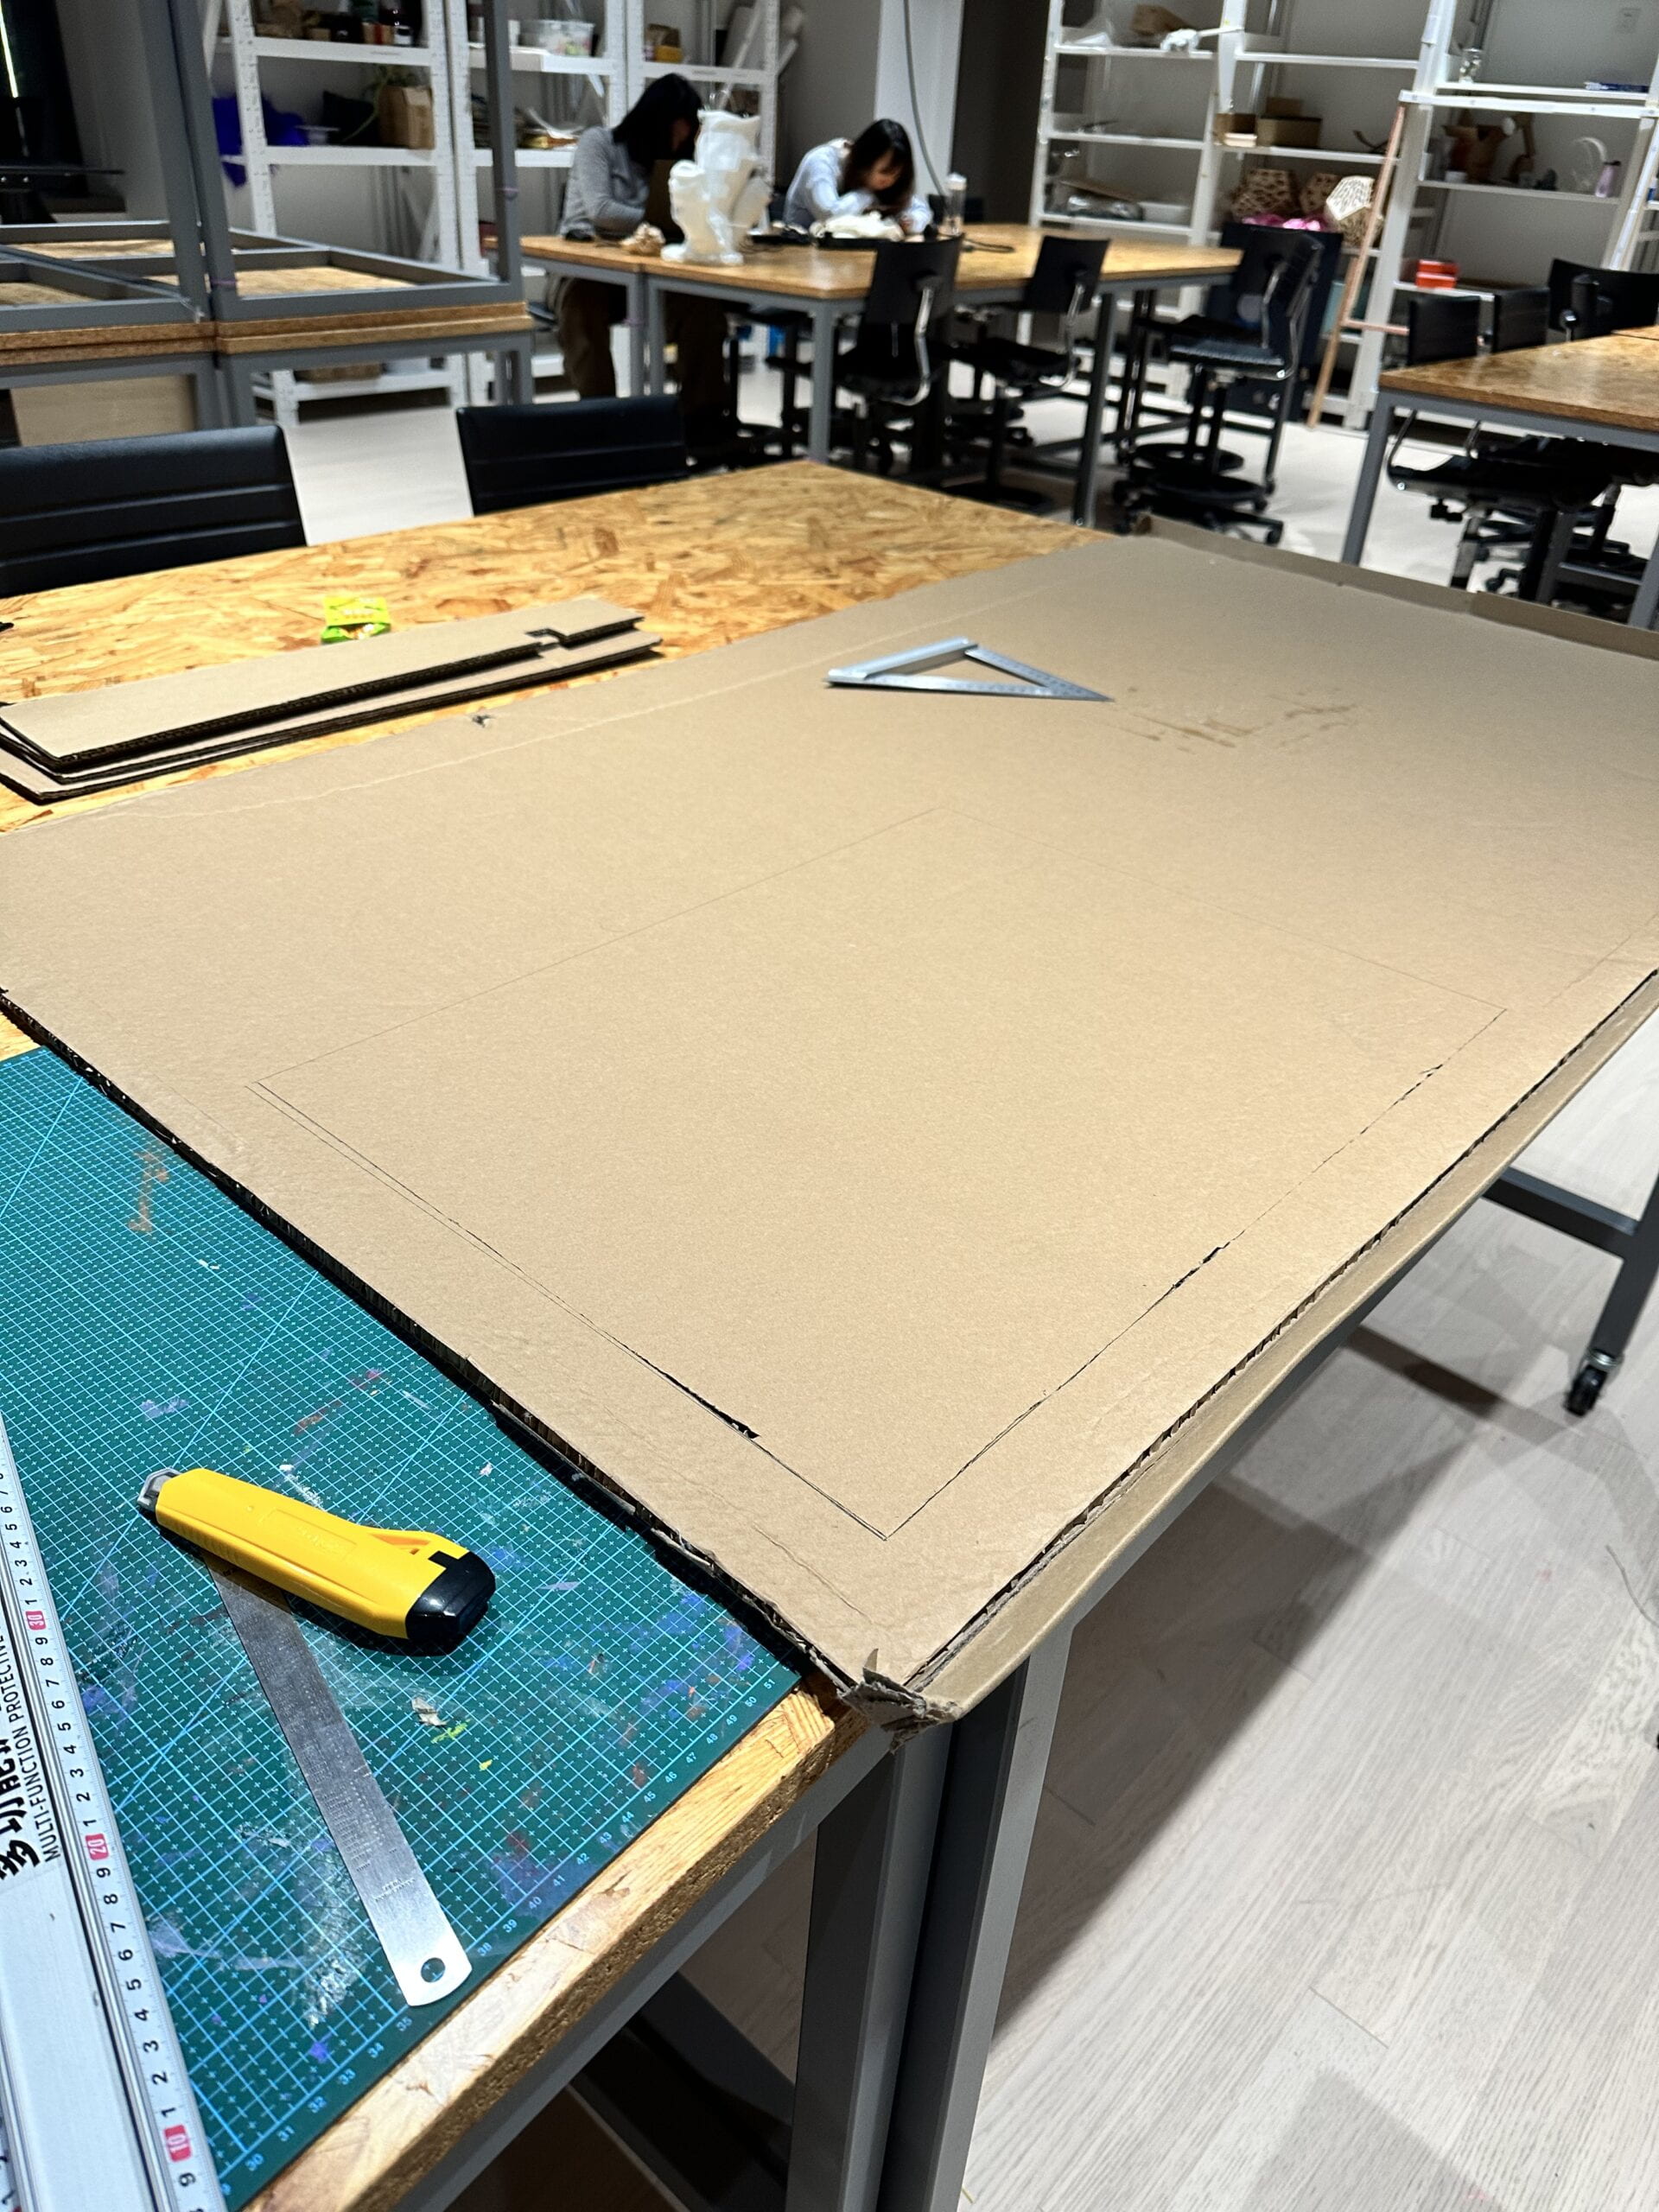
1.Main body making
We start making this early on Monday evening to get more time to do next things. It was difficult to use cardboard to build such a structure.
2.Initial Launch and Bumper Designs
We initially focused our efforts on effectively bouncing the ball using a rubber band’s force. In our earliest designs, the launcher directly applied the force of the rubber band. However, after receiving feedback from Professor Andy, we redesigned the bumper to harness the rebounding force of the rubber band. The revised bumper bounced back with significant power to propel the marble.
During user testing, we discovered some drawbacks to this approach. Controlling the bumper’s recoil took too long for players to react effectively. Taking the testers’ feedback into account, we opted for a simpler design where players could manually control the bumper with their hands.
For the launcher, applying force via a rubber band proved successful. This direct mechanism allowed players to launch the ball with adequate speed while retaining ease of use.
3.User Testing and Feedback
For our user testing session, Simon documented the feedback received. Some of the key points were:
Feedback:
—clearer instructions
How to paint it-style of expression
User experience: The two operations are a little counterintuitive, and the reaction time is too short, which can be longer.
—Interactive idea: Checkpoints
Adding sensor,LED strips
Sound+Music: Auto-sonic sensor to play some the music
Based on this valuable feedback, we focused our subsequent design iterations on simplifying the launching and bumping mechanics for improved intuitiveness and usability. We also sought to incorporate interactive digital components through the addition of an Arduino microcontroller. Elements like sensors, lighting effects and triggered audio aimed to enhance gameplay engagement and the overall user experience.
4.Decoration
Simon is responsible for the decoration and painted the machine really prettily.
5.Input
Sensor test
To realize the interactive elements of the pinball machine, sensor selection was a key early decision. Based on Professor Gohai’s guidance to experiment widely, I evaluated several options over multiple prototyping sessions:
- Plain buttons were initially tested but did not provide in-time collision detection.
- A magnetic ball. No time to test.
- A momentary switch under each contact point provided binary triggers but no intensity data.
- Capacitive sensors were considered for their location sensitivity but proved unreliable through cardboard.
With Professor Gohai’s assistance in the studio, I conducted tests using laser and LDR pairs, piezo disks attached to a Acrylic sheet.
The laser setup neatly detected ball launches but not in-game collisions.
Piezo disks generated clear voltage spikes on impact and were responsive enough.
After jointly analyzing the output graphs and discussing the suitability of various criteria like sensitivity, durability and form factor, Professor Gohai concurred that piezo disks in combination with a laser start detector offered the best sensor fusion solution.
6.Output
I first tested and modified the code from examples and applied them individually to the three parts: the beginning of the game, the end of the game, and collisions in the game.
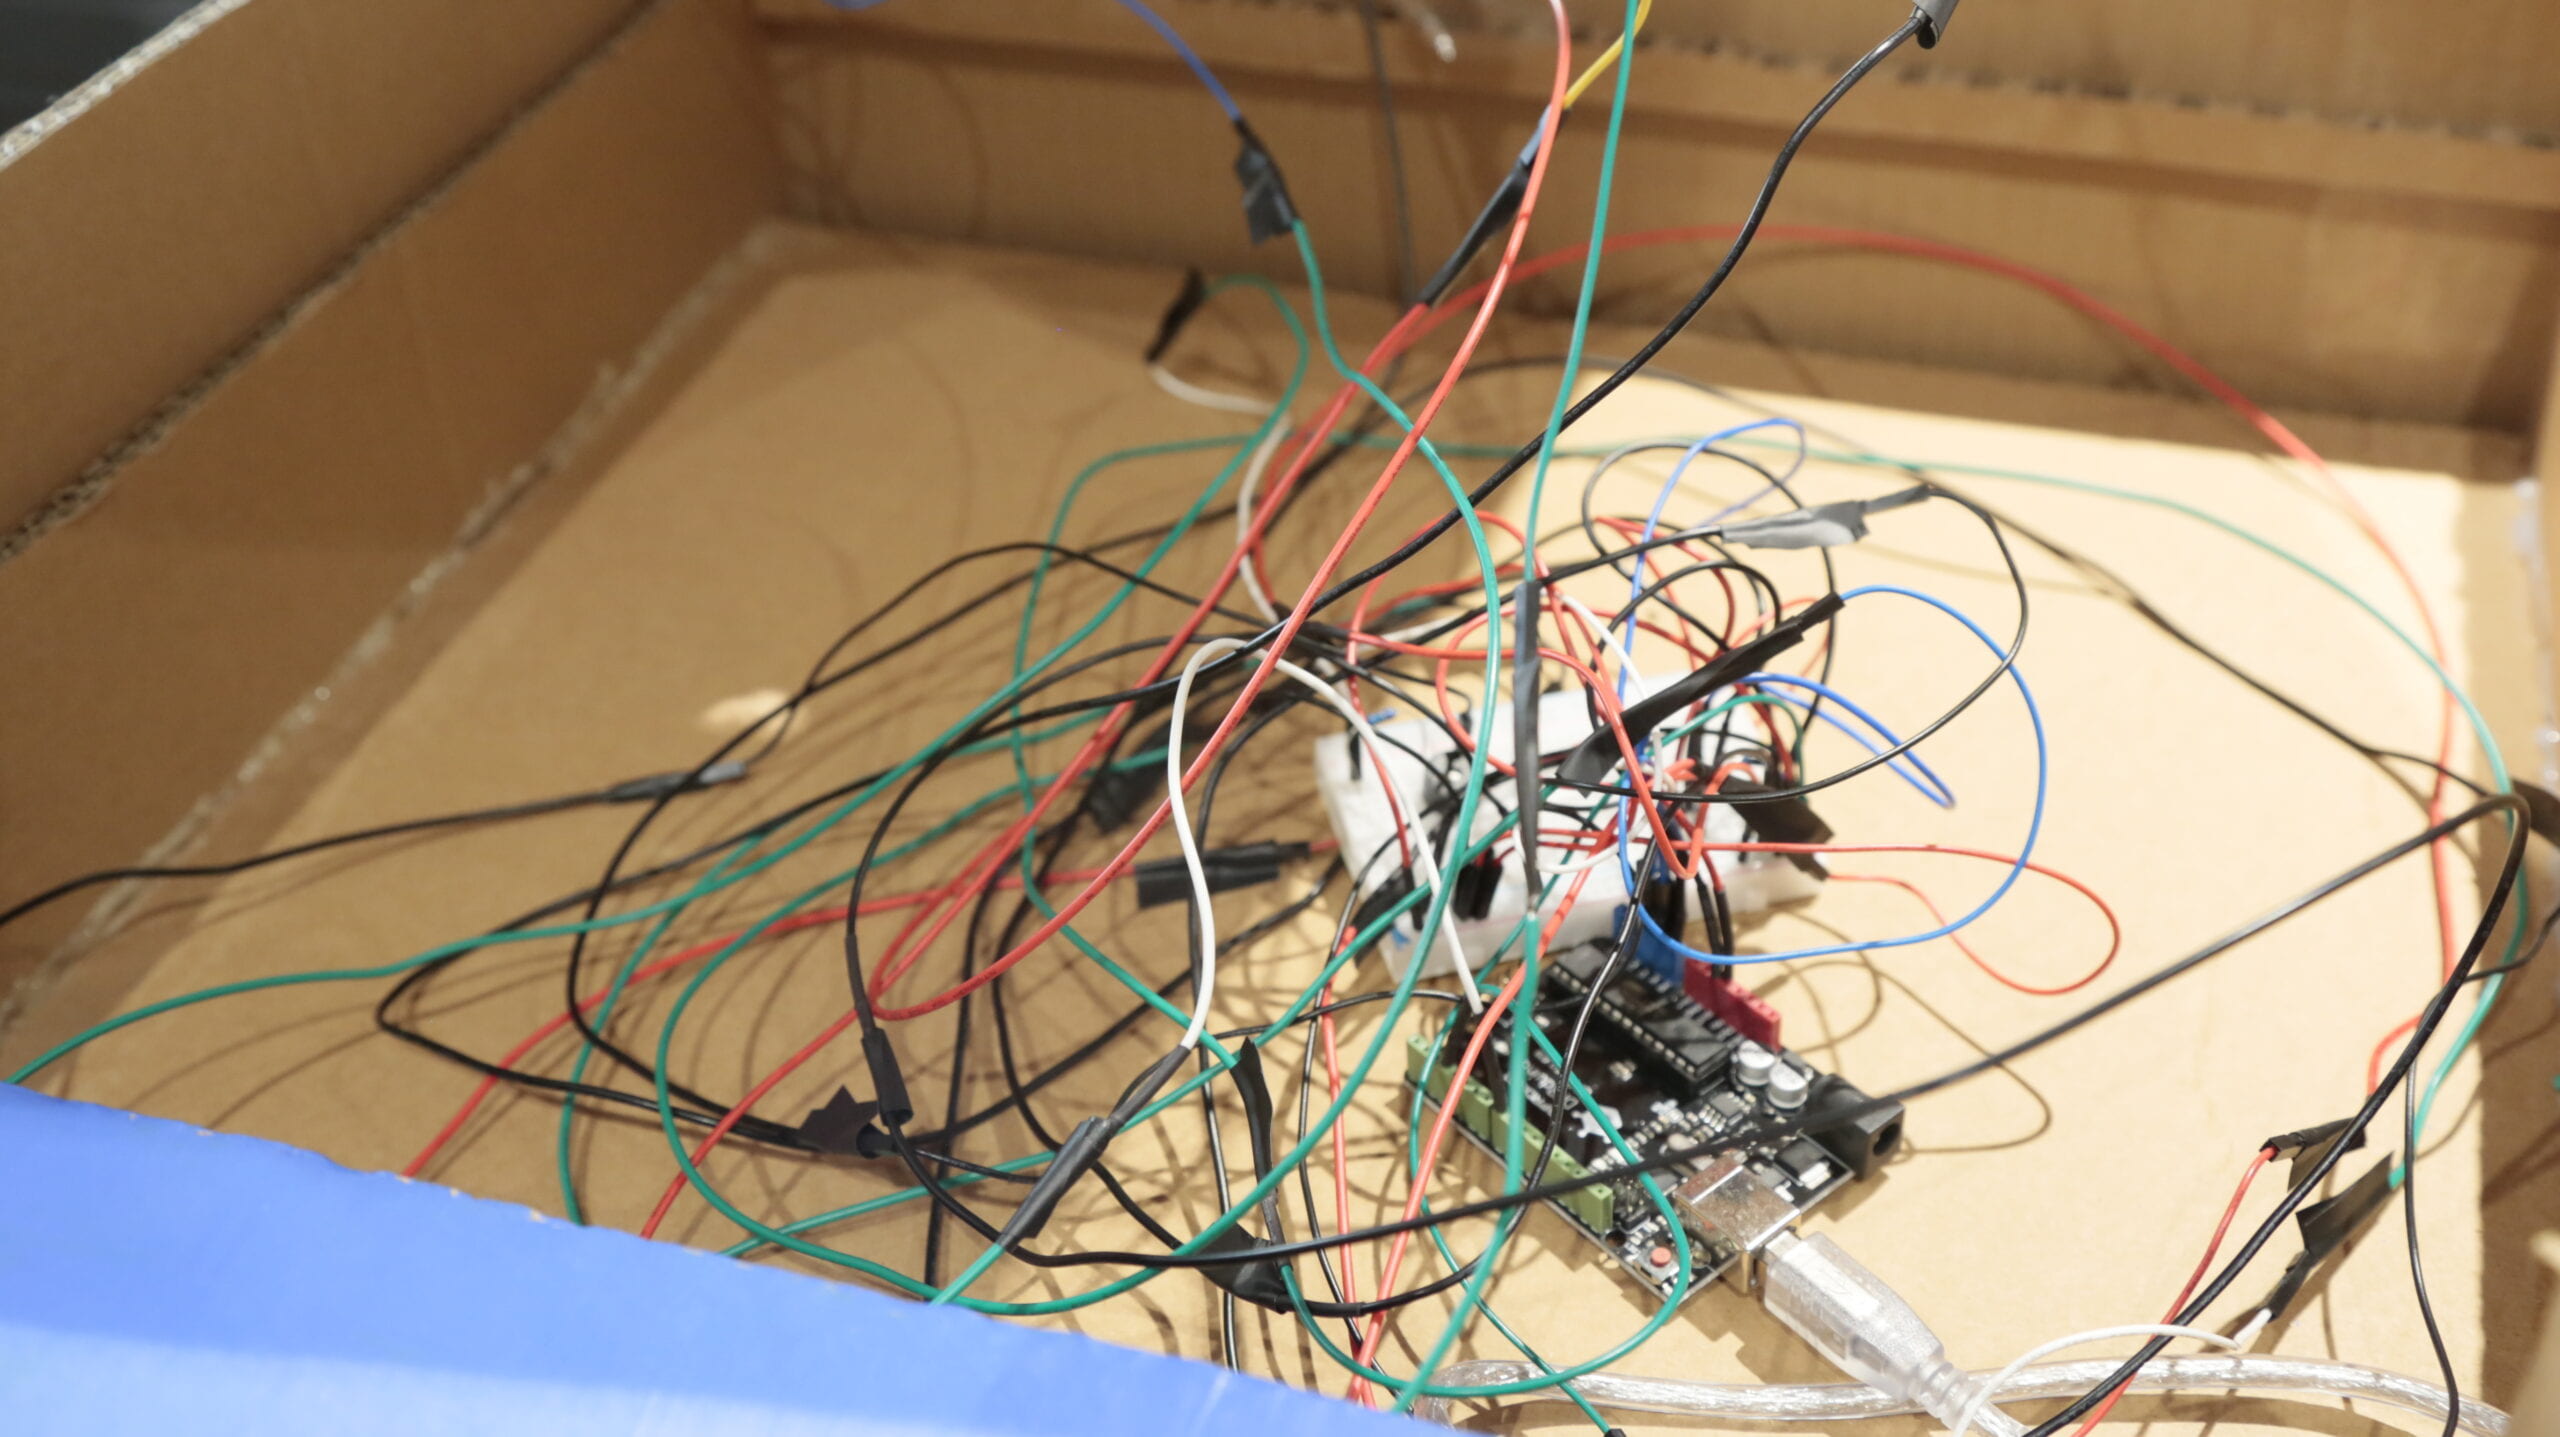
7.Circuit Design and Implementation
For the electrical aspects of our project, I took on the responsibility of circuit design and building.
Proper insulation of the wires was critically important to prevent shorts. I applied tape carefully to protect where wires ran in close proximity to each other. This prevented a short that had initially occurred during testing.
Consideration was also given to wire length and routing. Some wires needed to be extended to reach all components once everything was installed in the enclosure. I used a method of ironing striped sections of wire to successfully elongate them as required. This allowed for a neat interior with the more complex circuitry concealed in the box.
Overall, taking care with insulation, length and routing of the wires was key to developing a robust and dependable circuit that could power our system safely and discreetly within the overall design. Thorough testing validated that these circuit implementation efforts had yielded a reliable electrical foundation for the project.

8.Coding Implementation
For the software implementation, I was responsible for writing the code. Overall, the coding process went smoothly with few errors encountered.
To minimize mistakes, I developed the code in a modular way – writing separate functions for each major task and testing them individually before integrating everything. This helped ensure each component worked as intended before combining.
For readability and organization, I also structured the code using state functions like state1(), state2(), etc. to clearly delineate different phases of operation.
The one challenge I faced was getting a cool LED strip effect to trigger as part of the full code, even though it worked fine in isolation. After troubleshooting, I wasn’t able to determine why this particular feature wasn’t working when integrated. For time considerations, I ultimately removed it from the final implementation.
In summary, through a methodical, modular approach the coding was completed with minimal issues. The integrated software delivered the required functionality for our project overall.
Main Code
CONCLUSIONS
The goal of my cardboard pinball machine project was to create an interactive experience through effective communication between the user and the system.
My definition of interaction is facilitating effective communication between two or more entities. The project largely achieved this, as users were able to control gameplay by operating the pinball handle, while sensors tracked ball movement and provided feedback through lights and sounds. This demonstrated a two-way exchange between the user and system.
However, some technical limitations meant the feedback wasn’t always in perfect synchronization with user inputs. The communication could have been more effective.
Based on user testing feedback, players seemed engaged with the back-and-forth nature of controlling the pinball and receiving responses. However, some commented that glitches in feedback timing reduced theinteractive experience at times.
To improve the alignment with my definition, I would enhance the sensor and output systems to create a tighter feedback loop for seamless communication between user and machine. More dynamic and responsive gameplay could result in fully realizing the interactive potential.
Through this project, I’ve learned that setbacks are normal but can be overcome with testing, feedback and willingness to experiment further. While technical limitations remained, completing this first prototype helped strengthen my understanding of interaction design. The insights gained will help me build even more engaging experiences in the future.
Appendix
“pitches.h”:
One reply on “Go Pinball! – Avril’s documention blog of midterm project”
Hi, this is a comment.
To get started with moderating, editing, and deleting comments, please visit the Comments screen in the dashboard.
Commenter avatars come from Gravatar.