Cup-tain America
FINAL PRESENTATION
kindly click here for the video with captions.
MIDTERM PRESENTATION
kindly click here for the video with captions.
Group information | Project Description | Competitive Analysis | Weekly Build Updates | Final Documentation
Group Information
- Team Name:Cup-tain America
- Group members’ first names (include department and program for students, and whatever affiliation or information community member wants). Only use first names to protect privacy
- Bradley – Steinhardt, Post-Professional Occupational Therapy
- Aparna – Tandon, IDM grad
- Xin – Tisch, ITP grad
- Group members’ primary roles:
Bradley: Contact and understanding the function level of Cynthia, and possible ways and place to locate the device for the best outcome.
Aparna: Designing the product
Xin: Understanding the technical aspects of the product
Cynthia: Providing information on requirements, preferences, and personal experiences.
Project Description (Due 10/20/20)
Description of Team Name:
We were initially quite clueless of what to name the team. That’s when Bradley came up with the name “Cup-Tain America” as a pun for the cupholder design we are planning to make. Xin and I found it interesting and agreed to keep it.
Identify the student who will be the main point of contact for the group to schedule meetings, and manage email: Aparna
Set a schedule for regular meetings throughout the semester
Ideally, we are planning for meetings on Fridays. However, due to the difference in the time zone of each of our members, we end up meeting right after our class session.
What is the planned project? Provide a description of the goal(s) and subgoals
Cup-holder for daily use, majorly for coffee, which is how Cynthia, our team member, and partner starts her day every morning. However, her current cup-holder is located on the left side behind her back, and she will have to reach her left arm and grab the cup, which is inconvenient. The coffee spills out of the holder when the roads are too bumpy.
Goal: Thus, we would like to design a cup-holder that is more accessible and secure such that the cup will stay in the cup-holder and the coffee will not spill on her.
Sub Goal: Understanding Cynthia’s daily regime, getting the measurements of the wheelchair and space between doors and wheelchair, understanding the way she likes to have coffee (hot or cold), getting her input on personalization of her cup, knowing more about her constraints.
Tools/expertise for completing the project
Human-Centered Design, User Research, 3D Printing, Design, and Engineering.
Timeline: PFB
The broader population who might be interested in your solution: Who (other than your community partner) might be interested in this solution. This can include information such as age, diagnosis or functional limitation, environments for use
Ideally, anyone using a wheelchair should be able to use our cupholder design. However, the measurements will be slightly different as our prototype will cater to a specific user.
Weekly meeting scheduled every Thursday afternoon with Cynthia.
Competitive Analysis and Literature Review (Due 10/27/20)
Project Plan
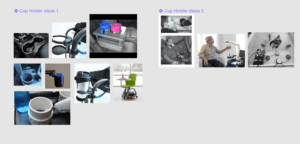
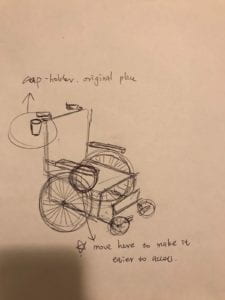
Cynthia’s current cup holder is made of plastic, grey color and has some drawbacks. The coffee spills from the cup holder when the roads are not smooth, she has lost her morning coffee several times when the roads are too bumpy. Another problem is the location of the cupholder. It is on the left side behind her shoulder and restricts access. She had several surgeries on both arms and shoulders, which adds to the hurdle of accessing her coffee. She said that she still has some complications after the rotator cuff surgery. She experiences pain and stiffness in her shoulder joints. Considering all these factors it is clear that the place of the current cup holder is inconvenient for her. Hence, we tried to understand the capability of her upper limbs and she said that she is able to reach up and touch the back of her head with both hands. There is no problem with grasp and pinch movements. Also, the left hand is her dominant hand. We have looked through some products that are similar to our ideas on online shopping websites. However, most of them are designed for cars and bikes. If we want to use them, we will need to do some changes to them.
The easiest way to solve the problem is to move the cup-holder to the front left side of the wheelchair. However, there is a space constraint as the space between the doors and her wheelchair is about 5-6 inches top. This could obstruct her caregiver from pushing her wheelchair through the doors as he would have to aim carefully every time and make sure the coffee won’t get knocked over or spill on her.
Another solution is to use a straw so that we will not need to change the location of the cup-holder. But she prefers hot coffee and it could be dangerous to drink hot beverages with straws as one cannot anticipate the heat through the straws and this could burn her tongue, especially since she likes her coffee hot (she said that sometimes after she got home and if the coffee cools off a little bit, she uses the microwave to heat it up). Thus, this is the first reason that straws won’t work for us. She also doesn’t like the idea of using a straw for her coffee. So we decided on turning down this plan. For a similar purpose, we also asked her if she would consider bringing her own cup to the coffee shop. She didn’t like that idea either. She said it’s not easy to clean, especially since she likes her coffee with milk or cream. So, this won’t work either.
So, the next idea that came to us is to use the folding table design, so that she can put away the cup-holder when it’s not needed. We still need to find more information about this idea.
In conclusion, we now know the size of the cup, and to personalize for preference and style, she would like her new cup-holder to be made of plastic. She also would like the color to be pink or black to match her crutches. So now our goal is to make a new cup-holder that will prevent the spilling of the coffee and/or prevent it from knocking over. It should also be in an accessible location for her daily use without interfering with her chores. Ultimately, we want Cynthia to feel an attachment to the cupholder. We aim to achieve this by asking her input on more personalization requirements and adding them to the cup holder.
What is commercially available to solve the problem?
Cupholders for wheelchairs are already commercially available, in fact, Cynthia already has one attached to her wheelchair. There are also cupholders that are used in cars that can potentially solve the ‘spilling due to rough surface’ problem. Our solution focuses on designing an accessible cup holder that is ergonomic, easy to reach, and is spill-proof (this could be a strong term though).

What research has been done in similar domains?
We found a couple of research papers on Google scholar pertaining to the design of cupholders on wheelchairs. While all these provide adequate design solutions, they are generic and hence are not personalized to a particular user. Thus, they come with their drawbacks: these designs do not take into account the spectrum of disability of their users. However, the designs are highly versatile and address a variety of concerns, including, but not limited to, different kinds of beverages, ease of access depending on the disability, portability, ease of plug and play, etc. The following research papers are relevant to our method of design and we believe that we can learn from them and even adopt parts of their design in improving our product.
1. Combination wheelchair and beverage container holder for attachment to a vertical support member of a wheelchair
James A Gospodarich, inventor; Jeanette M. Kanios, assignee. Combination wheelchair and beverage container holder for attachment to a vertical support member of a wheelchair. U.S. Patent No. 5,597,148 January 28, 1997.
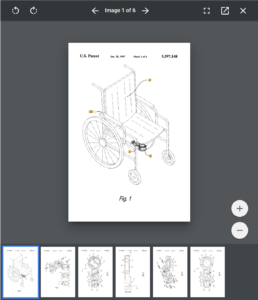
This cupholder prototype is designed for easy access and for holding multiple beverages. The design takes into account the roughness of the road and the variations of cup holders. It is attached to the verticle tubular support part of the wheelchair, near the leg area.
Our design has a lot of similarities to this design and is a great reference for our design. However, this paper does not specify the convenience while moving through a doorway or about the issues caused when having hot beverages such as hot steam, plausible heating of the wheelchair arm, and the possibility of spilling due to other reasons.
2. Articulated drink holder assembly for disabled persons
Thomas E. Sullivan Sr., inventor. Articulated drink holder assembly for disabled persons. U.S. Patent No. 6,896,231 May 24, 2005.
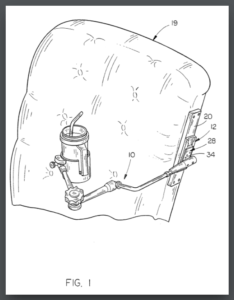
This paper provided an interesting pivot to our ideas as we had our design set on the arm of the wheelchair. This design has an articulated arm assembly that can be adjusted by the user according to need. This design also focuses on various disabilities and caters especially to people with ALS.
3.Drink cup holder mount
Shun- Huang, inventor; TAIWAN AN I CO. LTD. , assignee. Drink cup holder mount. U.S. Patent Publication No. US 2009/0032657 A1 February 5, 2009.
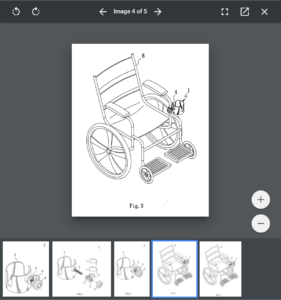
This design is similar to the first research paper but has provisions to attach the cup holder in positions according to the user’s requirement. However, we noticed that such attachments require proficiency with basic tools and is not a viable option if the user would want to do it by himself/herself. Nevertheless, the cupholder once fixed can be used in the same position again (but this again limits flexibility).
Reflection on the impact of this solution
What is the relationship between your proposed solution and the current technologies your partner uses?
The current cup holder which Cynthia uses is placed behind the wheelchair and restricts her access. Our solution proposes to provide easy access for Cynthia to use the cup holder by taking into account different parameters such as the type of beverage, the type of terrain for the wheelchair, Cynthia’ preferences for color and material, ergonomics, etc.
How will your group ensure that your solution won’t interfere with your partner’s current daily activities?
Our solution intends to be designed around Cynthia’s daily activities rather than trying to fit her activities according to our design. Our cupholder takes into account her daily regime and how and when she prefers to have her coffee, how that would affect her transit, and the preferences she has in using different types of cups. As mentioned above in the project plan, we have asked her about her coffee preferences. She likes her coffee hot, prefers not to have her own cup, and does not like the idea of straws, all of which will be taken into account. She also would prefer the cupholder to be made of plastic and would like it to be of black or pink color.
How will your group design a solution so it doesn’t interfere with other devices in your partner’s environment?
We have thought of a solution that would accommodate her movement on wheelchair and will take into account the immediate space around her. We do not want our design to be an obstruction to her transit especially through the doors (She said there is about 5-6 inch gap right now between the door and the wheelchair). We are also considering the possibility of spills when her assistant has to push her through different terrains. We intend to check with her on further constraints and opportunities as we progress through our designs.
11/3/20
Finding possible ways to make the cup-holder.
We are sure now that the size and kind of cup Cynthia use everyday for her coffee. But before we made prototype for the cup-holder, we need to make sure the other things we are adding on it will work, which are the buffer layer inside the holder, the disc to catch the spilt hot coffee, and how to attach the device onto the wheelchair.
We are looking for commercial product similar to our ideas on Amazon first, and thinking to get one from the website and test if we are able to add buffering materials inside of the cup-holder. The idea is to make sure that the material will stay in the cup-holder, and when Cynthia take the coffee out of the holder, the buffer will remain it’s place. At the same time, when putting back the coffee, it won’t cause too much trouble, and can be fulfilled easily.
The other thing we want to test on the product is a small disc under the cup-holder, the main purpose is to catch the coffee if it spilt and make sure it won’t splash on Cynthia. The material should be easy to clean or easy to replace for disposable materials. The coffee Cynthia drinks daily contains milk, it will mold if it can’t be cleaned properly, and we also need to make it easy to clean as well, because we don’t want to cause her any trouble greater than minimal in her daily life.
Hooking on the cup-holder to the wheelchair is probably our biggest problem for now, because of the pandemic, it seems less likely for us to visit her in person and measure the size of the armrest. We did ask her to take a few photos for us to gain a brief idea what the armrest look like. After we received the photos, the next step it to find out a way to attach our cupholder onto the armrest without damaging it or interfere Cynthia’s daily function.
The reason we need to do the test before making our own with 3-D printer is that Aparna mentioned it might take a while before we can get our device. It will be ideal to run some tests and make sure our plans work as we expected. This way we can save some time and also preventing being wasteful.
We shared the photo of the product we found with Cynthia, and she liked the design and the color (brown), we also discussed these issues and possible solutions with her. She seems very excited.
11/10/20
Test different materials on dummy prototype to see if the buffer can absorb the spillover, and keep the cup in the holder.
Possible buffer materials to reduce vibration: low tech such as foam, bubble wrap. Another idea is to build in to the 3-D model (Matlack et al., 2016).
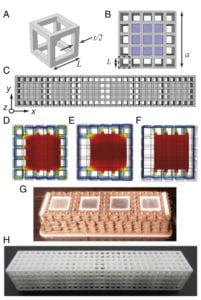
Possible tools to hold the spilt liquid: silicone disc, plastic disc, paper disc.
Possible ways to attach the holder to the armrest:
Scheduling to meet Cynthia in-person.
References
Matlack, K. H., Bauhofer, A., Krödel, S., Palermo, A., & Daraio, C. (2016). Composite 3D-printed metastructures for low-frequency and broadband vibration absorption. Proceedings of the National Academy of Sciences of the United States of America, 113(30), 8386–8390. https://doi.org/10.1073/pnas.1600171113
11/17/20
Task for the week: Build a rudimentary prototype.
Completed update:
Scheduled a meeting with Cynthia in person on November 18, 2020 at 3 p.m. We also asked her to save us the cup she used for coffee that morning for our future tests.
We decided to make a rudimentary prototype for the cupholder. Since we are located far currently, we could not come together to do this task. However, Bradley and I (Aparna) would be visiting Cynthia on Wednesday as mentioned. Since Xin is not in the US, we will be updating her about the meeting.
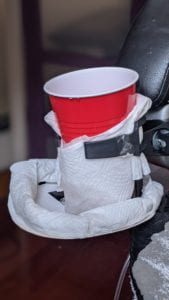
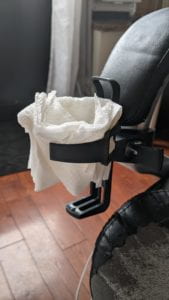
Coming to the prototype, we had decided to have a cupholder with absorbent material at the base and inside the cupholder. To mimic this, I used an old bottle holder and used screws to fit it onto my chair which has wheels to move around (the aesthetic condition of the chair is not at its best, but it’s too comfortable to be replaced 😀 ). I used tissue paper as the absorbent material (will be using a sponge later on). I attached the absorbent material to the cupholder. I cut out a circular base from a paper plate and attached it to the base of the cupholder. I then lined the base with the absorbent material. I used a party cup which is approximately the same size and shape as the cups we get from Dunkin Donut (or that’s what I thought it to be, will iterate using Cynthia’s cup). This was the idea of the design we had in mind.
I recorded the movement on my chair to observe the spillage. I did not have a third person to push me and hence I had to rely on myself pushing the chair which might yield slightly different results than expected. PFB the video.
Conclusions:
- The spillage radius is more than what we expected while moving through different ground levels.
- Would need a tighter module
- Definitely change the absorbent (although this was not the intended material and was used for a trail)
- Having a lid on the cup might yield a different output (mostly the shops provide lids along with the cups)
- The position of the cup holder seems to be fine for now.
In-person meeting with Cynthia (Nov. 18, 2020):
Today, we visited her at her apartment. Our visit was at between 3-4 pm. We measured the armrest and the space between the armrest and other equipments of the wheelchair.
| Space between Parts/ Size of a Part | Length (in inches) |
| length of the armrest | 11 |
| width of the armrest | 2 |
| height of the armrest | 2 |
| side guard to the brake handle | 2 |
| Bottom of the armrest to the top of side guard | 3.5 |
| Bottom of the armrest to the brake | 2.5 |
These numbers can help us have a better understanding of the size and the space we could use for the cup-holder project. We were at first wanted to attach it onto the right-handed side at the front of the side guard, however, that will interfere with the function of the brake handle. Thus, we went back to our original plan, to attach it on the left-hand side.
Here are our few ideas that might work for the placement of the cup-holder:
- at the front of the armrest, which won’t be in the way of the brake’s functional range. However, we do see most of the time, Cynthia likes to rest her arm on the armrest, and rest her palm on the edge of the armrest. If we want to keep this plan, we will have to hake the attachment part a bit longer, so that Cynthia won’t need to change her way of doing things too much.
- Adding an equipment like a folding table, this way even though the cup-holder might be on the way of the functioning of the brake handle, she can fold it up when needed and brake the wheelchair. This might cause more trouble than minimum though, but we decided to keep it as a back-up plan if other ways don’t work.
- Adding on another thing like an armrest and solely for the use of cup-holder. By attaching it to the lower part of the handgrip of the wheelchair. This way we don’t need to worry that our device might make it difficult to use the brake.
The next step is to choose one from above and start making our device for Cynthia. Besides that, Cynthia seemed happy to finally meet us in-person, and also excited for this project. She also reminded us to make the cup-holder colorful. After the measurement and chatting, we left at 4 p.m.
A Small accomplishment of the day: We helped her reset the time to the correct one on her microwave.
11/24/20
Since we met with Cynthia, we have been brainstorming about new possible ways to attach the cupholder. Apart from the three options above, we also looked up some existing products on Amazon. Some of them have a strap for attachment which we could try, but I’m afraid that it might not be sturdy enough. Nevertheless, we think it would be better to improvise an existing cupholder to suit her requirements since the design might be more flexible for use and that would provide us more room to customize it to her specifications.
We had taken the bottle holder prototype to test it on her wheelchair. We tried it both on the right and left side and as we have mentioned in the previous update, we decided to attach the prototype on the left side. This also allows her to use the right side of the wheelchair without any obstruction while getting in and out of her bed (she is accustomed to using the right side for this).
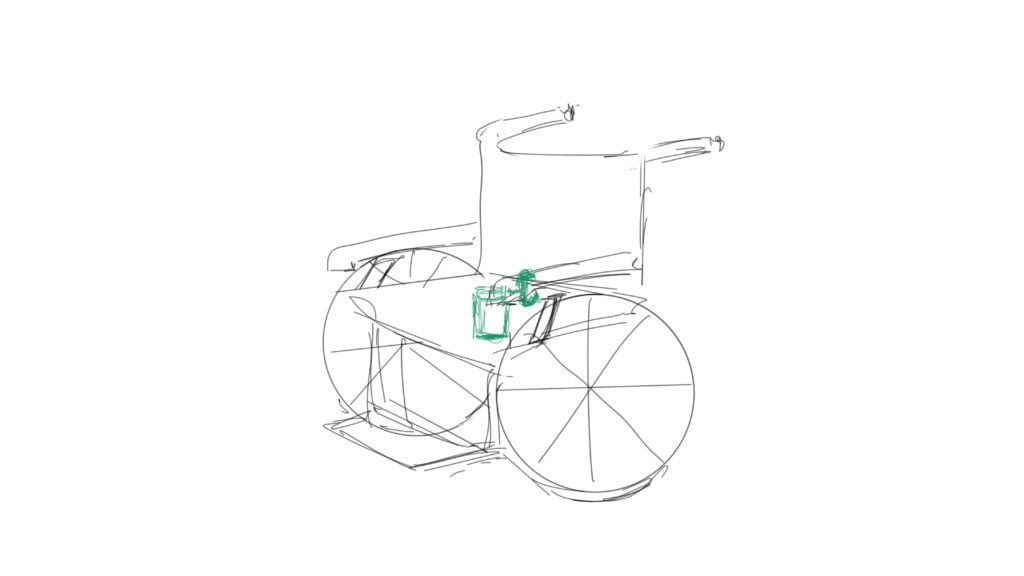
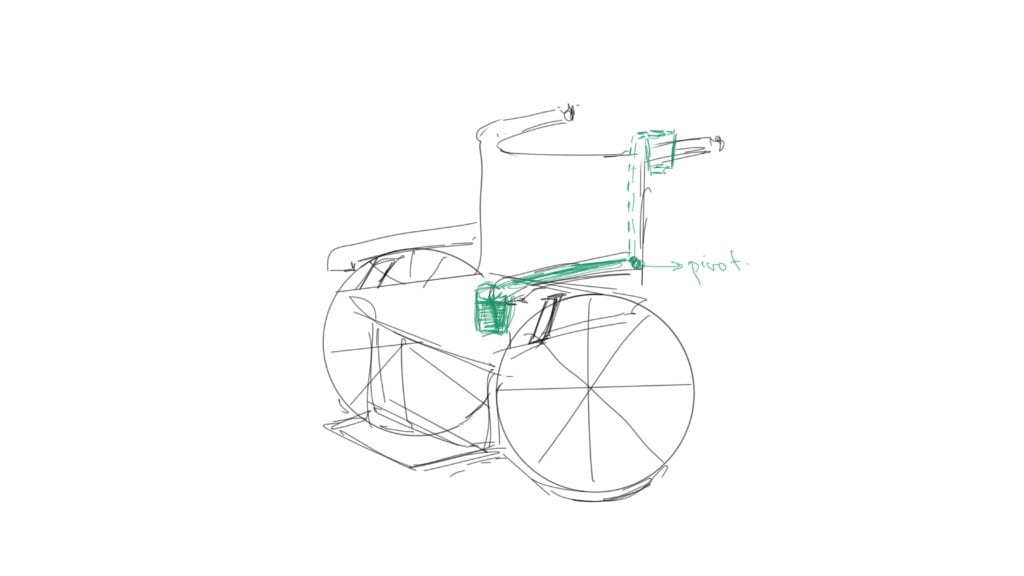
The main issue we found was that the armrest for the wheelchair does not have a vertical rod to attach a cupholder. Therefore, we are searching for alternative options such as clamps or an extra rod with a 90-degree rotational pivot at the existing armrest (please refer to the figures below)
Some of the products we found online are:
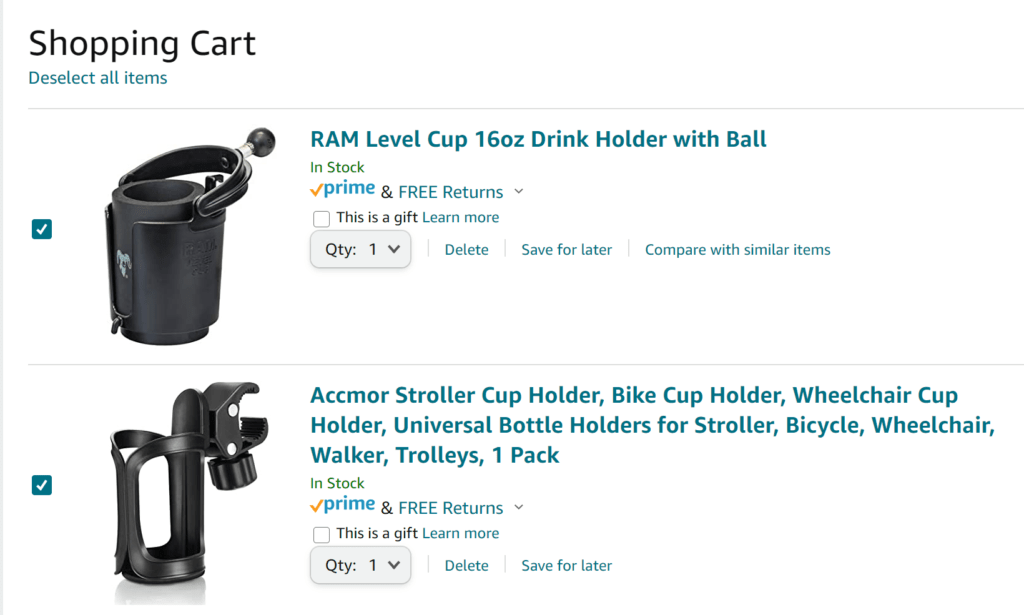
It would be easier to work with the second one as it would give us more room to customize and add the absorbents. (Would love input on this).
12/01/20
Created designs for the shell for holding sponge/foam, found a 3d model design on Thingiverse with the same dimensions, and took them for 3D printing.
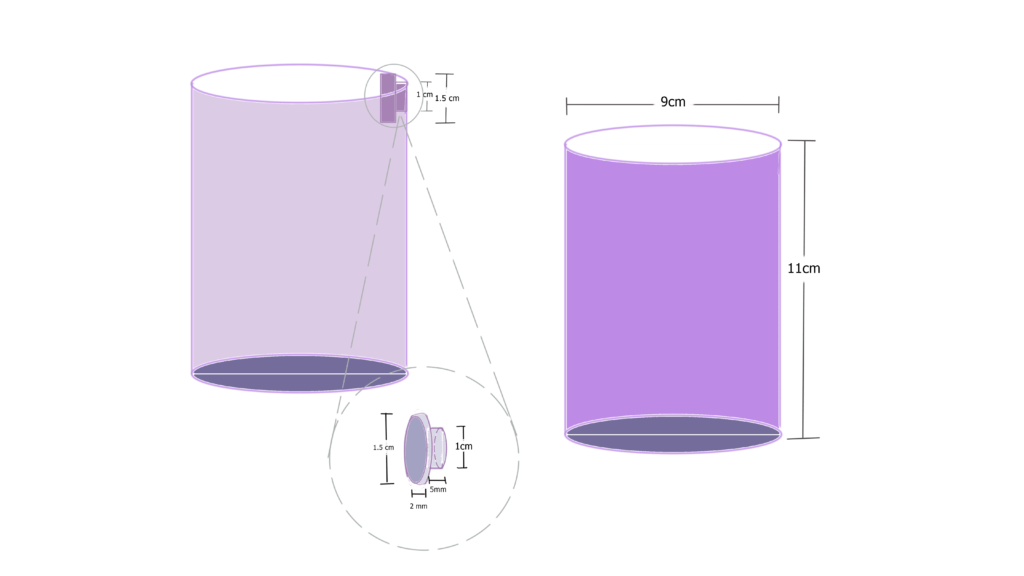

Below are the referenced images for the measurements. These are the measurements of the cupholder we are using.
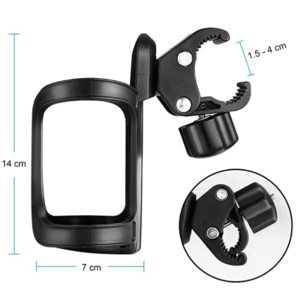
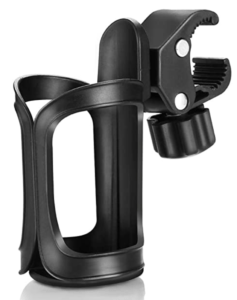
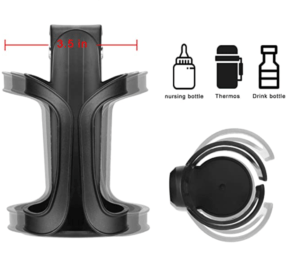
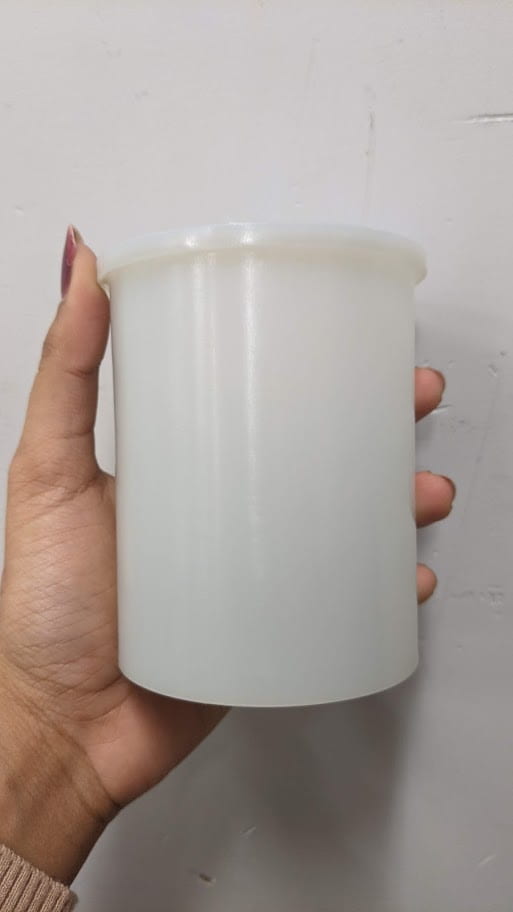
The MakerSpace only had resin for printing and did not have a black color plastic material as we had planned. However, I saw a 3D-printed cylindrical model with approximately the same dimensions as the design we had in mind. The surface was too rigid to hug onto the cup holder we had in mind. Therefore, had to drop the plan of using the 3d printed model. Also, we did not like the look and feel of it.
12/08/20
The final cup holder required more input as the previous plan had some drawbacks. Cynthia said that she always uses the cap for her coffee cups which prevents spillage. This resolved the spillage issue to an extend. Nevertheless, there was still the challenge of mitigating burns due to the hot beverage.
We decided to use a foam material as a solution. We found a couple of foam hugger for cans that had Cynthia’s favorite colors- Pink and purple. We used them around the cupholder as heat insulation pads. This also provided us room for decoration.
We asked Cynthia how she would like to personalize it. We also showed her a couple of stickers she would like to have. She wanted Unicorns on them and hence we decided to go with the plan of making the cupholders look magical.
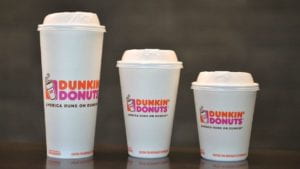
I got each of Small, Medium, and Large-sized cups from Dunkin Donuts where Cynthia orders her coffee take-out. This provided me with a reference for exact measurements. The Large-sized cup was a little too tight to fit into the ensemble and hence I had to remove a layer of the hugger material using knives. I also brought some foam sheets to create a thin pad, however, it did not hug well and was not a viable option for long term use.
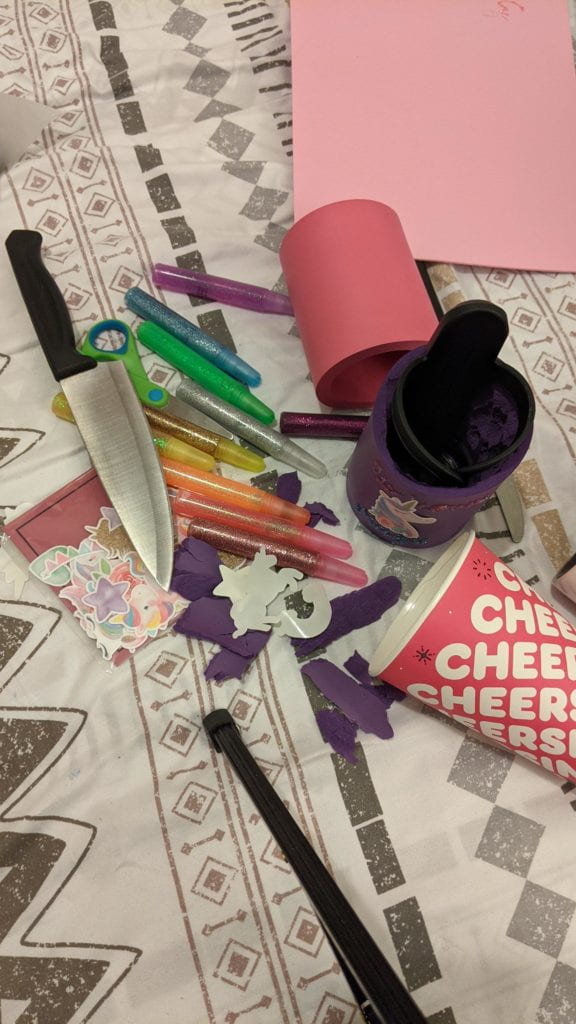
On removing the layers, the cup holder and the insulation pad ensemble could fit the cup inside. However, I feel there should be more room for fidgeting with the cup.
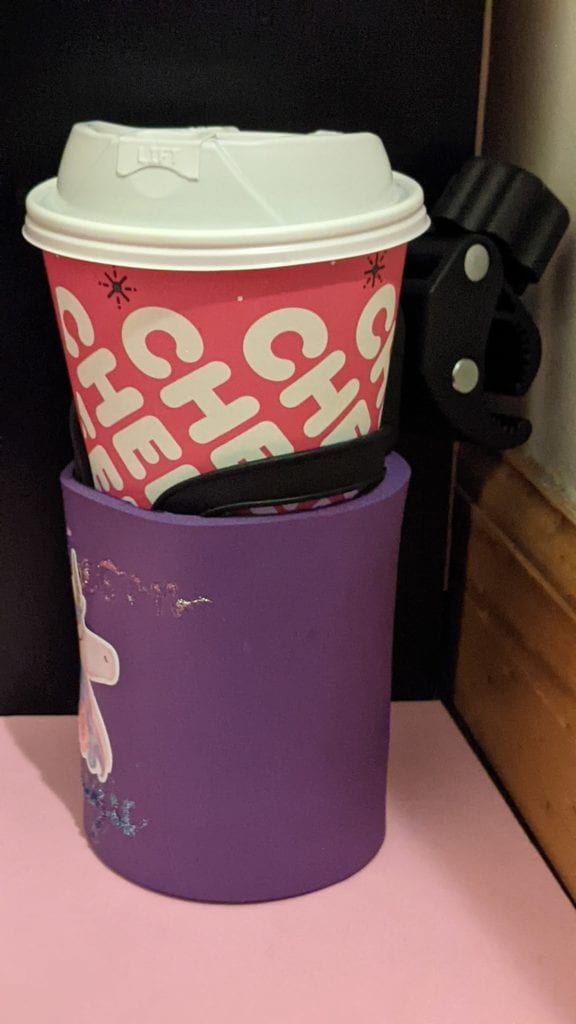
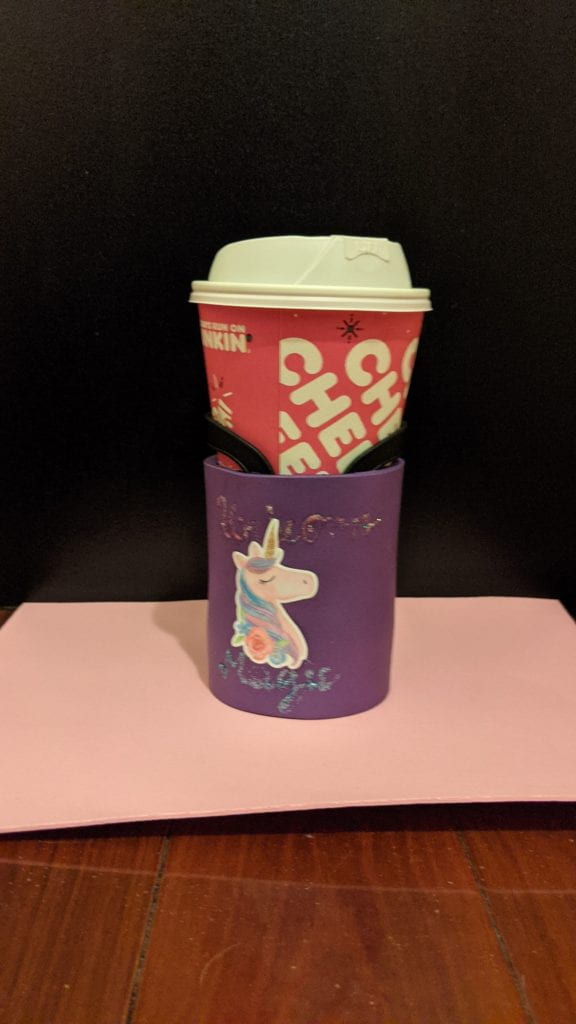
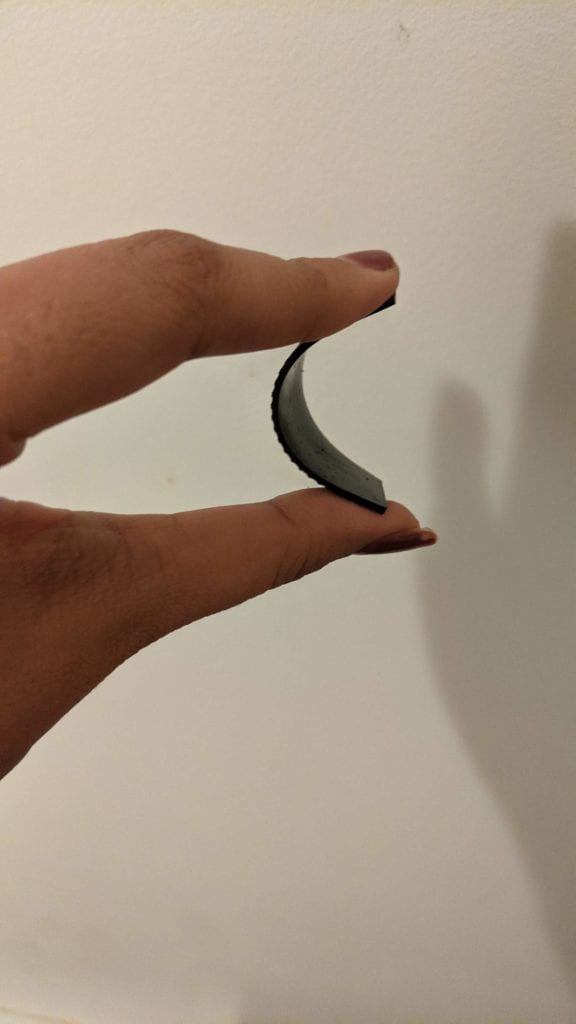
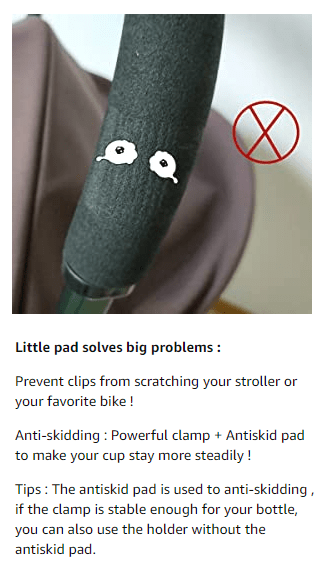
To enhance the grip of the cup holder on a wheelchair, we decided to get an antiskid pad, something which we found on amazon that comes with certain products.
12/10/20
We paid Cynthia a visit on December 10, 2020, and the purpose of this meeting was to see if our project meets her expectations and her personal needs. Our original idea was to attach the part on her left armrest, however, there is an additional part of the shape of a cylindrical skeleton under the armrest. Makes it difficult to attach our cup holder onto the armrest of the left side to the wheelchair. Then we try it on the vertical part of the bodyguard of the wheelchair on the right side. It is still a bit lose, but after adding the anti-skid padding between the claw of the cup-holder and the wheelchair, the cup-holder held firm.
So, we moved on to the next task and put the foam cup-hugger onto the outer layer of the cup-holder and put the regular cup Cynthia uses every day to see if it works. We attached the cupholder and asked Cynthia to try to use it. The cup holder was a bit tight as anticipated, although some layers have already been removed. We removed the hugger and tried it again. Cynthia found it a bit hard to remove the cup smoothly from the cupholder, leaving room for the possibility of spillage on taking the cup in and out from the cupholder. The cup has to be twisted while taking out for smoother access. This, we found, was a major drawback. However, she insisted that we leave the cupholder on the wheelchair as she wanted to try them again. She also found the designs very endearing.
Our next step is to further modify our current device, either make the cup-hugger even thinner so that it won’t fit so tightly, or add another cup-like device between the cupholder and the cup itself to make it safer and easier to take out the cup from our device. We also gave her around 5 designed foam huggers for her to use in case she wants to change them. We also showed her how to do that and also how to attach and remove the cup holder.
We scheduled another meeting with Cynthia after the end of the Fall 2020 semester, just to make our device right. She expressed gratitude and satisfaction with our hard work. We also learned a lot from her throughout this semester. Not just how to communicate with a client, but also the importance of listening to people and how all these factors can have a holistic impact on people. She emphasized that people like to be heard and also shared her experiences in Hawaii and with her studies. She also offered us some priceless advice that we would carry through in our lives. We are very grateful that we had this chance to work with her and use the knowledge and skills on a client-centered project.
———————————————————————————————————————————— 🙂
Here is the link for a timelapse of how you can make a personalized cup hugger for your cupholder
________________________________________________________________________________________________________________________________________________________________________________________________
CUP-TAIN AMERICA Extension Direction
kindly click here for the video with captions.
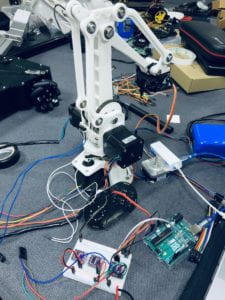
We add these just as an extension direction for our cup-tain America project. We make the AT robotic arm for this cup holder as another part. Combined with the cup-holder, Aparna and I think we probably can make AT robotic arm for this cup-holder as another part. In the future, if it is possible, the user can use this cup-holder with the assistive robotic arm. That would be flexible for the user to drink water or do other things. So I try to make a DIY robotic arm for our learning and testing about the technical aspects of the AT product.
Due to covid-19, I lose the chance to meet with Cynthia in person and our weekly meeting at 3:00 PM EST every time. I feel a little bit of struggle with this. Cause I am currently in china and we are in a different time zoom. I feel so sorry about it.
Currently, many research groups have focused on robotic applications for elderly and disabled people care, with the aim of improving life quality and to give the possibility of carrying out several tasks autonomously.
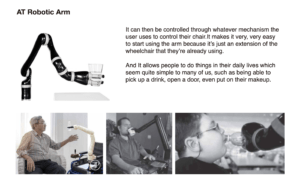
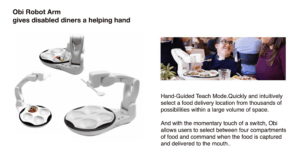
The main objective of the robotic arm is to allow the user to carry out four tasks autonomously, such as grasping and drinking from a cup, grasping a pen from the floor, turning on and off a wall switch.
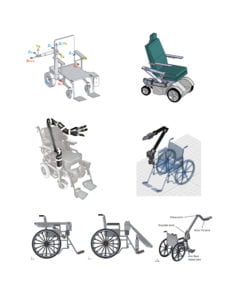 – Cupholder and Robotic Arm Cases
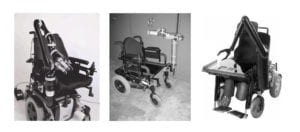
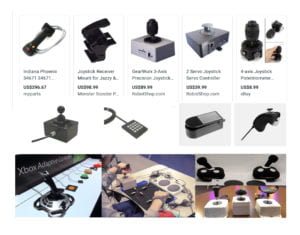
This robotic arm can be controlled by a joystick/keyboard which allows the user to drink water or handle objects. Here is the research about the accessible controller.
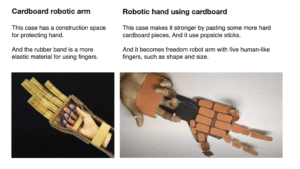
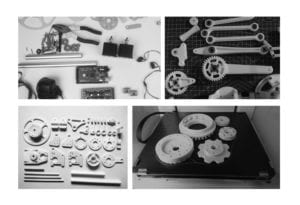
This the tutorial and instruction I followed step by step. (Thanks for sharing) My friends help me modify some of the mechanical systems of this robotic arm.) And I do the Fabrication Parts, Physical Computing Parts, and Coding Parts. Figure out the serial communication between the computer and the Arduino. And I think the most complex part is the mechanical system of this robotic arm.
Material list: Screw M3 M4 Arduino UNO Stepper moto Stepper motor driver Motor driver board Power 12V Camera Joystick Button
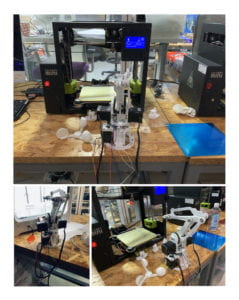
– 3D Printing Prototype
The most complex part is the mechanical construct of this robotic arm. My friends help me modify some of the mechanical systems of this robotic arm by trying to convey better and require less force. And finally, we made it.
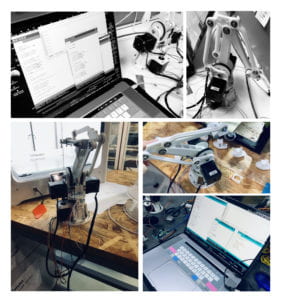
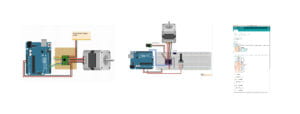
Problems: I was stuck in finding a stepper motor that was powerful enough. Some of the motors couldn’t force the little gear at a fast and stable speed. But it still has some problems. The code of the stepper motor is not easy to set up. I should try to run it several times.
It is hard to control the stepper motor and set the serial communication for the micro-controller. Then I found I need a DC to DC voltage conversion module. It could solve the voltage problem. Set up expansion board stepper motor driver board, and use stepper driver module. It can be configured down to 1/16 step, which makes the stepper movement really smooth and silent.
– Testing Stepped Motor
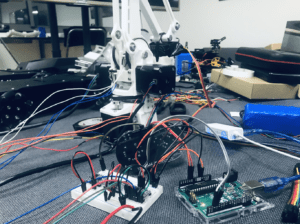
– Testing Stepped Motor
Figure out the serial communication between the computer and the Arduino. After this, the robotic arm can finish the task. This is a very challenging part for us to learn the visual grasp control for a robotic arm. I will learn more about this area after this semester and try to develop the software to control it easier.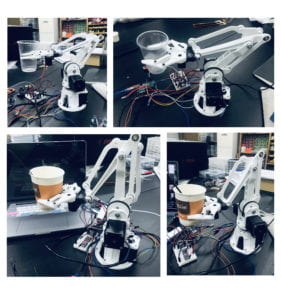

– Process Testing
This model can be controlled by a keyboard, joystick, or even a single button. For this robotic arm, the user can only use the button to control it. I think the accessible controller is a very important part for elderly and disabled people. This really depends on their preferences and their personal habits. If possible, we will get feedback from Cynthia and refine the controller design. This is just a typical button.
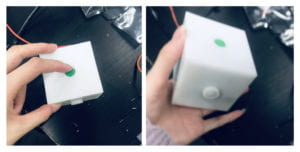 – Prototype Controller
Feedback: Cynthia has some difficult time with technology, but she is willing to learn and know about it. Her regular daily routines, she usually woke up, and her home aid will come at around 9. Then have coffee, take a shower, then go out/ read/ doing things on her computer. If possible, AT robotic arm could help her grasping and drinking from a cup, grasping a pen from the floor, turning on and off a wall switch.
Problem:
- It also seems to be heavy and not easily removable from the wheelchair. This arm has a limited extension, so picking objects up off the floor is fairly limited.
- It should be affordable by the majority of users. The current commercially available are mostly prohibitive in price, ranging from approximately $5,000 up to $40,000, or restricted in functionality with relation to the cost.
- And the robotic arm for the wheelchair should be tested and become user-friendly that they can feel easy to access. No worries about the safety problem.
Next Step:
- This part just an extension direction for our cup-tain America project. If possible we should fix the AT robotic arm mechanical system that could easily access a wheelchair.
- Knowing more about our users, I will try to design assistive, adaptive, and rehabilitative devices for people with disabilities or the elderly population. Have a chance to talk about her own needs and find out more details about her style, preference, and routines..
- I will learn more about how to use visual grasp control for robotic arms after this semester and try to develop the software to control it easier.
Final Documentation (Due 12/15/20)
