MIDTERM PROJECT | Blind Stick – Annika – Rudi
The Blind Stick
Annika Wen (Teammate: Rachel Duan)
Instructor: Professor Rudi
PART1: CONTEXT AND SIGNIFICANCE
My previous group project envisioned a machine that could create and record dreams. Obviously, with the current technology, we can’t implement such a machine so we couldn’t use it as a prototype for the midterm project. But we designed the dream machine with the original intention of helping people with PTSD and sleep problems get a good night’s sleep, so we want this new project to be something that could help people as well.
We wanted to make something that could be achieved with what we had learned so far, so we came up with the idea that the combination of ultrasonic sensors and buzzers from our previous recitation class might make a blind stick that would indicate distance. This is a significant aspect of our project – it is an item that has utility and can actually be used by the blind. We also tried to implement the concept of humanization in the design and production process (I’ll explain more about that in a later section).
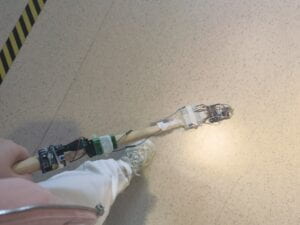
Most of the blind canes on the market today are simply sticks that can be swung from side to side and tapped on the ground. Our blind cane is equipped with ultrasonic sensors and a buzzer to alert when it senses an obstacle, making it more intelligent and interactive. In addition, we have also implemented a photoresistor to make the cane glow at night to alert passersby.
Regarding the understanding and definition of interaction, I always remember Tom Igoe’s blog post “Once you’ve made your initial statement by building the thing or the environment and designing its behaviors, shut up.” “How people interact with your work will change over the course of its presentation. If you’re making interactive artwork, that is the conversation you’re having with the people for whom you make your work.” This project is a practical object for the blind. In order to make it an interactive project for everyone, we used cardboard boxes, etc., to set up scenarios that blind people might encounter, such as classrooms and roadways. And we let the venue be plunged into darkness with lights out in real-time. Participants were then invited to put on blindfolds and try to use them to get over obstacles, while onlookers could see his movements and the light emitted by the blind stick in the darkness.
I have previously studied interactive art project SPIRALALALA – singing architecture (see details in the blog “PROJECT ASSIGNMENT | STEP1.1: How I Define Interaction”). In that interactive art project, people interact with the architecture by simply putting a ball into a microphone and recording a short piece of their own voice, but the final result is very impressive. In our project, although the blind stick is more of a utilitarian object, I think it is also interactive. When people hold the stick and get closer to something, the buzzer will sound and remind people to change the direction of advancement to avoid tripping. This is the process of “input (the distance/sound), read, and output (by sound/change directions)”. In the singing architecture project, the audience who did not participate in the recording of the sound could also be subjected to a stunning visual-auditory effect. I was thus inspired to add a light-sensitive LED strip to the blind cane, hoping that not only the user can experience what it is like to be blind, but also the onlookers can observe the state of the user and the light emitted from the cane. In this way, they will be more aware of the disabled who need help but don’t use such an attention-grabbing flashing blind stick in the future. It is also a call for designers to design more user-friendly products.
PART2: CONCEPTION AND DESIGN
Since we decided to make a blind stick that leaned towards practicality, we thought more about humanization in the design. At first, we tried to make telescopic rods to adjust the length of the stick so that it would fit people of different heights. However, the internal structure of the telescopic rod is too complex for a 3D printer to manufacture, so we changed the idea to making handles of different lengths.
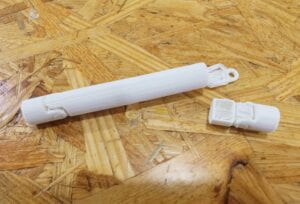
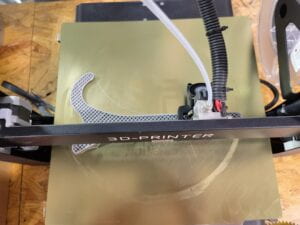
The body of the stick came from a wooden stick in the fabrication lab. We chose a length of 80 cm after measuring and sawing it down. The 3D printed extension handle can add 10 cm to the length, and if put into practical use, there can be more lengths to choose from. These removable handles can be easily assembled to the stick with a sleeve.
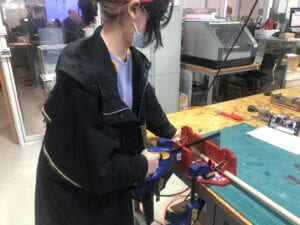
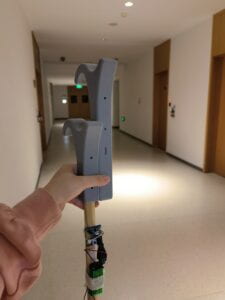
(If you want to watch me sawing wood, click here😛) This is my first time sawing wood, thanks to Andy and Steve’s guidance.
I even studied the national standard Tactile Sticks – a Sign of Safety Colors and Technical Specification and chose white as the overall background color, red as the safety color. I found suitable white cardstock in the fabrication lab and purchased the red reflective strip. This will serve as a warning in traffic safety and alert passersby to avoid in time.
PART3: FABRICATION AND PRODUCTION
I’m more in charge of the parts that require hands-on work, and my partner Rachel is more in charge of the code. But we pretty much did the whole process together and helped each other out.
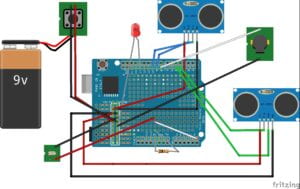
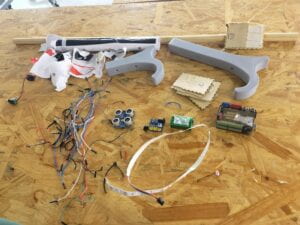
The initial circuit I connected was very simple: 9V battery, ultrasonic sensor, buzzer, and Arduino (actually there was an indicator light of little use).
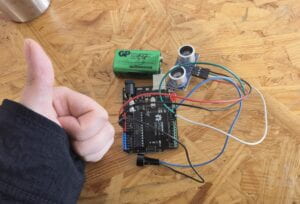
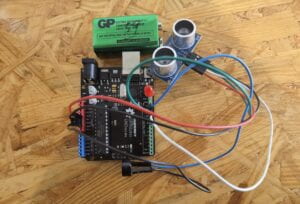
Later we found that without a switch, when the blind cane is not needed, the sensor will still make the buzzer sound when detects an object approaching, at which point it becomes something that produces noise. That’s why adding a switch is necessary. But at the beginning, our circuit was very simple so we didn’t use a breadboard, the number of interfaces became a problem. And the switches that we could borrow were small and not suitable for the switch for a blind cane. Thanks to Rudi, he lent us a suitable switch. I removed the non-functional indicator light (because it was too small), attached the switch, and used tape and straps to initially secure it, forming the first prototype of our cane.
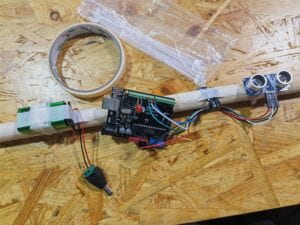
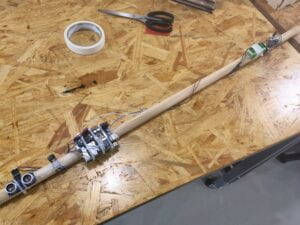
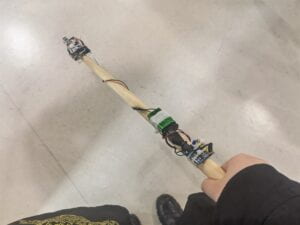
On Thursday we added a photosensitive LED light. This time we have to use the breadboard, because if you want to add a photosensitive circuit, the interface is really not enough. This formed the prototype we used for user testing in our Friday recitation class.
The response in the recitation class was very good and everyone was able to understand our project very quickly. In order to make it more like a complete usable item rather than a student experiment, we wanted to reduce the size of the “control center” and cover them. Instead of using the smallest Arduino Nano with a breadboard and a larger diameter cylinder on the outside, we went with Rudi and Steve’s suggestion of putting a Prototyping Shield on the Arduino and laser cutting a box to cover them.
We also improved the coding part to make the buzzer sound more sharply as the obstacle gets closer. We replaced the small LED lights with large LED strips (because the small lights are really small and the light doesn’t serve as a warning) and changed the small LED’s code into colorful LED strings’ code through online resources and the help of our professor. Yes, our blind cane glows with seven colors! Our user must be the coolest passerby on the street.
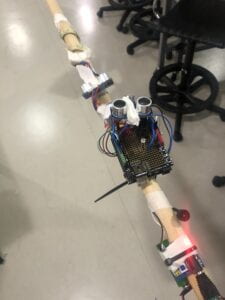
I laser-cut our names and my favorite emoji on the little box.
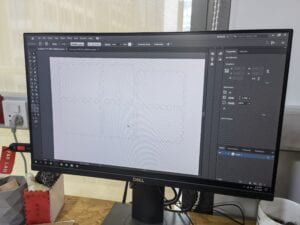
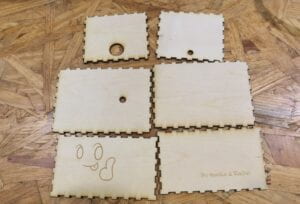
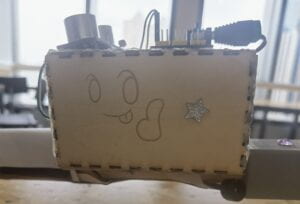
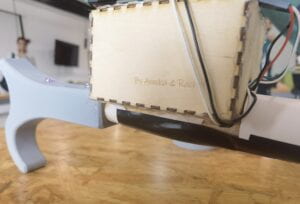
First time using laser cutting!
After the box was cut, we worked together to secure the Arduino in the box and pull the wires out of the reserved holes. Before we fixed the top of the box, we suddenly realized that there were some problems with the light sensor. It was hard to work within a tight space, but I managed to borrow a new photoresistor the next day and fit it in with pliers. However, after we fixed the top of the box so that the circuit was in a small sealed place, we discovered that the LED string was not working – it didn’t light up even when the most basic code was entered. At that time, only 14 hours before the final demonstration, we still could not solve these problems. Finally, it was Professor Andy who saved us by showing us how to check the circuit and telling us, “Never obstruct the road until you make sure everything is in order.” This was an important lesson for us.
It was the most memorable day of the whole production process – we almost turned the whole project upside down. But we also learned a lot.
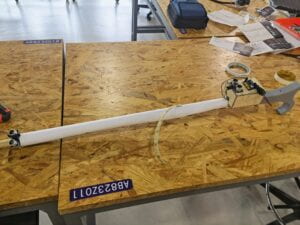
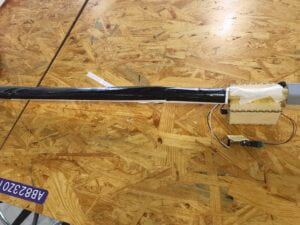
Finally, I wrapped the stick with lab cardstock and black tape, covering the wires and leaving only the sensor. At this point, it already looks like a complete work. To make it a little more unique, we purchased some stickers to decorate the stick (although they were only on display for a day before being taken down).
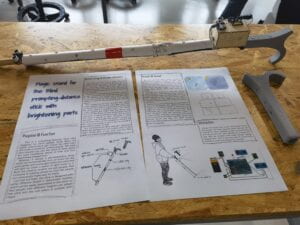 Class presentation!🥳
The final full view
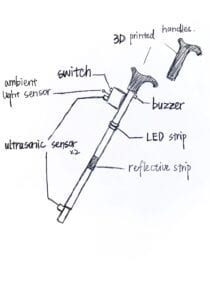
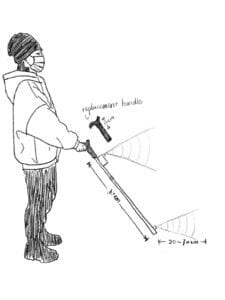
sketches and drawings
PART4: CONCLUSIONS
Based on feedback from recitation class and formal demonstrations, there are still many things we can improve. For example, the handle is harder for people with smaller hands to hold on to. As we are modeling and 3D printing for the first time, we are not that skilled in adjusting the model. Next is the detection range of the sensor, although its detection range is 2-450 cm, because of the lack of sensitivity, the sensor can only detect the distance in one direction. If the handheld angle is not right, it is easy to cause misjudgment. The sound of the buzzer is also too small to be heard in a noisy environment. If we can get better equipment, I believe we can deal with these problems.
As for the interactive part, at first, I envisioned a lot of different scenarios. For example, the buzzer should sound a sharp alarm when an object is detected approaching quickly (in the real world, that would probably be a car speeding towards you). The assembling of the main part already took most of our time, and we lack sufficient knowledge of code to implement these ideas. In recitation class, I saw a group of students create an alarm. An angry male voice will appear when it senses that the contents of the shopping bag have been taken away. This led me to wonder if I could give our stick emotions. For example, by recording different responses in advance, such as “There’s something ahead!” “You’re getting closer to it.” “Stop, don’t move!”
But anyway, we’ve done a great job! In the beginning, we felt that the project was complicated. Many of the ideas would be difficult to achieve with our abilities and could only exist in our minds. But after improving it step by step, we made a project many times more complex than the first version. Although we stayed up late and faced many difficulties and problems during the process, we finally solved them all. I learned to use a lot of software and unlocked my first experience with sawing wood, 3D printing, laser cutting, etc.
Thanks to my teammate Rachel! We really are a great team. Thanks to Professors Rudi and Andy for their selfless help, and Steve, our senior, for helping us a lot. Rachel always tried to solve all the problems by herself at first, and I encouraged her to ask for help from others with me. In the end, I was really touched by the patience and kindness of the professors, who would do everything they could to help you if you were brave enough to ask questions!
We were really sad when we took it down, so we took a video to record this last moment😢
Posters: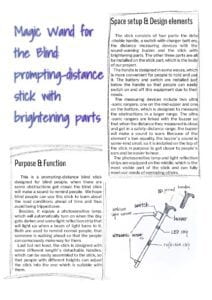
Learned to use Gravit Designer! Code: #include <FastLED.h> int beeppin = 8; int noteDuration = 100; //for the LED int LED = 13; int val = 0; #define AD5 A5 //for the forward int firstecho = 10; int firsttrig = 9; unsigned long firsttime_echo = 0; // record the pulse width by sensor returns unsigned long firstdistance = 0; // record the distance value; //for the ground const int secondtrig = 4; const int secondecho = 5; unsigned long secondtime_echo = 0; unsigned long seconddistance = 0; //For the LED #define LED_PIN 13 #define LED_TYPE WS2811 #define COLOR_ORDER GRB #define NUM_LEDS 15 CRGB leds[NUM_LEDS]; #define BRIGHTNESS 64 #define UPDATES_PER_SECOND 100 CRGBPalette16 currentPalette; TBlendType currentBlending; extern CRGBPalette16 myRedWhiteBluePalette; extern const TProgmemPalette16 myRedWhiteBluePalette_p PROGMEM; void setup() { Serial.begin(9600); pinMode(beeppin, OUTPUT); pinMode(LED, OUTPUT); delay( 3000 ); // power-up safety delay FastLED.addLeds<LED_TYPE, LED_PIN, COLOR_ORDER>(leds, NUM_LEDS).setCorrection( TypicalLEDStrip ); FastLED.setBrightness( BRIGHTNESS ); currentPalette = RainbowColors_p; currentBlending = LINEARBLEND; //for the forward pinMode(firstecho, INPUT); pinMode(firsttrig, OUTPUT); //for the ground pinMode(secondtrig, OUTPUT); // Sets the trigPin as an Output pinMode(secondecho, INPUT); // Sets the echoPin as an Input } void firstalert(unsigned i) { tone(8, 700, noteDuration); delay(i); noTone(8); delay(i); } void secondalert(unsigned i) { tone(8, 600, noteDuration); delay(i); noTone(8); delay(i); } void loop() { //for the forward digitalWrite(firsttrig, HIGH); //send pulse delayMicroseconds(80); //set pulse width with 50us(>10us) digitalWrite(firsttrig, LOW); //stop send firsttime_echo = pulseIn(firstecho, HIGH); //get return pulse width { firstdistance = (firsttime_echo * 34 / 100) / 2; //mm if (firstdistance < 700) { if (firstdistance < 200) { tone(8, 700, noteDuration); } else { firstalert(firstdistance / 2); } } Serial.print("forwardDistance: "); Serial.println(firstdistance); delay(10); }; //for the ground digitalWrite(secondtrig, HIGH); //send pulse delayMicroseconds(80); //set pulse width with 50us(>10us) digitalWrite(secondtrig, LOW); //stop send secondtime_echo = pulseIn(secondecho, HIGH); //get return pulse width { seconddistance = (secondtime_echo * 34 / 100) / 2; //mm if (seconddistance < 700) { if (seconddistance < 200) { tone(8, 600, noteDuration); } else { secondalert(seconddistance / 2); } } Serial.print("groundDistance: "); Serial.println(seconddistance); delay (10); }; //for the LED val = analogRead(AD5); // 读取电压值0~1023 Serial.print("the light is:"); Serial.println(val); // 串口查看电压值的变化 Serial.println('\n'); delay(10); if (val < 800) { // 一旦小于设定的值,LED灯关闭 fadeToBlackBy( leds, NUM_LEDS, NUM_LEDS); FastLED.show(); delay(0); } else { // 否则LED亮起 ChangePalettePeriodically(); static uint8_t startIndex = 0; startIndex = startIndex + 1; /* motion speed */ FillLEDsFromPaletteColors( startIndex); FastLED.show(); FastLED.delay(1000 / UPDATES_PER_SECOND); } } void FillLEDsFromPaletteColors( uint8_t colorIndex) { uint8_t brightness = 255; for ( int i = 0; i < NUM_LEDS; ++i) { leds[i] = ColorFromPalette( currentPalette, colorIndex, brightness, currentBlending); colorIndex += 3; } } void ChangePalettePeriodically() { uint8_t secondHand = (millis() / 1000) % 60; static uint8_t lastSecond = 99; if ( lastSecond != secondHand) { lastSecond = secondHand; if ( secondHand == 0) { currentPalette = RainbowColors_p; currentBlending = LINEARBLEND; } if ( secondHand == 10) { currentPalette = RainbowStripeColors_p; currentBlending = NOBLEND; } if ( secondHand == 15) { currentPalette = RainbowStripeColors_p; currentBlending = LINEARBLEND; } if ( secondHand == 20) { SetupPurpleAndGreenPalette(); currentBlending = LINEARBLEND; } if ( secondHand == 25) { SetupTotallyRandomPalette(); currentBlending = LINEARBLEND; } if ( secondHand == 30) { SetupBlackAndWhiteStripedPalette(); currentBlending = NOBLEND; } if ( secondHand == 35) { SetupBlackAndWhiteStripedPalette(); currentBlending = LINEARBLEND; } if ( secondHand == 40) { currentPalette = CloudColors_p; currentBlending = LINEARBLEND; } if ( secondHand == 45) { currentPalette = PartyColors_p; currentBlending = LINEARBLEND; } if ( secondHand == 50) { currentPalette = myRedWhiteBluePalette_p; currentBlending = NOBLEND; } if ( secondHand == 55) { currentPalette = myRedWhiteBluePalette_p; currentBlending = LINEARBLEND; } } } // This function fills the palette with totally random colors. void SetupTotallyRandomPalette() { for ( int i = 0; i < 16; ++i) { currentPalette[i] = CHSV( random8(), 255, random8()); } } void SetupBlackAndWhiteStripedPalette() { // 'black out' all 16 palette entries... fill_solid( currentPalette, 16, CRGB::Black); // and set every fourth one to white. currentPalette[0] = CRGB::White; currentPalette[4] = CRGB::White; currentPalette[8] = CRGB::White; currentPalette[12] = CRGB::White; } // This function sets up a palette of purple and green stripes. void SetupPurpleAndGreenPalette() { CRGB purple = CHSV( HUE_PURPLE, 255, 255); CRGB green = CHSV( HUE_GREEN, 255, 255); CRGB black = CRGB::Black; currentPalette = CRGBPalette16( green, green, black, black, purple, purple, black, black, green, green, black, black, purple, purple, black, black ); } const TProgmemPalette16 myRedWhiteBluePalette_p PROGMEM = { CRGB::Red, CRGB::Gray, // 'white' is too bright compared to red and blue CRGB::Blue, CRGB::Black, CRGB::Red, CRGB::Gray, CRGB::Blue, CRGB::Black, CRGB::Red, CRGB::Red, CRGB::Gray, CRGB::Gray, CRGB::Blue, CRGB::Blue, CRGB::Black, CRGB::Black };
