NoC Project B: Beyond the Ink-wash
Beyond the Ink-wash
P5js link: p5.js Web Editor | Beyond Ink-wash (p5js.org)
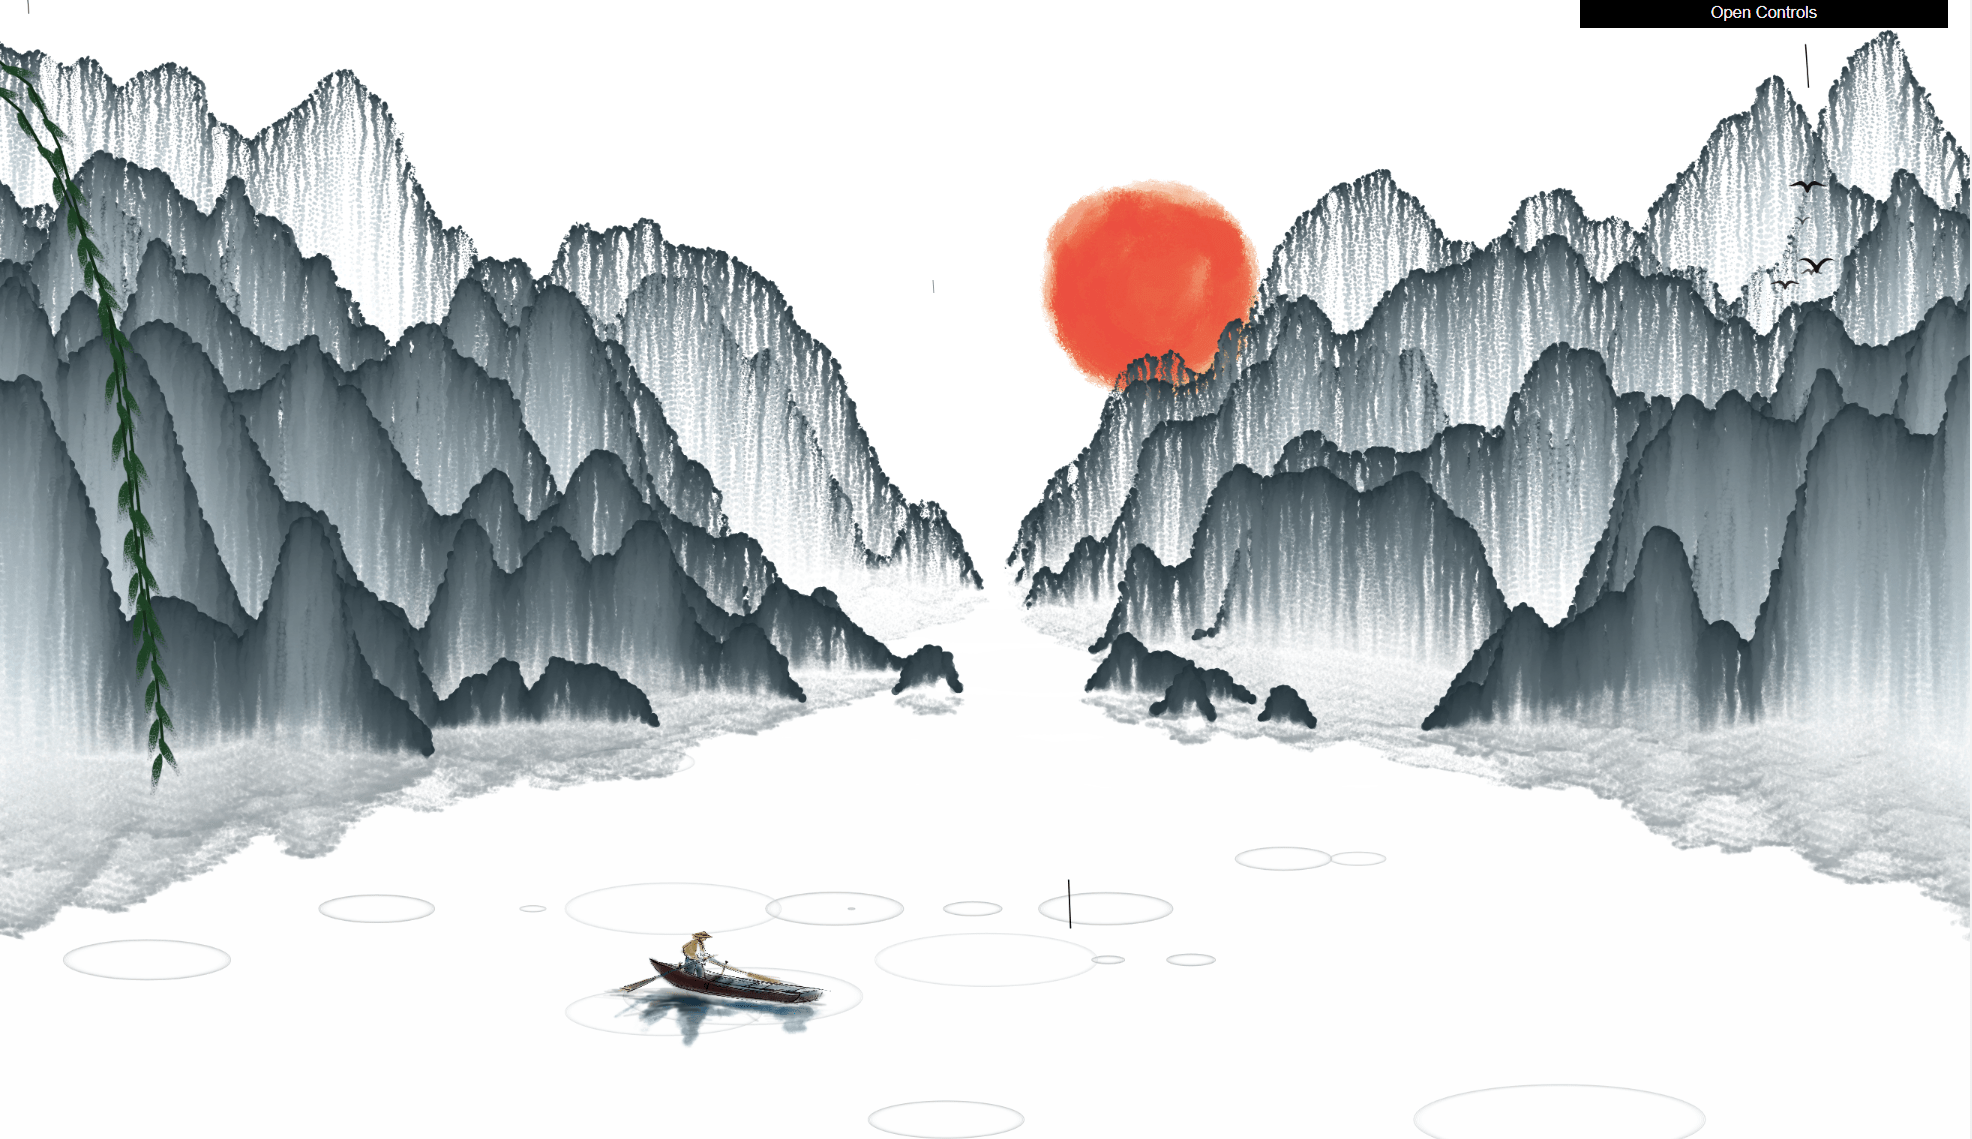
Idea: enjoy the collision between modern and the odd
Before we get to the topic, please first see these two photos.
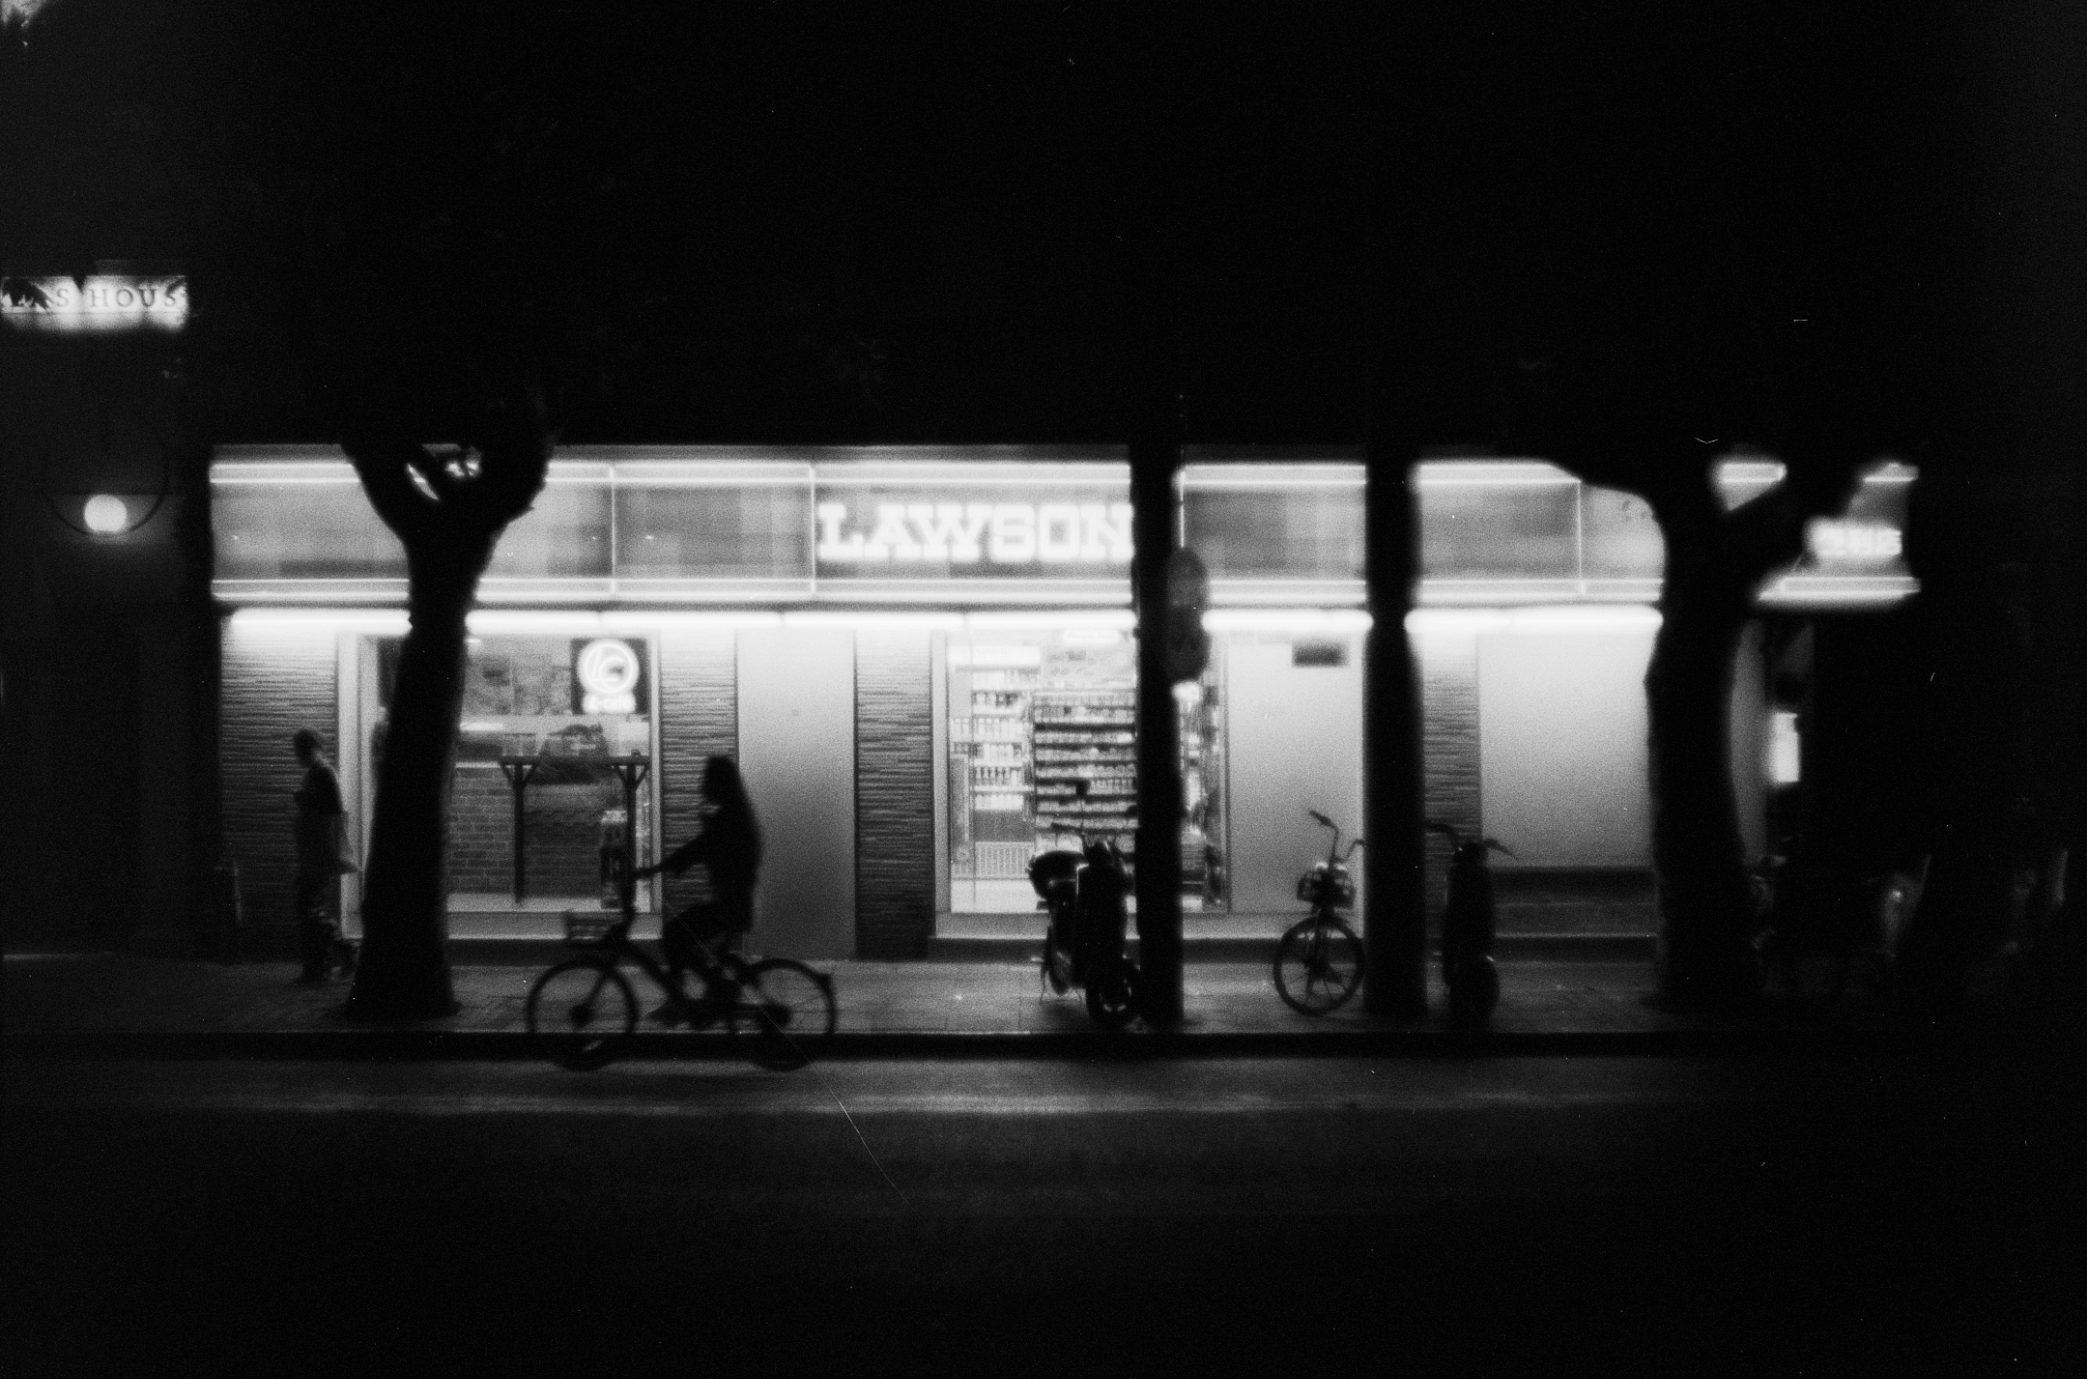
In this photo, the major element is the modern convenience store in the 21st century. However, we can feel that a blur filter on the photo makes it have a quite dream-like effect. This photo is taken with the Minolta xd camera which is a film camera from 40 years ago with a lens from 60 years ago. When modern scenes have encountered old technologies, I can always feel the enjoyable contract between each other.
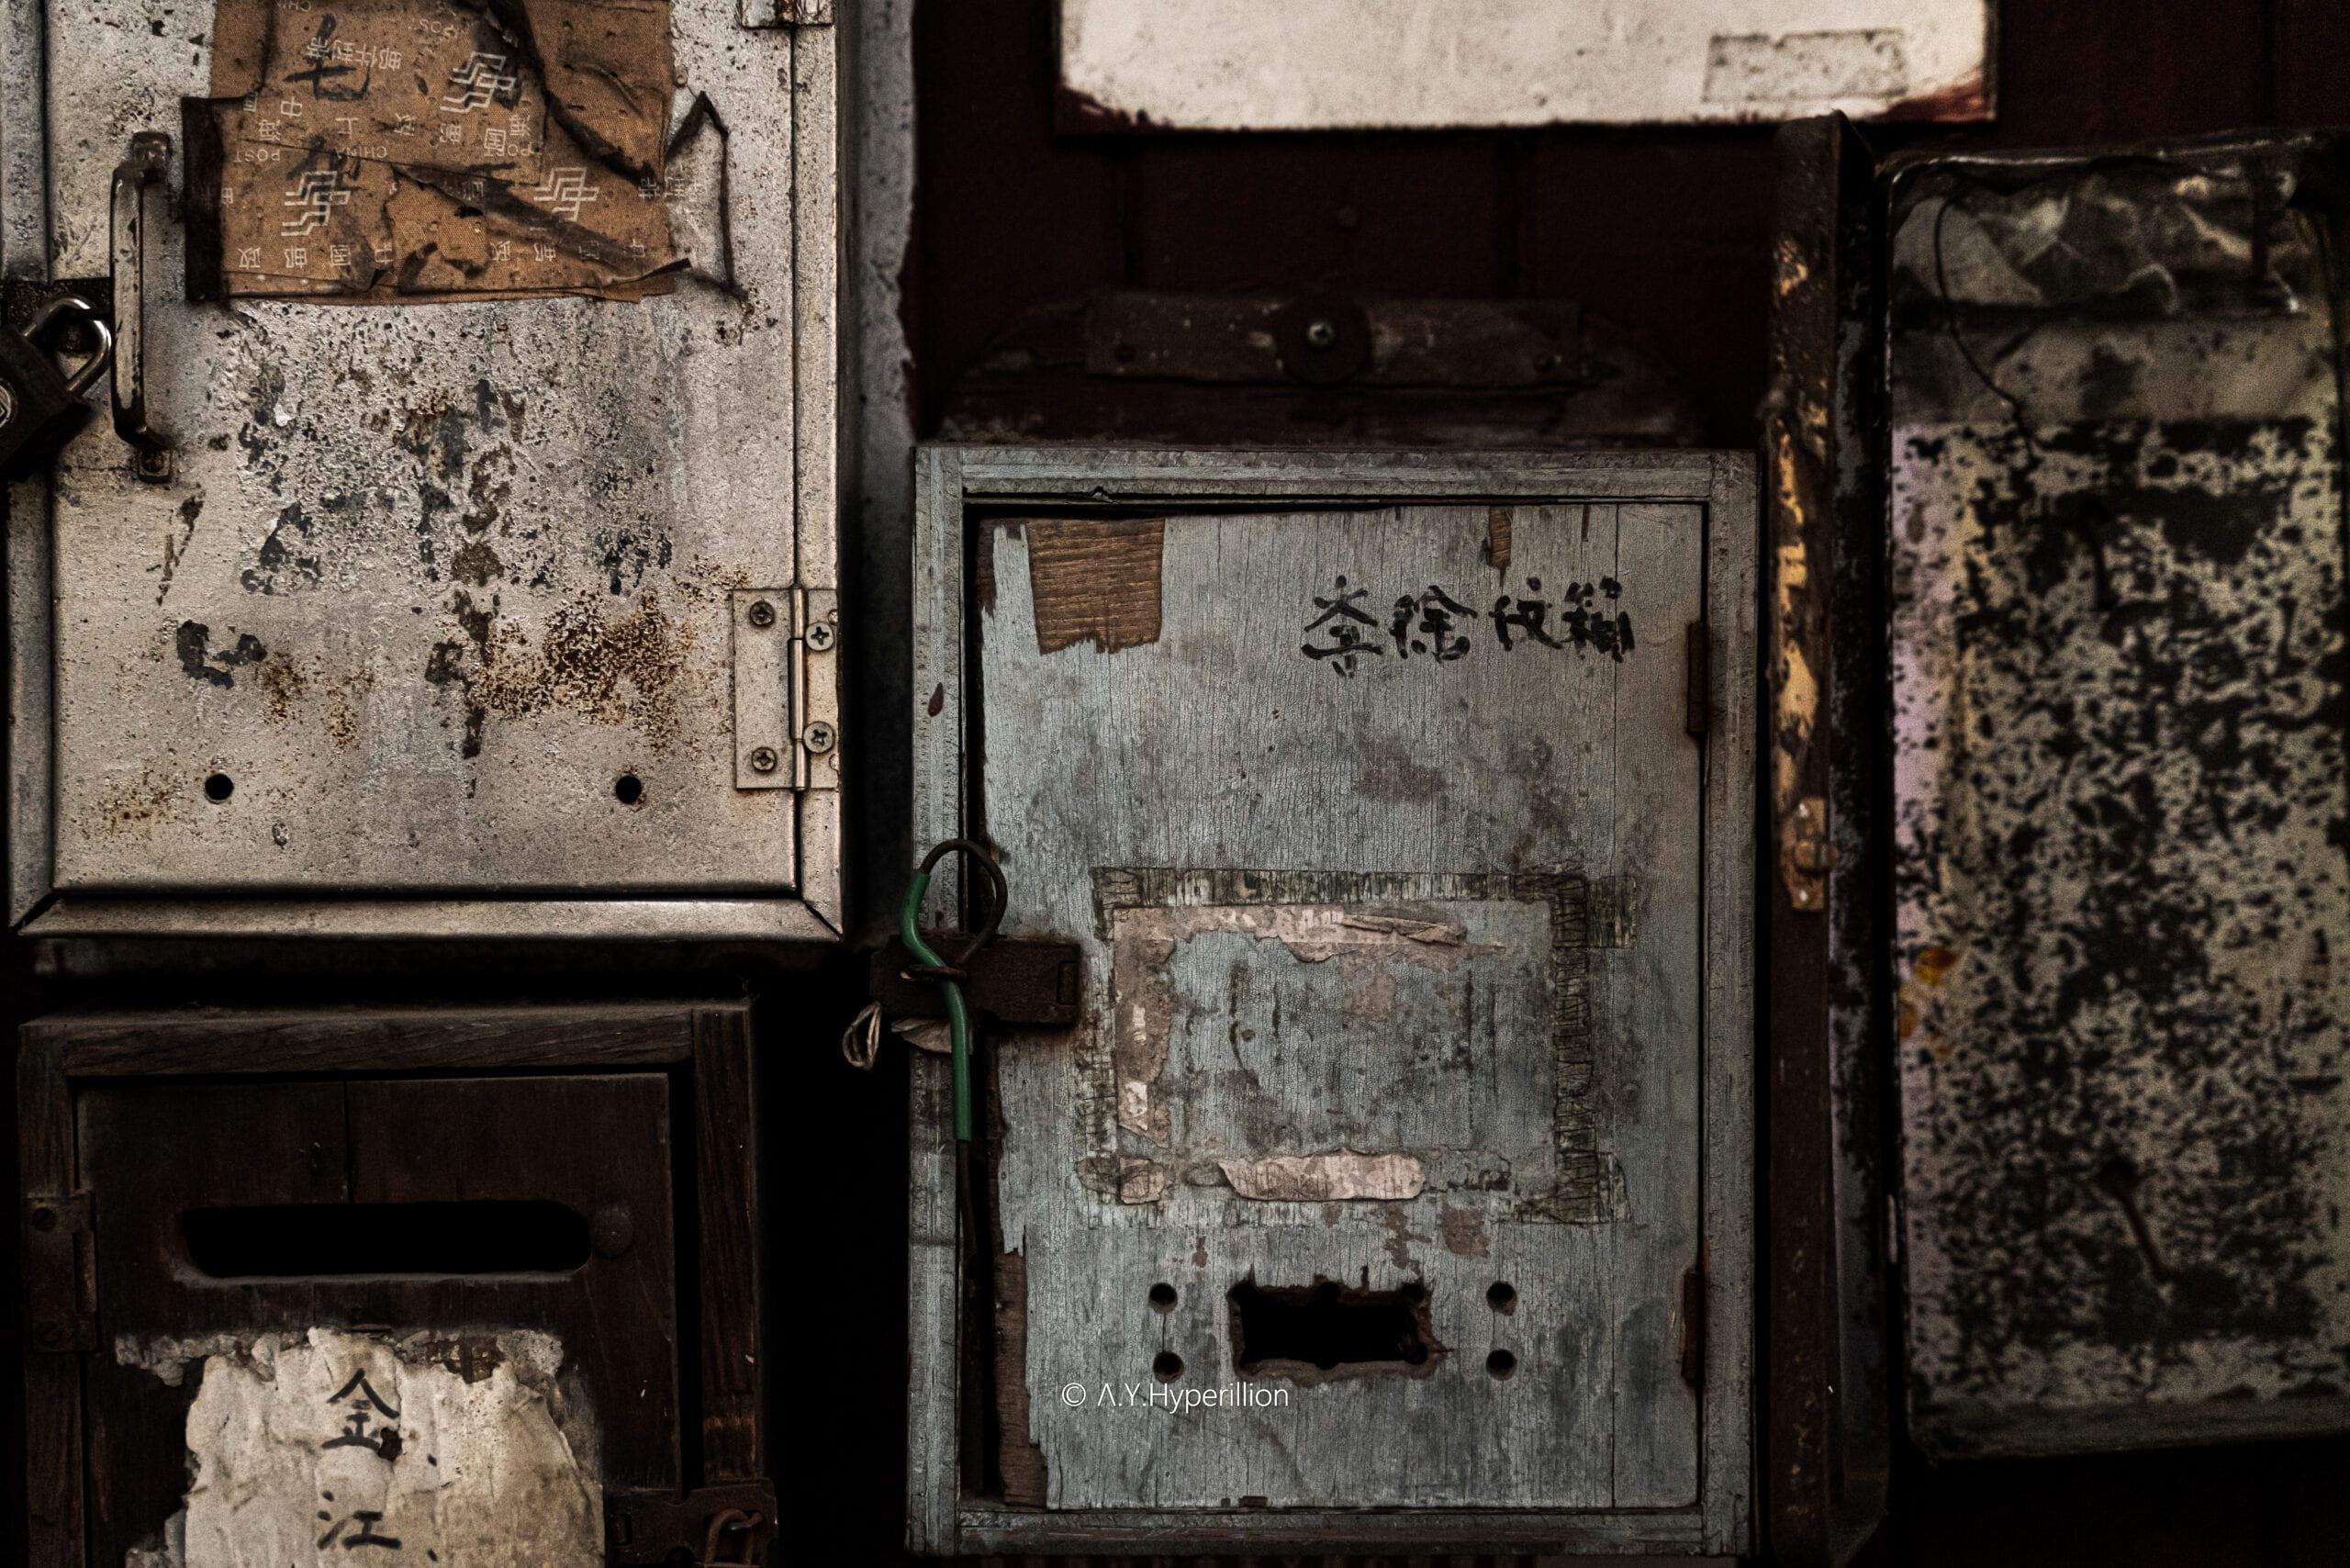
This photo is on the opposite side. This photo is of an old Shanghai mailbox from the last century. However, it is taken by one of the state-of-the-art cameras that has an extremely high resolution and details.
As for the Ink-wash paintings, it already has thousands of years of history. However, the coding can be treated as the product of contemporary invention. The collision between the old and the new is the main reason why I doing the project.
Also, since I have a strong interest in Chinese traditional calligraphy and aesthetic history, I chose the topic of doing a digital duplication of Chinese traditional ink-wash painting work.
To be more specific on the project itself, the project is mainly from the perspective of the Chinese traditional ink-wash painting aesthetics but performed digitally. I want to make this project able to reproduce the beauty of the ink-wash paintings and make everyone able to enjoy the painting procedure.
Polishing~
This project can be treated as a more comprehensive and completed version of the NoC Project A: Generative & Interactive Ink-wash – A.Y. Hyperillion (nyu.edu). Since I have received many suggestions when presenting the previous one, the whole procedure is mainly about adding elements making the whole thing more realistic, and pushing it to perfect.
Before coding: Design
To be honest, I’m not that good at painting. To make the project embed the most simple ink-wash painting aesthetics, I chose a human-made ink-wash painting as my visual reference.
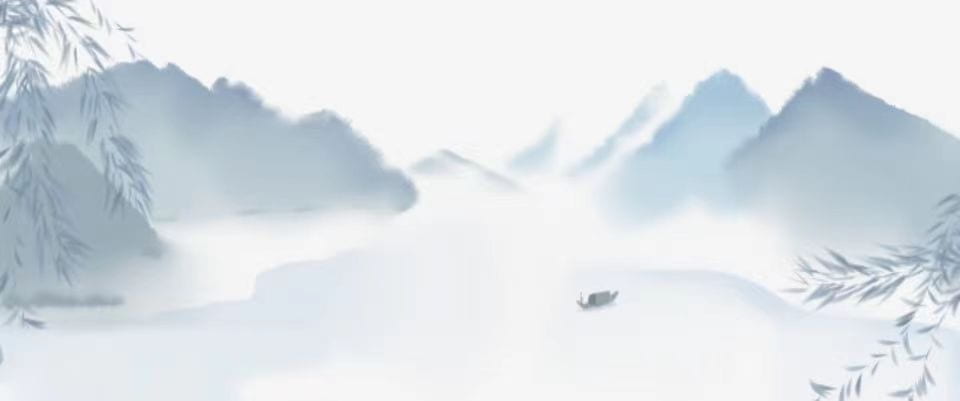
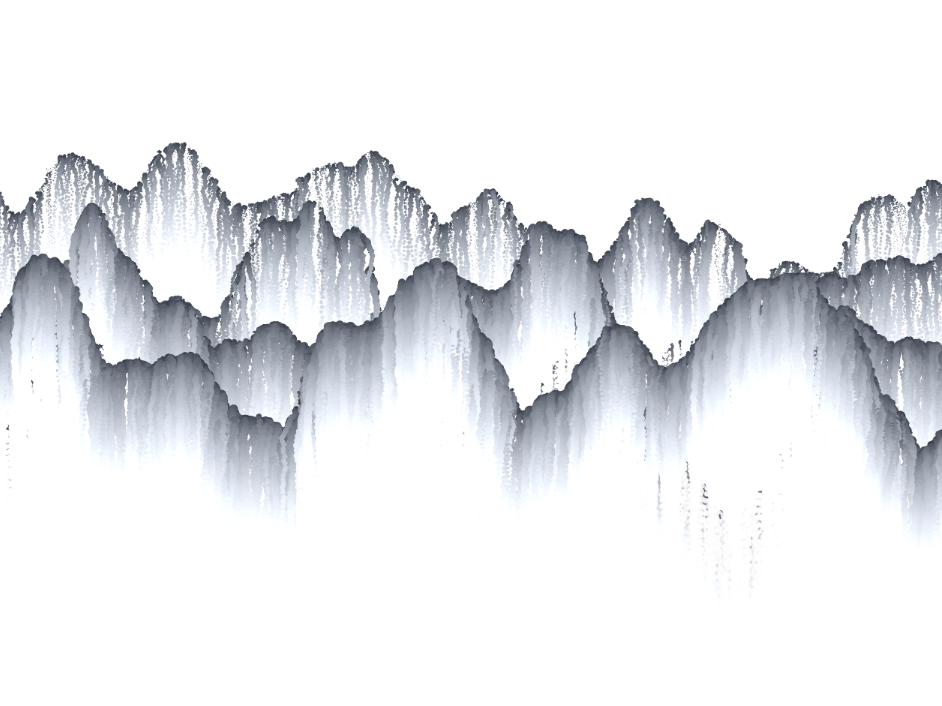
From this picture, we can see four main elements. The first element is the key component of the ink-wash aesthetics which is the mountains in the background. The mountains are covered by the light fog, giving the audience a sense of soft silence. It also has a significant brushwork on the mountain’s edge, which becomes the most challenging part of reproduction. After asking Professor Moon, he introduces the particle strategy to me. Which uses small random-size particles to simulate the ink and the brushwork.
Besides the mountain, is the lake (or river). The lake is quite hard to reproduce on the flowing action. When the water is still, it becomes almost invisible which is quite hard to make the audience realize its existence. To solve the above problems, I came up with an amazing idea which is when the weather is rainy, the raindrops can easily interact with the water and we can use ripples to make the water flow.
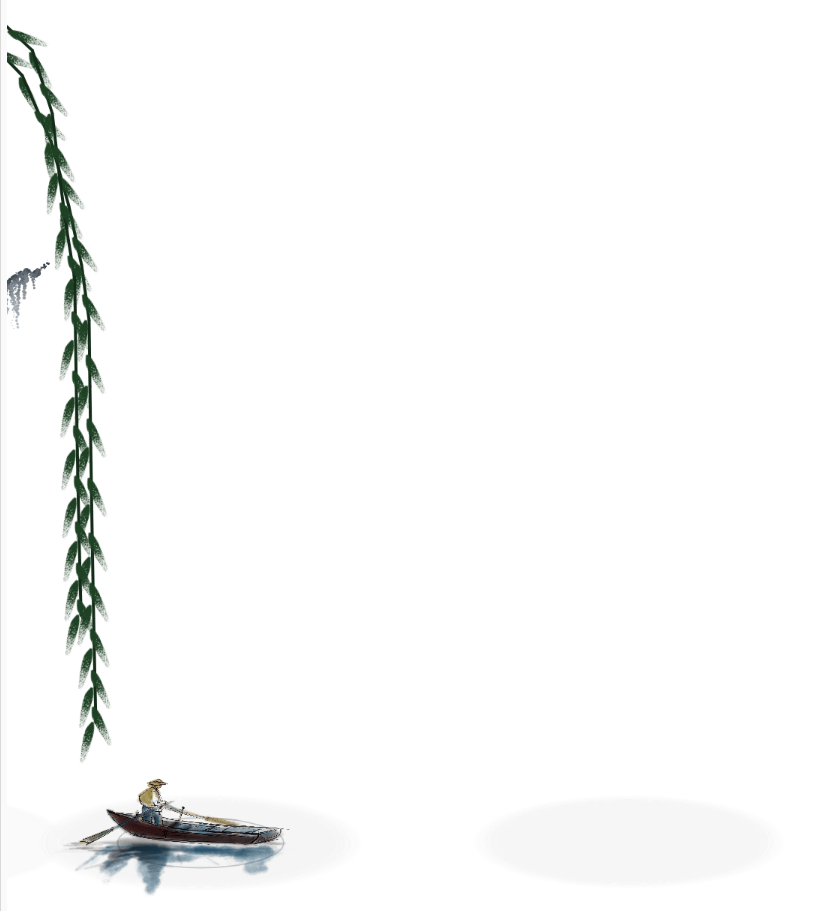
They are the willow leaves. The willow leaves are another challenge that I’ve encountered on this project. I decided to use a spring and ball structure to code the willow due to its hanging features. But how to make the willow leaves bend on a perfect curve is the thing that we need to consider. Professor Moon gave me the answer which is we can add a force on the top balls. This does not need a great effort and can perfectly achieve the effect.
The last element is the boat. The boat can be treated as one of the “点睛之笔” (the element that makes the project shinning) in this project. The boat can bring an active and life-like element to the whole frame. The action I’ve assigned to the boat is that it will flow up and down on the lake and create satisfying ripples.
Coding 01: Mountain but detailed particles
Since this project is hugely object-oriented, it’s a better option for me to divide the coding process into different object parts. And the first one is the mountain.
The brushwork comes first.
As I’ve mentioned above, I use ink particles to form this effect therefore the first action is creating an InkParticle object:
class InkParticle {
  constructor(x, y, r = 10) {
    this.pos = createVector(x, y);
    this.rad = r;
    //
    this.acc = createVector(0, 0);
    this.vel = createVector(0, 0);
    this.r = 51;
    this.g = 58;
    this.b = 69;
    //
    this.lifespan = (height / 1.5 - y) / 150; // 100%
    this.lifeReduction = random(0.006, 0.018);
    this.isDone = false;
    this.trans = 255 * this.lifespan;
    //
    return this;
  }
To initialize the class, I first need to initialize it with several variables. I assign the position, particle size(radius), acceleration, velocity, color, lifespan, status(isDone), and transparency to it. To make the particles can perform like the liquid, I make the new particles generate on the right side of the past one while the old particles will flow down to simulate the effect of ink.
From the final effect, we can see that it is quite realistic.
Coding 02: Rain and the Lake
As for the rain part, I mostly follow the previous attempt on my Mini-project 2. If you are interested in the coding procedure please take a look at that blog 😉
When comes to the lake, it’s hard to represent water without simulating the flow effect, I directly utilize the transparency of the background to make the place of the ripple have a deeper color to draw the boundaries of the lake. This can also make the lake generative and make the user a deeper sense of interaction.
For the codes:
pg = createGraphics(windowWidth, windowHeight); //pg for ripple in lakes, semi-transparent background

...

display() {
if (this.isDone) {
//Ripple
pg.push();
pg.noStroke();
pg.fill(245, ((height * 2 - this.doneY) * 255) / height);
pg.translate(this.pos.x, this.pos.y);
pg.scale(this.scale / 2);
pg.ellipse(
0,
0,
(this.pos.y - this.doneY) * 0.5,
(this.pos.y - this.doneY) * 0.15
);
pg.pop();
Coding 03: Willow makes the Frame Agility
The willow effect is both easy and hard to achieve. To say it’s easy is because I’ve already familiar with the ball-spring architecture when making the previous mini-project. Say it’s hard because we have to simulate the perfect curve of the branch.
To make the willow curve, I directly add the force on the balls which is the connection part between each spring.
balls0[0].firm(-25, 40);

balls0[1].applyForce(createVector(1, -0.7));
balls0[2].applyForce(createVector(0.5, 0));
balls0[3].applyForce(createVector(0.2, 0));
balls0[4].applyForce(createVector(0.2, 0));
balls0[5].applyForce(createVector(0.2, -1));
With this force, the willow can have a perfect curve:
Coding 04: Boat, the Diamond of the Ring
Without the boat, the project fairly meets the requirement and applies a lot of force. However, the whole frame is quite empty and has a large empty space. The boat can perfectly balance the whole frame and make it has a balanced aesthetics.
To be more specific on the boat itself, I didn’t use objects but directly calculate and apply force on them.
function boat() {
if (frameCount % round((2 - abs(boatSpd)) * 20) == 0) {
d = new Drop(boatX + 110, height * 0.65 + 80, [0, 0]);
d.isDone = true;
d.scale = 0.93;
// d.doneY = height * 0.65;
drops.push(d);
}
push();
translate(boatX, height * 0.65 + cos(noiseIndex * 100) * 5);
scale(0.06);
rotate((noise(noiseIndex) - 0.5) * ui.rainAmount);
image(fishboat, -100, -50);
pop();
if (boatX <= width * 0.33) {
boatAcc = noise(noiseIndex) - 0.3;
} else {
boatAcc = noise(noiseIndex) - 0.5;
}
boatSpd += boatAcc / 300;

if (addWind) {
boatSpd += mouseVel.x / 1000;
}
boatSpd += randomWind.x / 300;
boatSpd -= boatSpd / 100;
ui.boatSpeed = boatSpd * 10;
boatX += boatSpd;
}
after applying these codes, the boat is able to follow the mouse and accelerate on the lake.
Polishing 01: Polishing Hills is the “Start Point”
The first thing that needs to be modified is the hills. In the last project, the hill is mostly parallel to each other which only forms a planar feeling to the users. From the feedback of Professor Moon, it’s better to make the height of the hills related to the X position of the particles. This modification will lead the hill to go down when it reaches the center of the canvas and go up when it leaves the center of the canvas.
This modification is quite simple to achieve from the perspective of coding.
let i = new InkParticle(
hillX,
upper + ui.inkSize * 65 - abs(width / 2 - hillX) / 2 - 30,
random(ui.inkSize - 2, ui.inkSize + 2)
);
inkParticles.push(i);
This code simply modifies the starting point of the particles. It is based on the initial height of the mountain and decreased by the absolute value of the current X position minus half of the width.
In addition, the Y position is related to the inkSize which will make the mountain decrease in height when the size of the particles becomes larger and larger. This is also helpful for constructing a more realistic and stereoscopic visual effect.
Moreover, the modification of the hills has also covered the bottom value of the hills. The bottom value is related to another noise value which will build the height of the “water” and make the mountain disappear there:
ui.endPosition =
height / 2 + ui.inkSize * 30 + (noise(noiseIndex) - 0.5) * 35 - 40;
The color and the transparency of the hills have also been redesigned. I use the map to make the color and the transparency related to the height of the mountain(startPoint – endPoint):
this.trans = map(this.pos.y, this.initialHeight, ui.endPosition, 200, 10);
this.r += (height - this.pos.y) / 200;
this.g += (height - this.pos.y) / 200;
this.b += (height - this.pos.y) / 200;
After the modification, the mountain will look like this:
Polishing 02: Water Reflection
The water reflection is another important modification of this version. For the last version, the water reflection is simply the mirrored image of the current mountain. However, this is completely unrealistic. With the help of Professor Moon, we made the water reflection together.
Our first idea is to modify the position of the pixels of the water reflection graphic layer. However, when we were practicing this method, we found the problem that this will hugely influence the performance of the piece since this will relocate over a million pixels to draw the reflection. Then I come up with the idea that we can draw the different water reflections together with the hills since we can have the x and y position of the particles at that time. In this case, the water reflection is also drawn by particles but it will be influenced by the sin value as well:
display() {
if (this.pos.y < ui.endPosition) {
extraCanvas.push();
extraCanvas.translate(this.pos.x, this.pos.y);
extraCanvas.noStroke();
extraCanvas.fill(this.r, this.g, this.b, this.trans);
extraCanvas.circle(0, 0, this.rad);
extraCanvas.pop();

let x = sin(this.pos.y * 20 + frameCount * 5) * 5;
extraExCanvas.push();
extraExCanvas.translate(
this.pos.x,
ui.endPosition * 1.5 - this.pos.y / 2 + 5
);
extraExCanvas.noStroke();
// extraExCanvas.translate(0,ui.inkSize * 27)
extraExCanvas.fill(this.r, this.g, this.b, 20 + ui.inkSize * 3);
extraExCanvas.circle(x, 0, this.rad / 2);
extraExCanvas.pop();
}
Polishing 03: Birds Fill the Sky
Here we use a flocking system to deploy the birds.
The first step is to code the flow field of the birds:
// draw and update the flow field;
for (let r = 0; r < rows; r++) {
for (let c = 0; c < cols; c++) {
let x = c * RESOLUTION - 0.25 * width;
let y = r * RESOLUTION;

// angle
let xFrq = x * FREQ_POS + frameCount * FREQ_TIME;
let yFrq = y * FREQ_POS + frameCount * FREQ_TIME;

let noiseValue = noise(xFrq, yFrq); // 0 to 1
let angle;
angle = map(noiseValue, 0, 1, -PI / 4, PI / 4); // *** why 6?
if (r >= 8) {
if (angle >= 0) {
angle = -angle;
}
}
angles.push(angle);

push();

// draw grid
translate(x, y);
fill(255, 0);
stroke(0, 100);
if (ui.birdPath) {
rect(0, 0, RESOLUTION, RESOLUTION);
}
// diplay line
translate(RESOLUTION / 2, RESOLUTION / 2);
let vector = p5.Vector.fromAngle(angle);
vector.mult(RESOLUTION / 2);
stroke(0);
if (ui.birdPath) {
line(0, 0, vector.x, vector.y);
}

// draw index
let index = angles.length;
fill(0);
noStroke();
if (ui.birdPath) {
text(index, -15, -5);
}
pop();
}
}
For this code, it is able to divide the canvas into several grids which are able to lead the direction of the birds. They will assign different continuous angles in vectors and give them to the birds.
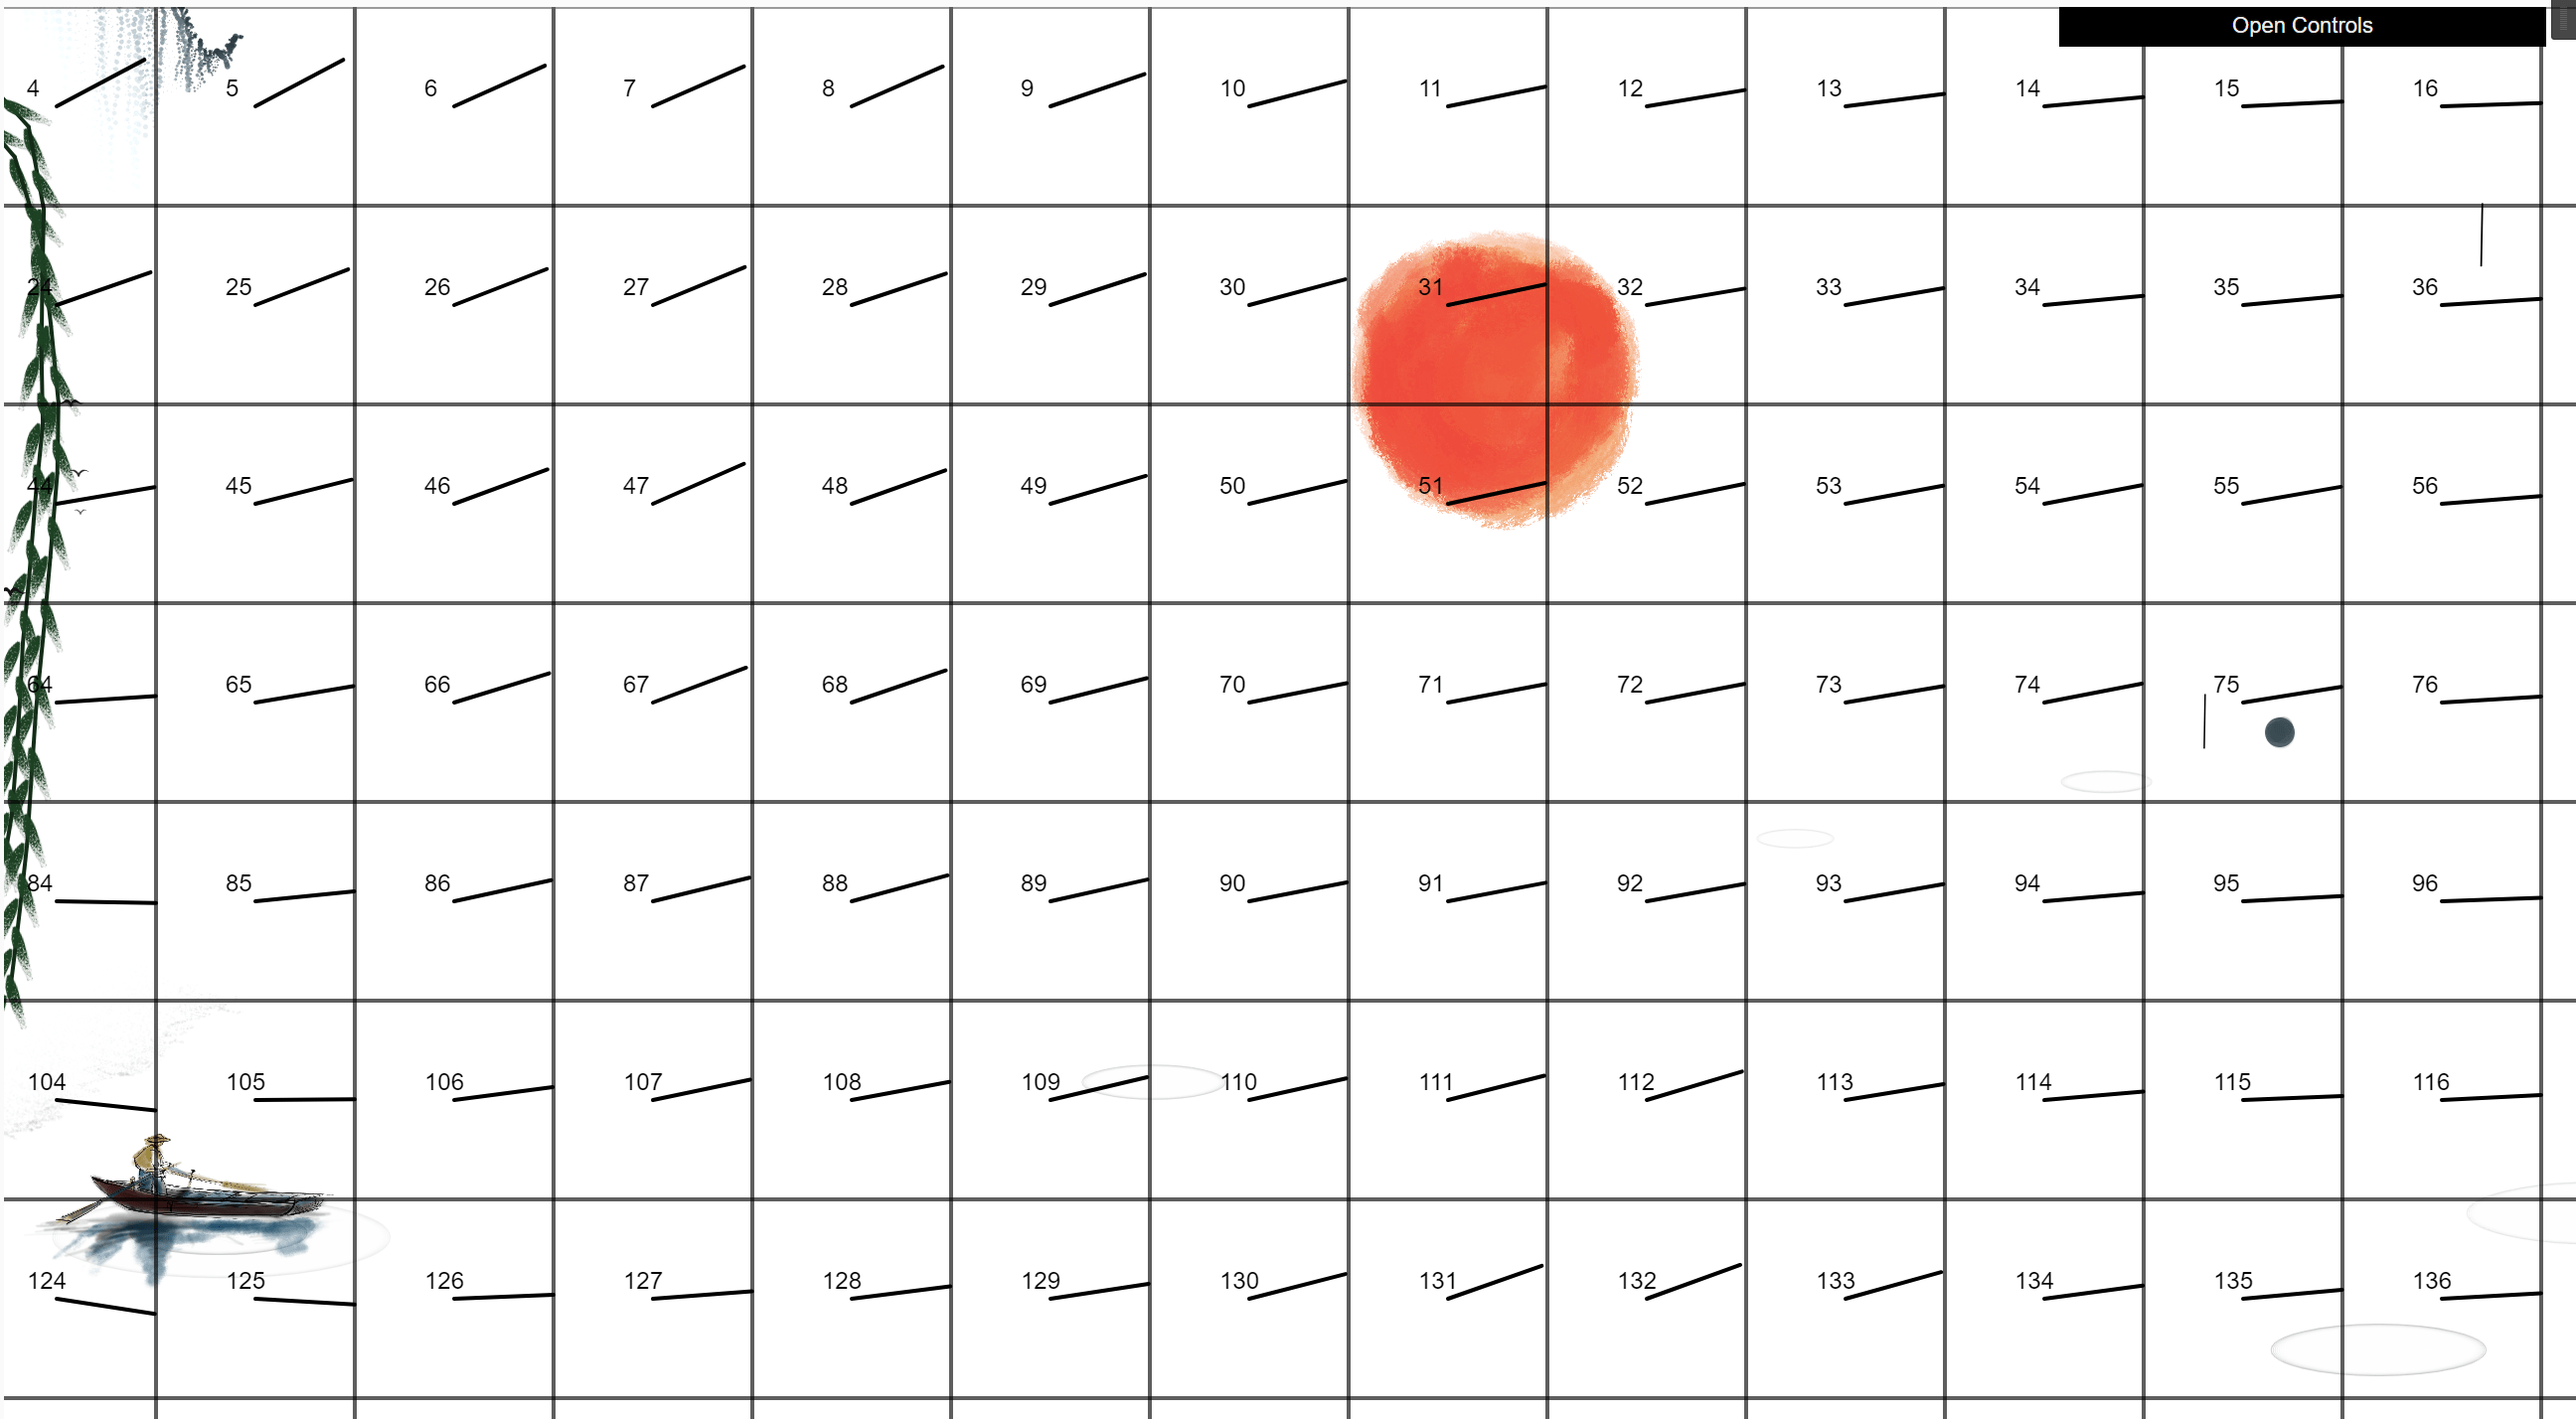
Then is to deploy the autonomous vehicle system which will receive the parameters from the flow field following these paths.
class Vehicle {
constructor(x, y) {
this.pos = createVector(x, y);
this.vel = createVector();
this.acc = createVector();
//
this.mass = 1;
this.size = 20;
//
this.angle = 0;
//
this.maxSpeed = ui.rainAmount / 60 + 0.2;
this.maxSteerForce = 0.1;
//
this.die = false;
this.size = random(0.3, 0.7);
this.phase = random(1);
}
attractedTo(target) {
let vector = p5.Vector.sub(target, this.pos);
vector.mult(0.05);
this.applyForce(vector);
//
this.vel.mult(0.9);
}
flow(angle) {
let desiredVel = p5.Vector.fromAngle(angle); // direction
desiredVel.mult(this.maxSpeed); // desire

let steerForce = p5.Vector.sub(desiredVel, this.vel);
steerForce.limit(this.maxSteerForce);

this.applyForce(steerForce);
}
seek(target) {
let desiredVel = p5.Vector.sub(target, this.pos);
desiredVel.normalize(); // direction
desiredVel.mult(this.maxSpeed); // desire

let steerForce = p5.Vector.sub(desiredVel, this.vel);
steerForce.limit(this.maxSteerForce);

this.applyForce(steerForce);
}
update() {
this.vel.add(this.acc);
this.pos.add(this.vel);
this.acc.mult(0);
//
this.angle = this.vel.heading();
}
applyForce(f) {
if (this.mass <= 0) {
console.log("Wrong mass");
return;
}
let force = f.copy();
force.div(this.mass);
this.acc.add(force);
}
reappear() {
if (this.pos.x < 0) {
// this.die = true;
} else if (this.pos.x > width + 20) {
this.die = true;
}
if (this.pos.y < -20) {
this.die = true;
} else if (this.pos.y > height + 20) {
this.die = true;
}
}
The last step is to code the animation of the birds:
display() {
push();
translate(this.pos.x, this.pos.y);
// rotate(this.angle);
noStroke();
fill(20, this.size * 500);
let zoom = map(
abs(this.pos.x - width / 3),
0,
width / 2,
-this.size,
-this.size / 4
);
scale(this.size + zoom);
let cosValue =
cos((noiseIndex * (1 - this.size) * 2 + this.phase) * 300) + 1;
let sinValue = cos((noiseIndex * (1 - this.size) * 2 + this.phase) * 300);
translate(0, sinValue * 5);
scale(0.5);
noStroke();
beginShape();
curveVertex(0, 2);
curveVertex(0, 2);
curveVertex(3, 0);
curveVertex(10, -15 + cosValue);
curveVertex(20, -25 + cosValue * 6);
curveVertex(30, -30 + cosValue * 12);
curveVertex(40, -30 + cosValue * 14);
curveVertex(50, -25 + cosValue * 8);
curveVertex(40, -32 + cosValue * 12);
curveVertex(30, -35 + cosValue * 10);
curveVertex(20, -34 + cosValue * 5);
curveVertex(10, -28 + cosValue);
curveVertex(0, -17);
curveVertex(0, -17);
curveVertex(-10, -28 + cosValue);
curveVertex(-20, -34 + cosValue * 5);
curveVertex(-30, -35 + cosValue * 10);
curveVertex(-40, -32 + cosValue * 12);
curveVertex(-50, -25 + cosValue * 8);
curveVertex(-40, -30 + cosValue * 14);
curveVertex(-30, -30 + cosValue * 12);
curveVertex(-20, -25 + cosValue * 6);
curveVertex(-10, -15 + cosValue);
curveVertex(-3, 0);
curveVertex(0, 2);
curveVertex(0, 2);
endShape();
pop();
}
}
Reflection: We All Have the Ability to Reproduce the Nature
In the project, I allow the users to control the ink which is the mountain in the background. The users are able to control the size, speed, the height of the particles and can make a splash effect if they wish. They can also clear the canvas and remake their own ink-wash paintings. In addition, the user can also control the willow and the boat to adjust them into a proper position. The user can also take a screenshot of the painting with a single button.
One of the reasons why I am making this system is because I am not that good at painting. However, I yearn to create a good-looking painting on my own. So I decided to use coding and make me and the people who have the same will as I gain the ability to create a painting on their own.
After making this project, I think I partly achieved my will. I see my users can create a unique ink-wash style painting on their own. They are using the painting as their slide background or the wallpapers of their computer. This makes me satisfied and genuinely feel honored for my project.
Also, this tells us the fact that one of the most powerful systems and the most valuable treasure that we all own is nature itself.


