IxLab Recitation 10: Image & Video
Design
When doing this recitation work, I want to utilize all of my devices like switches, buttons, and potentiometers to influence the video. So I took all the things that I could find in my kit.
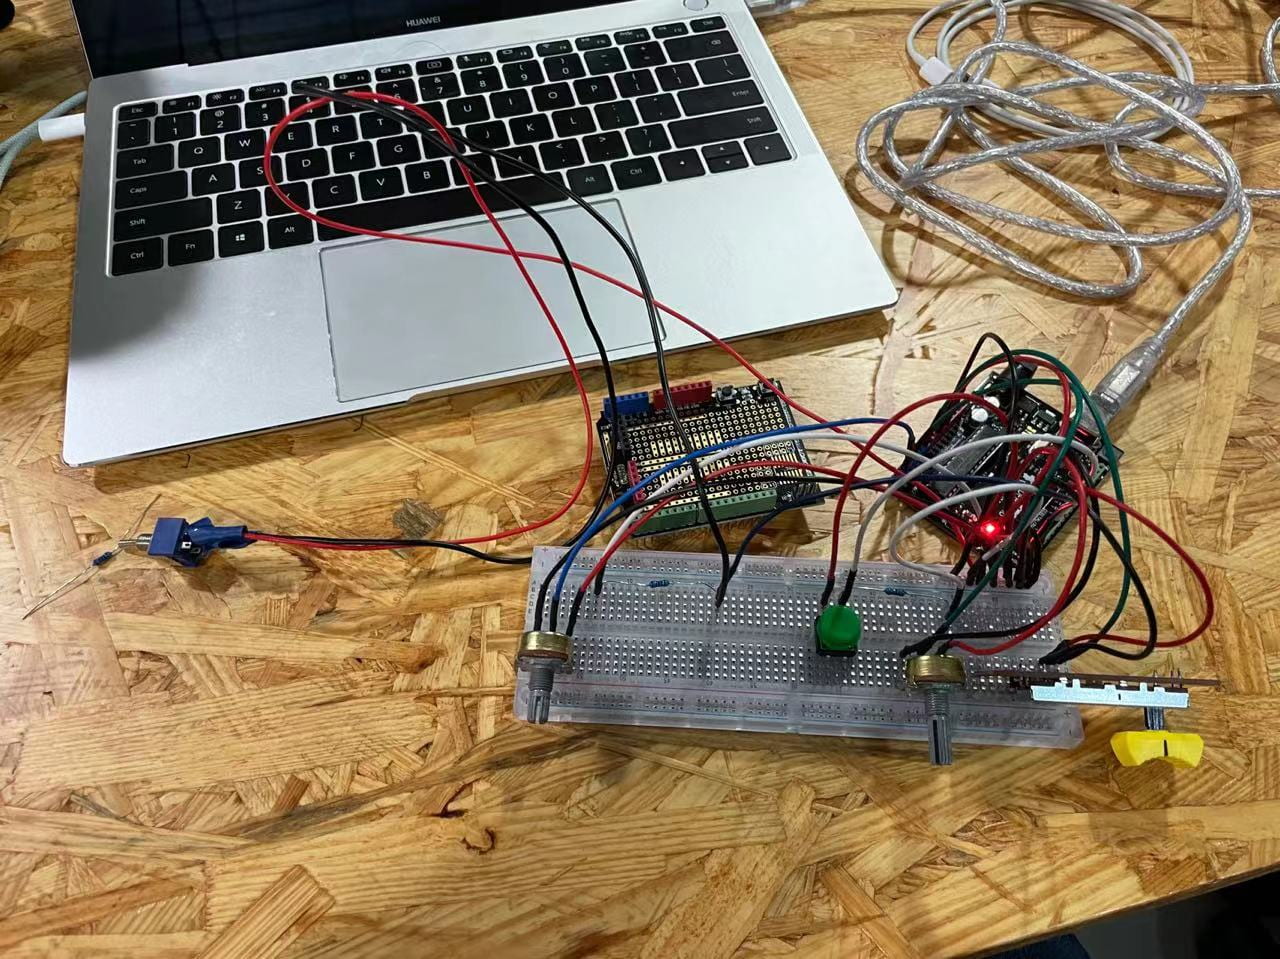
In my kit, I found 1 switch, 1 button, and 3 potentiometers. Based on the things that I can use, I decide to use 2 potentiometers to control the x-axis and y-axis of the video. The switch is for the on and off of the video on the screen. The button and a potentiometer are set to be the filter of the video, the button can change different filters while the potentiometer can change the density of the filter on the video.
Building
Then is building the circuits. At first, to make sure everything goes well, I decided to use a simple program test if all the components work properly. Then, I first connect the circuit and Arduino.

Here, the first problem occurred. When I connect the Arduino to my computer, I cannot upload my program to the board. However, when I change to another board, I found that I was able to upload the program. I thought it was caused by my Arduino board and decided to change the board. At that moment, I made my last attempt which is unplugging all of the cables on the board. This time, the Arduino can upload the program successfully. It should be the problem with my circuits which may have a short connection somewhere that made this happen.
After that, the test goes fluently. The Arduino can recognize the parameters of the input and successfully transfer the data to the processing.
Here’s the Arduino Code:
#include "SerialRecord.h"

SerialRecord writer(5);

void setup() {
  Serial.begin(9600);
}

void loop() {
  int voltage0 = analogRead(A0);
  int voltage1 = analogRead(A3);
  int voltage2 = analogRead(A5);
  int sw0 = digitalRead(2);
  int sw1 = digitalRead(3);
  // int value0 = map(voltage0, 0, 1024, 0, 255);
  // int value1 = map(voltage1, 0, 1024, 0, 255);
  writer[0] = voltage0;
  writer[1] = voltage1;
  writer[2] = voltage2;
  writer[3] = sw0;
  writer[4] = sw1;
  writer.send();
  delay(20);
}
Here, the building process has almost finished.
Coding
Then comes the coding part. Since the Arduino code didn’t need to modify, the main work focuses on the Processing part. The first function is to use a switch to control the video on and off. I set an if statement to control the display code for the camera:
Then is using two potentiometers to control the width and the height of the image that has been displayed. I first map the parameters from the potentiometers to the width and height of the window. Then I directly set the mapped variables as the width and the height of the video:
float mp1 = map(p1, 0, 1024, 0, width);
float mp2 = map(p2, 0, 1024, 0, height);

if (s1 == 1) {
  image(cam, 0,0,mp1, mp2);
}
As for the filter, I set the first button to change the random color of the filter while the other potentiometer is set to change the transparency of the fill() color. Here’s the code:
if (s0 == 1 && ps0 == 0) {
  colorR = int(random(255));
  colorG = int(random(255));
  colorB = int(random(255));
}

fill(colorR, colorG, colorB, trans);
rect(0,0,width,height);
ps0 = s0;
Then, when I thought that everything will go fluently, the second problem came. When I turned on all the stuff, I found the process is very lag. I need to wait for several seconds to control the on/off.
After the discussion with professor Minsky, I finally solve the problem. According to the instructions she gave me, we first check the Arduino value and latency to make sure that it was not a problem with the Arduino. After that, we comment out the serial input in the Processing and check if it’s the problem of the serial communication. After commenting out these serial inputs, the latency is lower and acceptable. After that, we checked every variable one by one. And while we are checking these variables, the professor found the problem that was caused by the serial input in the Processing. In the code, I’ve used the serial.get() to get the variables from the array. However, Minsky told me, this code will create an additional array once it was executed. Once I use the serial.value[], the latency is quite lower. And after I decrease the resolution of the canvas, the lag problem disappeared.
And here is the final work:
Reflection
The greatest knowledge that I’ve learned is how to identify the problem in such a complicated system. Also, I’ve learned that in order to properly use code, I should always check the official libraries and the checked libraries. The codes in these libraries are usually more stable and reliable. Also for the multi-sensor interaction, It’s quite interesting to use different inputs to control the Processing display.


